Inspiration comes in many forms for photographers, such as light falling on an object, the time of year, look on a person’s face and others. Below is our list of 100 inspirational photography quotes along with images and links to their authors. We hope this large list inspires you and makes you take a moment to reflect on your photography. Continue Reading
Photodoto
Posts Tagged ‘Photography’
100 Famous Short Inspirational Photography Quotes
05
Mar
13 Creative Food Photography Ideas (For Unique Results!)
04
Mar
The post 13 Creative Food Photography Ideas (For Unique Results!) appeared first on Digital Photography School. It was authored by Simon Bond.

If you’re looking for creative food photography ideas, then you’ve come to the right place.
Because in this article, I’m going to give you 13 fun ideas to take your food photography to the next level.
So if you’re ready to move beyond basic food photos, and if you want to start creating compelling artistic images with your food…
…then let’s dive right in!

1. Try different points of view
Here’s a simple yet effective food photography idea:
Change your perspective.
You see, most people view their food from a sitting position. And that’s how many casual food photographers approach their food.
But if you adjust your angle, you’ll capture food in a very different way.
Here are some perspectives you could try:
- Bird’s-eye view: Aim your camera directly down at the food from above.
- Plate level: Get down on the same level as your plate and photograph across it.
- Wider scene: It’s tempting to focus only on the food. Instead, use a wider lens to show the scene around the food (plus the food itself, of course!).

2. Experiment with the white balance
Food is often photographed with an off-camera flash, which opens up a lot of creative possibilities.
One trick:
Put a gel on your flash (such as a blue gel or an orange gel). Then adjust the white balance of your camera to compensate for this color shift. Finally, fire your flash at the subject (while aiming to keep the background untouched by artificial light).
If you’ve done your work carefully, you’ll end up with a colorful background (a color opposite that of the flash gel), but neutral food!
3. Use a food artist
Getting someone to professionally style your food before shooting will give your photos a more creative feel.
As a photographer, you’ll be leaning on the creativity of your stylist here; your job will be to compose and light your image in a professional way.

4. Try out some light painting
Food photography is, in essence, a form of still life (though one that needs to be carried out while the food still looks fresh!).
As with most still life photography, you can use light painting to give your images a more dynamic look.
Here’s how it works:
First, set up your food and determine your composition.
Set your exposure, making sure the shutter speed lasts 10 seconds or more.
Then fire off a shot and use some form of light to “paint” your food.
(Anything that emits light could be used, from a smartphone to a programmable LED light stick.)
If all goes well, you’ll end up with a very pro-looking image!

5. Think about the background
If your photograph includes a background, you’ll need to use it in an aesthetically pleasing way.
Because the background matters – almost as much as the foreground, in fact!
Fortunately, there are a few easy strategies you can use to create a stunning backdrop:
- Bokeh: Use a large aperture, focus on your main subject, and blur the background. Add some lights in the background for beautiful bokeh light balls.
- Plain: Stick colorful paper or a painting behind your subject for a more standard, plain look.
- Show a scene: Include the wider scene to give your food some context. (This could even include the restaurant where the food has been served!)

6. Reflect your food
Here’s a creative food photography idea that makes for very modern, sleek images:
Reflect your food in glass for a double image.
Simply set up your food on a glass panel. Then lower your camera angle until you get a nice reflection in the glass.
You’ll want to make sure your food is well-lit – but be sure to avoid obvious balls of light bouncing off the surface of your glass.

7. Tell the story
Cooking and preparing food is a process.
So every dish goes through a journey before it gets plated and put on a table.
Try to document that journey! Look to take photos of food at various points along the way to the table, so you can create a complete picture of the food.
Here are a few times when you might want to photograph food:
- When it’s growing. Food needs to be produced, and photographing it during this phase can help you tell a story, especially if you’re creating a series of images.
- When it’s sold. A visit to the market is a fantastic opportunity for food photography because vendors often display their food in an interesting way.
- When it’s cooked. If possible, photograph the chef as they prepare the food. Pro tip: If you can capture the chef adding the finishing touches to a dish, you’ll get an especially satisfying shot.
- On the table. The majority of food photos are of the plated meal. There’s nothing wrong with photographing food at this point; just aim to use some of these ideas to capture more creatively plated food photos.

8. Create some detail photos
Get out that macro lens, and get in close to your food!
First, this will offer some interesting, never-before-seen perspectives.
Plus, focusing on the detail or shape of food just makes for some very cool photography!
Try focusing on a single item of food. Then switch it up, and capture lots of the same food repeating throughout your photo.

9. Frame your food
Food photographers rarely frame food with important contextual elements.
But if you can find ways to create an interesting frame, you’ll end up with a much stronger composition.
For instance, you might try surrounding the main food item with items that relate to it, as I did in the photo below:

Or you can use plates or cutlery to frame the food.
Really, the sky is the limit!
10. Try lensball food photography
Lensball photography is a fun technique that uses a crystal ball to create unique photos. Like this:

And they’re easy to use, too!
Just place your lensball close to the food…
…and you’ll get a very cool result.
11. Shoot food floating in midair
If you want to get a bit wild with your food photography, then try some midair shots!
For instance, you might show a banana floating off the ground, or a carrot suspended against a dark backdrop.
And if you want to take this a step further, you can try cutting up the food – so you get a set of suspended food slices smack-dab in the middle of your photo.
Of course, you’ll need to build some type of stand for your food (or use a technique like this one here), and you’ll need Photoshop to complete the effect.
But if you’re willing to put in the work, the results will be worth it!
12. Create a splash!
You can use water (or other liquids) to give your food a fresh feel – especially if you’re willing to get the food wet.
Now, there are a couple of different approaches to this. Both use flash to get that moment of capture.
- Splash: Drop liquid-like milk, water, or juice onto food to create a splash.
- Food into water: Drop food into a tank of water. Then photograph the food as it creates bubbles and splashes. Of course, this works best with fruit and vegetables; cake will likely be a bit messy!
13. Freeze your food
Here’s your final creative food photography idea:
Put your food in a tub of water, then stick it in the freezer.
Check back in a bit, and you’ll have a block of ice – with the food encased inside it!
Take out the block and photograph through the ice. You’ll end up with some unique images, like this one:

While you can try this technique on many different types of food, I like to use it for fish photography. It can even look like the fish are swimming in the water!
Creative food photography ideas: final words
Now that you’ve finished this article, you know plenty of creative food photography ideas.
And you’re well on your way to capturing some unique photos.
So take your camera, find some food, and have fun!
Now over to you:
What food do you plan to photograph? Which of these creative ideas do you plan to use first? Share your thoughts (and images!) in the comments below.
The post 13 Creative Food Photography Ideas (For Unique Results!) appeared first on Digital Photography School. It was authored by Simon Bond.
The Rule of Odds in Photography (An Easy Trick for Better Compositions)
03
Mar
The post The Rule of Odds in Photography (An Easy Trick for Better Compositions) appeared first on Digital Photography School. It was authored by Rick Ohnsman.

When you create a photograph, you’re hoping to manipulate the mind of your viewer.
While photos are simple, two-dimensional representations of reality, you – as the photographer – hope to let the viewer see what you saw, feel what you felt, and experience the world as you did.
And that’s what the rule of odds in photography is all about:
Tapping into the brain of the viewer to create a more pleasing composition.
So if you’d like to make better photos, read on!

What is the rule of odds in photography?
The rule of odds states that, whenever possible, a composition should have an odd number of objects, not an even number of objects. So an image should have three flowers rather than two, and five people rather than four.
Why?
The rule of odds taps into the brain’s propensity to create order.
You see, when viewing a group of objects, we unconsciously want to group them in pairs.
But when we’re faced with three, five, or seven objects in a photograph…
…we have a group that can’t be easily organized.
With an odd number of objects, one may become dominant. At the very least, the viewer will look longer at the image, moving between the individual elements.
That is the power of the rule of odds in photography:
It creates a composition that makes the viewer’s brain work a little harder and look a little longer.


Three, five, or seven objects can work well.
Once you move beyond these single-digit numbers, we tend to treat all of the objects as a group – even if they’re odd.

Creating compositions with the rule of odds
Certain genres of photography give you, the photographer, complete power over your composition.
So you can arrange and compose your scene to include an odd number of subjects.
You can also arrange the odd number of subjects in pleasing ways; for instance, you can include strong compositional elements such as lines and triangles. In fact, these compositional tools are one more way to tap into the viewer’s brain as it works to find lines and patterns.
Often in still life compositions, we have the ability to arrange our subjects, choosing what, where, and how many objects are placed.
And that makes it easy to apply the rule of odds, as I did in the photo below:

Of course, it’s not enough to think only about the number of objects. You still need to think about natural pairs, because while a cup, a saucer, and a spoon might make a pleasing composition, a cup, a saucer, and a screwdriver would likely puzzle your viewer – even though it follows the rule of odds!

Flowers can make great subjects for tapping into the rule of odds. If you are arranging the flowers in the scene yourself, think about using a group of three or five rather than an even number.
If you’re shooting flowers in nature, perhaps you can frame your shot to include an odd number of subjects. (You could also clone out a flower afterward.)


The rule of odds for other subjects
Out in nature, perhaps shooting landscapes, you usually don’t have the option of moving around subjects.
Instead, spend time exploring your scene – and find compositions that take advantage of the rule of odds in photography.
When shooting outdoors, see what you can do to create compositions with an odd number of major objects, be it mountain peaks, trees, rocks, or clouds.
Note that you can still apply the rule during post-processing; if you have four elements instead of three, you can always clone one out, as I did in the image below:

Whether you’re composing in the field or editing on your computer, the rule will usually still apply. An odd number of objects will create a stronger image.


Exceptions to the rule
Do photography for a while, and you’ll hear all kinds of “rules” – the rule of thirds, the reciprocal rule, the left-to-right rule, and all manner of other compositional and camera operation rules.
Of course, there are always exceptions to the rules. And there are times when it’s good to break the rules for an even better composition.
So when should you break the rule of odds?
First, when photographing people, you shouldn’t always stick to the rule. If you’re shooting a couple, then it wouldn’t make sense to have a third person (and this, in fact, would lend a new meaning to the rule of “odds”).
Of course, should that couple have a child, great; the group of three would make a nice rule of odds composition. Then, if the couple were to have another child, you’ll have to find a different way to pose them that works around the rule of odds.
Here’s another time to break the rule of odds:
If you’re taking a photo of Mount Rushmore. Who are you going to leave out to adhere to the rule of odds?
Therefore, the rule of odds should be like the rule of thirds. Use it when it works to enhance your composition, but don’t feel constrained by it if your subject just doesn’t permit its use.


The odd one
Perhaps you’ve heard the song on Sesame Street, “One of these things is not like the others.” It’s a little game the show uses to teach children observational thinking.
Well, you can play a similar game with the mind of a viewer.
Simply seek out scenes and compositions where something in the image is odd, different, out of place, or doesn’t match.
Such images can be powerful. They engage the mind of your viewer, drawing attention to the odd object and making your viewer look a little longer at your photo.

Does the power of an “odd one out” image have anything to do with the number of objects in your photo? It might, or it might not. Perhaps it doesn’t conform to the standard definition of the rule of odds.
Still, it’s a powerful technique, and a great way to make captivating photos that engage your viewer.

The rule of odds in photography: Final words
When someone tells you your photos are odd, take that as a compliment!
Seriously, they aren’t likely to say that, but if you can find ways to embrace the rule of odds in photography, you will have another trick in your bag.
Not only is it hip to be square, but it’s also cool to be odd!
Now over to you:
What do you think of the rule of odds? Will you try it out in your compositions? Do you have any rule of odds photos that you’re proud of? Share your thoughts and images in the comments below!
What is the rule of odds?
The rule of odds states that an odd number of objects in a photograph (3,5,7, etc.) will be more engaging to the viewer than an even number of objects.
In what kind of photography is the rule of odds most easily used?
Probably still life photography, where you have full control over the number of objects in your shot and how they are arranged.
Can I use the rule of odds in landscape photography?
Yes, you often can! Even when you can’t move objects in your scene, you can carefully compose and frame your image to capitalize on an odd number of subjects.
Sometimes, you can also crop your image in editing or add/remove objects to create an odd number of subjects.
What is the “odd one out” method of composition?
A good technique can be to look for things that break the norm or “stand out” because they’re different from the rest of a photo. Such objects will immediately draw the viewer’s eye and become the focal point in your photo. Think of a red flower in a field of yellow ones, a fork in a line of spoons, and maybe a baby chick in a carton of eleven eggs, and you’ll get the idea.
The post The Rule of Odds in Photography (An Easy Trick for Better Compositions) appeared first on Digital Photography School. It was authored by Rick Ohnsman.
12 Tips for Beautiful Long Exposure Night Photography
25
Feb
The post 12 Tips for Beautiful Long Exposure Night Photography appeared first on Digital Photography School. It was authored by Matt Murray.

Long exposure night photography can seem tough.
But it doesn’t have to be.
Because there are a few simple tricks you can use…
…that’ll ensure you get great long exposures, consistently.
And that’s what this article is all about. I’m going to give you 12 easy tips for long exposure night photos. Specifically, I’ll tell you:
- Every piece of gear you need for pro-level night photography
- The simple secrets for keeping your long exposure shots sharp
- The best time of day to capture long exposure night photos (hint: It’s not at all what you’d expect!)
Plus a whole lot more.
Are you’re ready to become a master of long exposure night photography?
Let’s get started.

1. Scout your location ahead of time
Most photographers think that scouting is overkill.
But here’s the thing:
Knowing where the best locations are for night photography ahead of time can pay huge dividends.
It means you won’t have to work out where to set up when you arrive.
(And setting up is very stressful if you can’t find a spot and the sun is sinking rapidly!)
If you can, scout your location at the same time of day you plan on shooting. This will give you a good idea of what lighting to expect.
Have a good look around the area. And ask yourself:
Will there be any trees or obstacles blocking my view? Are there any lights in the vicinity – such as streetlights or floodlights – that will affect my images?
When choosing your location, also look for sources of movement, including:
- Crowds of people
- Cars that create dramatic light trails
- Boats skimming across the water
Why?
Because movement is great for long exposure photos!

If you’re not able to scout a location beforehand, consider your options.
For instance, you can turn up an hour or two before sunset to find the best location.
Or you can research the location by looking through social media. This will give you ideas for potential locations – including what they look like at night.
To learn more about the virtual scouting process, check out this article: Top Tips for Photographing the Best a City has to Offer in 48 Hours.
2. Consider taking multiple shots
Once you’ve determined your shooting location, here’s what to think about next:
Whether you will move your camera and tripod around on the shoot (changing locations, capturing different compositions, and/or using different focal lengths), or whether you will take a series of images that are exactly the same (perhaps for blending in Photoshop).
If you’ve decided on the latter, it can be worth taking a second camera and tripod with you; that way, you can take additional shots and make the most of your trip.
3. Use a checklist to pack your gear
Night photography requires a lot of equipment.
So before you go out to shoot, I highly recommend you create a checklist for packing your kit.
This is a great memory aid and will ensure that you don’t forget anything. Here are some of the things I have on my gear checklist:
- Cameras and lenses
- Fully-charged camera battery. If you’re capturing multiple images of the same scene to blend in Photoshop, you will have a very hard time lining them all up later on if you have to move your camera to change batteries.
- Spare batteries
- One or two tripods
- Tripod base plates (these small rectangular bits of kit can be the difference between a successful shoot and a disaster!)
- SD cards. Make sure you have a formatted card in your camera ready to go, as well as spares.
- Water and snacks
- Wireless headphones. Often, I’ll be in the same location taking images for several hours. If there’s not a fellow photographer to chat with, I listen to podcasts or music.
4. Set up early and be mindful of others
Try to arrive early so you can set up and be prepared at your preferred location.
When you set up your camera and tripod, be mindful of pedestrians, cyclists, and traffic in the area. Don’t place your gear where it will obstruct paths or where people could trip over it.

5. Shoot during blue hour for the best skies
If you want to create the most striking long exposure night photography, then I highly recommend you shoot during blue hour.
Specifically, start capturing images as the sun is setting, and keep photographing until all the color has drained from the sky.
That’s how you’ll get images with drama, like the one below:

6. Use a tripod
You must use a tripod for sharp long exposure night photography.
Otherwise, your photos will be full of blur.
I bought a Manfrotto tripod in 2005, and it’s still going strong! I also have a smaller, lighter MeFoto tripod for travel.
Owning several tripod quick release plates is also a good idea. That way, you can detach your camera from the tripod whenever you need (and stick it back on quickly, as well!).

7. Turn on your camera’s electronic level
Most cameras have a built-in guide or electronic level.
If your camera has one, then turn it on.
Why is an electronic level useful?
It’ll let you know if your camera is crooked, just like an old-fashioned spirit level. And you can adjust your camera so that every single image comes back straight.
(On my Fujifilm X cameras, this is a horizontal line across the screen that turns green when the camera is level.)
Of course, you can always straighten the horizon in a program such as Lightroom or Photoshop.
But this can get annoying, especially if it’s a frequent problem.
So find the electronic level, and make sure it’s active before you start shooting.
8. Use a remote release
When taking long exposures, you must minimize any movement of the camera during an exposure.
Which means that you cannot press the shutter button.
Why?
No matter how careful you are, when you tap the shutter, you may create camera shake. And end up with blurry images.
One way to avoid camera shake is to use a remote release. These are small accessories that plug into a socket on the side of your camera, allowing you to trigger the shutter without pressing the shutter button.
Many camera companies also have a smartphone app you can use to activate the shutter of your camera.

9. Use the self-timer feature
Here’s a second way for you to minimize camera movement during an exposure:
Use your camera’s self-timer feature. I actually prefer this method of hitting the shutter button for two reasons:
- I usually take two cameras on shoots, so using a smartphone app is not an option since it can only connect to one camera at a time.
- The two cameras I take use different types of remote releases, and I’d rather not have to remember to bring both of those accessories.
Instead, I recommend you set up a two-second self-timer delay in advance. That way, you can hit the shutter button, wait for any vibrations to fade, then get a tack-sharp shot.
(Just remember to deactivate the self-timer feature after the shoot is over!)

10. Try interval shooting for great results
Do you want to capture the beauty of a scene over a long period of time?
Try interval shooting.
With interval shooting, you can fire off photos with a set time interval (so you capture one photo every two minutes, for example).
I set my camera to take a photo every two minutes during the early part of my shoots, then – when the light starts to get interesting and the city lights come on – I set my camera to take a photo ever 20 or 30 seconds.
You can also set this feature to stop after a certain number of exposures.
Handy, right?
Interval shooting essentially sets your camera on autopilot, leaving you free to take images with a second camera.
Just be careful not to bump or move your main camera when adjusting settings during your shoot.
11. Turn off image stabilization
If you want sharp long exposure photos, you must turn off camera and lens image stabilization.
Now, you’re probably thinking:
What? Image stabilization makes photos sharper, not blurry!
And you’re right…
…mostly.
But remember:
You should always use a tripod for long exposure night photography.
And when image stabilization meets a tripod, it causes problems. You see, your tripod should be completely still, yet your image stabilization technology will often move your camera and/or lens slightly – resulting in unwanted blur.
Some newer lenses can sense when a camera is mounted on a tripod and turn off image stabilization automatically.
But I recommend you check, just to be sure.
12. Always stay safe!
This is of paramount importance when taking photos at night.
Always be aware of your surroundings and pay attention to who is nearby. I usually have my bag zipped up and next to me at all times.
Often, I put one of my bag straps around my leg so no one can try to run off with my kit.
And while I take wireless headphones, I would only ever use them in busy locations where I feel safe.

Long exposure night photography: Final words
I hope you’ve enjoyed this guide to long exposure night photography.
While shooting at night may seem difficult, with some extra thought and planning, you’ll capture some stunning images!
Of course, the best way to improve your photography is to get out there and practice as much as you can.
Now over to you:
Which of these long exposure night photography tips is your favorite? Which one do you plan to use the next time you’re out shooting? Let me know in the comments below!
The post 12 Tips for Beautiful Long Exposure Night Photography appeared first on Digital Photography School. It was authored by Matt Murray.
Black and White Still Life Photography: How to Do It (And Why It Matters)
18
Feb
The post Black and White Still Life Photography: How to Do It (And Why It Matters) appeared first on Digital Photography School. It was authored by Rick Ohnsman.

In the quest to improve your photography, sometimes the best approach is to slow down, concentrate on the basics, and be purposeful and deliberate. Working in black and white will do that. Making still life images will do that.
Combine the two, and you get black and white still life photography – which is an excellent way to make some great images and become a better photographer while you’re at it.

The power of monochrome
I will often use the terms monochrome and black and white interchangeably, but there is a subtle difference.
Black and white photos are just that: images with tones from white through black and all shades of gray, but with no color information whatsoever.
A monochrome image, on the other hand, might have a color tint. For instance, you can create a warm, sepia-toned shot or a cool, cyanotype photo. A single color – with various shades – would be present in the image.

But note that this article applies to both black and white photography and monochrome photography equally.
Why black and white?
Early photographers had no choice because they couldn’t shoot in color. Monochrome images were all they could make.
Of course, this ultimately was not a serious limitation; many of the most iconic photographs ever taken are black and white. Surely even non-photographers have seen what might be one of the most famous black and white still life photos of all time, “Pepper No. 30” by Edward Weston. And I can confidently say that Weston’s photo would not be better if it had been made in color.
Today, the default choice of most photographers is color. Because our world is in color – as are most of the photos we encounter – “seeing” in black and white is a skill you must develop.
You must learn to look at a subject with an eye toward the basics – the “bones” of an image, if you will. Shape, form, tone, and texture are those bones, and the best black and white images play to those strengths, where color is unnecessary and even a distraction.

Learning to see in black and white will, of course, make you a better black and white photographer. But if you can see in black and white while recognizing and taking advantage of the structural elements of a subject, you’ll become a better color photographer, as well.
Color then becomes an enhancement to an already-good image – one with a solid “bone structure” of shape, form, tone, and texture.
Why still life?
My two favorite genres of photography are probably still life and landscape.
Why?
It could be because they are so opposite. In landscape photography, you can rarely move the subjects in your scene, you compose by where you stand, and you don’t have much control over the light. Often, you must wait for the light to be just right, and you must be ready if and when such a moment happens.

Still life photography makes you the master. You set the scene, deciding what to add in and take out. You arrange the objects for the best composition, you choose the camera position, the lighting, and any additional components comprising your shot.
Then, when you’re satisfied and ready, you take the photo.
In a word, still life photography give you complete control.


Then add another distinct advantage. Consider this definition:
“A still life is a work of art depicting mostly inanimate subject matter, typically commonplace objects which are either natural (food, flowers, dead animals, plants, rocks, shells, etc.) or man-made (drinking glasses, books, vases, jewelry, coins, pipes, etc.).”
A real advantage of still life photography is that your subjects are still. They don’t move.
So in still life photography, it won’t matter if your shutter speed is 1/30s or 30 seconds. Being able to have such flexibility over your choice of aperture, shutter speed, and ISO is huge, and it opens up all kinds of possibilities that other genres of photography don’t offer.
Light painting is one of those unique possibilities. Since you don’t have to deal with a moving subject, you’re free to “paint” a subject with light during an extended exposure.
And this makes for some dramatic still life shots:

Lighting
Lighting for black and white still life photography comes back to the advantage we already identified:
Control.
The lighting instruments you choose, the modifiers you use, the number of lights and their placement – it’s all within your control.
Let’s break this down a bit more:
- White balance – Since you’re processing in black and white, you can ignore the color temperature of your lighting instruments. And this frees you up to use all kinds of light sources, from flashlights, LEDs, and daylight to candlelight, fluorescent lights, and incandescent lights. Yes, as you convert an image into black and white, the color tones will respond differently. But you can handle adjusting your black and white tones if your white balance is initially off. I’ve often “rescued” impossibly bad color images simply by converting to black and white.
- Placement – We spoke about the “bones” of shape, form, tone, and texture, which exist in all photos but are more readily apparent in black and white. In black and white still life photography, you get the opportunity to accentuate these “bones” with your careful consideration of lighting placement and control. Want to emphasize texture? Rake a hard light across the subject from the back or side at a low angle. Do you want a soft look? Try a broad light source, like a softbox, that illuminates the subject from the front. You can light your subject to create the look and mood you’re after. As the saying goes, “No rules, just right.”


A camera trick to help your visualization
In order to make this trick work, you must shoot in RAW.
(Also, I highly recommend you shoot in RAW all the time. Here’s why this is important.)
Now, when shooting in a RAW format, your camera will always capture a color image (and that is what you want).
The playback image you see on the rear LCD, however, will not be the RAW file. Instead, it’ll be a JPEG representation of the image.
So if you want to get better at seeing in black and white, why not switch the JPEG to black and white while keeping the RAW image in color? That way, after taking an image, you can immediately see it in monochrome – but you’ll still keep all the color details for post-processing later.
Bruce Wunderlich, a fellow dPS writer, describes how to set up your camera to do this. He promotes it as a way to better compose color photos, and it is good for that – but if monochrome is where you’re headed, it’s even more beneficial.
So read Bruce’s piece, set up your camera accordingly, and you will have a real aid in making black and white photos.

Editing for black and white
After a session of black and white still life photography, you’ll bring the images into post-processing as RAW color images.
Color?
Yes. Even if you’ve set up your camera using the recommendation above – where the LCD displays your images in black and white – your actual RAW images are still in color.
That’s a good thing. It’s during editing that you will convert your photos to black and white.
This will allow you to determine how various colors will be converted to monochrome. For instance, back in the black and white film days, you could darken the sky by shooting with a red filter. Because the red filter would block most of the blue light, the sky was rendered very dark on the black and white film.
Today we can create those effects during editing. When converting from color to monochrome, you can adjust the luminance of specific colors (e.g., you can darken the reds, the blues, and the yellows), thus affecting the overall look of the image.
Lightroom offers a nice black and white conversion tool, and there are a number of good articles on black and white conversion in Lightroom, such as this one by Andrew Gibson. You may also wish to try other methods of black and white conversion. A popular option is the Nik Silver Efex Pro plug-in from DxO, but there are dozens of other programs and methods for converting from color to black and white.
Without the limitations of having to make the color in a photo “look right,” you are free to creatively take the tonality in your black and white images wherever your creativity leads you.

Age your photo
Here’s another fun black and white still life photography trick:
Replicate a vintage black and white look!
First, make sure you find the right subject. I recommend working with old collectible objects. Then capture the shot and enhance it afterward with effects such as sepia toning.
It can be a fun and instructional exercise to gather some objects, set up a pleasing composition, light it, photograph it, and create a monochrome file complete with sepia toning.


Canon 50D | Canon 50mm f/1.8 | 1/15s | f/22 | ISO 800
Black and white still life photography: Now go do it!
You can and should read up on the concepts and techniques of photography, but there’s only so far “book learning” will take you.
Black and white still life photography will slow you down, make you think, concentrate your efforts, and force you to really study things.
You just have to dive in and do it!
So gather some subjects, decide how to arrange and light them, determine where you want to place your camera, what focal length you will use, how you will expose the image – all of those things.
Think about what you’re doing, what you’re trying to communicate, and why you’re making the photo.
Take your shot, evaluate it, consider what might make it better, and shoot it again.
Then repeat! There’s no hurry. You’re making photographs, not taking snapshots. You are the master when you practice black and white still life photography.
And that, as they say, is the beauty of it. Go make some great shots!
As always, leave your comments, questions, and photos in the comments section below. Best wishes!

The post Black and White Still Life Photography: How to Do It (And Why It Matters) appeared first on Digital Photography School. It was authored by Rick Ohnsman.
Is the Online Photography Community Toxic?
15
Feb
The post Is the Online Photography Community Toxic? appeared first on Digital Photography School. It was authored by Carl Spring.

Is the online photography community toxic? It certainly feels like it sometimes.
There seems to be a lot of toxicity to go around right now – and not just in photography.
Every time I look at social media these days, things get angry very quickly. You only have to look at anything political on Twitter and it generally takes just a few tweets before everything descends into accusations and hatred.
When I look at the photography groups I follow, I’m sad to say I tend to find similar issues. Not in every group, but you only have to look at news of any camera release before things generally descend into tribalism:
“My brand is way better! What were they thinking? This is garbage!”
And my personal favorite:
“You call yourself a professional with opinions like that?”
Sometimes it’s easy to drop the popcorn meme and sit back and enjoy the fireworks. But it does make me question whether there is value in staying in these groups and reading these sites (and comment threads). For pretty much all of us, photography is a hobby that some of us have been lucky enough to turn into our career.
So we need to think about why the photography community can be so toxic.
And we need to ask ourselves:
How can we do better?
Why are online communities toxic?
There any many in-depth essays from people way more qualified than I who have looked into this. It tends to boil down to the fact that not looking in someone’s eyes when you are talking to them removes inhibitions. There is no person and no feelings to be seen, just text on a screen.
That, combined with the ability to hide behind a username, gives people the power to be the vilest version of themselves without consequence.
It’s hard not to retaliate when faced with somebody sniping at you, whether you’re talking online or in person. However, what makes things harder is the fact that, when talking online, we lose the subtlety of delivery and expression.
I am sure everyone reading this has received an email, got the tone completely wrong, and sent a blunt reply. Our ability to articulate through speech is much more advanced and allows for many more subtleties than the written word.
This inability to read tone can get amplified when people from different backgrounds and cultures clash. The internet is worldwide, and as such, cultural differences can be misunderstood and can lead to innocent comments being taken the wrong way.
Finally, we need to take into account the stresses of real life. These days, we tend to lead less social lives. We work longer hours in incredibly stressful jobs where we cannot always say what we want to due to the repercussions.
So we need an outlet for our frustration.
Each of us responds in a different way. For some, it may be going for a run, whereas others may blast away their stresses on the latest first-person shooter video game.
But some people haven’t found a healthy outlet for their frustration, and the release of their anger occurs in online conversations.
With photography, every discussion tends to have two opposite viewpoints. And so, depending on the way your brain is wired, you may struggle to see other community members’ points of view.
Let me explain what I mean in the next section:

Two schools of thought: technical and artistic
Have you ever seen someone from an arts background make conversation with someone from an academic background?
It’s usually very awkward, and both individuals will struggle to find some common ground.
Because while artists tend to deal with unquantifiable factors such as feeling and emotion, academics prefer to work with facts and theory.
Photography, however, is the point at which science and art meet. This brings in two distinct schools of thought – which tend to be polar opposites of each other.
Those who prefer the academic side of photography enjoy technical perfection. The fact that engineers made sensors with the ability to capture so much detail and lenses that are so amazingly sharp is fascinating to them. They look at composition based on mathematical formulae, and past this, they may struggle to make sense of their art.
On the other hand, there are artistic photographers. Those who like lenses that have character, those who do not mind blur in photographs. Those for whom the feeling and the moment are the keys to the perfect photograph, not how sharp it is or whether it follows the golden ratio.
These photographers feel the confines of technology should not stop them from capturing the perfect moment.
Who is right in this argument depends on where you sit on the scale. Without getting too psychological about it, people generally fall into one of two character types: academic or creative. This is due to the makeup of each person’s brain and goes some way toward explaining these differing schools of thought and why people don’t see eye to eye.
In other words:
People are approaching the same problem from different angles.
But this doesn’t explain why there can be so many arguments about photography brands. For this, we need to look at sports teams and the problems of tribalism.

Tribalism
Tribalism is clearly present in sports. But is it also rife in photography?
As photographers, we tend to find a brand that we like, and we stick with it. If the company (and their marketing team) do their job properly, we become loyal to that brand.
Now, we invest a lot in photography from an emotional standpoint. We all know that feeling when you get a shot that turns out better than you expected. It releases the same chemicals in the brain as when your favorite sports team scores.
And the camera you used to take the photograph becomes your team. Your investment in the camera (both emotionally and financially) means it plays a part in your victories.
Ultimately, your camera brand becomes part of your photography and therefore part of you.

Over time, this can lead to tribalism. You love your brand, your brand has helped you in many photographic victories, and in many cases, it has been with you since your youth. So hearing someone talk badly about the brand you shoot with becomes associated with them talking badly about you. You feel the need to defend yourself and your team.
We also tend to surround ourselves with people who love the same brands that we do, which reinforces our opinions. Canon users frequent Canon groups, where Canon is the best and everyone else sucks. The same with Sony, with Nikon, and with every brand. This leads to our opinions becoming reinforced by those we surround ourselves with, cementing the inevitable tribalism.
No brand seems to personify this tribalism more than Sony. If Sony were a football team (or soccer, depending on where you’re from), it would be Manchester United – a team with incredibly adoring fans, but that is also despised by many others.
I have wasted too much of my life reading comment sections of Sony releases (and every brand!) that erupt into arguments about how much Sony rules or Sony sucks. Each time fans attack, then defend their side until the final whistle.
However, unlike sports, these arguments always end in a draw. Nobody wins, nobody loses. It just creates a deeper rivalry between those on either side of the argument and increases tensions for the next meeting.
Also, when you’ve invested thousands into a system, you don’t want to feel like you’ve made the wrong decision. You need to be secure in the knowledge that you have made the right choice, which leads nicely to my next point:

Insecurity
It’s scary to put something that you are so passionate about out into the world.
Sharing a photograph you are proud of is like putting a part of yourself out there for people to talk about. And to have people pick your photo apart can be soul-destroying. It can feel like people are saying that they don’t like you.
How people deal with this critique differs. Some people get depressed and withdraw. Others don’t take criticism very well and lash out toward those giving the critique. It depends on the person, their mood, and a multitude of factors that, quite frankly, are none of anyone else’s business.
A photo similar to yours getting more likes doesn’t mean anything. Unfortunately, thanks to social media, we are now conditioned to associate likes with validation.
Personally, I feel this is shallow, meaningless, and only serves to stroke the ego rather than nourish the soul. However, some see likes and positive comments as the holy grail of photography. It all comes back to our cultural values and our personal belief system.
Art is subjective by nature; remember, we are allowed to have different opinions. It’s not a bad thing to disagree with other people, but it is important that you respect other opinions. It is okay to agree to disagree.
And always try to remember:
Different is good.
Otherwise, there would only be one camera brand, one style of photography, one editing style. It’s also fine to be passionate and argue your case, but always keep it civil. Your bad day, boredom, and whatever else you have going on have nothing to do with your “opponent” or their creativity.
Remember that ripping something to pieces just to make yourself feel better is a pretty lousy way to interact with other people.
Which brings me to my final point:

Some people are simply not very nice
All groups have people that are amazing, kind, and like helping others out.
Unfortunately, all groups also contain people who are simply not nice.
And these are the ones who make the online photography community toxic.
There is nothing much you can do about it, apart from blocking those who you simply cannot agree with and trying not to let them bother you. Life is too short.
For some, going online to try and get a reaction from people is almost like a sport. And what better place to spark a reaction than a creative space where people are giving something of themselves?

What’s it like having to moderate all of this?
While websites and forums may seem full of hate, remember that there are moderators behind these pages trying their hardest to make people’s experience the best it can be.
I caught up with Simon, who moderates the Digital Photography School Facebook page and works with other camera companies’ social media, to see what it is like trying to keep a photography community a nice place for users to interact.
Here’s our exchange:
Can you describe your job and how it works?
I’ve been a social media/community manager for about 12 years now – 10 full time, and part-time for the two prior. I manage all aspects of social media, from content creation to community management to customer support.
Have things gotten better or worse over that time?
When Digital Photography School was in its infancy, I was working in the VBulletin forums that we had back then. I don’t think things have become particularly worse or better. I think, ever since people had a platform where they could speak their mind with little (to them) consequence, we’ve seen people talking without thinking.
How much toxicity do you deal with on a day-to-day basis in your work?
I see negativity on many levels every day: commentary on politics and religion, right through to “your horizon is crooked, are you stupid?” The sad part of what I see is that, with minor wording changes in the photography space, I think there’s potential for a lot less online anger and toxicity. From “Your horizon’s crooked, idiot!” to “I wonder how this photo would look if you straightened up that horizon?”
What is the most common thing that sparks arguments/toxicity in your experience?
In my opinion, insensitivity is what sparks most negative sentiment online. From insulting someone’s photography skills to insulting their way of life, we never can know what someone’s going through on the other end of that interaction; someone has a bad day and takes a comment badly, and up and up it goes until someone’s very upset. I see it daily.
Do you feel that photography is better or worse than other communities for this type of behavior?
I feel like photography is similar to any other, but I’ve always asked myself why. (I mean, I feel like I know the answer! We are making our vision come to life through photography, and when someone leaves an insensitive comment, we respond passionately…)
As someone who sees the worst of the photography community, does it depress you how bad it has become? Do you tend to avoid parts of the community due to this?
It does depress me. Obviously, it’s a little different for me than I guess most people, as it’s my job to wade into those conversations where it has an impact on a community that I manage or a brand that I manage, so I can’t avoid it. If I were a reader or contributor in one of our groups or on the blog, after seeing the conversations that I have seen spiral out of control so many times, I’d teach myself to have patience with people and to skip through threads that made me angry or sad; life is too short for that stuff!
What one thing would you ask of dPS readers when they are posting comments that could be considered obnoxious/rude/toxic?
I don’t want to ever control people’s commentary on a topic; sometimes I need to close and remove threads or give people little “timeouts.” But I’d ask that, if they were replying to something that made them angry, to maybe take a minute and think through what is happening in that thread; find a different way to respond. Don’t use incendiary phrases like “You’re an idiot!” It never achieves anything. Be kind.

How can we do better?
To conclude, I wanted to find a way to try and help the photography community. After many hours of thought, I came up with four simple words you should think about before you post to a website. They are as follows:
Don’t be a jerk!
I hope that helps.
Now over to you:
How do you feel about the photography community? Do you think that things are pretty toxic? How does that make you feel, and what can be done to make things better? Share your thoughts in the comments below!
The post Is the Online Photography Community Toxic? appeared first on Digital Photography School. It was authored by Carl Spring.
Fine Art Landscape Photography: The Complete Guide
09
Feb
The post Fine Art Landscape Photography: The Complete Guide appeared first on Digital Photography School. It was authored by Rick Ohnsman.

Perhaps you’ve heard the term fine art landscape photography.
But is fine art landscape photography something you should aspire to make? And what distinguishes a fine art photograph from a snapshot?
In this article, I’m going to explain everything you need to know about fine art landscape shooting. I’ll start by explaining what it actually is – and I’ll go on to give you plenty of tips you can use to improve your own landscape photos!
Let’s get started.
What is fine art landscape photography?
Some terms are hard to define, and fine art photography falls into that category.
“There are always two people in every picture: the photographer and the viewer.”
— Ansel Adams
That said, fine art photography is less about the subject and more about the photographer. Your goal in fine art landscape photography is not to simply to show your viewer what you saw; it’s to communicate how it felt to be there and how the scene made you feel.

“Photography for me is not looking, it’s feeling. If you can’t feel what you’re looking at, then you’re never going to get others to feel anything when they look at your pictures.”
— Don McCullin
So how do you communicate feelings through photographs?
Here are some tips to consider when capturing fine art landscape photography.

1. Think about what would make your image unique
Have you ever been making a landscape photo at a location where other photographers are lined up next to you also working the scene?
Most of us have.
The question to be asked is:
How will your photo be different, unique, special? What is it about your image that will stand out? How can you put your unique signature on the shot?
The choices you make to create an image that is uniquely yours matter. Any cook can follow a recipe, and if a dozen cooks all work from that same recipe, the dishes will be essentially indistinguishable. The gourmet chef making their signature dish, however, will strive to make the meal unique.
And as a fine art landscape photographer, your objective ought to be the same.

“Great photography is about depth of feeling, not depth of field.”
— Peter Adams
2. Be intentional and deliberate
When the light is rapidly changing, a landscape photographer might need to move quickly. However, most landscape photography can be done at a slow and thoughtful pace.
Rather than simply seeing a scene, positioning your tripod, shooting first and asking questions later, do the opposite. Before even touching your camera, thoughtfully observe the scene. Slow down.
Ask yourself what first attracted you to the scene. How does it make you feel? How can you best compose the shot? What if you moved higher, lower, to a different vantage point, used a different lens? What can you do to best capture your feelings in the frame?

Never be a one-and-done shooter. Take advantage of the instant playback capability of your camera, evaluate your image, and decide what might be better.
Then make a few more shots.
While he’s not a photographer and not talking about fine art landscape photography, famed hockey player Wayne Gretsky still offers advice photographers would do well to remember:
You miss 100 percent of the shots you never take.
Wayne Gretsky
3. Practice previsualization
You will know your skills are growing as a photographer when you can see your photograph before you even put your eye to the viewfinder.
Eventually, you should previsualize your finished image, have the vision, and then simply use the camera as an instrument to capture that vision.
It’s a beautiful loop:
The more you photograph, the better you become at seeing – and the better you become at seeing, the better your photographs will become.

“The camera is an instrument that teaches people how to see without a camera.”
— Dorothea Lange
But while previsualization is important, fine art landscape photography should always be open to serendipity: those unexpected moments when the light changes, the angels sing, and the miraculous appears for a brief moment for you to capture.
There have often been times when I’ve previsualized a shot, got set up, and waited for the light, only to have something amazing appear behind me out of the blue.
Practice working with your camera controls so that, when such a moment occurs, you can respond quickly and get the shot.

4. Fine art landscapes aren’t just monochrome
Google “fine art photography,” and you will mostly see black and white (monochrome) images. Due, perhaps, to its long existence, as well as a good number of early photographers for whom black and white was the only option, monochrome photographs may outnumber color images in the world of fine art.
But that’s not to say that color images can’t also be considered fine art photographs.
Circle back to our definition: Fine art photography is more about the artist/photographer and their vision than the content of the photograph. Whether color or monochrome, the best way to portray a vision will depend on the maker’s intent.

“What I love about black and white photographs is that they’re more like reading the book than seeing the movie.”
– Jennifer Price
Now, bear in mind the strengths of black and white photography. Without the addition of color, monochrome images rely more on the basics, the “bones” of a good photo: line, shape, form, tone, and texture.
Black and white images are typically simpler, with greater attention paid to the subject. Sometimes, a monochrome image can convey a look or mood better than its color counterpart.

When deciding whether an image might be best in color or black and white, the fine art photographer needs to come back to the objective, and ask themselves:
Which version best conveys the feelings and vision I had when making the image?
That, and not some notion that fine art photographs are always monochrome, should dictate the direction the photographer takes.

5. Don’t be afraid to alter reality
We talked about fine art photography being less about an accurate interpretation of a subject and more about the photographer’s feelings and vision.
So who says you can’t completely change your image to better convey those things?
Techniques like long shutter speeds to blur moving objects and very fast shutter speeds to totally freeze rapidly moving objects are right at home in fine art photography.

So is purposely blurring scenes with intentional camera movement (ICM) and using special digital tools to give an image a “painterly” look.
Infrared photography or other techniques that shift colors? Sure!
Art is totally subjective, and so is fine art landscape photography.
How you choose to portray a scene is your prerogative, where the “right way” is whatever best communicates your feelings and message.

“I really believe there are things nobody would see if I didn’t photograph them.”
— Diane Arbus

6. Experiment with interpretive editing
I’ve read much about the phrase “getting it right in camera,” something with which I both agree and disagree. Yes, I do believe one should master their camera controls so as to get the best possible exposure of an image while in the field.

Yes, making the best possible image in the field is important. Never should an editing session be a rescue mission where you try to overcome mistakes made when shooting. Fixing an image in Photoshop is an option, but usually not a good one.

However, enhancing an image with dodging, burning, or any of dozens of other editing techniques is the mark of a skilled fine art photographer. Using editing skills to further interpret an image, to convey feelings and intent, is part of the craft.
People who like to brag that their images are unedited and straight-out-of-camera have likely never studied the work of perhaps the most renowned landscape photographer of all time, Ansel Adams. He didn’t have the advantage of digital editing software to edit his images, yet that didn’t deter him.
Take a look at some of his before and after images, and you will marvel at how much change there was between the camera-captured negative and the final print.

How’d I do?
7. Put in the time
Fine art landscape photography isn’t done in a hurry.
I’ve seen software makers claiming their programs will allow you to work faster using artificial intelligence. While these programs have come a long way, I’m not convinced that they can yet equal the quality of old-school human intelligence and a more careful, though slower, style of editing.
You might be able to get some interesting results with a one-click preset, but will it result in an image that communicates your unique vision? If you replace a sky with something “canned,” it might be more dramatic, but is it still your photograph?

I also have to ask: What’s the hurry?
I enjoy photo editing, seeing where I can take an image with some thoughtful work. I know there are those that don’t care for editing, and I guess that’s okay. I just believe that most carefully-crafted art takes time.
I have used such software on occasion, and so can you. But rather than just learn the tricks of the trade, how about putting in the time and effort to learn the trade itself?
If fine art landscape photography that has your own personal style and signature look is your objective, there are no shortcuts. One-click presets will only make your work look like everyone else’s!
“Once you learn to care, you can record images with your mind or on film. There is no difference between the two.”
— Anonymous
8. See(k)ing the light
I enjoy various kinds of photography, from table-top still life and macro photography to flash-lit work and especially landscapes. What differentiates landscape photography from many of these other genres is the lighting, the degree of control the photographer has over the scene, and the ease of creating the desired look.
I can previsualize the look I want for a tabletop still life shot, set it up on the kitchen counter, light it, make adjustments, and tweak until I get the shot I like.
Not so for landscape photography.
Instead, I must travel to the area I want to photograph, be there when the weather is cooperative, the light is right, the foliage is in season, and everything else (none of it in my control) all comes together. If it ever does.
But this is also the joy of fine art landscape photography.

It might mean sitting patiently in the pre-dawn chill, hoping the clouds come in just right and the sunrise hits just so. You might hike miles to get to that overlook for a sunset that never comes, or get lucky and have a sudden thunderstorm come in over the canyon with dramatic clouds and lightning.
The lack of control is part of the attraction of landscape photography, the knowledge that luck really is when preparation meets opportunity.
“My life is shaped by the urgent need to wander and observe, and my camera is my passport.”
— Steve McCurry
So if you want to be a great fine art landscape photographer, then you’ll have to work at it. You’ll need to sacrifice a bit, get up before sunrise, stay well after the sun has set, hike into difficult spots, seek places drive-by photographers will never see, and strive to be different with your images, capturing not just what you see, but what you feel.

9. Shoot to a theme
Sometimes, a good way to stimulate your creative juices is to shoot to a theme. Rather than simply grabbing your gear and going to a location to do some landscape photography with whatever you see, decide that you’re going to make all of your images fit a theme.
Visually describe a concept or maybe make photos as if you were doing an article on a place or a single subject. Then, use the “visual vocabulary” that are your photographs to describe and define that subject.
Add your own style as a fine art landscape photographer to determine what you want your viewer to know and feel about your subject.

“The whole point of taking pictures is so that you don’t have to explain things with words.”
— Elliott Erwitt
10. The print is the performance
Today, most photos that are made are probably never printed. Instead, they’re viewed only on monitors or LCD screens, and sometimes projected. In the film days, photographers had no such options. After shooting and developing their film, they were only halfway to being able to show their photograph to viewers. Prints were mandatory.
Ansel Adams viewed it this way:
The negative is the equivalent of the composer’s score, and the print the performance.
– Ansel Adams
When discussing fine art landscape photography, I must raise the question:
Can a photograph be considered fine art if it is only viewed on a monitor and never printed?
If you’ve spent any time at all in a photo gallery and closely looked at printed photographs, you will know there is no comparison between seeing a printed photograph and seeing that same image on a monitor. Prints can render so much more detail, color, and tone.
Even the type and texture of the paper or other substrate on which a photograph is printed can make a huge difference.
Finally, when viewing photographs on a screen, the light is produced by the screen itself, whereas when you view a print, the light is reflected. It changes the way you view the shot.

So to repeat my question in a different way:
Must a photograph be printed to be considered fine art?
I could argue either side, but I must confess that I’m a big proponent of printing. Yes, learning to make good prints yourself is a whole other skill, and not an easy one to learn. Simply getting the color and brightness of a printed image to approximately match what you see on your monitor is a challenge.
But I would argue that learning to print is part of the photographic craft.
You might also choose to hand off your photos to a professional printer whose specialty is knowing how to get the most from your image. That’s okay, too. I guess my point is that the difference between a printed fine art landscape photograph and the same image viewed on a monitor is almost as great as the difference between going to a concert and just watching one on TV.
“Fine art prints created by the artist, or the artist’s collaborator, are important because they best represent the artist’s vision. Images displayed on digital devices are subject to the non-uniform nature of different displays and they may appear radically different than the artist intended.”
– Mac Holbert
11. Your photos are about you
What you see, what attracts your eye and your camera, and how you choose to interpret a subject says a lot about you.
Even if you haven’t consciously defined a “photographic vision” for yourself, chances are good that, if you review your archives, you will be able to identify commonalities in your work.
Hopefully, you will have developed a rating system (perhaps color coding or star rating as can be done in Lightroom) so you can determine which photos you consider to be your favorites. Take some time to look through your best shots and perhaps make some notes about defining styles, features, or techniques.
What are you consistently doing that works, and what signature style do you have?
“Only photograph what you love.”
— Tim Walker

Focus specifically on your landscape images and look for commonalities. What has worked well? What hasn’t worked? How can you find ways to build on your successes and also further define and develop your personal style so that your images communicate with your viewer?
“We are making photographs to understand what our lives mean to us.”
— Ralph Hattersley
When considering the subject of fine art landscape photography, you may be asking, “Does my work measure up? Am I good enough that my photographs could be considered fine art? Do I belong in the elite club of fine art photographers?”
I would suggest that what constitutes a fine art photograph is less about the quality of the image, and much more about the photographer’s success communicating something to the viewer.

“Good photographs are like good jokes. If you have to explain them, they aren’t very good.”
Anonymous
If you want to be successful in fine art landscape photography, or any other genre of photography, for that matter, teach your photos to speak for themselves. If they were displayed in a gallery without you there to say a word, what would they say to a viewer? What would a person feel when viewing them?
Yes, a photo can be worth 1000 words, maybe more. But it has to speak for itself!
Fine art landscape photography: Conclusion
Now that you’ve finished this article, you know all about fine art landscape photography.
And you know how to create some beautiful fine art landscape shots of your own!
So get out and get shooting. Best wishes in your photographic endeavors!

Fine art landscape photography FAQs
What is fine art photography?
This Wikipedia description sums it up nicely: “Fine-art photography is photography created in line with the vision of the photographer as artist, using photography as a medium for creative expression. The goal of fine-art photography is to express an idea, a message, or an emotion.”
Must an image be black and white to be considered a fine art photograph?
While many photographers choose to use black and white when making fine art landscape photos, and while traditional images were made that way, it’s not a requirement. The photographer should choose whatever representation best conveys their intention for the image.
How can previsualization help me make fine art photographs?
Good photos are made in the mind, and the camera then becomes a tool for capturing what the photographer has already “seen.”
Must a photograph be printed to be considered “fine art?”
No, but a print can do much more to convey the photographer’s message to the viewer as a tangible, physical object with much greater subtlety of color, tone, and higher resolution. Further, while every display device will affect how the image is seen, a print retains the look of the image as the photographer intended. Printing is also part of the art and craft of photography.
If you could only give one tip about making fine art landscape photographs, what would that be?
Determine what you want your viewer to see, think, and feel when looking at your image, and imbue your photograph with those qualities such that it can speak on its own to the viewer.
The post Fine Art Landscape Photography: The Complete Guide appeared first on Digital Photography School. It was authored by Rick Ohnsman.
Frame Within a Frame Photography: A Guide
04
Feb
The post Frame Within a Frame Photography: A Guide appeared first on Digital Photography School. It was authored by Kevin Landwer-Johan.

Frame within a frame photography is a creative technique that works in many genres of photography. But what is it, and how can you use it for amazing photos?
In this article, we’re going to take a look at this composition “rule” – which you can apply very obviously or even very subtly in your photographs.
So if you’re ready to create some unique images…
…then let’s get started!

What is frame within a frame photography?
Frame within a frame photography is all about positioning your main subject so it’s framed by something else within the scene.
You can use anything you like for this. For instance, you might use a full rectangular frame, like a door or a window. You could even use an actual picture frame.
But frame within a frame photography is not limited to structures that completely surround your subject.
You can incorporate body parts and tree limbs as frames. Using rocks, plastic bags, or mannequins can be an effective way to add a frame within a frame. These things may occur naturally, or you can bring them in as props to include in your compositions.

Frames in front and behind
Typically, we think of a frame that surrounds a subject as being in front of it.
But it doesn’t need to be.
Because you can often effectively frame your subject with something that’s behind them.
Here are three examples to illustrate what I mean:

In this first photo of the welder (above), I’ve used a hole cut in the steel to encircle the worker. There are also more holes in the panels behind him, though it’s the front hole that acts as the main frame.

In this second shot, however, while the gate pillars do frame the young monks, the contrast of the shadow on the wall also helps to frame the main subject.

Here’s a third example where I have used frames both in front of and behind my subject. By lining up the front and rear windows in the train carriage, I have managed to carefully frame the young woman.
Depth in frame within a frame photography
The woman on the train (above) is also an example of how using frames within a frame can help create an enhanced sense of depth in your compositions.
This becomes even more exaggerated when you use a shallow depth of field. Blurring the frame shows that the frame and the subject are at different distances from the camera (and it also helps draw the viewer’s eye to your subject!).
For instance, look at the photo below. The white pillars on either side of the dancer and the circular shape behind her head frame her well. And the shallow depth of field helps create actual depth in the image.

Note, however, that you can use frame within a frame photography in circumstances where you convey no sense of depth.

Take a look at the photo above. Are the people walking in front of or behind the large palm trees? The trees create a nice frame, but because the key elements are silhouetted, there’s no visual information to reference depth.
Composing with existing and created frames
Some frames are more obvious than others. Unfortunately, more obvious frames tend to be a bit too common in photographic compositions – to the point that they become clichéd.
So instead of using obvious frames, access your imagination. Look for unusual elements you can incorporate into your compositions. These can sometimes create interesting frames around your subjects.
Frames don’t have to be physical; you can always use light and shadow as a frame. Look for areas of contrast that surround what you’re focusing on. Carefully position yourself and your subject to maximize the effect.
Out-of-focus elements can also be used to create frames. When you have an object in the foreground that doesn’t form a complete frame around your subject, simply choose a wide aperture setting and make sure the foreground object is close enough to your camera. You’ll get a rather abstract form that can frame the subject and help lead the viewer’s eye into your picture.
Take a look at the image below. Do you see how the blurred vegetation creates a frame around my subject?

Making use of what’s around you to create a frame can be very effective. Here, I have used the model herself to make a frame within a frame:

Look for frames and you’ll find them
Practice looking for frames, and you’ll begin to see them everywhere. Study the work of other photographers and see how they work with frames. Do a quick image search online for examples, and you’ll soon see how imaginative some photographers are with frames!
Then go out with a camera. Like anything, the more you do frame within a frame photography, the easier it becomes. Set yourself the task of creating a frame within a frame every time you head out to shoot.
That way, you’ll begin to train yourself to see situations where you can incorporate this compositional technique into your work.
Frame within a frame photography: Final words
Frame within a frame compositions are a great way to focus the viewer’s eye on your subject – and a great way to add depth to your photos.
So make sure you get out and practice! As I explained, the more you practice, the sooner you’ll be creating stunning frame within a frame photos.
Now over to you:
Have you ever tried frame within a frame photography? Do you have any framing tips? What are your favorite frames? Share your thoughts in the comments below!
The post Frame Within a Frame Photography: A Guide appeared first on Digital Photography School. It was authored by Kevin Landwer-Johan.
8 Ideas for Awesome Abstract Photography
02
Feb
The post 8 Ideas for Awesome Abstract Photography appeared first on Digital Photography School. It was authored by Anthony Epes.

In this article, I plan to share some inspiring abstract photography ideas.
Now, I would never describe myself as an abstract photographer, yet I seem to have shot countless abstract photographs. In fact, I try not to assign myself to any genre. To me, that feels like the opposite of what photography should be – which is a place to have fun, to be curious, to explore, and most importantly, to give your imagination free rein.
I start the article like this because I want to encourage you not to be intimidated by this genre. Don’t worry about getting it right. Abstract photography should be a place of complete freedom.
And this is why the most important quality for abstract photography is imagination.

What is abstract photography?
For me, abstraction is about removing what’s in the world around us from its familiar context. It involves playing with elements and subjects, moving them away from their usual settings and placing them into new situations – so that they become something else entirely.
I find that doing abstract photography brings us into that childlike realm of imagination and makes us often think, “What is that?” Or, “That reminds me of…” Then our minds go off into dreamlike worlds.

“Abstraction demands more from me than realism. Instead of reproducing something outside of me, now I go inward and use everything I’ve learned thus far in my life.” – Susan Avishai
Therefore, I like to approach this genre as a way for us to have fun with our photos, the world around us, and ourselves. I’ll share eight abstract photo ideas that I hope ignite your imagination, and get you excited about exploring abstract photography!
Let’s get started.

1. Use your imagination as much as possible

“Abstraction allows man to see with his mind what he cannot see physically with his eyes…Abstract art enables the artist to perceive beyond the tangible, to extract the infinite out of the finite. It is the emancipation of the mind. It is an exploration into unknown areas.” – Arshile Gorky
Doing abstract photography feels like I am trying to detach myself from reality and delve into a space where everything around me is a new sight, a new sensation, or a new experience.
I look around and see elements, colors, shapes, lines, textures – each is almost separate from the other. I am looking for things that are connected, but in a different way to how my mind usually puts things together.
Then it’s my imagination that kicks in and starts creating all kinds of ideas about what things look like. To me, the photo above looks like something coming from the cosmos, the beginnings of a new world.
(In reality, it’s some slime floating around in water, which I played with in Lightroom.)
So use your imagination constantly. When doing abstract photography, don’t let “conventional” thinking get in the way!

2. Search for textures
Textures are a fascinating subject to explore. When you focus on textures, you capture a tactile quality in your photos. You make people want to lean in and touch something.
And you often give very ordinary things – water, brick, wires, or stone – an inviting feeling.
Today, we are often so disconnected from the ordinary (i.e., what we perceive as the boring world around us). We are so often lost in thought that we’re only jolted out of it when we see spectacular things – like beautiful views, intense sunsets, etc.
But all around us are terribly ordinary subjects that can be so very intriguing, if only we viewed them with our sense of wonder! So instead of capturing a snapshot of an intense sunset, try looking more closely at some “boring” subjects to see what textures you can find!
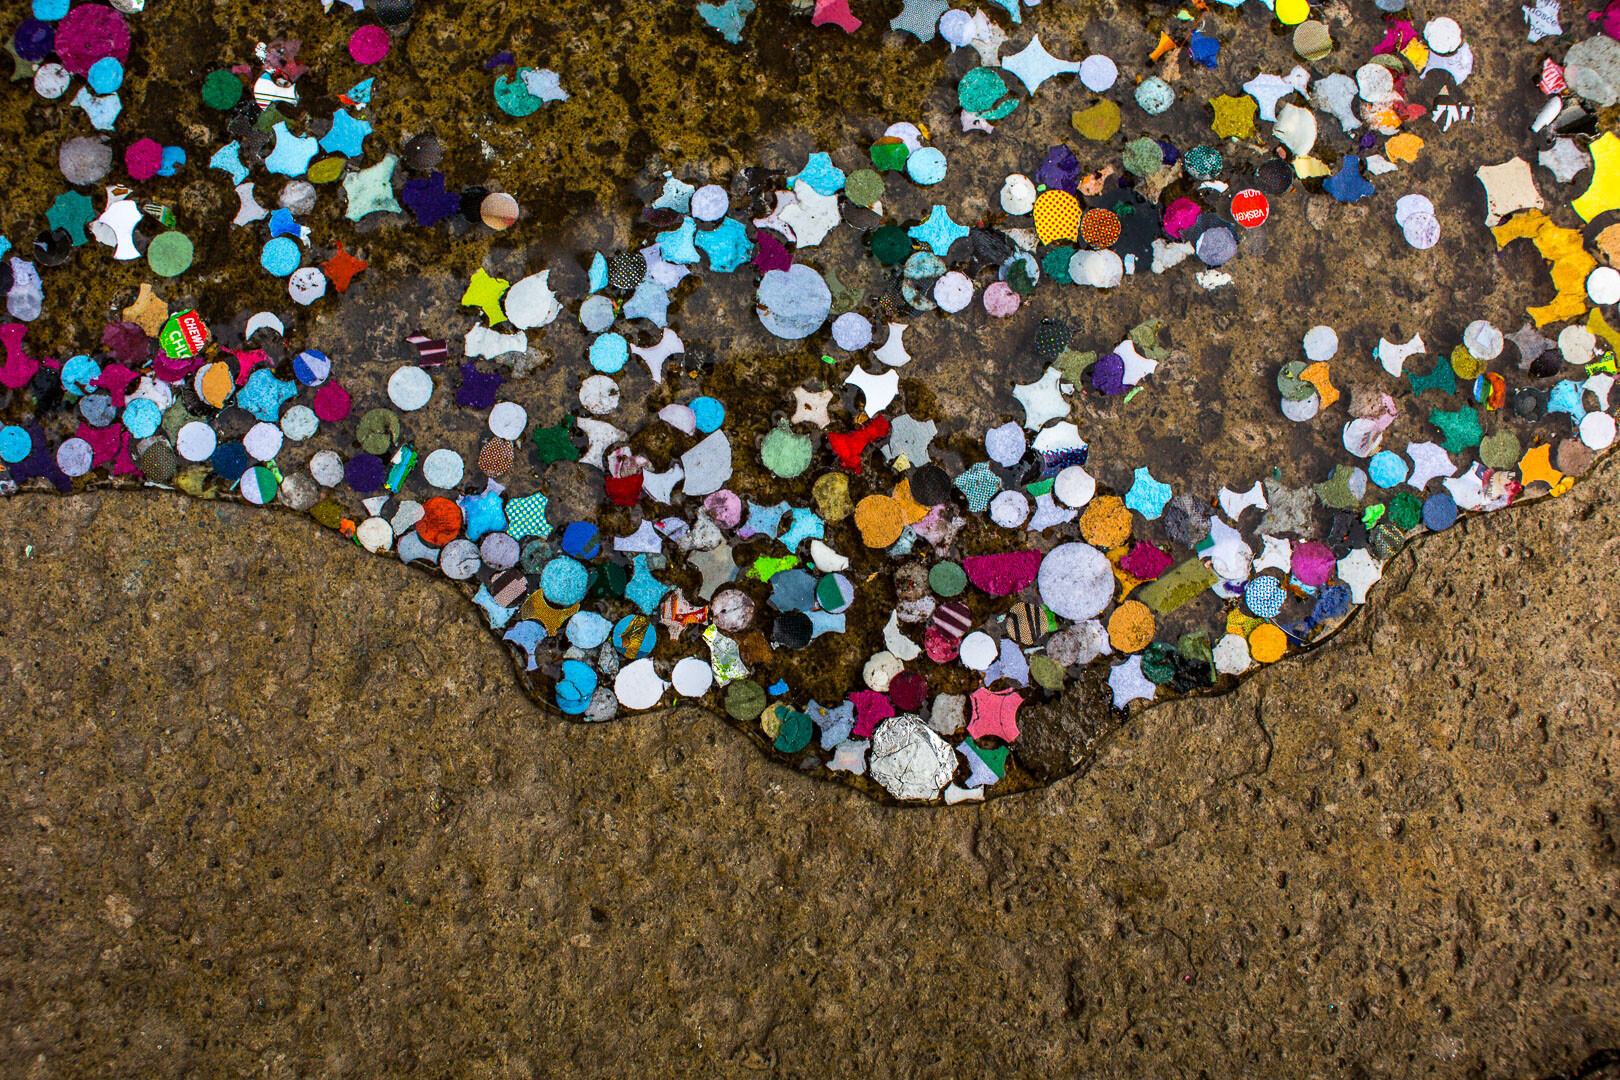
3. Shoot the ordinary
“The longer you look at an object, the more abstract it becomes, and, ironically, the more real.” – Lucian Freud
I love to shoot random, day-to-day subjects that I find all around me. I challenge myself to make these subjects seem interesting.
For instance, I am always on the lookout for torn posters on a wall – especially when they are bathed in beautiful light – as well as weird things I find on the street at my feet.
In fact, starting with what you find at your feet is a great way to do abstract photography!

Here’s why:
Everything, when you pay attention to it, can reveal different qualities than what we first notice. And our challenge as photographers- as artists, no less – is to find the most interesting way to shoot whatever catches our attention.
Maybe you need to take a different perspective – lying on the floor, getting up high, or changing angles. Or maybe, by using the quality of the light, you can turn the subject from ordinary to fascinating.

Or perhaps you could even use color to give boring, unoriginal subjects interest and depth:

4. Include mystery in your abstract photos
“Abstraction generally involves implication, suggestion and mystery, rather than obvious description.” – Robert Genn
The appeal of abstract photos for me is very much about mystery. Creating something that doesn’t look as it should, displacing your subject, mixing up reflections, creating contrasts and jarring juxtapositions – it’s all a fun part of making the world less real and more mysterious.
You can combine shapes together to create something that makes no real sense, but still sparks ideas and thoughts in the mind of the viewer.

In the photo below, I captured this reflection of a man on what I like to think is a moon landscape inhabited by interesting-looking creatures.

At least, that’s what I see when I look at the photo. What do you see? It might be completely different!
5. Aim to capture the feeling of your subject
“Of all the arts, abstract painting is the most difficult. It demands that you know how to draw well, that you have a heightened sensitivity for composition and for colors, and that you be a true poet. This last is essential.” – Wassily Kandinsky
In my photo teaching, I talk a lot about having a heightened awareness and sensitivity to the world.
Because if you want to find incredible photos wherever you go, you must have the ability to see more of what’s around you than you can when you are lost in your thoughts.
Now, with that heightened sensitivity comes increased feelings and impressions of what you see.
And thinking about the feeling you have when you look at your subject is so important. If you aren’t feeling anything, you won’t be able to communicate anything in your photos.
But if you do feel something when you look at your subject…
…you can channel it into the photo for a beautiful result!

I like the sensations I get when I look at the texture photos above. It’s perhaps a sense of awe at the water and the beautiful colored stones. I can almost feel the water, and that feeling is translated through the photo.
In the photo below, perhaps I get a feeling of fun, thanks to some bright colors on what I remember to be a dull London day:
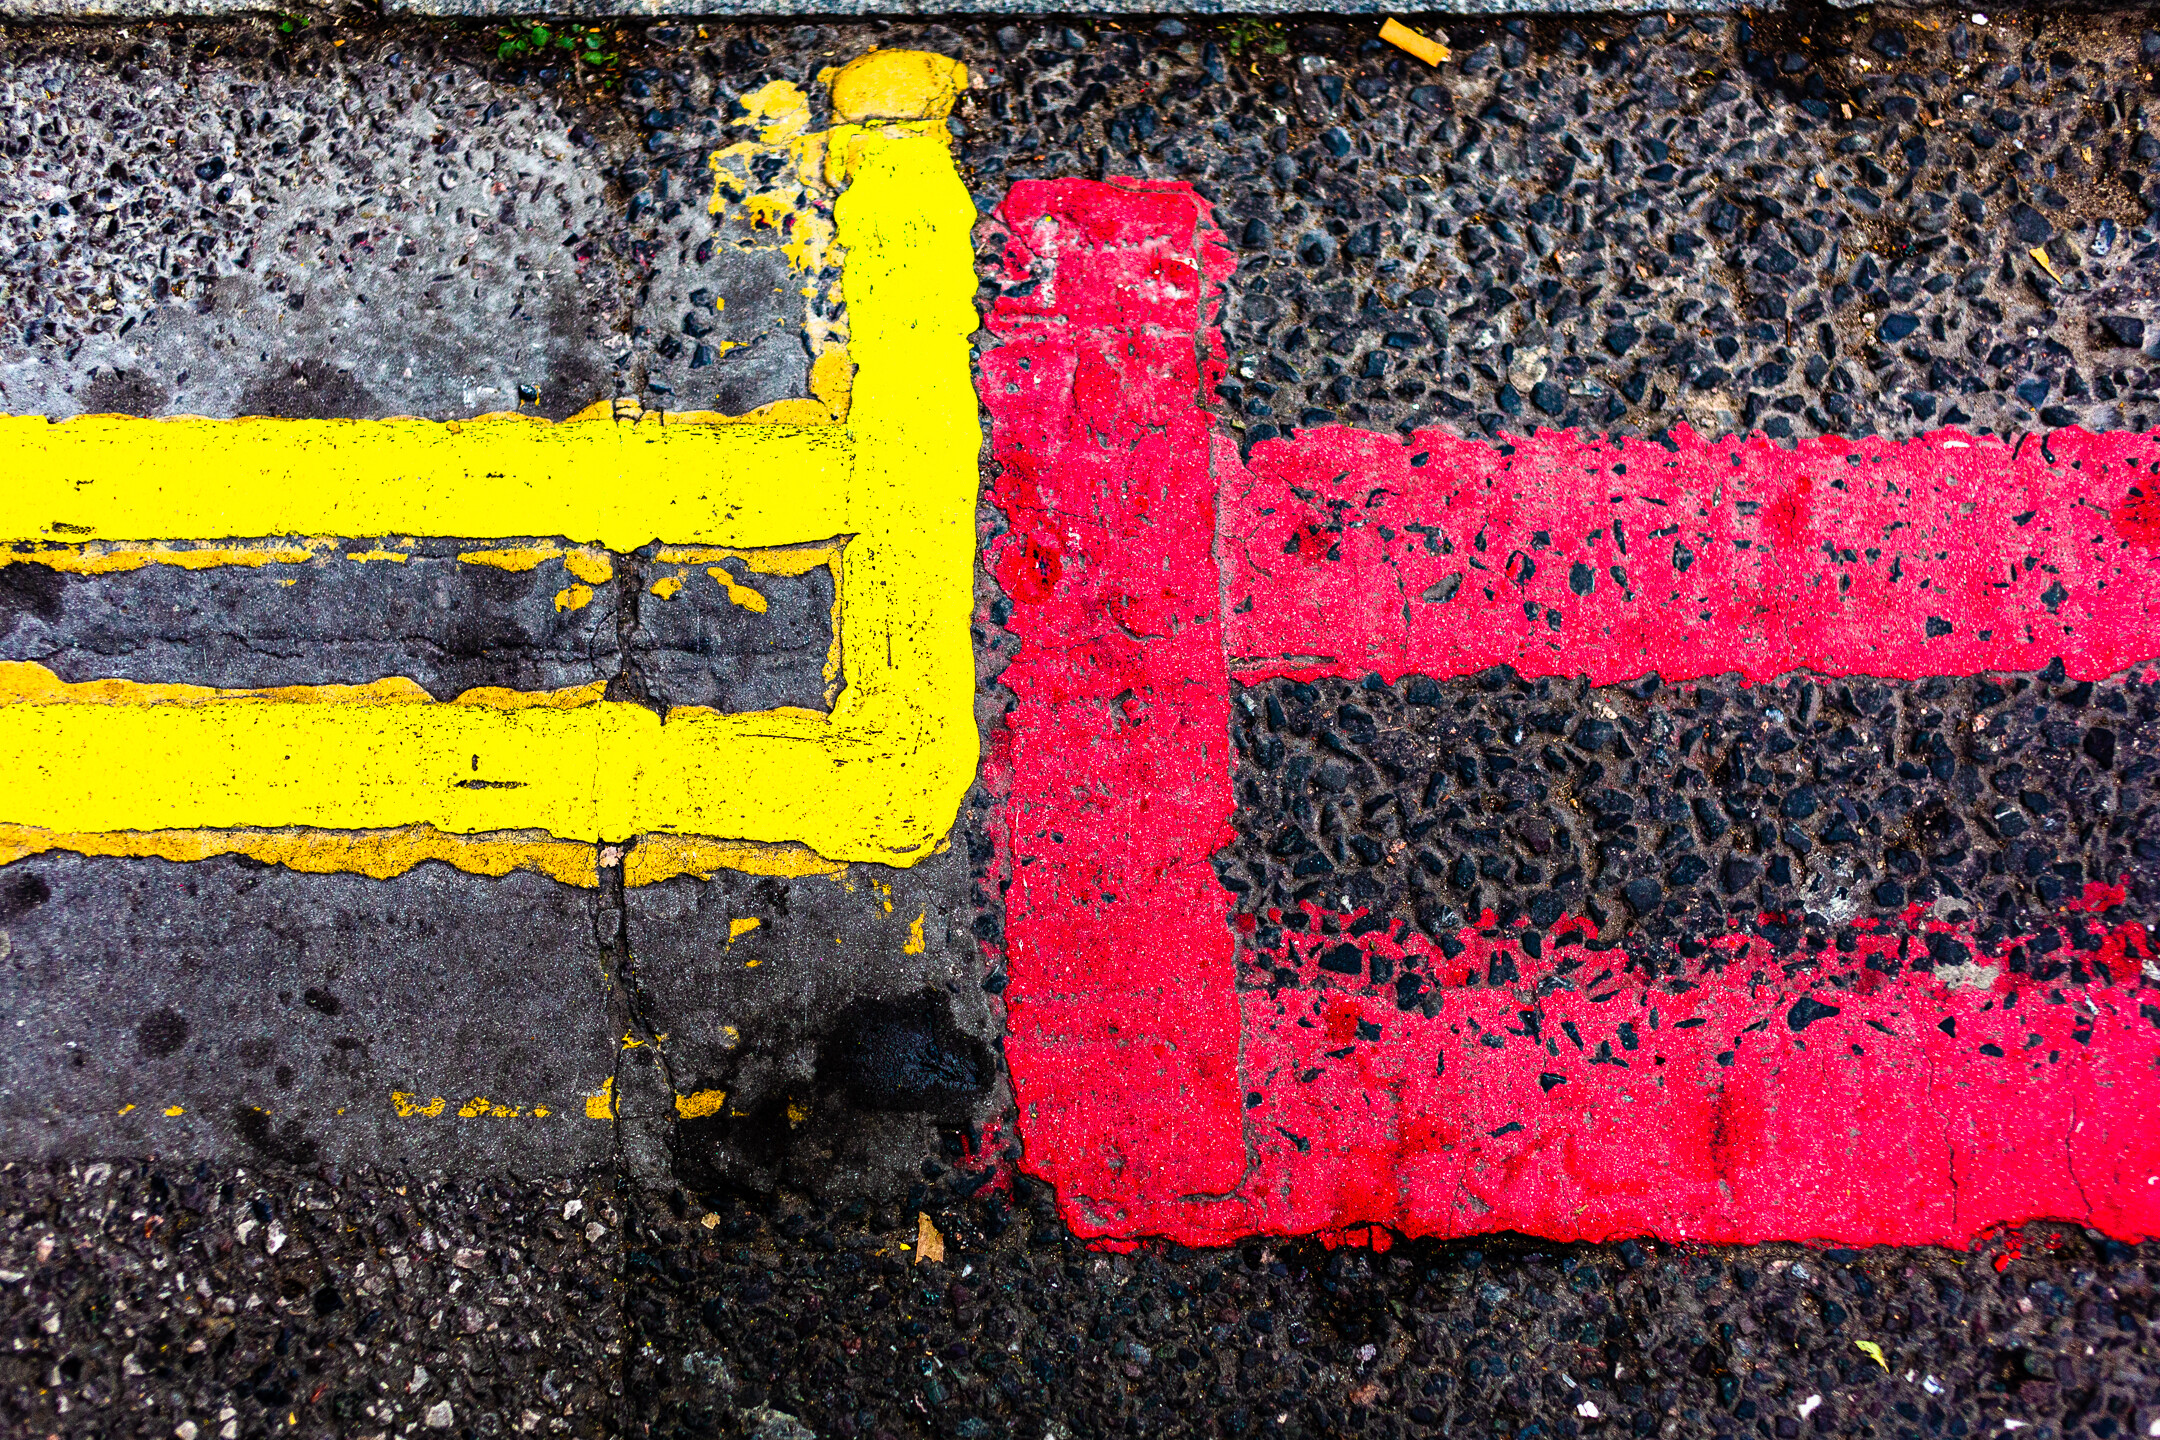
6. Find subjects that stop you in your tracks
I strongly urge you to cultivate a sense of wonder.
Why?
I think we often get so jaded by the world around us – that is, we are so busy with our lives and worries and things to do – that we stop finding things awe-inspiring. It takes more and more to make us stop in our tracks and say “Wow!”
But we photographers have a gift:
We are visual people.
We just have to make sure we’re always refreshing our vision and our sense of wonder at the world around us.
And we must go seek subjects that makes us feel awe.

I believe that we don’t always need new subjects and exotic locations. We can be impressed by things that are right on our doorstep. Therefore, going out with the intention of finding something that makes you go “Wow!” or “Cool” or “Interesting!” is a great thing to do.
Work on always trying refresh your eyes, so that you can be impressed by mundane subjects (this also refreshes the spirit!).
In the photo below, the faded street markings look like a sign in an unknown language. Maybe even a secret message.

I find that the easiest way to refresh your eyes is to go out with the goal of having fun in your photography. Try to find something that makes you laugh.
In this shot of gnarly wood below, I might have photographed a frog, or maybe an alien!

That, for me, is the essence of abstract photography:
Creating a new world, a new vision, and a new experience from this very familiar (yet still awe-inspiring!) world around us.
7. Use perspective for an unusual take on your subject
By changing perspective, you can create cool new images of otherwise dull subjects.

By shooting upward and not focusing on the entire scene, I captured this image:

So make sure you don’t always shoot using the same boring, eye-level perspective.
Instead, mix things up a bit! Experiment with changing your vantage point or your angle.
Make sense?
8. Break down the world into elements
In photography, you must learn how to see the world as a series of elements, and then learn to arrange these elements in pleasing and interesting ways.
Ultimately, you should be looking at the world as a series of elements, and not as a vast, interconnected whole.
This is relevant to all genres of photography. Gaining a sense of control over the elements you place in your scene, what elements you use to support your subject, and what elements you remove from the composition is a great way to improve your abstract photos.

This idea of breaking the world down into elements is particularly useful when doing abstract shooting, because you are looking at the world afresh and trying to use your imagination to create something that is super interesting – and also super unique!
Abstract photography ideas: Conclusion
Hopefully, you’ve found some exciting abstract photography ideas to try – and you’re ready to get out and start shooting!
So grab your camera and take some photos.
And make sure to have lots of fun while you’re at it!
Now over to you:
Have these abstract photography ideas helped you see what’s possible in your photography? Do you shoot abstracts, or will you now? Let me know in the comments below!
The post 8 Ideas for Awesome Abstract Photography appeared first on Digital Photography School. It was authored by Anthony Epes.
65 Films About Photography: Our Picks to Watch
30
Jan
Photography and movies have a lot in common. While one is the art of capturing a frame, another is capturing moving frames. However, both are powerful creative mediums to tell a story. Apart from practicing photography yourself, one of the easiest ways to learn and improve your photography skills is to watch other people’s work and be inspired. And, what’s Continue Reading
Photodoto
You must be logged in to post a comment.