RSS
 

Posts Tagged ‘Photographs’

BTS: Heisler Photographs Alonzo Mourning

13 Mar

Having just spent a week with Greg in Dubai at Gulf Photo Plus, I have now heard him express the following thought multiple times:

There is light you create that is a photographic reaction to light as it exists in the world, and there is light you create just because it's cool.

I think it's safe to say that this photo he made of NBA star Alonzo Mourning, for ESPN Magazine, is the latter. How he did it, below.

Read more »
Strobist

 
Comments Off on BTS: Heisler Photographs Alonzo Mourning

Posted in Photography


How I Will Publish One Million Photographs Before I Die

07 Mar

Waiting for the Mother Ship -- Death Valley, CA

My friend Chris Guillebeau sent me an email this morning about my uploads to Flickr. One of the things I love about Chris is that like me he is a big dreamer/achiever. For those of you who don’t know him, you should get to know him. He’s a huge motivation and someone who can help you achieve great things as well. Chris wrote up a really nice interview on my photography a few years back.

One of the things that Chris wanted to do was to visit every country in the world by April 7, 2013. For this goal he is using the United Nations list of 193 member states. You know what? He’s visited 192/193 so far. WOW! His Brief Guide to World Domination should be required reading for every person in the world. It should be taught to students especially.

I sincerely believe human beings are capable of so much more than they think they are. Unlocking our true potential and power comes from some very basic tools and techniques that can be learned. In 2005 I read a book that dramatically changed the way I think about my own life by Brian Tracy called Focal Point. I’d encourage you to buy this book and read it. It’s probably the most important book I’ve ever read. If you’ve got kids buy it for them and give it to them as well. It teaches you how to accomplish great things.

One of the things that I’ve decided that I want to do with my own life is to publish one million photographs before I die. When I talk about publishing a million photographs, I’m not talking about simple shutter actuations — I’ve already taken over a million frames. Anyone can push a shutter a million times. You could probably train a monkey to do this. Anyone can even publish a million meaningless photo clicks to the web — many in fact already have.

My quest is not simply quantity over quality. What I’m focused on is publishing one million *quality* photographs that I believe in and care about as personal art — photos that I can be proud of. Each photo I choose to publish is carefully selected amongst many different frames from a shoot. Each photo is individually worked with, processed, edited with software, keyworded, and frequently hand titled and geotagged (although not always, for those last two points). Occasionally I will create more than one version of a single frame, but each photo is unique and different.

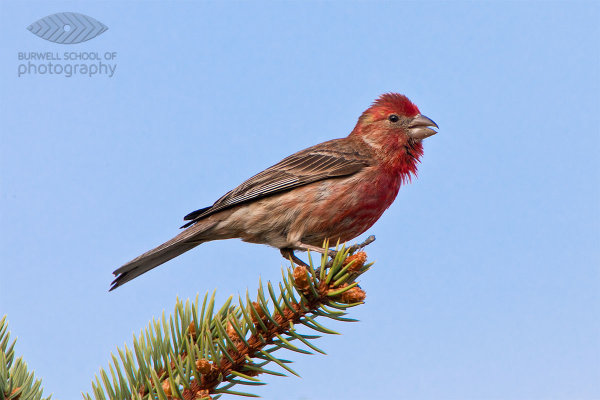
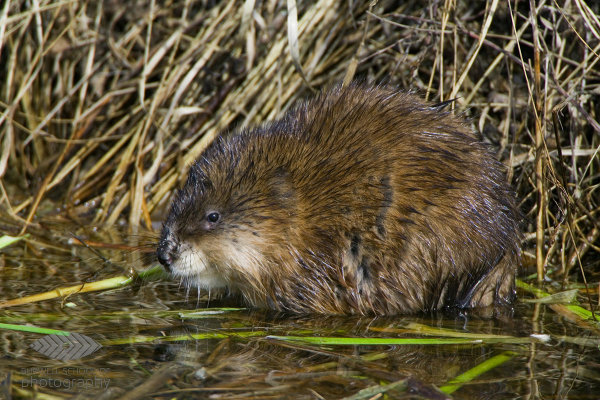
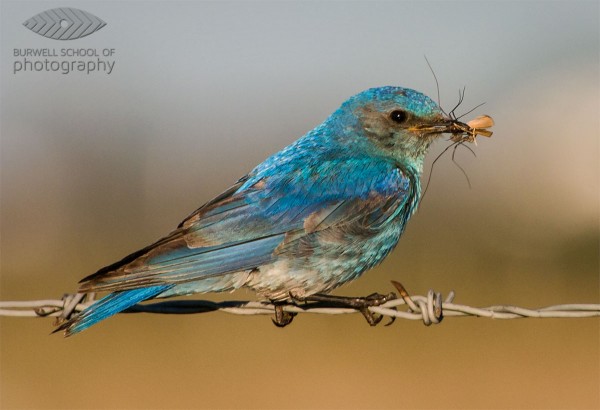
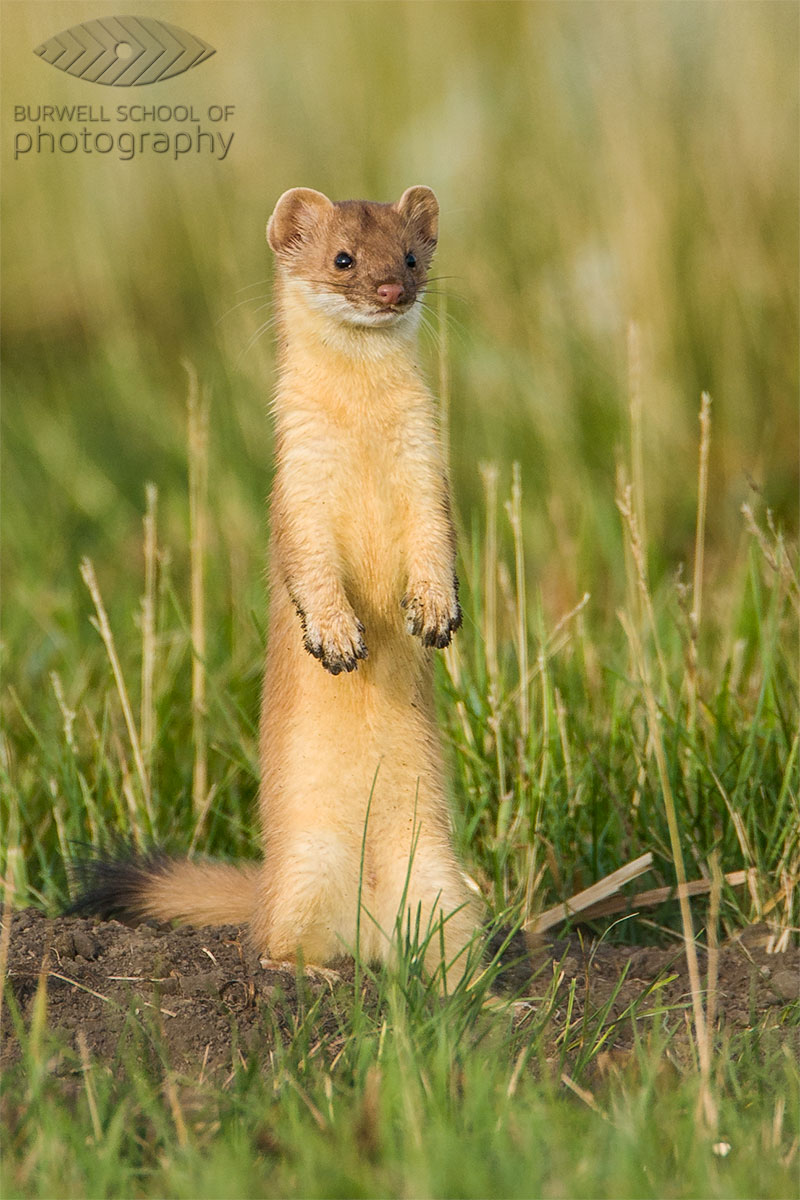
Although I publish my photos to many different sites on the web, Flickr is where I’m presently maintaining my larger body of work. What a deal Flickr is — unlimited high res photos for $ 24.95/year. Nobody comes close to touching this. In addition to this great value, Flickr comes with great presentation tools, an awesome new iPhone app and a pretty terrific social network too.

At present I’ve published 79,783 photographs to Flickr. In addition to these published photos, I’ve got an archive of about 22,000 fully completed and finished photos in a folder ready to go to Flickr. Each day I publish about 30 more of these to the site, pretty much at random — or about 11,000/year.

Which brings me back to Chris’ email earlier this morning. Chris is working on a new book right now and for the book had asked me some questions last month about my photography. He was following up today to confirm that last year I published about 11,000 new photos to Flickr — which I’m going to confirm with him shortly after finishing this post — but in considering this, I realize that the 11,000 number for 2012 is problematic. It’s problematic because if you assume that I continue on at this pace, I will need to live 84 more years to realize my goal of 1,000,000 photos. At age 45 today, it is highly unlikely that I will live to be 129, and so at my present pace, this sets my goal up for failure if people take my publishing rate today at face value.

My goal is much more complex than simply 11,000 photos per year for the rest of my life though. I’ve thought about my lifetime goal for many, many hours and my plan to achieve it is more complicated than a simple number for 2012 might suggest.

I’ve actually worked out my lifetime achievement goal in rough form with a spreadsheet as I’ve developed my thinking. At present what I plan on doing is increasing my publishing rate of photos by 2% per year during the next 10 years. The reason why I’m publishing less photos today is primarily because I’m so focused on actually shooting the photos today. I want to spend the time in my life when I’m most physically fit shooting the most. I also think that time/age frequently add interestingness to many photos. So I’d rather capture photos here and now today than in the future.

If I increase my publishing 2% each year for the next 10 years (something I’m very confident I’d be able to do even with my current unpublished archive alone) I should have about 200,000 photos published 10 years from now.

10 years from now my last of four children, Kate, will (hopefully) be leaving us for college. With all four of my kids out of the house, I will likely spend less time on my children than I do today. So 10 years from now I will increase my publishing rate even more, about 5% per year — more time for shooting but more importantly, more time for processing. In 10 years I’ll have approximately 370,000 photos published.

20 years from now, not only will my kids (again, hopefully) be done with college, but I’ll also be able to retire from my day job at around age 65. This will then free me up 100% to focus my time and energy on photography. I plan to increase my publishing rate by 10% per year then.

After age 65 the proportional rate of time spent shooting vs. processing will likely flip flop from what I’m doing today as well. Instead of spending 80% of my time shooting and 20% of my time processing, like I do now, I’ll likely spend 20% of my time shooting and 80% of my time processing. When you’re an old man (not that 65 is old, but I’ll get older likely after that) it’s a lot easier to sit in front of a computer and process than it is to run around the country staying up 20 hours at a stretch and shooting.

If I follow this strategy, and the part between age 65 and 80 is super important, I will publish 1 million photos when I am 80. Government life expectancy tables today give me until age 83 to live, but I wanted a few years as a buffer in case I kicked the bucket early.

My biggest challenge in all of this is maintaining my unpublished archive. I want this archive to grow larger and larger and larger, even as my published work grows as well. By growing my unpublished archive larger, I ensure that greater and greater diversity will be represented in my daily publishing. This is a secondary goal of mine, to have as much diversity with what I publish as possible. 20 years from now I like the idea of a photo from 2010 being published alongside a photo from 2015 and one from 2020. I like the idea of my photos been diversified not just by time, but by location (I’ll shoot more and more locations over my lifetime), subject matter (I’ll shoot more and more different things), style (my style will evolve and change), etc.

As I pursue this lifetime goal I’m also cognizant of a powerful tailwind at my back — technology. Technology will make my goal easier and easier to achieve. Already in 2013 I’m blown away at how much faster I can process my work than two years ago. Going from hard drives to flash storage, going from USB to Thunderbolt, faster macs, better cameras, all contribute to ensuring that I will be able to keep pace in the future even as I grow my publishing rate. For the first time, this year, I’ve felt like the only thing holding me back with my processing is actually me. For the first time with the hardware and software advances, I feel like I’m working and editing my work in real time. The future is indeed bright for the future tools that will not only continue to make our images look better, but which will also help us do more faster.

One final note — this goal is intensely personal for me and me alone. I created it, I live it, I fuel it. Over the years I’ve had many who have been critical of my goal. Many don’t understand that quantity can also be quality. Many have expressed an opinion that taking so many photos somehow diminishes my work. Many people have a desire to produce less, not more. All of this is fine. Everyone can do whatever they want. This is just what *I’m* doing. I’m not saying that this is the right path for anyone other than me and me alone. I’m not making a larger statement about photography in general, or saying that people that don’t keep my path/pace are in any way less significant as artists or photographers.

While I’ve personally admired many of the most prolific artist/photographers in the world (Warhol, Eggleston, Winogrand, Friedlander, etc.), I also admire many photographers and artists who make great art in smaller but more intense doses too. Whatever YOU do is fine. Be true to yourself and follow the artist that is inside of you.


Thomas Hawk Digital Connection

 
Comments Off on How I Will Publish One Million Photographs Before I Die

Posted in Photography


Making Sharper Wildlife Photographs – [Part 2 of 2]

06 Mar
House Finch perched on a spruce tree branch: Canon 5D Mark II, Canon 500mm F4L IS lens, 1.4x Extender II and 2.0x Extender II @1400mm, 1/400th of a second at F10, ISO 800, Gitzo 3541 Tripod with Jobu Design BWG-Pro gimbal head

House Finch perched on a spruce tree branch: Canon 5D Mark II, Canon 500mm F4L IS lens, 1.4x Extender II and 2.0x Extender II @1400mm, 1/400th of a second at F10, ISO 800, Gitzo 3541 Tripod with Jobu Design BWG-Pro gimbal head

A contribution by Paul Burwell from Burwell School of Photography

In my last article I discussed the sort of equipment the average person might afford and use for wildlife photography. We discussed lenses and teleconverters along with tripods and monopods. This time, we’re going to look at how you use that equipment to come away with the sharpest possible images.

Tripod Heads

My first piece of advice is to learn how to use your tripod along with whichever type of tripod head you have. My recommendation for wildlife photography is to use some sort of Gimbal head like the excellent models sold by Canadian company Jobu Design.

These heads allow you to balance the lens/camera over top of the tripod while providing finger tip control. If you’re using a monopod, I’d mount the lens either directly to the monopod or use a quick release plate. At the risk of sounding like a children’s piano tacher, and not meaning to pester, but you do need to practice with this gear to become proficient. Photographic opportunities in the wild are often fleeting and you’ll need to rehearse so that when the time comes you’re making great images and not fumbling with knobs and latches.

Shutter Speeds

Another aspect of making sharp images is using a fast enough shutter speed. As a rule-of-thumb when photographing off of a tripod or monopod, you’ll want your shutter speed to come close to matching 1/2 of your focal length. This rule means that if I’m photographing at a focal length of 400mm, I’ll want to make sure that I’ve got a shutter speed of at least 1/200th of a second to make a sharp image of a stationary critter. If there’s a lot of action going on and you want to freeze the motion, shutter speeds of 1/500th of a second or quicker may be required. I’m also not afraid to use my camera’s higher ISO settings to get a higher shutter speed if required.

There is little doubt that today’s lenses with their built-in gyroscopes to help stabilize the image go a long way in letting photographers get away with slower shutter speeds than the one over the focal length rule of thumb would allow for.

Many of today’s stabilized lenses claim that they can save three or even four stops of shutter speed and still return sharp results. My experience has been that these lenses (IS for Canon users, VR for Nikon shooters, OS or some variation thereof for the rest) do make a tremendous difference and are especially useful in low light shooting conditions. Look at many of my pictures and you’ll see I’m a big beneficiary of this new technology.

Muskrat pauses while eating: Canon 1Ds Mark II, Canon 500mm F4L IS lens, 1.4x Extender II and 2.0x Extender II @1400mm, 1/500th of a second at F10, ISO 640, Saddle-shaped bean bag from vehicle window

Muskrat pauses while eating: Canon 1Ds Mark II, Canon 500mm F4L IS lens, 1.4x Extender II and 2.0x Extender II @1400mm, 1/500th of a second at F10, ISO 640, Saddle-shaped bean bag from vehicle window

The Eyes Have It…

Another trick for making sharper images comes down to the connection between the camera and your body. While it might seem to make sense to just lightly rest your eye against the camera’s viewfinder, I suggest you do the opposite. When I’m photographing using telephoto lenses, I physically push my eye as firmly as possible against the viewfinder (or in my case glasses which leaves them very greasy at the end of a photo session).

This technique allows the mass of my body to help dampen vibrations the camera might be experiencing. Next, I hold the camera with my right hand positioned to press the shutter release and make adjustments to the camera’s settings. My left hand gets draped over top of the lens. Again, we’re trying to use our body’s weight to help dampen vibrations and steady the rig as much as possible.

Now that I’ve got my camera equipment mounted on a suitably weight-rated tripod or monopod, I’ve chosen a suitable shutter speed AND I’ve positioned my body against and on the camera to ensure steadiness, all I’ve got to do is shoot away and I’m good, right?

Squeeze the Shutter Release

Not quite. The next trick is to learn how to press the shutter release. If you were a casual observer watching just my finger on the shutter release, I’d wager you’d never be able to accurately guess when I’d made a photograph. And that’s because I’ve practiced my technique to the point where, much like the way a sniper squeezes the trigger on a rifle, I can release the shutter on my camera with the same controlled almost indiscernible action.

While I’m photographing, my shutter finger never loses contact with the shutter button and I’m not so much pressing it as I am squeezing it. Remember to squeeze and never stab the shutter button. When photographing wildlife at the longer telephoto lengths, you need to keep all of your actions as smooth as possible and the way you press the shutter is a huge factor in making sharp images.

To summarize these techniques, get your camera gear supported in the best way possible, choose an appropriate shutter speed, brace your body against the equipment so that you almost become part of it and finally squeeze the shutter button with the most subtle of movements. Remember to utilize the three P’s of wildlife photograph (Practice, Practice, Practice) and you have my guarantee that you’ll be well on your way to producing sharper images.

Paul Burwell is the owner Burwell School of Photography

Post originally from: Digital Photography Tips.

Check out our more Photography Tips at Photography Tips for Beginners, Portrait Photography Tips and Wedding Photography Tips.

Making Sharper Wildlife Photographs – [Part 2 of 2]


Digital Photography School

 
Comments Off on Making Sharper Wildlife Photographs – [Part 2 of 2]

Posted in Photography


Making Sharper Wildlife Photographs – [Part 1 of 2]

03 Mar
Canon EOS Digital Rebel, Canon 100-400 F4.5-5.6L IS lens @400mm, 1/800th of a second at F8, ISO 400 - Hand held

Mountain Bluebird with prey: Canon EOS Digital Rebel, Canon 100-400 F4.5-5.6L IS lens @400mm, 1/800th of a second at F8, ISO 400 – Hand held

A contribution by Paul Burwell from Burwell School of Photography

If there is one area that seems to flummox more aspiring wildlife photographers it is the subject of making sharp images. You’d think that with today’s modern cameras and equipment that there’d be no problem going home with sharp images after each wildlife encounter. Un fortunately, that isn’t the case and I’m going to provide you with some tips and tricks to make sure you’ve got the best possible chance of making sharp images.

Lenses

One of the truisms in wildlife photography is that it is virtually impossible to have too much lens. This means it is extremely rare that the wildlife critter you are trying to photograph is too big in your viewfinder and in fact the opposite is much more common. Not everyone can afford one of the prime super-telephoto lenses that the major manufacturers produce. These lenses in the range of 300mm to 800mm can set you back anywhere between $ 5,000 and $ 11,000 respectively. Unless you’re a pro or a serious amateur with a healthy bank balance, these lenses aren’t feasible for the average user.

So, what’s a person to do? My recommendation is to purchase the largest telephoto lens you can afford. And when you’re looking at telephoto lenses, you want the biggest number of millimetres that you can afford. Common lens lengths include 200mm, 300mm and 400mm.

If you end up purchasing a zoom lens, look for one that has the shortest range possible. Why? Because in general, the more extreme the range the lens covers, the lower the quality at all those ranges. Therefore, I’d choose a lens that gives a range of 70-300mm over a lens that gives a 35-3500mm range every time. You also want to purchase the fastest lens you can afford. All lenses have a maximum aperture they can photograph at.

A lens rated at F2.8 is two stops faster than a lens rated at F5.6 and allows four times as much light to reach the camera’s sensor. Because wildlife is often photographed under challenging lighting conditions, a faster lens allows for faster shutter speeds which equals sharper images.

Long-tailed Weasel pauses outside of ground squirrel burrow: Canon EOS Digital Rebel,  Canon 500mm F4L IS, 1.4x Extender II @ 700mm, 1/500th of a second at F7.1, ISO 200 - Hand held

Long-tailed Weasel pauses outside of ground squirrel burrow: Canon EOS Digital Rebel, Canon 500mm F4L IS, 1.4x Extender II @ 700mm, 1/500th of a second at F7.1, ISO 200 – Hand held

Teleconverters/Extenders

I also recommend purchasing a teleconverter (or extender). Teleconverters are rated by the number of times they magnify your lenses range. So, if you’re using a 1.4x teleconverter on a 300mm lens, you’ve now got yourself a 420mm lens. Unfortunately, this comes at the cost of some light and so if your 300mm lens was rated at F2.8, a 1.4x teleconverter will cost you one stop of light and it will effectively become a 420mm F4.0 lens. Stay away from the two-times (2.0x) teleconverters unless you happen to own one of those multi-thousand dollar prime super-telephoto lenses we were discussing earlier.

You’ll often hear that teleconverters degrade the quality of the image and this is true, but there is a trick for overcoming this problem. The solution? Stopping down up to a full stop. If you’re not familiar with the terminology, stopping down means using a smaller aperture setting (smaller aperture == larger f-stop number).

While it is a general practice to photograph wildlife wide open (at the lenses largest opening or smallest f-stop) to separate the subject from the background, I recommend practicing with your lens/teleconverter combination to see how much you need to stop down to make sharper images. Depending on the lens I’m using, I find I need to stop down between 1/3 of a stop up to a full stop.

Support

What else can you do to get sharper images? Use some sort of support. I’ve met a few photographers who have no problem making sharp images hand-holding over 6.5kg (14 pounds) but the majority of people will make sharper images using support. Buy the highest quality tripod you can afford. Make sure the tripod is rated to support at least the amount of weight you’re going to put on it. High quality tripods can be pretty pricey but another alternative to consider that will also give your camera/lens combinations great support is a monopod.

These handy devices also provide excellent support for even the heaviest equipment and they are a lot easier to pack and move about. If you want to save some money, (and who doesn’t), consider purchasing aluminum tripods and monopods over carbon fibre. They aren’t quite as light and they get cold as heck in the winter, but they are strong and a whole lot more affordable.

So, now that you’ve got yourself the best wildlife photography equipment your pocket book will allow, stay tuned for my next column (next week) where I’ll give you the tips and tricks you’ll need to make the sharpest photographs possible.

Until then, get out there and practice, practice, practice!. Photograph ducks at the local pond or go to a dog park and capture some of the action there. Regardless of whether you are in a remote location or on your own back deck, the more familiar you are with your equipment, the better chance you’ll have of making an award winning shot.

Paul Burwell is the owner Burwell School of Photography

Post originally from: Digital Photography Tips.

Check out our more Photography Tips at Photography Tips for Beginners, Portrait Photography Tips and Wedding Photography Tips.

Making Sharper Wildlife Photographs – [Part 1 of 2]


Digital Photography School

 
Comments Off on Making Sharper Wildlife Photographs – [Part 1 of 2]

Posted in Photography


Astronaut tweets impressive space photographs

02 Feb

R0~TS520x0~cms_posts_9122995185_Screen_Shot_2013-01-31_at_10.46.22_AM.png

Astronaut Chris Hadfield is tweeting some impressive photos from his five-month journey aboard the International Space Station. Images are stripped of their data, so it is unclear what camera Hadfield is using. Popular Photography magazine speculates that it might be a Nikon due to the company’s history of cooperation with NASA. Click through to check the photos on connect.dpreview.com.

News: Digital Photography Review (dpreview.com)

 
Comments Off on Astronaut tweets impressive space photographs

Posted in Uncategorized


Set Your Photographs Apart with These Incredible Pro-Lighting Techniques

10 Jan

This is the trailer for our Fashion and Beauty Lighting Secrets DVD. Part out our Pro Photography Masterclass DVD series. Get More FREE Training at my website: www.photography-tips-online.com See how these stunning shots were created from start to finish. Broaden your knowledge of studio and location lighting for Beauty Portraiture and Fashion Photography as Karl Taylor reveals some of his incredible lighting secrets. In this programme Karl shows you 9 incredible lighting set-ups and model shoots in an easy to understand format that will give your images that professional edge. On this DVD you will learn: * Beauty Studio Lighting * Soft Light on Location * Lighting Panels * Soft Dish Techniques * Fashion Lighting * Mixed Lighting Sources for Drama * Fashion Lighting on Location * Beauty Dish and Backgrounds Get More FREE Training at my website: www.photography-tips-online.com
Video Rating: 4 / 5


BBC examines how fake photographs can change our memories

14 Dec

romney-money-picture-c.jpeg

Manipulation of photographs is nothing new. For as long as cameras have existed, photographers have staged, retouched and combined images and passed them off as ‘real’. Sometimes for artistic purposes, sometimes for fun, but sometimes for more nefarious purposes. The BBC has published a fascinating article exploring the power that faked photographs have over us, and draws some alarming conclusions about our memories, and how easily they too can be manipulated. Click through for more information and a link to the full article. 

News: Digital Photography Review (dpreview.com)

 
Comments Off on BBC examines how fake photographs can change our memories

Posted in Uncategorized


Black & White Lies (Photographs by David McKean)

13 Nov

David McKean (born 29 December 1963 in Maidenhead, Berkshire) is an English illustrator, photographer, comic book artist, graphic designer, filmmaker and musician. His work incorporates drawing, painting, photography, collage, found objects, digital art and sculpture. ‘A SMALL BOOK OF BLACK & WHITE LIES’ WHITE LIES stare king queen travels atmospherics umbilicus four seconds optimist perch bird watcher immovable object irresistible force listen and learn BLACK LIES nightmare roots piercing life lines serrated edges eavesdropping spur arteries spine daydream tip of my tongue crossed binding Music by Robert Fripp, ‘Reflection 1’.
Video Rating: 4 / 5

 
Comments Off on Black & White Lies (Photographs by David McKean)

Posted in Photography Videos


Photographs and memories Jason Reeves lyrics

11 Nov

This is a song that reminds you of someone you miss terribly Enjoy..:) comment what you think..
Video Rating: 4 / 5

 
Comments Off on Photographs and memories Jason Reeves lyrics

Posted in Photography Videos


Photoshop tutorial: How to add light to photographs | lynda.com

01 Nov

This Photoshop tutorial describes how to add light to photographs to redirect how the viewer views an image. Watch more at www.lynda.com This specific tutorial is just a single movie from chapter three of the Photoshop for Photographers: Creative Effects course presented by lynda.com author Chris Orwig. The complete Photoshop for Photographers: Creative Effects course has a total duration of 4 hours and 57 minutes, provides a practical guide to enhancing photos, and shows how to modify color and light to add vibrance, drama, and emphasis. Photoshop for Photographers: Creative Effects table of contents: Introduction 1. Creating Vibrant, Saturated, and Rich Colors 2. Creating Subdued, Artistic, and Unique Colors 3. Adding Light and Shadows 4. Increasing Visual Interest with the Blur Gallery 5. Adding Motion 6. Creating Lens Flare Effects 7. Making HDR Toning Effects 8. Creating Digital Infrared Looks 9. Adding Film Grain 10. Creating Vintage Effects 11. Adding Border and Edge Effects 12. Blending Layers Together 13. Working with Custom Brushes 14. Working with Photoshop Plug-Ins Conclusion

 
Comments Off on Photoshop tutorial: How to add light to photographs | lynda.com

Posted in Retouching in Photoshop