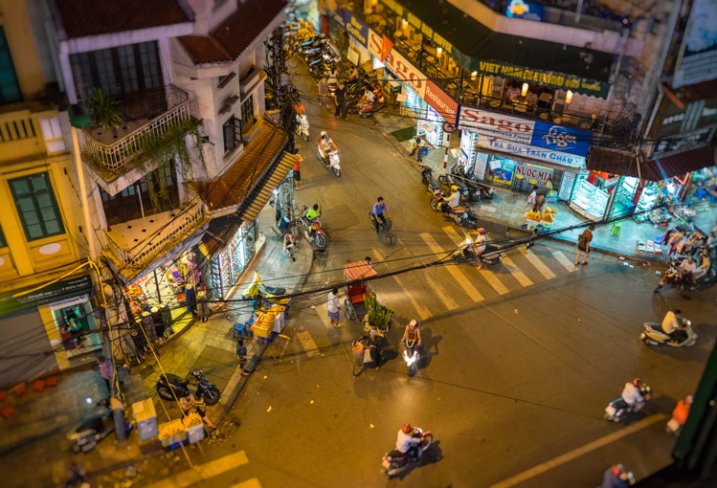
I do a lot of wandering at dawn, taking photos of the city as it wakes. Mostly I am on my own, but occasionally I come across someone, a worker or a person coming home from a party. In Paris, a few summers back, I came across this guy.
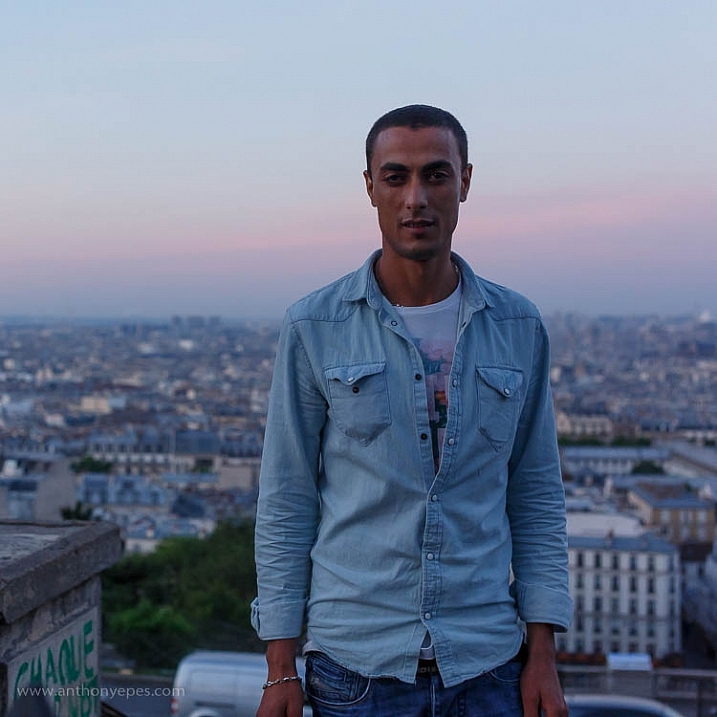
“Take my photo, friend!” he said to me.
So, of course, I did. He was brash, but when I was done he hugged me and carried on with his early morning adventures.
If only all interactions with strangers, when I’m out with my camera, could be that easy! But, unfortunately, they are not. So when you don’t have random strangers accosting you on the street, here are some thoughts on how to get amazing shots of people you don’t know.
Tips for photographing strangers
Let’s start with what holds most people back from approaching that cool looking stranger, or from raising their camera when they see a great shot of interesting people.
1 – Dealing with your fear
Having fear come up when you are approaching strangers to photograph is totally normal. All photographers who do this have experienced fear, and may continue to. Sometimes we give in to fear and walk away without the shot, but if we can get through it and push ourselves to do what we love, then gradually the practice of photographing strangers becomes much easier.
When you look up the definition of fear it says it is: an unpleasant emotion caused by the threat of danger, pain, or harm. Now I have occasionally been shouted at when out and about – usually in situations I would expect to be shouted at, like in an Italian market where people were selling fake designer handbags – but I’ve never had a threat of danger. So I like to think – “Okay fear, there is nothing that is likely to cause me pain or harm, I’ll just let you hang around until you feel the urge to go.” It probably sounds weird talking to your fear like that, but it works for me. Just letting it be there until it drifts away on its own.
2 – The secret
But actually there is a secret to this – most people are not just happy to be photographed, they love to be noticed. It’s a massive compliment to them that you have sought them out and want to take their picture. This is your secret key!
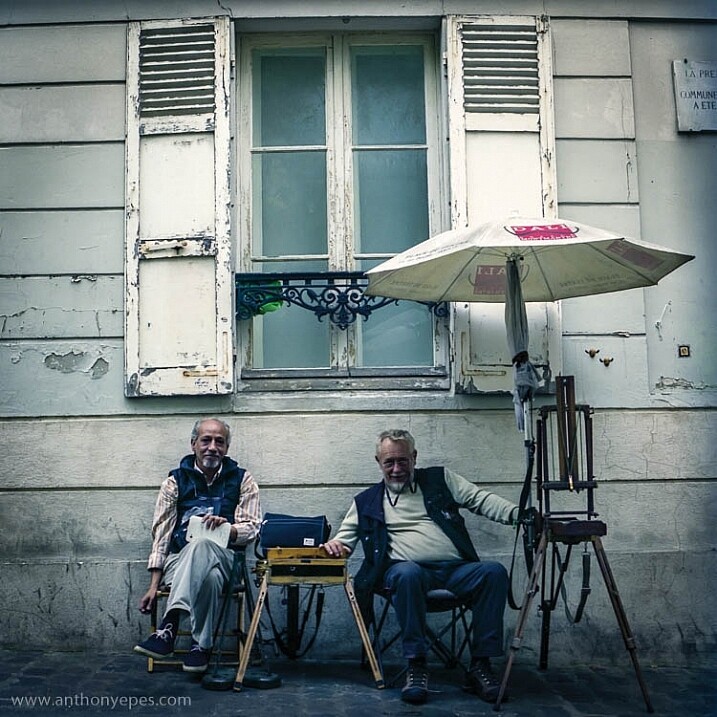
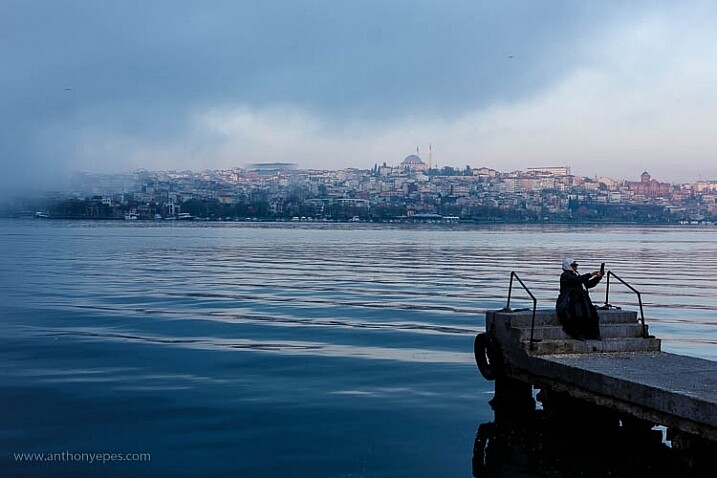
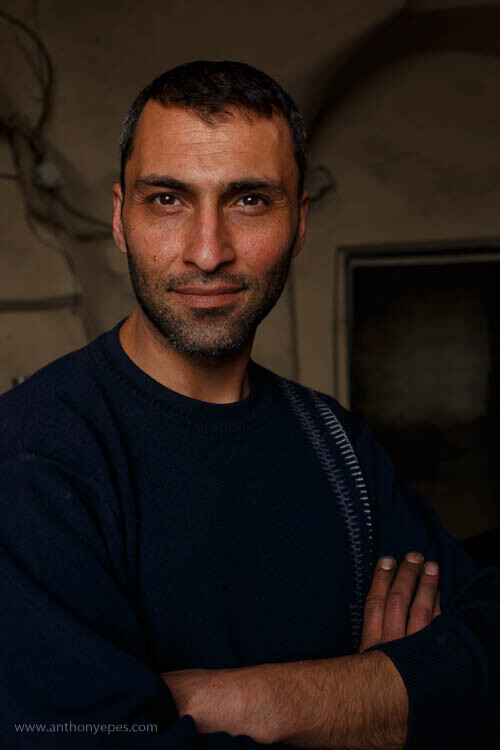
I was wandering around Montmartre in Paris about 5 a.m. and walked past two men having their early morning coffee and chatting. They looked at me curiously, and to be honest I faltered. I walked straight past them. A language barrier can sometimes add to the intimidation. But I knew if I didn’t go back I’d be kicking myself all day. So even though I’ve been doing this for twenty years, even though I’d photographed hundreds, if not thousands of strangers, the fear does sometimes return. Just don’t let it get in the way of taking shots of those awesome strangers that you see!
So I went back and smiled at them. They smiled back, and I gestured to my camera. They both nodded and I took a few shots. It took a minute or two at most, and I loved the result:
3 – Break down your fear into bite sized chunks
Diane Arbus talked a lot about her fear of photographing strangers. She described spending a summer hanging around a park in the hope of getting up the courage to talk to a group of people who hung out there most days. Gradually over days and weeks she started to get to know them. Her constant proximity helped to make them trust her and she started to chat to them. Over time, she developed a relationship, and it was only then that she introduced the camera. Because they trusted her she was able to get some stunning portraits of people.
“If I were just curious, it would be very hard to say to someone, ‘I want to come to your house and have you talk to me and tell me the story of your life.’ I mean people are going to say, ‘You’re crazy.’ Plus they’re going to keep mighty guarded. But the camera is a kind of license. A lot of people, they want to be paid that much attention and that’s a reasonable kind of attention to be paid.” Diane Arbus
4 – Be genuine, be human
I’ve had a few occasions where people have been sticking cameras in my kids’ faces, snapping away without asking me or my wife, and it has really irked me. There are photographers who seem to think that anything and everything are your subjects, regardless. I know that the law is on your side in most countries (see note at the bottom) but I don’t think it’s respectful to just treat everyone as a subject regardless – and I think people can feel if you are being respectful of them as human beings.
I will always show the subject the photo if they want to see it and give them my business card or take their details so I can send them photos.
5 – How to approach strangers
It doesn’t matter what you say to people, the most important aspect of approaching people is being genuine, warm, friendly and calm. People will read your body language before you open your mouth, so if you come off as tense they will probably think you are shifty. If you are not smiling, people are going to think you’re unfriendly. Of course being a bit nervous is natural, I still get nervous too. It’s totally normal. But the more you practice, the calmer you’ll become. Then you’ll settle into yourself more, get a little pattern going and it’ll be much easier. It doesn’t matter much what you say, how you say it, or what you are working on, how people react to you is almost 100% because of your body language and the feelings you have when you approach them.
“You can find pictures anywhere. It’s simply a matter of noticing things and organizing them. You just have to care about what’s around you and have a concern with humanity and the human comedy.” Elliott Erwitt
6 – Be quick, be prepared
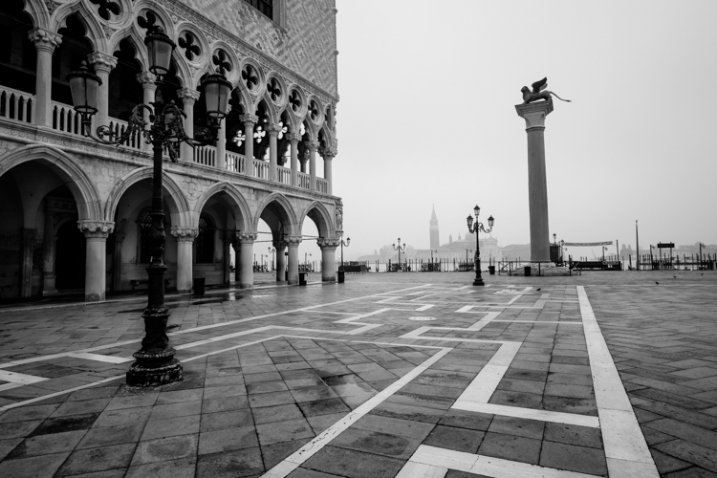
That’s not to say I won’t take a good anonymous portrait – I love them. At the moment I seem to be having a good time with this selfie trend:
I took the photo above in Venice a few months back. I was walking up some steps with a group of students and bang, there it was. Because I was prepared with my camera, and because I always see what’s going on around me, I was able to capture it straight away.
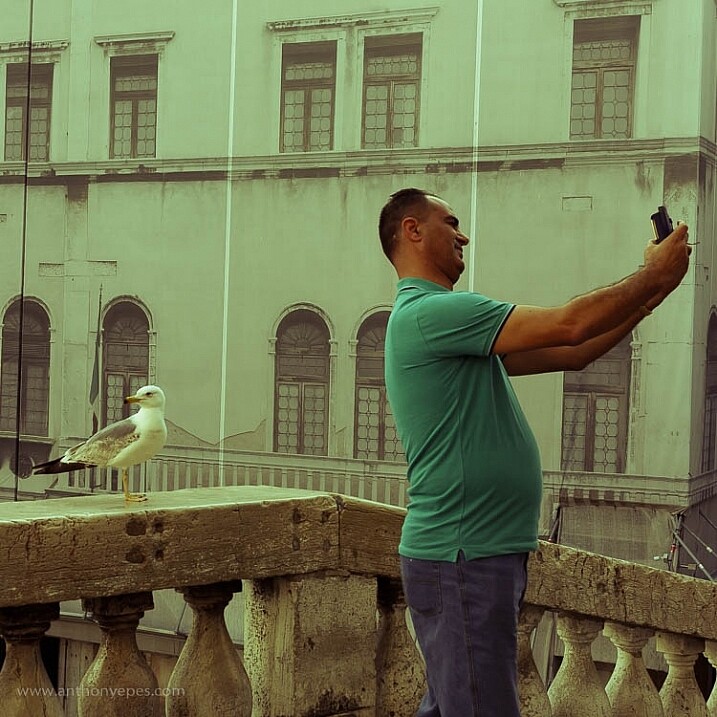
I also liked this photo because for me selfies feel a bit vacuous, and the background was not of Venice but a large photo of Venice covering a building. Both the background and the selfie seem to me to speak of how most people see the world, just on its surface. We photographers have to be prepared to get deeper and see more of what’s really going on.
7 – Have a project and be professional
Over the past several summers I’ve been working on a project, photos of people’s bellies. I always felt it was quite an under-appreciated part of the body and I wanted to see how people felt about theirs. So I started out experimenting by asking people if I could take photos of their bellies.
Now for this kind of project it’s a harder sell. I was asking people to reveal a part of their body that they mostly keep covered up. So the way that I did it was I would look for people on the street who were on their own (because for some bizarre reason people are usually more receptive to strangers taking their photo when they are alone and they seem relaxed). I would approach them, explain what I was doing, and give them a business card that I had made about the project – which had all of my business details on one side and a bunch of belly photos on the other.
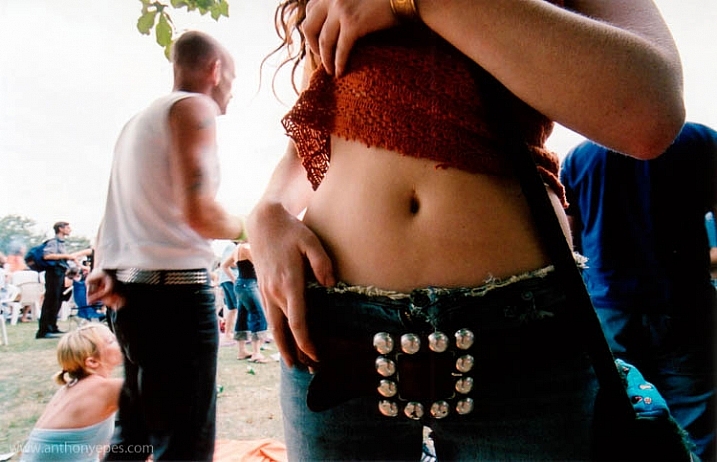
Image from The Belly Project by Anthony Epes Photography
I also got people’s photos by hanging out at my local cafe, hanging around summer festivals, anywhere really where I could just hang out and chat to people. It’s a brilliant way to fall into conversation with people, so the approach can be more subtle and relaxed.
I am not a super chatty guy. I am not known in my private life to fill the space with epic conversation. You do not need to be a master of conversation – you just need to be genuinely curious and people will feel that, and start to open up to you. Most people love talking about themselves, and they love people who are interested in them. It’s a human trait that photographers must be aware of. Once you’ve approached someone, or when you are just hanging out – ask people questions about themselves. “Worked here long? What’s this festival all about? That’s an awesome t-shirt, where did you get it?”
8 – Your background is your second subject
What I hope you see in my shots is that the person is not the only subject – where you place your subject, the colours, the lines, the light – all of that will enhance, or detract from the portrait. Ideally you want to find a background that adds to the portrait in someway – almost like a comment on the appearance or pose of your subject. Ask yourself – what does this background add to the photo?
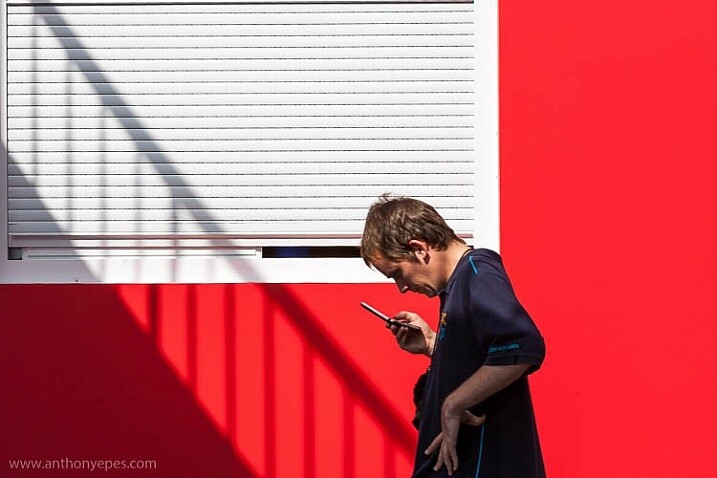
I find that many people use backgrounds that are too busy, so the subject gets lost. The camera can’t distinguish between the layers of a background the way that your eye can, so you almost want to over simplify the background to create the maximum impact for your viewers. Break down the elements that you see, and work out how a person would affect that.
If you are shooting posed portraits this is easier, but before you go about approaching people, get your background organized first. I often wander around looking for interesting locations, interesting elements out on the street, and then once I’ve found something I like, I wait around to see who comes along.
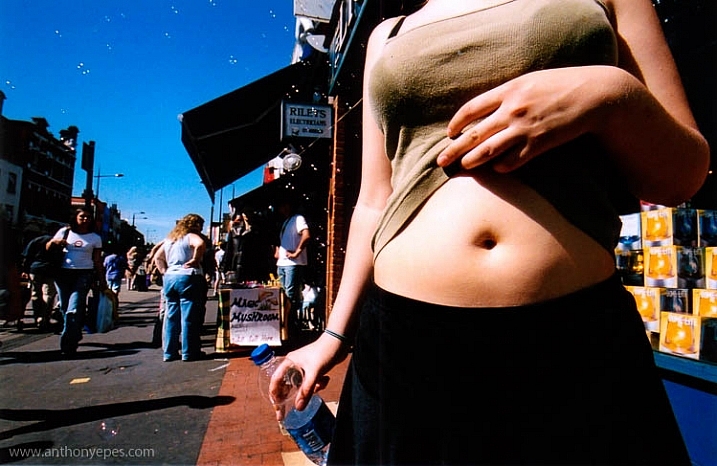
Image from The Belly Project by Anthony Epes Photography
9 – What story are you telling with your photos?
When you are taking someone’s portrait, you are not just putting together an interesting combination of colour, light and shape – you are doing that as well – but there is something else too. You have an amazing opportunity to tell a story, and to communicate the emotion and feeling of your subject. The human face and body are the most expressive and revealing things on this planet.
“A picture of a guy in the street in New Guinea, with a bone through his nose is interesting to look at. But for it to be a really good photograph; it has to communicate something about what it is like to live with a bone through your nose. It is a question of the moment to reveal something interesting and profound about the human condition.” Steve McCurry
10 – How do you get people to reveal their emotions?
When you hold a camera up to a person, you will see that they start out with one emotion, but quite quickly that will change. After a few seconds most people start to get uncomfortable looking into a camera lens, then once they pass through that, other emotions start to appear as their minds move on to thinking about other things – perhaps how uncomfortable they are in the heat, the shopping they have to pick up later. People’s thoughts move at an alarming speed and their faces reveal it all. So just being with them, looking at them, photographing them, you’ll start to see how they peel like an onion.
Summary
So to sum up – be friendly, smile, enjoy yourself. Remember this is fun what we do! I have stayed in touch (through Facebook and the like) with a bunch of my subjects whom I’ve met on my travels. It’s a great way to get to know people and create really compelling photographs.
A note about usage and permission
In most countries you only need people’s permission if you are going to sell the photos, or use them for commercial gain. Photos for art and editorial usage usually don’t require individuals’ permission (but there are exceptions – like Hungary where it’s now illegal to photograph anyone without their permission). There are exceptions, especially for children, so always check out the law in the country you’re in, and remember laws change all the time.
Plus, when you are travelling it’s important to be aware of cultural sensitivities before you blaze out there, camera in hand. There is a ton of info out there on the web. Load up on knowledge and that will also help you feel confident as you go out to shoot.
googletag.cmd.push(function() {
tablet_slots.push( googletag.defineSlot( “/1005424/_dPSv4_tab-all-article-bottom_(300×250)”, [300, 250], “pb-ad-78623” ).addService( googletag.pubads() ) ); } );
googletag.cmd.push(function() {
mobile_slots.push( googletag.defineSlot( “/1005424/_dPSv4_mob-all-article-bottom_(300×250)”, [300, 250], “pb-ad-78158” ).addService( googletag.pubads() ) ); } );
The post 10 Tips for Photographing Strangers by Anthony Epes appeared first on Digital Photography School.


You must be logged in to post a comment.