RSS
 

Posts Tagged ‘Photographer’

Tips For Choosing The Right Photographer For The Occasion

27 Feb

Choosing the right photographer for your special day can be a real concern for some, you want to have beautiful photos of the day that you can treasure forever. So it makes sense to do your homework before deciding on a photographer.

Here are some things you should be aware of before hiring your photographer to ensure your day goes as smoothly as possible.

Digital Or Film?

While the vast majority of photographers these days have made the switch to digital, there are some photographers who prefer to keep it traditional and use film. It is down to personal choice and budget as to which method you choose, bear in mind using film will be more expensive due to the process of developing the prints afterwards. The drawback of film is that it is not quite so easy to make changes to your prints, even switching a colour print to black and white. With digital, there is no danger of over-exposure and the photographer can literally take thousands of shots at no extra cost to you.

Today’s digital photography offers sharp, clear, bright photographs with great clarity. What’s more, digital film allows the photographer to quickly and easily edit the photographs, put them onto DVD and email the shots to the client. This means you can share your photographs with family and friends without waiting weeks after the event.

Choosing A Photographer

No photographer is alike; they have their own individual style which reflects in their work. Depending on the occasion in which you want the photographer for, you need to check out their portfolio. For example, a wedding photographer should have an extensive range of photographs in different conditions, outside, indoor, candid, formal and more classic shots. Businesses and corporations may wish to use a commercial photographer. Make sure the photographer you select has adequate experience in photographing most events such as weddings, christenings and graduations etc. Check out their colour and black and white work as there can be variations on both styles.

Personality

A sign of a good photographer is one that is prepared to listen to what you want and work closely with you to get the best results, a good photographer will never dismiss your ideas and tell you that he/she knows best, they will want you to be happy with their work and though they may offer their opinion the final decision should always rest with the customer. Also evaluate how they work with other people. A family photographer, particularly working with children should be patient and accommodating.

Experience

How long have they been in the business for? Do they have experience in working at many different events? Make sure they have at least a few years’ experience under their belt before hiring them for an important event. This will ensure that there are no tears when looking at the images of the day. Check out testimonials and ask around for references of your chosen photographer.

Pricing

Before signing on the dotted line, make sure the photographer is upfront about all of the costs involved. And don’t be afraid to ask. Be wary of photographers that offer a very low fee initially as you can get caught out when purchasing the prints as they most likely charge extremely high prices to buy the prints.

Get a full written and signed contract of what you are paying for, the hours, the location/s, the date/s of the event etc. Does the photographer have a cancellation policy? What about copyright?

By following these guidelines will assure that you will have a permanent record of your special day for many years to come.

This post was written by the team at Beck Photographic – the premier Northampton wedding photographers.

dslrBlog

 
Comments Off on Tips For Choosing The Right Photographer For The Occasion

Posted in Photography


What Type of Photographer Are You?

11 Feb

A Guest Post by Ben Evans
Diagram
Have you discovered what type of photographer you are? Doing so will make a big difference to your photography, allowing you to improve faster. If you don’t know right now, read on and I’ll help you find out.

Photo1
?Okay so the first thing to understand is that Holistic Photography is both a Craft and an Art. The earliest photographers were often skilled in both painting and chemistry; an unlikely combination today.??We will see that you develop competency in craft and art separately. This understanding gives us the four Types of photographer which we’ll cover in this article.??Times have changed. Digital cameras do almost everything for you now. To take a photo on the iPad you simply press on your subject, then take the picture!??For a photographer who grew up developing film and making prints, this is amazing. Sepia-toning a photo to make it brown took ages; now there’s an Instagram filter which does it, well, instantly.??So realise that for most people, learning the craft of photography isn’t necessary to get started. Sometimes some very famous photographers know next to nothing about cameras or lighting; they just have a good ‘eye’ – and great assistants!??What is this artistic ‘eye’? Simply put, it’s the ability to ‘see’ a picture that others might miss. Cartier-Bresson had it; so did Avedon.

A photographer with a good eye can make better photographs with a phone than an untrained person could with the best camera in the world.??There’s a hint in the last paragraph; I used the word ’untrained’. Yes, it’s possible to get this elusive ‘eye’ for yourself. How? Well the best place to start is with the principles of Aesthetics.??Of course Art also requires an oblique approach to learning, covering psychology, philosophy and heightened self-awareness; but this is beyond the scope of this article.

Photo2
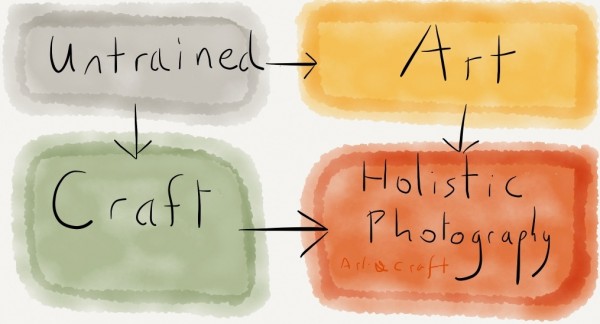
??Unless they’ve developed themselves in different fields, most people begin at square one. This is our first type of photographer.??

>The Untrained Photographer

Photo3
?The untrained photographer is someone who takes pictures. That’s all. They don’t really know what they’re doing or what they’re looking for. Of the billions of images of Facebook, most were taken by the untrained.

Of course there is no shame in this. Photography need not be part of anyone’s life. A camera can just be a useful tool to save and communicate life’s little attractions. And just by the law of averages, if they’re out and about and take enough pictures, maybe one or two will be great.?So how do we move on from this average state? We develop our technical skill, which we’ll deal with later, or we work on our Artistic ‘eye’.??Designers, painters and the fashion-conscious have a head start. I have a friend who finds no interest in sunsets or people’s faces. Don’t take your fascination for the world for granted; a lot of people don’t have it.??A large part of having a good ‘eye’ is colour consciousness. You can study which colours work well together. A combination of blue and yellow or red and green works well, for example.

Photo4
?It’s also very important to be aware of the world around you. The artist really looks at the world. They want to see what’s there, not what they think is there. Practice this.??As with most creative endeavours, experiencing what’s been done before is a catalyst for improvement. It therefore pays dividends to visit art galleries and study great artworks.??You may be doing all of these things already. Perhaps your childhood encouraged an artistic temperament. If you have a good eye already, well that’s half the battle won.??

The Art Photographer

??The artist doesn’t really know anything about photography, cameras, lenses or proper technique; but they do have a good eye. This takes them quite far, especially now with Instagram, Photoshop and the ever-improving ‘auto’ modes on digital cameras. They know what they’re looking for, but not how to get there.

It may be worth buying their finished work if the quality is good, but they’re unlikely to have enough consistency for you to consider commissioning them. They focus on the world too much and overlook the camera. Serendipity and clever dSLRs can only take you so far.

The Practical Photographer

??Photography can be technically complicated, especially if you want the best image quality and need to use artificial lighting and post-processing. To develop a high degree of skill takes time and effort; so camera operators can be in demand.

Specialised equipment can also be prohibitively expensive, further limiting the supply of reliable image-makers. They’re a safe bet, but you can’t expect too much soul or originality.

Photo5

Don’t assume because the subject is interesting that there’s much going on behind the camera. It’s perfectly possible to take uninspiring pictures of beautiful people or sublime landscapes if the focus is on niche techniques and maximising sharpness.??

The Holistic Photographer

??As in most things, a balance produces the best results. I’m talking about the balance between the Artistic ‘eye’ and technical mastery of photography. The Holistic Photographer knows what they want to create, and they understand how to control the camera to achieve it.

Photo6

While very aware of the principles of aesthetics, they also have enough trust in themselves to break the rules when necessary. The camera becomes an extension of the mind’s eye, and the focus is on preserving moments or expressing ideas and feelings.

What To Do Next?

??So where are you at on the journey? If you’re reading this, chances are that you’re already more advanced than most people, who are untrained. But are you focussing on developing your Art, or your Craft??
You can see that you will supercharge your own progress by balancing both. What do you need to concentrate on? Are more visits to exhibitions in order? Or would you benefit from a month spent shooting in Manual mode so you can master exposure? Why not have a look through your photographs with a friend and find out???And the takeaway? You’ll get the best results by learning both the art and craft. Holistic Photography involves learning to See and communicating what you’ve seen effectively. It is having something to express, and understanding how to work with the realities of photography to create something tangible. Skilled artistic creation is worth striving for; you will find that it is its own reward.?

Love photography? Get your copy of Ben’s best-selling book, ‘Photography: The Few Things You Need To Know’ for 99p now at www.GreatBigBear.com.

Ben Evans is an English Photographer who teaches photography classes in Barcelona with Barcelona Photography Courses.

Post originally from: Digital Photography Tips.

Check out our more Photography Tips at Photography Tips for Beginners, Portrait Photography Tips and Wedding Photography Tips.

What Type of Photographer Are You?


Digital Photography School

 
Comments Off on What Type of Photographer Are You?

Posted in Photography


Stop Motion Photographer

09 Feb

twitter: @innovateimages instagram: innovateimages facebook: http:www.facebook.com/innovateimageworks website: http:www.innovateimageworks.com clicktotweet.com Who needs a video camera when you’ve got 2335 photos? Follow the adventures of two young photographers as they meet and create memories together. Please show photo-printing-gurus ClickPixx some love. They were amazing to me! (www.clickpixx.com) A huge thanks to Brian Van Wyk (http and Laura-Jane Tresidder for all of their hard work. Behind The Scenes: www.youtube.com www.innovateimageworks.com tags “stop motion photographer”, stop, motion, photographer, davewallace4, dave, wallace, brian van wyk, laura-jane tresidder, canon, nikon, dslr. clickpixx, picture, frame, animation
Video Rating: 4 / 5


Deciphering Photo Jargon – Learn to Speak “Photographer”

08 Feb

If you’ve ever been a little lost while reading your camera’s manual, or a photography magazine it could be that you just need to learn to speak “photographer” language. In this article I’ll go over some of the most common technical terms, as well as some less common slang or photographer jargon. By the end I promise you will have a better grasp on the language and be able to have a conversation with a seasoned pro and hold your own!

Speaking “Photographer” – the Basics

These are the terms you’ll find in your camera’s manual and in most beginner tutorials on how to use it. Hopefully this will help you get a better grasp on them so the manual isn’t quite so foreign.

  • Photography – the word photography comes from two old Greek words “phos” meaning light and “graph” meaning to draw.  So photograph literally means to draw with light, or a drawing made with light.  So photography is the art of drawing with light.
  • Aperture – the variable opening in the lens through which light passes to the film or digital sensor.  Measured in  f-stops. I like to compare it to your pupil which opens and closes to allow more or less light to enter your eye depending on the brightness level of the room.
  • Bracketing – taking a series of images at different exposures or EV. You may see a setting on your camera that says AEB (auto exposure bracketing). This is often used when creating HDR images or in difficult lighting situations where you may want to have a range of exposures from light to dark.
  • Bulb – the “B” setting on your camera where the shutter remains opened as long as the button or cable release (remote trigger) is pressed. On a Canon it may be on your mode dial on top of the camera, or at the low end of the shutter speed settings (also where it is on a Nikon)
  • DSLR – digital single lens reflex camera. Any digital camera with interchangeable lenses where the image is viewed using a mirror and prism, and the image is taken directly through that lens. What you see in your viewfinder is what the lens sees.
  • EV – Exposure Value is a number that represents the various different combinations of aperture and shutter speed that can create the same exposure effect.
  • Exposure compensation – modifying the shutter speed or aperture from the camera’s recommended exposure to create a certain effect (over or under exposing) – usually used in the Shutter Priority or Aperture Priority modes. Represented by a little +/- button on your camera. Your camera reads light bouncing off your subject and is designed to expose for medium grey. So when photographing a subject that is lighter or darker than 18% grey, you can use this setting to tell the camera the proper exposure (- or + respectfully)
  • Exposure – the total amount of light reaching the digital sensor. It is controlled by setting the aperture, shutter speed and ISO.
  • F-stop – is a measure of the aperture opening in the lens defined by dividing the focal length of the lens by the aperture diameter. Sequence of f-stops are multiples of the square root of 2 (1.414…): 1, 1.4, 2, 2.8, 4, 5.6, 8, 11, 16, 22, etc. Even though these numbers are rather cryptic, just remember that each step is double the amount of light. Know that and it’s half the battle.
  • ISO – stands for International Standards Organization and represents the sensitivity of your camera’s digital sensor to light. The lower the number (ISO 100), the less sensitive, the higher the number (ISO 3200) the more sensitive. A higher ISO allows you to shoot in low light conditions.
  • Shutter speed – the amount of time the shutter is opened during an exposure. The shutter speed controls motion. Use a fast speed (like 1/2000th of a second) to freeze motion, or a slow one (1/4 of a second or longer) to blur moving objects.
  • Zoom lens – any lens that has variable focal lengths such as a 24-70mm or 18-55mm. You zoom in or out by rotating the barrel of the lens.
  • Prime or fixed lens – any lens that does not zoom and is a set focal length such as a 50mm lens.
  • Remote trigger or digital cable release – a device that allows the camera to be fired without pressing the button or touching the camera. Helps eliminate movement of the camera during long exposures.
  • Macro lens – one that focuses very close to the subject allowing for 1:1 reproduction size of the object or larger.
  • “Normal” lens – generally a 50mm lens (on a full frame sensor camera) is considered to be a “normal” lens because it is closest to what the human eye sees.  If you have a cropped sensor that will be closer to 35mm.
  • Telephoto lens – simply stated a telephoto lens is one that is longer than a normal lens, eg., 70-300mm. The dictionary says: a lens with a longer focal length than standard, giving a narrow field of view and a magnified image.  Super telephoto is usually 300mm and longer lenses.
  • Wide angle lens – again simple answer is a lens that shows a wider field of view than a normal lens, which allows more to be fit into the frame. Depending on the degree of wide angle there may also be edge distortion (super wide angle), and if you get wide enough the image will become a circle (fish-eye).
  • Tilt shift lens – a lens that attempts to recreate the movements available when using a view camera. Being able to tilt the front lens element allows for realignment of the plane of focus. Shift allows adjusting the placement of the subject within the frame without angling the camera, thus keep parallel lines from converging. This is a popular lens for architectural and landscape photographers, and is becoming more widely used by portrait photographers for creating a unique stylized look.
  • Camera resolution – expressed in megapixels is the dimensions your camera’s sensor is capable of capturing. For example Canon’s new 6D has a resolution of 5472 x 3648 which equals 19,961,856, which they’ve rounded off to 20 megapixels. This is not the only factor in image quality, but generally the large the number, the larger prints you can produce from it without loss of quality.
  • File format jpg versus RAW – most DSLR’s have the ability to shoot both formats. If you choose JPG, the camera will shoot a RAW file, process it using the picture style you’ve selected in your menu, save it as a JPG and discard the RAW version. If shot in RAW the resulting file will be larger, carry more information (but the same pixel resolution, see above) and require software to process. It gives you the photographer more control over the final look of your image. For more on the subject see this article
  • Full frame vs cropped sensor – I get asked about this in my classes all the time. A full frame sensor is roughly the size as the “old” 35mm frame of film. Lenses are made to create a circle of light just large enough to cover that area (covering power). In a cropped sensor camera the physical size of the sensor is smaller so it only captures a portion of the entire image the lens is projecting, effectively cropping part of the image out. For more information on this see “Crop factor explained“. Common crop factors are 1.5 or 1.6x so if you put on a 50mm lens it is more like a 75mm with a 1.5x crop factor.
  • Camera modes – manual: full manual the user is setting the ISO, shutter speed and aperture. Shutter priority (Tv on a Canon or S on a Nikon) the user is selecting ISO and shutter speed, the camera is then choosing the aperture to make a correct exposure. Aperture priority (Av for Canon users, A for Nikon) the photographer selects the ISO and aperture and the camera picks the shutter speed.

Lighting and Portrait Photography Terms

  • Ambient light – also referred to as available light, is the light that is occurring in the scene without adding any flash or light modifiers. This could be daylight, or man made light such as tungsten or fluorescent bulbs.
  • Main light or key light: is the main light source for a photograph. It could be the sun, a studio strobe, a flash, a reflector or something else. But it is the source of light that is producing the pattern of light on the subject with the most intensity.
  • Fill light: is the light source that is secondary to the mail light. It is used to “fill” in the shadows to a desired degree. It can be produced by using a flash, a reflector, or a studio strobe.
  • Lighting pattern: this is the way the light falls on the subjects face. A particular pattern of light and shadow that is created.
  • Lighting ratio:  is a comparison between the intensity (brightness) of the main light and the fill light and thus the difference of the lit and shadow sides of the subject’s face.
  • Incident light meter: is a handheld device separate from your camera that measures the amount of light falling on a subject (as opposed to the reflective reading your camera takes which is light bouncing off the subject back to the camera). The incident meter is not fooled by the brightness range of the subject, where as in camera reflective meters can be fooled.
  • Speedlight (speedlite for Canon users): small portable flash which can attach to your camera’s hot shoe, or stand alone if activated remotely.
  • Reflector – a device that is used to reflect light, generally back towards the subject. It can be a specialized factory made reflector (I recommend getting a 5-in-1 if you get one) or as simple as a piece of white cardboard.
  • Light meter – a device that measures the amount of light in a scene. Your DSLR has one built in, it uses reflective readings (light bouncing off the subject coming back through the lens [TTL])
  • Remote flash trigger – a device used to fire speedlights off camera. Pocket Wizard is a popular brand.
  • Subtractive lighting – as the name implies it is the taking away of light to create a desired affect. Commonly it involves holding a reflector or opaque panel over the subject’s head to block light from above and open up deep eye shadows cause by overhead lighting. It can also mean holding a black reflector opposite your main light to create a deeper shadow, in essence reflecting black onto the subject instead of light.
  • Hard light – harsh or undiffused light such as produced by bright sunlight, a small speedlight, or an on-camera flash. It produces harsh shadows with well defined edges (edge transfer), contrast, and texture (if used at an angle to the subject). Emphasizes texture, lines and wrinkles, and used to create a more dramatic type of portrait (character study).
  • Soft light – diffused light such as from an overcast sky, north facing window with no direct light, or a large studio softbox. This type of light produces soft shadows with soft edges, lower contrast, and less texture. Generally preferred by most wedding and portrait photographers as it flatter the subject more.
  • Edge transfer – where the light turns into the shadow, the edge transfer is how quickly it goes from dark to light. If using harsh light the edge transfer is very defined and sudden, almost a clear line. When using soft lighting the edge transfer will be much more subtle, almost imperceptible as it gradually changes from light to dark.
  • Flash sync – simply put is the synchronization of the firing of an electronic flash and the shutter speed. You need to know what shutter speed your camera syncs at, otherwise if you shoot too fast a shutter speed you may get a partially illuminated image. For most cameras that is around 1/200th of a second, but it can be adjusted if you have a flash that can be set for fast speeds.

Slang and Photography Jargon

Here’s a few other terms that are a bit more advanced, and even completely made up jargon. Become familiar with them so you can walk among the pros with confidence!

  • Fast glass – refers to a lens with a very large maximum aperture such as f1.8 or f1.2. “Fast” as in, it allows you to shoot at a fast shutter speed due to the large aperture.
  • Chimping – slang term meaning looking at the back of the camera after every image. Spending too much time reviewing images on camera, not enough time shooting.
  • Bokeh – often mispronounced “bow-kay” or “bow-kuh” it is correctly pronounced as “bo-ke” like the ke in kettle. It is used to described the out of focus blurred bits in the background when “fast glass” is used. Most often bokeh occurs where small light sources are in the background, far in the distance.
  • Depth of Field (DOF or DoF)- the distance between the nearest and farthest objects in your scene that appear in focus.  It is controlled by many factors including the aperture, lens focal length, distance to subject, film or digital sensor size, and camera format. Read about how to use aperture to adjust depth of field.
  • Circles of confusion – closely related to the above bokeh, the textbook definition is:  the largest blur spot that is indistinguishable from the point source that is being rendered. Objects outside the depth of field of an image that the human eye can determine as “out of focus”.
  • Hyperfocal distance – often used by landscape photographers, it is the focus distance providing the the maximum amount of depth of field. Older prime lenses for film cameras usually had hyperfocal distance marks to aid in finding this magic sweet spot. With today’s lenses it is possible to calculate, just takes a bit more work and a hyperfocal distance calculator.
  • Gobo – something used to block unwanted or stray light from falling onto the subject. Often a reflector (using the black side) can serve a dual purpose and act as a gobo as well.
  • Scrim – a translucent device used to diffuse and soften the light, could be a reflector with a translucent panel or option. Also used on movie sets scrims can be made extremely large, several feet across, and clamped in place to create shade where these is direct sun without it.
  • Shutter lag – every camera has a slight delay from the time you press the shutter button to the time it actually fires and opens. In DSLR’s it is minimal and almost unnoticeable. In smaller point and shoot cameras the delay is more pronounced such that it may actually cause a missed shot of a fast moving subject.
  • Chromatic aberration – in terms of lens optics it is the failure of the lens to focus all colours (RGB) at the same point. It shows up as colour fringes in areas of the image where dark meet light (think edge of a building against the sky). It is more common in wide angle lenses, and those of inferior optics (kit lenses). It is correctable, to some degree, using Photoshop, Lightroom or software of your choice.
  • Rear shutter curtain sync – by default most cameras are set to front curtain sync which means that if the flash fires, it does so at the beginning of the exposure time. By setting to rear shutter curtain sync it fires the flash at the end of the exposure time. The difference in some cases me be negligible, but in shooting a moving subject front sync will put any motion blur in front of the subject, where as rear sync will place the blur behind the subject. Neither is wrong, just preference.
  • Camera shake – this is a blurry image which has resulted from an insufficiently fast enough shutter speed, while hand holding the camera. So how slow is too slow? Many teachers will say that 1/60th of a second is the rule of thumb. I tend to recommend 1 over the focal lens of your lens instead, as the longer the lens the more amplified any shake will become.
  • Lens flare – occurs when the light source hits the lens directly, it can manifest as a hazy looking image or artifacts such as circles of light. Some photographers actually desire lens flare and position their camera to create it and use it as a compositional element.
  • Kelvin – is the absolute measurement of colour temperature. On your camera under the White Balance settings you make see a “K” setting. This allows you to adjust the colour manually by degrees kelvin. The lower numbers represent warmer colours like orange (tungsten light) and the higher numbers are cooler (blues). Play with this scale to create different affects.
  • ND filter – stands for neutral density filter which is a filter designed to go in front of the lens to block out some of the light entering the camera. Often used by landscape photographers to be able to get slow shutter speeds when photographing waterfalls and streams in full daylight.
  • Panning – the act of using a slow shutter speed, and moving the camera in the same direction as a moving subject, during the exposure to create a blurred background. See panning tips here.
  • Stopping down – the act of closing down the aperture to a smaller opening.  EI going from f5.6 to f8.
  • TTL and ETTL – stands for Through The Lens, refers to the metering system in regards to flash exposure. The flash emits light until it is turned off by the camera sensor. ETTL is evaluative through the lens metering and fires a “preflash” to evaluate and calculate for lost light then compensates and fires the main flash. It happens so fast you do not see two flashes.
  • Photog – short for photographers, something pros often call each other
  • Glass – lens, as is “what glass do you own?”
  • Golden hour – also called “magic hour” is the hour right before sunset or right after sunrise. The sun is low on the horizon and it is an optimal time for photography.
  • Spray and pray – shoot as many images as possible and that hope and pray you got something good. Not a philosophy I personally recommend.
  • Blown out – having highlights that are off the chart on the right side of the histogram, having no detail in the white areas.  Eg: “the bride’s dress is blown out”
  • Clipped – similar to blown out being off the histogram, but it can also apply to shadow or blacks areas of the image.
  • Grip and grin – often used to describe a quick photoshoot at an event or set up with two people shaking hands. Most photographers have had to shoot these during their career.
  • Selfie – a self portrait
  • SOOC  – straight out of camera, no post processing or editing done
  • Dust bunnies – dark spots that appear on the image, caused by bits of dust on the digital sensor
  • Pixel peeper – someone that spends too much time looking at images at 100% size in Photoshop
  • Nifty 50 – an old school prime 50mm lens, great to have
  • ACR – Adobe Camera Raw
  • Flash and drag – the method of using a slow shutter speed combined to flash to capture more of the ambient light in proportion to the flash
  • Wide open – using your lens with the aperture at the widest setting (f1.8 for example)

Enjoy and get out there and start practicing your Photographer Speak. This list is not exhaustive by any means, and if there’s any I missed please mention them in the comments section below.


Post originally from: Digital Photography Tips.

Check out our more Photography Tips at Photography Tips for Beginners, Portrait Photography Tips and Wedding Photography Tips.

Deciphering Photo Jargon – Learn to Speak “Photographer”


Digital Photography School

 
Comments Off on Deciphering Photo Jargon – Learn to Speak “Photographer”

Posted in Photography


Photographer to shoot 50 weddings in one day with his iPhone

08 Feb

R0~TS520x0~cms_posts_2355497650_IMG_1302.jpeg

Professional photographer Kevin Kuster, who lives in Chicago, was recently approached by the charity Watts of Love  to help with an interesting photography project that seemed a perfect opportunity to make use of his newfound love of mobile photography. He will now travel to the Philippines and shoot 50 weddings in one day  – with his iPhone 4s.

News: Digital Photography Review (dpreview.com)

 
Comments Off on Photographer to shoot 50 weddings in one day with his iPhone

Posted in Uncategorized


Conflict photographer Ben Lowy explains why he uses an iPhone

06 Feb

Lowy.jpeg

Photojournalist Ben Lowy made headlines in 2011 when he used his iPhone to shoot an assignment for the New York Times in Afghanistan. Since then he’s used his smartphone to document many more events including the Libyan revolution, and the impact of Hurricane Sandy. Today, photo sharing network EyeEm published an interesting interview with Lowy, in which he offers some insight into journalism’s changing landscape, and why he chooses to shoot with an iPhone. Click through for more details and a link to the interview on connect.dpreview.com.

News: Digital Photography Review (dpreview.com)

 
Comments Off on Conflict photographer Ben Lowy explains why he uses an iPhone

Posted in Uncategorized


How I shoot sports as an amature photographer

04 Feb

This video is intended for the beginning photographer to hopefully give you an idea how you might like to shoot sports. I realize this might not be the technically correct way to do sports photography, but its what has been working for me. Thanks, and Enjoy.
Video Rating: 4 / 5


Professional photographer turns to iPhone for post-wedding photoshoot

25 Jan

iphone-6.jpeg

Would you be brave enough to let a wedding photographer immortalise your celebration with only an iPhone? One couple in Gujarat, western India did just that. When Rishita and Kintan Brahmbhatt hired professional photographer Sephi Bergerson to shoot their wedding, he used a DSLR for the main ceremony, but turned to his iPhone for the post-wedding ‘couples shoot’. Click through to learn more about his experience and view some of the resulting images on connect.dpreview.com.

News: Digital Photography Review (dpreview.com)

 
Comments Off on Professional photographer turns to iPhone for post-wedding photoshoot

Posted in Uncategorized


3 Minutes with Photographer John Lund

23 Jan

Photoshop is both loved and hated in the photography world. Too much Photoshop can unleash the fury of the masses, but just the right amount can trigger inspiration, awe, laughter, and a variety of other emotions that make for a great viewing experience. One photographer who has made a career of balancing his photography and photoshop skills is John Lund who is today’s guest on “3 Minutes with…”

1. Describe your photography in 100 words or less.
I started out trying to be a writer, but when I did a job for Yachting magazine back in 1976, they paid me $ 200.00 for the writing and $ 2000.00 for the photography. I switched. Then, in 1990, this thing called Photoshop came along. Instead of paying my taxes I bought an Apple computer and traded Adobe some photos for their new program. The rest, as they say, is history! I quickly concluded that Photoshop eliminated the barriers between imagination and execution…I could now create whatever I could dream up. Today, twenty plus years later, I am still blown away by what can be done with digital imaging.

2. What gear/software do you use?
I use Canon cameras, Apple computers and Profoto and Speedotron lights.  The most challenging part of creating composites, at least for me, is getting the photography right. It helps to have the right equipment to get the parts you need. I’d rather use the power of Photoshop to create rather than “fix”.

3. What’s one quick tip that you’d give people interested in animal portrait photography?
In the kind of work that I do it is critical to be able to visualize your image. Once you have a clear vision you can break the image down into parts and steps. Then it is just a matter of doing it.  One of my biggest challenges is constantly adding images to my library for use in images that I haven’t dreamed up yet!

4. What 3 Photography Sites or Photo blogs do you recommend?
Sites like oneeyeland.com and 500px.com inspire me with all the breathtaking work that other photographers are doing, and Photoshelter is great for the nuts and bolts of making a career flourish in the Internet age.

To view more of John’s photography visit his web site:
JohnLund.com and blog.johnlund.com or follow John on Twitter & Google+

Post originally from: Digital Photography Tips.

Check out our more Photography Tips at Photography Tips for Beginners, Portrait Photography Tips and Wedding Photography Tips.

3 Minutes with Photographer John Lund


Digital Photography School

 
Comments Off on 3 Minutes with Photographer John Lund

Posted in Photography


How To Become A Better Photographer By Watching Movies

06 Jan

I went to the movies to see Skyfall recently. As I sat amongst strangers, throwing popcorn into my mouth, it suddenly dawned upon me that what a movie, at its simplest, is just a big collection of photographs. Consider this: a movie’s sole purpose is to tell a story. So the movie-maker’s job is to position his cameras, subjects and Continue Reading

The post How To Become A Better Photographer By Watching Movies appeared first on Photodoto.


Photodoto

 
Comments Off on How To Become A Better Photographer By Watching Movies

Posted in Photography