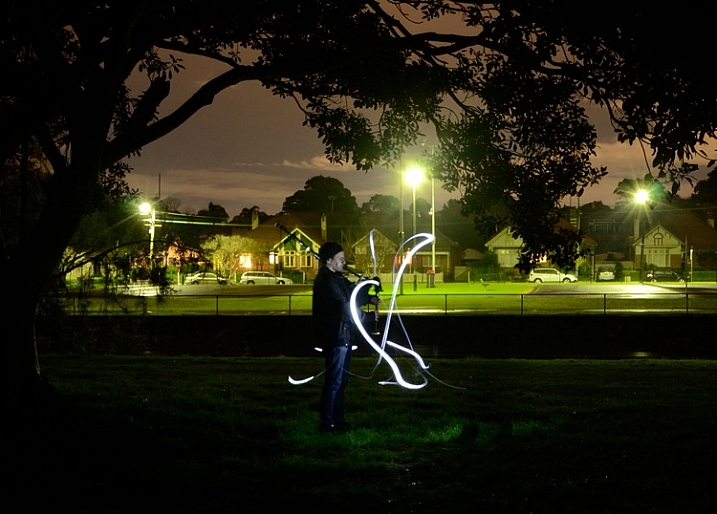
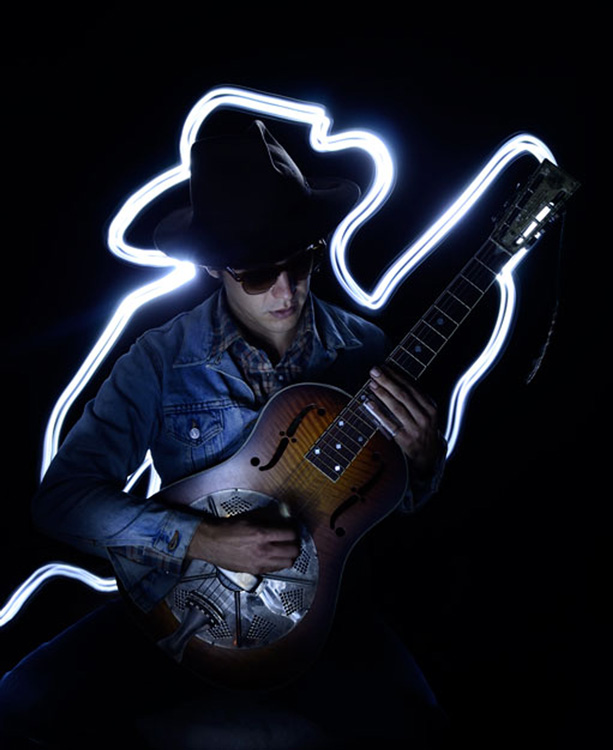
If you enjoy light painting photography, I think this review of tools from Light Painting Brushes (LPB) will interest you. All photographers know that light is essential to taking a successful photograph. At night, when light is limited, light painting can be a fun and artistic form of photography that may stretch a shutter-bug’s creativity by creating light, solely for the purpose of photographing light. If you are new to light painting please read my article – Beginner’s Guide to Light Painting for some ideas to get started.
Also, Light Painting Brushes has a great online presence, full of ideas, examples and tutorials. Check out this example of the great tutorial video available:
There are two main types of light painting:
- Off-camera painting, by which a light source, unseen to the camera’s view, is used to illuminate a scene or objects so as to make them appear out of the dark in an image. Here the light is only showing the subject and is not part of the image.
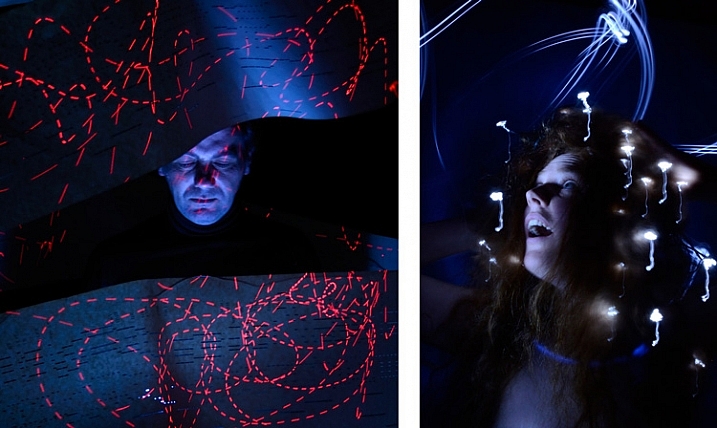
- Secondly, on-camera painting, in which the light source is seen by the camera and is a subject to be photographed. So here the light IS the subject.
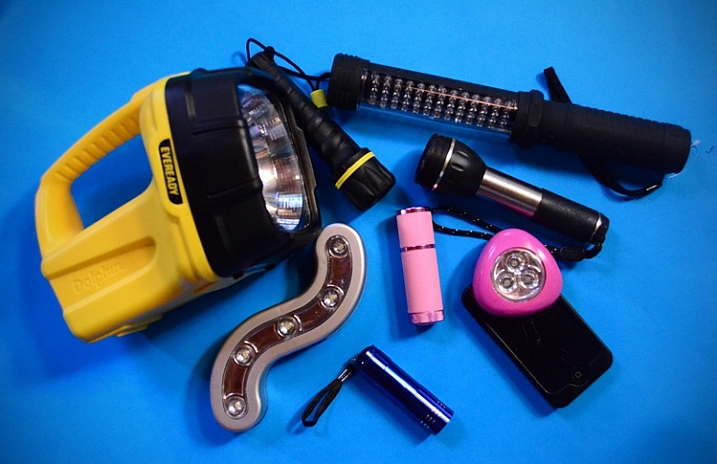
The tools I am reviewing in this article are used for on-camera light painting. With Light Painting Brushes, most of the tools are used to add a graffiti-type light to a scene. This can be lots of fun (especially in social situations) and the creative options are endless! Listed here are the items from Light Painting Brushes that I will be reviewing in this article. (Spoiler alert. they are really cool!)
- Universal Connectors
- Set of 8 Opaque Light Writers
- Set of 6 Translucent Light Writers
- White Fiber Optic
- Black Fiber Optic
- Plexiglass Diamond
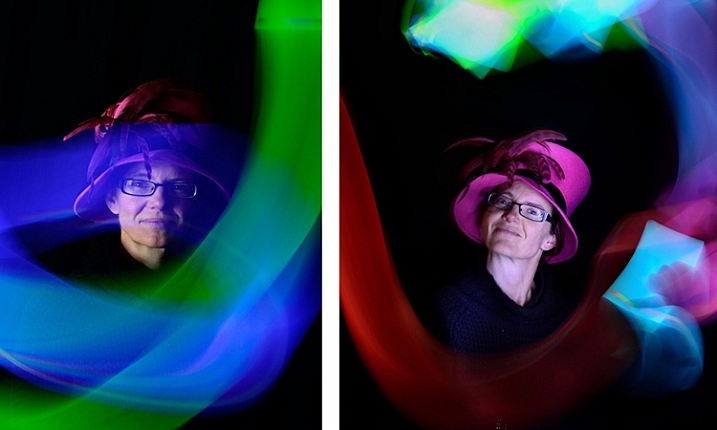
- 22″ Light Sword
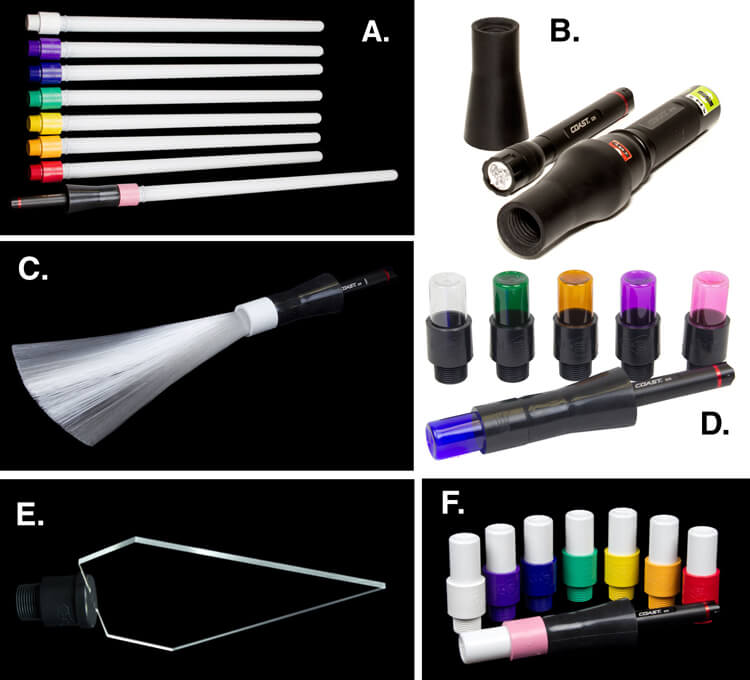
A. – Light Sword, B. – Universal Connectors, C. – White Fiber Optic, D. – Translucent Light Writers, E. – Plexiglass Diamond, F. Opaque Light Writers
Universal Connectors
The universal connector is the glue that literally holds this whole system together. Made of a durable rubber, the universal connector allows any flashlight with a diameter of .975″ to 1.5″ to connect to any of Light Painting Brushes’ tools. The end of the universal connector appears to be threaded, but don’t try to screw the brushes into the connector. The thread’s function is to just grip the brush and hold it tightly it in place.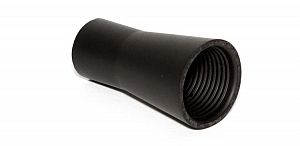
Flashlights will easily insert into the other end, but never hold the whole thing by just the flashlight, as the brush may slide out. Instead, hold it by the universal connector. The universal connector may also be used to connect a “brush” of one’s own making, such as a pop bottle, to a light source (your flashlight).
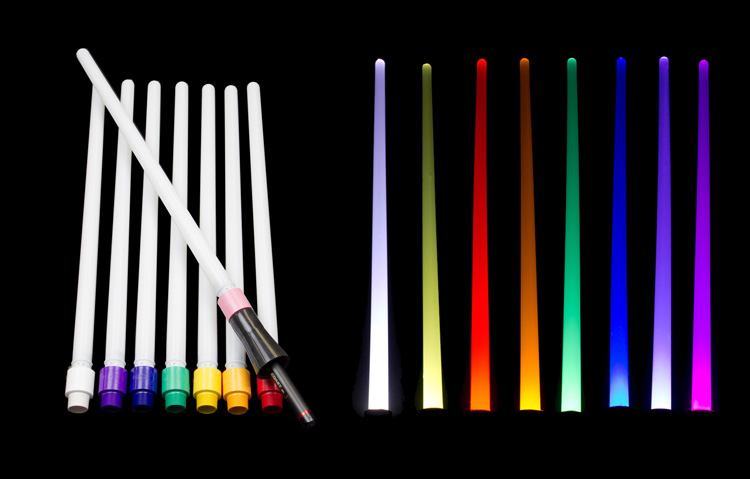
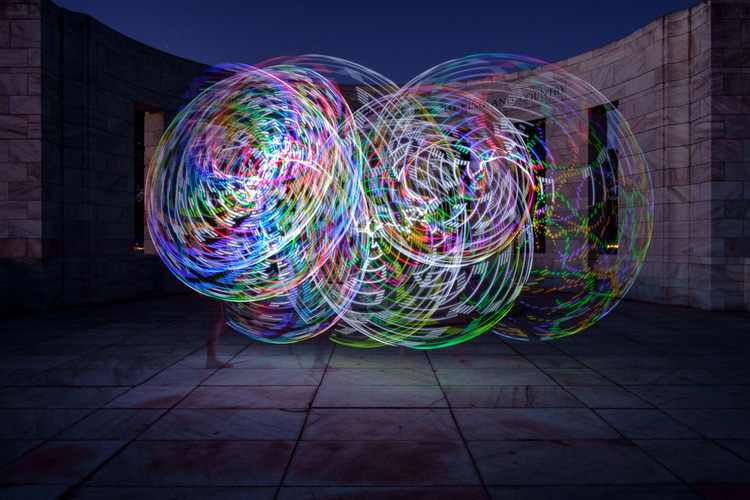
Opaque Light Writers (Set of 8)
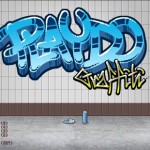
Use the universal connector to connect these opaque colored lights to your light source. The set is available in eight hues including white, purple, blue, green, yellow, orange, red, and pink. The opaque color makes them excellent tools for light writing, drawing or graffiti, and creative uses limited only by one’s own imagination. Because of the opaque colors of these light brushes, a very crisp drawing or writing source results. After some practice with this tool, I am sure some very detailed light drawings can be captured within a photograph.
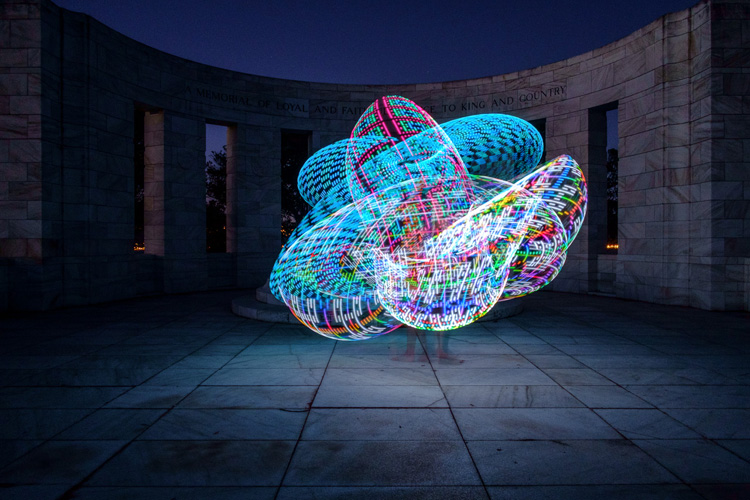
Translucent Light Writers (Set of 6)
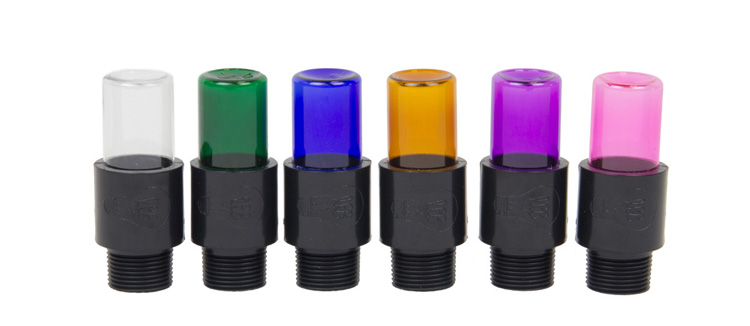
These attachments are very similar to the opaque light painting brushes, but because they are translucent the lights create a more textured effect than the opaque lights. Another tool for artistic expression lighting up the night!
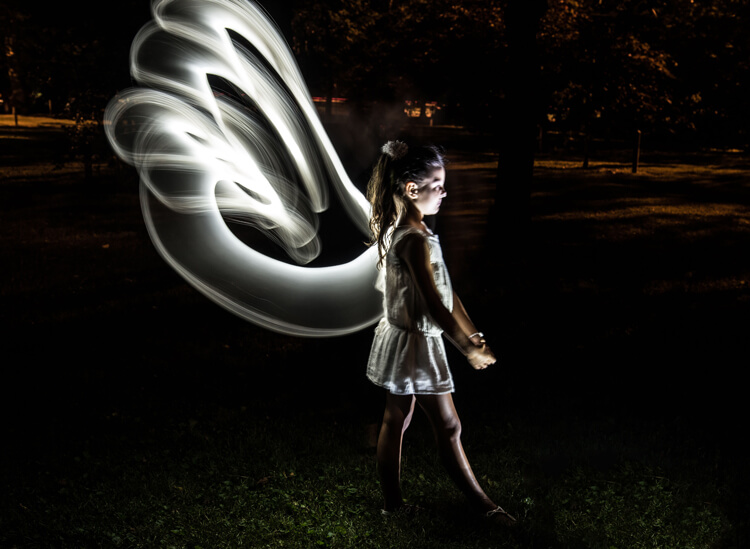
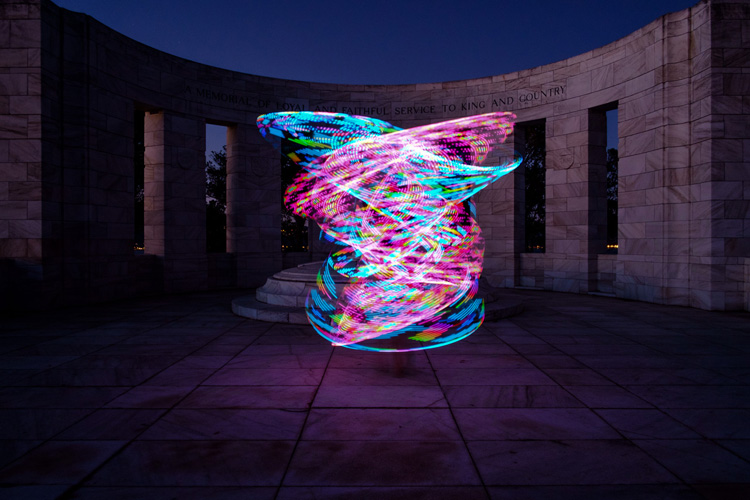
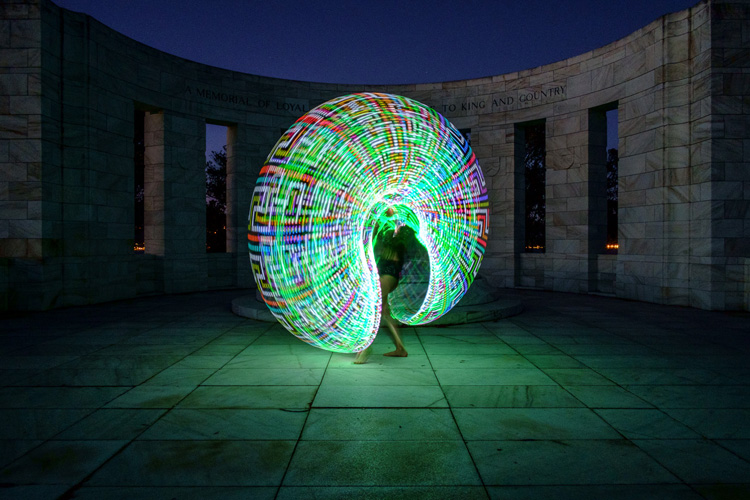
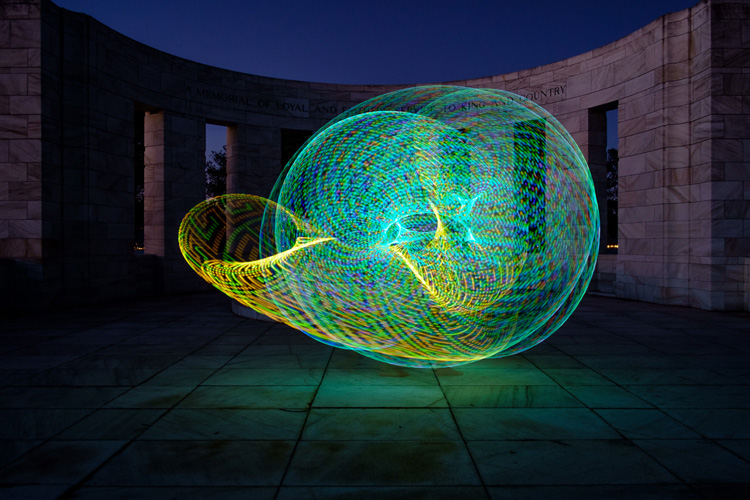
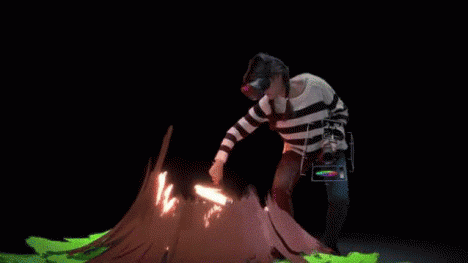
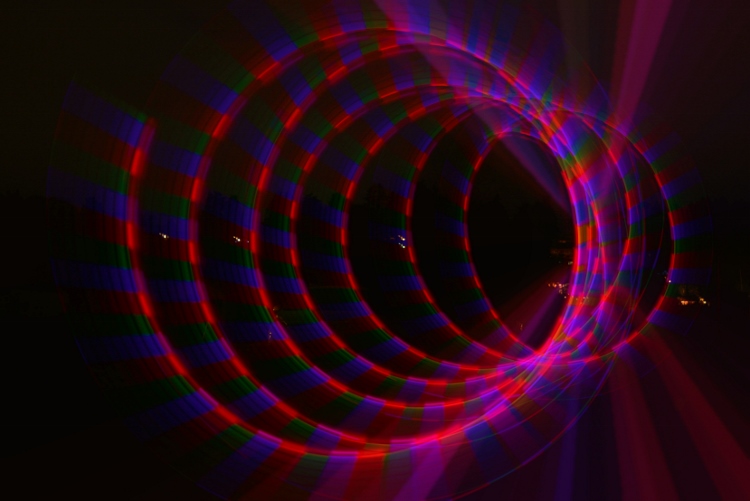
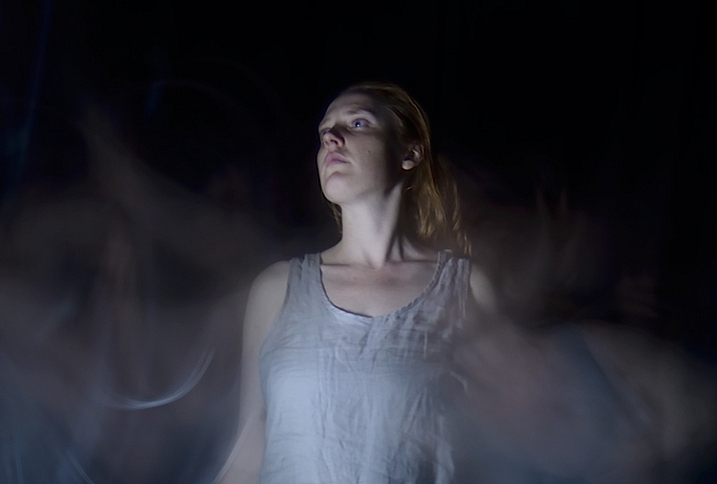
White Fiber Optic
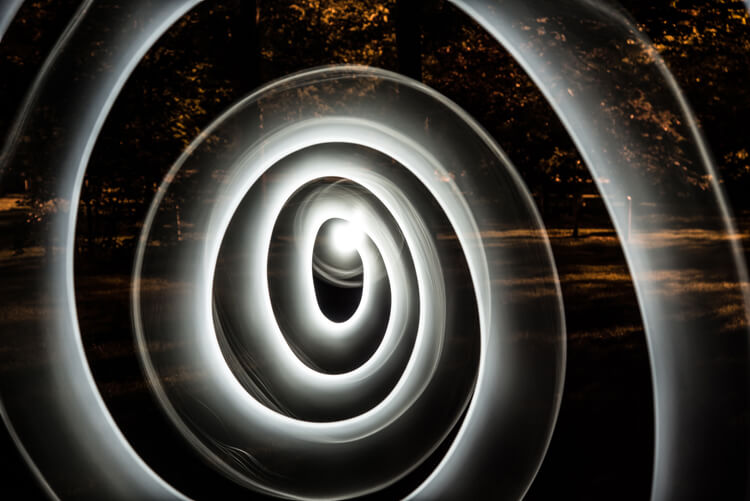
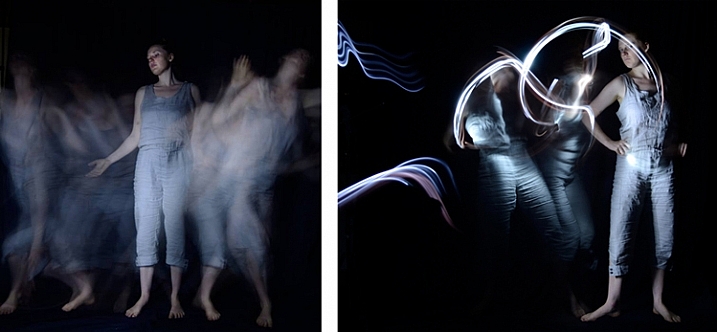
Spiral design created using the White Fiber Optic brush
The fiber optic brush connected to a light source really makes some awesome wispy lines. The white light has great depth as the whole strand of the brush lights up. This tool really gave me the feeling that I was actually painting with light! The white fiber optics is so much fun to use, creating some great effects and can be used for many light painting applications.
Black Fiber Optic
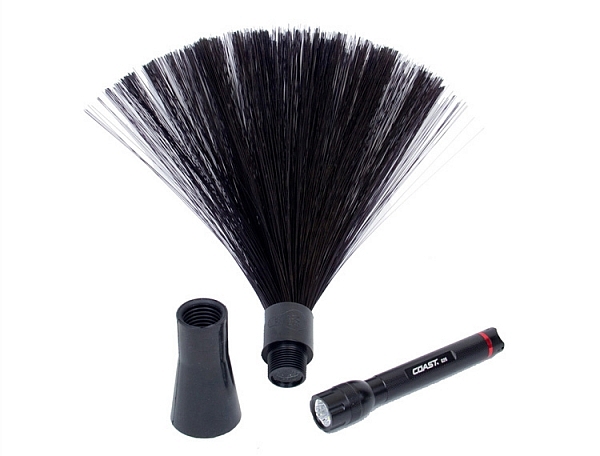
The black fiber optic tool only lights up the ends of the brush, great for use in portraits. However, I feel it has a more limited use for other types of light painting, since it puts out a lesser amount of light.
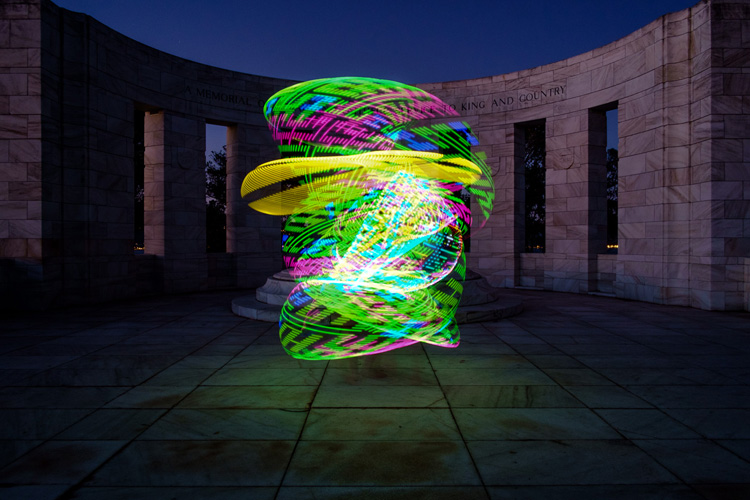
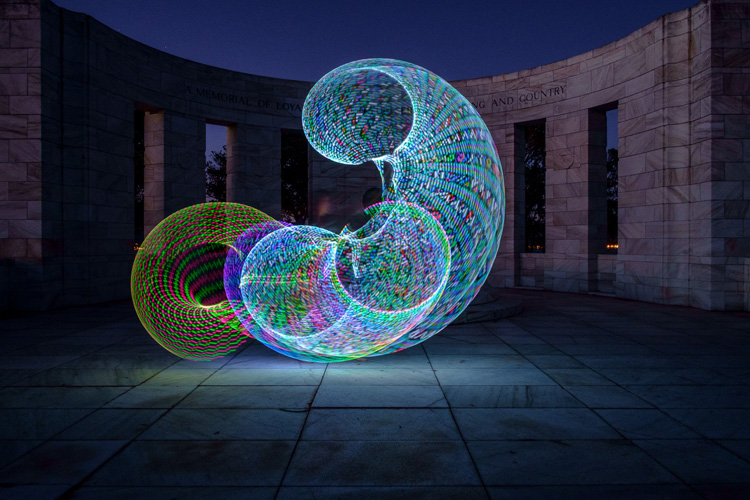
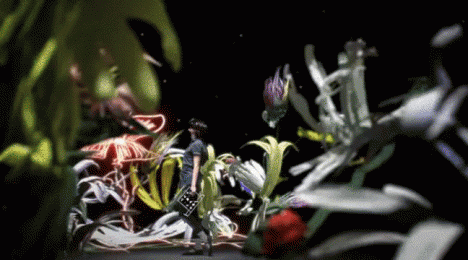
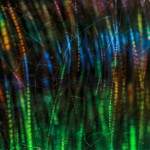
Plexiglass Diamond
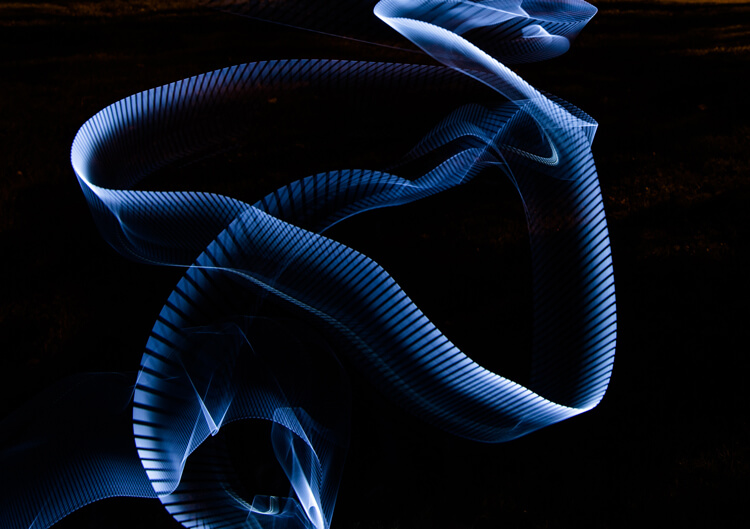
Abstract design created using the Plexiglass Diamond brush
The 9” Plexiglass Diamond shines light out through the cut edges, creating interesting and unique textures when waved about as the image is being shot. This tool is great for light graffiti, portraits, and abstract designs. It is my favorite tool of all the ones I’ve reviewed in this article!
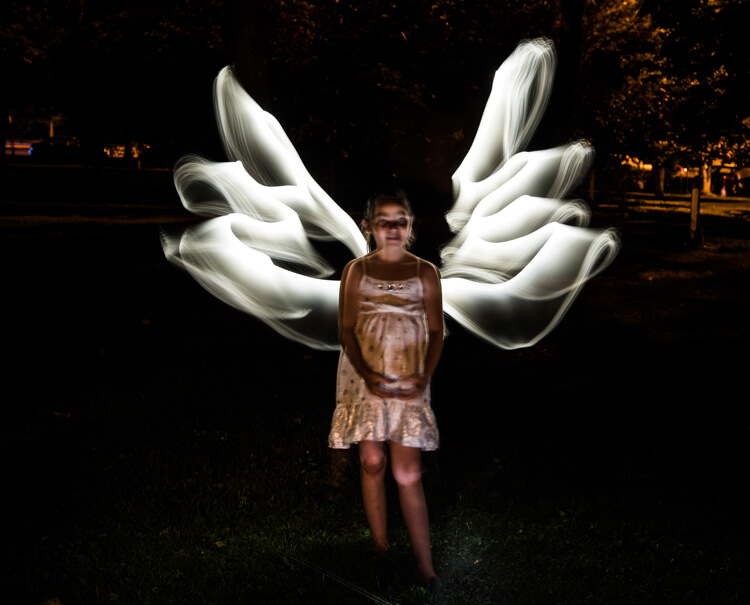
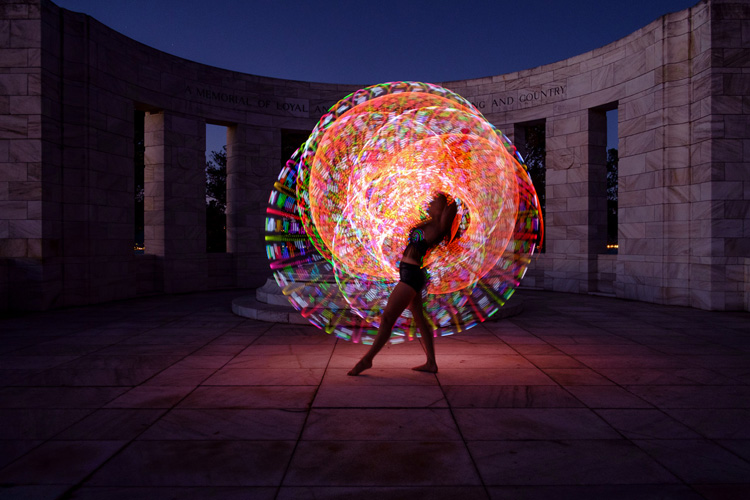
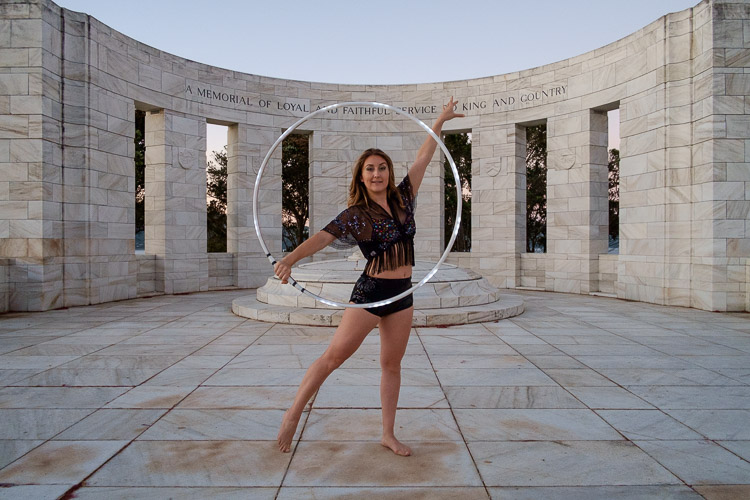
22″ Light Sword
These tools create a very wide path of light, and are available in 8 different colors: blue, green, orange, pink, purple, red, yellow and white. The colored swords cause some stunning effects, but while the white sword can make some nice strokes of light, in my opinion its results are not as exciting as the colors.
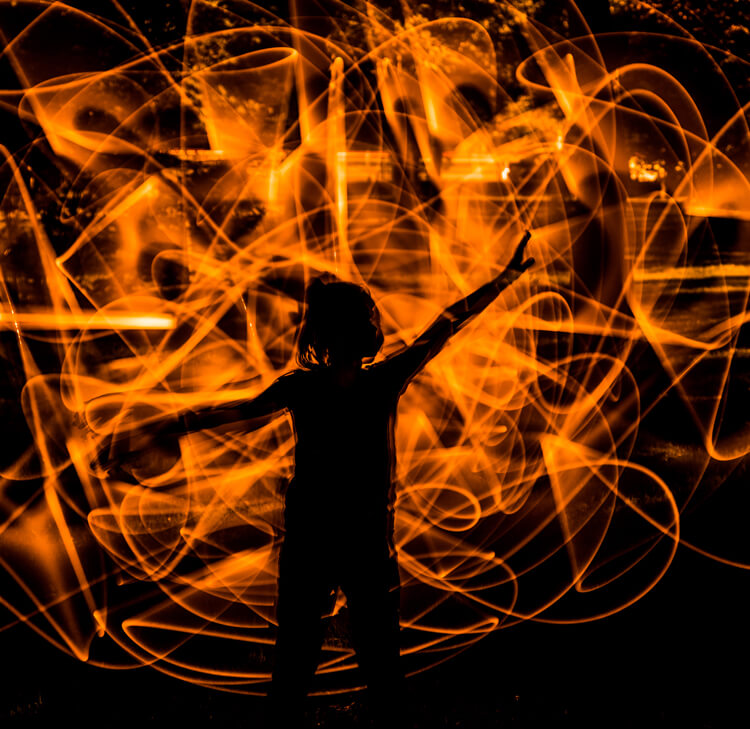
This silhouetted image of a girl was created using the orange 22″ sword brush
Tips:
- To remain as invisible as possible when trying to photograph a light painting, wear dark colored clothing, keep moving, and avoid holding the light source too close to your body.
- Speed of motion can make a big difference with many of these tools: the slower the motion, the more vibrant and textured the effect; the faster the motion, the smoother but fainter the effect.
First impressions
I recently had the privilege to lead a light painting workshop with some local photographers, so I introduced the Light Painting Brush system to them during our course. The following feedback comes from a few of the participants:
- “I felt like a kid, amazed and surprised with all the images we shot and with the numerous options we used to create and express ourselves as we played with the Light Painting Brushes. My favorite was the colored ones because they made things and shapes look like I was using chalk, and the colors were great in the pictures! It helped me to express and to imagine numerous things. I just wish we’d had two more hours!”
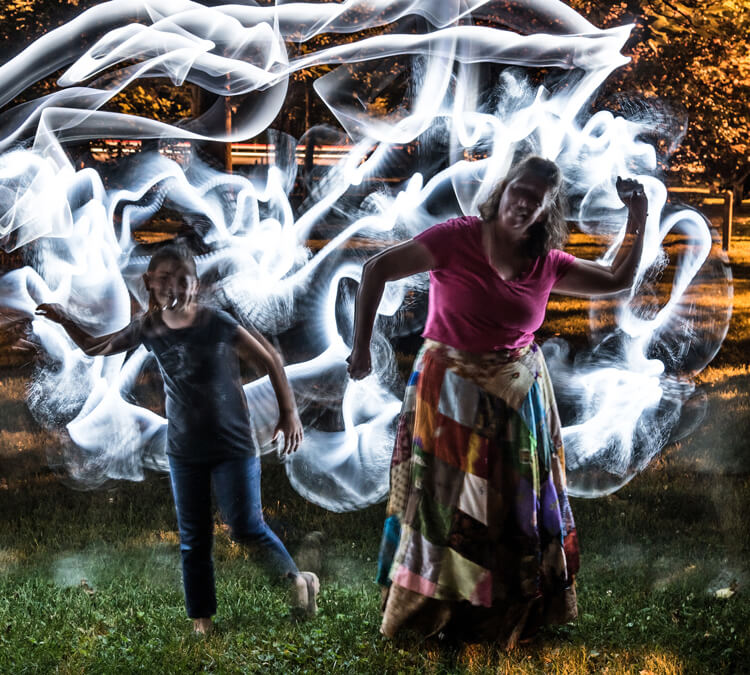
- “Several lighting methods were demonstrated, but my favorite was using light painting brushes to create an angel figure out of a beautiful little girl.”
- “My favorite was the white fiber optic, as it made a really pretty effect and I felt I could be more creative with it.”
- “I was very impressed with the quality and the different possibilities of the light painting tools! I love that it gives you the ability to add your own personal unique touch to a photo!”
The brushes were easy to use, even for beginners, and cast a new “light” giving night photography a new perspective and dream like world.
Conclusion
Whether you are an experienced light painter or just wanting to give this technique a try for the first time, these tools from Light Painting Brushes are a fantastic addition to your accessory arsenal. They are designed by light painters who create and use their products. If you watch their tutorials online you’ll see that they have a passion to create tools that are to be used to create works of art in Light Painting.
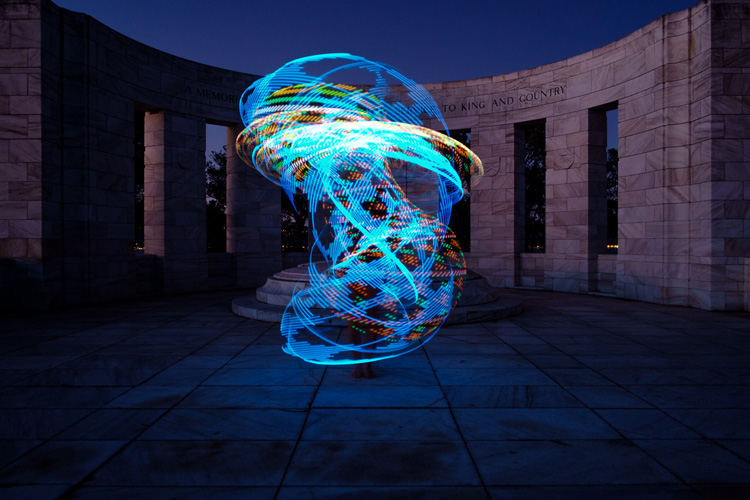
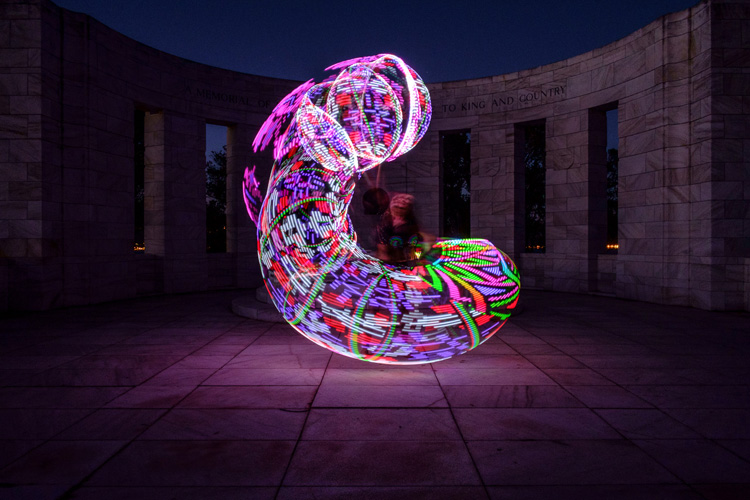
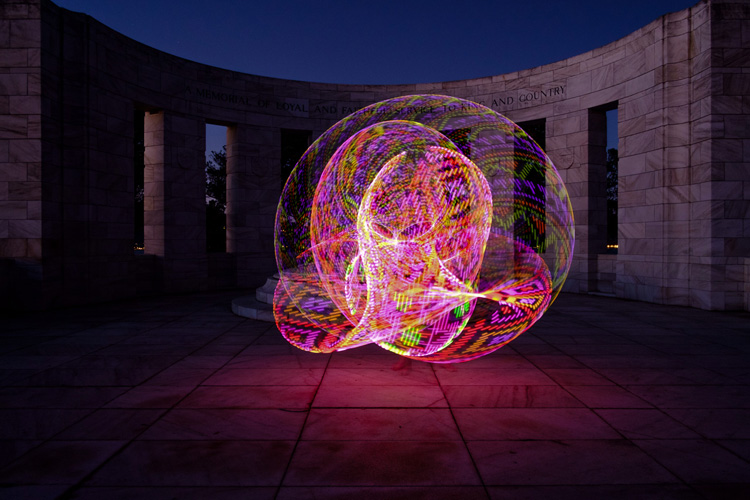
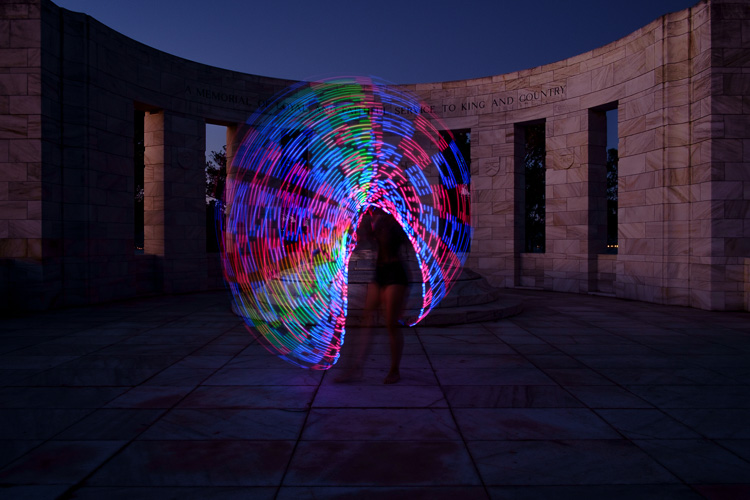
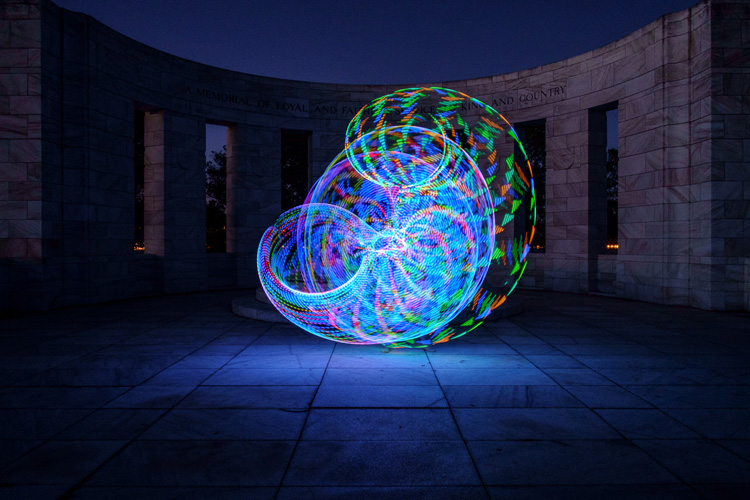
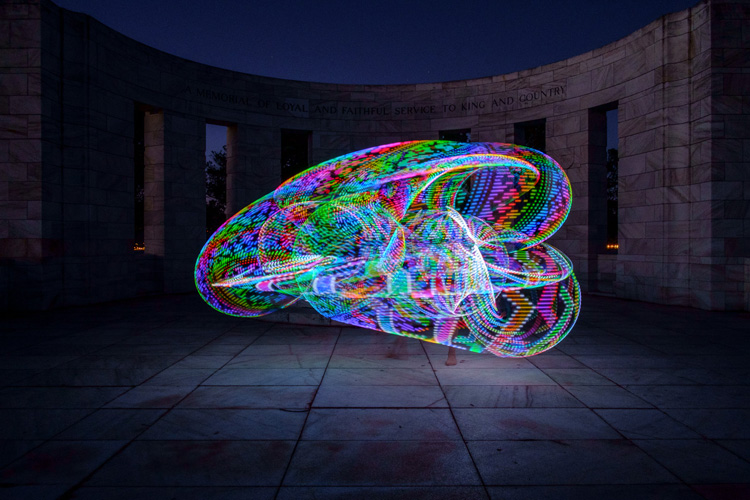
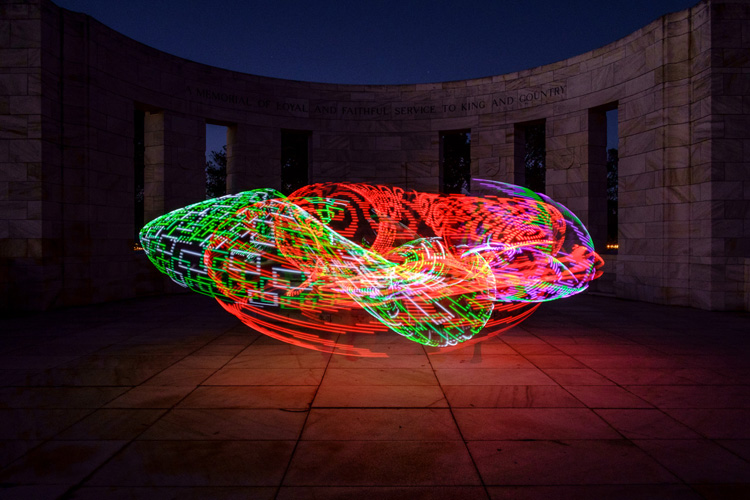
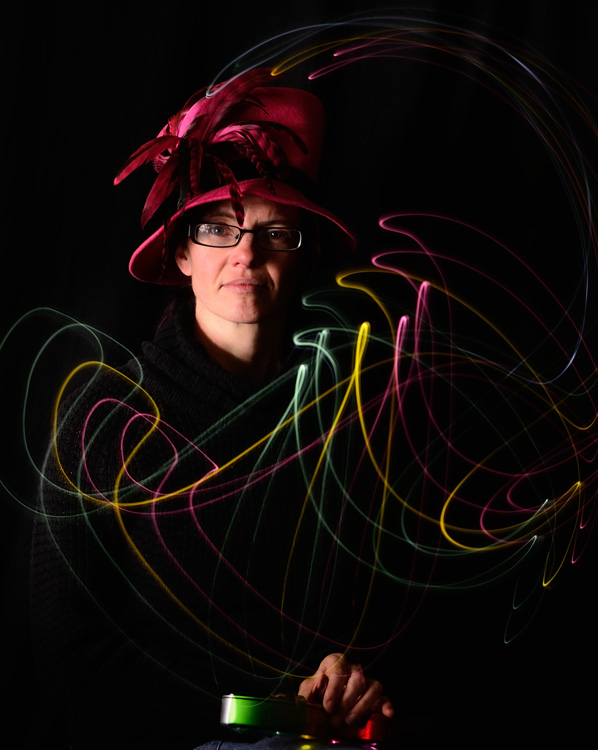
Here’s another really cool thing you can do with these tools – make a spirograph!
The Universal Connector is the essential tool for using the actual brushes. I really like the unique textures and shaping possibilities of my two personal favorite brushes, the White Fiber Optics and the Plexiglass Diamond. My previous experience with light painting has mostly been of the off-camera type, but after using these Light Painting Brushes my interest has really been piqued to pursue on-camera light painting.
googletag.cmd.push(function() {
tablet_slots.push( googletag.defineSlot( “/1005424/_dPSv4_tab-all-article-bottom_(300×250)”, [300, 250], “pb-ad-78623” ).addService( googletag.pubads() ) ); } );
googletag.cmd.push(function() {
mobile_slots.push( googletag.defineSlot( “/1005424/_dPSv4_mob-all-article-bottom_(300×250)”, [300, 250], “pb-ad-78158” ).addService( googletag.pubads() ) ); } );
The post Review: Light Painting Brushes – Tools for Creativity by Bruce Wunderlich appeared first on Digital Photography School.


.jpg")
.jpg")
.jpg")
.jpg")
.jpg")
.jpg")
.jpg")


.jpg")


You must be logged in to post a comment.