RSS
 

Posts Tagged ‘Night’

Paradise Found: Spend a Night Floating Above the Great Barrier Reef

05 Jul

[ By SA Rogers in Destinations & Sights & Travel. ]

Screen Shot 2016-06-30 at 6.55.49 PM

Better hope your kids remain firmly tucked into their Finding Dory-themed beds all night long lest they get a little too enthusiastic about leaning over the edge of this wall-free AirBNB floating over Australia’s Great Barrier Reef. The vacation rental company is offering one lucky family of four two free nights aboard their 2-bedroom, 1-bath open platform, with a beautiful white-curtained master suite on one end and the kids’ room tucked behind it.

Screen Shot 2016-06-30 at 6.56.07 PM

Screen Shot 2016-06-30 at 6.56.31 PM

The platform itself is pretty cool, taking advantage of the beautiful weather and pleasant temperatures of the area, not to mention the world-class snorkeling and scuba diving. If you want to win, you’ll have to submit an essay on why your family deserves to stay at the temporary rental, and your answer better “surprise and delight” the folks at AirBNB. The winner will be selected on July 4th.

Screen Shot 2016-06-30 at 6.56.39 PM


Screen Shot 2016-06-30 at 6.56.46 PM

“Imagine living atop a coral garden beside a sand cay in a billowing reef home on the Great Barrier Reef,” says AirBNB on the promo page for the contest. “You feel the pull of the unknown when you peek over the edge of the coral shelf and take in your neighborhood – home to 600 types of soft and hard corals, 100 species of jellyfish, 3,000 varieties of molluscs, 500 species of worms, 1,625 types of fish, 133 varieties of sharks and rays, and more than 30 species of whales and dolphins. And somewhere, beneath you, is the most famous Blue Tang in the world.” [The latter refers to the type of fish featured in ‘Finding Dory.]

Screen Shot 2016-06-30 at 6.56.13 PM

Screen Shot 2016-06-30 at 6.56.23 PM

Unsurprisingly, the contest is a collaboration between AirBNB and Disney Pixar’s Finding Dory, the animated film that’s likely set to wipe out the species of fish it highlights just as it did with clownfish back in 2003. In the years since ‘Finding Nemo’ came out, more than 10 million clownfish were removed from reefs for home aquariums, causing them to go locally extinct in places like Thailand. At least viewing tropical fish in their natural habitat at the Great Barrier Reef leaves them where they belong. Just don’t go throwing any trash overboard, please, kids.

Share on Facebook


[ By SA Rogers in Destinations & Sights & Travel. ]

[ WebUrbanist | Archives | Galleries | Privacy | TOS ]


WebUrbanist

 
Comments Off on Paradise Found: Spend a Night Floating Above the Great Barrier Reef

Posted in Creativity


How to Enhance Urban Night Photographs Using Luminosity Masks in Photoshop

19 Jun

As the sun sets on a city’s skyline, thousands of lights come flooding the concrete jungle, turning every urban scene into a photographer’s paradise. Every corner around the city suddenly seems too irresistible not to be photographed.

Image 01

Urban night shots is probably one of the most common photos taken at night. The way most people shoot cityscapes at night is to keep the camera still, press the trigger, and snap the shot. The result is often an uninspired image, with overexposed highlights due to the long exposure. This problem can be fixed by blending multiple exposures, to recover details in the highlights with luminosity masks.

Image 02

Overexposure of highlights circles in red.

Using Luminosity Masks is a way of making a selection based on the luminosity (or brightness) value of the pixels. The main advantage of luminosity masks over other selection tools is its ability to feather the edges, which makes the transition seamless. One of the earliest articles detailing how luminosity masks works was published by Tony Kuyper. You can learn more about luminosity masks here.

In this tutorial, I will show you step by step, how you can recover detail in the highlights of your urban night shots, using luminosity masks in Photoshop. There are two parts to this: taking the multiple exposure, and editing them in Photoshop with luminosity masks.

Part one: How to take multiple exposures

  • Step 1: You need a tripod, and a camera that has aperture priority and manual mode.
  • Step 2: Mount your camera on the tripod and compose your image. In aperture priority mode, set the aperture and ISO settings you want, and take a shot with the default metering mode (usually matrix metering).
  • Step 3: Review the image on the LCD screen and take note of the shutter speed. Switch your camera to manual mode and dial in the ISO, aperture, and shutter speed that you used for the first shot.
  • Step 4: Speed up your shutter speed by one stop and take a shot again. For example, if the initial shutter speed was 30 seconds, stopping up by one stop would be 15 seconds (the shutter speed halves).
  • Step 5: Repeat step 4 until you can see details in the highlights by zooming in on the LCD screen on your camera, and checking the histogram for clipped highlights (blinks).

Tip: Use a remote release and/or enable mirror lockup (in a DSLR) to ensure the sharpness of your photos.

Part two: Recovering the highlights using luminosity masks in Photoshop

Step 1: If you use Adobe Lightroom, select all the images you want to blend. Right click on the mouse, choose Edit in > Open as layers in Photoshop. Otherwise, you can open them individually in Photoshop, use the move tool and drag each image into a single file as layers.

Step 2: Make sure the images are arranged such that the brightest exposure is at the bottom of the layers. To make sure all images are absolutely aligned, select all layers, then go to Edit > Auto-Align Layers. You may have to crop the image a bit after alignment.

Image 03

The layers are arranged so that the brightest image is at the bottom.

Step 3: Make sure you have luminosity masks Photoshop Actions to add and remove luminosity masks. If you don’t, you can download it here (the file is zipped, so make sure you unzip it first, then follow the instruction on how to install it here).

Step 4: To start off, make all layers invisible except the bottom two (layer 1 and 2). You can do so by unchecking the eye icon next to each layer. Next, create a mask for Layer 2 and fill it with black.

Image 04

Step 4: Next, generate luminosity masks based on Layer 1 (the brightest exposure). To do that, select Layer 1 on the layers panel, and generate the luminosity mask with the Photoshop Action.

Step 5: Go to Channels panel, select a Brights luminosity mask that targets just the highlights. In this case, Brights 2 seems like a good choice because it is not too restrictive and has good feathering on the edges.

Image 05

Step 6: Select Brights 2 luminosity mask by holding down CMD (Mac) or CTRL (Win) and left click on the mask. You should see marching ants appear on the image. Depending on your image, if you do see a pop-up window that says “Warning: No pixels are more than 50% selected…”, don’t worry about it and just click ok.

Step 7: Go back to the layers panel and click on the mask on layer 2. Select the brush tool, set the opacity to 50%, color to white, and paint over the layer mask to blend the darker exposure (Layer 2) into the brighter exposure (Layer 1 below). Depending on your image, you can choose to paint just the brightest highlights or all of them. In this example, I chose to paint all the highlights. If you find the marching ants annoying, hit CMD (Mac) or CTRL (Win) + H key to hide them.

Image 06

Details in the highlights are gradually recovered.

Step 8: Delete the luminosity masks generated previously because you now need luminosity masks based on the brightness of Layer 2, where you have just blended in the darker exposure. To do so, remove the current luminosity masks with the Photoshop Action.

Step 9: Now select Layer 2 and generate luminosity masks with the Photoshop Action.

Step 10: Select Layer 3, add a layer mask, and fill it with black.

Step 11: Go to the Channels panel, select a brights mask that targets the highlights. In most cases, selecting the same mask should do the job. In this example, I have chosen the Brights 2 mask again.

Image 07

Comparison of Brights mask for Layer 1 and Layer 2.

Step 12: Hold down CMD (Mac) or CTRL (Win) and click on Brights 2 mask to select once again. Go back to layers panel and click the mask on Layer 3, then use a white brush as before, and paint over the highlights again. You should see details being recovered gradually. At this stage, you should consider painting over the brightest highlights only instead of the whole image. In this example, I only painted the highlights as circles in the illustration below.

Image 02

Step 13: Repeat Steps 8 to 12 until you are done with all the layers. Your final image should have a more balanced exposure, with details in the highlights. You can then apply further tonal or color adjustments, and sharpening to your image.

Image 08

Final image.

Bonus: Adding a reflection and color to the lights

This involves a lot of editing, and may not be for everyone. For those of you who are into post-processing, you can clean up the image by removing unwanted objects, add a reflection, and change the color of the lights.

Adding a reflection

This only works if you have an empty foreground in your image like the example here.

  • Step 1: Use the rectangular marquee tool and make a selection of the city’s skyline. Then, copy and paste it as a new layer.
Image 09

Copy and paste the selection as a new layer.

  • Step 2: Select the layer of the copy, hold CMD (Mac) or CTRL (Win) + T to transform. Move your cursor to the image, right click and select > Flip Vertical. Use the move tool to position the flipped image lower to align the border.

Image 10

  • Step 3: You can add a ripple effect to the reflection by going to the top menu and selecting Filter > Distort > Ripple. Keep the size of the ripple to medium, set the amount you like, and press ok.
  • Step 4: Increase the contrast of the reflection by adding a curves adjustment layer, and clip it to the reflection layer only. To do that, right click on the curves layer and select Create Clipping Masks. You should see a little arrow on the curves layer pointing down at the layer below it. You can also reduce the opacity of the reflection layer if you like.
image-11

Clipping curves adjustment to the layer below.

Image 12
Final image with reflection.

Adding color to the lights

  • Step 1: You need a visible layer to begin with. If you don’t have one, you can go to the menu on the top and choose Layer > Merge Visible.
  • Step 2: Generate luminosity masks based on this layer. Remember to delete any luminosity masks you had before this.
  • Step 3: Select a brights luminosity masks that targets the highlights. In this example, I know from before that brights 2 mask works very well, so I’m going to choose it again. Select it by holding cmd (Mac) or ctrl (Win) + left click on your mouse.
Image 13

Brights 2 luminosity mask.

  • Step 4: Add a new layer, and change the blend mode to soft light. The selection should be automatically loaded onto this new layer already.
  • Step 5: Now fill the with the color of your choice by holding down Shift + Backspace, select a color, and press ok. You should now see the color of the lights have changed subtly.

Image 14

  • Step 5: If you want the effect to be stronger, duplicate the layer once or twice until you like it.
Image 15

Duplicate the layer for a stronger effect.

  • Step 6: The final step is what makes the lights glow. Double click on the top layer to bring up the layer style. Check the box for outer glow, and pick a color that is slightly darker than the one you have used before. Click ok and your done!
Image 16

Apply outer glow for the final touch.

Apply a few other tweaks and sharpening and you’ve got yourself a cool urban night cityscape!

Before

Before

Image 01

After


googletag.cmd.push(function() {
tablet_slots.push( googletag.defineSlot( “/1005424/_dPSv4_tab-all-article-bottom_(300×250)”, [300, 250], “pb-ad-78623” ).addService( googletag.pubads() ) ); } );

googletag.cmd.push(function() {
mobile_slots.push( googletag.defineSlot( “/1005424/_dPSv4_mob-all-article-bottom_(300×250)”, [300, 250], “pb-ad-78158” ).addService( googletag.pubads() ) ); } );

The post How to Enhance Urban Night Photographs Using Luminosity Masks in Photoshop by Yaopey Yong appeared first on Digital Photography School.


Digital Photography School

 
Comments Off on How to Enhance Urban Night Photographs Using Luminosity Masks in Photoshop

Posted in Photography


How to Make a Unique Portrait in the City at Night

12 Jun

What makes a portrait into a portrait ?

Making a portrait is like baking a cake in a way, you need to mix the right ingredients, evenly set it in a tray and add some personal touches. Once the cake is in the oven there is no way back, a bit like pressing the shutter release, then the portrait is done.

ouria_tadmor_city_portrait003

Any portrait, will always include a person, a background, and a key light that will allow the subject’s face and soul to come through in the picture. The subject, background and light are the ingredients, and your frame is the baking tray. Let’s hit the streets and bake the perfect portrait cake!

The city, especially after sundown, has a vast variety of portrait ingredients to be found. Take your portrait subject with you, and go for a walk in the urban studio to look for frames, backgrounds, and light.

The key to success, as always, lies in your eyes, so start looking at the city through a portrait lens, and look for balanced compositions that will frame a good portrait. Try to use what can be found on the streets, but if that’s not possible, a simple off-camera flash with white umbrella can complete the setup for the urban studio.
We took a walk in the city and looked for portraits to be made. Here is what I and my model found.

Bright store in a dark corner

The dynamic composition shown here creates the needed interest that focuses viewer’s attention on the model’s facial features and eyes, therefore communicating the personality of the model. This is done by having soft gentle light coming from the left and adding a red bokeh circle in the background. An invisible triangle between the model’s lips, eyes, and the red circle is directing the energy back to her eyes.

ouria_tadmor_city_portrait011
As you can see here, the setup for this portrait wasn’t a big soft-box in the studio, but instead was a messy drug store at night, in a busy street corner in Jerusalem. The store’s fluorescent lights provided an even and soft light source, while the much needed red circle in the background came from the traffic light behind the model (shown in green in the photo below).

ouria_tadmor_city_portrait012

Hotel enigma

A classic hotel building, with some human presence, helped create an enigmatic atmosphere for this portrait, the background here being part of the story. The key light on the subject came from an off-camera flash positioned at 90 degrees. The dark frame for this composition was made by photographing through a metal railing between the camera and the subject, as you can see in the next photo. This setup helped create depth, that continues with the blurry figures on the street and inside the building.

ouria_tadmor_city_portrait013

The whole setup can be seen below. The flash was positioned about four feet from the model, with the output set to manual at 1/32 power, in order to match the amount of light coming from the background.

ouria_tadmor_city_portrait014

Layer store

Layers are not only to be found in photo editing programs, they are everywhere, all over the city. A corner store with windows on both sides made it possible to compose a complicated composition, that gives the eye something to explore. When doing so, you need to make sure that the viewer’s eye ends up looking at the subject, so it can still be a portrait. Dividing the frame into three, using the vertical lines on the store’s window, and positioning the subject in the right third of the frame, kept the focus on the subject in this case.

ouria_tadmor_city_portrait002

The main light here also came from the off-camera flash setup, as you can see in the next image. The photo was taken through the window on the left side of the store.

ouria_tadmor_city_portrait004

Equipment

Any camera with a decent portrait lens and manual exposure control can do the work, most of it is hidden in the lens.

A classic portrait lens is between the 85 mm and 105 mm focal lengths on a full frame camera, or their equivalents on any other sensor size. Those focal lengths will give you the perfect camera to subject distance of about six feet, and will produce a moderate compressed perspective, that is distortion free. Typical portrait lenses have a large aperture of f/2 or wider, which allows more light to go through, and therefore are perfect for working with what the city has to offer at night, and will deliver a shallow depth of field when needed.

Off-camera flash can be any speedlight with manual control and radio slave system. Here is the list of equipment I used for this session:

  • Panasonic GH4 camera
  • Olympus M.Zuiko 45mm f/1.8 lens
  • Metz 52 AF-1 flash
  • Two Cactus V5 radio slaves
  • ProVision 20″ White umbrella
  • ProVision M11 shoe mount umbrella adapter
  • Meking L-2000A Light Stand

So if you want to try something a little different get a willing subject (model), grab a flash, and head out into the city at night to make some unique portraits.

Please share your questions and results in the comments below.

googletag.cmd.push(function() {
tablet_slots.push( googletag.defineSlot( “/1005424/_dPSv4_tab-all-article-bottom_(300×250)”, [300, 250], “pb-ad-78623” ).addService( googletag.pubads() ) ); } );

googletag.cmd.push(function() {
mobile_slots.push( googletag.defineSlot( “/1005424/_dPSv4_mob-all-article-bottom_(300×250)”, [300, 250], “pb-ad-78158” ).addService( googletag.pubads() ) ); } );

The post How to Make a Unique Portrait in the City at Night by Ouria Tadmor appeared first on Digital Photography School.


Digital Photography School

 
Comments Off on How to Make a Unique Portrait in the City at Night

Posted in Photography


Lumigon launches T3 smartphone with night vision camera

08 Jun

Danish electronics company Lumigon has announced a new smartphone that it claims is the first in the world to offer a night vision camera. The Lumigon T3 features three cameras in total; a 13MP rear camera, a 5MP front camera and a 4MP night vision camera that uses what the company describes as a ‘dual infrared flash’. Lumigon says the camera can take stills and video in total darkness. The rear 13MP camera uses a dual tone flash, has a phase detection AF system and can shoot 120fps slow-motion video as well as 4K video.

The T3 uses a 2.2 GHz 64-bit 8-core processor with 3GB of RAM, and all models come with 128GB of internal storage. The device runs Android 6.0 and features a 4.8in Super AMOLED 1280×720 display. The stainless steel body uses Gorilla glass on the front and back, and offers BackTouch touch sensitivity on the rear for controlling functions displayed on the front screen. Other features include dual SIM slots, universal IR remote control and wireless charging.

The Lumigon T3 will be available in white, black and orange, as well as four different gold versions. The standard ‘classic’ models will cost €645/DKK 4799/$ 740 while the gold models will be€1100/DKK 8000/$ 1200.

For more information visit the Lumigon website.


Press release:

Lumigon launches T3, a premium smartphone with unique features in Scandinavian design

Lumigon announces the launch of the T3 smartphone, integrating minimalistic Scandinavian design with durable steel exterior and innovative features such as a night vision camera and the innovative BackTouch technology, so far never seen before in mobile phones.

“We wanted to create a new smartphone that reflects our design philosophy,” says Lumigon CEO Lars Gravesen. “The glass and steel used in the T3 are extremely durable, but that doesn’t mean sacrificing the look and feel of the phone. In fact, it provides a great balance between design, premium materials, innovation and technology.”

In addition to the classic versions, the T3 is also available in a gold edition with four different models, to fulfil the needs of customers who like it a little more extraordinary.

Innovative design, inside and out
The exterior of T3 is crafted from molybdenum 316 stainless steel, whose strength and high resistance is known from the boat industry. This durability is further enhanced with scratch and damage resistant glass. Both the front and back of the phone are of Corning® Gorilla® Glass to help ensure the 4.8” HD Super AMOLED Diamond display is not spoiled by screen cracks. These robust materials were carefully selected and precisely crafted to create a dust and water-resistant phone that can withstand daily use, while retaining the sleek design of an exclusive product.

These details extend to the interior, which is powered by an ultra-fast 2.2 GHz 64 bit 8-core processor with 3 GB RAM running Android™ 6.0, making this smartphone run smooth and fast. Lars Gravesen continues, “In a world with such huge demands for data, we wanted to give our customers enough capacity that will make users hardly run out of space, thus we decided to launch the T3 with 128 GB internal memory as standard.”

Being a truly versatile device, the T3 also features a 4G Dual Nano SIM slot allowing the use of two SIM cards simultaneously. These can be hot-swapped without shutting down the phone, allowing for exceptional agility on the go.

Perfect picture – day and night
The T3 comes with three cameras and provides high quality photography regardless of time of day or lighting conditions. The 4K HD camera takes ultra-sharp photos while the advanced Phase Detection Autofocus find its focus point instantly. The 2K HD front camera with innovative FrontFlash allows for perfect selfies even in dark environments. The mirror in combination with the FrontFlash turns this phone to a gadget that the ladies will find very handy when fixing their makeup on the go.

The T3 is the first smartphone in the world to have a 2K HD Night Vision camera that can capture photos and videos even in total darkness.

BackTouch
The innovative BackTouch technology enables to scroll content on the display from the back of the phone and is very convenient when taking selfies as the user just needs to tap on the BackTouch. This brand new feature introduces easy one-handed navigation and improved swiping and scrolling capabilities.

Secured
T3 has cutting-edge security and interface features. The 360° ceramic fingerprint reader provides added security along with 740 unique Vault feature that lets the user store private and confidential information on the phone. The data within the Vault is secure and encrypted with AES 256-bit algorithm.

Make it Your Way
T3 is provided in three classic colours, black, white and orange as well as the exclusive series, like the elegant 24-karat gold in four different models. Users can then show their individual looks, while those who want to experience the next level of luxury can leave their mark with a personal engraving.

Mr Gravesen says, “The T3 was created for users who want something different and want to stand out from the crowd.”

“To me,” he continues, “Danish design reflects craftsmanship, simplicity and real-life functionality, taking high-quality materials and combining them with innovative features to create a clean premium product. That was the design mindset that brought us to the creation of the T3 smartphone.”

Availability
The T3 is available for purchase at the Lumigon web shop and at selected dealers worldwide at a price starting from EUR 645/DKK 4799 for the stainless steel versions with 128 GB internal memory. The sales box also includes a stainless steel designer headset created from quality materials and with precision in every detail.

Articles: Digital Photography Review (dpreview.com)

 
Comments Off on Lumigon launches T3 smartphone with night vision camera

Posted in Uncategorized


How to Get the Correct Exposure at Night with These Helpful Tips

25 May
Tappan zee bridge

Colorful lights on the Tappan Zee Bridge reflected in the Hudson River at night. Behind the shot: ISO 200, aperture f/8, shutter speed 90 seconds, White Balance tungsten, lens used 80-200mm f/4.5 manual Nikkor zoom.

Exposing your photos correctly at night can be a bit challenging, and will certainly require some trial and error. In this article, you will learn helpful information to minimize the learning curve. Follow the tips outlined below and you will be taking better night photographs in no time.

Tappan zee bridge at night

View of the Tappan Zee Bridge and surrounding landscape at night. Behind the shot: ISO 400, aperture f/8, shutter speed 10 seconds, White Balance auto, lens used 105mm f/2.8 Nikkor.

Claiborne pell newport bridge

Night-time view of the Claiborne-Pell Newport Bridge and Narragansett Bay, taken in Jamestown, Rhode Island. Behind the shot: ISO 200, aperture f/8, shutter speed 25 seconds, White Balance fluorescent, lens used 50mm f/1.8D Nikkor.

Things You’ll Need

A Tripod

If you’re shooting at night, your exposures are going to be pretty long (anywhere from one to 30 seconds, or more). Since it is impossible to hold your camera perfectly still for that long, you will need a sturdy tripod, so that your camera does not move at all during the exposure. For added stability, you can hang your camera bag (or another somewhat heavy object) from the hook on your tripod’s center column. This is especially handy in windy conditions.

Plants at night

Long exposure of plants illuminated by streetlight at night in Nyack, New York. Behind the shot: ISO 400, aperture f/4, shutter speed 30 seconds, White Balance tungsten, lens used 50mm f/1.8D Nikkor.

Illuminated plant at night

Golden plant illuminated by streetlight at night in Nyack, New York. Behind the shot: ISO 400, aperture f/4, shutter speed 30 seconds, White Balance tungsten, lens used 50mm f/1.8D Nikkor.

Remote Shutter Release

With a long exposure, any camera movement can ruin the shot, making it soft or blurry. To ensure you get a sharp image, use a remote shutter release (remote trigger). The best type of shutter release to use is the kind that functions as a timer remote as well. If you don’t have a remote shutter release, you can use your camera’s self-timer. The only downside to using the self-timer is that you will have to keep your shutter speed at 30 seconds or less. If you don’t have too much light, you can always increase your aperture (decrease the f-stop) or increase your ISO to speed up your shutter speed.

Colors of night

Assorted foliage illuminated by streetlights in Nyack, New York. Behind the shot: ISO 200, aperture f/5.6, shutter speed 30 seconds, White Balance fluorescent, lens used 24mm f/2.8D Nikkor.

Colorful night

Colorful plants and trees in Nyack, New York. Behind the shot: ISO 200, aperture f/5.6, shutter speed 30 seconds, White Balance fluorescent, lens used 24mm f/2.8D Nikkor.

Camera Settings

Shoot RAW

Keeping image quality in mind, you should always strive to shoot in RAW format. It records more pixel information, and does not compress your images at all. RAW provides you with more post-processing options, including white balance correction. If you happen to under or over expose an image, you can easily adjust the exposure if your image is in RAW format.

ISO

When taking photographs with little available light, you are better off using a low ISO (400 and below) and longer exposure times. This is important so you don’t get too much noise (or grain) in your images. Also, make sure you have Long Exposure Noise Reduction turned on in your camera’s settings.

Yellow leaved tree moving clouds at night

Yellow-leaved tree and moving clouds at night in Nyack, New York. Behind the shot: ISO 200, aperture f/5.6, shutter speed 30 seconds, White Balance tungsten, lens used 50mm f/1.8D Nikkor.

Tree in wind

Tree in wind at night in Valley Cottage, New York. Behind the shot: ISO 400, aperture f/2.8, shutter speed 30 seconds, White Balance tungsten, lens used 50mm f/1.8D Nikkor.

Use Manual Mode

While shooting in very low light, your camera’s light meter may not read the scene too well. Your best bet is to use Manual mode, where you control both the aperture and the shutter speed. To find a baseline for the correct exposure, you can use the following trick (which I learned in this blog post):

  1. Set your ISO to 6400
  2. Set the aperture you would like to use
  3. Set your shutter speed at one second

Take a test shot using these settings to get an idea of what your image will look like. Note, these settings are almost equivalent to a 1-minute exposure at ISO 100, a 30-second exposure at ISO 200 and a 15-second exposure at ISO 400, etc. If your scene is too bright with these settings, you can see what a half second exposure at 6400 looks like. This would equal a 30-second exposure at ISO 100, a 15-second exposure at ISO 200 and a 8-second exposure at ISO 400. This baseline is a great guide, you can easily take test shots to figure out what shutter speed to use.

Autumn leaves in motion

Autumn leaves in motion at night in Valley Cottage, New York. Behind the shot: ISO 400, aperture f13, shutter speed 30 seconds, White Balance fluorescent, lens used 24mm f/2.8D Nikkor.

Tree at night

Tree and clouds in motion at night in Nyack, New York. Behind the shot: ISO 400, aperture f/5.6, shutter speed 30 seconds, White Balance tungsten, lens used 50mm f/1.8 manual Nikkor.

If you use the above trick, you won’t unnecessarily waste time taking a bunch of long test exposures. As it is, long exposure night photography is rather time-consuming. Make sure you switch your ISO back to 400, or below, before you start taking photos that you intend to keep.

In scenes where you have a decent amount of available light (e.g. places with numerous streetlights), you may be able to use Aperture Priority mode instead of Manual mode.

In Conclusion

Night photography can be rather tricky, and requires a good amount of practice. In time, you will have a feel for the amount of light in various night scenes, and be able to figure out accurate camera settings with relative ease. Hopefully, the information contained in this post will help you capture great long exposure night shots, that don’t need much post-processing.


googletag.cmd.push(function() {
tablet_slots.push( googletag.defineSlot( “/1005424/_dPSv4_tab-all-article-bottom_(300×250)”, [300, 250], “pb-ad-78623” ).addService( googletag.pubads() ) ); } );

googletag.cmd.push(function() {
mobile_slots.push( googletag.defineSlot( “/1005424/_dPSv4_mob-all-article-bottom_(300×250)”, [300, 250], “pb-ad-78158” ).addService( googletag.pubads() ) ); } );

The post How to Get the Correct Exposure at Night with These Helpful Tips by Marshall Reyher appeared first on Digital Photography School.


Digital Photography School

 
Comments Off on How to Get the Correct Exposure at Night with These Helpful Tips

Posted in Photography


How to Improve Your Night Photos – Add Reflections

24 May

Reflections can be great things to add to your photographs at any time, but they are particularly cool at night. Adding reflections can solve compositional problems you face at night. Further, the steps you have to take to capture photos at night – such as having your camera on a tripod and using a slow shutter speed – actually make it easier to capture reflections.

How so? I’m glad you asked. Let’s take a look at the use of reflections in night photography.

Lakehouse2

Why use reflections in your night photography?

Why would you want to use reflections in your nighttime photos? There are many reasons, but in this article I want to concentrate on two.

1 – Adding a reflection adds interest to the composition

First adding a reflection allows you to turn a straight-ahead photo of a single thing, into an interesting composition. For example, common subjects of nighttime photos are things like well-lit buildings, bridges, and fountains. If you take a picture of just a building, it might not be terribly interesting. It’s just a building. The same goes for pictures of bridges and fountains.

Adding other items to the picture can be a challenge. Everything around the subject is likely to be very dark. Adding more space just results in a sea of blackness around your subject that doesn’t add anything to your photo, it just detracts from your subject. If you add a reflection, however, it adds a compositional element to your picture. Now your picture isn’t just a single thing (like a building, bridge, or fountain). The reflection adds interest to the photo.

2 – Adding a reflection gives you a good foreground element

Secondly, adding a reflection to your picture also solves a common problem for all pictures. That problem is what to do with the foreground. Often the subject and background are clear, but the foreground can be difficult to ascertain. However, particularly when you are using water to create the reflection, the reflection will be on the bottom portion of the picture. Therefore it provide you with a ready-made foreground. Problem solved.

Dallas

When to use reflections

You could use reflections in your nighttime photos whenever possible. The limitation on their use is typically not lack of desire, but lack of opportunity. There isn’t always a large shiny surface for you to use to capture a reflection.

Note: if that is the case, you can always create one in Photoshop!

So what circumstances create the opportunity to use reflections? Obviously, water works great. It is available for you to use in a lot of different contexts. Here are some of them:

  • Skylines: Most cities are built on a bay or a river that you can use to create a reflection. (By the way, don’t worry about making it a sharp reflection – just a blurry set of lights in the water can provide what you need.)
  • Bridges: A common nighttime photographic subject are bridges, which are almost always over water.
  • Lakes: There are lakes everywhere. You can capture reflections of nearby objects. On clear nights you can also capture the reflections of the stars.
  • Puddles: They provide a great opportunity for using reflections where you might not otherwise expect them. Keep in mind there doesn’t actually need to be a puddle but often a wet surface will reflect light from nearby sources. See Using Rain Puddles to Create Unique Reflection Photos.
  • Fountains: Since fountains are filled with water, they also provide great opportunities for making reflections.

Besides water, any shiny surface will do. Most cities have many modern office buildings built of steel and glass. While not generally sought out as photographic subjects in and of themselves, they do provide great opportunities for capturing reflections of anything nearby.

StPaulMirror

How to capture reflections

Here is some good news: you probably don’t need to do anything different in terms of exposure to capture reflections in your picture. For reflections of most shiny surfaces, you simply set the exposure as you normally would, and take the picture. While using water to create the reflection does require that you smooth the water out, this is probably already happening because of the inherent challenges of exposure in night photography.

Night photography requires slow shutter speeds. Because it is dark, your camera needs to hold the shutter open a long time in order to gather sufficient light for the exposure. This is true even if you are using a wide aperture and high ISO. This long shutter speed is what smooths out the water. Therefore, the mere fact that you are taking the photo at night, probably means you are already creating a picture with smooth water. If not, just be sure to slow down your shutter speed.

Riverwalk

Enhancing the effect

The most common problem when using reflections in your nighttime photos, is that the reflection does not show up as much as you would like. The way to fix that is to brighten the reflection. If you apply a global brightening to the picture, however, you risk blowing out the highlights of other parts of your picture. In any case, you will probably end up brightening other parts of the picture more than you want. Therefore, you will need to apply selective brightening to the photo. Here is how to do that, depending on the software you are using:

  • Lightroom: In Lightroom, use the Adjustment Brush (keyboard shortcut K) to apply selective brightening to the reflection. Select the brush, and using the controls that appear, increase either the Exposure or the Whites slider (or both) to make the reflection stand out. At the same time, you will need to maintain contrast in your picture. Do that by decreasing the blacks in the picture (pull the Black slider to the left). Just paint it in and you are all set. You can also adjust the effect after you have painted it in.
  • Photoshop: In Photoshop or Photoshop Elements you can use the same process as described above in the Adobe Camera Raw (ACR) screen that pops up when you open the picture. Once you are in Photoshop, the best way is to use Curves adjustment layers and then mask out the effect everywhere except in the reflection. To do that, just create a Curves adjustment layer, then pull up the line on the right side of the curve (or pull in the white point) to increase the brightness of the reflection. To maintain contrast, pull down the left side of the line (or pull your black point to the right). If you’re not familiar with Curves adjustment layers or masking check out this or this tutorial to get you started with the process.

Destin2

The other common problem when using reflections in your night photography, is enhancing the clarity or sharpness of the reflection. Much of the work here is done in the capture phase, and keep in mind that you cannot fix a blurry picture. But you can enhance the effects a bit. Here are some ways to go about that:

  • Lightroom: As with the selective brightening above, use the Adjustment Brush (either in the same step or as a separate step as the brightening). Within the controls of the brush, increase the Clarity slider. Brush in the area of the reflection to add the clarity. You can also increase the Sharpness slider, but beware of doing this too much as it tends to increase digital noise.
  • Photoshop: Within Photoshop or Photoshop Elements, you can use the ACR screens to increase the clarity of the reflection. Once the image is opened in Photoshop though, there is no Clarity slider. The best way to increase clarity is to use the High Pass filter. This article explains how to increase clarity and walks you through the use of the High Pass filter.
  • Plug-Ins: There is also third-party software available that allows you to increase the clarity of your photos. One such program is Topaz Clarity, which works really well. For the best results, apply this effect on a new layer within Photoshop so that you can use masking to apply the effect exactly where and how you want.

Of course, there will probably be other edits you want to make to the photo in addition to these. You can, and should apply your standard workflow to your pictures. These are just the common issues you will experience when you add reflections to your photos.

Conclusion

Reflections can add great compositional interest to your pictures. They also allow you to add context to your nighttime photos, which is not always easy since much of the surrounding area will be dark. They are readily available once you start looking for them. In addition, they are easy to apply. Once you start adding reflections, I think you will find they will help add interest to your night photos, and might even take them to the next level.

googletag.cmd.push(function() {
tablet_slots.push( googletag.defineSlot( “/1005424/_dPSv4_tab-all-article-bottom_(300×250)”, [300, 250], “pb-ad-78623” ).addService( googletag.pubads() ) ); } );

googletag.cmd.push(function() {
mobile_slots.push( googletag.defineSlot( “/1005424/_dPSv4_mob-all-article-bottom_(300×250)”, [300, 250], “pb-ad-78158” ).addService( googletag.pubads() ) ); } );

The post How to Improve Your Night Photos – Add Reflections by Jim Hamel appeared first on Digital Photography School.


Digital Photography School

 
Comments Off on How to Improve Your Night Photos – Add Reflections

Posted in Photography


Stacking Light Trails for Night Photography Special Effects

18 Mar

In Melbourne there is an intersection that’s iconic for taking light trails phtos. It is the corner of Flinders Street and Swanston Street, in front of Flinders Street Station.

15-Leanne-Cole-Light-Trails

Light Trails in front of Flinders Street Station. There are 23 images in this stacked light trail.

It isn’t a hard image to take, you just need a camera and a tripod. To get a really good photo, you want to pick a time when there is going to be a lot of traffic. You want the traffic to be moving, as cars caught in a traffic jam will not give you the light trails you’re after. The cars need to be moving constantly, and not standing still for too long.

Pick a place that you think will give you the best advantage. Set the camera up on the tripod, and try to take as long of an exposure as you can. To get the trails, you need to have exposures for several seconds, up to 30. You could do them for longer, but you would need other equipment (like a neutral density filter to cut the light). Most of the images shot for this article had an exposure of around eight to 10 seconds.

Sounds fairly easy, but there are many things that can make it hard. The time of year can inhibit you, as daylight savings will affect when the best time for traffic is, and how busy the roads are. If you go to a place on the weekend, you might find there aren’t as many cars as there would be during the week.

To get the light trails in front of Flinders Street Station, you need to be there at dusk, or after the sun has gone down. In summer that means not many cars or trams. However, there are ways to get around that.

Stacking Light Trails

One of the best ways to get light trails, is to stack many images together.

From the intersection that was mentioned previously, the corner in front of St Paul’s Cathedral is the most popular. There are other places, but that seems to be the one that most use. You will have to work out a great place to photograph them where you live.

14-Leanne-Cole-Light-Trails

A single image, and as you can see there aren’t that many light trails.

Set your camera up on the tripod, this is necessary so you will get identical photos. Set the aperture to what you want. The ISO can be low, on 100 or 200, so you can get longer exposures. If you want longer, remember you can put your aperture to the smallest possible, like f/22.

Once you have a shutter speed that is several seconds, it is time to start taking your photos. Take one photo, then repeat until you have at least 10. You can do this with as many images as you like, however, Adobe Photoshop might not like you using too many. I’ve done it with four images, and as many as 23.

When you get home

Put all your photos onto your computer. You can use Lightroom to do this, but to do the actual stacking you will need Adobe Photoshop or any program that allows you to use layers.

Once you have all the images ready to use, select all the ones you want. If you are using Lightroom to begin with, go to: Photo > Edit in > Open as Layers in Photoshop. In Photoshop open Bridge and select the images you want to use.  Go up to Tools > Photoshop > Load files into Photoshop Layers.

01-Leanne-Cole-Light-Trails

Select all the images you want to use for the light trails.

It can take some time for the layers to all open, especially if you are using raw files, and there are a lot of them.

02-Leanne-Cole-Light-Trails

All the layers are opened in Photoshop.

The magic happens

Once the layers are all loaded, you need to select them all. You can do this by selecting the bottom layer, then pressing the shift key and clicking on the top layer. This will select them all.

03-Leanne-Cole-Light-Trails

Select all the layers so they can be used.

Once selected, go to the Blending Mode Options in the Layers panel. The default setting is Normal. Click on it for the drop down menu, select Lighten, and click.

05-Leanne-Cole-Light-Trails

Select the lighten blend option.

You should notice that the image now has far more light trails. All the trails, from all of the images have come through now.

06-Leanne-Cole-Light-Trails

Lots more light trails apply.

You now have a stacked light trail image.

Getting rid of unwanted lights

Sometimes when you do this, it can change a lot more than just the light trails, it may lighten other buildings too much as well. You can correct this.

Select all the layers, except the bottom one, and put them into a group. You can do this by dragging them down to the group icon at the bottom of the panel, or right click on the select layers, and when the menu pops up click on Group from Layers.

07-Leanne-Cole-Light-Trails

Put all the layers, except for the first one, into a group.

Add a mask to the group from the bottom of the Layers panel. Select the brush from the tools on the left, or press Ctrl b (just B on Mac). Make sure foreground colour is set to black. Making sure the mask is selected, paint over the areas where there is too much light to mask those areas.

08-Leanne-Cole-Light-Trails

Once the mask is added you can use the brush to remove the unwanted lights.

10-Leanne-Cole-Light-Trails

If you alt click on the mask you can see what you have done. The black is where you have removed the unwanted lights.

Finishing the image

The image is now completed, unless you want to do more to it. But, as far as the light trails go, you really don’t need to do any more.

11-Leanne-Cole-Light-Trails

The final image.

This is a great technique which can be applied to many areas. You could use it for ships on the water, or trains going in and out of the city. It can also be used on waterfalls to make them seem fuller. Why don’t you try and see how else you can use this technique.

Here are some other images to give an idea of how to use this technique.

12-Leanne-Cole-Light-Trails

Boats on the water in the foreground of the Manhattan skyline. Four images.

13-Leanne-Cole-Light-Trails

Trains coming into and out of the city. Three images.

This article is part of a series that we will be featuring this week on dPS all about special effects. Check out the others that have already been published here, and look for another new one every day:

  • How to Photograph the Full Band of the Milky Way
  • Fire Spinning with Steel Wool – A Special Effects Tutorial
  • Special Effect – How to Create Multiple Flash Exposures in a Single Frame

googletag.cmd.push(function() {
tablet_slots.push( googletag.defineSlot( “/1005424/_dPSv4_tab-all-article-bottom_(300×250)”, [300, 250], “pb-ad-78623” ).addService( googletag.pubads() ) ); } );

googletag.cmd.push(function() {
mobile_slots.push( googletag.defineSlot( “/1005424/_dPSv4_mob-all-article-bottom_(300×250)”, [300, 250], “pb-ad-78158” ).addService( googletag.pubads() ) ); } );

The post Stacking Light Trails for Night Photography Special Effects by Leanne Cole appeared first on Digital Photography School.


Digital Photography School

 
Comments Off on Stacking Light Trails for Night Photography Special Effects

Posted in Photography


The Long Night: Tim Matsui on creating social change through stories

26 Jan

Award-winning and Emmy-nominated visual journalist and filmmaker Tim Matsui used to view stories as a means of having experiences. Now, he sees them as a means of creating change, engaging audiences and helping them see that they can make a difference. In this PIX 2015 video, Matsui speaks on The Long Night, his documentary on human trafficking, and how he leveraged grassroots distribution to effect social change.

Matsui’s insistence on grassroots distribution stems from the difficulty he found in getting sponsorships to fund creation of the project and get the final film in front of audiences. ‘This is a difficult subject,’ Matsui says. ‘Brands don’t want to touch it. It’s a little too dark. This pisses me off.’

After exhausting his grant money, leveraging his own savings and going into debt just to get the filming done, Matsui explored every avenue he could find to take his film to his audience. He explored social media, Kickstarter, mainstream media like TIME Lightbox and the Huffington Post, and GATHR, a crowdsourcing platform for bringing small productions into mainstream movie theaters.

To be successful in creating change, ‘don’t make them come to you,’ he says about his audiences. ‘Go to them.’

Articles: Digital Photography Review (dpreview.com)

 
Comments Off on The Long Night: Tim Matsui on creating social change through stories

Posted in Uncategorized


Behind the Shot: Prince of the Night

12 Dec
‘Prince of the Night’. Parque Nacional Los Glaciares, Argentinian Patagonia, April 2014

In this article I’d like to take you far away to Parque Nacional Los Glaciares, a well known national park in Argentinian Patagonia. I visited Patagonia in April 2014 and spent a month scouting for my ‘Giants of the Andes’ photo workshop and Fitz Roy Annex. I shot in several locations in Argentina and in Chile, and among those, I spent several nights in Campo Poincenot, a camp offering relatively short hiking distances to some very good view points of Mount Fitz Roy, one of Patagonia’s most renowned landmarks.

On one of these days we hiked to Laguna Sucia (‘Dirty Lagoon’ in Spanish). It’s so named because before the glacier that formed it receded, the lagoon was always littered with icebergs. When I visited, there were no icebergs to be found anywhere near the bank.

The hike to Laguna Sucia isn’t long, but it’s mostly on loose rock, which is no fun at all. Basically you need to always watch your step: some rocks might shift and tumble when you step on them, others are covered with ice so you might slip – you get the idea.

Loose rock on our way to Laguna Sucia. Image courtesy of Santiago Siro Folcini.

Since we wanted to shoot the lagoon and Mount Fitz Roy both at night and during sunrise, we decided to camp there, but as we didn’t want to carry the tents, we only carried our sleeping bags and inflatable mats. We set up our ‘sleeping quarters’ under a large boulder close to the lagoon and went on to explore the area.

Setting up camp in a most unusual location. Image courtesy of Santiago Siro Folcini

After shooting the lagoon and the mountain at sunset, I started looking for nighttime compositions. I was thinking about shooting the moonlight glowing on the very top of the mountain (the same way the sun glows on tops of mountains producing Alpenglow), so I had to wake up before moonrise. This meant it was going to be very, very dark, and thus I had to compose and leave the tripod at the same place, so when I returned, I only had to find it, attach the camera and I’d be ready to shoot. I found a composition I liked, set the tripod and went back to ‘camp’. The moonrise was at about 3 a.m., so we set up the alarm for 2:30 and went to sleep.

Upon waking up, things didn’t look so good. Clouds had accumulated and blocked the moonlight, so all plans for glow fell through. We were quite disappointed but decided to stay around and see what happened. And surely enough, half an hour or an hour later, the clouds dispersed and the mountain was bathing in moonlight. This was the moment I had been waiting for. I went back to the tripod (which was still at the same spot) and took the shot.

Before discussing how I made the shot, I’d also like to show you two additional images I took at the same place, at later stages. I call them ‘Prince of Crimson’ and ‘Prince of Gold’, and it’s pretty clear why when you see the colors. I really like these images (‘Crimson’ is probably the best of the three), but I had much less to say about them, and so I chose the night image as the topic for this article. By the way, I named the images so to allude to the name of the mountain, literally meaning ‘Son of King’.

If only I had left the tripod in the same place for the last shot… I’m still sad about it!

Settings and Execution

To shoot this image, I used my Sony A7R and a Canon 16-35 F2.8L with a Metabones III adapter.
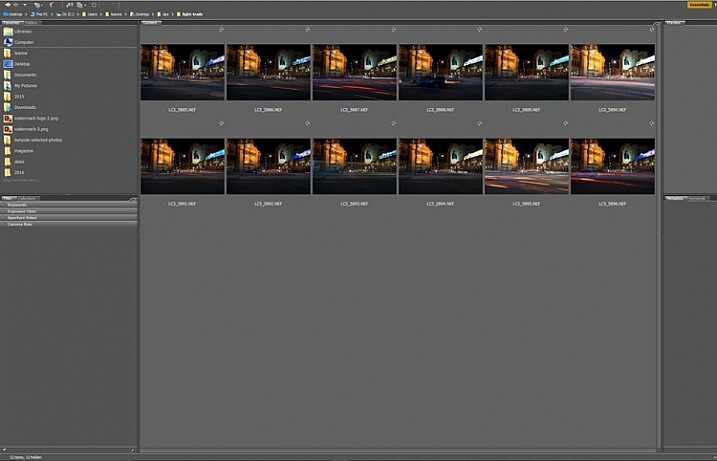
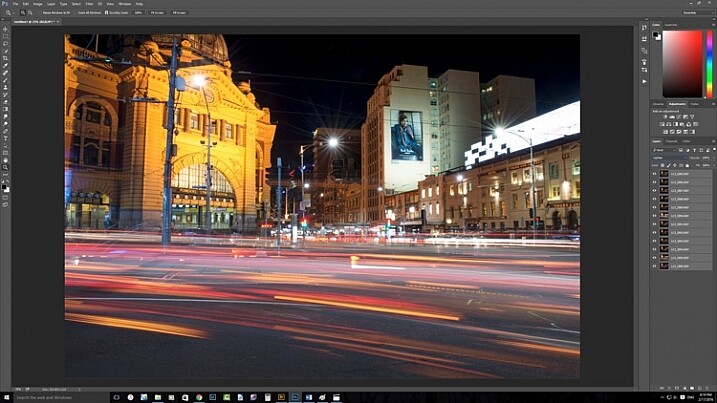
The image is a composite of 3 different shots, each taken for a slightly different purpose. Let’s view the untouched Raw files.

The leftmost image is a relatively short exposure for the sky and reflection. It was taken at ISO 6400, F2.8 and 30sec exposure. The middle image is a longer exposure, just over 2 minutes at ISO 1600, F2.8 to preserve the luminosity. From this image I took the mountain itself and the other parts of the background, except for the sky which at this exposure time had unwanted startrails. The last image was taken with very similar parameters to the second, but the focal point was on the foreground. I used this image to focus-stack the foreground and background, to get sharpness across the image.

Composition

The composition isn’t very complicated. The only point really worth mentioning is that the specific location was chosen since the rocks in the foreground follow a similar contour to that of the mountains’ reflection. This contributes greatly to the flow of the image. 

Post Processing

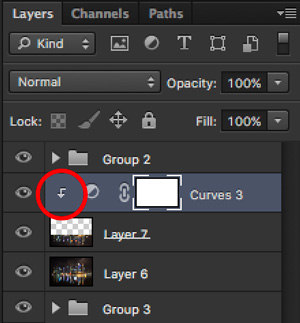
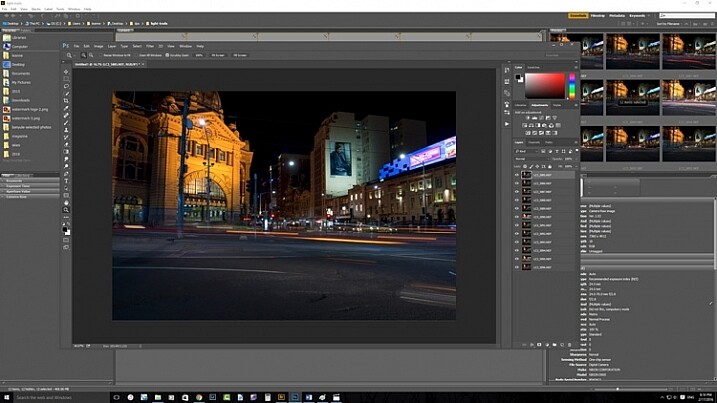
As I’ve mentioned, the image is a composite of the 3 shots above. Before combining them, I needed to make some initial tweaks in Adobe Camera Raw (ACR). The first thing I did was apply the lens profile, to avoid aberrations and counteract some of the vignetting. I also changed the white balance to better match what I had seen with my eyes, and made some other minor adjustments, visible in the screenshot below.

Next I did some local adjustments. I brightened the foreground (to balance the global contrast) and boosted contrast and clarity in the reflection part, to enhance detail.

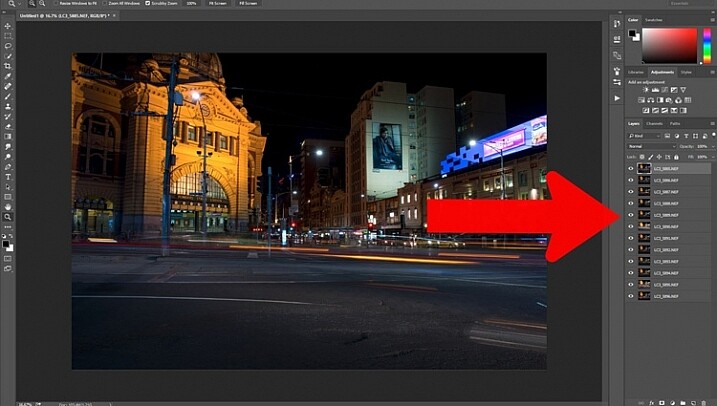
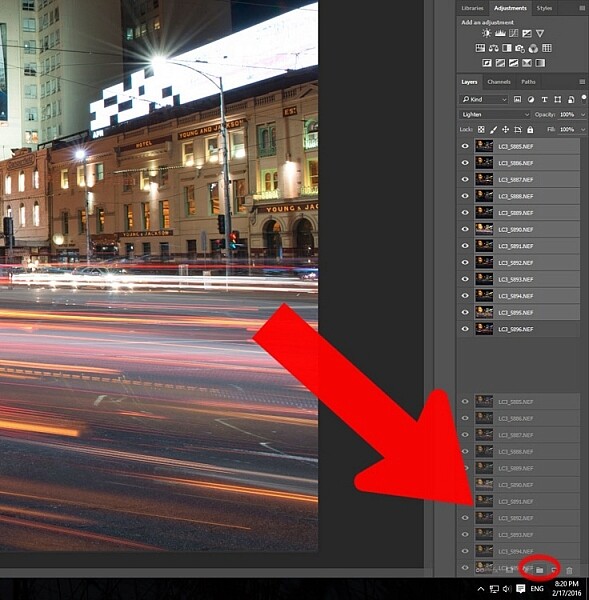
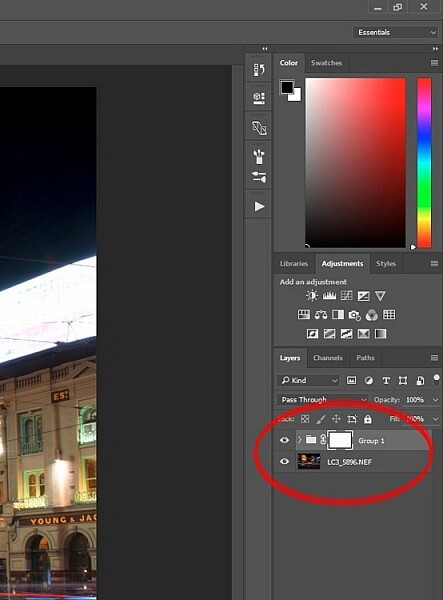
I was then ready to combine the images. This wasn’t such a hard task, as the different parts were very distinct. I placed the three images as layers in Photoshop and aligned them (Edit->Auto Align layers). The top layer was the sky layer, and I had to delete the mountain from it in order to get the cleaner version of it from the mid layer. I selected the part I wanted to delete, refined the selection (Select->Refine Edge) and deleted it, exposing the layer below. Once done, I merged the two top layers.

I was left with a top layer with a blurry foreground, and a bottom layer which I had to expose to get the sharp foreground rocks. I manually deleted the foreground, following the contour of the rocks to avoid exposing the blurry reflection in the bottom layer.

Once finished, I merged the layers and was left with a flattened image.

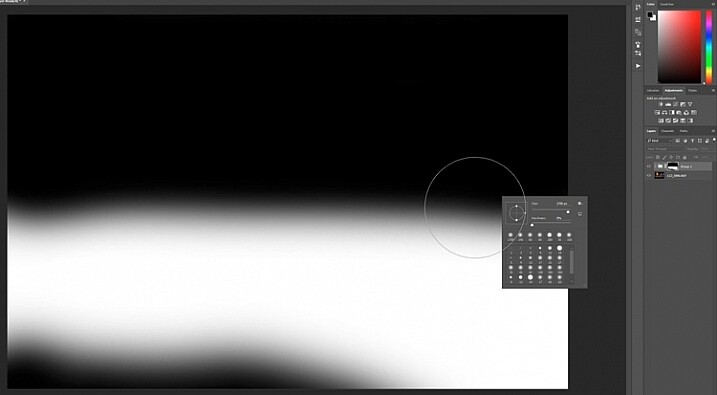
My next goal was to increase local contrast and enhance detail in the image, which has a lot of flat parts. Initially, I used luminosity selections to enhance contrast without losing detail in the highlights or shadows. I selected the midtones and used a levels adjustment layer to boost contrast.

At this point I was pretty happy with all but the higher-left part of the image. It felt too bright compared to the foreground and the right side, so I needed to work on that separately. I selected the bright parts and refined the selection once again. I then used a levels adjustment layer to darken it, while keeping it brighter than the other parts of the image, which made sense as it was directly lit.

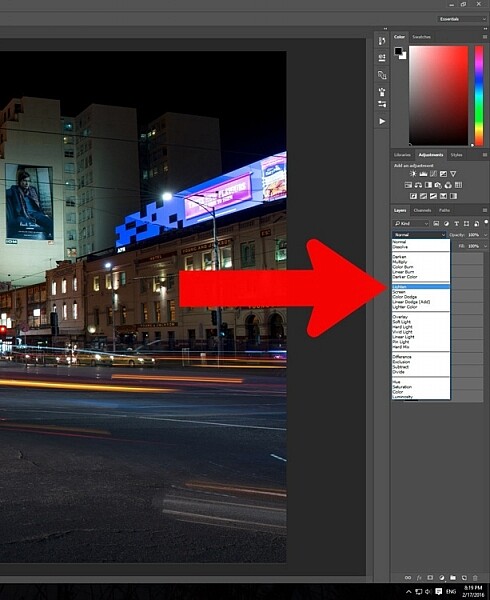
The last task was to take care of unwanted color, caused by high ISO and shadow recovery. As you might notice, the sky is spotted with purple blotches, and the foreground seems too green. Both these color problems were dealt with in the same way: a color blend layer. The process is as follows: you duplicate the image layer, select blend mode ‘color’, and then whatever the pixel color on the top layer, it passes to the bottom layer as well. To cancel the purple in the sky, I had to select the sky without selecting the stars. I did that by selecting the whole image, and then subtracting a very light luminosity selection, until I had a selection which almost didn’t contain stars. I then used the pipette tool to sample the sky’s blue color and gently painted it in.

The same was done with the foreground rocks. I sampled the foreground color I wanted and painted a color layer, until the rocks were grey, as they were in reality.

All that was left was to convert to the sRGB color space, perform size reduction and sharpening and I was finally done.


Erez Marom is a professional nature photographer, photography guide and traveler based in Israel. You can follow Erez’s work on Instagram, Facebook and 500px, and subscribe to his mailing list for updates.

If you’d like to experience and shoot some of the most fascinating landscapes on earth with Erez as your guide, you’re welcome to take a look at his unique photography workshops around the world:

Land of Ice – Southern Iceland
Winter Paradise – Northern Iceland
Northern Spirits – The Lofoten Islands
Giants of the Andes and Fitz Roy Annex – Patagonia
Tales of Arctic Nights, Part I and Part II – Greenland
Earth, Wind and Fire – Ethiopia

Selected articles by Erez Marom:

  • Behind the Shot: Dark Matter
  • Mountain Magic: Shooting in the Lofoten Islands
  • Behind the Shot: Nautilus
  • Behind the Shot: Lost in Space
  • Behind the Shot: Spot the Shark
  • Quick Look: The Art of the Unforeground
  • Behind the Shot: Watery Grave
  • Whatever it Doesn’t Take
  • Winds of Change: Shooting changing landscapes

Articles: Digital Photography Review (dpreview.com)

 
Comments Off on Behind the Shot: Prince of the Night

Posted in Uncategorized


Night House: Artist Cloaks Suburban Home Facade in Starry Skies

02 Dec

[ By WebUrbanist in Art & Installation & Sound. ]

night house suburban intervention

House painting is such time-consuming and meticulous work just to get a single color on a facade; perhaps next time you could clad your home in printed image of the night sky instead.

night house looking up

night house in making

For the Night House, Chicago artist Kate McQuillen covered a suburban house with a contiguous skyscape of nighttime space images digitally printed on weatherproof styrene panels.

night house poster project

The project was funded by sales of a screenprinted poster and created as part of the Terrain Biennial, an Oak Park-based international exhibition of yard, balcony and porch interventions.

night house glowing stars

night house screenprinted wall

Like some kind of suburban camouflage, the covered sections of the home start to disappear against the backdrop of the sky at the right times of early evening and morning. Read also: The Night House, a poem by Billy Collins.

Share on Facebook


[ By WebUrbanist in Art & Installation & Sound. ]

[ WebUrbanist | Archives | Galleries | Privacy | TOS ]


WebUrbanist

 
Comments Off on Night House: Artist Cloaks Suburban Home Facade in Starry Skies

Posted in Creativity