RSS
 

Posts Tagged ‘Night’

The Mystery of Night Photography – 35 Images of the Night

24 Jan

By Billy Wilson

One of my favorite classes that I teach is on night photography. I find that many beginners haven’t yet ventured out into the dark of night and I love introducing them to the wonders of night photography, and showing them the possibilities. Things like light painting, orb making, fire spinning, zooming exposures and star trails are some of the exciting things possible at night.

Let’s take a look at a few night photography images to get fired up!

By Dustin Diaz

By H. Raab

By DomiKetu

By earsaregood

By Alexander Kesselaar

By Lotus Carroll

By Jeff P

By David Kingham

By Kevin Cole

By Logan Brumm

By Kris Williams

By Chris Luckhardt

By Toby Keller

By Bala Sivakumar

By Joe Penniston

By Howard Ignatius

By Howard Ignatius

By Lotus Carroll

By William Cho

By ben matthews :::

By Andrea Costa

By Joe Penniston

By Adrien Sifre

By Simon & His Camera

By Carl Jones

By Cedric Lange

By Riccardo Francesconi

By photophilde

By Viewminder

By Duane Schoon

By Justin Brown

By Luz Adriana Villa

By William Cho

By john curley

Learn about how to do night photography here:

  • Moon Photography: 6 Tips for Better Moon Photos
  • Painting with Light in the Landscape
  • The Night Sky In Landscape Photography

The post The Mystery of Night Photography – 35 Images of the Night by Darlene Hildebrandt appeared first on Digital Photography School.


Digital Photography School

 
Comments Off on The Mystery of Night Photography – 35 Images of the Night

Posted in Photography


In the Dark: 10 Tips for Street Night Photography

21 Jan
1/80th at F2.8, ISO 1600.

1/80th at f/2.8, ISO 1600

Much is spoken about photographing during the twilight hour, but what about after that?

Night is my favorite time for street photography. Cityscapes are lit with a myriad of interesting and colorful light sources, such as lampposts, neon signs, store windows, car lights, and bare bulbs. People dress in their favorite outfits to go out. Bland scenes by day can suddenly turn ominous and fascinating at night.

Here are 10 tips for night photography to get you thinking about starting your next street photography session at twilight, rather than ending it.

1. Ideal camera settings for sharpness at night

To freeze motion during the day, I prefer to use a shutter speed of 1/320th, with 1/160th as my lower threshold.

At night, this changes. In the brightest areas, you will be able to photograph at 1/250th, but most of the time it will be best to use a shutter speed somewhere between 1/160th and 1/60th. You need to have: steady hands; a wide-angle focal length; and to stop your own motion completely to be able to photograph handheld at speeds around 1/60th, but with some practice it can be done.

1/125th at F2.5, ISO 6400.

1/125th at f/2.5, ISO 6400

A wide-angle lens is necessary for this type of photography because the longer the focal length, the faster the shutter speed needed to keep an image sharp. With a 28mm or 35mm lens (up to 50mm) it becomes much easier to handhold the camera at slower shutter speeds.

It will also help to use a fast, prime lens, such as a 35mm f/2. It is possible to shoot at f/4 in brighter areas, but being able to shoot at f/2.8, f/2, or even 1.8 will greatly expand your opportunities.

Finally, you will need to raise your ISO significantly. With modern digital cameras you can photograph anywhere from ISO 1600 to 6400 with decent or good quality. It’s just not possible to photograph handheld at night otherwise. I prefer to shoot at ISO 3200 and sometimes at ISO 6400 if needed.

To learn more about photographing with a high ISO, you can read about it here: Reasons to Shoot High ISO Images.

2. Seek out the light sources first

1/60th at F2.8, ISO 3200.

You should always pay attention to the main light sources in a scene, no matter where or when you are photographing, but at night this becomes even more important. Start by finding a beautiful light source, or an area with good lighting, and wait around for something to happen.

Focus on how these light sources hit your subjects. If you are leaning against a shop with a lit sign behind you, like the man in the photograph above, then as subjects pass you they will be lit with a strong light that has a gorgeous color to it. If your lens aperture doesn’t go wider than f/4, this is a fantastic way to get around that limitation.

On the other hand, if you stand in the street and aim the camera at the light source, as I did in the above photo, then the light will be less pronounced on the subjects, however, you will get the beautiful sign in the scene.  Notice the difference between the light on the left and right side of the man’s face in the photo.

3. Photograph nightlife

1/125th at F2, ISO 6400.

1/125th at f/2, ISO 6400

Some of the most interesting night street photographs occur where the most people are, and that is often where the nightlife is. A fantastic project to look at for inspiration is Maciej Dakowicz’s Cardiff After Dark.

4. Alternate between getting close and stepping back

I’m a proponent of the Robert Capa advice that, “if your photos aren’t good enough, you’re not close enough.” However, at night I often alter this strategy.

I try to get close to many of my subjects, but I will also try to create scenes where the subjects are small aspects of the overall scene. At night, backgrounds can be much more beautiful than during the day, so it often works to have people become the secondary element to the scene, rather than the primary focus.

The technical advantage to this is that you do not need to use as fast a shutter speed to capture the motion of subjects when you are further away. You can freeze a moving subject at 1/60th of a second from further away, whereas you will need to use at least 1/125th when close.

5. Tripod and crowd blur

1/8th at F4, ISO 800 (Tripod).

1/8th at f/4, ISO 800 (with tripod)

For street photography, it’s usually best to go handheld since you never know what interesting thing is going to happen, and where it’s going to happen. However, one of the times to use a tripod is when you want to capture a busy scene, with lots of people and motion.

Experiment with slower shutter speeds, such as 1/8th of a second and take a lot of images.  It took me a long time to capture the image above because I wanted the people spread out evenly throughout the entire scene and I also wanted something interesting within the foreground, which is the pose of the woman in the street and the man looking at her. It took some time, and a lot of captures for this to happen.

6. Use a flash

Whether you want to try flash on the street is up to you, but keep in mind that it can easily lead to some confrontations.  I prefer to work with the constraints of the natural light on the street and I also get uncomfortable flashing strangers in the face in dark settings, but many prefer to photograph this way. It creates a fantastic look when done well.

Using a flash means that you are freed from a lot of the constraints of photographing at night. You can use a faster shutter speed and include more depth of field in the photo and less grain (noise).

You can either have the flash do all of the work lighting the scene, where the foreground area within reach of the flash is lit and everything else is dark, or you can set the camera to expose for the scene, similar to what you would do without the flash, and then use the flash to add some fill light to your main subjects in the foreground.

7. Noise and the dreaded underexposed image

1/250th at F2, ISO 3200.

1/250th at f/2, ISO 3200

Always expose correctly when photographing with a high ISO.

That being said, even with the best settings, some of your images will be taken in areas that are too dark to be exposed correctly. It’s impossible to photograph this way and expose every image perfectly within the camera. For the occasional shots with excellent content that you want to save, you will have no choice but to raise the exposure when editing.

For these photos, I will first ignore the noise and get the exposure and look correct in Lightroom. After I do this, if I’ve had to raise the exposure setting a significant amount, the grain will look terrible. Luckily, there are some keys to saving an image like this as long as you are photographing in RAW.

What I do is to first remove the grain and then I add it back. I want the image to look grainy, but I want the grain to look pleasing.  There are many noise reduction programs, such as PhotoNinja, Topaz DeNoise, and DxO. I like Lightroom’s built in Noise Reduction. If the noise is still bad after noise reduction I will sometimes bring it into Photoshop and add a very slight Gaussian blur.

Then I will use Lightroom’s grain settings to add grain back into the photo. This grain looks much more pleasing to the eye than brightened, extreme digital noise and it can further hide some of the technical deficiencies in underexposed images. The result will not be a perfectly sharp image, but it will still be pleasing and beautiful.

8. Blur and imperfection

On this note, aim to get your photos as sharp as possible when you want sharpness, but know that a photo can still look fantastic even if it’s not tack sharp.

You don’t need to freeze motion perfectly when photographing at night for the image to still look great. I hold my day images to a higher standard than my night images when it comes to sharpness.  They need to be interesting and look good and that’s what counts.

Also, at shutter speeds around 1/60th to 1/30th, you can experiment handheld with slight blur, where your subjects are somewhat sharp but have a little motion to them. It’s a great way to add an energetic feeling of movement into an image.

9. Night images should be dark

1/250th at F2, ISO 3200.

1/250th at f/2, ISO 3200

This is an overly general statement, so feel free to disagree, but I want to make a point here.

I believe that night shots should look like they were taken at night.  They should be dark, with deep shadows and areas that are hard to see and make out.  When you look at the histogram of a night image it should be further towards the dark end (left) than a day image.

When you expose a night shot, especially on automatic settings, the camera will often misread the scene and overexpose the image.  It will be bright and you will be able to see everything as you would during the day, but it will not feel like a realistic night scene.  In these cases, you will want to lower the exposure compensation on your camera slightly (-).

There are many situations where bright night images are a good thing, but don’t be afraid to make your night images dark and realistic.

10. Be careful

Depending on where you live, going out at night with a camera is not always the safest idea. Travel light with equipment and be careful about where you go. Use your best judgment on who to photograph and think about bringing a friend along. You don’t want to suddenly find yourself in a bad situation.

Do you have any addition tips you’d like to add? Please do so in the comments below.

For more reading on night photography in general check out these:

  • Tips for Photographing Star Trails
  • Nightscapes: Photographing the City at Night
  • How it was Done – Zooming the Exposure
  • Painting with Light in the Landscape
  • 5 Tips for Creating fun Campfire Photos

The post In the Dark: 10 Tips for Street Night Photography by James Maher appeared first on Digital Photography School.


Digital Photography School

 
Comments Off on In the Dark: 10 Tips for Street Night Photography

Posted in Photography


How to Shoot Sports at Night and in Other Challenging Situations Like a Pro

21 Dec

Sports photography is often shot either one of two ways – a 1/1000th shot freezing everything in frame and capturing a single, frenetic moment during a race, or at 1/60th, panning with the subject and creating some motion blur to emphasize the speed of the subject. No matter which method, they’re always taken during the day. Daylight allows photographers to Continue Reading

The post How to Shoot Sports at Night and in Other Challenging Situations Like a Pro appeared first on Photodoto.


Photodoto

 
Comments Off on How to Shoot Sports at Night and in Other Challenging Situations Like a Pro

Posted in Photography


Night Graffiti: Shake-Powered LED Spray Paint Can Sleeve

22 Nov

[ By WebUrbanist in Design & Products & Packaging. ]

led spray can light

The nature of graffiti tends to result in nocturnal excursions, but painting completely in the dark can be a be problem and sometimes you just need a little bit of light.

led graffiti can sketches

led can sleeve model

LASH is a light attachment for spray cans designed by Subinay Malhotra of New Delhi, India to provide low-level illumination on demand to artists on the street.

led spray can design

The device slots onto the can and charges via a motion familiar to anyone who has sprayed paint, illicitly or otherwise: the shaking action one has to repeat to keep on painting.

led spray paint functions

The LEDs are intentionally dim and easy to turn both on and off at the push of a button, all so artists can see what they are doing on an as-needed basis but blend back into the shadows with a simple click.

Share on Facebook


[ By WebUrbanist in Design & Products & Packaging. ]

[ WebUrbanist | Archives | Galleries | Privacy | TOS ]


WebUrbanist

 
Comments Off on Night Graffiti: Shake-Powered LED Spray Paint Can Sleeve

Posted in Creativity


Nightscapes: Photographing the City at Night

18 Nov

By Joseph Eckert

Eckert_NightScape_1.jpg

The idea of taking photographs at night can be counterintuitive to the novice photographer. After all, photography is an art, a craft, a technology that is wholly built on light. Film or digital, it doesn’t matter: we need light to make a photograph—it is as simple as that.

Night, of course, by very definition lacks the pervasive light of day, and therefore doesn’t seem like a good time for photography. In the broadest sense, this intuitive understanding of light and its importance to photography is absolutely correct. Night does represent a more challenging time to take pictures, because we lack all those wonderful photons barreling down from the sun and reflecting off everything interesting and into our waiting lenses.

However, note that I said “challenging” but not “impossible.” Indeed, nighttime photography is not only possible; it is wonderfully ripe for creative expression and can help you create genuinely unique looks in your work.

The Night in General

Eckert_NightScape_2.jpg

Take a moment, tonight, or whenever you have a chance, and go outside into the darkness long after the sun has gone down. Really open your eyes and observe, noting all the differences, all the unique things that set night apart from day. It is as simple as the lack of sunlight, but infinitely more complex than that breezy statement would suggest.

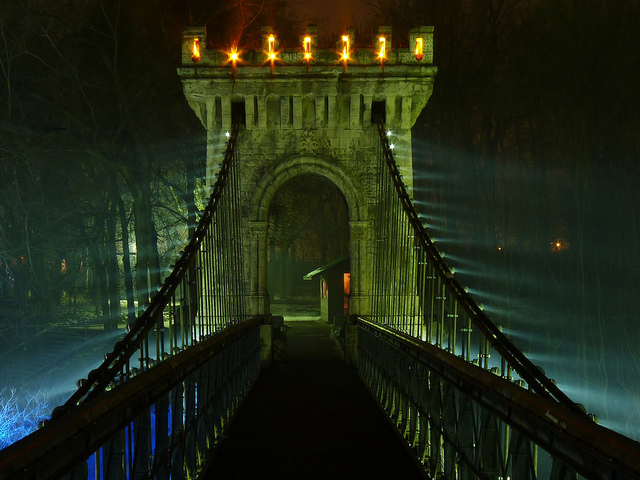
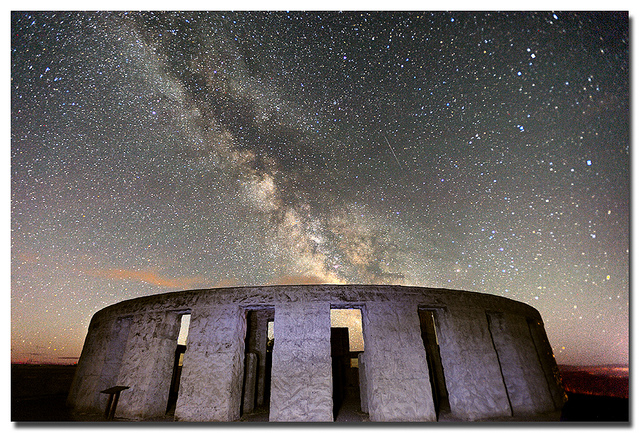
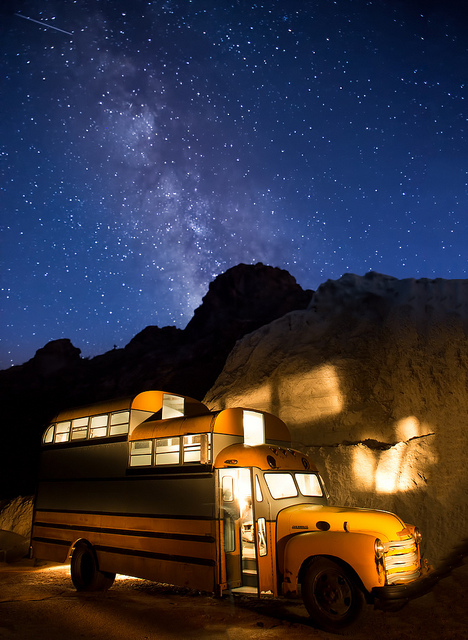
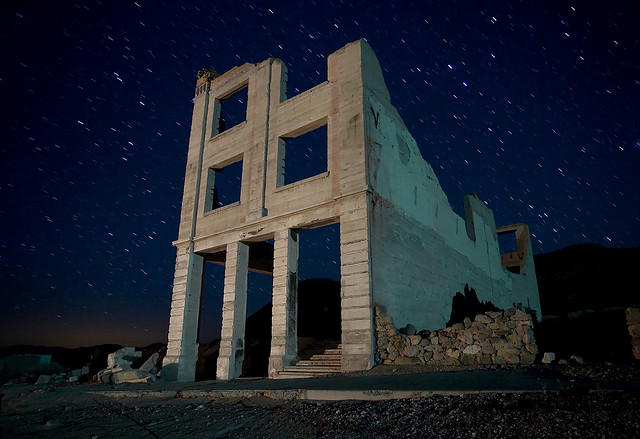
Pay attention to the way the shadows have deepened and pooled, how colors are muted or rendered differently by the artificial light of streetlamps or the exposed bulb on your backyard porch. Notice how things feel, how significant just changing the time of day can be. That old oak tree that seems so friendly and comforting in the day can turn into a gnarled, malevolent specter at night. Or a car that during the day is simple and boring might become a gleaming chariot in the darkness. The possibilities are endless.
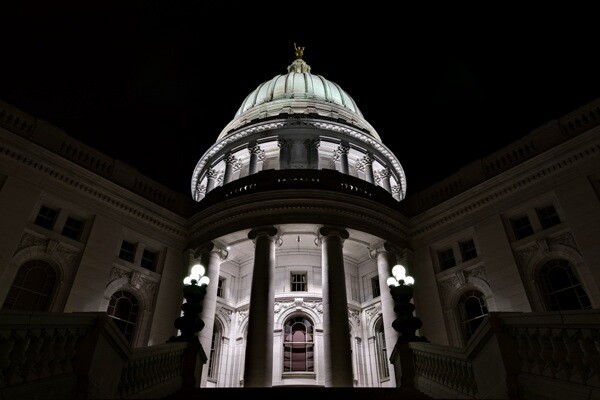
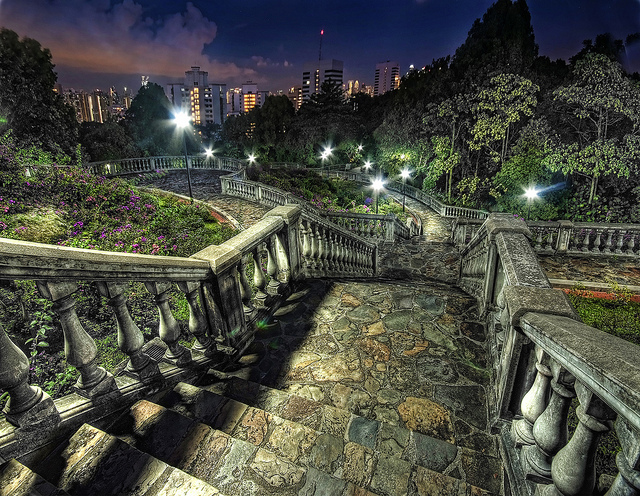
The City at Night

Eckert_NightScape_3.jpg

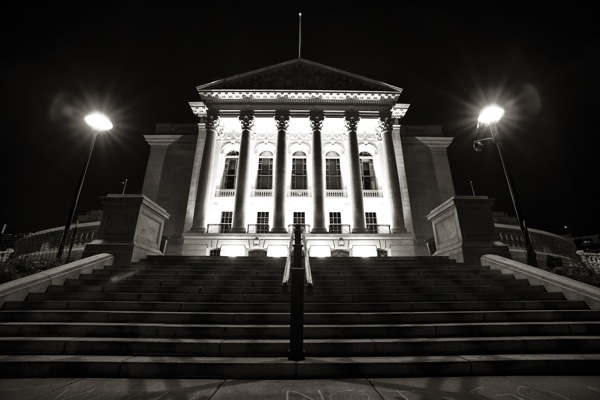
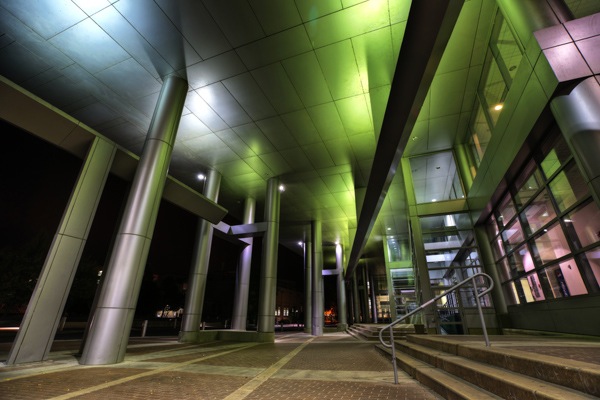
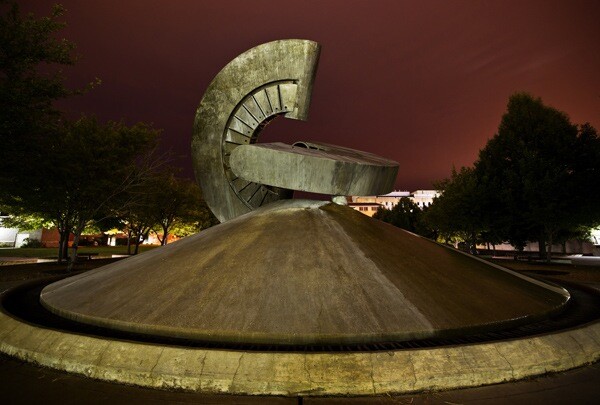
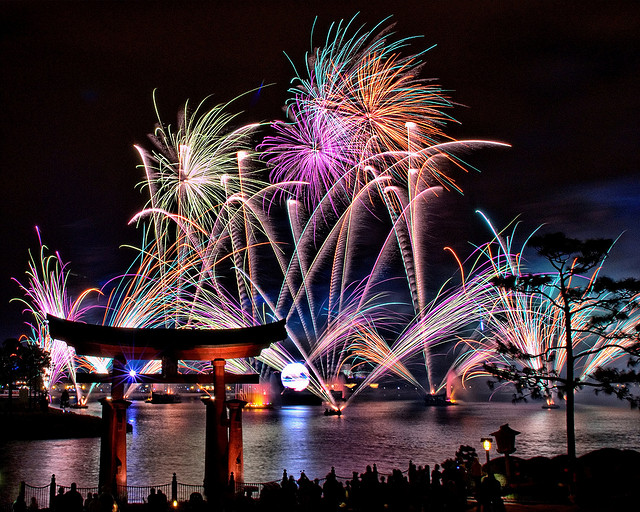
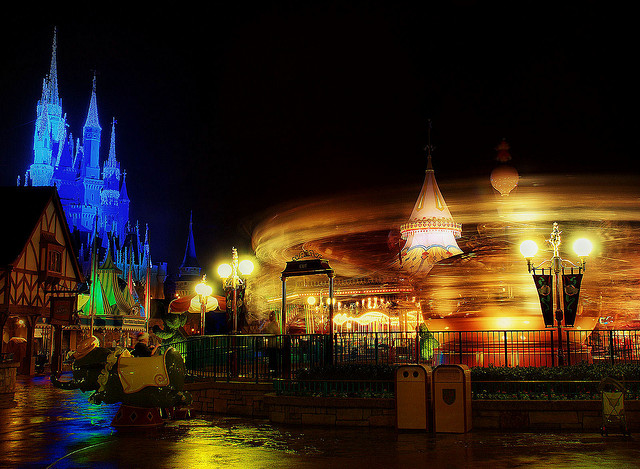
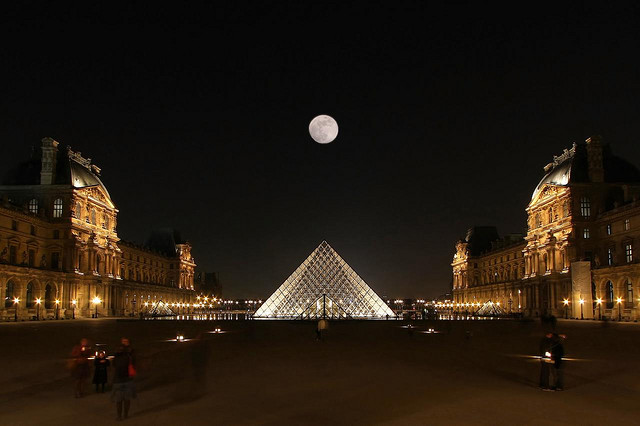
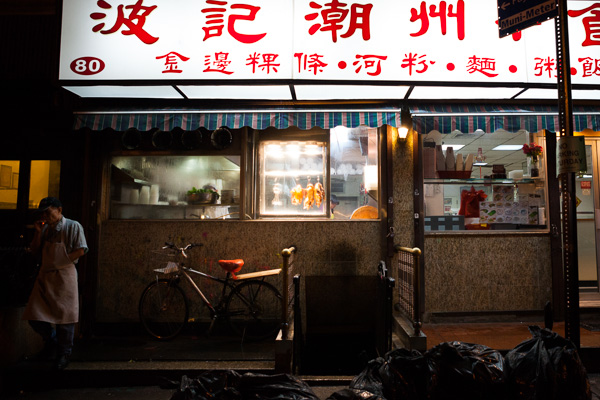
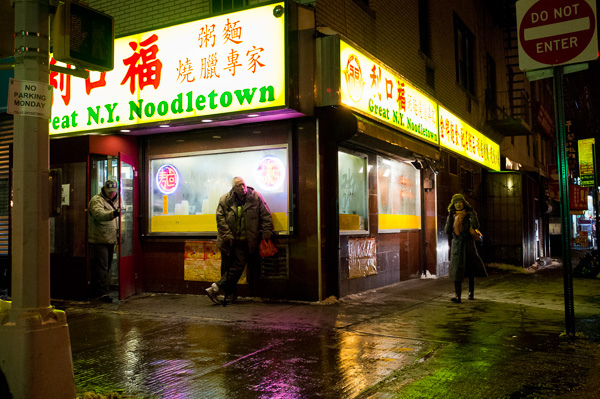
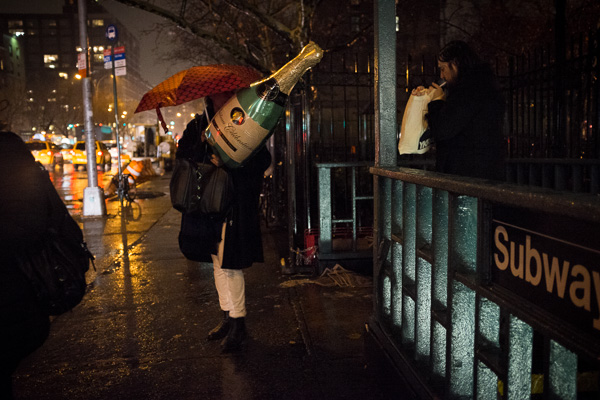
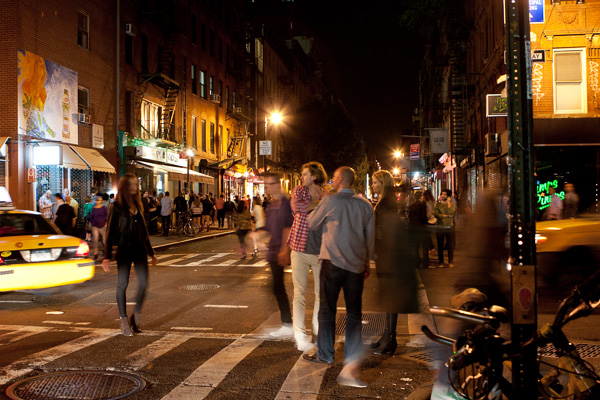
Cities are wonderful engines of creative possibility for the nighttime photographer. We lose the sunlight, but we gain thousands (or millions) of individual points of artificial light of every different color and tonal quality. We can (literally and figuratively) view our city in an entirely new light. The old and staid can become fascinating again as the changes in lighting shift the shadows and alter the textures and wring out, or completely change, the colors.

And all these bright points of artificial light give our cameras something to gather and turn into a photograph.

Great. So…What Do I Do?

Eckert_NightScape_4.jpg

I’m going to try to distill my experiences from my nighttime cityscape photography outings into a series of recommendations, aimed at giving you the best possible chance to get that shot, the one you really want, full of color and deep shadows and crazy lighting that showcases your city in a whole new way.

Bring the Right Gear

I’m not going to categorically deny that you can take great nightscapes with a compact digital camera. I will say that using a point and shoot is going to make getting that fantastic image of your dreams a lot harder.

I recommend the following:

• Tripod, sturdy but lightweight enough for you to carry around easily
• DSLR
• Remote shutter release
• Relatively fast wide angle lens (the wide angle part is optional, but what I recommend to get the most dramatic shots of the architecture and streets of your city)
• Lens hood (to reduce lens flare from outside-the-frame light sources)

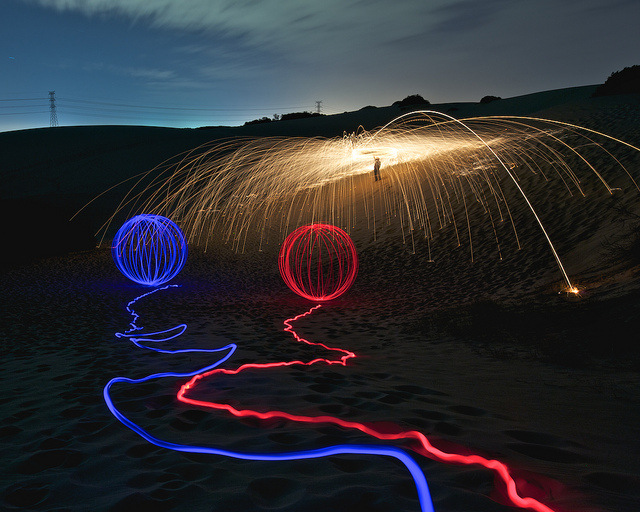
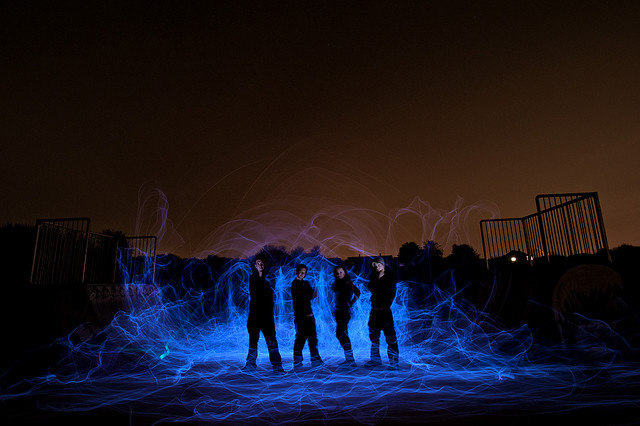
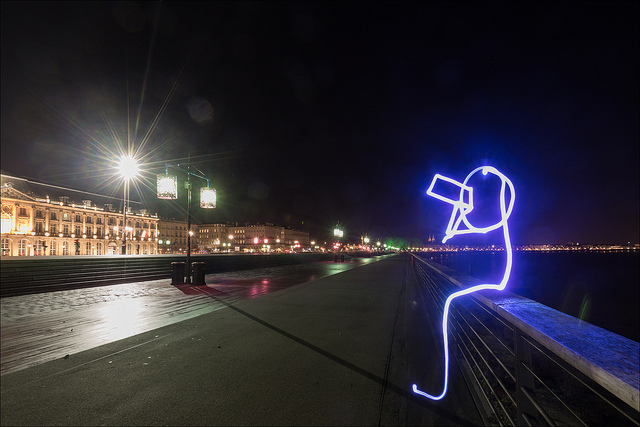
Note that I didn’t say “flashlight.” This article assumes you are in the city, which, barring unforeseen power outages, should have light enough for you to see by and make your way around. That may vary by city, however, so bring a flashlight if you feel you’ll need one, or if you plan on doing “light painting” with it.

Know the Gear You Brought

Things will be dark. It’s nighttime. So make sure you know how to operate your DSLR in minimum light and with little fuss. If your camera has the ability, make use of custom modes to have your settings in place and ready to go ahead of time. Also be able to fit your remote shutter cable onto your camera, and your camera onto your tripod, in the dark (and both of those back off again).

Going further, try to get to know your lens(es) and your camera with regard to how they behave in low light. Some DSLRs are better at autofocusing in dim light than others; you may need to manually focus for best results if the AF ends up endlessly searching (alternatively, point the camera the moon or some other distant light, let AF put the focus at infinity, recompose and shoot). DSLRs will also vary a great deal on how well they handle high ISO values and/or very long exposures (in terms of the level of noise in the resultant image). If you are looking to capture fast action in freeze-frame in a nighttime shot, you will inevitably need a high ISO level and probably a very wide aperture lens. Remember, a tripod can hold your camera solid and in place, but it has no effect on the movement of the subject matter.

This brings us to:

Know What You Want

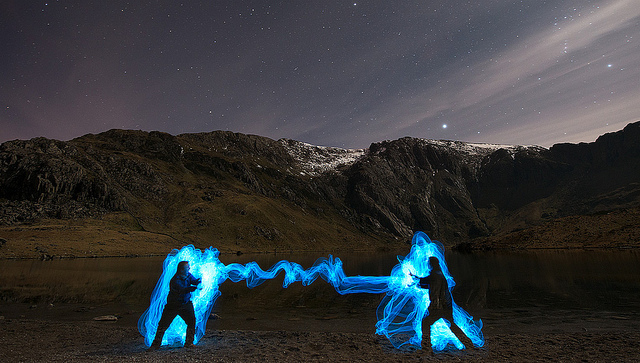
Are you looking for a freeze-frame in the darkness? This is going to be tough – a technologically demanding task for your camera. You’ll have to set the ISO quite high and have a “fast” lens (one with a wide aperture, as noted above, like f/2.8 or f/1.7, etc). The result will necessarily have a very shallow depth of focus with potentially a lot of noise – things to keep in mind as you are shooting. You will also need a high ISO and fast aperture if you are trying to shoot handheld (without a tripod), something that is very possible, especially with newer, less noisy digital cameras, but be prepared to have do noise reduction in post!

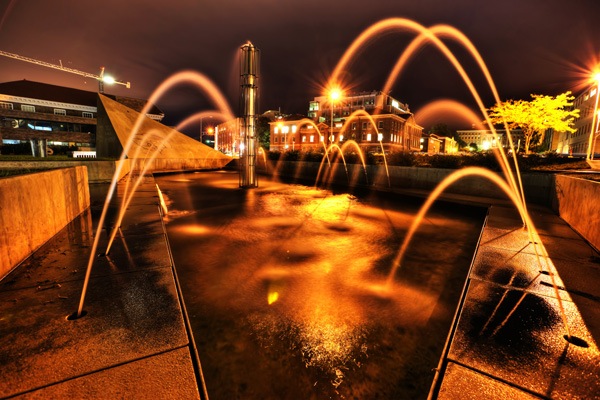
If, instead, as is more commonly done, you want to create light trails from passing cars or use long exposures to really capture the fantastically different nighttime lighting, you can get away with using much lower ISO (e.g. 100) and a smaller aperture (f/8, for example) to enlarge your depth of field and minimize the ISO-induced noise. This will mean, commensurately, a longer exposure time: the shutter will remain open longer, letting those light trails form and also filling the frame with more detail as more photons are gathered by the imaging sensor. Bear in mind, however, that most DSLRs have an automatic shutter time cutoff of 30 seconds, so if you need longer to get a proper exposure you’ll need to know how to use the Bulb mode on your camera (where the shutter speed is determined by how long you hold down the shutter release button). In either case, you will need a tripod, because the exposure time will be much too long to keep still when hand-holding.

Also, keep in mind a fact of all digital sensors (so far): the longer the shutter is open, the more noise creeps up, regardless of ISO setting. To combat this you can set your camera to apply in-camera noise reduction. Many DSLRs do this automatically on longer exposures, and usually the time it takes to apply the NR is equivalent to however long the shutter was open. This is important to remember when you are out and about, because it means your camera is unusable for however long the NR is being applied.

Know Your City

Every city is different, in layout, points of interest, people and the overall character, and all of those elements (except the layout) change, sometimes drastically, when night falls.

You should be at least decently knowledgeable about the city you are attempting to shoot in before you make an excursion at night – or, at least, be with someone who does know. Big cities present nearly endless opportunities for architectural and artistic delights, delights that change and morph and become radically different when no longer lit by the sun, but by artificial lights. However, big cities can also be more dangerous, particularly at night, and especially for a photographer who is lugging around two to ten thousand dollars (or more) worth of equipment with them.

Therefore, for reasons of safety and for practicality, get to know your city before you tromp out with DSLRs hanging around your necks, tripods in hand and release shutter cables dangling. Go out in the day and get to know the streets and where the interesting buildings and parks and monuments and statues are; go out at night, without your camera, and see how all of those things look in the light of night.

Then, when you do take all your equipment out for the shoot, make sure to keep your eyes open. Be cognizant of your surroundings. Walk confidently, even assertively, so as not to be pegged as a tourist, mark or target for potential predators. Work in a group, or at least go with one other person who can watch your back, even if that other person is not a fellow photographer.

Or, do as I often do: go at times when most of the rest of the city is asleep. There are such times, even in those big cities that “never sleep.” When? I’ve found early—and I mean really early—Sunday mornings are the quietest possible times to tramp around the downtown. At 3:30 or 4:00 AM, after bar-close but well before sunrise (for most of the year), the night is just as dark and the light just as good—unless you are trying to shoot nightlife and people and cars, rather than architecture and light and shadow.

Shooting in the early morning also lets you capture a series that progresses from a pure black sky (or one with the moon and stars) to one of deepening purples and blues as the sun begins to rise, and finally gives you a chance to partake in the Magic Hour of sunrise itself. Yep, it means an early morning on a Sunday, but it’s the best time to go out if you want to encounter as few people as possible.

Know the Weather

Another important consideration in nightscape photography is the weather.

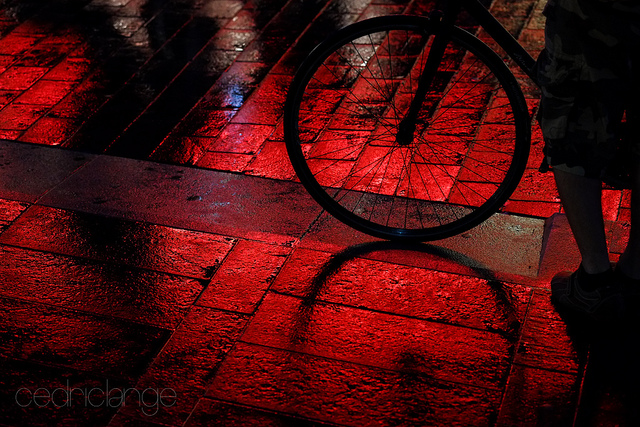
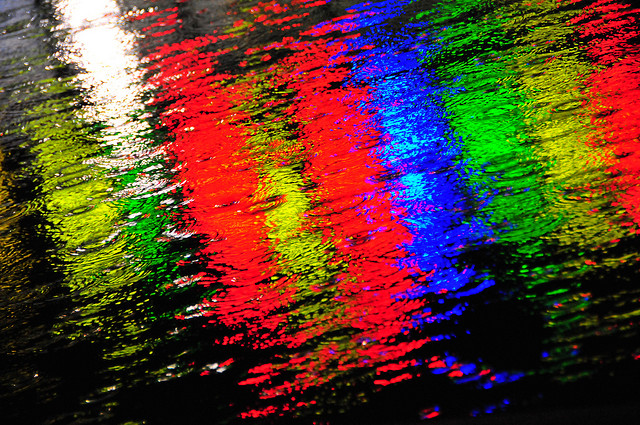
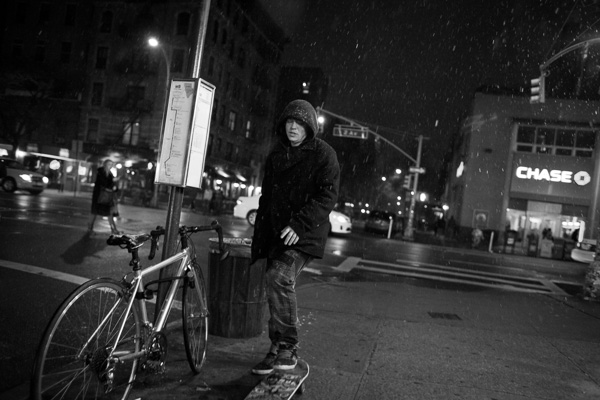
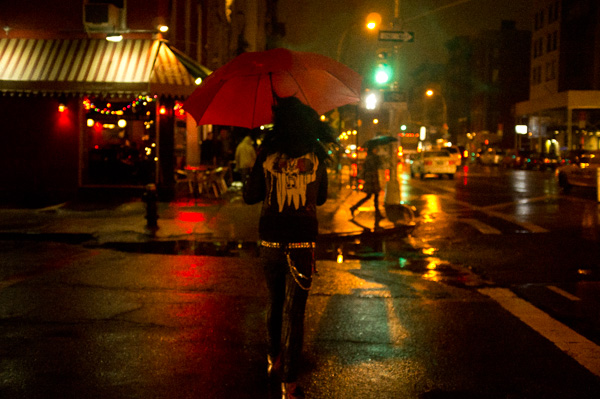
Cities at night can look absolutely amazing after a downpour has left the roads wet and gleaming with columns of reflected light. Snow can render a city almost post-apocalyptic at night, blanketing everything and colored by the lights of storefronts and parking lamps. But rain and snow, as they are coming down, are not great for cameras or lenses (or photographers, for that matter) if you aren’t probably prepared.

So be aware of what the skies are doing, and plan ahead. If it’s going to rain, bring waterproof clothing for you and protection for your camera. Watch the weather reports on the night you want to go out and see if you can time it so you hit the streets just after the rain has stopped, so you capture all the magical wetness without it fouling up your camera or lens. If it’s snowing, be prepared for the cold and, again, protect your gear.

Conclusion

Eckert_NightScape_5.jpg

Nighttime cityscape photography can be a fantastic avenue for creative expression, and a way to make your images pop with unique feeling and life. The light and the shadow behave differently without the sun overhead, and the world, as a result, changes in tone and mood and expression. Streets turn black and shiny and are broken by orange circles of light from streetlamps. Shadows pool in alleys and the corners of buildings, and are stretched into new, looming figures and shapes by the bright light from a gas station or convenience store.

As a photographer, out at night in the city, the most important thing to remember is to stay safe. After that, keep your eyes open and your imagination working, and go after those amazing low-light shots. Try new things, bend and break the rules, have fun, and let the magic flow.

You might be surprised just how much you like what you come home with.See more of Joseph Eckert’s work his website.

Post originally from: Digital Photography Tips.

Check out our more Photography Tips at Photography Tips for Beginners, Portrait Photography Tips and Wedding Photography Tips.

Nightscapes: Photographing the City at Night

The post Nightscapes: Photographing the City at Night by Guest Contributor appeared first on Digital Photography School.


Digital Photography School

 
Comments Off on Nightscapes: Photographing the City at Night

Posted in Photography


How To Photograph The Night Sky Part 2: The Stars

11 Nov

Well, I certainly hope you all enjoyed part 1 and have managed to take some stunning photographs of our Milky Way! Photographing stars offers the exact same concept as shooting the Milky Way, but with this, there are a lot of different principles that come into play. The Foreground Stars on their own are rather dull and don’t really make Continue Reading

The post How To Photograph The Night Sky Part 2: The Stars appeared first on Photodoto.


Photodoto

 
Comments Off on How To Photograph The Night Sky Part 2: The Stars

Posted in Photography


How to Photograph the Night Sky, Part 1: The Milky Way

06 Nov

Taking pictures of the heavens can be tricky. Not only do you need a fast camera, but you also need a clear night sky. This can be a tough situation to achieve, as not only are you up against the weather, but you also have light pollution and a number of other factors that can all contribute to making your Continue Reading

The post How to Photograph the Night Sky, Part 1: The Milky Way appeared first on Photodoto.


Photodoto

 
Comments Off on How to Photograph the Night Sky, Part 1: The Milky Way

Posted in Photography


Suburb-Terranean: 70s Bunker Home Simulates Day & Night

10 Sep

[ By WebUrbanist in Architecture & Houses & Residential. ]

underground bunker home

It is a dream home like any other of its era, with brick walls, sliding doors, stock windows and shingle roofs as well as a lawn, garden, trees and pool. The difference? It is set two stories underground in Las Vegas, Nevada, where the faux flora never wilts nor does it grow, and it is for sale.

underground home day night

If this real-life 1970s home seems like something out of a science-fiction movie, you may be remembering the film Blast from the Past, in which the protagonist spends decades underground in vintage fallout shelter styled after a mid-century suburban home and garden.

underground house kitchen pool

Listed at 1.7 million dollars, this foreclosed property looks conventional at street level, but hides a stunning set of secret spaces below, including two bedrooms, three bathrooms, a kitchen and every other space you would expect inside and outside of a single-family house on the surface.

Next Page:
Suburb Terranean Fake Day Night In 1970s Bunker Home

Share on Facebook


[ By WebUrbanist in Architecture & Houses & Residential. ]

[ WebUrbanist | Archives | Galleries | Privacy | TOS ]


WebUrbanist

 
Comments Off on Suburb-Terranean: 70s Bunker Home Simulates Day & Night

Posted in Creativity


How I Took This Award Winning Night Sky Group Photo

17 Jul

Last weekend one of my photos was selected as a category winner in the national night sky photography competition, the David Malin Awards. The category was “People and Sky”, and Darren asked if I could write a post describing how the photo was created.

creek-120812-012-X2

I assist friend and colleague Phil Hart with regular night sky photography workshops under the beautiful dark skies of country Victoria (Australia). Knowing my love of fisheye photography, Phil had an idea for a photo to help promote the course: A group photo under the stars by fisheye lens.

I immediately had a vision in my head of the photo and knew it would look cool, so I set myself to working out how to achieve the difficult task of composition and balancing light. Once night fell and we made sure the students were all confident with their new skills and happily taking photos of the night sky, I put my Sigma 8mm f4 circular fisheye on my full-frame Canon 5D MkIII. To achieve this effect you will need a circular fisheye lens and a full-frame camera, or a fisheye lens designed to give a circular image on a cropped sensor. A diagonal fisheye will not capture the whole hemispherical field of view needed to image the whole sky.

Testing the setup and lighting.

Testing the setup and lighting.

From experience shooting the night sky with this lens, I knew that I would be shooting at the widest aperture of f4 and the full 30 seconds shutter speed. Balancing noise and sufficient exposure I chose an ISO of 8000. These settings give me a good exposure of the night sky and particularly the milky way, which would feature in the shot. This is incredibly faint! My main problem was how to light the faces of the students to approximately the same brightness of the Milky Way.

At first I considered using a flash, but even at the lowest setting, even with significant diffusion, the exposure was too difficult to control. The other problem is that I’d need the light to be omnidirectional so that all of the people in the shot would be evenly lit. Ultimately the solution I came up with was to use my LED video light, dialed down to its lowest power setting and laid face down on the ground on a piece of white paper. Only a little bit of light leaked out from around the edges, but it was even and spread out in all directions. Due to the relatively warm white balance of the Milky Way I adjusted the light’s white balance to be warm to match.

A recreation (in my office) of the setup I used. The video light is pointing straight down into the paper.

A recreation (in my office) of the setup I used. The video light is pointing straight down into the paper.

I took a few test shots to make sure the exposure, focus, white balance and everything else was working just right, and when the galaxy had risen to it’s highest point and was nearly directly overhead we called everyone together. We formed a circle and put our arms over each others’ shoulders to ensure even spacing, and tried to keep where the camera would be in the centre. Linking arms also helped us all to stand as still as possible for the 30 seconds of the exposure. Once we were all ready, I set the camera to 10 second self timer mode and placed it on the ground pointing directly up.

There were a couple of confused comments as people tried to work out how it would look, and jokes about how we all must have looked to anybody watching us from the outside. But once we got a look on the back of the screen, everyone was convinced. This was a truly unique group photo.

Join me on Facebook to learn more and see new photos daily: http://facebook.com/neilcreekphoto.

Post originally from: Digital Photography Tips.

Check out our more Photography Tips at Photography Tips for Beginners, Portrait Photography Tips and Wedding Photography Tips.

How I Took This Award Winning Night Sky Group Photo


Digital Photography School

 
Comments Off on How I Took This Award Winning Night Sky Group Photo

Posted in Photography


Get 31% Off Neil Creek’s Night Photography Course

20 Jun

NewImage
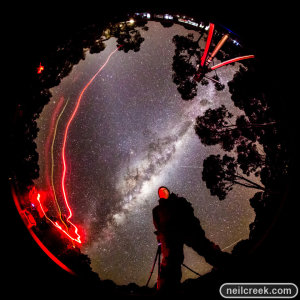
One of the most popular deals in last years ’12 Deals of Christmas’ promotion that we ran here on dPS was a discount on Neil Creek’s ‘Night Photography Unlocked’ video course.

This week I’m excited to say that we’ve brought the deal back and you can now pick up this fun course at 31% off the normal price over at our sister site – SnapnDeals.

Neil is the author behind our best selling Photo Nuts series of eBooks and is a great teacher.

His beginners course will help you open up a whole new world of photographic possibilities as you learn to shoot in low light.

You’ll learn:

  • The main problems you face when taking photos at night.
  • The camera settings you need to understand to take great night photos.
  • How different types of cameras perform at night.
  • Getting the most out of your camera.
  • Getting creative with night photography.
  • Processing photos taken at night.
  • This video course is for those who own all types of cameras and is delivered to you in 21 great tutorials with over 4 hour of teaching.

    Get more information and pick up your discounted enrolment in Night Photography Unlocked here today.

    Post originally from: Digital Photography Tips.

    Check out our more Photography Tips at Photography Tips for Beginners, Portrait Photography Tips and Wedding Photography Tips.

    Get 31% Off Neil Creek’s Night Photography Course


    Digital Photography School

     
    Comments Off on Get 31% Off Neil Creek’s Night Photography Course

    Posted in Photography