RSS
 

Posts Tagged ‘Motion’

4 Ways to Add a Sense of Motion to Your Urban Photography

27 Sep

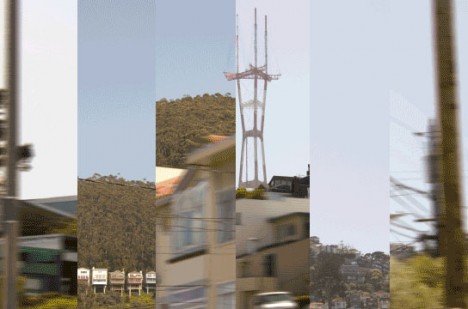
It is great to walk around a new city, or a new part of a familiar city, and just explore. You never know what will be on the next block or around the next corner. When you bring your camera along with you, you can often capture a few nice skyline photos, some interesting pictures of buildings, and perhaps some street photos of people going about their daily life.

CityMotion1 Panama

But you know what is often missing from these photos? A sense of movement, and that’s what cities are all about. Cities are not just collections of buildings. They are dynamic environments full of hustle and bustle. The trouble, of course, is that it is hard to capture this movement in a still image.

So I want to show you a few techniques for adding that sense of motion to your urban pictures – how to capture the city in motion

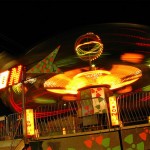
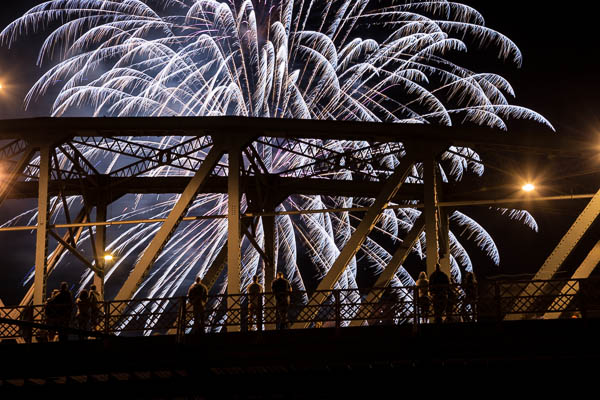
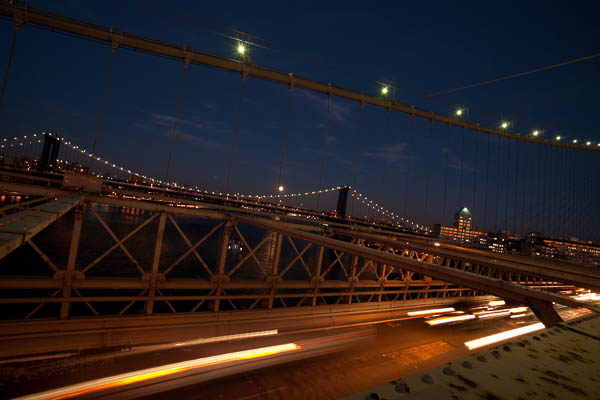
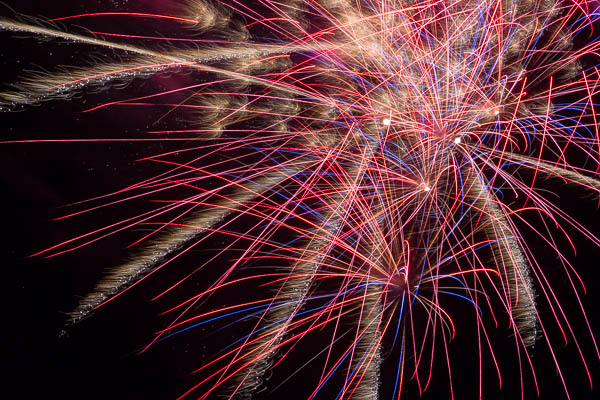
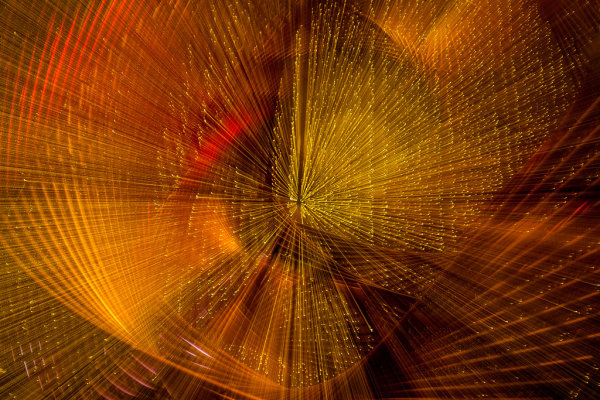
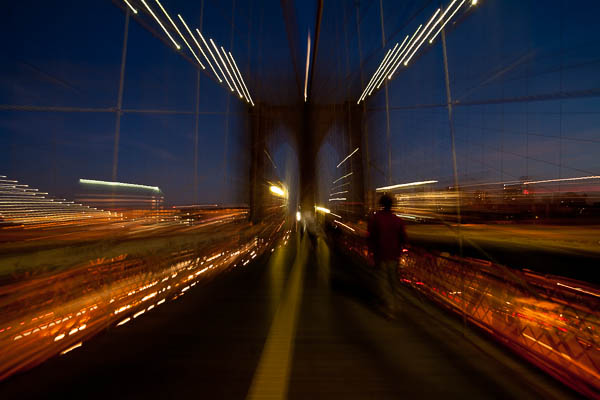
#1 – Add streaking headlights and taillights

A common way you can add movement to your urban photos is by including streaking headlights and taillights. But don’t stop with capturing only the streaking lights, without regard to capturing the city. Streaking lights can work really well as an accent to a photo of your city. In other words, the streetlights don’t necessarily need to dominate the image, but rather just add a sense of movement to the overall image.

CityMotion6 Whitehall

The key to capturing this effect is to set up your shot on a tripod with a long exposure and take shots as traffic moves past you.

CityMotion4 Westminster

There are no set exposure settings because the ambient light is always different. Start with something like a 20 second exposure at f/8 and adjust from there. Try triggering the shutter just before traffic enters your frame. You will probably need to take several of these pictures to make sure you’ve got it right.
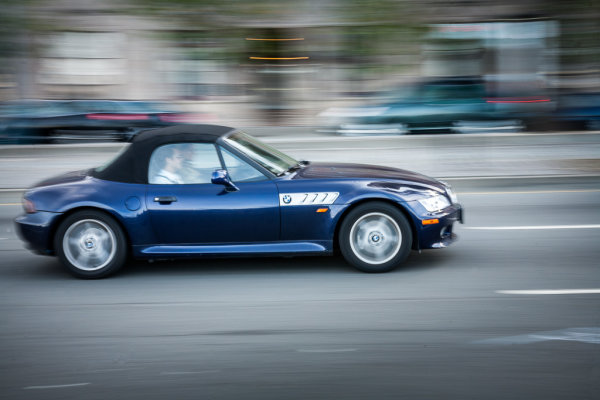
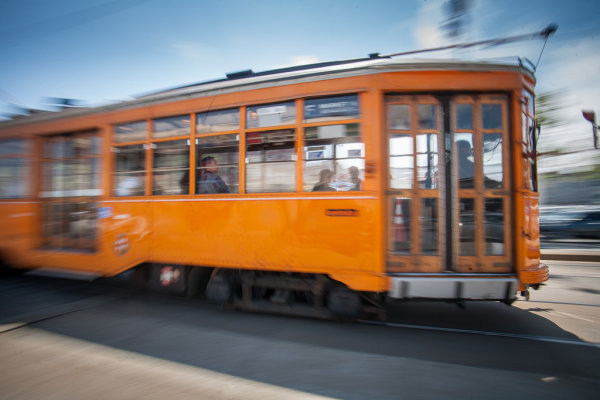
#2 – Panning

CityMotion3 NYCcab

Another great but often overlooked technique for capturing motion in the city is panning. Panning is where you follow a subject with your camera so that the subject is in focus and reasonably sharp, while the background is blurry and shows a sense of motion.

CityMotion11 ChicagoTrain

Panning is great because it doesn’t require a tripod and can’t be done at any time of day. What you do is follow a moving subject with your camera at a moderately slow shutter speed. The best shutter speed for this technique tends to be between a 1/30th and an 1/8 of a second. Since the camera is moving at the same rate as the subject, the subject should be reasonably sharp, while the background will be blurred.

You can use this technique on anything that is moving, whether it be a train, a car, or even a bicyclist or skateboarder. My favorites tend to be the iconic vehicles of the city.

When you get back to the computer, you can accentuate the effect a bit in Photoshop by sharpening your subject a little bit, while at the same time adding a slight blur to the background.

CityMotion5 Trafalgar

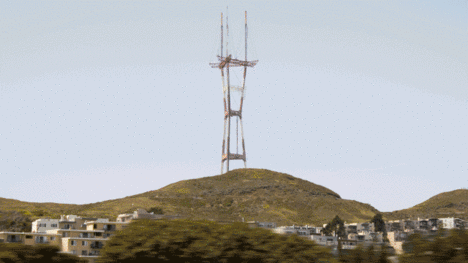
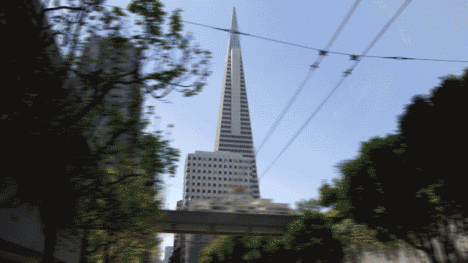
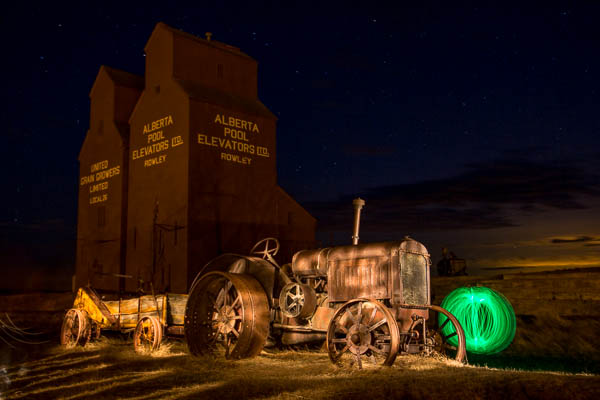
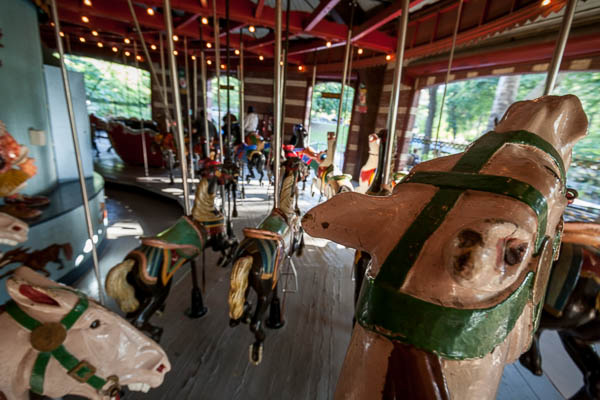
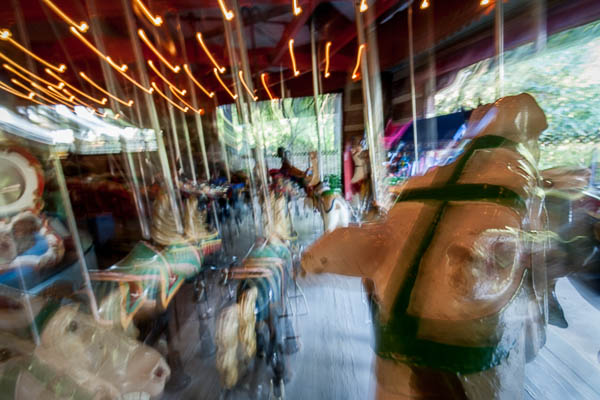
#3 – Capture movement of vehicles

When it comes to vehicles, don’t limit yourself to streaking taillights and headlights. It often works really well just to add a slight blur to vehicles in your frame to add a sense of movement. In fact, a lot of times this adds more of a sense of movement than just having lines streaking across the image.

CityMotion8 Ludgate

You will want to use a tripod for these types of shots. It is important that everything be sharp except the blurred vehicle. To capture the movement, a shutter speed of just a few seconds works really well. You will probably have to take several shots to get a good one.

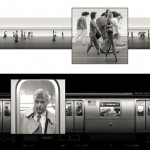
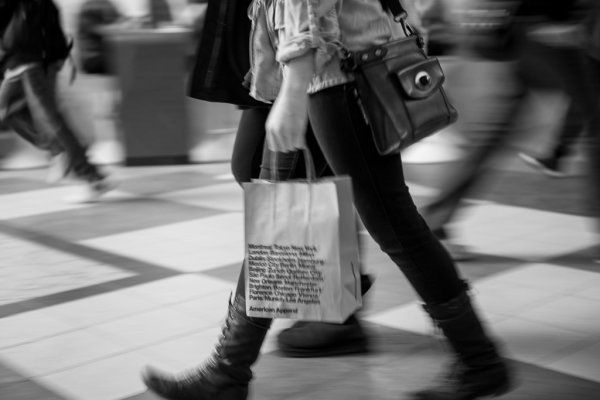
#4 – Capture the movement of people

CityMotion2 OxfordCircus

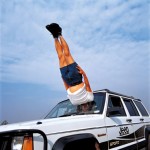
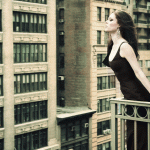
The final way to capture movement in an urban setting is by capturing people in motion. This is used much less than the other techniques, largely because it is harder. People don’t have lights that streak across the screen. In addition, you have to get closer and it is more personal. But when done well, the results can be dramatic.

CityMotion9 Tube

The best way to go about it is to set up shop where you know people will be walking past you. Train stations, subway stations, and other places where people rush in and out, work really well for this. If you can use a tripod to keep the background sharp, do so.
The shutter speed will need to be a bit slower than what you use to capture moving vehicles because people move so much slower. Typically a shutter speed of about 1/2 to 1/10th of a second works pretty well.

This is another one you can do any time of day, any day of the year. It is a good thing to work on when conditions are not right for other photography you want to do.

CityMotion7 NYClady

Conclusion

Including movement can add a missing element to your urban and street photography. It is also something that you can get out and do on any particular day or night. Plus it requires no special gear. If you have a camera and a tripod, you are good to go.

So head out and try some of these techniques, and if you have any questions about it just leave it in the comments below.

The post 4 Ways to Add a Sense of Motion to Your Urban Photography by Jim Hamel appeared first on Digital Photography School.


Digital Photography School

 
Comments Off on 4 Ways to Add a Sense of Motion to Your Urban Photography

Posted in Photography


Frozen in Motion: 24 Stunning High Speed Photographs

14 Aug

[ By Steph in Art & Photography & Video. ]

High Speed Reugels 1
Spectacular forms that come together and dissipate far too quickly for human eyes to perceive are captured permanently using high-speed photography techniques. The elusive and temporary shapes created when liquid is thrown into the air or pellets are shot at strawberries become momentarily sculptural.

Floating Sculptures by Floto + Warner
High Speed Floating Sculptures 1

High Speed Floating Sculptures 2

High Speed Floating Sculptures 3

Ephemeral sculptural forms that shift and change by the nanosecond are captured against stark landscapes in particular chaotic arrangements that will never be seen again. The final theatrical photographs in this series by Floto + Warner momentarily make elusive forms within colored liquid seem three-dimensional and static. Getting these dramatic images just right is no easy task; many attempts are made to toss the fluid into the air so that it looks just right against the hills and desert of northern Nevada.

Liquid Orchids: Paint Splash Flowers
High Speed Liquid Orchids 1

High Speed Liquid Orchids 2

High Speed Liquid Orchids 3

Colorfully streaked, blossom-like forms come into being just for a split second when artist Fabian Oefner drops a sphere directly into a tank filed with layers of acrylic paint in various shades. The explosion that results from the impact of the object in the tank, which often happens too quickly for our eye sot properly take it in, is permanently preserved via high-speed photography.

Exploding Food by Alan Sailer
High Speed Exploding Food 1

High Speed Exploding Food 2

High Speed Exploding Food 3

Avocados, popsicles, strawberries and chocolate bunnies are ripped apart in spectacular patterns and forms when photographed just at the instant of an impact from a pellet or marble. Photographer Alan Sailer uses a micro-second guided spark flash to get the images, and a PVC or copper cannon to launch the food-destroying objects.

Black Hole: A Visual Demonstration of Centripetal Force
High Speed Black Hole 1

High Speed Black Hole 2

High Speed Black Hole 3

High Speed Black Hole 4

Physics and art come together in another project by Swiss artist Fabian Oefner, appropriately titled ‘Black Hole’ for the visual effect that’s achieved. The images are created using a drill and a high-speed camera that can create flashes as brief as 1/400000 of a second; a sensor connected to the drill sends an impulse to the flashes to freeze the paint in motion.

Next Page – Click Below to Read More:
Frozen In Motion 24 Stunning High Speed Photographs

Share on Facebook


[ By Steph in Art & Photography & Video. ]

[ WebUrbanist | Archives | Galleries | Privacy | TOS ]


WebUrbanist

 
Comments Off on Frozen in Motion: 24 Stunning High Speed Photographs

Posted in Creativity


Using Slower Shutter Speeds to Show Motion in Your Images

15 Jul

Changing shutter speed not only changes the amount of light that enters the camera, it also changes the way your images look. By changing the shutter speed, you’re allowing the film or digital sensor to be exposed for a longer or shorter period of time. That affects how motion is portrayed in your image. A short (or ‘fast’) shutter speed will freeze motion, whereas a long (or ‘slow’) shutter speed will allow you to show motion.

Let’s take a look at a few examples using slower shutter speeds to show motion in your images:

Img 1 Cycling on the boardwalk Melbourne 600px

Slow speeds – camera stationary

The image above shows what happens when you use a slow shutter speed while holding the camera still. In this case the shutter speed was 1/40th of a second, which allowed me to hand-hold the camera while still showing some motion on the cyclist. The slower the shutter speed, the more movement in your subject.

The image below was made with a shutter speed of 1/15th of a second. That’s starting to get a little slow for hand-holding so I rested the camera on the top of a fence rail on the side of the road. The image shows a cyclist riding along the road, followed closely by a skateboarder. Both the cyclist and skateboarder are blurred quite a lot, but they’re still identifiable, while the rest of the image is still in focus. It gives a feeling of movement, without moving the camera.

Img 2 Skateboard and bicycle Melbourne 600px

Panning the camera to add motion

Moving the camera while making an exposure is another way to show movement in an image. Instead of keeping the camera still and using a long shutter speed – you move, or pan, the camera with your moving subject as you expose the image. That way the subject remains sharp, while the background becomes blurred.

This image of another cyclist riding along a boardwalk was also taken at 1/40th of a second, panning with the rider and following him from right to left as he passed by. The shutter speed was slow enough that the background is blurred, while the bicycle and rider are relatively sharp.

Img 3 Orange bicycle Melbourne 600px

Remember, the subject doesn’t have to be ‘tack sharp’ when you’re showing movement. Sometimes a little blur on the subject helps to enhance the feeling of movement in the image, as it does in this case. Notice the spokes of the bicycle’s wheels are blurry too, which also helps to show movement. Using a faster shutter speed while panning would have resulted in the background not being as out of focus and the wheels would have been frozen in time with the spokes clearly visible. In essence, the cyclist would have looked like he was stationary and balancing on the boardwalk, not moving as he actually was.

Moving water

Cyclists and other fast moving objects are not the only subjects for slow shutter speeds. What about shots including moving water. I think it’s fair to say we’ve all seen images of the sea or a river with water that looks buttery smooth. That smoothness is also achieved by using a slow shutter speed.

The following three images were all taken from the same location on the side of the Yarra River in Melbourne, Australia. The camera was mounted on a tripod for stability and the images were made at different exposure values. The first image was made with a shutter speed of 1/4 of a second, which is relatively fast for this type of photograph. The individual ripples in the water are clearly visible. You can see some movement, but not much.

Img 4 Melbourne skyline Melbourne 600px 2

The second image was made with a shutter speed of 2 seconds. The water is starting to get smoother due to the longer shutter speed. The individual ripples are starting to disappear.

Img 5 Melbourne skyline Melbourne 600px

The final image in this series was exposed for five seconds. The water has now become much smoother due to the movement while the shutter was open. Photography is an art form and there is no right or wrong way to photograph any subject, but for me, the third image with the smooth water is much more appealing than the first two versions.

Img 6 Melbourne skyline Melbourne 600px 3

Why not experiment with different shutter speeds next time you go out to make photographs. It’s a great way to add interest to an otherwise static and maybe boring subject! All it takes is a little imagination and patience and you can come away with some really interesting and different images – like this water drain for example, which was hand-held with a shutter speed of one second. The ghostly images passing over the drain make it a little more interesting than just the drain grate itself. The most important thing is to experiment – and have fun!

Img 7 Ghostly legs Melbourne 600px

The post Using Slower Shutter Speeds to Show Motion in Your Images by Ken Lyons appeared first on Digital Photography School.


Digital Photography School

 
Comments Off on Using Slower Shutter Speeds to Show Motion in Your Images

Posted in Photography


DIY Hyperlapse: Make Your Own Timelapse Motion Pictures

30 Apr

[ By WebUrbanist in Art & Photography & Video. ]

hyperlapsefinal

You may have seen this amazing animation and thought it took an impossible amount of work to create, but there are multiple sites tools, and do-it-yourself tutorials that greatly simplify the process. This particular piece, which has been circulating the web, is a GIF from the music video below (scroll a few minutes in to see various examples).

timelapsetaketwo

Popular enough now to warrant its own definition and description, here is a summary of the trending phenomena: “Hyper-lapse photography [is] a technique combining time-lapse and sweeping camera movements typically focused on a point-of-interest.” Other names for this include: Walklapse, Spacelapse, Stop-Motion Time-lapse, Motion Timelapse and Moving Timelapse.

time lapse hyper speed

As for those wishing to follow suit and create something similar: the Google Street View Hyperlapse creator is by far the easiest online generator for these kinds of panoramic captures – you simply set start and end points as well as a point of focus then click a button. Be warned: experimentation with this tool may be habit-forming.

hyperlapse tool generator page

Per this tool’s creators, who have made their API-based work openly available on GitHub, “creating them [can] require precision and many hours stitching together photos taken from carefully mapped locations. We aimed at making the process simpler by using Google Street View as an aid, but quickly discovered that it could be used as the source material. It worked so well, we decided to design a very usable UI around our engine.”

For those who want to customize their work and take it to the next level, the video above walks creators through a more direct use of Google Maps, screen captures and more nuanced edits. While their approach presumes you have and know how to use a video editor (higher barrier to entry), they also go into more detail about how to pick the perfect shots. For instance, their video explains how to line them up and utilize motion blur effects in the foreground to enhance the visual experience – all techniques that can be applied in Photoshop or a similar program to GIFs as well as videos.

Finally, lest you think this is a brand-new fad, consider Devil’s Circuit from Takashi Ito, which took the same wraparound approach to buildings in 1988 – the big difference now is simply the accessibility and ease of tools with which anyone can make something of this kind.

Share on Facebook


[ By WebUrbanist in Art & Photography & Video. ]

[ WebUrbanist | Archives | Galleries | Privacy | TOS ]


WebUrbanist

 
Comments Off on DIY Hyperlapse: Make Your Own Timelapse Motion Pictures

Posted in Creativity


Behind the shot: ‘Louisville in Motion’

24 Mar

Screen_Shot_2014-03-20_at_12.39.50_PM.png

Making a time-lapse video isn’t trivial, but the end result is compelling. Photographer Eric Stemen explains how he made his tribute to Louisville, Kentucky. He talks about his shooting technique – everything from getting good exposures to using sliders. There’s also a look at all the gear he used and some post-processing tips. Learn more

News: Digital Photography Review (dpreview.com)

 
Comments Off on Behind the shot: ‘Louisville in Motion’

Posted in Uncategorized


How To Make A Magical VineUsing Stop Motion

16 Jan

When we first saw Matt Willis of yelldesign’s flawless stop motion Vine videos, we thought, “How in the world does he even…?”

So we asked him … AND HE TOLD US!

It turns out he doesn’t use any fancy apps or software or even voodoo. He just uses Vine, his phone and know-how.

He was kind enough to share his know-how with us and you too!

Matt gave us step by step instructions on how to make an apple disappear into a tabletop (and how to pull it back out again). No magic required.

Learn Matt’s Pro-tips for Wow-Worthy Stop Motion Vines

(…)
Read the rest of How To Make A Magical Vine
Using Stop Motion (570 words)


© laurel for Photojojo, 2014. |
Permalink |
No comment |
Add to
Using Stop Motion”>del.icio.us

Post tags:


Photojojo

 
Comments Off on How To Make A Magical VineUsing Stop Motion

Posted in Equipment


3 Tips for Creating Dramatic Images using Motion

18 Oct

motion-dps-09

There is a common misconception that if your image isn’t tack sharp and free of motion blur then it isn’t a good image. I’d like to show you three ways you can use motion blur to add drama and interest to your photography.

Misconception: motion blur in photography = a bad image

I would disagree and say, not necessarily so! It really depends on the subject you are shooting and your intention as the photographer and artist. Using blur can add interest and show implied movement in the image. It can help add a feeling of speed. If your are shooting a subject like sports, for example, you have use a fast lens and fast shutter speed to freeze motion at the peak of the action. OR you can introduce intentional motion blur by using a slower shutter speed to add a sense of speed. Neither is right or wrong, they’re just different. You get to choose and if you aren’t sure, do both!

Three tips for adding motion to your images

  • panning a moving subject
  • long exposures for affect
  • zooming or moving the camera during the exposure

Let’s look at each in more detail.

PANNING

DandC-Feb2013-0011-PPT

Panning is a technique for photographing moving subjects which allows you to get the subject relatively sharp, and blur the background. This adds a sense of speed and works particularly well when you have a background that is unattractive or distracting. The basics behind panning is you choose a slow shutter speed, and move your camera to follow the subject. Here are some tips on setting your camera for panning and giving it a try.

  • use high speed or “burst” shooting mode to take multiple images while holding down the shutter button
  • select Shutter Priority on your mode dial
  • start with 1/30th of a second and adjust slower and faster as necessary
  • practice following the moving object after it passes by
  • just like in golf, follow through is the key. Point your camera towards the approaching subject, shoot and follow them as they move through your field of view, and keep following their motion even after you stop shooting.

It takes a little bit of practice and a lot of trial and error but can result in some really stunning and creative images. Try shooting the same subject using a fast shutter speed and freezing the motion, then try panning and compare. It’s not something you will use for every subject, but it’s a good technique to have in your bag of tricks!

Here are a few examples of panning.

SanFran-2012-1090-PPT

1/25th of a second panned

DandC-June13-0092-PPT

1/30th of a second, panned

SanFran-2012-0893-PPT

1/25th of a second, panned

LONG EXPOSURES

By long exposures I’m taking about a shutter speed slower than you would usually be able to hand hold the camera. There are many reasons to use long exposures including: moving water, capturing star trails at night, car headlights moving through your scene, and night photography in general. You will need a sturdy tripod, a remote trigger to fire your camera and time. I say time for two reasons: one you will have to wait for some really long exposures sometimes, especially star trails; and two because you will need time to shoot, adjust and correct. A lot of photography is trial and error and in this age of digital photography we have the huge benefit of being able to have instant feedback so we can correct or adjust in the field and continue shooting.

Here’s an example of the same subject photographed at different shutter speeds. Which do you prefer?

1/5000th of a second

1/5000th of a second

1/40th of a second

1/40th of a second

Besides night photography another common reason to use long exposures during the day is to photograph waterfalls and moving water. Keep in mind neither approach is right or wrong, you just yield different results based on the choice you make. A faster shutter speed will freeze the water in mid air (like the first image above). A long exposure will blur the water, and if you use a long enough exposure it can even disappear or become misty looking. Here’s a comparison:

1/100th of a second

1/100th of a second

2.5 seconds

2.5 seconds

With moving water, there also comes a point where doing a longer exposure doesn’t look any different. Compare the image below a 5 seconds, to the one above at 2.5 seconds. The water looks pretty similar, but what did happen was the tree above was blurrier in the 5 second one, so I chose to use the 2.5 exposure.

5 seconds

5 seconds

Here are a few more examples of long exposures.

Do you see the motion in the images below? What is moving in each?

motion-dps-01 motion-dps-02 motion-dps-03 motion-dps-04 motion-dps-05

For more information on how to shoot these types of scenes read:

  • 15 Tips for Successful Fireworks Photography
  • Three Special Effects for Night Photography

ZOOMING

Last but not least, you can add motion by zooming your lens during the exposure. Basically what you do is physically rotate your zoom lens to change the focal length during a long exposure. This works really well and gives some really neat affects on night scenes with lights, neon signs, and even fireworks. But try it during the day too and see what you can create. It often results in a rather abstract image, sometimes completely obscuring the subject to make it unidentifiable. But that’s okay! Experiment and play with this idea. Have fun with it and get creative.

Some tips for zooming during your exposure:

  • Zoom in first to focus and lock it there so it doesn’t shift when you press the shutter button. You can use focus lock (a bit cumbersome), use autofocus and then turn it off, or use your camera’s back button focus capability. Whichever you choose just make sure you’ve focused with the lens at the longest focal length where it’s more critical than a wide one
  • Practice rotating the zoom mechanism on your lens. Get comfortable with which way to turn it, and how to turn it smoothly without making a bumpy mess.
  • Use an exposure of one second or longer. It’s pretty hard to do this a a/100th of a second!
  • Experiment with different zoom speeds (how fast you rotate the lens) and timing. The image will look different if you pause at the beginning and then zoom quickly, versus zoom slowly at the beginning and pause at the end of the exposure.

Here are a few examples of zoomed exposures

No zoom

No zoom. Notice all the small lights in this hotel lobby.

2 seconds

2 seconds

Also 2 seconds, notice how different they are? That's the zoom timing.

Also 2 seconds, notice how different they are? That’s the zoom timing.

2.5 seconds. Abstracted image of the sculpture in the first non-zoomed image (bottom left corner)

2.5 seconds. Abstracted image of the sculpture in the first non-zoomed image (bottom left corner)

motion-dps-06

No zoom, I thought it was boring so I played with panning and zooming while on the carousel. Parents were looking at me funny after my 4th time around.

No zoom, I thought it was boring so I played with panning and zooming while on the carousel. Parents were looking at me funny after my 4th time around.

motion-dps-08

Zoomed version. Is it better? Debatable but it’s the process of playing that leads to creating great images. Always continue to play.

ACTION PLAN

If you haven’t really played with long exposures much, I challenge you to try some of these techniques. Find some moving subjects and blur them on purpose. Or find something that will make an interesting abstract and blur it by zooming.

The point is that not every image has to be tack sharp and some have absolutely nothing in focus and they’re still great images. Don’t get stuck on technical things like sharpness and try experimenting with out of focus for a while. Add some motion using these tips, or maybe even shoot completely out of focus on purpose. Come back and share your images and experience with us.

Have you got some great motion blur images? Do share those as well in the comments below.

Got another tip you want to add to the list?  Please do!

Cheers,

Darlene-1-250x130


Post originally from: Digital Photography Tips.

Check out our more Photography Tips at Photography Tips for Beginners, Portrait Photography Tips and Wedding Photography Tips.

3 Tips for Creating Dramatic Images using Motion

The post 3 Tips for Creating Dramatic Images using Motion by Darlene Hildebrandt appeared first on Digital Photography School.


Digital Photography School

 
Comments Off on 3 Tips for Creating Dramatic Images using Motion

Posted in Photography


In Motion: Weekly Photography Challenge

21 Sep

This week your photographic challenge is to take and share an image on the theme of ‘In Motion’.

Image by Midlander1231

This gives you a great opportunity to practice a range of photographic techniques (like panning, zooming, slow sync flash) in a variety of settings – after all there’s ‘motion’ everywhere around us.

Before you head off to shoot your image – here are a few posts from our archives that might help with capturing some motion shots:

  • How to capture motion blur
  • 13 places to practice taking motion blur shots
  • A beginners guide to capturing motion in your photography

Once you’ve taken your ‘In Motion’ shots, upload your best ones to your favourite photo sharing site either share a link to them even better – embed them in the comments using the our comments tool to do so.

If you tag your photos on Flickr, Instagram, Twitter or other sites with Tagging tag them as #DPSINMOTION to help others find them. Linking back to this page might also help others know what you’re doing so that they can share in the fun.

Also – don’t forget to check out some of the great shots posted in last weeks Available Light Portraits challenge – there were some great shots submitted.

Post originally from: Digital Photography Tips.

Check out our more Photography Tips at Photography Tips for Beginners, Portrait Photography Tips and Wedding Photography Tips.

In Motion: Weekly Photography Challenge


Digital Photography School

 
Comments Off on In Motion: Weekly Photography Challenge

Posted in Photography


Constant Motion: Open-Plan, Puzzle-Piece Apartment Design

19 Sep

[ By WebUrbanist in Design & Fixtures & Interiors. ]

open 12

A small cubic condo with windows on only one side hardly seems an obvious candidate for a complex and dynamic plan, but from concept through execution, this design embodies its creator’s and clients’ visions for space in motion.

open 11

open plan concept diagram

As the diagrams by designer Alex Bykov illustrate, the layout started with a central kitchen, acting as a modern-day hearth and center of activity around which the rest of the mostly-open rooms revolve.

open 14

open 15

open 13

The raised-level library area, framed in richly variegated plywood, feels like a cozy and separate space, but also remains an extension of the main volume. Its shelving shapes play into the puzzle theme that inspired the overall plan.

open 7

open 5

open 6

The steps leading up to this little library serve two purposes, acting as stairs but also forming a corner breakfast nook on the main floor – another one of many turns and angles throughout the project that add to its dynamism.

Next Page:
Constant Motion Open Plan Puzzle Piece Apartment Design

Share on Facebook


[ By WebUrbanist in Design & Fixtures & Interiors. ]

[ WebUrbanist | Archives | Galleries | Privacy | TOS ]


WebUrbanist

 
Comments Off on Constant Motion: Open-Plan, Puzzle-Piece Apartment Design

Posted in Creativity


Do the robot: ‘Locomotion lab’ uses Zeiss lenses to capture motion

06 Aug

Makro_Planar_Lauflabor_Bild01-622x417.jpg

Photographic pioneer Edward Muybridge was fascinated by motion, and today, scientists at the Locomotion Lab of the Friedrich Schiller University of Jena continue to use cameras to research how we walk. As well as looking at human and animal movements, they’ve also created ‘walking robots’, and are capturing their movement using high-speed cameras. According to Zeiss’s blog, the researchers are using the ZEISS Makro-Planar T* 2/50 ZF.2 lens attached to Vosskühler HCC-1000 cameras, which are capable of 923 fps, at 1024 x 512 pixel resolution. Click through for more details. 

News: Digital Photography Review (dpreview.com)

 
Comments Off on Do the robot: ‘Locomotion lab’ uses Zeiss lenses to capture motion

Posted in Uncategorized