RSS
 

Posts Tagged ‘Money’

How to Make Money as a Photographer with this Instagram Tip

27 Oct

?????

Are you looking to make money using Instagram? Then this Instagram Tip from Rich Maciver is for you.

Many of you photographers out there are sure to have an Instagram account by now. You’ve probably been sharing your photos and following some of the photographers you love for quite some time. But have you ever wondered how you can utilise this platform to help you make money as well as share your photos?

In this video, Rich Maciver shares some useful pointers on how to make money with your photography using this popular social media platform.

So what’s it all about?

Instagram Directing Messaging (DM)!

How’s it done?

  • Search for people in your area using geotags (locations).
  • Check out their account to see if they are an influencer, model, business or restaurant, who may be in need of some professional photography.
  • Depending on your area of specialisation, choose the accounts that are the right type for you.
  • Look through their photos and see if they ever use professional photographers. If so, send them a DM with a short introduction, a link to your website. Maciver suggests something along the lines of this:  “Hi (name), Great page! If you’re ever looking for a photographer for your portfolio or any sponsor content, it would be great to work together. You can see some examples of my work on IG or my website ‘insert website here’. Regards, (your name)”
  • Look at any of the professional photographs they may have had taken and see who they have tagged as the photographer.
  • Look at the tagged photographers page and see who else they have photographed, and then contact those people too.

The deeper you go, the more people you will find that may be potential new clients.

Give it a go, and let us know if it works for you in the comments below.

More Instagram Tips

You may also find the following articles on our website helpful when it comes to using Instagram.

How to Publish Images Directly to Instagram From Lightroom

How to Connect With Your Photography Followers Through Instagram Stories

12 Steps to Successfully Promote your Photography on Instagram

10 Tips for Mastering Instagram


The post How to Make Money as a Photographer with this Instagram Tip appeared first on Digital Photography School.


Digital Photography School

 
Comments Off on How to Make Money as a Photographer with this Instagram Tip

Posted in Photography


Meyer Optik Görlitz’s parent company is insolvent, backers won’t get lenses or money returned

18 Oct

In August Net SE, the company behind Meyer Optik Görlitz, Emil Busch, C.P. Goerz, Ihagee, Oprema Jena, and A. Schacht products, was removed from the German stock exchange and subsequently filed for insolvency.

Now, the fears of Kickstarter backers of the Meyer Optik Görlitz products who have not received their lenses yet have turned into a reality: The reward will not arrive and you won’t get your money back either. Net SE is completely dead. This was first reported by German photo publication Photoscala after an official notice was published, asking to direct claims to a law firm.

Insolvency proceedings have been opened which means all hopes for backers to receive rewards or their money back have evaporated. Net SE’s lack of assets means nothing can be expected from the company and Kickstarter and other crowdfunding platforms reject all responsibility in such cases.

This isn’t the first crowdfunding project ending up in a mess but given we are dealing with several campaigns here the number of affected photographers is likely higher than usual. It’s a reminder that backing a crowdfunding project isn’t the same thing as pre-ordering and there’s always some risk of losing your money.

Articles: Digital Photography Review (dpreview.com)

 
Comments Off on Meyer Optik Görlitz’s parent company is insolvent, backers won’t get lenses or money returned

Posted in Uncategorized


Adobe Portfolio – This Unsung Hero of Creative Cloud Could Save You Money

24 Aug

I have used Adobe Lightroom since version 4 in 2012. After upgrading to version 5 and 6 in the following years, have really grown to appreciate its workflow, comprehensive suite of editing tools and the digital asset management.

When Adobe switched to a subscription model for Lightroom and announced they would no longer offer the product as a standalone license, I started looking at other options because I didn’t want to be locked into a perpetual pricing model. I was already paying nearly $ 100/year for a website and as a hobbyist photographer with a family and a full-time job, the thought of paying another $ 120/year for Lightroom seemed crazy.

That is until I discovered Adobe Portfolio and had a complete change of heart.

Adobe Portfolio website landing page

A bit of background

In 2015 I got serious about doing photography work for clients. At that time, I recognized the need to have a professional easy-to-use website to attract clients and showcase my work. I tried a number of options before settling on Squarespace.

Their $ 96/year fee was entirely reasonable to me because it provided access to dozens of templates as well as a worry-free website I did not have to update or maintain like a self-hosted WordPress installation requires. I appreciated how easy Squarespace was to use as well as its rich set of features including blogging, podcasting, and even tools for buying and selling goods and services.

A few years later as I was investigating software options to replace Lightroom, I stumbled across Adobe Portfolio entirely by accident. I certainly never intended this barely-mentioned service to be the fulcrum on which my decision to subscribe to the Adobe Creative Cloud Photography Plan would rest!

The more I examined what Portfolio had to offer the more I realized that the subscription which includes Portfolio along with Lightroom and Photoshop would be ideal for my needs as a part-time photographer.

This is the homepage for my own Adobe Portfolio site. When users hover over one of the sections with their cursor it shows the name of that particular photo gallery.


While Squarespace handled all my website needs with aplomb, it also offered many things I did not use at all. Portfolio, on the other hand, is almost anemic by comparison but uniquely suited to fit the basic needs of most photographers.

It does not have all the options, tools, integrations, and flexibility of other platforms including Squarespace, Wix, Weebly, and WordPress. But as a photographer who just wanted a simple way to showcase my work, it fit the bill perfectly.

For me the choice was clear. I could sign up for the Creative Cloud Photography plan for only a few dollars more than what I was paying for my Squarespace website and get Lightroom, Photoshop, and a beautiful website that did everything I needed. I canceled my Squarespace account, signed up for Creative Cloud, and couldn’t be any more pleased with how things have worked out.

Start with a theme

If you have a Creative Cloud plan you already have access to Portfolio and you can get started by visiting myportfolio.com and entering your Adobe ID. After that, you begin the process of building your website by selecting a theme. Right away you may notice one of the significant shortcomings of Portfolio compared to other website services. There are only eight themes from which to choose. This dearth of options can be a source of frustration if you’re used to a myriad of themes on other platforms.

Adobe Portfolio themes

Some photographers might balk in horror at the idea of only having eight template options but I saw it as a way of streamlining my design approach. I couldn’t spend hours poring over different templates if I only had eight to choose from, so it only took me a few minutes to select one that suited my tastes just fine.

The templates do allow for some editing and customization but you are limited to the basic look and feel of how they are laid out. This approach is similar to how many mainstream website platforms operate and is well suited to photographers who would rather spend their time taking and editing pictures instead of poring over lines of HTML code.

It’s also worth noting that you can change templates at any time. So if you are not sure where to start you can just pick one that you like and begin editing with the freedom to change it later. I settled on the Mathias template but any of the eight options would work well for photographers who want a simple, pleasing, and functional website.

Lightroom Integration

The ace in the hole for Portfolio and a standout feature that allows it to really shine despite its lean feature set is the way that it integrates seamlessly with Lightroom. This is a huge boon for photographers who rely on Lightroom for their editing and digital asset management, and one of the big reasons it makes sense to consider Portfolio as a worthwhile website platform.

On the editing screen, there is a giant blue Add Content button which gives you access to four different options: Page, Lightroom Album, Gallery, and Link. Any photo collections in Lightroom CC, or those you have synced with Lightroom CC from Lightroom Classic CC, will show up as options when you click Lightroom Album. There is no need to export images and upload them individually. Choose Lightroom Album and the full Lightroom Web interface will load which will let you select any of the albums to be automatically displayed on your website.

You can also manually upload pictures via drag-and-drop interface but I found it much easier to manage images by loading them from Lightroom.

add content Adobe Portfolio

Editing Website Content

In addition to loading images directly from Lightroom, you can create content right from within Portfolio. This is useful if you want a few image galleries to showcase your work while also having elements like an About Me and pricing pages. Individual pages can contain blocks of text and images with captions, and elements can be re-ordered using a simple drag-and-drop interface. There’s even an option for inserting a Contact page which can contain many different fields that you are free to customize.

After creating a Page, Lightroom Album, or Gallery the ever-present floating menu lets you edit the unique characteristics of the element you just created. This floating menu took me a little while to get used to but now I don’t mind it at all.

My contact page using Portfolio.

It never really goes away but you can expand and collapse the panes and use the three horizontal lines at the top to move it around so it’s not in your way. While you can’t go so far as editing the actual CSS code you can make changes to things like background color, page header, and fonts.

editing options Adobe Portfolio

It won’t take you long to get the hang of this workflow but you also may get frustrated at what initially feels like a criminal lack of options. As you poke around with the tools available you will likely hit some brick walls, just as I did, when you find out you can’t insert pull-quote text boxes, customize the appearance of individual blocks of text, or embed elements such as a blog feed. Slideshow options are limited as well, and this is where some people might hang their head in frustration and run back to WordPress with open arms.

However, keep in mind that the purpose of Adobe Portfolio is to offer a simple way for photographers to showcase their work. It’s not supposed to be a comprehensive all-in-one web publishing platform, and within the context of that framework, the limitations in terms of choices and options make a little more sense. You can add a custom logo, change the appearance of your pages, embed dozens of web elements, and even password-protect your site if you so choose.

site options box - Adobe Portfolio

Portfolio lets you use a custom domain name as well, and though this process is fairly straightforward it does add a little extra to the cost of the service. Portfolio nor Adobe cannot actually register your domain so you will need to go to a third-party site like Dreamhost, Hover, or Register to set it up. Most domain names cost about $ 15/year which isn’t much but it does bring the total cost to around $ 135/year when you add that to a Creative Cloud subscription.

setting up your page in Adobe Portfolio

The Happy Middle Ground

The entire idea of a website might seem like somewhat of an anachronism in today’s social media-saturated internet. Many photographers have elected to forego a traditional web presence entirely in favor of building a brand and following on social media.

The downside of this approach is that your audience experience can be tainted by design decisions and embedded advertising entirely beyond your control, and there are always going to be a subset of potential clients who choose not to engage on social media at all and will, therefore, miss out on the chance to view your work.

My family portrait gallery.

Websites might not have the shine and excitement that they once did but there are still plenty of good reasons to build and maintain your own presence on the internet. To that end, Adobe Portfolio offers a compelling set of features for literally no cost at all if you already subscribe to any of Adobe’s Creative Cloud plans.

If you don’t currently subscribe to Creative Cloud but do pay a third-party provider to host your website you might want to give Portfolio a second look. Think of it as paying about the same as you are now for a website, but with the added bonus of world-class photography software like Lightroom and Photoshop thrown in at no extra charge.

Adobe Portfolio options

Your opinion of Adobe Portfolio will likely depend on your needs for a website and your expectations of what Portfolio can offer. If you want an extensive do-everything website solution, Portfolio is going to fall short in many respects and you’d be better off with something like Squarespace.

But if you want a simple platform that lets you display your work for the world to see, in a manner that you choose, without any intrusive third-party advertising or corporate mining of your personal data, I can’t recommend Portfolio highly enough.

Rating: 5/5

The post Adobe Portfolio – This Unsung Hero of Creative Cloud Could Save You Money appeared first on Digital Photography School.


Digital Photography School

 
Comments Off on Adobe Portfolio – This Unsung Hero of Creative Cloud Could Save You Money

Posted in Photography


Five Budget Portrait Photography Hacks to Save You Money

23 Apr

We all love some good photography hacks, and what better than some for portraits. Photography is such a great and fun artistic journey and there is always something new to try, or rather, buy. However, taking great portraits can be done with these five hacks that won’t break the bank. Most of these hacks can be made using household items or you can find them at your local craft stores for a quarter of the price.

Background Portrait Photography Hack - Five Budget Portrait Photography Hacks to Save You Money

Use a plain, solid painted wall on location as a background for your portraits to add a different look.

#1 – Reflectors

Reflectors are a great tool, especially for both studio and on-location setups. They help fill in the shadows with light, bounce light back onto your subject, and can create cool effects. They can even help block out the sun or light falling on either on you or your subject. A reflector is great all around tool.

There are many great reflectors available, like the very popular 5-in-1. But you can definitely make one yourself that will give you the same results and enhance your portrait photography. The great thing here is that your handmade reflectors can be large or small depending on your portrait needs. Small, perhaps for the studio, and large for outdoors or on location portraits. Or make one of each, as it really is so simple to do!

Reflector portrait photography hack - Five Budget Portrait Photography Hacks to Save You Money

Use your handmade reflector to bounce light back onto your subject’s face.

Making your reflector

Grab a piece of cardboard and some aluminum foil (crinkle it up a bit first). Next, glue down the aluminum foil with the shiny side up with spray glue or double-sided tape. Make sure to smooth it out as best you can and cover one side of your board. Finally, paint the other side white. If you choose to go with white foam board, then you can skip the last step.

What you will have is a very durable and effective two-in-one reflector! Use the silver side for maximum fill and use the white side for a softer look. This reflector can be used for both indoor and outdoor portraits. Make a few in different sizes to fit your needs.

Aluminum foil glued to recycled box cut to lay flat.

DIY reflector in use.

Reflector bounce portrait photography hack - Five Budget Portrait Photography Hacks to Save You Money

Use the white side of your DIY reflector to softly fill in light while photographing portraits on location.

Don’t want to DIY it? You can head over to your nearest store and pick up a reflective car shield, the ones that help block the sun from heating up the inside of your car. Those also work great as reflectors and the best part is that you can simply fold it up when you’re finished using it.

#2 – Diffusers

Diffusers, like reflectors, are incredible tools especially for outdoor portraits and for newborn photography. They are simply a translucent material that you can use to soften hard lighting or to create soft light on your subject.

I say newborn portraits because even window light can be hard for these little ones and a diffuser helps to soften it. You can also place the diffuser in front of off-camera speedlights to disperse the light over a larger area, effectively softening it.

Newborn portrait photography hack - Five Budget Portrait Photography Hacks to Save You Money

Use a diffuser to create soft light for your subject, especially great for newborns.

You have the ability to create a diffuser just the right size for your portraits. Grab an embroidery ring and some translucent fabric at your local fabric or craft store. Place the fabric inside the embroidery ring, cut the remaining fabric so that you don’t have too much hanging out. You could hem the edges but the embroidery ring really does hold it pretty tightly.

Once you cut the edges, you have a portable and easy to hold/mount diffuser. It’s lightweight and easy to carry. Use this indoors to soften window light or even a speedlight. Or use it on location to soften harsh sunlight and simply to shade your subject during the session.

This scrim was made with a thiPVCvc pipe about 6 feet long to create a diameter of about 3 feet. I duct taped the ends together and hot glued the translucent fabric to the ring. A hula hoop would be perfect to use for this as well. I couldn’t find one big enough to use for this so I used PVC, both are inexpensive and quick to make.

DIY lighting diffuser in action.

You can also make a DIY large lighting panel – get instructions here.

Editor’s Note: Make note that a ring, 12″ or so is still a relatively small light source and as such will produce fairly hard light. You need a large diffuser (larger than the subject’s face) to really soften the light.

#3  Portrait stools

There are many tools that are made specifically for portrait photography like the portrait stool. It’s basically a fancy hydraulic stool to sit your subject on while you make their portrait. There are also some made especially for children. You don’t have to invest in one of those, however, you simply have to go to your local hardware store and pick up a small two-step ladder, or if you photograph children, a two-step stool. Both of these options offer you the same functionality as a portrait stool.

Use them during your session to pose your subject indoors or on location. Another advantage to using a ladder as a posing stool is that it gives you the option to use it yourself to get a higher camera angle. There are really no limits to the usefulness of the ladder, or small step stool, and it is easy to transport. If you are a beach photographer, use it as a tabletop to hold your gear and keep it from touching the sand.

Portrait Photography Hack - Five Budget Portrait Photography Hacks to Save You Money

Use a portrait stool to seat your subject.

#4 – Phone Flashlight

Sometimes the best tools are right in your pocket. Your phone is used for so much of your daily life and it can also be a great tool for photography. The flashlight on your phone can serve as a steady fill light in case you don’t have an off-camera flash or need a little boost of light.

Turn your camera’s flashlight on and point it directly toward your subjects. You may need the help of a selfie-stick or a friend because although it’s powerful, you’ll still need to have the light pretty close to your subject. The mighty flash is perfect for portraits where you want to capture the light behind, but need a little fill on your subject. This is perfect for on-location photography, especially when the sun is setting behind your subject.

A phone flashlight was used to create interesting lighting in a dark area.

Use your handy smartphone’s flashlight to add drama to your portraits.

Create a little drama using your phone’s flashlight and use it to manipulate the available light around you. This is also very easily done for indoor portraits and it works great to fill your subjects when there is beautiful warm light behind, like in the photo above. Get creative with this portable light that you always have with you. It’s quick and there’s no fussing with adjustments.

#5 – Backgrounds

One of the best photography hacks that you’ll learn is how to turn plain walls into beautiful portrait backgrounds. When you’re looking to do some headshots or just photograph so that it looks as though you were in a studio, this is the hack you can use every time.

Choose a concrete wall that is plain. Pose your subject a good distance from the wall so that you can let the background blur a bit (use a wide aperture as well). Then, with your handmade reflector or phone flashlight, photograph your subject. What you will get is a beautiful seamless background just a tad out of focus to give it that studio look.

Portrait photography hacks - Five Budget Portrait Photography Hacks to Save You Money

Use your ladder and a plain wall to create studio-style portraits on location.

You can also choose a more patterned wall to give your background added texture. Look for walls that are painted in a solid color or have a repeating texture like the brick wall below. Another great photography hack is to shoot from above and let the concrete stairs or asphalt blur out so that it creates a nice background.

Portrait Photography background hack - Five Budget Portrait Photography Hacks to Save You Money

Choose plain or patterned walls to give your on-location portraits more of a studio look.

Conclusion

These five portrait photography hacks will save you both time and money all while enhancing the portrait experience for both you and your subject while photographing on-location. Use them for your next portrait session to get new and different results!

The post Five Budget Portrait Photography Hacks to Save You Money appeared first on Digital Photography School.


Digital Photography School

 
Comments Off on Five Budget Portrait Photography Hacks to Save You Money

Posted in Photography


Worth the money? Fully loaded iMac Pro vs fully loaded iMac

08 Feb

A fully loaded iMac Pro will cost you an eye-watering $ 13,200… but if you’re set on an Apple all-in-one, is it really almost $ 8,000 better than a fully-loaded 5K iMac? Parker Walbeck of Full Time Filmmaker ran some tests to find out, putting both all-in-ones through their paces using RED 8K footage, Canon 1D X Mark II 4K footage, and DJI Phantom 4 Pro 4K footage.

He also tested the machines using both Adobe Premiere Pro and Final Cut Pro X, to eliminate the CPU-crushing effects of Adobe’s software.

As you might expect, the iMac Pro outperformed the iMac in nearly every test, playing back full resolution footage flawlessly while the iMac dropped frames, and rendering/exporting at about 2x the speed. However, it didn’t win in every regard. The iMac actually outperformed the iMac Pro by 25% when it came to applying Warp Stabilizer, because this feature is only using an individual core to do the work.

Playing back 8K RED footage on the iMac Pro was much smoother than the iMac, which had to be dropped to 1/8th resolution to match performance.

All of this leads Parker to his very reasonable conclusion:

“I definitely think there is a point of diminishing returns, where you’re paying a premium for slight, incremental improvements,” says Walbeck. “But that’s how it is with most new technology, it’s overpriced and you’re going to pay a premium for the latest and greatest.”

As for the value, he sums it up pretty well in the video, and it’s probably exactly what you expected coming into this comparison. Is it worth the money?

For most people? No. For a select few, yeah, it may be a difference maker. Do I personally need a computer this powerful? No. I’m sure I’d be just fine with my iMac or a base model iMac Pro

[…]

I’ve edited RED 8K footage on my MacBook Pro before, it’s definitely doable, it’s just a lot slower than if I were to use an iMac Pro. So my advice would be to use whatever you’ve got, whatever you can afford, and just start creating content.

And that, ladies and gentlemen, might be the most practical advice to come out of one of these iMac Pro comparison videos yet. Check out the full breakdown in the video above, where Walbeck offers some great advice for video shooters who are salivating over Apple’s newest machine… and yes, he does touch on why he doesn’t think that, at least for him, it’s worth it to spend less money and build an equally powerful PC.

Articles: Digital Photography Review (dpreview.com)

 
Comments Off on Worth the money? Fully loaded iMac Pro vs fully loaded iMac

Posted in Uncategorized


Clear or UV Filters – Essential or a Waste of Money?

18 Jul

In this video from Phil Steele he discusses the debate over whether or not you should use clear or UV filters on your lenses. It’s a highly heated topic, and Phil makes some very good points. See what he has to say, and then tell us your opinion.

What are your thoughts?

Please fill in this quick poll and tell us if you use UV filters on your lenses or not. Add your comments in the discussion area below – we want to hear from you.

Note: There is a poll embedded within this post, please visit the site to participate in this post’s poll.

If you want to learn more from Phil check out some of his video courses covering topics like event photography, Lightroom, headshots, and more on Steele Training.com.

The post Clear or UV Filters – Essential or a Waste of Money? by Darlene Hildebrandt appeared first on Digital Photography School.


Digital Photography School

 
Comments Off on Clear or UV Filters – Essential or a Waste of Money?

Posted in Photography


Google Sunroof: Search to Save Money With Home Solar Power

26 Dec

[ By WebUrbanist in Architecture & Houses & Residential. ]

google sunroof

Google has rolled out a search engine with a specific target in mind: your house, more specifically how much area of your roof could be covered in solar panels, what that would save you and where you can look for companies to install a system for you.

Interested homeowners can input their addresses and get realistic illustrations of how many solar panels would fit and what their potential cost savings on energy bills are likely to be.

google solar savings calculation

A complex data comprising everything from your home’s location and orientation to the presence of shade from adjacent trees or buildings – but this set is broken down into simple information for users.

google solar energy savings

Google, of course, is well-positioned to make this Sunroof tool effective, combining its Google Maps and Earth data that can sort out not just the footprint of a building but its 3D space too, and thus shadows. It also has all of the other information at hand, like average temperatures, sun exposure, cloud cover.

new google solar energy

Users of the tool can tinker with variables, but ultimately are given a recommended installation that maximizes the potential output and thus puts more back in homeowner pockets long-term. For now it is limited to the San Francisco Bay Area, Boston and a few other locations, but they have plans to expand around the country.

Share on Facebook


[ By WebUrbanist in Architecture & Houses & Residential. ]

[ WebUrbanist | Archives | Galleries | Privacy | TOS ]


WebUrbanist

 
Comments Off on Google Sunroof: Search to Save Money With Home Solar Power

Posted in Creativity


Tips from the Sports Photography Pros to Help You Get the Money Shots

07 Dec

The pros know that sports photography is a fast paced and intense profession. You have to be quick. Really quick! Catching the moment is one-third intuition, a third skill, and the rest is pure luck. Accept it now! Sometimes the most amazing shot you capture will just be pure luck.

sports photography action

Capture the emotion and the intensity of the players. These shots sell.

There are things you can do to increase the odds of success. If you’re like me and you want to earn part of your income from sports photography then there are some tips and tricks you need to learn. Sports photography is a lot more than just pointing the camera at an athlete and holding down the shutter button.

Camera grip is key

The sheer speed of sports photography requires a specialized grip. You have to be able to zoom in and out quickly as well as switch from landscape to portrait (horizontal to vertical) orientation. If you are strong enough to handhold your lens then this technique is for you.

sports photography black and white

For a magazine a shot in black and white can create a lot of drama.

Loosen up the tripod collar on the lens so it slides easily. Hold the lens by placing the base of the collar in the palm of your hand and grip the zoom ring with your fingers. As you rotate your camera from portrait to landscape your camera will automatically change focal lengths. It’s quick and convenient and it’s also pretty easy to maneuver. You can then adjust the orientation of your camera back to portrait or landscape by releasing your grip on the zoom ring. It takes practice to perfect this method but once you’ve got it the process becomes very quick.

The same basic premise can be used if you shoot with a monopod. Instead of using your hand as the base for monopod ring you’re going to handhold the zoom ring and turn from portrait to landscape in the same way.

sports photography

In this case, the image is about the struggle and expressions on the kid’s faces. The scene tells a story about struggle.

Money shots

I quickly learned that certain types of shot sell while other shots are nice but they don’t sell. The images that generally fall into one of the following three categories:

sports photography action hockey

At tournaments, these types of shots sell to parents.

1) The Celebration

Images of athletes celebrating are so popular because they show the height of emotion and sacrifice. The recent shot of the World Series winning Chicago Cubs is a fantastic example.

While this isn't an epic celebration parents love this type of shot.

While this isn’t an epic celebration parents love this type of shot.

2) The profile shot

In this instance, you capture an image of an athlete in action. The shot shows the shape of their body as they compete and there is little to distract from the perfection of their form.

sports photography girl running

The water droplets are my favorite part of this shot even though most people won’t notice them.

3) The unusual occurrence shot

These are the unique moments in sports that only happen once. You won’t catch these types of shots very often but when you do it’s a fantastic adrenaline rush.

sports photography expressions

In this case, the facial expression and position of the girl’s arms and the ball make for a unique shot.

I’m not saying that other shots won’t sell but the likely hood is far less. Sometimes the image falls into a category of its own. If you try to capture the majority of your images from these three categories then you are well on your way to earning an income from sports photography.

Don’t give up

Sports photography is an incredibly tough world to try and break into. You have to work so hard to get noticed. It’s also incredibly challenging and very physical. Be prepared for the ride of your life. You will have to push your camera and your body to their limits to keep up with these talented and very physical athletes.

So use every trick or tip you can find to rise above the rest and take those memorable shots. Leave any of your tips below and also share your favorite images.

Capturing goalies is a real challenge. Usually, there's a lot of traffic in front of them.

Capturing goalies is a real challenge. Usually, there’s a lot of traffic in front of them.

googletag.cmd.push(function() {
tablet_slots.push( googletag.defineSlot( “/1005424/_dPSv4_tab-all-article-bottom_(300×250)”, [300, 250], “pb-ad-78623” ).addService( googletag.pubads() ) ); } );

googletag.cmd.push(function() {
mobile_slots.push( googletag.defineSlot( “/1005424/_dPSv4_mob-all-article-bottom_(300×250)”, [300, 250], “pb-ad-78158” ).addService( googletag.pubads() ) ); } );

The post Tips from the Sports Photography Pros to Help You Get the Money Shots by Erin Fitzgibbon appeared first on Digital Photography School.


Digital Photography School

 
Comments Off on Tips from the Sports Photography Pros to Help You Get the Money Shots

Posted in Photography


Overview and Field Test of HoldFast Gear’s Money Maker Leather Camera Strap

02 Nov

The camera strap is one accessory that has definitely evolved along with the photography industry. While the default strap that comes with every camera might suit your basic shooting needs, there are plenty of options available with enhanced features (and style). Some help you shoot more ergonomically by better balancing heavy gear across your body, and some just give you the appearance of looking like a more polished professional. This product review is a camera strap that meets both ergonomic and stylistic needs of today’s photographers: the Money Maker leather camera strap by HoldFast Gear.

best leather camera strap Holdfast Moneymaker Review

About the MoneyMaker strap

The MoneyMaker is one of several camera strap products created by HoldFast Gear founder Matthew Swaggart. As a photographer himself, Swaggart created his line of camera straps to efficiently carry his own camera gear and pocket items, while also maintaining a nice aesthetic. Beginning with his very first product, the RuckStrap, Swaggart’s brand is perhaps best known for the MoneyMaker leather dual camera strap. Based in Tulsa, Oklahoma, every single HoldFast product is made in the USA, and Swaggart has been known to openly collaborate with customers to design custom straps.

best leather camera strap Holdfast Moneymaker Review

Benefits of Dual (or Double) Camera Straps

While dual (or double) camera straps are already very popular among photographers who carry multiple camera bodies, many of them such as the popular Black Rapid Double have designs that resemble tactical SWAT team gear. As a petite female photographer using these dual camera straps, I’m frequently met with raised eyebrows and asked if I’m getting ready for battle.

This is where the HoldFast MoneyMaker comes into play. Once I switched from Black Rapid to the MoneyMaker, I noticed even more raised eyebrows, but this time with the question, “Where did you get that beautiful camera strap?”

best leather camera strap Holdfast Moneymaker Review

MoneyMaker Basics

Crafted from high-grade leather and metal fasteners and buckles, the MoneyMaker is worn like suspenders, with a camera suspended from each end. The design balances the weight of the cameras so they both hang down by your hips, and you can even attach a third camera to the front by using an optional attachment leash. One of the best features, that is lacking from competitors such as BlackRapid, is the MoneyMaker’s inclusion of a Safety Catch clip that adds an extra layer of security to your camera.

best leather camera strap Holdfast Moneymaker Review

If you’ve ever used a Black Rapid camera strap, the mechanics of the MoneyMaker will be very similar.

  1. Start by first putting on the MoneyMaker Straps, then fasten the HoldFast screws to the tripod mount of your camera.
  2. Next, attach the circular split ring from the Safety Catch to your camera. This can be a bit tricky for Canon DSLRs.

best leather camera strap Holdfast Moneymaker Review

MoneyMaker Options and Variations

Textures

There are several standard variations you can choose from with the MoneyMaker to make it more comfortable and stylish. First, the MoneyMaker comes in several different materials including English Bridle, Water Buffalo, Great American Bison, and even Genuine Python. Prices and color options vary according to the material you choose, with Bridle Leather being the lowest priced, and Genuine Python costing the most.

best leather camera strap Holdfast Moneymaker Review

For those preferring camera straps not made of leather, HoldFast offers the Camera Swagg collection featuring the same MoneyMaker design crafted from high-grade nylon. Slightly lighter in weight and more affordable in price compared to leather options, this ultra-light option also comes in a wider array of colors including copper, navy, red, and black.

pratt_holdfast-gear-camera-strap_16

If you want a truly unique, one-of-a-kind camera strap, you can even opt for the hand tooled, hand painted leather MoneyMaker. Each is custom made to order and results in a beautiful, functional piece of art that embodies the art of leather craftsmanship.

Sizes

All of the leather straps can be ordered in the Original (1 1/2″ wide) or Skinny (1″ wide with 1 1/2 inch removable shoulder pads) version. They also come in Small, Medium, or Large, depending mainly on your height and build, with optional D-ring metal loops that can add extra attachment options. As a 5’2″ petite female, I opted for the Bridle Leather MoneyMaker in Chestnut color, size Small, and the Skinny version with no D-rings (they are’t recommended if you have long hair). It was a perfect fit!

best leather camera strap Holdfast Moneymaker Review

My Experience Shooting with the MoneyMaker

While the MoneyMaker is very popular among wedding photographers, I found it to be perfect for shooting concerts and corporate events as well. At concerts and music festivals, in particular, where leather camera straps aren’t yet prevalent, the MoneyMaker proved to be an excellent conversation starter among other photographers and concert-goers.

best leather camera strap Holdfast Moneymaker Review

When I shoot big concerts and events, I typically have the following camera setup:

  • (1) Canon 5D Mark III (B&H or Amazon pricing) with a 70-200mm f/2.8 attached  (B&H or Amazon pricing)
  • (1) Canon 6D (B&H or Amazon pricing) with a 24-70mm f/2.8 attached (B&H or Amazon pricing)
  • (1) 580 EXII Flash (B&H or Amazon pricing)
  • (1) Wallet with extra memory cards, batteries, and business cards

Using the MoneyMaker to carry my two camera bodies, I also used a lightweight ThinkTank belt pack to carry my flash and wallet. This combination helps balance the weight in my upper body and allows me to emerge with zero back and shoulder pain after shooting a multi-day music festival and two corporate conferences.

best leather camera strap Holdfast Moneymaker Review

best leather camera strap Holdfast Moneymaker Review

Things to Note

While my experience with the MoneyMaker was highly positive, there are a couple things about this camera strap system to note.

First, the use of all authentic leather makes the MoneyMaker heavy compared to the all-nylon systems of Black Rapid and other competitors. This isn’t a problem when you’re wearing and using the camera straps, but it can feel and appear somewhat intimidating right out of the box.

best leather camera strap Holdfast Moneymaker Review

Second, leather takes some time to break in, so the straps aren’t the softest and most supple at first. That doesn’t mean the straps aren’t comfortable, but you’ll need to use them frequently over time to get them to loosen up. Also, you’ll want to take extra care of the material if you go with a genuine leather camera strap option so it retains high quality.

Over to you

Do you have a certain camera strap that you prefer to use other than the default strap you automatically receive when you buy a camera? Is style as important as function when it comes to your ideal camera strap? What do you look for in a strap?

Please share in the comments below.

best leather camera strap Holdfast Moneymaker Review

googletag.cmd.push(function() {
tablet_slots.push( googletag.defineSlot( “/1005424/_dPSv4_tab-all-article-bottom_(300×250)”, [300, 250], “pb-ad-78623” ).addService( googletag.pubads() ) ); } );

googletag.cmd.push(function() {
mobile_slots.push( googletag.defineSlot( “/1005424/_dPSv4_mob-all-article-bottom_(300×250)”, [300, 250], “pb-ad-78158” ).addService( googletag.pubads() ) ); } );

The post Overview and Field Test of HoldFast Gear’s Money Maker Leather Camera Strap by Suzi Pratt appeared first on Digital Photography School.


Digital Photography School

 
Comments Off on Overview and Field Test of HoldFast Gear’s Money Maker Leather Camera Strap

Posted in Photography


12 Sources Where You Can Make Money in Photography

11 Oct

It can be a daunting task when you first start looking for ways to make money in the photography world or find photography jobs. On one hand, there seems to be, and are, many different avenues you can take to achieve an income, but on the other hand, each of these avenues can be difficult to break into.

I created this list to help focus you on your path to finding the right way to achieve income through your work. Take your skill level, your location, your situation, your short-term goals, and your longterm goals all into account and choose the strategies that you think will be most effective. Hit those strategies hard. There is no need to waste your valuable time on the other stuff.

1. Friends, colleagues, and family

Band Photography

Band photography

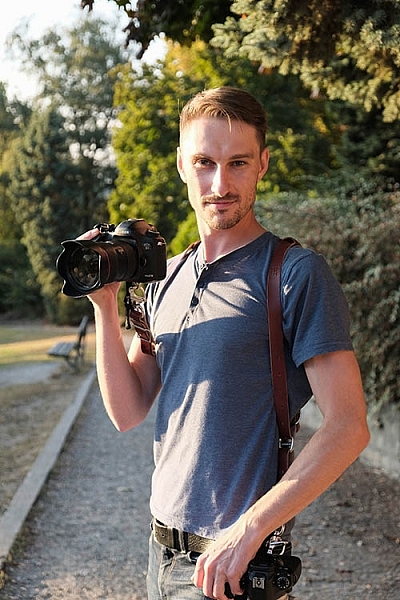
There are few photographers that I know who did not gain their first photography jobs through friends and family. Your friends, colleagues, and family already know you and your work ethic (which I hope is strong). They trust you and will be willing to recommend you. Some will even hire you. Everyone needs photography in some way and people often want to work with a person they know. Let that person be you.

Think about how your network can help propel you where you want to go. Who might they know who can help your career? Ask for an introduction. If you want to do business or law firm portraits, ask your friends who work for those type of companies to put you in touch with the person who hires photographers. In addition, influential people (connectors) can be a big boon to your business. Reach out to any of these people that you might know or seek out an introduction from a friend who might know them.

Send out an official announcement about your business. Create a mailing list, and send out a professional looking email that talks about your services and how you can help people. It’s one thing to talk in passing to your friends and family about it, but it’s another to be official and explain how you can help them or the people they know while showing your accompanying work.

2. Assisting and internships

Business Portrait

Business portraiture

Besides your personal network, assisting and internships are the other primary way that you can effectively break into the photography business. Be prepared to make coffee and sweep floors (tip: if you learn to make good, strong coffee, everyone on a photo shoot will love you). Doing this will allow you to learn about how a true photography business runs quicker than at any photo school. It will give you a nuanced insight that you cannot get in any other way.

If you assist a portrait photographer, you will learn about lighting really well because you will be in charge of setting up the lights. If you assist for a wedding photographer, you will likely be a second shooter. In that role, you will gain invaluable wedding experience without the risk of shooting a wedding for the first time without any support.

It will allow you to build a new network around you. The photographers you work for will pass along jobs that they cannot do. You will make friends with the other assistants and you can help each other out in the future when you all start shooting on your own. The relationships and skill building that happens in these environments is invaluable.

3. People that need photographs for their wall
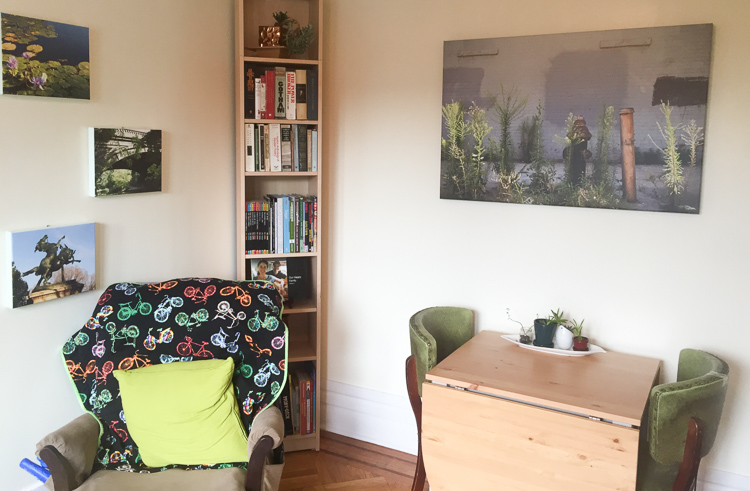
Canvas Print

Canvas wall print

If you are aiming to sell your photographs, you can market directly to businesses, restaurants, local galleries, everyday people, collectors, and your network. You can be a go-to person for gifts. However, keep in mind that this is a very hard way to make money. It can take years of dedicated work to build up and you will need to actively market yourself.

Studying marketing and selling is important for anything you do on this list, but particularly if you are aiming to sell your work. Most photographers choose other ways to make a majority of their income at first while building up a print sales business over time.

4. Local businesses

Business Portrait

Business portraiture

You know the needs of your local businesses well, and most likely you already know the people who own them. Figure out what they might need, whether it’s business portraits, shots of their food or products, event or conference photography, or work for their walls. Approach them with a plan in mind, and ask to set up a meeting to discuss your ideas and how they can benefit.

Better yet, if you know anyone that works for the business or has a relationship with someone who does, ask for an introduction first. Introductions will give you a huge advantage.

5. Couples, weddings, and engagement photography

Engagement Photography

Engagement photography

Wedding photography is a big business for photographers. It takes a lot of time to get good and is very hard to do well, but it is one of the best ways to make a good living at photography. If you are aiming to start off with wedding photography, I suggest trying to at least work as a second shooter for a while to gain a portfolio and skills.

But there are other ways you can take advantage of this as well. You do not have to be a wedding photographer to be an engagement photographer. Couples and family photography is a very viable business wherever you live and engagements are a big part of that, whether or not you are a wedding photographer. Learn the best locations in your area to photograph and market to families and newlyweds. This may also be a good first-step to transition into the wedding world.

6. Travelers

batman_couple

Tourists from a workshop

If you are in an area that gets any sort of tourism, you can become a photography tour and workshop leader. Learn about all the best locations in the area and the best times to photograph them. Learn some history too. Just because you are running a photography tour does not mean that history isn’t important. People should be able to get to know more about what they are photographing. They want to learn that stuff. Market yourself through hotels, tourism companies, local tourism boards, and Google.

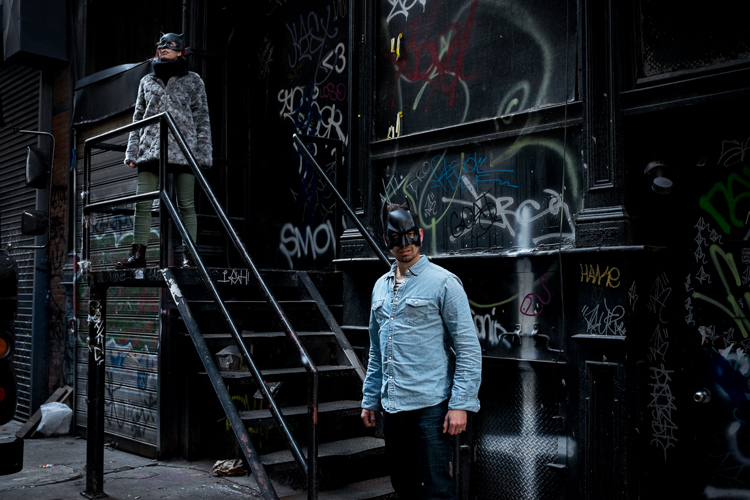
7. Actors, artists, and students

Dancer

Dancer

There is a whole photography sub-industry that caters to creatives and students. These genres do not usually pay as much as working with business firms, but they can as you improve and move up. Go advertise where these people hang out. Find a connection at your local schools. Learn which of your friends have high school age children that need photos taken, then begin to work with their network of friends. Try to get into acting or art schools.

8. Conferences and events
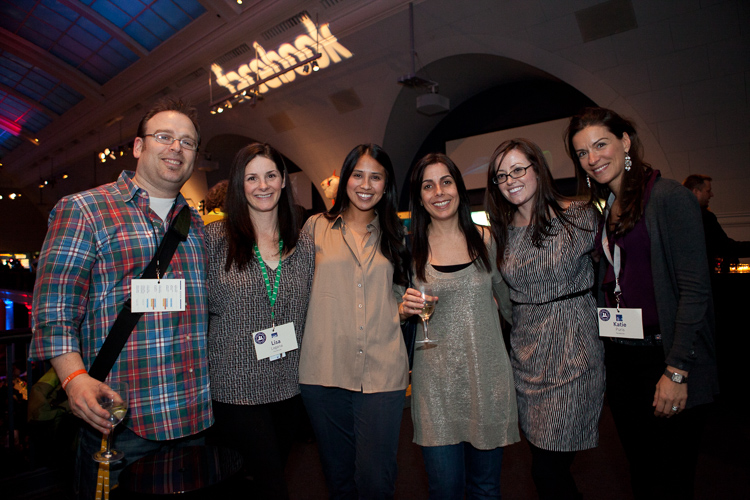
Conference and Event Photography

Business Conference

Event photography is another way that photographers can start making money right away. Event photography is on the easier and less stressful end of the photography spectrum, as long as you are okay with the socializing. There is not as much pressure involved as shooting a wedding, and the technical skills are not as difficult to master as other forms of photography. Learn to use your camera, your flash, how to shoot in low light, and how to get people to smile in photos and you’ll be good to go.

9. Trade and art shows – networking events

Trade Show

Trade event

Seek out all of the trade shows whose members you think you might be able to work with. Whether it’s a business related show or a local tourism event, many of the attendants will need your services. Meet people, get to know them, don’t come on too strong, and let them know that you’re there if they ever need your services. The more you attend these different events, the more people will recognize and get to know you. Just this exposure can be very valuable in the long run.

In addition, many areas have arts and crafts fairs and shows. This is a great way to get your work seen by your community. It’s a lot of work, so plan carefully and try not to go overboard at first. Do your research coming in, and use the time at the show not only to sell your work but to get to know people in your community. Even if someone is not ready to buy your work, it doesn’t mean that they will not want to in the future or for a gift. Get to know them, and see if they want to sign up for your mailing list, so you can keep your work in front of them in the future.

10. Organic: Google and social media

GStar Fashion Show

An image used as a fashion show backdrop

Due to all the competition, ranking highly in Google is tougher than it used to be. But with some focus and time, it is very doable. Learning how to rank higher in Google involves too much information to do the topic justice here, but you should follow resources and websites such as problogger.com (our own Darren Rowse’s other site), which will help you learn to make more of your living through the internet. You will need a website of course. Also keep in mind that besides a variety of unique factors, Internet links are the lifeblood of ranking highly in Google, so it is necessary to figure out how to get other people to link to your site and mention your work.

In addition to your email list, build a Facebook business page and an Instagram page to grow your following. This will help you keep your work in front of people so that they will remember you the next time they need your services.

11. Local internet marketing

Business Portrait

Business photography

You can market your work to all types of business on the internet. However, local websites can be the most important. Local news sites, blogs, or wherever your community hangs out on the internet are important to become a part of.

Think about how you might be able to work with these websites or be of value to them. If you join certain communities, you do not want to go crazy marketing to them. Join the community, be a valuable member, answer questions and offer advice, and just get to know people. That’s how you market in these situations. If you do this the right way, they will like and trust you and will want to work with you in the future.

12. Other photographers

There is so much competition between photographers that it can get incredibly frustrating. Other photographers share the same passions that you do, and they are going through the same trials and tribulations. Seek out the good ones and become friends with them. Offer to help them if they need. Pass along jobs if you can’t fulfill one. Grow together.

Over time, you will surround yourself with an invaluable community and you will all be stronger together. The photographers who feel too competitive to give you the time of day will then not have the advantages that the rest of you do.

Conclusion

Making money in photography can be challenging and hard especially when you’re getting started. These tips should give you some ideas to move forward with in your photography career. If you have any other ideas that have worked for you please share them in the comments below.

googletag.cmd.push(function() {
tablet_slots.push( googletag.defineSlot( “/1005424/_dPSv4_tab-all-article-bottom_(300×250)”, [300, 250], “pb-ad-78623” ).addService( googletag.pubads() ) ); } );

googletag.cmd.push(function() {
mobile_slots.push( googletag.defineSlot( “/1005424/_dPSv4_mob-all-article-bottom_(300×250)”, [300, 250], “pb-ad-78158” ).addService( googletag.pubads() ) ); } );

The post 12 Sources Where You Can Make Money in Photography by James Maher appeared first on Digital Photography School.


Digital Photography School

 
Comments Off on 12 Sources Where You Can Make Money in Photography

Posted in Photography