RSS
 

Posts Tagged ‘Mistakes’

5 Critical Mistakes to Avoid When Buying New Camera Gear

05 Sep

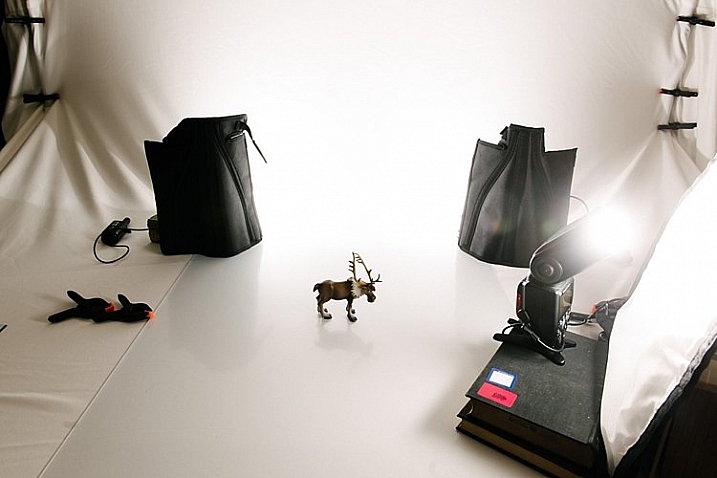
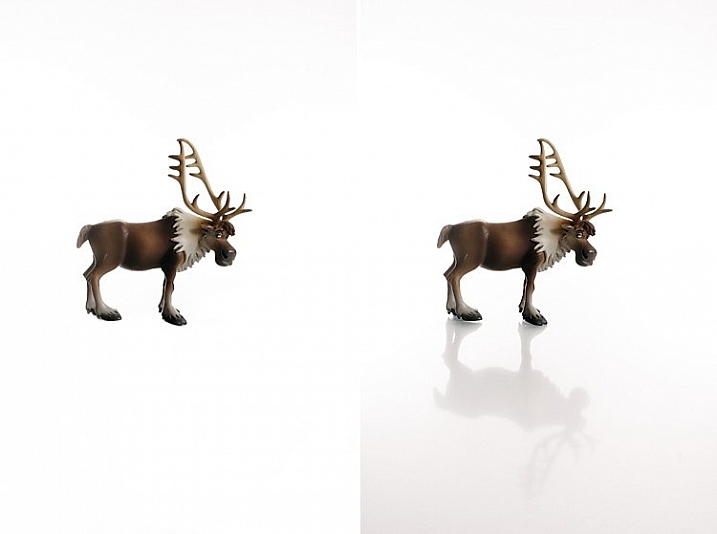
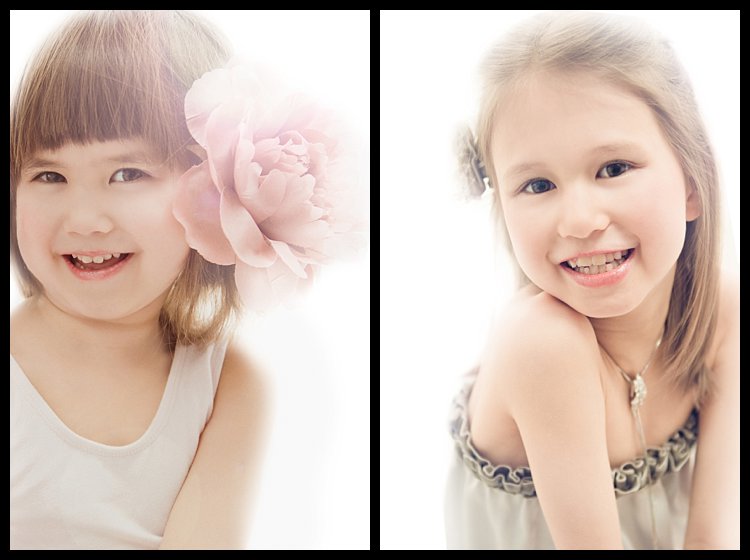
The day you’re finally in the market for a new camera gear is certainly an exciting one when you’re a photographer. Visions dance in your head of all the killer shots you’ll be capturing with a sleek new set-up. You get excited about finally having gear that not only meets your current needs, but that you can grow with into the future as well.

However, it goes without saying, that the buying process can be daunting to say the least. There’s a lot to choose from out there! You want to make absolutely sure that what you buy is actually worth the investment you’re about to make.

Buying New Camera Gear mistakes

In this article I’ll go over some of the most important (and most common) mistakes to avoid when shopping for a new camera or any other piece of photography equipment.

Mistake #1. Taking advice from the wrong person

It’s normal, and wise, to ask for other people’s advice before you finalize a major buying decision. However, it’s important to get it from the right sources. It’s not enough for someone to simply sound like they know what they’re talking about.

Do they actually know what they’re talking about? Is this someone that really knows their way around a camera, and could be considered an expert when it comes to photography gear? Do they actually understand all of the features associated with the item you’re shopping for well enough to have an informed opinion? You should be able to say “yes” with assurance to all of these questions. You need to make sure the person actually understands your unique needs, and the many ways they might differ from theirs.

Buying New Camera Gear mistakes

I need this camera for the work I do, but you may not need one so large. Get what’s appropriate for your needs.

Avoid buying anything just because another photographer you know has one, or because all the online reviews say it’s the one to have. Definitely don’t buy on the say-so of one person, who may or may not really understand photography. Ask for advice from trusted experts and take it for what it’s worth – a great tool that can help you make a decision. Even the best advice isn’t a proper substitute for research and careful comparison shopping.

Mistake #2. Assuming quality is equal to price

Yes, good quality gear should be considered an investment. It’s most definitely a purchasing decision that should be made with care, especially if you’re a professional photographer or hope to become one. However, it’s important not to simply assume that a higher price tag automatically equals a better item.

Buying New Camera Gear mistakes

Do your research and due diligence.

Even if money isn’t personally an issue for you, paying more money doesn’t guarantee that your purchase will actually meet your needs. It doesn’t guarantee you the spectacular photos you’ve been dreaming about either. Even great photography equipment is only going to be as good as the person actually taking the photos.

Focus less on the price tag, and more on whether or not a given item is right for you, especially when buying a camera. Does it fit your current skill level? Are you familiar with all of the functions and tools it comes with? According to your research, is it a good fit for the type of photography you do? Lots of bells and whistles, and tons of different settings won’t do you any good if you either won’t use them, or don’t understand them.

Buying New Camera Gear mistakes

Mistake #3. Failing to budget properly

Proper planning is the key to success when it comes to many endeavours, and shopping for a new camera or photography gear is no different. A big part of that is budgeting, and there are a number of ways people can stumble in that arena.

Many drastically overestimate what they’re likely to get in exchange for their money. An outrageously expensive camera won’t magically allow a beginner to somehow start pulling off National Geographic quality images. Nor will world class photography skills make up for a cheap camera, that’s incapable of taking professional quality pictures.

Buying New Camera Gear mistakes

A lot of shoppers also fail to factor the full cost of all the accessories they’ll need into their budget. Okay, so you did your homework when it comes to the camera you’ll need in order to take your landscape photography to the next level. But, did you also remember to consider the lenses you’ll require? What about the batteries, tripods, memory cards, and everything else? It’s important to be thorough from the get-go.

Mistake #4. Becoming distracted by bargains and specials

So you’re finally ready to walk into the photography shop and make your purchases. You’ve done your homework. You’ve figured out which camera is right for your needs, both present and future. You’ve even picked out the accessories and other tools you’ll need to go with it. You’re sure you know exactly what you’re looking for.

Buying New Camera Gear mistakes

Then you get inside, and see all the signs advertising special deals on this, and bargain pricing on that. Do you lose your focus, or do you remind yourself that item isn’t really what you went there for? Hopefully it’s the latter.

Never buy any piece of photography gear just because it’s displayed under a flashy sign, or a salesman insists that it’s what you really want. If something sounds way too good to be true, it probably is. Keep your eye on the prize, and make sure you walk out of that shop with what you actually need.

Mistake #5. Not being realistic enough

Buying New Camera Gear mistakes

Most of us entertain really big dreams that we hope will come true someday, when it comes to our interest in photography. However, it’s important to ask yourself whether those dreams are realistic as far as the near future goes, before you actually sink your money into them.

Are you brand new to photography, but already picture yourself traveling the world, making big money as a travel photographer within a couple of months? Are you shopping based on a desire to jump straight into professional photography with a ton of new, expensive gear, even though you’ve never used anything more complicated than the Instagram app on your iPhone?

Buying New Camera Gear mistakes

Make sure you’re not getting ahead of yourself when it comes to what you think you’ll accomplish, by spending lots of money on new camera gear right now. Shop according to what your needs and skill level are currently, not what you’re hoping they’ll be “someday”. You’re that much more likely to be happy with your purchases not only now, but in the years to come as well.

If you have any other gear buying tips, please share in the comments below. What is your though process?

googletag.cmd.push(function() {
tablet_slots.push( googletag.defineSlot( “/1005424/_dPSv4_tab-all-article-bottom_(300×250)”, [300, 250], “pb-ad-78623” ).addService( googletag.pubads() ) ); } );

googletag.cmd.push(function() {
mobile_slots.push( googletag.defineSlot( “/1005424/_dPSv4_mob-all-article-bottom_(300×250)”, [300, 250], “pb-ad-78158” ).addService( googletag.pubads() ) ); } );

The post 5 Critical Mistakes to Avoid When Buying New Camera Gear by Destin Sparks appeared first on Digital Photography School.


Digital Photography School

 
Comments Off on 5 Critical Mistakes to Avoid When Buying New Camera Gear

Posted in Photography


6 Still Life Photography Mistakes and How to Avoid Them

28 Aug

As a beginner photographer, I still remember experimenting with random photo-shoots of colorful fruits, leave,s and flowers. Believe it or not, capturing the inanimate has always been one of our favorite pass time activities as photographers. But, not anymore! With so much demand for lively product shoots in magazines and websites, still life photography is a million dollar business today.

Capturing the still life is a very unique photographic experience. With your subject being inanimate, you get enough time to play with all the creative controls on your camera, and keep snapping until you end up with a shot to which you say – Woah! That is the perfect one.

Rikaguite 225579 compressed

Capturing still life photographs seems easy, but breathing life into those inanimate objects requires a great deal of creativity and obviously, a lot of practice. Should you mess up with the lighting and framing, it’s fairly easy to end up with an austere shot of that already dull bunch of keys. Here are the six most common mistakes that photographers make while doing still life photography.

Still Life Mistake #1 – Improper Lighting

Rule one, your subject needs to be well lit up. After-all, it is the central theme of your photo-shoot. Using natural light generally gives superb results.

In case you are shooting inside a room, you need to be a little creative with the way light falls on your subject. One of the most common mistakes is to photograph your subject under full blown artificial light sources like LEDs and fluorescent tube-lights. Why? Because such light sources add a color temperature to your subject that makes it look less natural. Moreover, they make your inanimate object look just what they are – lifeless and boring.

Rikaguite 846293 compressed

Solution

Place your subject near a natural light source, such as an open window. Get creative with the light falling on the subject. Does it look amazing when light falls on it from the side? Or does it look more attractive with light falling on it from behind? I personally find natural light from the side to look more attractive. The subtle shadows and visible details under the natural light, sparks interest in the otherwise dull object.

Rikaguite 552047 compressed 1

Another important thing to take care of is the intensity of the natural light falling on your subject. Avoid shooting it under direct sunlight. The bright sunlight may washout the otherwise delicate details and colors of your subject. As a remedy, in case you really need to shoot under broad sunlight, use a light modifier such as a soft-box (or translucent reflector) that will help produce an overcast effect, and will direct the light to softly diffuse over your subject.

Still Life Mistake #2 – A Distracting Background

Placing your subject on a backdrop full of distractions is another potential mistake in still life photographs. Your product being the central theme, deserves all the attention. Therefore, you need to ensure that the background is free from all such distractions. By this, I mean anything that shifts your attention from the main product to the backdrop behind it. For example: capturing a vase of flowers in a background of a home furniture shot.

Rikaguite 336911 compressed 1

Solution

Choose a wall that’s simple, and painted with a plain color. If your wall is not plain, use a piece of white chart paper to cover the wall, so that it doesn’t interfere with your main subject. One more tip, if you’re shooting your product over a table top, again make sure that the table is neatly covered with a white piece of cloth or paper. The main idea is to focus as much attention on your product as possible.

Still Life Mistake #3 – Not Using a Tripod

In case you need to shoot your subject with longer shutter speed, you need to make sure that you do not end up with a blurry shot. An example under this kind of setup can be a decorative indoor water fountain. You may want to use longer shutter speed to capturing the motion of the falling water. So in this case, it makes any sense to use a tripod because even a slight camera shake can result in a blurry shot.

With a tripod, you may also wish to use a wireless remote control for shutter release. This makes sure that not even the slightest of the shakes can blur your photo. Alternatively, in case you do not have a remote control shutter release, you can capture the shot by setting your camera on the 2-second timer mode.

Still Life Mistake #4 – Improper Framing

Rikaguite 534724 compressed 1

Framing your shot helps focus and arrest the attention of the viewers on your main subject. While framing the shot, determine whether the subject fills the frame in a way that draws the required attention. Utilize the rule of thirds, move around and experiment with different possible angles. You’ll definitely come up with that perfect shot.

Still Life Mistake #5 – Not Experimenting

Rikaguite 486072 compressed

Being fastidious really pays off when it comes to taking still life photographs for professional and commercial purpose. When you’ve finished setting everything up for the shoot, take a few good clicks and randomize the entire setup – shift your subject to a little different location, add something to the scene that complements the subject, use different angles and lights, try framing the shots all over again. You’ll end up with a unique piece of art each time.

Still Life Mistake #6 – Wrong Choice of Lens

Still life photography is all about creating depth, and bringing out the subject in a way that directly interacts with the viewer. How will you achieve this level of focus? By utilizing the shallow depth of field.

This works great with subjects with high levels of detail such as: flowers, leaves, and fruits. Under this kind of a setup, you will want to come closer to your subject, set the camera to AV mode (Aperture Priority), and keep the focal length as long as possible. A telephoto lens is your best bet for this kind of a setup, because the longer focal length compresses perspective, helping your subject stand out more.

Rikaguite 868377 compressed 2

This doesn’t mean that only telephoto lenses work for still life photography. If you wish to bring out, and focus on the delicate details of your subject, go ahead and shoot with a telephoto lens. On the flip side, if you wish to capture everything on your table top setup, you would be fine with a either a standard 50mm lens or a wide angle.

How do you capture the still life?

What has been your experience with still life photography? Do you have any other useful tip to share? We look forward to your thoughts and suggestions on this article.

googletag.cmd.push(function() {
tablet_slots.push( googletag.defineSlot( “/1005424/_dPSv4_tab-all-article-bottom_(300×250)”, [300, 250], “pb-ad-78623” ).addService( googletag.pubads() ) ); } );

googletag.cmd.push(function() {
mobile_slots.push( googletag.defineSlot( “/1005424/_dPSv4_mob-all-article-bottom_(300×250)”, [300, 250], “pb-ad-78158” ).addService( googletag.pubads() ) ); } );

The post 6 Still Life Photography Mistakes and How to Avoid Them by Rika Guite appeared first on Digital Photography School.


Digital Photography School

 
Comments Off on 6 Still Life Photography Mistakes and How to Avoid Them

Posted in Photography


Don’t Delete Your Failed Images – Instead Learn from Your Mistakes with These Tips

28 Jul

I know you’ve done it. It’s okay to admit it. I’ve done it too! We all have! You’ve shot some terrible photographs.

Perhaps you shot the whole time in the wrong white balance, or you didn’t pay attention to shutter speed and everything is blurry. When this happens it’s incredibly disappointing. Frustrated and angry with yourself, you consider the experience a write-off, and delete the images. Then you head for the snack cupboard searching for some kind of solace.

But, everyone makes mistakes when they shoot, even professionals. There are times when we get excited and forget to check our settings, or make sure we are using the right lens for the right moment. It happens.

Image 1

We were canoeing and in my rush to get an image of a small bird I underexposed the shot.

These failures don’t have to be a complete waste though. There’s nothing negative about making mistakes. Willie Nelson once said, “Once you replace negative thoughts with positive ones, you’ll start having positive results.”

So with that in mind, start looking at every photograph you take, as a step forward. Don’t delete those mistakes right away. You can learn a lot about taking good photographs from the missteps you make. I’ve met some photographers who have created a special file for all of their failures. Then when they have a little bit of time, they peruse through the collection and reflect upon them. This type of exercise can help you grow as a photographer.

There are lots of ways to reflect on your images. Some people make mental notes about their images. Others like to use a written journal format. I know of a few photographers who use the keyword section in Lightroom to make notes. I’ve even seen a detailed scrapbook in which the photographer printed out his failures and scribbled notes beside each. Just be sure to pick a format that works for you. Regularly reflecting on your work is important.

To start you down the path here’s a list of questions that you can use to help you reflect on your images.

Reflection Tips

  • In the first few seconds of viewing the photograph, what was the first emotion you experienced? Why? Now let it go. Detach from the emotion and be critical.
  • Why do you consider this image a failure? Don’t analyze too much just scribble down the first thought that comes to your mind. Try to make this part of the analysis a stream of consciousness.
  • What were your goals or intentions when you shot this image? Why were you unable to meet those goals?
  • If you could turn back time and reshoot the image what would you do differently?
  • Think carefully about the image and come up with one key piece of learning that you can take away from this experience.

Now let’s practice your reflection skills. It’s not easy to analyze your own photographs; it can take some time to perfect. Let’s analyze some of my failures, and some successes.

View each image, and really look at it in a critical sense. You can use the guiding questions from above to help you. After you’ve finished your reflection, scroll down and take a look at my notes, see if you agree with my thoughts. Perhaps you noticed something different then I did.

Image 2

What did you come up with? Keep in mind there’s no right or wrong to this whole process. Some people might argue the image isn’t a failure. I personally, hate it.

Notes about the image

  • I cut off the hockey stick, it’s bad framing.
  • She’s looking down at the puck, there is no eye contact.
  • Loss of impact or connection with the viewer.
  • The edge vignette makes it too dark.

Ways to improve

  • Mark out the ice and give players a guideline for where to stop.
  • Remind players to look at the camera at all times.
  • Remove one complication by having kids skate without the puck (Photoshop the puck into the image in post-processing).

Image 3

Compare the shot above, with the previous image. It was taken in the same arena a few months later. Do you think there’s a difference? The framing is certainly better and he makes eye contact with the camera. Have I improved over the first shot?

Let’s consider another mistake. This image was shot for a magazine article. Can you tell why it’s a fail?

Image 4

Notes about the image

  • Her face is slightly out of focus.
  • The client wanted a unique angle for the shot but the focus is on the ball.
  • The houses behind in the background don’t suggest or support that we are on a soccer field.

Ways to improve

  • Ensure the focus is on the correct part of the scene by using back button focus.
  • Always take the time to set up the scene. Remember that the background is as important as the foreground.
  • Direct the player more to remain in a certain area.

Here’s the image the magazine chose to use for the article. You can see how the background gives this image more context than the previous shot.

Image 5

The more you reflect upon your images, the more you will grow as a photographer. If you find you are stuck in a rut, this kind of activity may just be a way to move forward. Coming back to images after a few days, or weeks, is always a good idea. By separating yourself from the image it will help you to analyze it more carefully.

I’ve posted a few more images here for you to reflect upon below. Once you’ve finished analyzing my work, try it on some of your own shots. Leave some examples in the comments below, and include your reflections.

Image 6

Image 7

Image 8

This is an opportunity to grow and become a stronger photographer. I expect that everyone who shares will be heartened by the fact that they are not the only ones to have taken a bad photograph. If you choose to reply to other people’s posts, please be kind and be constructive. This is all in the name of learning, we are not here to criticize each other.

Keep in mind, even geniuses have some failures!

“I have not failed. I’ve just found 10,000 ways that won’t work.” – Thomas Edison

googletag.cmd.push(function() {
tablet_slots.push( googletag.defineSlot( “/1005424/_dPSv4_tab-all-article-bottom_(300×250)”, [300, 250], “pb-ad-78623” ).addService( googletag.pubads() ) ); } );

googletag.cmd.push(function() {
mobile_slots.push( googletag.defineSlot( “/1005424/_dPSv4_mob-all-article-bottom_(300×250)”, [300, 250], “pb-ad-78158” ).addService( googletag.pubads() ) ); } );

The post Don’t Delete Your Failed Images – Instead Learn from Your Mistakes with These Tips by Erin Fitzgibbon appeared first on Digital Photography School.


Digital Photography School

 
Comments Off on Don’t Delete Your Failed Images – Instead Learn from Your Mistakes with These Tips

Posted in Photography


3 Rookie Mistakes to Avoid When Shooting on a White Background

05 Jul

Because the ubiquitous white background portrait is so commonplace, many people think it’s easy to achieve. Simply put your subject in front of the camera against a white background, preferably with a flash or strobe, and take the picture.

how-to-shoot-white-seamless-tutorial

Unfortunately it’s not as simple as that. Doing just that would result in a photo with either a gray, dull, muddy toned background. The best possible result would be an off-white background after you have done some edits. That’s not the only issue though, you’d be dismayed to see unwanted shadows everywhere too.

I have replicated the setup with my little model Sven – Kristoff’s beloved reindeer in the movie Frozen. It is easier doing this on small scale subject as the lights are oversized in comparison. With people, to do this to scale, you need to have massive size octoboxes and flags. But this tutorial will show you the process clearly.

Here are 3 rookie mistakes to avoid when trying to achieve a 100% pure white background:

Mistake #1 The background is not lit properly

The background must be lit with approximately two stops more light, than the amount of falling on the subject. For example, if you want to photograph your subject at f/8, set your background lights to two stops brighter, so the meter would read f/16 on the background.

Note: You need to meter both background lights separately, so that when metering for the main light (on the subject) you would turn the background lights off, and vice versa. When both the background and main lights are on, your meter should still give you f/8 on the subject, because you are metering the light that falls on your subject and not on the background.

The photo below (right) shows what it looks like when you don’t light the background at all. You get a tone and color other than the intended white. In the photo on the left the background was lit, but there was no main light illuminating the subject; thus the resulting image is almost a silhouette of the subject.

how-to-shoot-white-seamless-tutorial

My camera settings for all the shots in this setup were: ISO 250, 1/160th of a second, shot at f/8 for Sven, (the background read f/16). The speedlights were set to 1/16th power. I rarely use them at full power because the batteries run out very quickly that way. If you are using the SB900 Nikon, firing at 1/1 power, not only does it drain the batteries very quickly, but also makes the flash overheat. Nikon has solved this problem with the SB910. These are some reasons why I did not shoot this at ISO 100. The camera used was a Nikon D750, which handles noise superbly, so that ISO is not an issue. Two SB910s and one SB900 were used for this setup.

The photo below shows a pull back of the setup with only the left background light firing.

how-to-shoot-white-seamless-tutorial

You will notice in the two images below that only the right background light fired on the left photo, and only the left background light fired on the right photo. This lighting is acceptable of course if that were your intention. The main light was positioned at a 45 degree angle on camera right. I wanted to bounce my flash onto the white rogue bender to modify it.

how-to-shoot-white-seamless-tutorial

You may also notice that on the left photo (above) there is a pleasing shadow of Sven behind him on the background – because the left background light didn’t fire. Where the background light did fire on the left, this shadow was eliminated (right photo above).

Below is the setup with all three lights firing correctly.

how-to-shoot-white-seamless-tutorial

Now that you have your background and main lights set up, you need to make sure these lights only hit the intended subject. This leads us to the next rookie mistake… separation.

Mistake #2 Not enough subject background separation

Because the background lights are so much brighter, you need to separate them from the main subject. There are two key ways of doing this:

  1. Flagging
  2. Distance

Flagging

You can use anything block to flag your lights; the black side of a reflector, black cardboard sheets, black foam core. Black does not let light in, instead it absorbs light rather than bounces it. It also blocks light from seeping through to places where you do not want it. If you don’t flag (block) your background lights, your subject will get a halo effect and look very backlit.

Distance

Once you have flagged your lights, you need to distance your subject far enough away the background (and background light) so that any spills won’t touch your subject. This depends on your personal preference and intention of course – you may want some spill on your subject for a certain look or effect, or you may not.

If you do want some spill on your subject, make sure to run a few tests with various lenses, as chromatic aberration tends to occur around the edges due to the abundance of light. Some lenses are prone to chromatic aberration irrespective of aperture, while others can handle it very well even at wide apertures, where it is most commonly observed. Also, be careful with the amount of spill you allow so as not to chop off parts of your subject from the spill overexposure.

how-to-shoot-white-seamless-tutorial

The photos above show a properly lit Sven. The two background lights firing at f/16 and the main light firing at f/8. There are no unwanted shadows on the background, as was my intention. However, I wanted to have a reflection and shadow in the foreground. This leads nicely to the third rookie mistake to avoid…a floating subject.

Mistake #3 The subject is floating

If you do not include some floor shadows, your subjects will look like they are floating on white air, or cut out and pasted on a white sheet of paper.

The best tip for avoiding floating subjects is to use a reflective surface like translucent white plexiglass, or white tile sheet, as a base for your subject to stand on. You can adjust the opacity of this reflection in Photoshop during post-processing, but having the reflection shows that your subject is planted firmly on solid ground.

how-to-shoot-white-seamless-tutorial

The left image shows Sven floating, and on the right you see the reflection showing Sven standing on solid ground. The latter looks more pleasing and natural, and not like a cut-and-paste job.

Bonus Mistake #4 Overexposed background

Be careful not to add too much light to the background. If you go past pure white and really overexpose it, the white will start almost glowing around the subject just like if you had sun flare outdoors. It lowers contrast and your subject looks like that have a bit of a halo, as you can see in the images below.

white-seamless-overexposed-background_0000

For more tips on a white or high key background see: 4 Tips for a Perfect White Background in High Key Photography

Conclusion

I hope this little tutorial has shed some light on basic techniques for shooting a white background, where you want the background to be 100% white, and that it has dispelled any mystery over how to achieve this look. If you have other more advanced techniques, do share them here!

googletag.cmd.push(function() {
tablet_slots.push( googletag.defineSlot( “/1005424/_dPSv4_tab-all-article-bottom_(300×250)”, [300, 250], “pb-ad-78623” ).addService( googletag.pubads() ) ); } );

googletag.cmd.push(function() {
mobile_slots.push( googletag.defineSlot( “/1005424/_dPSv4_mob-all-article-bottom_(300×250)”, [300, 250], “pb-ad-78158” ).addService( googletag.pubads() ) ); } );

The post 3 Rookie Mistakes to Avoid When Shooting on a White Background by Lily Sawyer appeared first on Digital Photography School.


Digital Photography School

 
Comments Off on 3 Rookie Mistakes to Avoid When Shooting on a White Background

Posted in Photography


4 Mistakes Beginning Landscape Photographers Make

23 Jun

Even the most famous photographers started out as beginners. Nobody is a master after day one, and learning is a big part of the process. However, nobody likes to appear as a beginner or an amateur, we all want to create images that looks more professional than just a snapshot.

There are certain mistakes that makes it very obvious that you’re a beginner, and if you want to gain some exposure online, these mistakes might turn people away. Here are four mistakes beginning landscape photographers make and you can can avoid them.

An example of when a spirit level is important to see if the horizon is straight.

An example of when a spirit level is important to see if the horizon is straight.

Mistake #1 – Uneven or crooked horizon

In many photographers’ opinions, there are few things more annoying than viewing landscape images with a uneven or crooked horizon. I see so many images with great potential that are ruined because of this issue. The reason we find this annoying is that the composition is severely weakened with an uneven horizon. Instead of using the composition to lead the eye towards the subject, the horizon will grab your attention and lead the eye straight out of the image.

I know many photographers struggle, or simply forget, to straighten it. This may be because they are so excited to capture the image that they forget to look at it (hi mom!) or because they just don’t know how. Still, straightening the horizon is a huge step towards improving your landscape photography.

Luckily there are a few simple tools to fix this problem, both in the field and in the post-production stage.

In the field: Use a spirit level

If you’ve ever done any sort of construction, this should be a tool you likely know well. But did you know it’s also a highly valued tool amongst photographers?

IMG_7941

It’s becoming more common, even for mid price-range cameras, to have a built-in spirit level. Nikon names it Virtual Horizon, and Canon has the Electronic Level. Personally, I use the Virtual Horizon for all my compositions when the camera is mounted on a tripod (which is 99% of the time). This tool shows you a spirit level on the camera’s LCD screen, so you need to be working in Live View. Note: Keep in mind that using Live View will drain your battery much quicker.

Even though a Virtual Horizon or Electronic Level is becoming more common, there are still many cameras that don’t have this feature, and there are those who prefer the old school method: using a spirit or bubble level on top of the camera. This small and handy tool can be found in most photography stores, and shouldn’t cost more than a few dollars (see photo right).

In post-production: Fix it in Adobe Lightroom

spirit-level-LR
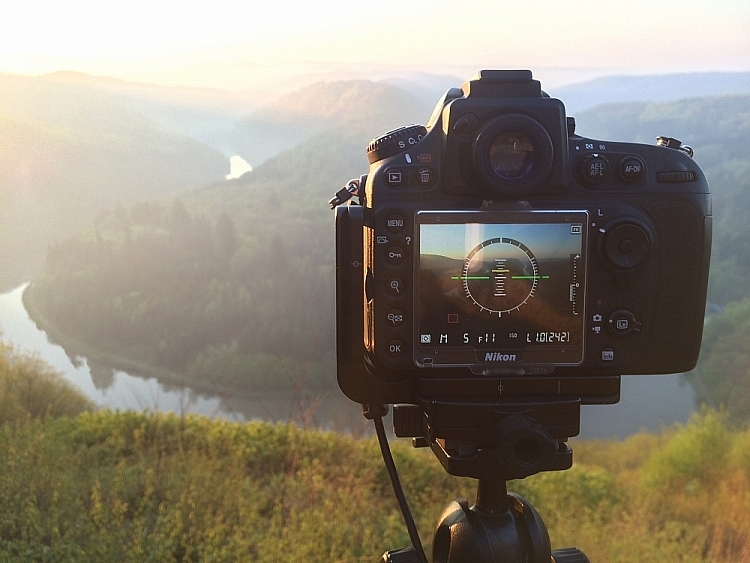
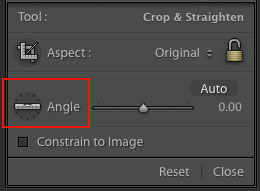
If you weren’t able to get a straight horizon in the field, there’s also a easy method to fix it in post-production.
Adobe Lightroom has a great tool called Straighten. You can find this by going into Develop  > Crop Tool (the keyboard shortcut is R). You then see a spirit level followed by the word Angle (outlined in red on the right).

There are three methods to easily straighten your shot using the crop tool:

  1. Click Auto and see how Lightroom does at straightening the image. It usually does a pretty good job so try that first, you can also undo it if it’s not right and try the other methods.
  2. Select the spirit level and drag a line along the horizon. Adobe Lightroom will then automatically straighten the image according to the data you gave it.
  3. Manually insert amount of straightening you need, or drag the point back and forth until you’re pleased.

Mistake #2 – Being stuck in Automatic Mode

Mode Dial
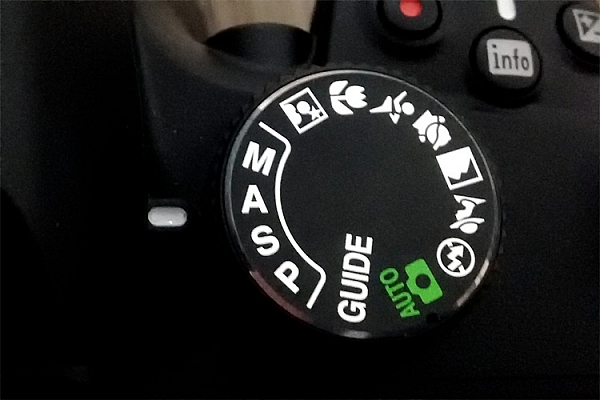
While Automatic Mode may have its benefits for those who just bought their first camera, the sooner you stop using it the better. I always recommend mainly using Manual mode, even though both Shutter Priority and Aperture Priority are acceptable for beginners.

There are several reasons you want learn how to manually control the camera, and understand how the settings work together. Even though the camera does a decent job exposing the image correctly, it doesn’t take the image quality into consideration. In other words, the aperture and ISO will rarely be optimum if you wish to get a sharp result.

I know it may seem scary in the beginning, and I still remember how I tried to understand the basics when I was starting out, but I guarantee you it’s worth the extra effort. When you can use the ideal settings, the final result will be much better.

It would be nearly impossible to get an image like this in Automatic Mode

It would be nearly impossible to get an image like this in Automatic Mode

Mistake #3 – Not using a tripod

Besides the camera itself, a tripod is the most important tool for landscape photography. While some may complain that it’s not practical to travel with, trust me when I say –  there’s an ocean of opportunities when you begin using a tripod.

Not only will your images become noticeably sharper, you will also be able to do certain techniques that aren’t possible without a tripod (such as long exposure photography). Let’s look at some of the advantages of using a tripod for landscape photography:

  • You’re able to achieve longer exposures without getting blurred images.
  • You don’t need to use a high ISO to keep the image sharp. Keep the ISO low and use a longer shutter speed instead.
  • You can carefully make your composition and keep it for many images.
  • Since the camera stays in the same spot you can take multiple images and stack them later (for things like: HDR, time-lapse or techniques to remove people).
  • You’re able to keep the image straight by using Live View, and carefully adjusting the tripod.
  • The amount of motion is reduced so your images become sharper.
Using a tripod makes it possible to have a longer shutter speed

Using a tripod makes it possible to have a longer shutter speed to make images like this.

You don’t need to blow your wallet on the most expensive tripod on the market, but I do recommend getting something that’s more durable than the $ 20 one at the electronics shop. A solid tripod will last for a long time and might save you money in the long run. A sturdy tripod is more flexible to work with, and it’s still gonna do a good job even in windy conditions.

Mistake #4 – Shooting during the daytime

I know I might start some discussion with this point, but good landscape images are not taken during daytime. In landscape photography, light is everything.

You might have heard about the Golden Hour, at times referred to as the Photographer’s Hour. The time around sunrise and sunset is when the sun’s position in the sky is ideal for photography. The low light gives a soft and golden glow to the landscape.

Bird flying through a stormy sunset at Liencres, Cantabria.

Bird flying through a stormy sunset at Liencres, Cantabria.

During midday the light is harsh, and very few images looks good in these conditions. If you want to improve your landscape photography you need to go out and photograph during sunrise and sunset. Daytime is perfect for scouting locations or sleeping.

As always, there’s a few exceptions to the rule:

  • Commercial travel photography: If you’re photographing for tropical hotels and resorts, they do need sunny pictures, as this is what attracts tourists.
  • Cloudy days can be okay for photographing waterfalls.

Read also: 5 Reasons Why Bad Weather Days are the Best Times for Photography and 5 Ways to Create Dramatic Landscape Photos at Midday for other ideas.

Jotunheimen-Cabin-Fog

An example of when shooting during daytime works

Are you guilty of these four landscape photography mistakes? Have you made any other mistakes that had a negative impact on your photographs? Please share your thoughts in the comments below.

googletag.cmd.push(function() {
tablet_slots.push( googletag.defineSlot( “/1005424/_dPSv4_tab-all-article-bottom_(300×250)”, [300, 250], “pb-ad-78623” ).addService( googletag.pubads() ) ); } );

googletag.cmd.push(function() {
mobile_slots.push( googletag.defineSlot( “/1005424/_dPSv4_mob-all-article-bottom_(300×250)”, [300, 250], “pb-ad-78158” ).addService( googletag.pubads() ) ); } );

The post 4 Mistakes Beginning Landscape Photographers Make by Christian Hoiberg appeared first on Digital Photography School.


Digital Photography School

 
Comments Off on 4 Mistakes Beginning Landscape Photographers Make

Posted in Photography


10 Silly Mistakes Photographers Make

11 Apr

It’s OK to make mistakes. In fact, our experience is all about making mistakes and learning certain lessons out of them. So by listing these silly mistakes most photographers have probably made at least once, we’re by no means scoffing at anyone. Our goal is to draw your attention to some issues you can easily avoid if you approach your Continue Reading

The post 10 Silly Mistakes Photographers Make appeared first on Photodoto.


Photodoto

 
Comments Off on 10 Silly Mistakes Photographers Make

Posted in Photography


7 Common Mistakes That Newbie Street Photographers Make

26 Feb

Over the last few years I have worked with enough budding new street photography enthusiasts, to notice a common thread of early mistakes that many of them make. A lot of these are very simple tendencies and changes, that can make a vast difference to the final output. It’s for this reason that I try to teach these 7 tips from the very start. Follow along so you can avoid the seven common mistakes that newbie street photographers make:

Grand Central, NYC Street Photography

Grand Central, NYC.

1. Thinking too much while shooting

If you are reading this article, you are on the right back. You should read about photography to teach yourself, and study the work of great photographers. However, when you are out there, in the process of shooting, try to not over-think things too much. There are so many tips and tricks, and you may worry a lot about capturing bad images, but that can all get in the way sometimes.

Instead of worrying about the results, get lost in the process. You can assess your results during the editing phase. When you are out there shooting, have fun. Explore, take your time, relax, and just watch everything go by. This is a type of photography that you really have to enjoy to do well, and the best part about it is that you can go out and do it nearly anywhere and at any time. You can do it in 10 minute spurts, or during your lunch hour. You can even do it with your iPhone if you don’t have your camera. The more fun you have with the process of being out there, getting lost, and exploring, the more dedicated you will become, and the better street photographer you will become.

2. Traveling too heavy

There are many great videos of the old masters shooting street photography. You know what is the one common thread between many of them? It’s that they had manageable sized cameras, that they could easily take anywhere, and they more often than not they used small prime lenses. You can certainly shoot street with an SLR, and do it very well. There are top photographers that do just that, but at the same time are you really going to want to carry that tank of a camera around on a daily basis? That’s the big advantage of a smaller camera, and the technology is catching up quickly with the large bodies. A small Fuji camera, or a Ricoh, will do wonders, and you can even get an older used version for much cheaper than the new ones. There are many iPhone street shooters as well.

Astor Place, NYC Street Photography

Astor Place, NYC.

Likewise, you do not need a big bag of lenses and filters. If you haven’t tried it, I can’t stress enough, how freeing going out for a day with a single small camera body, and a single prime lens, can make you feel. Leave the rest behind. Yes, you will miss out on that 200mm zoomed shot of the water tower, but you will come back in the long run, with so many more good photos, and you will have a lot of fun doing it.

3. Trying to get somewhere too quickly

We’re all in a rush these days, running from place to place. Luckily, that is one of the worst ways to do street photography. To do street photography well, you need to slow down, and take your time. You can’t always be in a rush. Look around, and wait for things to happen. Wait with your camera, and let the subjects come to you. The slower you go, the more aware you will be of your surroundings, and the more able you will be to capture those extraordinary fleeting moments. Use photography as a way to break out of the rushed lifestyle, and to get lost and slow down for awhile.

4. Not standing in the middle of the action

Broadway, SoHo, New York Street Photography

Broadway, SoHo, NYC.

It is so easy to get intimidated when you are first learning. Many people start by photographing from a distance, and they never really push themselves to get right in the middle of what’s happening. Carry your camera proudly, put a smile on your face, and get involved in the action. Get in the middle of the street.

You might notice that if you are standing too far away and shooting, then people will actually think you are up to no good. But, if you are directly in the middle of the action, people will walk right by thinking that you are doing nothing wrong. Sometimes you’ll even blend in more being in the middle. How could you possibly be doing something wrong if you are right there in the middle? Nobody that obvious would be doing anything bad, but that photographer creeping around over there in the corner, just has to be a stalker. Stop and wait right in the middle of an area where things are happening, and just let everything happen around you. Engulf yourself in the experience.

5. Not putting the camera to your eye enough

I hip shoot a decent portion of the time, particularly when things are happening incredibly fast, but I also try to look through the viewfinder as often as possible. A lot of new photographers only hip shoot, and it quickly becomes a crutch. After a while, they become even more afraid to put the camera to their eye, than when they started. Force yourself to get comfortable shooting through the viewfinder. Just stand in a busy place, with the camera to your eye for a while, until you feel comfortable. After that you can add in the hip shooting. There will be situations where a hip shot is beneficial, but you will get better shots, and better framing, when you look through the viewfinder. Take pride in seeing it all coming together, and capturing that split second moment where it does.

Fire Hydrant, SoHo, NYC

SoHo, NYC.

A tip that helps with this, is to not take the camera away from your eye right after you take a shot of someone. It’s a natural habit to remove the camera from your eye briefly when you take an image. Instead, get in position, and wait for a person to be in the right spot, Then, take the image, but continue to keep the camera to your eye as they walk through the scene and past you, as if they got in your way and you are trying to photograph what is behind them. This trick works incredibly well in areas with quite a few people walking around.

6. Rapid firing with the camera

Turn the machine gun setting on the camera off. A lot of people think that if they take 10 photos of the same scene, they will be guaranteed to get a good one. Where’s the art in that? I actually find that holding down the shutter button, and taking a stream of shots, is a way to guarantee that you will screw up the shot. You need to be able to visualize what you are getting. See the moment as it happens, then capture the elements as they all fall into place. That only takes one shot. Then, as a scene further develops, you can take more, but see the moment and grab it. If you miss it, and you will miss some, there’s always next time. Let go of the fear of missing a shot.

In addition, with rapid fire you will end up taking 10 times the number the photos, over the course of the day. How are you going to find the perfect moment in all of that? Nobody has the time, or the hard drive space. With less, and more purposeful photographs, comes a much more enjoyable editing session.

7. Under and over-editing

East Village, New York Street Photography

East Village, NYC.

A lot of new street photographers will both under, and over-edit their photos. What I mean is that they will show too many photos, and they will over-process them. Be ruthless with narrowing your photos down to the best ones. You want people to actually give your work attention, and if you show too many photographs at one time, they will tune out. By showing too many photos you are relying on the viewer to do the editing in their heads about what they like. That’s not fair to them, do that work yourself. Spend that extra time organizing. Use a starring system to give your photographs ratings and make sure that there are not too many five star images. Spend the time after each shoot to narrow it down to just the cream of the crop. If you don’t do this consistently, you will allow your archive to pile up into an unorganized mess.

When you do the actual editing to your photos, keep a light touch. You can, and should fix the exposure, blacks and whites, vignettes, color temperature or black and white tones, contrast, and all that other good stuff. However, a lot of new street photographers go way too far. Part of the extraordinary nature of street photography is that it was actually captured in the real world. It was not made up. If your photos are too edited, and lose that real feeling to them, it kills the thing that makes them special.

Are you guilty of any of these mistakes? How have you overcome them? Do you have any others you’d like to share? Please do so in the comments below.

googletag.cmd.push(function() {
tablet_slots.push( googletag.defineSlot( “/1005424/_dPSv4_tab-all-article-bottom_(300×250)”, [300, 250], “pb-ad-78623” ).addService( googletag.pubads() ) ); } );

googletag.cmd.push(function() {
mobile_slots.push( googletag.defineSlot( “/1005424/_dPSv4_mob-all-article-bottom_(300×250)”, [300, 250], “pb-ad-78158” ).addService( googletag.pubads() ) ); } );

The post 7 Common Mistakes That Newbie Street Photographers Make by James Maher appeared first on Digital Photography School.


Digital Photography School

 
Comments Off on 7 Common Mistakes That Newbie Street Photographers Make

Posted in Photography


12 Common Newbie Photography Mistakes to Avoid

14 Jan

None of us are perfect and we all make mistakes. While some photographers might be naturally gifted, and just do amazing work from the moment a camera is put into their hands, that is not the case for most of us. Chances are, if you are new to photography, you are going to muck things up. You shouldn’t feel bad however, as you can be sure that many newbies have done exactly the same things. Here are a number of very common mistakes that new photographers make. Learn to avoid them, and you will improve your images.

1 – Centering everything in your images

The horizon line is right in the middle, cutting the image in two.

The horizon line is right in the middle, cutting the image in two.

When most of us look back at our early images, we usually see the horizon line placed very much in the middle of the image (see photo above). This is one of the most common mistakes new photographers make when they start. Sometimes it’s a good thing to do, but not always. The problem is that it cuts the image in half, and leaves people looking at the image, unsure of which half to look at, which is the intended subject.

When you take photos of landscapes, or anything with a horizon line, it is best to put the horizon on one of the third lines.The Rule of Thirds is one of the compositional guides for photography. As you get more into photography you will hear more and more about it.

With the horizon in the top third most of the ground is showing, telling the viewer what to look at.

With the horizon in the top third, more ground is showing than sky, telling the viewer where to look

It’s the same idea for your subjects. If you are photographing a person, put them to one side of the image, on one of the vertical third lines. Which line you use is up to you. Sometimes it is better to do both and see which one looks better. Experimenting is the key to getting great photographs.

2 – Taking attention away from the main focus in the image

Without meaning to, you may include something in your frame, that takes the focus off the main subject in the image – things like bushes, or a light post that is just a line through the image. It goes back to the previous point about giving your subject so much attention, that you aren’t taking the time to look around it.

3 – Cutting things off at the edge of the frame

It is amazing how many times you can look at someone’s photo and ask, “Why have you cut off their feet?” They then look back at you blankly, saying they had never noticed it before.

LeanneCole-common-newbie-mistakes-0029

Be careful not to cut off parts of limbs, like feet, when you are taking photos.

It is a very typical thing that newbies do. It may not be the feet, but it could be someone’s hand or the top of their head. It can happen in architecture and landscapes as well; the tip of a church dome will be missing, or the top of a tree.

It is all about learning to look at your subject and making sure you concentrate on getting them all in the frame. If you can’t fit them in the image, then you need to make decisions about what you will include, and what to crop off. Often if you take more than two thirds of a leg away it looks deliberate. If you only take one third away it looks like you weren’t paying attention.

Missing toes or feet.

Missing toes or feet.

Make sure to include feet.

Make sure to include feet.

4 – Thinking that having a great camera is enough

“I bought this fantastic camera and I paid a lot of money for it, but my photos don’t look great.” There is an assumption that if you have a good camera, you will automatically take amazing photos. This is not the case.

Just because you have a great camera, doesn’t mean you don’t need to learn photography. It is the person behind the lens that is responsible. If you see amazing photos by other photographers, that it is because they have learned about composition, and how to use their camera properly. Scroll to the bottom for links to more beginner articles to help you with this one.

5 – Not looking behind your subject

“Look at the tree coming out of that person’s head.” This similar to the previous point. You need to consider everything in the frame. You can usuallt remove the tree from their head by taking one or two steps to either side.

LeanneCole-common-newbie-mistakes-0027

Look behind your subjects and make sure there aren’t things like trees coming out of their heads.

leannecole-newbiemistakes-portrait

Slight camera reposition and no tree coming out of her head any more.

6 – Taking only photo of a subject and from a common viewpoint

We all see people who want to take photos of a building, they walk straight up to it, take one photo from the middle position, and that’s it.

Think about other angles you can use as well. Try moving to the left, the right, or both. Take some from low camera angles and then some standing up. As you take more shots, you will learn what works and what doesn’t. Again, it is all about experimenting.

LeanneCole-common-newbie-mistakes-0031

Taking a photo of a place by standing right in front of it. 

7- Having a really good camera and never learning how to use it properly

If you get an amazing camera that is capable of so many things, and never take it off auto, you are missing out on a lot. Learning to use your camera is one of things you can never regret. While you may be able to get some great photos with it on automatic, if you learn about aperture, shutter speed, and ISO, you will have more control over your images. It is usually something that no one is ever sorry about doing.

Once you have the basics worked out, you can then learn more advanced things like long exposures and HDR. The world of photography really opens up to you when you know how to use your camera to its full potential.

8 – Not giving your camera enough time

I was at an event once and I handed my camera over to friend to grab a few shots for me. When I got home and looked at the photos he had taken, they were all out of focus. I realized that he was pressing the shutter release without giving the camera time to focus properly.

You have to learn how to let the camera focus for you and give it time to do that. They are fast, but not always fast enough. The same goes with exposure, you have to give it the time to get the correct exposure. It doesn’t ask for a lot, so just give it the time it needs.

9 – Forgetting to check the settings you used the last time

It’s common for newbies to go out to take photos, making adjustments on their camera for what they are shooting at the time. But, the next time they go out to shoot, they forget to look at how the camera was set up. Afterwards, when they put the images on the computer, they realize they have lots of photos that didn’t turn out, because the camera settings were wrong for that subject or situation.

I was photographing a four day event a few years ago, and I couldn’t work out why some photos were really overexposed, while some were really dark. It took nearly three days to realize it was because my camera was set on auto bracketing (AEB). It was around that time I had just started taking photos at different exposures (bracketing) and had forgotten about it. Now I pick it up straight away.

LeanneCole-common-newbie-mistakes-0028

Checking your camera setting when you take photos in case the last time you were out your were underexposing or bracketing your images.

Always look at the settings you have on the camera. Check what the aperture is set to. Work out if you have it on manual, shutter priority, aperture priority or auto. Be aware of what the ISO is at all times. It is a good habit to get into, to check them all every time you start.

Make sure you have a memory card in the camera too. I have gotten into the habit of leaving the card out of my camera, and when I pack my gear to go somewhere, I put the card in the camera. It is part of my routine now, I also pack an extra as well.

10 – Never turning the camera vertically

One thing you often notice with new photographers is that they only use their camera in landscape mode. They never seem to consider turning their cameras up on the side, to shoot vertically. It isn’t always necessary to do so, but some subjects would benefit more from that orientation. When you are taking photos, try turning the camera into the portrait mode (vertical) and see if you can get a better image.

leannecole-newbiemistakes-horizontal

Don’t always have your camera in landscape mode, like this image, turn the camera up into portrait mode as well.

Try vertical for a different perspective.

Try vertical for a different perspective.

11 – Not asking for help

You should never be afraid of asking for help. Generally, photographers are more than happy to help someone who wants to learn. Don’t badger people with too many questions, but asking a few questions isn’t going to hurt.

12 – Don’t panic

A friend was telling a story about how she was in a Cathedral taking photos and they were all turning out black. She started to panic and couldn’t work out why. Once she calmed down she realized it was because her ISO was too low.

If you get into a situation where your photos are not working, don’t panic. Think logically about it. In most cases it is going to be your aperture, shutter speed or ISO. Just take the time to think about them and check the settings. You will work it out.

Have fun

The best advice anyone can give you is to enjoy your time with your camera. Explore the world around you. Remember that the mistakes you make are being made by nearly everyone in your situation. You aren’t alone.

googletag.cmd.push(function() {
tablet_slots.push( googletag.defineSlot( “/1005424/_dPSv4_tab-all-article-bottom_(300×250)”, [300, 250], “pb-ad-78623” ).addService( googletag.pubads() ) ); } );

googletag.cmd.push(function() {
mobile_slots.push( googletag.defineSlot( “/1005424/_dPSv4_mob-all-article-bottom_(300×250)”, [300, 250], “pb-ad-78158” ).addService( googletag.pubads() ) ); } );

The post 12 Common Newbie Photography Mistakes to Avoid by Leanne Cole appeared first on Digital Photography School.


Digital Photography School

 
Comments Off on 12 Common Newbie Photography Mistakes to Avoid

Posted in Photography


6 Mistakes to Avoid in Long Exposure Photography

13 Jan

Do you want to get better at creating long exposure photos? Long exposure photography is famous for tranquil and serene landscape shots, but when engaging in this type of photography there are many pitfalls that can ruin your shots. Below you will find a list of 6 common mistakes and how to avoid them. Shaken and Blurred Photos Even though Continue Reading

The post 6 Mistakes to Avoid in Long Exposure Photography appeared first on Photodoto.


Photodoto

 
Comments Off on 6 Mistakes to Avoid in Long Exposure Photography

Posted in Photography


10 Photography Website Mistakes That Might be Repelling Your Potential Clients

19 Oct

If you are serious about your photography business, then you most likely have your own photography website already (if not, you should set one up right away). You are probably really proud of it and consider it the best website under the sun. However, numerous mistakes can be found on almost every photographer’s site. These mistakes could be fatal for your business, since they can easily repel your potential clients. We are talking big agencies, companies and even government organizations, not just regular consumers who want you to be their wedding photographer.

Here’s some good news: these mistakes can be fixed easily once you know what they are based on.

We have recently researched thousands of photographers’ websites when looking for professional vacation photographers for our new project. We were quite surprised by the number of mistakes we had encountered on them. On top of that, several particular mistakes kept constantly repeating!

Some seem obvious, some of them not, but almost every photographer’s website is guilty of at least one or two of these mistakes. So, here comes the checklist of some of the most common photography website mistakes that might save some of your serious assignments:

1) Your name is missing

This is probably the most obvious mistake. However, you would be really surprised how many websites are anonymous. A nickname may be great, it might help you look like a mysterious artist, but it definitely won’t help you to get new inquiries.

Your name is your only brand. You should be proud of it and present it to the public as much as you can. So put your name out there! Visibly! And buy yourself a domain with your name if possible.

1 example of good website be proud of your name

Example of good website, be proud of your name: Kristina Kislitsyna

2) You’re using cheap web templates

Do you want to run a successful photography business? Then you have to invest in it, at least a little. Start with investing in a decent website. A few hundred bucks and a skilled friend will have the work done in a blink of an eye, you’ll have a nice, basic, yet original website.

However, I implore you, do avoid those cheap template websites with the provider‘s logo all over the place.

3) Your contact information is missing

Email address is the key. Your client needs to find it quickly and easily. Contact forms might not seem like a bad choice at first, however, they most certainly are. Lots of big clients prefer to contact you via email, because they want to have a copy of the email that they send to you.

If you insist on having a contact form, put your email address next to it and let your client decide. Here’s a secret tip – insert your email address as an image with your email on it so bots cannot find it and you save yourself from getting tons of spam.


2 example of good website put your email address next to the contact form and let your client decide www sarahbel com

Put your email address next to the contact form and let your client decide: Sarah Bel Photography

4) Check your spam box

This one is closely connected to the previous point. Inquiries from agencies, companies, and other projects often end up in the spam box or junk folder. It doesn’t matter which email service you use to communicate with your client, but it is essential to check your spam box every few days. This is the only way to avoid those embarrassing moments when you respond to an important inquiry after several months, and indeed, it is usually too late at that point.

5) There’s music playing on your website

Do I have to add anything else? Hello, it’s 2015! Everyone is listening to Spotify or YouTube while browsing the internet. The last thing people want is to be interrupted by the blasting of your favourite music.

6) Your pricing is hidden

It’s okay if you don’t want to share the pricing on your website, it’s also okay if you want to share it, but you definitely need to decide which way you want to go! If you want to show your prices, do so visibly, clearly, and in a special menu category. If you don’t want to share them, then say so clearly (and add your email address at that point, so that the client can contact you regarding the pricing details right away).

There’s nothing weirder and more suspicious than a small hidden grey link to a PDF pricing guide that cringes at the bottom right corner of an About Me page.

3 example of good website clear statement about where to find pricing www verapavlovaphotography com

Example of what to do – clear statement about where to find pricing: Vera Pavlova Photography

7) Your website is too slow

On photography websites, this is most often caused by high-resolution and uncompressed photos. I know, we are photographers and we are proud of our latest cameras with great dynamic range and stuff. Still, these things are usually not that important for our potential clients. You need your website to be fast! And because of that, you need to compress photos for your website – compress them big time (150-200kb is a good maximum file size for website images, any bigger will slow your site down). Speed is the king in the realm of photography websites.

8) There’s no English version

This one is for photographers from non-English speaking countries. Yes, English is the most important language in the business world nowadays, so you need to have an English version of your website if you want to target the worldwide market. If you don’t have the time, or the resources, to prepare two language versions, then go for an English only site.

4 example of good website two language versions including English www barulaphoto com

Example of a website with two language versions including English: Baru la Photo

9) Your location is missing

Lots of (semi)professional photographers try to target the whole world, thus the only location info that you can find on their website is “available worldwide”. Okay, it’s great to know that you’re willing to travel, but clients are sometimes looking for local know-how. Always specify your location (at least by the city).

10) There are no links to social media

Social media is the new place to check testimonials and references to your work. It is crucial for your potential clients to be able to quickly find their way to your profiles on social media. The rule “the more, the better” applies here 100% – Facebook, Twitter, Pinterest and Instagram are necessary. You name the others…

5 example of good website clearly visible links to social media www austinsheppardphotography com

Example of clearly visible links to social media: Austin Sheppard Photography

Summary

You put a great amount of energy and time to build up your website. It would be pity to reduce the possibility of attracting potential clients just by making some small mistakes that you can get rid of quite easily. I hope that this article will show some practical examples of such possible changes.

We would also love to hear from you! Are there any other mistakes that you suggest avoiding on photography websites?

googletag.cmd.push(function() {
tablet_slots.push( googletag.defineSlot( “/1005424/_dPSv4_tab-all-article-bottom_(300×250)”, [300, 250], “pb-ad-78623” ).addService( googletag.pubads() ) ); } );

googletag.cmd.push(function() {
mobile_slots.push( googletag.defineSlot( “/1005424/_dPSv4_mob-all-article-bottom_(300×250)”, [300, 250], “pb-ad-78158” ).addService( googletag.pubads() ) ); } );

The post 10 Photography Website Mistakes That Might be Repelling Your Potential Clients by Matej Slezak appeared first on Digital Photography School.


Digital Photography School

 
Comments Off on 10 Photography Website Mistakes That Might be Repelling Your Potential Clients

Posted in Photography