RSS
 

Posts Tagged ‘Locations’

How to Find the Best Locations for Landscape Photography

28 Apr

Have you ever looked at the work of a good landscape photographer and wondered how they found such beautiful places to shoot? Or would you like to travel to a new place to do landscape photography but are unsure how to find the best locations?

You are not alone. It takes work to find the best locations and most landscape photographers go through this process. The tips in this article will help you.

Landscape photography locations

1. Look at the work of other photographers

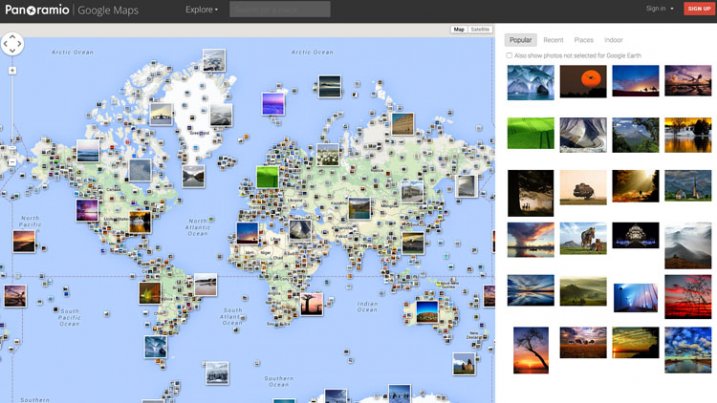
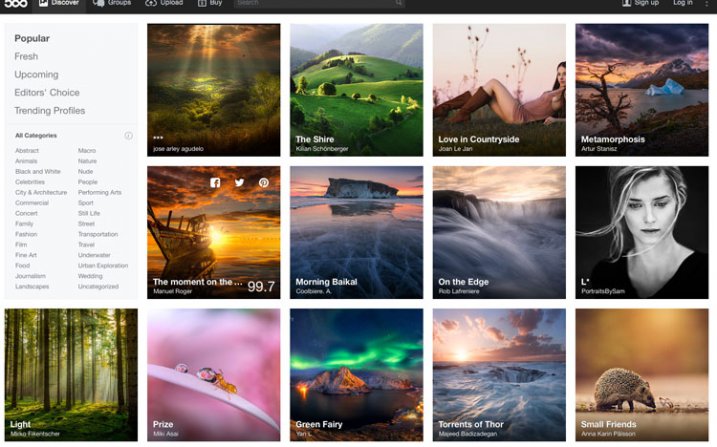
The first step to finding great places to take landscape photos is to look at the work of other photographers. There are so many great photographers on 500px, Instagram, and Flickr that it should be relatively easy to find some who have worked in the areas that you have in mind.

Looking at the work of other photographers helps you in two ways:

  1. It helps you find the most iconic, popular, and spectacular places to take photos.
  2. It gives you an idea of the potential of a place for the type of landscape photography you have in mind (for example, perhaps you are looking for somewhere to do long exposure photography, or perhaps you like to work in black and white).

It’s a good idea to look for the work of a local photographer. Locals have a huge advantage over visitors. They know the area better and are familiar with photogenic but relatively unknown locations. They may have lived there for years and built up a substantial body of work. Their portfolios contain photos taken at different times of the year. All these things help build a picture in your mind of the location and its potential for landscape photography.

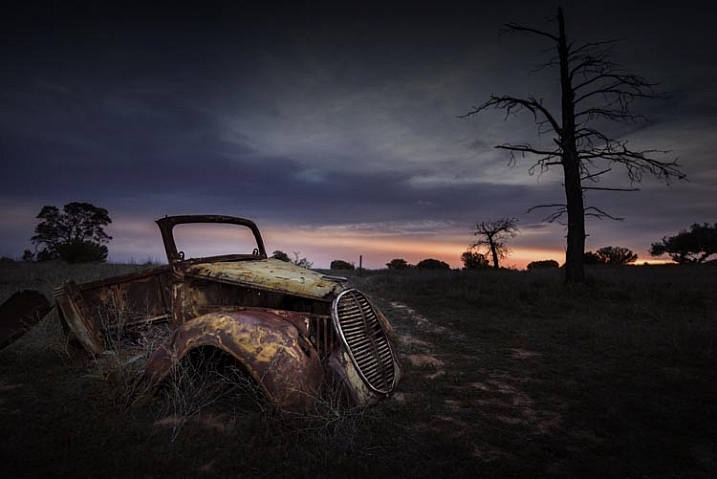
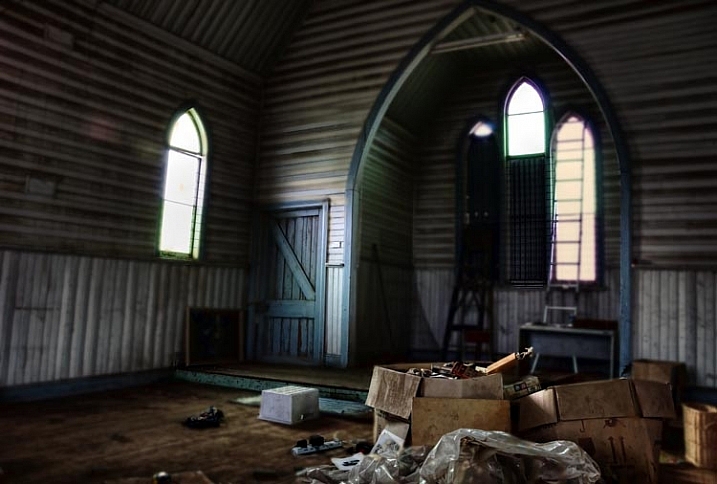
I went through this process when I traveled to northern Spain last year. Looking at the work of local photographers helped me find locations like this.

Landscape photography locations

2. Go out and explore

Once you’re on location, curiosity is the key to finding interesting things and places to photograph. If you’ve done your research you already know the most iconic and popular locations – they are probably what attracted you in the first place.

But what about other locations? The not so well known ones? You can only find those by exploring. It’s only the desire to see what lies around the next corner, or where a lonely road takes you that allows you to find these places.

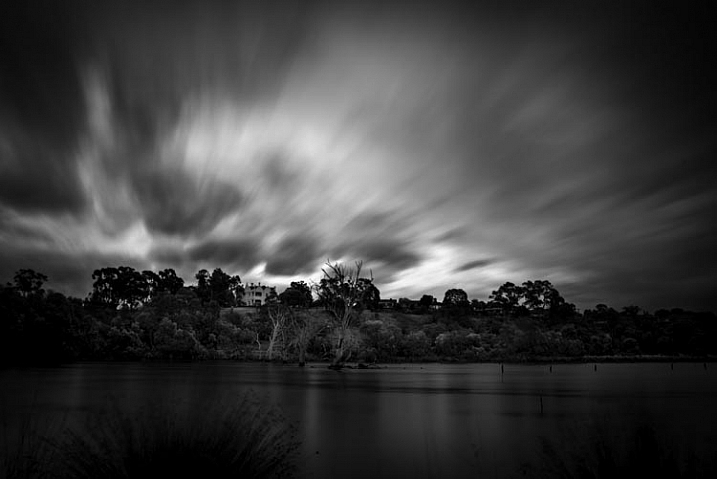
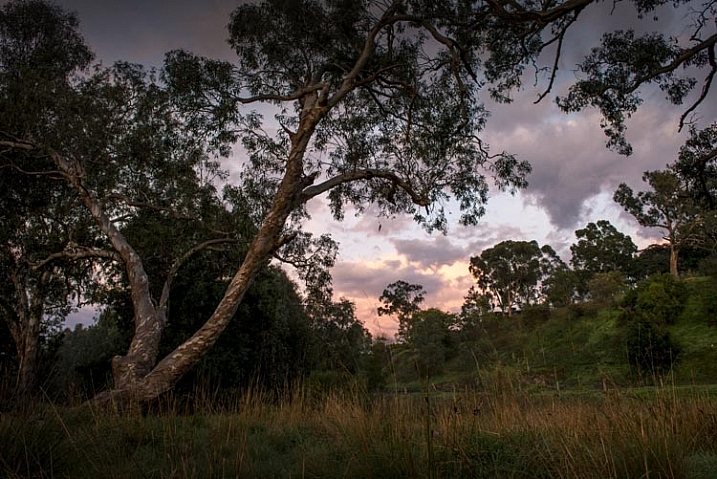
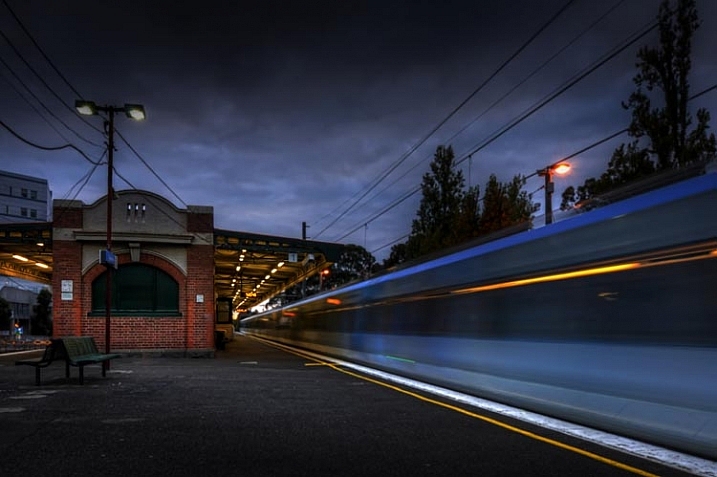
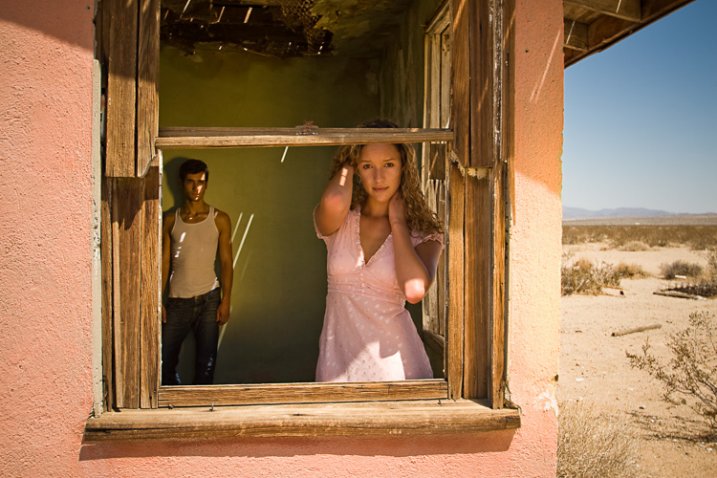
I made this landscape photo while walking along footpaths near my parent’s house. This is not a well-known area and you’ll struggle to find other photos taken here. Yet it has a lot of potential and I was able to make photos like this.

Landscape photography locations

3. Make a bucket list of great locations

As you look at other photographer’s work and read about landscape photography on websites like Digital Photography School you are bound to come across interesting places and locations.

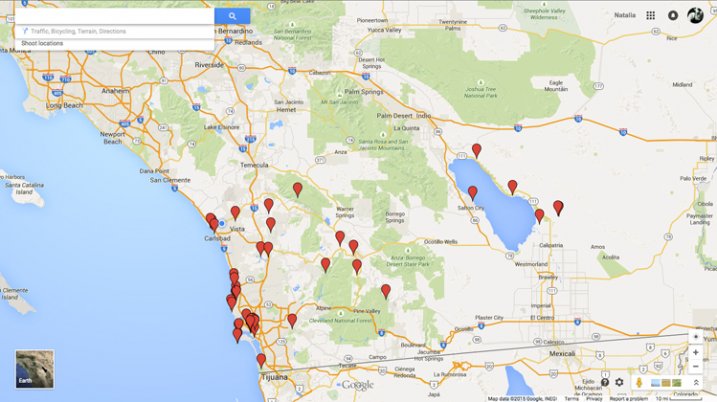
My suggestion is that you set up a spreadsheet or word processing file that contains a list of all the places you might like to visit one day. The world’s a big place and there are a lot of photos to look at online. If you don’t make a note when you find something interesting you may forget it and never find it again.

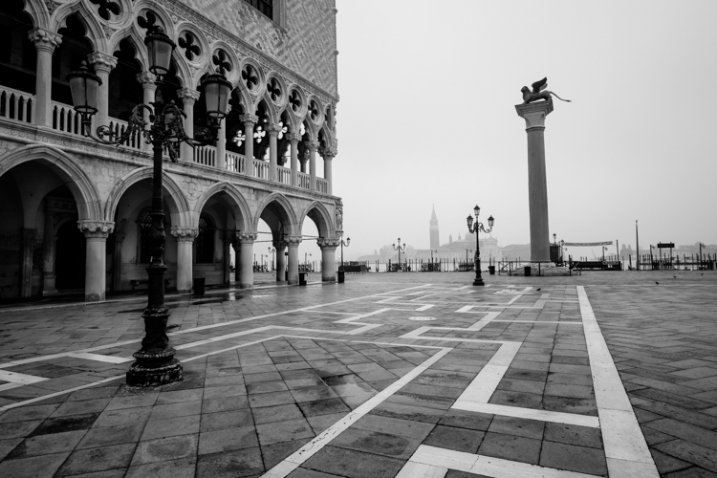
As time goes by you can go back to your list and research the places that seem most interesting to you. For example, let’s say you have the city of Venice on your bucket list. Whenever you find an interesting photo or a good article about photography in Venice, add it to your file. Then, when the time comes that you finally get to go, you’ve already done most of the research required and have a good idea of what you’d like to achieve.

Make your list

Another approach is to write down a list of the places you’d like to visit. Don’t censor the list – they are ideas, not certainties. Then you can research them and make notes as you find out more information. This gives you time to think about how much time you need on location, and how to fit that into your schedule. You can think about time and money and gradually build your plans.

Places on my bucket list include the mountains of Torre del Paines National Park in Patagonia, the Italian Dolomites, and the desert landscapes in the southwestern United States. How about you?

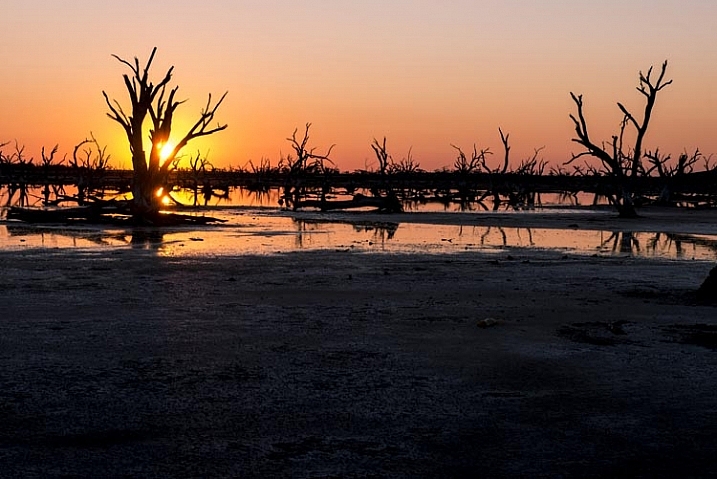
The Picos de Europa in northern Spain, where this photo was taken, were also on my list.

Landscape photography locations

4. Find your personal vision

One of the dangers of looking at the work of other photographers is that it creates a desire to take photos of the same places as other photographers. There’s nothing wrong with capturing photos of iconic locations, and sometimes it’s just an itch that has to be scratched before going on and finding the lesser known places. But the danger is that you forget to look elsewhere for good places to take photos.

Photographer Cole Thompson has an interesting idea he calls photographic abstinence. He never looks at the work of other photographers as he wants to find his own locations and his own way of seeing the landscape. There’s a lot of merit to this idea and it’s something you might like to try for yourself. It’s the opposite approach to the advice given at the beginning of this article, and it may work well for you.

Personalize it

Last year I visited my family in Norfolk, England. Look up the work of local photographers and you’ll find lots of photos of sand dunes, wide beaches, and beach huts – the typical landscape of the local area.

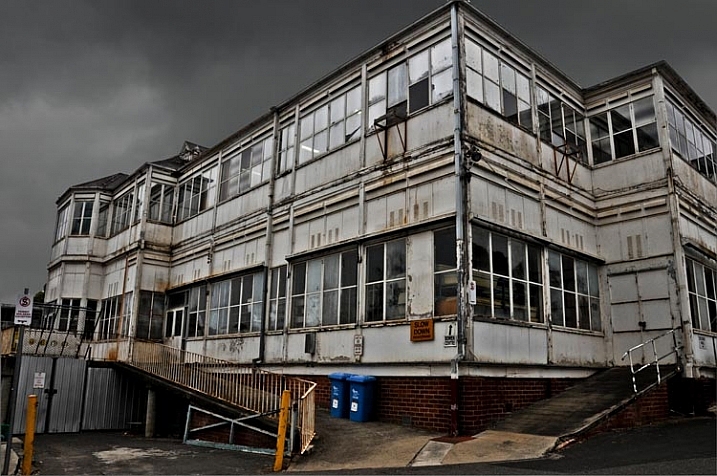
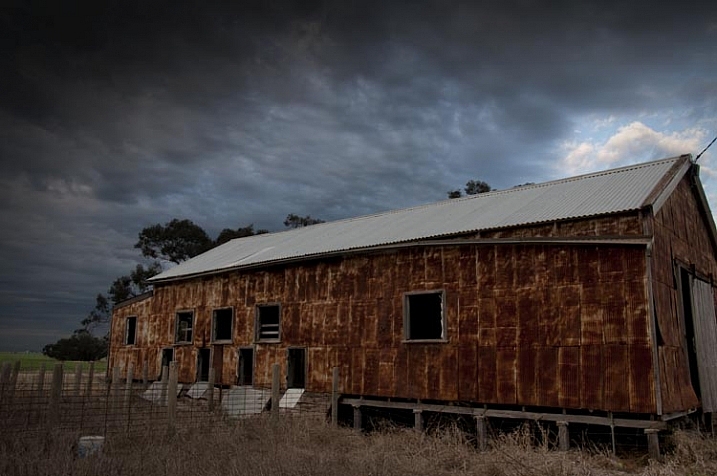
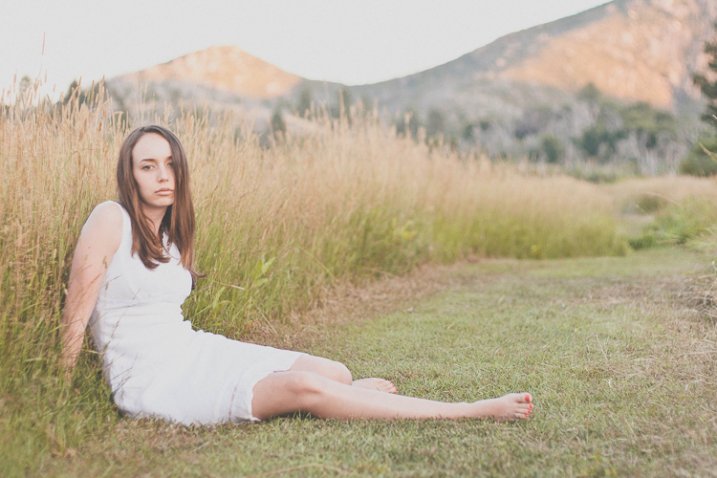
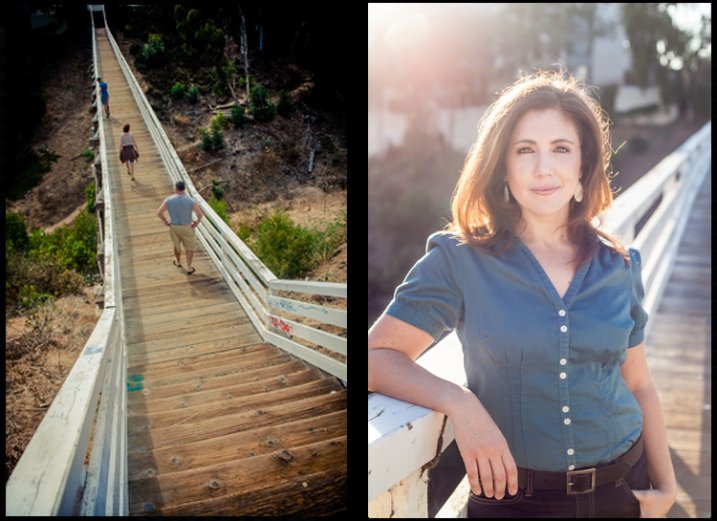
I stayed away from those places and walked around with my camera through the landscapes around the village where my family left. It wasn’t intentional to start, but as I did so I found that I was building a body of work photographing the elements of the landscape that were personal to me. I was ignoring the iconic locations, the ones you see photos of for sale in local galleries, and photographing the landscape in a much more personal and interpretive way.

I ended up taking photos like the one above, and this one.

Landscape photography locations

Wherever you go to take landscape photos, and no matter how well known and iconic some of the locations there are, I encourage you to look for and find your own personal vision.

Conclusion

These ideas are just some of the ways that you can find interesting landscapes to photograph. Do you have any more? I’d love to hear them – please let me know in the comments.


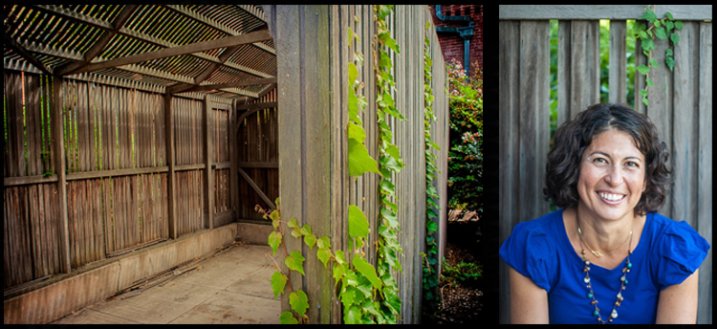
Andrew is the author of the ebook The Black & White Landscape.

The post How to Find the Best Locations for Landscape Photography by Andrew S. Gibson appeared first on Digital Photography School.


Digital Photography School

 
Comments Off on How to Find the Best Locations for Landscape Photography

Posted in Photography


8 Tips to Avoid Crowds at Popular Landscape Locations

11 May

Photographing popular tourist destinations can at times be a great challenge. Hundreds of people are walking within your frame, and regardless of the direction you’re facin,g it’s nearly impossible to capture an image without people in it.

1

I often visit beautiful landscapes, many of which are popular among tourists, even though I prefer to shoot more unique locations, and enjoy photographing in quite areas where it’s nothing but nature and me. So when I visit extremely crowded landscapes, I get slightly stressed. But these touristic places are popular for a reason.

When I visited the famous Svartifoss, Iceland a few weeks back, I left without taking more than a couple snapshots, most with my phone. Even though the roughly 40 minute long hike is considered challenging by some, I was amazed to see the amount of people gathered around the waterfall, not to mention the bunch of tripods placed all over. It seemed to be impossible to take the classic image with the river leading up towards the falls, as a group of tourists had occupied the entire place.

Even though it might seem impossible to take professional looking landscape images from these places, there are ways to avoid the crowds and enjoy them alone. It all comes down to planning and prioritizing.

1 – Choose the Hour Wisely

If you’re into landscape photography you may already know that the best time to photograph is during the Golden Hour. This is the time of the day where the sun’s position in the sky is at the lowest, which creates a soft light ideal for photography.

2

2 – Wake Up Early

Since many tourists aren’t dedicated photographers, most of them won’t be awake and out in nature for sunrise. Normally they prefer spending a couple extra hours in bed and having breakfast at the hotel.

3

This is a great advantage for us who wish to capture the beautiful landscapes in optimal light. It’s rare that you meet large crowds this early in the morning, but you may meet a fellow photographer or two. Usually most photographers, and non-photographers, that are up for sunrise try not to get in each other’s way.

About one or two hours after sunrise, depending on what time of the year it is, the first busses filled with tourists begin to arrive. This gives you a lot of time to enjoy these places, and take the images that will be difficult to capture when it gets annoyingly crowded.

3 – Enjoy the Sunset

It’s no secret that it’s more normal to be awake for sunset than for than sunrise. Accordingly the crowd will be a larger during this hour, and if you’re photographing close to a large town it might even be very crowded. Since I’m a landscape photographer and this article is mainly focused on avoiding crowds at popular landscape destinations, I won’t get into cityscapes, etc.

4

What you will see when you are photographing landscapes during sunset is that most people present are fellow photographers. Most normal tourists tend to head back towards the town or hotel, for dinner or other activities.

4 – Photograph the Night Sky

If you haven’t photographed landscapes at night yet, I strongly recommend you try it. Be aware though, as it is highly addictive!

Images captured during the night can often be quite different than what you normally see from these touristic locations, since the majority of people prefer to sleep at this time. I would say the lack of sleep is part of a landscape photographer’s life (for both beginners and professionals).

5

Another benefit of photographing at night is that you might witness certain astrological events, such as meteorite showers, or the northern lights in the northern hemisphere. Be sure to bring something warm to drink as it may get chilly throughout the night.

5 – Choose the Month Strategically

I know that getting vacation days outside the normal holidays might not be possible for everyone, and some locations are definitely best to visit during certain times of the year. But, visiting during low-season is the best method to avoid the crowds.

6

If you want to photograph events such as the Tulip Festival in the PSNW (Washington/Oregon), or the Cherry Blossom in Japan, you have to visit during a specific time of the year, and most likely it’s going to be crowded with both photographers and tourists. While the tips above still will be beneficial, you will most likely not be at these places alone.

However, if you’re not photographing a specific event, visiting during low season can be a great choice. Not only will you avoid the biggest crowds, you may also be rewarded with some unique scenery and weather.

7

I’ve visited Iceland during low season a couple times, and the results have been great. Yes, it has been challenging with the harsh weather but when the light is good, it’s GOOD!

6 – When the Crowds Won’t Leave

But what if you’re not able to go during low season, sunrise, or sunset? What if there is still a large crowd even during these times? Should you just give up and head back home? Of course not! There’s always a solution, so don’t worry.

7 – Use a Neutral Density Filter

While I won’t get too into the technical aspects of Neutral Density Filters, they allow you to use a longer shutter speed. By placing the dark piece of glass in front of your lens, you need a longer shutter speed to get the correct amount of light to reach the camera sensor. Just be sure to bring a tripod, I doubt you will be able to hold your camera completely still for several seconds or minutes.

8

Why it’s Beneficial to use an ND Filter at Crowded Locations

When you are using a long shutter speed, all motion within the frame will become blurred. The longer your shutter speed is, the less visible people will be. In fact, if you set the shutter speed to a couple minutes, you may even completely remove all people from your image.

8 – Stack Multiple Images

Stacking multiple images is another method to remove crowds from your pictures. This is a little more advanced than using an ND Filter, and requires that you have an image editing software such as Adobe Photoshop. Let’s do this step by step:

  1. Take a set of images from the exact same position. Ideally you should use a tripod so that the frame is the same on each image. Try to take 20-25 images with an interval of roughly 20 seconds. Having this interval will allow people to move a little between each shot.
  2. Import the images to your computer.
  3. Open Photoshop
  4. Click File > Scripts > Statistics
  5. Choose Median as your Stack Mode in the box that appears, and check the box for “Attempt to Automatically Align Source Images”.
  6. Go to YouTube and watch funny videos until Photoshop is done processing…
  7. When the image is done, zoom in to 100% and look for any spots where the script wasn’t able to do a perfect job. If you find such spots select the Spot Removal Tool and carefully heal these places.

9

This is a great technique to remove people from your images. My experience is that the script works well on 99% of images, and even on the remaining 1% it does a decent job.

Final Words

I think most of us have experienced being frustrated due to the large crowds more than once. Personally I think it’s important to remain respectful to both fellow photographers and other tourists when we are at these popular places. Sometimes all you need is a little patience.

10

On another note, the best way to avoid the crowds is to go somewhere less known. I know it’s scary for many to go explore new locations, as you already know how beautiful the popular spots are, but the best images are often taken at less known locations.

What do you do when photographing these popular locations?

googletag.cmd.push(function() {
tablet_slots.push( googletag.defineSlot( “/1005424/_dPSv4_tab-all-article-bottom_(300×250)”, [300, 250], “pb-ad-78623” ).addService( googletag.pubads() ) ); } );

googletag.cmd.push(function() {
mobile_slots.push( googletag.defineSlot( “/1005424/_dPSv4_mob-all-article-bottom_(300×250)”, [300, 250], “pb-ad-78158” ).addService( googletag.pubads() ) ); } );

The post 8 Tips to Avoid Crowds at Popular Landscape Locations by Christian Hoiberg appeared first on Digital Photography School.


Digital Photography School

 
Comments Off on 8 Tips to Avoid Crowds at Popular Landscape Locations

Posted in Photography


5 Secrets for Finding Great Indoor Portrait Locations

04 Apr

156

Not all photographers choose to have a dedicated indoor studio, but sometimes you need to shoot a session indoors. Maybe it’s freezing outside, and you don’t want to be out in that weather. Maybe you have a bride who wants bridals, but is worried about her dress getting dirty. Maybe you just want something fresh and a little quirky. Maybe the building has special meaning to you or the person you are photographing.

Whatever your reasons, in this article you are going to learn all my secrets to finding indoor locations, and getting permission to use them. Hopefully they’ll help you find the perfect spot for your next session!

174

Secret #1: Always be on the lookout

Wherever you go, keep your photographer eyes open. You may be surprised at how many places transform into a great location once you really start looking. Some unique and exciting photography locations could be: family photos in the library, model portfolio shots in the city building, engagement session in the laundromat, dance group session in a hotel lobby, mom and toddler portraits in a grocery store, bridal session in a grand old house, a museum, a quaint bed and breakfast, a roller-skating rink, a university building, a furniture store, a toy store, or candy store – the list is endless.

Look for great lighting, open spaces, interesting backgrounds, and fun things to interact with. Notice if there are lots of people that you might be disturbing, or if it’s a relatively calm place that you could photograph in peace. Use your imagination and creativity to turn the ordinary into something extraordinary.

192

Secret #2: Always ask permission

Once you’ve found a place you’d like to try, make sure you ask permission before you bring a client there. I find, if possible, that asking in person is usually the best, because they can see who they are talking to, and are often less resistant if they can see your smiling friendly face. If you need to call, be professional and friendly on the phone, so they feel comfortable letting you come with your camera.

If you aren’t sure who owns the building, check with city or county records, or ask a neighboring building or house if they know who owns it. Do the legwork to find out who owns the property before you barge in uninvited. It gives all photographers a bad name if you trespass. I’ve had many times where I call to ask permission, and the owner thanks me profusely for asking permission. They express their frustration that other photographers just start shooting without asking. They allowed me to photograph on their property, so obviously they don’t mind people being there, but they always appreciate being asked first.

Some locations, like museums, or theme parks, are fine with you taking photographs inside, but you have to pay the entrance fee.

148

Some places charge a fee for photography, and some don’t allow photographers at all. If you whip your camera out in either of those types of places without asking permission first, you could be fined huge amounts. It’s not worth it. If you ask permission and get a no, just move on and find another place. However, it never hurts to ask. Most of the time you get a yes, and often they are pleased that you think their building is worthy of being a photography location.

112

Secret #3: Find an owner who will also benefit

I needed a place to have adorable kids come for Valentine’s Day photos, but I didn’t know who would want multiple kids and families traipsing in and out of their establishment. Then I came across an adorable little candy shoppe that was decorated perfectly, and full of delicious sweets and treats. My photography clients came in and out all day for their sessions, and ended up buying lots of candy in the process. Many who came had never noticed the little hometown shop, with homemade caramel apples and every kind of candy you can think of, and they were happy to have discovered it. I ended up having a great place for my Valentine’s Day photos, and the owner got a lot of new business.

177

Look for places that might have a similar situation, and chances are the owner will be more than happy to let you use their location, free of charge. Many small locally owned places need a couple of photos of their establishment for websites and advertising purposes, or maybe even a quick headshot, and would be thrilled to let you photograph there in exchange for a photo or two.

146

Secret #4: Explore any connections

Sometimes a friend may own a quaint little bed and breakfast, or maybe she works at a museum. If you are photographing that friend, that may be an especially smooth way to get your foot in the door. If things go really well, they may be okay with you bringing other people to their property again. Even if they aren’t the one that you are photographing, you could ask what they think about letting you use the property that they have a connection to.

Be careful not to ask for too much, and be careful not to put anyone in an uncomfortable position. If you sense that they are hesitant about having a camera there, don’t push it. A little respect goes a long way, and you don’t want to be the photographer that people avoid at all costs. Relationships are more important than having a cool place to photograph, so be extra sensitive when using this secret.

171

Secret #5: Be the best guest

When you’ve gotten permission to use a place, never, never, never ever let anything get destroyed, damaged, or left in any way other than how you found it. If you need to move something out of the way, ask if it’s okay first, and then put it back where you found it. Be mindful of what is going on around you, especially if you are photographing kids. You are responsible for what happens with your session, and you never want to pay a big repair bill, or lose a friendship because you were careless.

You are not only representing yourself, but all photographers everywhere, when you use a public or private property for photographs. If you make it a horrible experience for the owners, you have more than likely ruined it for future sessions for yourself, and for all other photographers who might think to ask permission. Please don’t be that careless photographer who ruins it for everyone. Instead, leave such a great impression that all photographers will be welcomed with open arms into almost every establishment, to create beautiful and unique photographs.

111

Do you have any other tips for finding great indoor portrait locations? Have you found any gems? Please share your comments and images of your favorite spots below.

googletag.cmd.push(function() {
tablet_slots.push( googletag.defineSlot( “/1005424/_dPSv4_tab-all-article-bottom_(300×250)”, [300, 250], “pb-ad-78623” ).addService( googletag.pubads() ) ); } );

googletag.cmd.push(function() {
mobile_slots.push( googletag.defineSlot( “/1005424/_dPSv4_mob-all-article-bottom_(300×250)”, [300, 250], “pb-ad-78158” ).addService( googletag.pubads() ) ); } );

The post 5 Secrets for Finding Great Indoor Portrait Locations by Melinda Smith appeared first on Digital Photography School.


Digital Photography School

 
Comments Off on 5 Secrets for Finding Great Indoor Portrait Locations

Posted in Photography


How to Find Good Locations for Family Portraits

28 Jan

When you’re shooting a family portrait, about nine out of 10 times the client will ask, “Do you have a place you typically like to shoot?”

We all do, of course, but if you take every portrait client to the same location, your portfolio will develop an undesirable, repetitive consistency. So, it’s important to thoroughly scout the area where you live and work, to build a list of go-to spots for any scenario, circumstance, and style.

2015 12 26 0002

Think about your city, and build a list of these places where you can shoot:

  • A field or shoreline with broad vistas to capture the aura and glow of twilight
  • A similar outdoor venue with features like tall grass or trees to provide backdrop
  • An outdoor area with full shade, appropriate for shooting midday
  • A covered outdoor space like a gazebo or covered porch, for shoots in inclement weather
  • An indoor space with high ceilings and lots of windows for natural light

Because most family portrait sessions will include a variety of backdrops and poses, the perfect shooting location contains all of these elements. But that’s rare to find.

Finally, make sure that you have the required permits, permissions, and licenses to shoot in your desired locations, whether they’re public or private (many municipalities require a business license to shoot in public places like parks and beaches).

2015 12 26 0003

Once you’ve built your list of go-to locations, you’re ready to schedule a session with a client. Here are the two scenarios that could play out:

1 – The client has already chosen a location

It’s surprisingly rare for a client to be dead set on a location, but sometimes there’s a family home, or a special place with memories where they’d like to be photographed. Or perhaps there’s extended family gathered together already, and they’d like to keep the photo shoot as easy as possible by having you come to them. If you’re shooting for next year’s holiday portrait or another special event, they may also choose a place that fits the theme, such as an evergreen forest or a snowy landscape.

If you’re not familiar with the location, ask questions about it while confirming the shoot. You may discover that you need to bring extra equipment like lighting to fill in shadows, if they’re hoping for a family portrait underneath a moss-strewn oak tree at two o’clock in the afternoon.

Likewise, indoor shots — such as people gathered around the fireplace or the Christmas tree, for example — may present difficulties with lighting that you’ll want to work out and be prepared for, prior to the actual shoot. When feasible, visit the site of any shoot before arriving for the actual job.

2015 12 26 0005

2 – The client is open to your location suggestions

This is the more common scenario, where you pull out that list of locations you’ve already scouted.

Start by getting a sense of the feeling the family wants to capture in their photos. If it’s a holiday family portrait, they may prefer a warm and rustic theme over something bright and urban, for example. Or they may want a look that’s relevant throughout the year.

Timing will also have a lot of influence over your decision on where to shoot. When possible, schedule sessions for an hour, to an hour-and-a-half before sunset, giving you time to arrive and chat, get the family comfortable with your presence and style, and then be fully ready to capture beautiful, stunning portraits just when the changing light is at its peak.

2015 12 26 0004

Sunset (and sunrise) shoots

For golden hour sessions, just after sunrise and before sunset, choose a location that ideally has both broad vistas, and objects of interest. For example, if you’re shooting on the beach, don’t just choose a spot with wide open beach (plus houses and passersby) – aim to find a section of beach with sand dunes, tall grass, driftwood, or even distant trees. These objects help frame the image and make it more interesting, without distracting from the subjects of the photograph. The same rules apply in a desert, lake, or city park scenario.

Midday shoots on a sunny day

The challenge with shooting at midday is shadows. You don’t want your subjects to squint in full sun, and you don’t want shadows from tree branches, or manmade obstructions, blocking portions of their faces. The key to shooting in midday on a sunny day is to put your subjects fully in the shade.

2015 12 26 0006

When a client wants to schedule midday, I often lean toward urban areas with architectural interest. If your city or town has a historic neighborhood, seek out alleyways, parks, cobblestone streets, or even sidewalks that are shaded at midday, but present a beautiful surrounding for subjects.

Cloudy day shoots

It’s a huge misconception that overcast days are bad for family portraits. Clients may be discouraged by the threat of rain, but encourage them with the news that even cloud coverage actually makes for beautiful outdoor shots — there’s no squinting and nice even light.

But, if there’s no drama in the sky (dark clouds swirling on the horizon), an overcast day may be less exciting when shooting with broad vistas and open spaces. Turn to your surrounding objects (trees, historic buildings) to provide the intrigue in the photograph. Or bring in a pop of color with balloons or other props.

2015 12 26 0007

On an overcast day, a local mural can actually make a perfect backdrop — just make sure your subjects wear muted tones (black, white, gray, beige) rather than colorful attire that might clash with the art.

2015 12 26 0001

Final tips and tricks

Start by putting together your list of places. Keep the same principles in mind that helped you choose those spots, when giving feedback to a client on their suggested locations. In addition, make sure that wherever you decide to shoot won’t be crowded at the time you’re there — the last thing you want is a bunch of strangers in the background.

Finally, be flexible. Not every shoot will be perfect, but it’s your job as the photographer to ensure that your clients have an enjoyable experience. Have confidence in your skills, and work around obstacles as they arise. If you are engaged and the subjects are happy, it’s possible to create gorgeous family portraits that your clients can share on cards, calendars, and gifts throughout the year.

Do you have any other location scouting tips? Please share in the comments below.

googletag.cmd.push(function() {
tablet_slots.push( googletag.defineSlot( “/1005424/_dPSv4_tab-all-article-bottom_(300×250)”, [300, 250], “pb-ad-78623” ).addService( googletag.pubads() ) ); } );

googletag.cmd.push(function() {
mobile_slots.push( googletag.defineSlot( “/1005424/_dPSv4_mob-all-article-bottom_(300×250)”, [300, 250], “pb-ad-78158” ).addService( googletag.pubads() ) ); } );

The post How to Find Good Locations for Family Portraits by Hunter McRae appeared first on Digital Photography School.


Digital Photography School

 
Comments Off on How to Find Good Locations for Family Portraits

Posted in Photography


How to Find Inspiration Photographing Locations Near Home

20 Nov

Everywhere you look there are thousands of images depicting beautiful places in the world. How many times have you thought to yourself, “I wish I could travel so I could take the same photographs?” The reality is that most of those photos were taken by people who live close to the locations, or have the ability to travel there multiple times.

It is a statement that you hear from many photographers. It may be true, but the truth is most of us live in wonderfully rich photographic areas. The problem is that you see it every day, so it no longer seems interesting.

leanne-cole-photographing-home-008

Knowing that a storm is coming, then being able to get to a good location quickly, is an advantage when you photograph near where you live.

What would you recommend to a visitor

If another photographer was coming to your area and wanted to know places to go, what would you recommend? Think about what someone else might be interested in, that is a way you can photograph it. Try to look at your area from another point of view.

How to find something to shoot

There has to be something unique or different about where you are located. Look at the history of your town or area. See if you can find out about an event that happened where you can visit the place. Use the history as your motivation for photography. Google the area around you, and see what you can find.

Think about interesting buildings, ones that are abandoned or still in use. There may be some interesting landmarks that can help tell a story. Perhaps there was an industry there that no longer exists.

For example, suppose in your area the local hospital started as a home for incurables. Then the land was given to the city for a permanent hospital. How has that hospital shaped the town? Is the original hospital still there? Has the hospital gone, but now something else is in its place?

There is always the possibility that nothing has ever happened. Maybe your location is devoid of that, and in which case you could photograph the normality of it. What makes it boring? What does the main street look like? Is there anything interesting there at all? There will always be something.

leanne-cole-photographing-home-001

An older part of the Austin Hospital in Heidelberg.

How far are you willing to travel?

Mark a circle on a map of where you would be willing to travel to in a day. For instance, you might be prepared to travel at least two hours to get somewhere. Perhaps time isn’t on your side, and you can only travel 15 minutes in any direction. That becomes your zone, and the area you are going to photograph.

My area is two hours, or around that. I will travel somewhere for the day and take photos. I will go back to the same areas. There is a lot that is within that area near where I live.

Find the story

Perhaps instead of finding individual images of the place you might be better off trying to do a whole story on it. Find the story of the area. What makes it important to the people who live there? Why have they stayed? Why do you live there?

The answers to all these questions will help you find the story, and can inform your photography.

leanne-cole-photographing-home-002

An old car left to rust in the Mallee.

Advantages

When you photograph where you live, you have nothing but all the advantages:

1 – You can take photos at the best time of day

One definite advantage you have over visitors to your area, is that you can work out when the best time to photograph that spot. Then, you can go back as many times as you need.

If it is very close, you can get up early and see if it is worthwhile going there for a sunrise. Perhaps in the afternoon you can see if there are clouds in the sky, which might make it a good opportunity to get a sunset. You will be able to look out the window and figure out when you want to go.

Most people have to hope that the one time they go, the conditions will be perfect for what they want to photograph. You know how often that happens.

leanne-cole-photographing-home-003

Getting sunrises is easier when you can wake up and go down the road to capture it.

2 – Experiment with different techniques

You can try a lot different techniques to take photos. You can go home and see what you have, then go back and experiment with other angles or conditions another time. You can try more experimental types of photography, that other people who only have one opportunity to go there, might not want to try.

Every time you go, try to shoot it that spot a different way.

leanne-cole-photographing-home-004

Sunset over a salt pan in the Mallee. Being able to get back to the same spot to get the best photos is a bonus.

3 – Visiting the location multiple times

How often have you gone somewhere, put your photos on the computer when you got home and thought, “I wish I had noticed that tree” or something else on the side of the image? Maybe you wished you could have taken it at a different angle.

If you live there, that will never be a problem for you again. You can visit that spot as many times as you like, to get exactly the photos that you want.

leanne-cole-photographing-home-005

Old towns can have great buildings that have just been left, like an old shearing shed make from kerosene tins.

4 – Have access to local knowledge

Visiting any places where you might only go once, you have to be content with information from the internet, or with what you see when you get there. However, when you live in an area, you can talk to people you know, who may be able to introduce you to others. If they know you are interested in the local area and taking photos, then you might find people coming to you, to tell you about places that you didn’t know existed.

Disadvantages

Are there really any disadvantages? Perhaps the fact that you aren’t going anywhere exotic to take photos, unless you already live somewhere like that.

When you decide to photograph the area you live in, you get all the advantages that so many others don’t have for that place. It is up to you to make the most of it. Some examples:

A Mallee Town of not much consequence

Take a small town in North West Victoria (Australia) where my mother lives. I go up there to visit all the time. According to the locals there is nothing there. But when I drive around, I see shops that are now empty, or a train station that has closed, and stopped being used many years ago. There are things that give hints to a time past, that was industrious. The town had a past where it was bigger, where those stores were open for business.

It would be easy to agree with the locals that there is nothing there, but that would be a mistake. The story is there in those closed buildings and what is left of the town. As a photographer you can then show what is happening there.

leanne-cole-photographing-home-007

Getting to know locals in towns can give you access to buildings, like this old church in a Mallee town.

Finding the history of where you live

For many years I always travelled to other places, in the city, or in the state of Victoria, to take photos because I was convinced that what was around me was boring. Who would be interested in what’s here?

I started to realize that this area has a rich art history. Some famous Australian artists have painted this area, and perhaps that was where I needed to start looking. Once I started looking with different eyes, a lot of new places started to open up to me. This area has some great parks. It is quite old so there are ancient homes, hospitals, cemeteries. Now I photograph it all the time.

leanne-cole-photographing-home-006

Knowing the local train station and timetable, can be great for getting to the station at a good time to take photos.

When you photograph somewhere you live or a place you travel to often, you really get so many wonderful opportunities.

Many photographers dream of travelling to other places and photographing the world, but sometimes your best subject is right outside your door or within a stone’s throw of where you live. You just need to get out there and see what you can find.

Please share your local photography finds and your images in the comments below.

googletag.cmd.push(function() {
tablet_slots.push( googletag.defineSlot( “/1005424/_dPSv4_tab-all-article-bottom_(300×250)”, [300, 250], “pb-ad-78623” ).addService( googletag.pubads() ) ); } );

googletag.cmd.push(function() {
mobile_slots.push( googletag.defineSlot( “/1005424/_dPSv4_mob-all-article-bottom_(300×250)”, [300, 250], “pb-ad-78158” ).addService( googletag.pubads() ) ); } );

The post How to Find Inspiration Photographing Locations Near Home by Leanne Cole appeared first on Digital Photography School.


Digital Photography School

 
Comments Off on How to Find Inspiration Photographing Locations Near Home

Posted in Photography


6 Tips to Find Undiscovered Photography Locations in Your City

02 Jul
This location was discovered by walking BEYOND the main public area and exploring nearby dirt paths.

This location was discovered by walking BEYOND the main public area and exploring nearby dirt paths.

There’s nothing quite like the rush of finding a nook, a cranny, a wall, a corner, or a building that looks amazing in photos but has not been fully discovered by others just yet. Ask any photographer about unique locations, and most likely they will cringe a bit at the thought of giving up their secret spots. How, then, do you find new locations for yourself? It’s not always necessary to go outside of your city (or even your neighborhood!) to find a great photography location.

Here are several tips for how to find those hidden gems you crave:

1. Break routine

Do you have a usual way to drive home from work? How about that super fast shortcut that you love to take when meeting friends for dinner? Set some time aside to go a different route, and really look at your surroundings as you drive by. Take note of things like texture, if there is a lot of shadow or direct sun on a wall, if there are bright colors, and if certain areas have easy access from the road. Are there any buildings that stand out to you? How about the landscaping – any beautiful trees that provide a dramatic canopy or a large flowering bush that has bright colors?

Use this designated time to explore, stop spontaneously when something speaks to you, and take some quick sample photos (even if with your phone!) to keep on file for future reference.

Cell phone shot while exploring is on the left.  Finished photo for a family portrait is on the right.

Cell phone shot while exploring is on the left. Finished photo for a family portrait is on the right.

2. Leave the car at home

This may sound extremely basic, but if you are like most people, you’re used to driving everywhere. While this is a huge time-saver, it also causes you to not SEE your surroundings in as much detail. When you walk, you see the cracks in the sidewalk, the nooks full of graffiti in the small alley behind the shops, or the vantage points that can be seen at eye level. Changing your perspective is an instant way to re-evaluate your surroundings. If you’re not able to walk, consider riding your bike. It’s still a more leisurely way to explore the details than by car would be, and it’s much easier than a car to stop repeatedly and explore.

Not visible from the street, this pedestrian bridge gets overlooked from a car.

Not visible from the street, this pedestrian bridge gets overlooked from a car.

3. Ask

Sounds simple, right? Yet, how many of us actually do this? Most of us will search online, scan the forums and Facebook groups, and explore on our own. All this, we do instead of simply asking those around us. Next time you go into a small local store, ask the clerk if they have any favorite spots for photos, or ones that offer a fantastic view. Reach out to other local photographers you know; ask them if they have any locations they love going back to time and time again, and if they would be willing to take you there sometime. Ask your friend or relatives if they have any spots in town that they’ve always thought would be great for photos. Their answers may surprise you. Oftentimes, all you need to do is ask.

Many locals recommend this property, but few use the old carports as backdrops. Cell phone shot on left, final portrait on right.

Many locals recommend this property, but few use the old carports as backdrops. Cell phone shot on left, final portrait on right.

4. Create an assignment

It can be overwhelming to just get in your car and drive without knowing what you’re seeking. To make things easier, give yourself a specific type of location that you’re looking for that day. Perhaps you want to find a beautiful skyline view of your city, or you want to find a wall that has colorful graffiti for a backdrop. Maybe just give yourself a theme – industrial buildings, or lush bright flowering landscapes, or open pastures, or patterns.

Having a goal in mind can give you some direction as to where to start looking. Looking for rustic and open? Head out of the city and into wide open spaces. Looking for urban and gritty? Go straight for urban neighborhoods and industrial areas of town.

On a search for great texture and patterns, this wall was discovered. It is part of a research facility at a local university.

On a search for great texture and patterns, this wall was discovered. It is part of a research facility at a local university.

5. Yes, asking Google can help, too

Let’s face it, we go to Google for all our questions these days, and that’s okay. Do a bit of online research, keeping in mind some parameters for what you’re seeking. If you’re looking for old industrial buildings, be sure to enter that into your search. Be as specific as you can be, then get more general as needed to widen the net. There are also a good number of websites and books about “weird places” or “abandoned places”, all of which would have loads of appeal to photographers. If you do seek out abandoned or off-the-beaten-track locations, be sure to take all safety precautions possible to ensure a safe return.

Researching abandoned locations in the desert resulted in this location near a major attraction.

Researching abandoned locations in the desert resulted in this location near a major attraction.

6. Keep records of your discovered gems

This is a tip about finding locations, but more about making sure to remember them. Find a system that works for you to keep track of locations you like, what type of work they may be suited for, any outstanding characteristics, and any sample photos you snapped while exploring. While everyone will have a slightly different way of organizing this information, Google Maps is highly recommended for marking locations on a map and adding notes.

If you have a Gmail account, you can go to Maps and create your own. After each outing, you can add pins to locations you want to remember, name them whatever you’d like, and even add a few notes. In addition to this, I would recommend keeping a folder on your computer that is specifically for sample photos of locations. This comes in handy, not only for remembering a location yourself, but also for showing a potential subject and convincing them of your vision for their photos.

An ongoing project - the personalized Google Map.

An ongoing project – the personalized Google Map.

Have you found tucked away locations that you are proud of? What tactics did you use for stumbling upon these spots? Please share in the comments below.

googletag.cmd.push(function() {
tablet_slots.push( googletag.defineSlot( “/1005424/_dPSv4_tab-all-article-bottom_(300×250)”, [300, 250], “pb-ad-78623” ).addService( googletag.pubads() ) ); } );

googletag.cmd.push(function() {
mobile_slots.push( googletag.defineSlot( “/1005424/_dPSv4_mob-all-article-bottom_(300×250)”, [300, 250], “pb-ad-78158” ).addService( googletag.pubads() ) ); } );

The post 6 Tips to Find Undiscovered Photography Locations in Your City by Natalia Robert appeared first on Digital Photography School.


Digital Photography School

 
Comments Off on 6 Tips to Find Undiscovered Photography Locations in Your City

Posted in Photography


Photographing in Crowded Locations – 5 Tips to Avoid the Masses

25 Jun

Travel photography is certainly one of the most rewarding experiences you, as an image-maker, can have. You get to combine visiting amazing places, learning about other cultures, and, of course, your passion for taking photos, all at once.

VENICE, ITALY - CIRCA MAY 2015:  Piazza San Marco and Doge's Palace with San Giorgio Maggiore behind.

Piazza San Marco and Doge’s Palace with San Giorgio Maggiore behind – Venice, Italy

However, certain famous locations, or populated cities can be frustrating. You arrive there to find out they are always crowded with visitors and tourists, making it almost impossible to shoot clean photos without intrusions. Granted, locations like these have been photographed millions of times by somebody else before, but I know you can’t consider it your very own until you’ve pressed that shutter button. Here are some suggestions to avoid becoming disgruntled and frustrated in crowded locations, so you can return home from your next trip with memorable images.

1) Shoot up

A good way to avoid the masses is to photograph above their heads. Pointing your camera up makes an interesting and different angle. There are plenty of subjects, and architectural elements, that can be easily recognized when shooting this way. Landmarks such as national buildings, memorials, or iconic temples, just to name a few, are ideally suited for this as they can be effortlessly recognized by your viewer without showing them in their entirety.

BANGKOK, THAILAND - CIRCA SEPTEMBER 2014: Detail view of Wat Arun, a popular Buddhist temple in Bangkok Yai district of Bangkok, Thailand, on the Thonburi west bank of the Chao Phraya River

Detail view of Wat Arun, a popular Buddhist temple in Bangkok, Thailand

2) Shoot details and close-ups

Get closer and make details stand out. One the best themes to try this one on is food. Epicurean photos are often used in travel publications to illustrate local customs and traditions. This is easy, as you can just aim your camera straight and click. You can photograph your own food during meals, or walk into a market and search for interesting colors and textures. You can also try close-ups on reflective surfaces, like windows, or water reflections in the streets. The idea is to concentrate on small details that can also help to tell your story.

Vegetables in Hanoi

Vegetables in Hanoi

3) Go early

Beat the crowds by getting there right at dawn. This is not for everybody – but no pain, no gain. The quality of the morning light, and beautiful sunrises, are the main reasons why most landscape and nature photographers love to work at this time of the day. But you’ll also find that in popular destinations, most of the tourists are sleeping, so this is your opportunity to find empty streets. Go out and take photos early, while nobody is there, then get back to your hotel and catch up with breakfast.

4) Go late

If you are not a morning person, you still have chances to take great photos. Surely this works the opposite of going early, but in most cases, you’ll find empty quarters as well late in the day. You can take advantage of strolling around well past dinnertime and shoot the sought-after spaces with nobody in sight. Better yet, do like the pros and photograph both instances for better results, and more options for better pictures.

Riga Freedom Monument

Riga Freedom Monument, Latvia

5) Photograph the people

If nothing else works out, you can just photograph the people. After all, what better way to show sense of place than documenting the locals, or even the flocks of tourist enjoying their thing? You see, it’s okay to try to avoid conglomeration, but in some instances it just can’t happen, or simply won’t reflect the true spirit of the destination.

Corner Street in Hanoi

Corner Street in Hanoi

Needless to say, there are several other ways to address the matter. You are more than welcome to share in the comments below your photos and experiences in similar situations, and what you find works best for you.

googletag.cmd.push(function() {
tablet_slots.push( googletag.defineSlot( “/1005424/_dPSv4_tab-all-article-bottom_(300×250)”, [300, 250], “pb-ad-78623” ).addService( googletag.pubads() ) ); } );

googletag.cmd.push(function() {
mobile_slots.push( googletag.defineSlot( “/1005424/_dPSv4_mob-all-article-bottom_(300×250)”, [300, 250], “pb-ad-78158” ).addService( googletag.pubads() ) ); } );

The post Photographing in Crowded Locations – 5 Tips to Avoid the Masses by Daniel Korzeniewski appeared first on Digital Photography School.


Digital Photography School

 
Comments Off on Photographing in Crowded Locations – 5 Tips to Avoid the Masses

Posted in Photography


3 Downsides to Scouting New Photography Locations Online

05 Jun

Do you scout for potential photography locations online through sites like Flickr, Panoramio or 500px?

Of course you do! It’s easy, you get hundreds of photographs to look at of any given location, and you might even get some great ideas that you hadn’t thought about for subject matter or composition. So why am I asking you this question?

Well here’s another question for you…

Have you ever thought about the downsides of online photo scouting?

I’m going to venture a guess that it probably hasn’t even crossed your mind before today. What downsides could there possibility be with these rich resources, filled with information about where, and how a photograph was taken? Read on to find out.

1. You’re seeing hundreds, if not thousands of photographs

scouting-photos

When it comes to sites like Flickr or Panoramio, or even apps like Stuck on Earth (which pulls its photographs from these sites) you’re able to see many years worth of photographs taken by dozens, if not hundreds, or even thousands of photographers. At first glance this might seem like a great resource, and to some extent it is, but there’s also a downside – namely you might get lost trying to mimic and forget to create.

Because you’re able to see so many photographs of a given location you may become so focused on a specific angle or idea from these photographs, that you forget to look for your own unique way to express the scene in question – and as a result your image may lose some originality.

2. The things a photo can’t tell you

A photograph on a website will give you some great ideas and insight into a location, but at the same time, it doesn’t tell you a lot of important things too. For example, you’ll have no idea how many attempts it took the photographer to find the right lighting conditions. You won’t know much about how difficult the location is to reach, or if that particular image required camping out to achieve the desired result.

3. You’re drawn to the best photography

scouting-photo

Not only are you naturally going to be drawn to the best photography on these sites, but they tend to push the best photography higher in searches and ranking, making it even more likely that’s what you’re going to see. Again, on the surface this might sound like a great thing because you’re able to see all the great possibilities that a given location has to offer – but there may be a downside here as well.

Think about this… how likely is it that these great photographs you’re seeing are from people who have visited a location just once? Most great photographs are planned, iterated upon, and purposefully shot. When you find a photograph on a site like this you’re looking at the best of the best, and as a result you’re seeing the best possible lighting conditions a scene might offer, which might not occur while your there.

In an article I’ve previously written for DPS titled Start feeling GOOD about YOUR photography I noted that it’s important that you don’t compare your work to someone else’s. This is particularly true for those who have more experience behind a camera than you, as it will only lead to disappointment.

I think that this advice can be extended to scouting for locations and inspiration as well. Setting the bar too high will only lead to stress and anxiety if you’re unable to produce results that live up to your expectations. This experience could leave you disappointed about your trip to a fantastic location – which had you gone in blind, may not have happened.

Final thoughts

I don’t want you to completely write off these resources, after all they do provide you with great inspiration and ideas. This isn’t an article designed to get you to stop using these sites, or even this technique for finding locations, but rather, to use it smarter. I hope this has given you something to think about. Please feel free to share your own thoughts in the comments section below.

googletag.cmd.push(function() {
tablet_slots.push( googletag.defineSlot( “/1005424/_dPSv4_tab-all-article-bottom_(300×250)”, [300, 250], “pb-ad-78623” ).addService( googletag.pubads() ) ); } );

googletag.cmd.push(function() {
mobile_slots.push( googletag.defineSlot( “/1005424/_dPSv4_mob-all-article-bottom_(300×250)”, [300, 250], “pb-ad-78158” ).addService( googletag.pubads() ) ); } );

The post 3 Downsides to Scouting New Photography Locations Online by John Davenport appeared first on Digital Photography School.


Digital Photography School

 
Comments Off on 3 Downsides to Scouting New Photography Locations Online

Posted in Photography


How To Source Locations For Portraits In Your Own Town

20 Nov

I’ve noticed that a lot of articles on scouting locations focus on travel — we have a wonderful one on this website listing 100 amazing places to shoot. That is, however, not actionable advice for everyone. Some photographers can’t afford to travel regularly, some aren’t interested in it, and some simply focus on a different type of photography. For that Continue Reading

The post How To Source Locations For Portraits In Your Own Town appeared first on Photodoto.


Photodoto

 
Comments Off on How To Source Locations For Portraits In Your Own Town

Posted in Photography


Netflix is seeking Instagram users to photograph movie locations

03 Oct

Netflix is looking to hire a trio of photographers who will travel the country snapping photos and posting them to the entertainment company’s Instagram account. The three Instagram users selected for the roles will travel with expenses paid for two weeks, taking pictures of iconic movie and TV locations. Learn more

Articles: Digital Photography Review (dpreview.com)

 
Comments Off on Netflix is seeking Instagram users to photograph movie locations

Posted in Uncategorized