RSS
 

Posts Tagged ‘Lights’

Ricoh announces Pentax K-S2 with Wi-Fi, no blinking lights

10 Feb

Ricoh has announced the Pentax K-S2 DSLR, offering a 20MP APS-C sensor, fully articulated LCD, weather-resistant construction and Wi-Fi with NFC. Where the K-S1 took an unconventional approach, the K-S2 is more traditional with a mode dial on the top panel, dual control dials and a standard grip without the preceding model’s flashing LED lights. Read more

Articles: Digital Photography Review (dpreview.com)

 
Comments Off on Ricoh announces Pentax K-S2 with Wi-Fi, no blinking lights

Posted in Uncategorized


Food Photography – How to Shoot A Beverage With Only Two Lights

30 Jan

The wonderful thing about food photography is that you can easily turn your apartment, home, or garage into a studio. This image was shot for a local ice cream franchise that offers a different spin on the traditional root beer float. The set was constructed on a coffee table with common household items, and was lit with just two lights.
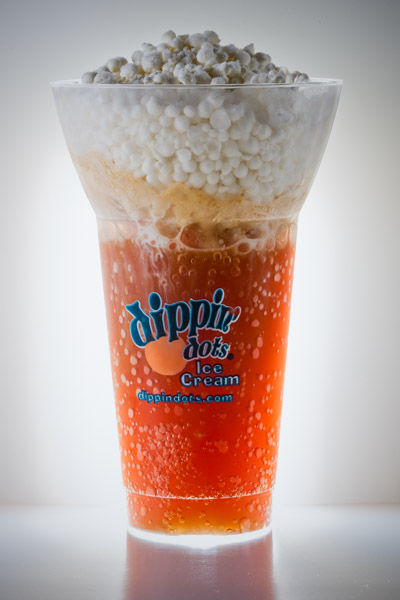
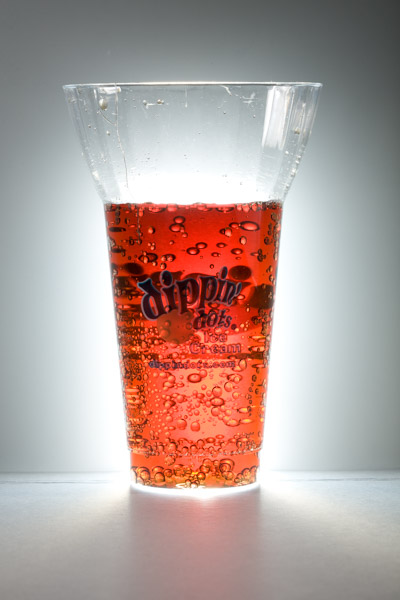
Final image with real ice cream

Final image

You might be thinking that the featured photo does not look like your normal, every-day root beer float, and you would be right. The ice cream pellets in the float were created by flash freezing ice cream mixed with liquid nitrogen.

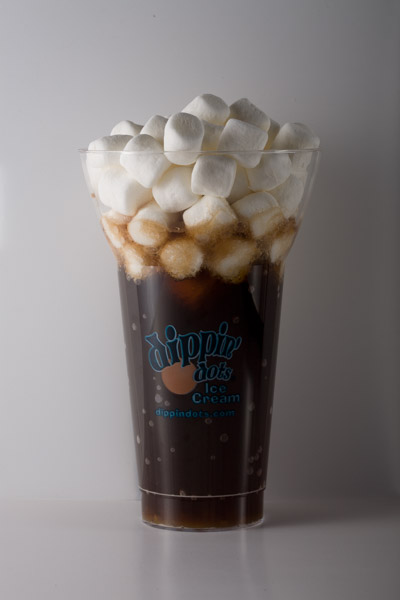
Because the ice cream was made up of these small pellets, it melted quickly, leaving little time to get the “money shot”. To solve this problem, I created a stand-in cup that was filled with soda and mini marshmallows. This stand-in allowed me to tweak my lights while the ice cream was safely stored in an ice chest filled with dry ice.

Marshmallow stand-in

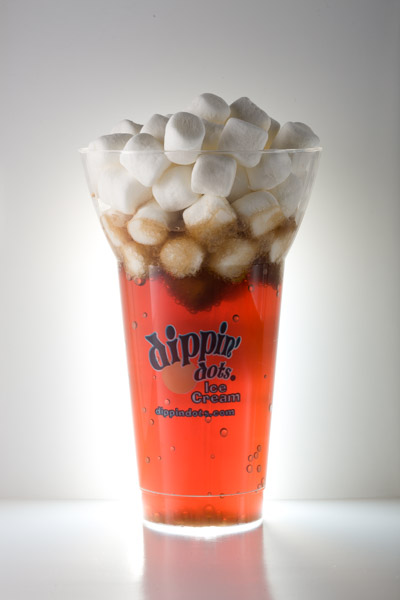
Marshmallows used as stand-in for ice cream, during set up phase.

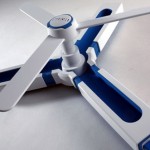
Two pieces of white poster board were used to construct the set. One for the floor and one for the background. The background piece was attached to sections of PVC tubing, which were re-purposed from homemade DIY light panel frames. Small one pound dumbbells were placed on top of the PVC frame to secure it and keep it from moving around.

Whenever you photograph beverages, it is important to backlight them in order to show the transparency of the container and/or liquid. That is what makes soda, iced tea and beer ads look so delicious.

For this shot, I decided to achieve the effect by creating a really tiny pseudo-softbox behind the glass of root beer. I started by cutting a rectangular hole in the back of the poster board. Careful attention was taken to insure that the hole was large enough to cover the entire lower portion of the glass, while still being hidden from the camera’s view.

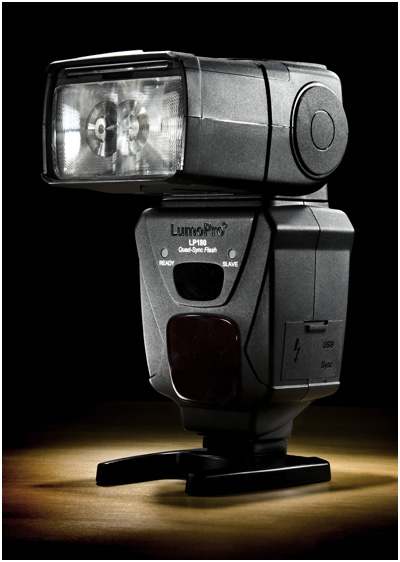
A small off-camera flash fitted with a radio trigger was then placed behind the background. Since the hole and glass were tall and narrow, the strobe was placed on its side, to match.

View from behind background

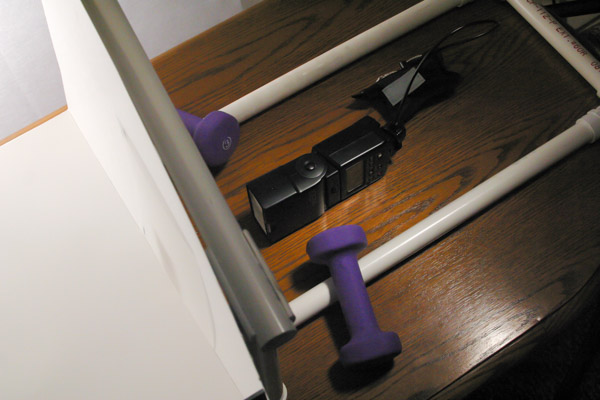
View of PVC frame and hotshoe flash with radio receiver. Notice how flash is placed on its side, vertically.

Next, a small sheet of frosted stencil paper purchased from a local hobby store was placed in front of the hole, to evenly diffuse the light across the opening. The translucent properties of the paper also created a soft falloff to the background, as if it were being lit from the front instead of the back.

frosted stencil paper

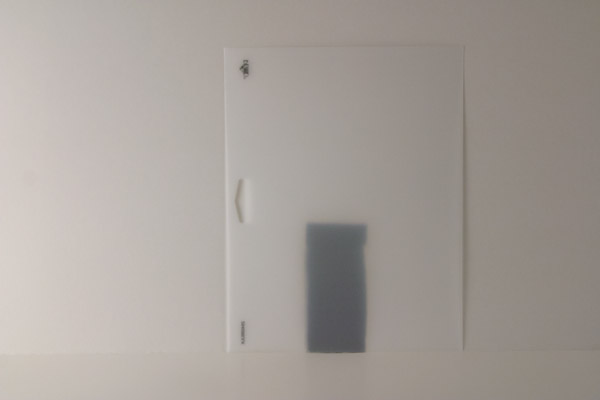
Frosted stencil paper was butted against the background, behind the glass, to evenly diffuse the light shining through the hole in the poster board. The sheet was moved so that the edges, logo and holes were not seen from the camera’s angle of view.

backlit root beer

First backlight test, before marshmallows were added.

Now that the liquid was backlit, we needed to add a light to illuminate the ice cream. To do this, a large piece of diffusion fabric attached to a PVC frame was placed just out of frame, towards camera left. A strobe light was then placed behind the panel. The diffusion fabric created a large source of illumination, which created a very soft transition from the highlights to the shadows.

float without backlight

Light shining through diffusion panel with back light turned off

Finally, an acrylic mirror was attached to a light stand and placed just out of frame, towards camera right. The mirror reflected and bounced some of the light from the large panel back into the shadows.

Before and After of Mirror Fill

Mirror fill: Before and After

setup view

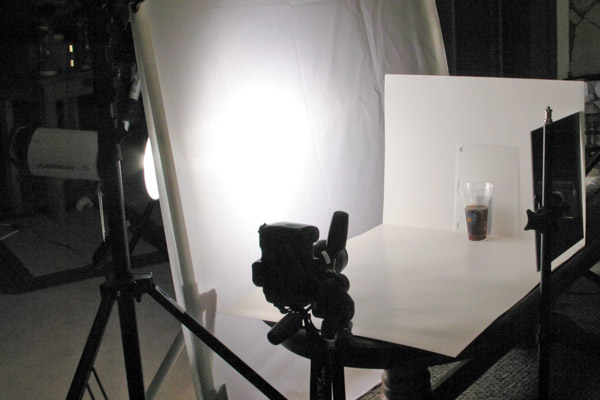
View of entire setup.

The final image was shot using a Canon EF 100mm f/2.8 Macro lens. The camera was set to f/14 at ISO 100.

Final image with real ice cream

Final image using real ice cream.

With a little imagination and ingenuity you too can create professional looking food images on a budget, with minimal equipment. In fact, here are a few cheaper alternatives that could have been used to create the image above:

CFL or LED Light Bulbs

The wonderful thing about still photography is that your subject is “still”. This means you can use regular household bulbs to light your scene if you do not have the money for strobes. All you have to do is lower and adjust the shutter speed of your camera, since the bulbs do not emit as much light as a strobe or off-camera flash. Experiment with different bulb wattages, or try alternating the amount of bulbs to create different lighting ratios. Just make sure you have the bulbs placed behind some source of diffusion. By diffusing the lights, you will create a single large light source; otherwise, you will create multiple shadows and weird reflections from the various sources of light.

White Twin Bed Sheet

A white bed sheet is an inexpensive and great form of diffusion. You can attach it to a PVC frame or stretch it between two light stands using spring clamps. The sheets are also great for portrait work. Need a GIANT softbox? Try a king size sheet!

googletag.cmd.push(function() {
tablet_slots.push( googletag.defineSlot( “/1005424/_dPSv4_tab-all-article-bottom_(300×250)”, [300, 250], “pb-ad-78623” ).addService( googletag.pubads() ) ); } );

googletag.cmd.push(function() {
mobile_slots.push( googletag.defineSlot( “/1005424/_dPSv4_mob-all-article-bottom_(300×250)”, [300, 250], “pb-ad-78158” ).addService( googletag.pubads() ) ); } );

The post Food Photography – How to Shoot A Beverage With Only Two Lights by Joel Dryer appeared first on Digital Photography School.


Digital Photography School

 
Comments Off on Food Photography – How to Shoot A Beverage With Only Two Lights

Posted in Photography


Street Pong: Play with Fellow Pedestrians at Traffic Lights

09 Dec

[ By Steph in Gaming & Computing & Technology. ]

Street Light Pong 1

You might not be too concerned about how many light cycles go by before you actually get to cross the street if you’re too busy playing pong with the person waiting on the other side of the intersection. The ActiWait project aims to brings ‘street pong’ to intersections around the world, with two functioning games already installed in the city of Hildesheim, Germany.

Street Light Pong 2

The concept made its debut on the web in 2012, with the original video (below) getting so much attention that the interaction design students from HAWK University who created it decided to make it real. Designers Amelie Künzler, Sandro Angel and Holger Michel collaborated with traffic experts and fabricators to create a device that can be installed on traffic poles.

Street Light Pong 3

“Yeah well… the idea was simple but traffic engineering isn’t,” say the designers on their IndieGoGo page, where they’re currently raising funds to bring the ActiWait to more cities. “So we got us some support from companies and professionals in the traffic technology industry. The prototype is 3D printed and fully equipped, the first game is programmed and we’ve already launched our product in October so we can proudly say: the world’s first smart pedestrian light button is finally here!”

Street Light Pong 4

The product needs funding to develop hardware and software for the final stage, a new professionaly-produced case, and to pass safety tests. The designers also intend to make it wifi capable for news feeds, navigation, traffic education and other applications in addition to pong – even speed dating. Learn more at IndieGoGo.

Share on Facebook


[ By Steph in Gaming & Computing & Technology. ]

[ WebUrbanist | Archives | Galleries | Privacy | TOS ]


WebUrbanist

 
Comments Off on Street Pong: Play with Fellow Pedestrians at Traffic Lights

Posted in Creativity


Choosing Lights

03 Sep
Because big lights and small lights each bring a different set of considerations to the party, I am splitting my recommendations into speedlights and “studio lights.” (Although I hate that term.)

For speedlights, you have to decide if you wanna drive stick or automatic—AKA manual or TTL. I live in manual mode, which means I sacrifice some convenience for reliability and repeatability. It also means I can pay about a third as much for each of my flashes.

If you live by TTL, you will die by TTL. Or, at least your wallet will die a small, unnecessary death every time you need to purchase a flash.
__________

For manual speedlights, I wholeheartedly recommend the LumoPro LP180, about which I go into far more detail here. It’s built like a tank, syncs four different ways, has a fluid and intuitive user interface, a built-in light-stand socket, a built-in gel holder and has a two-year manufacturer’s warranty. No other speedlight comes close to claiming all of those useful features.

That it costs about a third as much as you would pay for an OEM branded flagship TTL flash is icing on the cake. If you can commit to shooting manually, this is your flash.

If you need TTL (and remember, this is the gear acquisition equivalent of joining the TTL mafia) I would consider eschewing the OEM flagship TTL flashes. They can run north of $ 500USD, which is just nuts.

The Phottix Mitros comes in Nikon and Canon variants and sells for about $ 300USD—with twice the warranty length. It does pretty much all the fancy stuff most of the OEM flashes do including the optical TTL triggering of other TTL units, be they other Mitros units or OEM units.

I will say that for the lesser price you will give up some ease of user interface. But this may well be that I was used to the OEM flash user interface and that of the Mitros is pretty radically different.

Finally, for some people the flagship OEM flashes will be just fine. For instance, if your name is Bill Gates they are a perfect choice for you.

On the opposite end of the spectrum, there are a ton of flashes constantly hitting the market from the far east, from a variety of pop-up brands. Some of the brands are recognizable because they bought the rights to use familiar but now bankrupt brands that were formerly trustworthy. They have spotty track records for quality. Factory warranties are short to nonexistent.

Many who read this will be tempted to go that route because of prices that are almost too good to be true. If that’s you, by all means knock yourself out. Some people need to be stung in the wallet to remember a lesson or bit of advice. I know I did when I was young. Good luck with that!
__________

As far as big lights go, there is a completely different set of variables to consider. Big lights are system-oriented, and you would do well to choose wisely in what will likely be a long-term relationship.

I spent a lot of time and money auditioning big lights over the past 25 years. I am really happy where I am now, and would have loved to make this good of a choice from the get-go. I wrote about researching and choosing big lights a couple years ago and at the time settled on a Profoto/Paul Buff hybrid choice.

I loved Profoto’s light mods and quality of light, but they were very expensive. And the battery options insanely so. So instead of battery versions of my Profotos, I went with Profoto plug-ins and a full Paul Buff Einstein setup for portable, battery-powered big lights. Sounds crazy, but for the price of just two AcuteB battery generators you can outfit yourself like an Einstein King.

So for the last couple of years I have had two full systems in my gear closet: Profoto plug-ins and Einstein 640s with portable battery packs. (But they also plug in.) And even though the Profotos are far more expensive, rugged and “professional” (whatever) I found myself again and agin choosing the Einsteins to use.

That’s because inexpensive or not, they are simply amazing flashes. And they come with a 2-year warranty (sensing a trend here?) and legendary factory service. Further, Paul Buff has finally taken some time to develop the modifier system that a good flash deserves. The reflectors and accessories are well-designed—and wonderfully inexpensive.

The caveat here is, this is pretty much a US-based choice/suggestion. One of the main reasons Paul Buff lights are so inexpensive is that he only sells direct, and mostly in the US. There are a couple of dealers outside the US but that starts to erode the value proposition pretty quickly.

So, to beginners looking for a great light at an amazing price in the US, I would suggest you strongly consider Einsteins. Not the similarly shaped and even cheaper AlienBees, however. They look similar, but are not in the same league as the Einsteins. Save your money and go Einstein. It is not that much more.

If you are outside of the US, I am sorry that this choice will be either not available or not nearly as good a value to you. So I would suggest that you look at other reputable flash brands (Bowens, Elinchrom, Hensel, Profoto, etc.) and choose the brand that works best for your needs and your wallet. This advice also holds for people for whom the Einsteins aren’t a good fit.

Again, I would suggest avoiding the temptation of the super-cheap mystery brands from the far east. Personal experience. But if you need some personal experience of your own to dissuade you in the future, by all means go right ahead.

Next: Triggers


Strobist

 
Comments Off on Choosing Lights

Posted in Photography


Lighting Tutorial: Types Of Lights & Meters

29 Aug

Image from Alana Tyler Slutsky's Surrealia series as seen on Fashion Photography Blog (FashionPhotographyBlog.comTYPES OF LIGHTS + METERS

Hey FashionPhotographyBlog.com readers! Welcome back.

Now that you know different sources of lights that can be used, today we’ll cover the ways in which they can be set up.

TYPES OF LIGHTS

Key” light is the main light source and generally the brightest.


Fill” is used to brighten shadows and does bit create a secondary shadow and is generally a diffused source.  (Avoid a secondary shadow at all costs! This is the sign of an amateur photographer.)


Background” lights are used to illuminate the background and aid in separating the subject.  They can provide a sense of depth.


Hair” light is typically overhead and slightly behind a subject.  It’s a separation light which only hits the top of the head.


Hair Lighting Example As Seen On Fashion Photography Blog (FashionPhotographyBlog.com

Kickers” are lights that help separate the subject from the background.  Kickers are also known as “Accent,” “Rim” and “Edge” lights.


Kickers Lighting Example As Seen On Fashion Photography Blog (FashionPhotographyBlog.com

No Kicker vs. Kicker – This is a more obvious example. Kickers can be use more subtlety.

Rim” lights are pretty self explanatory.  They hit the rim of the subject to serve as a separator from the background.

Rim Lighting Example As Seen On Fashion Photography Blog (FashionPhotographyBlog.com

Rim Lighting

TYPES OF METERS

Reflective Meters are the types of meters build right into your camera.  How do they work?  Reflective meters measure the light that is reflected back into them.  These types of meters take an average reading of the scene and meter for “middle grey.”  Be aware of this when using the meter built into your camera (or a reflective meter) to meter a scene!

Experiment: Using a reflective meter, take a photograph of a black card, take a photograph of a white card and take a photograph of a grey card.  You’ll notice that all the images essentially come out grey- the black will be over exposed and the white will be under exposed.

The following information and pictures are from Scantips.com

Image of Three Cards As Seen On Fashion Photography Blog (FashionPhotographyBlog.com

Three cards, f/8, 1/1250 second Nearly exactly Sunny 16

Black Card Image As Seen On Fashion Photography Blog (FashionPhotographyBlog.com

Black card, f/8 1/200 second (result is not black) Result is 2.3 stops overexposed, from first one.

White Card Image As Seen On Fashion Photography Blog (FashionPhotographyBlog.com

White card, f/8 1/5000 second (result is not white) Result is two stops underexposed, from first one.

Grey Card Image As Seen On Fashion Photography Blog (FashionPhotographyBlog.com

18% gray card, f/8 1/800 second Result is 1/3 stop over first one.

Incident Meters are the type professionals typically use.  They’re handheld meters which are held at the subject (not at the camera, like reflective meters) and measure the amount of light that falls on to the subject.  These are much more accurate than reflective meters and are easiest to use in studio.


Sekonic L-358 Incident Meter Image As Seen On Fashion Photography Blog (FashionPhotographyBlog.com

The Sekonic L-358 is one of the most commonly used incident meters.

They also come with an attachment to use it as a reflective meter.

Hang tight for tomorrow where we’ll cover different types of lighting modifiers.

See ya tomorrow-
Alana


IMAGE SOURCE:

Feature image & image 1: photography by Alana Tyler Slutsky from her Surrealia series. To view the rest of the photos from this series visit her website.

Image 3: StackExchange.com

Image 2, 4 & 9: Alana Tyler Slutsky

Image 5-8: Scantips.com


Fashion Photography Blog

 
Comments Off on Lighting Tutorial: Types Of Lights & Meters

Posted in Uncategorized


Time-Traveling Trams: 30,000 LED Lights Vanish Street Trains

04 Jul

[ By WebUrbanist in Art & Installation & Sound. ]

seasonal time traveling tram

Extended exposure photography combined with a unique art installation project creates an incredible time lapse illusion on the streets of Budapest, making train cars appear to disappear in a burst of light.

seasonal christmas tram lights

seasonal time lapse art

Started for Christmas 2009, this is a project of a regional transport company since captures by a number of intrepid photographers, each showing different speeds and resulting effects.

seasonal installation art series

seasonal train photo shoot

Via Colossal, this seasonal lighting is meant to attract tourists and additional riders, a decorative nod to the holidays as well as a moving work of photogenic art.

seasonal train light art

seasonal disappearing train view

Images here were taken by Andras Csore, Victor Varga, Krisztian Birinyi, Krisztian Birinyi, Zsolt Andrasi English Hungary and the Centre for Budapest Transport.

Share on Facebook


[ By WebUrbanist in Art & Installation & Sound. ]

[ WebUrbanist | Archives | Galleries | Privacy | TOS ]


WebUrbanist

 
Comments Off on Time-Traveling Trams: 30,000 LED Lights Vanish Street Trains

Posted in Creativity


Infrastructural Art: Colorful LEDs Lights Up Shipyard Cranes

13 Jun

[ By WebUrbanist in Art & Installation & Sound. ]

shipyard crane art

The imagination readily fastens onto the anthropomorphic figures like those found in shipyards, turning looming metal giants into huge toy beasts, origami cranes writ large.

shipyard light show art

shipyard colorful close up

Lighting designer Dean Skira takes things a step further in this public exhibition titled Lighting Giants, using nearly 100 RGB LEDs to produce an array of colorful effects at a massive scale – 16,000 different possible hues in total.

Pula, 04.05.2014 - U sklopu drugog Visualia festivala osvjetljene Uljanikove dizalice

shipyard multi colored installation

Located in a major Croatian shipyard, the show involves a shifting spectrum of illumination that ranges from pure white to wild rainbows, all directed up into the rugged frameworks of industrial monstrosities.

shipyard light up all white

shipyard light up red

The installation, funded by the ministry of tourism, was in part a response to calls for the relocation of the shipping infrastructure, seen by many as an eyesore. Instead of doing away with the cranes, a part of local industry and history, this work celebrates and highlights them.

shipyard light colorful

shipyard last image photo

About the artist: he is a “lighting designer with over twenty years of experience in designing innovative lighting solutions for urban, landscape, commercial and residential spaces. Even in his early childhood he was fascinated by light and its sources, strongly influenced by his father’s professional work in stained glass. He promotes an architectural lighting design concept that goes beyond utilitarian where lighting can have high impact on person’s emotional states.”

Share on Facebook


[ By WebUrbanist in Art & Installation & Sound. ]

[ WebUrbanist | Archives | Galleries | Privacy | TOS ]


WebUrbanist

 
Comments Off on Infrastructural Art: Colorful LEDs Lights Up Shipyard Cranes

Posted in Creativity


Street Smart: Solar Roadway Lights Up & Feeds Power Grid

21 May

[ By WebUrbanist in Conceptual & Futuristic & Technology. ]

solar roadway graphic design

Currently in crowdfunding, these hexagonal pavers can provide energy, melt accumulated snow and ice, light up with LEDs, all while being tough enough to support trucks weighing 250,000 pounds.

solar roadway parking sidewalk

Designed by American electrical engineer Scott Brusaw to work everywhere from roads, parking lots and driveways to sidewalks, bike paths and playgrounds, you can walk, drive or park on these hexagrams with ease. They have been extensively tested for load-bearing capacity as well as traction and impact resistance.

solar road test panels

solar roadway led lights

More about the project from IndieGoGo (graphics by Sam Cornett): “Solar Roadways is a modular paving system of solar panels that can … pay for themselves primarily through the generation of electricity, which [in turn] can power homes and businesses connected via driveways and parking lots.”

solar roadway rural highway

solar roadway system sketch

Current working prototypes are already powerful, as demonstrated above. Beyond existing capabilities there are many possibilities for further development, including mutual induction technologies that would allow charging while driving and more complex LED systems to create changing road displays on demand.

Share on Facebook


[ By WebUrbanist in Conceptual & Futuristic & Technology. ]

[ WebUrbanist | Archives | Galleries | Privacy | TOS ]


WebUrbanist

 
Comments Off on Street Smart: Solar Roadway Lights Up & Feeds Power Grid

Posted in Creativity


Sanges Indecent Eye & Lyubimkin’s City Lights

20 May

Marco Sanges' The Indecent Eye Exhibition - Fashion Photography Blog (FashionPhotographyBlog.com)
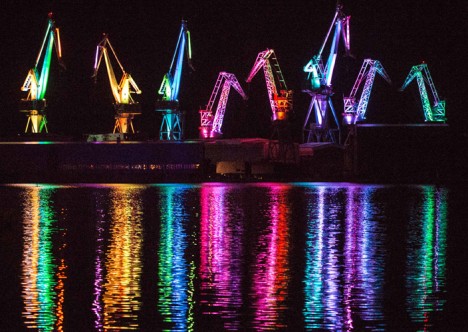
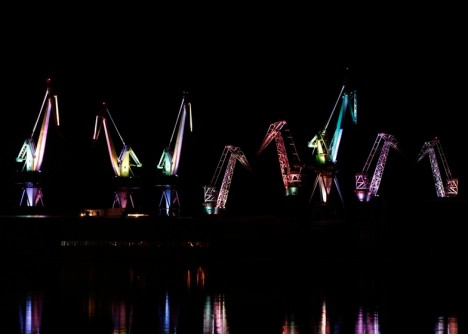
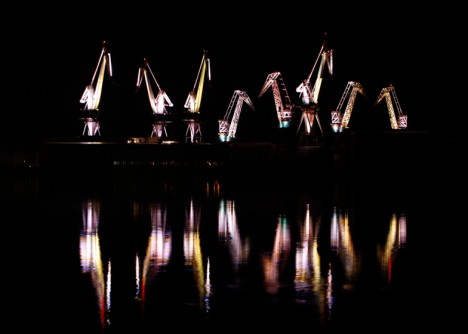
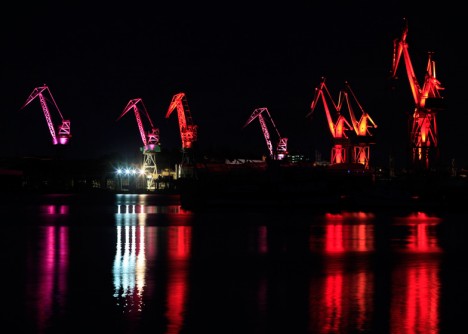
Readers based in London may be interested in hearing that the Hay Hill Gallery, who represent a selection of internationally recognized contemporary artists, will be presenting a double exhibition from the 26th May to the 21st June, showcasing the photographic works of fashion photographer, Marco Sanges, entitled “The Indecent Eye”, and the architectural images of Alexey Lyubimkin, called “City Lights”.

Marco Sanges' The Indecent Eye Exhibition - Fashion Photography Blog (FashionPhotographyBlog.com)

Marco Sanges and possess a matchless photographic eye that creates alluring photography echoing the works of art from the Byzantine, Surrealist and Gothic periods. Not only are his images reminiscent of art paintings but he has ability to transmute and infuse each subject matter with its own and distinctive vibrancy and energy.

Marco Sanges' The Indecent Eye Exhibition - Fashion Photography Blog (FashionPhotographyBlog.com)

From developing and printing black and white photos in his uncle’s photographic lab, Sanges went on, in the pursuit of fashion, to become a photographer for Vogue Italia, before relocating to London where he presently resides. He has been exhibited worldwide, worked with clients such as Cutler and Gross, Agent Provocateur, Sunday Telegraph, Vogue, Trace, Elle, Dolce & Gabbana, and there is even a permanent collection of his work held in the Virginia Museum of Fine Arts, in the United States.

Marco Sanges' The Indecent Eye Exhibition - Fashion Photography Blog (FashionPhotographyBlog.com)

With his exhibition, Marco Sanges invites the public to visit and open their imaginations. As a storyteller, Sanges photographs appear to look more like cinematic narratives, as though we are looking through the lens as the photographer tells his tale. Having been influenced by the silent films of the 1920’s and 30’s, his dark and enchanting images portray the frailty and strength of humanity, confronting the viewer with the conclusion that there can be a funny side to our own mistakes if you choose to see it. Magician, puppet master and photographer, Sanges takes you on a journey of mystique and romantic intrigue in “The Indecent Eye” exhibition.

Marco Sanges' The Indecent Eye Exhibition - Fashion Photography Blog (FashionPhotographyBlog.com)

Having been provoked into deep thought by “The Indecent Eye”, you may wish to proceed through the “City Lights” exhibition in the same venue, displaying the architectural works of photographer, Alexey Lyubimkim. What can be described as love letter to the cities he shoots, revealing the tree and building lines as though they were part of the original city’s design blue-print. With a camera in hand, the lens is like a magnifying glass under Lyubimkim’s scrutinising eye that reveals what our naked eyes can’t see – an ever changing landscape.

Alexey Lyumbimkin's City Lights Exhibition - Fashion Photography Blog (FashionPhotographyBlog.com)

Born in Novosibirsk, Russia in 1963, Lyubimkim has worked as a professional architect, published the “Russian Gallery” art magazine, developed the growth of the Moscow’s Artist Center at Tretyakov Gallery and Savvinskaya Arts Center, was a founding member of London’s Hay Hill Gallery (where the exhibitions are held), and holds memberships in both the Russian Photo Artists Union and the International Journalist Union. His works have been sought after in private collections across the globe, including Russia, UK, Germany, Mexico and USA.

Alexey Lyumbimkin's City Lights Exhibition - Fashion Photography Blog (FashionPhotographyBlog.com)

How does architecture apply to fashion photography you may ask? Well, according to Alex Lyubimkin he says that “Architecture is the most stylish way of culture representation, and… like many people, I like to make my own discoveries. In this variety of city landscapes and cultural traditions no creative person can remain indifferent. I often carry my camera with me, which becomes my interpreter and even my partner… London is one of the most beautiful cities in the world for me.” Be inspired by the lines, shapes and bold use of color in Lyubimkin’s courtship of the cities he has photographed.

Lyubimkin pays homage to the old technique of tinting images but incorporates a variety of contemporary solero hues. This artist’s colour fascination embodies the double take turn of the head towards beauty in amidst the bustle of a metropolitan city, encouraging the viewer to take notice of their surroundings next time they step outside. He brings to the surface the sense of home and belonging, while making conscious of the world around us at a local scale.

Marco Sanges' The Indecent Eye Exhibition - Fashion Photography Blog (FashionPhotographyBlog.com)

To visit or find more information for both Marco Sanges’ “The Indecent Eye” & Alexey Lyubimkin’s “City Lights” exhibitions, the contact details for the Hay Hill Gallery are below:

Hay Hill Gallery

Address: 35 Baker Street, London W1U 8EN

Phone: 020 7486 6006

Opening hours: Monday – Friday 10.30-6, Saturday 11-5

Website: www.hayhillgallery.com

Email: info@hayhillgallery.com

Marco Sanges' The Indecent Eye Exhibition - Fashion Photography Blog (FashionPhotographyBlog.com)

PHOTO CREDITS:

Pictures 1, 2, 3, 4, 5, 8 & 9: from Marco Sanges’ “The Indecent Eye” Exhibition

Pictures 6 & 7: from Alexey Lyubimkin’s “City Lights” Exhibition


Fashion Photography Blog

 
Comments Off on Sanges Indecent Eye & Lyubimkin’s City Lights

Posted in Uncategorized


Lights. Smartphone. Action!

17 Mar

With just the right accessories, you and your phone can make movie magic.

Might we suggest a dolly that slides, lenses for a new perspective and a constant light to really shine.

Don’t just rely on your hands or zoom to pan your cam. The Table Dolly glides smooth as silk on its four wheels and holds tight to any phone.

Change up your view with the Phone Lens Series. The wide angle and fisheye more than make up for your phone’s auto crop in video mode. The telephoto and macro get you stunning close ups.

For pro-level lighting use the Pocket Spotlight on or off of your phone. Get constant even light right where you want it.

Learn More About the Table Dolly
$ 90 at the Photojojo Shop

Buy the Phone Lens Series
$ 20+ at the Photojojo Shop

Nab a Pocket Spotlight
$ 30 at the Photojojo Shop


© laurel for Photojojo, 2014. |
Permalink |
No comment |
Add to
del.icio.us

Post tags:


Photojojo

 
Comments Off on Lights. Smartphone. Action!

Posted in Equipment