RSS
 

Posts Tagged ‘lightroom’

Adobe releases ‘massive update’ to Camera Profiles in ACR and Lightroom

03 Apr
The new Profiles panel in Lightroom CC. Credit: Adobe

Earlier today, Adobe launched a major update to Camera Profiles (now known as just “Profiles”) in Adobe Camera Raw (ACR), Lightroom Classic CC, Lightroom CC, and both versions of Lightroom Mobile. The update brings six new Adobe RAW profiles, over 40 new Creative profiles, a new profile browser, and a bunch of new features and feature enhancements across both mobile and desktop.

The most significant update here is obviously Profiles.

Camera Profiles has now been renamed “Profiles”, and the whole panel has been moved so it’s easier to find. In Adobe Camera Raw and Lightroom Classic CC, Profiles have been moved from the Camera Calibration panel into the Basics panel; in Lightroom CC, they’ve been added to the top of the edit panel.

But this update isn’t just about adding Profiles to Lightroom CC and moving them around a bit. There are now six new Adobe RAW profiles to work with.

Six New Adobe RAW Profiles

In addition to the tried and true Adobe Standard, you now have Adobe Color, Adobe Monochrome, Adobe Landscape, Adobe Neutral, Adobe Portrait, and Adobe Vivid. Credit: Adobe

Previously, the only Adobe RAW profile you had at your disposal was Adobe Standard. Now, you’ve got six more to choose from:

  • Adobe Color: designed to improve the look and rendering of warm tones, improve the transition between certain color ranges, and slightly increase the starting contrast of your photos. As the new default, it was designed to work with the widest range of photos.
  • Adobe Monochrome: Tuned to be “a great starting point” for any black & white photo. Results in better tonal separation and contrast than Adobe Standard converted to B&W.
  • Adobe Landscape: Produces more vibrant skies and foliage tones.
  • Adobe Neutral: Provides a starting point with very low contrast. Adobe claims this one is most useful “for photos where you want the most control, or that have very difficult tonal ranges.”
  • Adobe Portrait: Provides “more control and better reproduction of skin tones.” This means less contrast and saturation applied to skin tones throughout the photo, so you have more control over how those tones turn out.
  • Adobe Vivid: A “punchy, saturated starting point.”

The point of each of these profiles (and Adobe Standard) is to give your images a unified “look and feel” regardless of the camera you’re using. But now, rather than a single profile, you’ve got six “starting points” to choose from depending on your genre and photo editing style.

Adobe Color replaces 10-year-old Adobe Standard as the default profile for newly imported photos, but you’ll still have access to all of them in the new Profiles section of the Basics panel.

New Creative Profiles

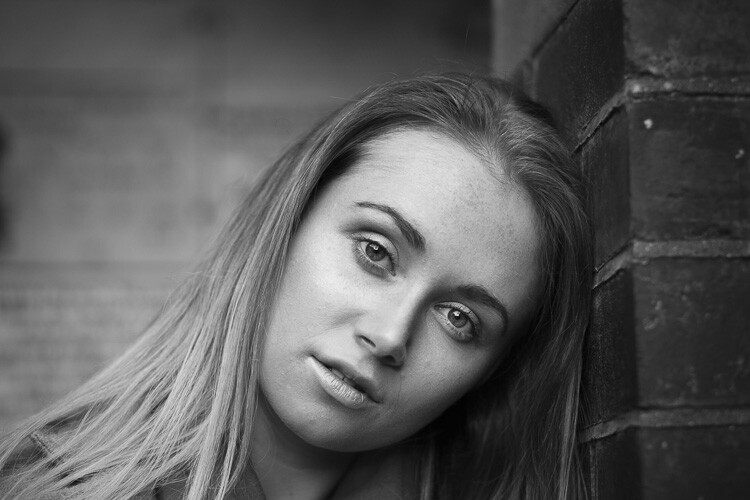
Creative Profile comparison. Credit: Adobe

You now have 40+ Creative profiles to choose from, split up into four groups: Artistic, Modern, Vintage, and Black & White. These profiles can be applied to both Raw and non-Raw photos, and come with a 3D Lookup Table (LUT) for a level of control that was previously reserved for Photoshop.

Creative profiles also come with an Amount slider, so you can increase or decrease the effect.

Black & White Creative Profiles comparison. Credit: Adobe

Additionally, Adobe has also been working with some popular Lightroom preset creators to create a range of 3rd Party Profiles, some of which are already available today. These include profiles by photographers Brian Matiash and Matt Kloskowski, and companies like RNI Films and Contrastly.

You can find links to all of the 3rd Party Profiles on the Adobe blog post about this update.

Updates to Lightroom CC on Android and iOS

The new Detail tab in Lightroom CC for Android. Credit: Adobe

In addition to the Profiles update described above, Lightroom CC for iOS, Android and ChromeOS all got some feature updates and upgrades as well.

On the Android/ChromeOS front, a new Details tab provides Sharpening and Noise Reduction options, Grain options have been added for “realistic film grain,” and some additional control for sharing images over Lightroom CC Web have been added as well.

For iOS users, the new Geometry tab will help you straighten crooked and skewed photos using new Upright, Guided Upright, and Geometry sliders; the same Grain options mentioned above have been added, and Adobe has introduced a Left-Handed Editing Mode on the iPad. The company has also done some iPhone X layout optimizations to take advantage of the dreaded notch.

The new Geometry tab in Lightroom CC for iOS. Credit: Adobe

A Few More Things

Finally, in addition to everything mentioned above, a few minor improvements have been made to Lightroom CC and Lightroom Classic CC on the Desktop.

In Lightroom Classic CC, the Dehaze tool has been made more accessible by moving it to the Basics panel, the Tone Curve panel has been expanded for better/more precise control, and the face-tagging algorithm has been improved.

In Lightroom CC, support has been added for Network Attached Storage (NAS) devices, and a new filter option has been added that allows you to sort your images by “sync status.”


To learn more about all of the updates detailed above, and particularly if you want to dive deeper into the new Profiles features, head over to the Adobe blog or update your Adobe Camera Raw, Lightroom CC and/or Lightroom Classic CC to the latest version. This update went live about 15 minutes ago, and should be available to all Creative Cloud subscribers.

Articles: Digital Photography Review (dpreview.com)

 
Comments Off on Adobe releases ‘massive update’ to Camera Profiles in ACR and Lightroom

Posted in Uncategorized


Six Reasons to Upgrade From Lightroom 6 to Lightroom Classic CC

25 Mar

If you’re a Lightroom 6 user you may be wondering whether it’s time to upgrade to Lightroom Classic CC. Yes, it will cost you more to move over to the Lightroom Classic subscription, but you will receive a lot of extras in compensation. Let’s take a look at what they are, so you can decide whether the upgrade is worth it for you or not.

1. The Lightroom Classic CC subscription includes Photoshop CC

Lightroom Classic CC upgrade

It’s true that many photographers do all their photo processing in Lightroom without ever moving across to Photoshop. If that’s you, then don’t feel you need to use Photoshop just for the sake of it.

But there are things you can do in Photoshop that you can’t in Lightroom. If you’d like to try any of these, then you’ll need to subscribe to Lightroom Classic CC to access to the latest version, as you can’t buy a standalone version of Photoshop CC.

These are just some of the things you can do in Photoshop that you can’t in Lightroom.

  • Use layers and masking.
  • Advanced portrait retouching.
  • Blend or composite multiple images together.
  • Swap skies or heads (in a group portrait).
  • Use Content-aware fill to remove unwanted items.
  • Make complex selections.
  • Add texture overlays.
  • Add fancy borders.
Lightroom Classic CC upgrade

I used Photoshop to add a texture layer and an interesting border to this still life photo.

2. Lightroom Classic CC lets you synchronize photos to use with the Lightroom CC mobile apps

With Lightroom Classic CC you can synchronize selected Collections and view the photos in those Collections in the Lightroom CC app (formerly known as Lightroom mobile) on a tablet or smartphone. One benefit of this is that you can download the photos to your device so that you can show them to people even when your device is offline.

This makes Lightroom CC a great way to show your portfolio to people while on the go. You can also develop photos in the Lightroom CC app, which may come in handy when you are away from home.

Lightroom Classic CC upgrade

A Collection of photos in Lightroom Classic CC.

Lightroom Classic CC upgrade

The same Collection in the Lightroom CC iPad app.

3. Lightroom Classic CC lets you display photos online

There are two ways to display your photos online using Lightroom Classic CC. The first is to make a Collection public – something you can do with any synchronized Collection. When you do this Lightroom generates a URL that you can give to other people so that they can see the photos in the Collection in a browser (also known as Lightroom Web).

This is a good way to share photos with family, friends, and even clients. If the viewer logs in with an Adobe ID they can even favorite photos and add comments.

Lightroom Classic CC upgrade

This is how the same Collection shown above looks when displayed in a browser.

The other way is to use Adobe Portfolio to build your own portfolio website. I explored this option in more detail in my article How to Create a Beautiful Online Gallery with Lightroom Classic CC and Adobe Portfolio in 15 Minutes.

Adobe Portfolio is the easiest way I know of to turn a synchronized Collection into a website portfolio.

Lightroom Classic CC upgrade

One of the pages from my Adobe Portfolio-generated website.

4. Lightroom Classic CC is faster than Lightroom 6

The latest upgrades to Lightroom Classic CC means that it runs much faster than Lightroom 6. The exact speed gains depend on your computer setup (for example, you need to have at least 12GB of RAM to take advantage of some of the speed gains in the latest Lightroom Classic CC release).

But there’s no doubt that the process of importing photos and generating previews is much faster in Lightroom Classic CC. If speed is an issue with Lightroom 6, it may be time to upgrade.

5. Lightroom Classic CC has Color Range Masking and Luminance Range Masking

These new tools give you more options when it comes to making selections and applying Radial Filters, Graduated Filters and the Adjustment Brush. They are extremely useful when it comes to making local adjustments. You will need to upgrade to Lightroom Classic CC if you’d like to use them.

Lightroom Classic CC upgrade

The Color Range Masking tool in action. I used it here in conjunction with the Adjustment Brush to apply Clarity to the red tin, but no other part of the photo.

6. Lightroom 6 is no longer supported by Adobe

While I’ve tried to emphasize what you will gain by upgrading to Lightroom Classic CC in the rest of the article, there’s no getting away from the fact that Lightroom 6 is no longer supported by Adobe. As a result, new features added to Lightroom Classic CC won’t be available to Lightroom 6 users.

The question you need to ask yourself is how important are the new features, such as Color Range Masking, to you and your workflow?

There’s no need to make an immediate decision. There’s nothing wrong with continuing to use Lightroom 6 for now and upgrading to Lightroom Classic CC in a year or two when the difference between the two is much greater.

You also need to be aware of the effect it will have on your workflow if you buy a new camera whose Raw files aren’t supported by Lightroom 6. In this situation, you can use Adobe’s free DNG Converter to convert the new camera’s Raw files to the DNG format, which can then be read by Lightroom 6. If that is too much of an inconvenience then it may be time to upgrade to Lightroom Classic CC.

Conclusion

These are the six main reasons that I can think of that Lightroom 6 users might want to upgrade to Lightroom Classic CC. If you’re considering the upgrade then take the time to think through your decision and decide which of these (if any) apply to you.

It’s important to make the right choice because once you upgrade to Lightroom Classic CC it’s extremely difficult to go back to using Lightroom 6. The reason for this is that Lightroom upgrades your Catalog so it’s compatible with Lightroom Classic CC. But the new Catalog format isn’t recognized by Lightroom 6. So make your decision wisely.

Can you think of any other reason why a Lightroom 6 user might want to upgrade to Lightroom Classic CC? Have you already upgraded? Then please let us know your thoughts in the comments below.


Mastering Lightroom ebooks

Want to get a head start with Lightroom? Take a look at my popular Mastering Lightroom ebooks, written to help photographers learn how to use all of Lightroom’s powerful features. Use the code DPS20 to get 20% off your first order.

The post Six Reasons to Upgrade From Lightroom 6 to Lightroom Classic CC by Andrew S. Gibson appeared first on Digital Photography School.


Digital Photography School

 
Comments Off on Six Reasons to Upgrade From Lightroom 6 to Lightroom Classic CC

Posted in Photography


How to Rescue an Image in Lightroom With Split Toning

17 Feb

Split toning is one of the most overlooked features in Lightroom (or any post-processing program for that matter). It’s a technique used mostly in the film industry and is apparent in just about any action movie poster. You know the ones, where the skin tones are super warm, while the background and shadows are cool and blue.

That’s all split toning is: adding a hue to your highlights and an opposing (but complementary) hue to your shadows. Most of the time, the best colors to stick with are an orange tone for your highlights and a blue tone for your shadows, although there are certainly exceptions.

How to Rescue an Image in Lightroom With Split Toning

Before processing.

How to Rescue an Image in Lightroom With Split Toning

After processing and split toning added.

Great location, less than ideal lighting conditions

The location was Ke’e Beach, an incredible spot on Kauai that is literally at the end of the road on the north side of the island. I was there with my workshop students and we had realized earlier on in the day that shooting conditions were going to be tough.

A think layer of vog (volcanic fog) had blown over all the way from the Big Island. It covered all of Kauai’s north side in a thick, desaturated haze. This made shooting conditions quite challenging. On top of all that, the ocean was quite angry that day! A rough sea is normal in the winter on Kauai, but this was something else.

Our goal at Ke’e Beach was to photograph the waves that exploded out of the sea and then fanned out, almost like seashells. But because of the conditions, the waves were just getting obliterated before they could fan out. Still, we didn’t give up. We focused on capturing the anger and drama of the ocean and everyone walked away with some great shots.

Split toning to the rescue

In the video below, I process an image from that evening from start to finish inside of Adobe Lightroom Classic CC. The problem with the shot is that it came out of the camera looking quite dull. Because of the thick haze and everything in the shot being backlit, the resulting RAW file looked almost monochromatic. The sky was grey and looked overcast, the rocks and water were dark, and it just looked uninspiring.

?

A common technique that a lot of photographers reach for in these situations is just embracing it and converting the image to black and white. But, if you’re looking for something new to add to your bag of tricks, split-toning can be quite effective at saving images as well.

For this image, I started out by doing what I could in the Basic module to bring out details, add contrast, and make the image pop. After a few other adjustments, I made my way down to the Split Toning module, adding a warm orange tone to the sky (the highlights) and a cool blue/teal tone to the rocks and water (the shadows).

Here are the settings I used in the Basic panel.

These are the Split Toning settings I applied.

The result is a dramatic looking shot that both effectively shows the power of the ocean that evening and also gives the impression of a warm, vibrant sunset.

After

Conclusion

Split toning is a powerful and fun technique. It can be used both to enhance already great images or save otherwise dull ones. When you discover this technique for the first time, you’ll have a blast going through your images and trying it out in different situations. And, just a heads up, it can be used on either color or black and white images. Regardless of the image type, you’re simply adding one hue to the highlights and another to the shadows.

Have you used split toning in Lightroom before or is this completely new to you? If you have done it, please share your favorite split toned image in the comments below. If not, give it a go and share your results.

The post How to Rescue an Image in Lightroom With Split Toning by James Brandon appeared first on Digital Photography School.


Digital Photography School

 
Comments Off on How to Rescue an Image in Lightroom With Split Toning

Posted in Photography


Lightroom Classic 7.2: Major performance boost, new features, and more

14 Feb

Lightroom Classic 7.2—the performance boosted version of Lightroom DPReview got to test for ourselves at the end of January—has finally arrived! And with it come numerous performance improvements, better support for Intel hardware, a fix for speed issues experienced by some users, and some new features to boot.

Additionally, Adobe has also updated the new cloud-based Lightroom CC ecosystem for both desktop and mobile operating systems. Let’s take them one at a time.

Lightroom Classic Performance Boost

The company explains that it has worked with Intel to improve performance scaling on computers that have multiple cores and at least 12GB of RAM, and as we showed in January, the result is much faster importing and preview generation, and improved speed for things like adjustments rendering in Develop, HDR/Panos rendering, and more.

“One key attribute of the enhancements is that they scale appropriately with a customer’s investment in hardware,” says Adobe. Users who invest in newer, more powerful hardware will see more performance improvements, particularly if the system has at least 12GB of memory. This time around, Adobe says it focused on batch processing improvements (how efficiently system resources are used and batch tasks are completed), but the company will also focus on Interactive (interface response speed) needs in the near future.

Some users had experienced problems with Lightroom Classic slowing down over time, an issue Adobe says it has fixed “in most cases,” though it is possible some users will still experience this issue.

Lightroom Classic Feature Enhancements

Performance improvements and fixes aside, Lightroom Classic 7.2 comes with multiple new features, including a text search for finding a specific folder (“Folder Search”), the ability to filter favorites within folders, an option for creating collection sets from folders for use with Lightroom mobile, as well as a feature for creating collections from Map Module pins.

This version of Lightroom Classic also adds a library filter for unedited and edited images and enables users to create smart collections with unedited or edited images.

$ (document).ready(function() { SampleGalleryV2({“containerId”:”embeddedSampleGallery_3173476968″,”galleryId”:”3173476968″,”isEmbeddedWidget”:true,”selectedImageIndex”:0,”isMobile”:false}) });

Finally, Adobe says it has enabled Photoshop Continuously Scalable User Interface in the Adobe Camera Raw plugin, with the scaling limited to 100% or 200%. Support for per-monitor scaling in Windows has also been added. In explaining the plugin update, Adobe said, “This is primarily a Windows change to sync up Photoshop, and Windows users will now be able to scale the ACR plugin from 100% to 500%, in increments of 100%.”

The full Lightroom Classic 7.2 update changelog is available here, new camera support can be found here, and new lens profile support can be found here.

Updates to Lightroom CC and Lightroom Mobile

In addition to the Lightroom Classic CC updates, the whole Lightroom CC ecosystem—including the Lightroom Mobile apps on iOS and Android—have been updated as well with “optimized performance, added support for new cameras and lenses, and some great new features for desktop and Android.”

Adobe says it put a lot of effort into “tuning and improving stability” with this update. Lightroom CC on Mac and Windows will see performance improve when moving between photos, grid scrolling, and exporting, while all the apps across mobile and desktop should be “a lot more stable.”

As for new features, Lightroom CC for desktop gets the ability to add copyright to imported images; meanwhile, Lightroom Mobile on Android gets a geometry tab for correcting perspective distortion, the ability to add a watermark upon export, the ability to search your Lightroom library with Google Assistant, and a new “Add to Lr” option that will allow you to add photos from third party apps directly into your Lightroom library.

$ (document).ready(function() { SampleGalleryV2({“containerId”:”embeddedSampleGallery_8528326624″,”galleryId”:”8528326624″,”isEmbeddedWidget”:true,”selectedImageIndex”:0,”isMobile”:false}) });

All of these updates are available now, so if you have a Creative Cloud subscription, update to the latest versions and give them a go. And if you want to dive deeper into all of these new features, head over to the Adobe blog.

Articles: Digital Photography Review (dpreview.com)

 
Comments Off on Lightroom Classic 7.2: Major performance boost, new features, and more

Posted in Uncategorized


How to Geotag Your Photos Using Lightroom and a Smartphone App

10 Feb

As a landscape and travel photographer, it is important to be able to track where you traveled and note exactly where a specific picture was taken. Sound complicated and expensive? It’s not if you have a smartphone and a geotag app that will track your GPS location. In this article, I’ll show you how to use Lightroom and the Geotag Photos Pro app to mark your photos locations.

Geotag Your Photos Easily in Adobe’s Lightroom with the help of Geotag Photos Pro App

How to Use Lightroom’s Map Module and the Geotag Photos Pro App

Geotagging is the process of pinpointing the location you took your picture with the aid of a GPS unit. There are a few ways to collect GPS information from a camera. A GPS unit can be built-in to your camera, an accessory to your camera, or a smartphone app like Geotag Photos Pro.

All of these GPS accessories will add EXIF data to your photo files. This data usually consists of the file name, folder location, city, GPS coordinates, as well as the date and time the image was captured. This feature can be very useful if you are a travel or landscape photographer who would like a record of your travels and photo shoot locations.

How does it work?

Your camera records the picture information each time you take a shot, including the time each photo was captured. All the while, you will have the Geotag Photos Pro app running on your phone to record your exact position at the time the photo is taken. It’s all tracked based on the time the image was shot. The fun comes later when you merge all of the data in Lightroom.

Geotag Photos Pro app

Using GPS attachments on an SLR can be expensive and cumbersome. The Geotag Photos Pro app might be a good solution for you. It will work with whatever capture device you prefer to use, a DSLR, a mirrorless camera, a compact point and shoot, or a mobile phone.

Available in both IOS and Android versions, the app records your position while you are taking photos. It then creates a “.gpx” file that you export to Geotag Photos Pro desktop app or other apps and services like Lightroom, Flickr, and Apple Photos.

It’s all tracked by synchronizing the clock on the app with the clock on your camera. It will create a track log with custom interval settings that you set up. The best part is you can bring it into the Lightroom mapping module and it will create a map of your shoot with thumbnail images along the route.

Setting up the app

Before you start your photo walk, make sure that your camera and your cell phone are synced at the same time. There is no need to have internet access to use the app, it works through a GPS signal which is available anywhere for free. First, start the Geotag Photo Pro App.

How to Use Lightroom’s Map Module and the Geotag Photos Pro App
In the settings, set the desired time for Geotag Photos Pro for your logging interval – 2 minutes is the optimal time interval. That way you can create a balance between the battery life of your cell phone and the accuracy of the app without using up all of your power. If you’d like it to track at faster intervals, you can set it up that way or manually set a point on your track.

You don’t need to hold on to the phone or watch the app once you have initiated your photo walk and you are happy with the interval settings. It will create a map similar to the one below when you are done. Your map may create an odd route as if you were walking in the ocean like this one, but there is actually a pier which doesn’t show up on this map.

How to Use Lightroom’s Map Module and the Geotag Photos Pro App

After your walk

When you have finished your walk, Complete the track on the app and share the track log to your Dropbox, iCloud, or Google Drive account and download the track to your computer.

Once you have downloaded the .gpx file track log, import your images into Lightroom and select the images in the filmstrip that you would like to geotag. Then open the map module of Lightroom.

How to Use Lightroom’s Map Module and the Geotag Photos Pro App

Just below the map window but above the filmstrip, there is a squiggly line that is the track log menu (circled in red above). Hover over it, navigate to your saved .gpx file and load into Lightroom. Once you open the file, you will see the track start to load on your map.

How to Use Lightroom’s Map Module and the Geotag Photos Pro App

Once you see a map similar to this (below), it is time to geotag your images.

How to Use Lightroom’s Map Module and the Geotag Photos Pro App

Geotagging your images

Look at your filmstrip and navigate to the images you would like to include in the track log. Click on the first image and shift-click the last image in the sequence to select them all. Then click on “load track logs” and select “Auto Tag the select photos”.

Now the photos and location will load to the track. If the track doesn’t look 100% correct, you can move the location of the track to put the images in the right place.

How to Use Lightroom’s Map Module and the Geotag Photos Pro App

Now you will have a track log of the images you took located on the map. Hover over the picture icons, and your images will pop up in the location where they were photographed. How cool is that?!

How to Use Lightroom’s Map Module and the Geotag Photos Pro App

In conclusion

What a great tool for you as a landscape and travel photographer! As GPS gets more advanced, it will be included in more cameras and make this process a little easier. But for now, an app like this is fun and easy to use and adds another handy element to your photo toolbox.

Give it a try on your next trip!

The post How to Geotag Your Photos Using Lightroom and a Smartphone App by Holly Higbee-Jansen appeared first on Digital Photography School.


Digital Photography School

 
Comments Off on How to Geotag Your Photos Using Lightroom and a Smartphone App

Posted in Photography


*Updated* Adobe is preparing a major Lightroom Classic performance update, and we got to try it

30 Jan

This article has been updated to include results from a 2015 quad-core Apple MacBook Pro.

Adobe Lightroom Classic users have been pining for a serious performance update for ages—even Adobe admitted that Lightroom performance was lackluster, and improving it was ‘top priority.’ Well, it looks like ‘top priority’ is going to pay off very soon.

Late last week, Adobe told DPReview that it has a significant Lightroom Classic performance update in the works. The update—which is “coming soon”—is supposed to improve performance across the board for anybody using a multi-core machine with at least 12GB of RAM. Or, in Adobe’s own words:

In this upcoming Lightroom Classic 7.2 release, we were able to make significant strides with our partners at Intel on addressing key performance issues. We have optimized CPU and memory usage so that performance will scale better across multiple cores on computers with at least 12 GB of RAM.

Adobe claims the update will result in:

  • Faster import and preview generation
  • Faster walking of images in the Loupe View
  • Faster rendering of adjustments in Develop
  • Faster batch merge operations of HDR/Panos
  • Faster export

The company’s own benchmarks back up this claim in a big way. Adobe shared these results with DPReview, revealing substantially improved export times between the current v7.1 and the upcoming v7.2.

Adobe Export Test

Adobe tested the new build on three machines:

  1. A 10-core iMac Pro with 32GB of 2666MHz DDR4 RAM, a 3GHz Intel Xeon W processor, AMD Radeon Pro Vega 64 graphics card with 16GB of RAM.
  2. An 8-core Windows 10 PC with 64GB of 2400MHz DDR4 RAM, a 3.2GHz Intel Xeon E5-1660 processor, and an Nvidia GeForce GTX 1080 graphics card with 8GB of RAM.
  3. A 10-core Windows 10 PC with 64GB of 2400MHz DDR4 RAM, a 2.9GHz Intel Core i9 7960X processor, and an Nvidia Quodro P2000 graphics card

Each of the three showed significant speed improvements when exporting 100 heavily edited Raw files as either full-resolution JPEGs or full-resolution DNGs:

  • The 10-core iMac Pro exported JPEGs 29.5% faster and DNGs 43.7% faster
  • The 8-core Windows 10 PC exported JPEGs 32.5% faster and DNGs 32.4% faster
  • The 10-core Windows 10 PC exported JPEGs 48.3% faster and DNGs 64.7% faster

Additionally, while subsequent tests of the current version got slower and slower on the Windows, version 7.2 fixes this problem. In other words: Lightroom Classic will no longer slow down over the course of a long editing session on Windows machines.


Our own tests also showed a noticeable speed boost when it came to exporting files, and a massive increase in performance on import. Adobe gave us early access to the new build, and we tested it alongside the current version of Lightroom Classic CC twice. We ran an initial export test on a 2016 13-inch MacBook Pro, with 16GB Ram and a 3.3GHz dual-core i7 processor running macOS 10.12.6, and found a modest but still significant speed improvement of around 11%.

After speaking to Adobe’s technical experts, we then conducted a follow-up import and export test on a Mid-2015 15-inch MacBook Pro. Specifically, a Retina model with a 2.2GHz quad-core Intel Core i7, 16GB of RAM, and Intel Iris 5200 Pro graphics card. It’s not exactly in the same class as the 8+ core powerhouses that Adobe seems to have lying around, but it’s arguably closer to the average setup for an enthusiast or semi-professional photographer. Also, despite being an older machine, we knew that according to Adobe, more cores would give us a better chance of seeing some serious performance gains.

As such, these results replace our earlier published figures.

DPReview Import Test (2015 Quad-core MacBook Pro)

When importing 130 Raw files from the Fujifilm X-T2 (7.6GB in total), we saw a major performance boost in LR Classic CC 7.2, on our quad-core 2015 MacBook Pro. Roughly 80%, in fact.

  • LR 7.1 – 4:05 (245 seconds)
  • LR 7.2 – 50 seconds

DPReview Export Test (2015 Quad-core MacBook Pro)

When exporting the same 130 Raw files as JPEGs (quality level 80, Adobe RGB), after heavy edits (including exposure, shadow/highlight adjustment, lens corrections and luminance noise reduction) we saw a modest performance improvement in LR Classic CC 7.2 compared to 7.1. Roughly 10% when averaged out – very similar to the 11% performance increase we saw when we ran the earlier test on our dual-core 2013 Mac.

  • LR 7.1 – 11:08 (668 seconds)
  • LR 7.2 – 10:16 (616 seconds)

Adobe was adamant that this update is just the beginning. The company is “pleased with these performance improvements” and believes Lightroom Classic users will be please as well, but Adobe also told us it is “far from done.” The company promises continued performance optimizations and improvements in future releases of Lightroom Classic CC.

For now, we’re just happy to see the first fruits of that “top priority” promise Adobe made last year.

Articles: Digital Photography Review (dpreview.com)

 
Comments Off on *Updated* Adobe is preparing a major Lightroom Classic performance update, and we got to try it

Posted in Uncategorized


How to Take Control of Color in Lightroom

27 Jan

Back when everybody used film cameras, photographers had to match the film type to their subject. For example, landscape photographers liked Fuji Velvia 50 because it produced deeply saturated slides. But portrait photographers liked films like Fuji Reala which rendered good skin tones. Today, as long as you use the Raw format, you can take the same approach in Lightroom.

It doesn’t matter what camera you have, Lightroom gives you a great deal of power when it comes to adjusting the colors of your photos. To give you an idea of Lightroom’s potential, take a look at the different versions of the photo below. The first is more or less straight out of the camera. I developed the others with customized Lightroom Develop Presets.

Color in Lightroom

Now let’s look at some of the tools Lightroom has for altering color.

Vibrance and Saturation

The Vibrance and Saturation sliders are located at the bottom of the Basic panel. They alter the intensity of the colors in the photo in different ways.

  • The Saturation slider changes the intensity level of all colors in the photo equally.
  • The Vibrance slider affects the most deeply saturated colors in the photo the most. It evens out the saturation levels and is a more subtle adjustment than Saturation.

I prefer to reduce Saturation and Vibrance rather than increase them as desaturated colors are more subtle and atmospheric than saturated ones. These photos illustrate the difference between Vibrance and Saturation.

Color in Lightroom

Camera profiles

Most digital cameras come with a set of color profiles. Every manufacturer gives their color profiles a different name. For instance, Canon uses Picture Style and Fujifilm uses Film Simulation. Check your camera’s user manual if you’re unsure. Regardless of your camera maker’s terminology, the color profiles all appear in the Camera Calibration panel in Lightroom.

Color profiles are the digital equivalent of the idea of using different films for different subjects. Most cameras have profile names like Landscape, Portrait, and Monochrome. The exception to this is Fujifilm, which names its profiles after real Fuji films, such as Velvia, Provia, and Astia. You’ll find most of these in Lightroom as well, ready for you to use.

The color profile setting is important as it sets both the color and contrast. You need to select the best profile before adjusting other Develop module sliders. For example, if you apply a preset intended for landscapes to a portrait then it’s unlikely you will get good skin tones.

This photo shows three different color profiles. I made the photo with a Fujifilm camera and the color profiles are specific to that model.

Color in Lightroom

HSL / Color / B&W panel

The HSL / Color / B&W panel contains a set of powerful tools for adjusting colors in Lightroom. The HSL and Color tabs both contain the same sliders, just arranged in a different order.

I prefer to use the HSL tab, so let’s look at that. It lets you adjust Hue, Saturation, and Luminance individually.

Color in Lightroom

Hue

The Hue sliders let you change the colors in your photos. The colors on the sliders (see above) tell you how they work. For example, if you move the Red slider to the left you will turn anything that is colored red in your photo to magenta. If you move the slider right then red colored objects become orange.

In the example below, you can see that I moved the Red, Aqua, and Blue sliders to change some of the hues (colors) in the photo.

Color in Lightroom

Saturation

The Saturation sliders let you change the intensity levels of the colors in your photo individually. This is different from the Saturation and Vibrance sliders, which change the color saturation levels across the entire frame.

The photo below shows how it works.

Color in Lightroom

Luminance

The Luminance sliders let you adjust the brightness levels of individual colors in your photos. In turn, this affects the apparent saturation. If you make a color darker (by moving the corresponding slider left) the color appears to be more deeply saturated. If you make it lighter (by moving the slider right) the color appears to be less saturated.

The example below shows it in action.

Color in Lightroom

Putting it all together

Now it’s time to look at how you can put these techniques into action. We’ll do that by looking at the portrait I showed you at the beginning of the article.

Here is the before version and one of the after versions.

Color in Lightroom

These are some of the settings I adjusted that affected the colors.

Camera profile

I set the Camera Profile to Adobe Standard. This is a standardized setting created by Adobe specifically for your camera. The idea is that if you take a photo of the same scene with two different cameras, then apply the Adobe Standard Profile to each one, the colors will look the same in each.

The benefit of using Adobe Standard is that it lets you create a Develop Preset that you can apply to photos made with any camera with consistent results. If you don’t want to do this, then you can use one of Lightroom’s camera specific profiles instead.

Color in Lightroom

Saturation

Next, I reduced the overall Saturation using the Vibrance slider.

Color in Lightroom

I reduced the Saturation of specific colors using the sliders in the HSL tab.

Color in Lightroom

Luminance

Then, I increased the brightness of some of the colors using the Luminance sliders.

Color in Lightroom

Tone Curve

Next, this isn’t related to the color, I made a Tone Curve adjustment to create the faded effect. The result of this Tone Curve Adjustment is that there are no true blacks in the photo.

Color in Lightroom

The techniques in this article don’t cover all the color adjustment tools in Lightroom as there are too many for one article. But these are the main ones and they will get you started. Let us know in the comments if you have any questions about any of them.


Faded Glory Presets for Lightroom

Want to get a head start with creative colors in Lightroom? Take a look at my Faded Glory Presets for Lightroom, created to help photographers like you apply powerful creative color fade effects to your photos.

The post How to Take Control of Color in Lightroom by Andrew S. Gibson appeared first on Digital Photography School.


Digital Photography School

 
Comments Off on How to Take Control of Color in Lightroom

Posted in Photography


Preset Brewery drag-and-drop tool converts Lightroom presets for Photoshop

27 Jan

An application for macOS 10.10+ called Preset Brewery makes it possible to convert Lightroom presets into Camera Raw presets for use in Photoshop by simply dragging and dropping them—it really doesn’t get any simpler than that.

Preset Brewery was recently updated to version 1.1, which adds support for exporting the presets directly into Camera Raw so that they’re immediately available; however, the option remains to save the converted presets into the folder where the Lightroom presets are located.

Preset Brewery was created by developer Adam Bardon, who tells Fstoppers that a future update will add support for batch processing presets. Unfortunately, the application is not available for Windows, but Mac users can purchase Preset Brewery through the company’s website for $ 7.90 USD.

Articles: Digital Photography Review (dpreview.com)

 
Comments Off on Preset Brewery drag-and-drop tool converts Lightroom presets for Photoshop

Posted in Uncategorized


How one photographer built the ‘ultimate’ PC for Adobe Lightroom

26 Jan
The finished product, a computer designed to be as fast as possible in Adobe Lightroom.

When professional designer and hobbyist photographer Paul Stamatiou got back from his last trip to New Zealand and set about culling and editing his photos from the trip, he quickly realized that his 2-year-old 5K iMac was just not keeping up with Adobe Lightroom Classic CC and the high-megapixel Raw files he was importing. In fact, he spent over a year of spare time editing the 848GB worth of 42-megapixel RAW photos and 4K videos to create the resulting nine photosets.

And so Paul decided it was time to build his own computer. Specifically, his goal was to:

Build a fast, yet quiet and understated desktop PC with a healthy overclock aimed at improving my photo workflow while giving me the ability to upgrade parts of it later on.

Fortunately for all of us, he chronicled the entire journey to this goal in a massive, 32,000-word blog post filled with footnotes and links to all the parts and incredibly detailed descriptions of exactly why he picked the parts he did, how he put them together, and how he optimized it all once it was set up.

This is, I’m comfortable saying, the most comprehensive custom photo-editing computer build breakdown I have ever seen. If you’re at all considering building your own editing PC, bookmark it. If not, we spoke to Paul yesterday and have penned a bit of a TL;DR summary below.

For the Mac lovers out there, note that Paul did consider building a dual-boot Hackintosh, but ultimately decided the annoyances wouldn’t be worth the time. His experience in the past—”randomly have bluetooth stop working and have days where the machine just won’t boot,” he told me over email—just wasn’t worth risking. It was time to build a PC.

This beautiful piece of technology is what he came up with:

$ (document).ready(function() { SampleGalleryV2({“containerId”:”embeddedSampleGallery_4984509525″,”galleryId”:”4984509525″,”isEmbeddedWidget”:true,”selectedImageIndex”:0,”isMobile”:false}) });

What’s impressive about this computer isn’t its sheer power. The parts he used (full list here) won’t make it the most beastly desktop PC you’ve heard of this week… or maybe even today. What makes it impressive is how Paul designed the PC so that it would run Lightroom’s Develop module and his personal workflow as efficiently as possible.

As Paul explains in his post:

As you know, there are a few main levers that affect the majority of a computer’s performance: storage, RAM, GPU and CPU. To be more precise: storage throughput, RAM size, RAM speed as well as the number of CPU cores and clock speed. In the case of Lightroom, CPU plays the most important role in overall application performance and to a much lesser extent GPU.

[…]

For my needs Lightroom loves the highest clock speed it can get, as opposed to a ton of lower clocked cores.

So rather than spend money on a chip with a crazy number of cores, all of which would be running at a lower clock speed, he picked a 6-core Intel i7 8700K, then had it ‘delidded’ and set it up to be water-cooled so he could overclock it safely to 5.2GHz on all cores.

We spoke to Paul about the build yesterday, and he was kind enough to offer this little summary for those of you who aren’t keen on reading all 32,000 words of the full article:

I was most concerned with performance in the Develop module of Lightroom as opposed to other actions that are more efficient with multiple cores and are not GPU accelerated. For me that meant that instead of opting for a machine with a ton of cores at a lower clock, I’d do better for Develop module tasks with fewer cores that were clocked higher, much higher.

With this build I wasn’t particularly concerned about cost and decided to make a full-blown project out of it (along with a high-end graphics card I could use to try out some 4K gaming and Oculus Rift as a side benefit—I’m a designer by day and lots of my friends have begun designing for VR so I was curious to learn more about it). I definitely recognize the build is overkill in many aspects, including having the CPU delidded and running an aggressive overclock.

While the build definitely sped up the Develop actions I was used to—it’s important to note that much of the future improvement will need to come from Adobe optimizing their software even more. […] Until Classic CC gets some performance optimization updates, I think my next step will be integrating something like Photo Mechanic into my culling workflow to do some of that outside of Lightroom so I end up importing, generating previews and managing fewer shots inside Lightroom itself.

And that last bit, really, is the disappointing epilogue to what is a really fun computer build: even with a great system built specifically to run Lightroom well, any major performance improvements will have to come from the Adobe side of the equation. Not that it doesn’t make us want to build something similar…

The final build cost Paul $ 5,931, including all of the peripherals and accessories—$ 1,500 27-inch Dell UltraSharp 4K display, Logitec mouse, Apple Magic keyboard, Bose bluetooth speaker, and Vesa monitor mounting arm.

For a full parts list, or if you want to dive deep into how this computer was built and optimized, check out Paul’s massive article at this link. But don’t be surprised if you find yourself sourcing parts for your own custom-built photo editing PC once you’re done.


All photos by Paul Stamatiou and used with permission.

Articles: Digital Photography Review (dpreview.com)

 
Comments Off on How one photographer built the ‘ultimate’ PC for Adobe Lightroom

Posted in Uncategorized


4 Tips For Better Black and White Photos In Lightroom

20 Jan

Some photographers use Photoshop for converting photos to black and white, others use plugins. But what you might not know is that you can create beautiful black and white images with Lightroom. The benefit of keeping your workflow within Lightroom is that it saves you a lot of hard drive space (as the only way to send a full-quality photo file to a plugin or to Photoshop is to convert it to a 16 bit TIFF).

The tips in this article will help you create beautiful black and white photos in Lightroom without Photoshop or an extra plugin!

4 Tips For Better Black and White Photos In Lightroom

1. Shoot Raw

The first tip is quick and simple. You need to use the Raw format to make the most out of your camera and for Lightroom to get the best out of your photo files. JPEG files have already been developed and compressed by the camera and don’t contain the information that Lightroom needs to make a good black and white conversion.

2. Learn to use the B&W tab

4 Tips For Better Black and White Photos In Lightroom - B&W panel

The B&W tab is part of the HSL / Color / B&W panel. When you click on the B&W tab, Lightroom converts your photo to black and white. At the same time, it automatically adjusts the Black & White Mix sliders (see below) to the settings it thinks will give you the best black and white conversion.

As this is an automated process, it is quite likely that you’d like to take control and override the settings. But first, you need to know what the Black & White Mix sliders actually do. They work very simply and make the tones in your photo lighter or darker according to the underlying color.

The easiest way to explain this is with examples. The color photo below has a deep blue sky which would look great in black in white.

4 Tips For Better Black and White Photos In Lightroom

When you click on the B&W tab Lightroom carries out an automatic conversion. This is what the photo looks like.

4 Tips For Better Black and White Photos In Lightroom

And these are the Black & White Mix sliders as set by Lightroom.

4 Tips For Better Black and White Photos In Lightroom

Tweak it a bit

The conversion looks good, but you can take control by moving the sliders yourself to see what happens. In this example, you could move the Blue slider left to make the sky darker, which would make the conversion even more dramatic. Or you could move it right to make the sky lighter and give a softer, more subtle conversion. It’s up to you.

You can see the difference when I move the Blue slider more to the left.


Here the blue sider is at -30.

Or move it to the right and the sky gets lighter: Blue + 25

Skin tones

The next example shows how the Orange slider makes a big difference to Caucasian skin tones. Here’s a portrait converted to black and white in Lightroom, with the Black & White Mix settings as chosen automatically by Lightroom.

4 Tips For Better Black and White Photos In Lightroom

This is what happens when you move the Orange slider. To the left makes skin darker – to the right makes it lighter.

4 Tips For Better Black and White Photos In Lightroom

Orange at -31. It makes the model’s skin darker and brings out its texture. If that is not desired – move the Orange slider to the right. 

Orange at 0.

Orange at +20

Experiment with the B&W Mix sliders to see the effect they have on your photos. Keep these points in mind as you do so:

  • The sliders always affect the underlying colors in the photo. If it helps to see the colors in your photo so you can understand which tones are affected by which sliders, click on the Color tab in the HSL / Color / B&W panel. Click the B&W tab again to return to black and white and your settings will not be lost.
  • The B&W panel is for subtle adjustments. If you move the sliders too far you’ll get strange effects like pixelation. Try not to go past +35 or -35.
  • If there are people in your photos pay attention to skin tones when adjusting the Red, Orange, or Yellow sliders. Zoom into 100% to double check your adjustments haven’t done anything odd to their skin tones.

3. Apply Clarity wisely

Clarity is a powerful adjustment that increases contrast, emphasizes texture, and adds punch to your black and white photos. But it needs to be used wisely in order to avoid an overcooked look. If you are new to Lightroom this can be hard to judge at first, but a good rule of thumb is to always add a little less Clarity than you think you need.

Another tip is that Clarity may be more effective when it’s applied locally. A good example of this is a photo taken with a prime lens at a wide aperture, with the subject in sharp focus and a blurred background. In this situation, it’s best to apply Clarity to the sharp areas using a local adjustment.

Let’s look at some examples. In the first, the entire scene is sharp. You can apply Clarity globally (using the slider in the Basic panel) to photos like these. Here, I set Clarity to +80 to emphasize the texture of the metal.

4 Tips For Better Black and White Photos In Lightroom

In the second, I applied Clarity only to the cow’s head, but not to the blurred part of the photo, using the Adjustment Brush.

4 Tips For Better Black and White Photos In Lightroom

This screenshot shows the mask created by the Adjustment Brush.

4 Tips For Better Black and White Photos In Lightroom

4. Learn from Lightroom develop presets

Follow the tips in this article and you’ll have a good foundation for working in black and white in Lightroom. Now it’s time to get even more creative. There are lots of techniques you can use, from Tone Curve adjustments to Split Toning and manipulating contrast.

One of the best ways to learn these techniques is to download Develop Presets made by other photographers. These are helpful if you are new to black and white photography by giving you a quick and easy way to convert your photos to black and white without paying too much attention to the details.

But you can also learn a great deal from those presets by analyzing the settings used. Go into all the Develop module panels and see what the photographer has done. For example, I developed the photo below using a preset.

Black & white in Lightroom

One of its characteristics is that there are no true black tones in the photo. This is confirmed by the gap on the left side of the histogram.

4 Tips For Better Black and White Photos In Lightroom

How has this been achieved? The answer is in the Tone Curve panel. The creator of the preset lifted the left-side of the Tone Curve up, which gives the effect seen in the photo.

Black & white in Lightroom

Conclusion

Lightroom is a powerful tool for black and white conversions and you’ll be amazed at what it can do when you learn how to use it properly. The tips and techniques in this article will get you started. If you have any questions about this then please let us know in the comments!


SuperBlack Presets for Lightroom

Want to get a head start with black and white? Take a look at my SuperBlack Presets for Lightroom, developed to help photographers like you create powerful black and white photos in Lightroom.

The post 4 Tips For Better Black and White Photos In Lightroom by Andrew S. Gibson appeared first on Digital Photography School.


Digital Photography School

 
Comments Off on 4 Tips For Better Black and White Photos In Lightroom

Posted in Photography