RSS
 

Posts Tagged ‘Light’

How to Make a Mini Light Studio Using School Supplies

28 Jun

When school’s out, most kids are thinkin’ “Oh man, summer’s here!”

Us? We’re thinkin’ “What are we gonna do with all these binders???”

Staring at binders all summer long is no fun, so our buddies Chris Rutter and Jeff Meyer (of Digital Camera World) showed us how to turn them into a sweet light tent — perfect for casting beautifully diffused light onto your photo subjects.

That means your photos won’t have harsh shadows from the sun, and your camera will catch all of your subject’s details.

Everyone has a binder or two at home, so you can start this project today!

Plus, this portable light tent gives you great lighting on flowers, insects, and other small stuff without having to pluck them out of the ground.

Throw it in your bag, and you’ve got a mini studio wherever you go this summer.

How to Turn Binders into a Light Tent

Ingredients

  • 3 white, translucent binders
  • 8 1/2″x11″ colorful cardstock
  • Duct tape (grey is good!)
  • A camera
  • Optional: small hand-sized beanbags

Step 1: Tape it together

beforeLay one binder open and flat.

Grab a second one and lay it open and flat. Keeping them open, overlap the cover of one binder on top of the back cover of the second.

Use your duct tape to keep them connected at their folds (check out the photo). You should have three panels.

Cut the front cover off your third binder and attach it to the center panel at its top edge. It’ll act like the roof to your light tent.

Try standing your light tent up, and if the roof is too floppy (flappy?), tape it down to help the tent keep its shape.

Step 2: Pick something to shoot

beforeTake a peek outside.

Scratch that. Take a good long look! We bet there’s something hidden out there that’d make a great photo subject.

Jeff found this budding flower, but maybe you’ll catch a rollie pollie unfurling or a butterfly snacking on a daisy.

If you’re not feeling the outdoors, set up a fun miniature scene with figurines, knick knacks, and stuff around your house. Slinkachu’s rad inspiration for that.

You can also practice your product photography by throwing almost anything in your light tent and playing around with getting the best even lighting on it (think setting it by a window, taking it outside, setting something reflective under it or playing around with the angle of the flaps).

Step 3: Make it pretty with a background

beforeNow that you have your thing-to-photograph picked out, observe its beautiful array of colors and what kind of background you think would complement it.

Perhaps take a gander at the Color Wheel, a diagram for figuring out which colors are complementary and which might clash.

The blue-yellow combination here goes pretty good, we’d say.

You can go with a piece of card stock or a color folder, even. Get more use out of those school supplies!

Place your background over the back panel and use use tape or a paperclip to keep it in place.

Step 4: Mad Props

beforeNow, prop it up! It’s a tent, after all.

Place it over your subject so that your subject sits in the center of your “tent.”

If you have nice cushy grass to work with, then getting it to stand on its own might be easy. If your surface is smooth, prop it up with paperweights or small hand-sized beanbags on either side of each flap.

Step 5: Get your camera ready

beforeOnce you have everything just how you want it, grab your camera and put it on manual mode, so you can figure out the best settings for your snap.

For this shot, Jeff used an aperture of f/5.6 and shutter speed 1/200 at 200 ISO. A low ISO worked here because the sunlight was aplenty, but if your photo looks too dark, you might need to raise your ISO to 400 or so.

Play around with your settings ’til it’s how you envisioned.

Take it further

before

  • Ever wanted to set up a mini studio in your home? Here are the 5 things you’ll need.
  • Teresa Franco shoots amazing macro photos of all the little things we miss under our feet.
  • How to make macro photos without buying an expensive lens

Related posts:

  1. Turn Your Tablet Into a Studio Light Extra photos for bloggers: 1, 2, 3 Your iPad is…
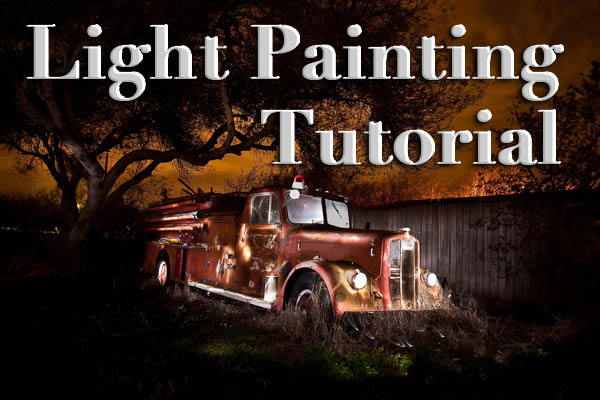
  2. DIY: Make Crazy Detailed Light Paintings with Photo Light Stencils Extra photos for bloggers: 1, 2, 3 Ever tried painting…
  3. You Only Need 5 Things to Make Your Own Home Studio Extra photos for bloggers: 1, 2 Photography doesn’t have to…


Photojojo

 
Comments Off on How to Make a Mini Light Studio Using School Supplies

Posted in Equipment


How to Create a Beam of Light in a Photo using Photoshop [Video Tutorial]

24 Jun

Have you ever wanted to create a beam of light in a photo using Photoshop? Me neither – but after watching this tutorial I think I’ve found a little project to try – check it out!

Post originally from: Digital Photography Tips.

Check out our more Photography Tips at Photography Tips for Beginners, Portrait Photography Tips and Wedding Photography Tips.

How to Create a Beam of Light in a Photo using Photoshop [Video Tutorial]


Digital Photography School

 
Comments Off on How to Create a Beam of Light in a Photo using Photoshop [Video Tutorial]

Posted in Photography


A Guide to Shooting Outdoors in Low Light Conditions

22 Jun

A Guest Post by James Farley.

1

Shooting in low light as for many other forms of photography requires a bit of thought beforehand in order to get the most from the time you have, first and foremost will be making sure you have the right equipment with you.

Besides your camera and lenses, top of the list of things you will need will be a tripod, sturdier the better as exposures can get up to 30 seconds and sometimes even longer which is where even the slightest vibration or movement of the camera can ruin a shot.

2

Other items that you can get by without but if you have them will be very helpful include:

  • Remote release, these come in many forms, infra-red/wired/wireless, I’ve used all of them at some point or another and would now always opt for a wireless trigger, can be inexpensive and give you a good mix of reliability and range.
  • ?There are now also apps that you can use on your smartphone with a suitable cable that act as a release and can offer some great features above and beyond being a simple trigger, one I’ve used that is worth a look is called TriggerTrap

  • A torch – trying to get your camera to autofocus in very low light can be a right headache at times, shining a torch on your desired area of focus will allow it to lock on quickly (but remember to switch to manual focus when it has!)
  • ?Also useful for changing settings on camera and just generally seeing your way around!

  • ND Grad filters – by no means essential, but if still a bit of colour in the sky these can be helpful to ensure things in foreground are correctly exposed, particularly if already in shadow when beginning to shoot.
  • Warm clothes! Depending on where you are in the world, it can get very cold very quickly as it goes dark, nothing worse than standing round shivering as your 60 second exposure ticks very slowly by!

3

Personal safety is also very important to mention if you are out to shoot in limited light conditions, ideally take someone along with you, not least to give you someone to talk to, can get very boring waiting for long exposures to finish!, or at least tell someone where you plan to go and what time you expect to return. Carry a mobile phone and try not to make it obvious you have valuable equipment with you where possible.
You will probably already have locations in mind that are suitable for low light photography, I tend to find that cities offer the best opportunities and will set out with the intention of shooting specific buildings from various viewpoints, and then improvise as the night progresses and other things present themselves.

4

Artificial lighting can greatly enhance a dark scene, and if you use a narrow aperture, f/16 for example you should capture lights with a starburst effect to add some drama to the image.

Once you have found the composition you like the look of, set your tripod up ensuring it’s not in the way of others, if it has a bag hook as some do then hang your camera bag from it to give you a bit more stability.

Compose the scene in your viewfinder and use the torch as mentioned if needed to focus, then switch to manual focus which will stop the lens from ‘focus hunting’. At this point I will wait for any moving light sources such as vehicles to leave the composition so I can check the settings selected by the camera before then plugging these into the cameras manual mode to ensure they do not change when shutter is triggered.

5

If the scene is very dark, it may be the case that your camera cannot meter it sufficiently well to give a correct exposure (DSLR’s generally will not automatically select an exposure longer than 30 seconds), if this is the case, you will need to go into manual mode, choose your aperture and then select the cameras ‘Bulb’ mode which will open the shutter when you use the remote release, and keep it open until you press it again, this is where guesswork comes into it, you will need to try out some exposure times until the image is sufficiently exposed, use the histogram on back of camera to give you some idea of how far under/over your exposure is.

Longer exposures can also produce ‘noise’ within an image, similar to when using higher ISO’s, to reduce this most DSLR’s will have some sort of ‘long exposure noise reduction’ setting somewhere within the menu system, if you turn this on when you have taken your image, the camera will then close the shutter and take a similar length exposure. You won’t see this second exposure and it doesn’t get saved to your memory card, but the camera will use it to subtract any hot pixels showing from your original image which can greatly reduce noise, can get annoying though as every exposure will then take double the time to capture!

White balance can be tricky in low light with all kinds of artificial light spilling across your scene, for this reason I would suggest shooting in RAW to give you the flexibility to adjust this later, plus it will capture more detail in the image which can sometimes be an issue in very dark areas.

Don’t let rain put you off either, wet surfaces can look brilliant as light bounces off them!

And if you are feeling really creative, timelapse sequences can look fantastic as the light slowly disappears, this clip was made from about 140 photographs taken on Tower Bridge in London.

Now just grab your coat and get out there!, love to see what you get if you’d like to share some links in the comments below.

James Farley is a semi professional photographer in the UK covering a wide range of genres, recently including wedding photography, and a self confessed ‘kit geek’.
More of his work can be found on Facebook and at www.jamesfarley.co.uk

Post originally from: Digital Photography Tips.

Check out our more Photography Tips at Photography Tips for Beginners, Portrait Photography Tips and Wedding Photography Tips.

A Guide to Shooting Outdoors in Low Light Conditions


Digital Photography School

 
Comments Off on A Guide to Shooting Outdoors in Low Light Conditions

Posted in Photography


Low Light: Weekly Photography Challenge

22 Jun

1To followup on our post earlier today on Low Light Photography we thought it might be a good topic for this weeks challenge.

So – your challenge is to take and share a photo taken in low light.

You’re welcome to take any approach to this that you like. You might want to try shooting some star trails (also check out this post on star trails) or night skies, do some candle light photography, do a night time streetscape or shoot some light trails – really it is totally up to you.

Once you’ve taken your Low Light photo upload it to your favourite photo sharing site either share a link to them even better – embed them in the comments using the our new tool to do so.

If you tag your photos on Flickr, Instagram, Twitter or other sites with Tagging tag them as #DPSLOWLIGHT to help others find them. Linking back to this page might also help others know what you’re doing so that they can share in the fun.

Also – don’t forget to check out some of the great shots posted in last weeks Converging Lines challenge – there were some great shots submitted.

PS: Don’t forget Neil Creek’s Night Photography Course is 31% off this week – it’d be a great way to explore this topic.

Post originally from: Digital Photography Tips.

Check out our more Photography Tips at Photography Tips for Beginners, Portrait Photography Tips and Wedding Photography Tips.

Low Light: Weekly Photography Challenge


Digital Photography School

 
Comments Off on Low Light: Weekly Photography Challenge

Posted in Photography


Canon EOS Rebel SL1/100D studio samples and good light samples gallery

18 Jun

ShawnGallery.jpg

Just Posted: Canon EOS Rebel SL1/100D studio samples and good light samples. We’ve just got a production version of Canon’s miniaturized DSLR and, as part of the process of reviewing it, have shot our standard studio scene. We’ve also taken it out to see how it performs away from the studio lighting and have put together a series of daylight samples. Click through to see how it fares.

News: Digital Photography Review (dpreview.com)

 
Comments Off on Canon EOS Rebel SL1/100D studio samples and good light samples gallery

Posted in Uncategorized


Meet The Deluxe Pop-Up Flash Bounceand His Light Perfecting Pals

23 May

You’ve got the Camera and the Action — now, about those Lights.

We’ve rounded up our favorite easy to use lighting gadgets. And we’ve even added a new one … The Deluxe Pop-Up Flash Bounce that bounces light from any angle.

Grab up these gizmos and give your photos pro-quality lighting, just the special sparkle you’ve been looking for.

     
Deluxe Pop-Up Flash Bounce

The Deluxe Pop-Up Flash Bounce redirects the harsh light from your pop-up flash.

It swivels around so you can bounce your flash’s flash off of a wall or ceiling and make the light fall more evenly.

Deluxe Pop-Up Flash Bounce
$ 37 at the Photojojo Store


Ring Flash Adapter

Get the soft glowing look of a ring flash with the Ring Flash Adapter.

It works with your external flash to surround your subject with light, for a fraction of cost of a pro ring flash.

Ring Flash Adapter
$ 40 at the Photojojo Store


White Balance Lens Caps

Nothing ruins great lighting like crumby white balance.

The White Balance Lens Cap helps you set the perfect custom white balance every time, even in mixed light where the presets just won’t cut it.

White Balance Lens Caps
From $ 45 at the Photojojo Store


Related posts:

  1. The Pop-Up Flash Bounce – Perfect Lighting with Your Camera’s Own Flash! Your pop-up flash’s measly spurt of light and shadowy results…
  2. No light? No hot shoe? No problem. The Metz 28 CS-2 Digital Slave Flash to the Rescue! Nothing will ruin a shot quicker than on-camera flash. Unless…
  3. The Ring Flash Adapter Ever wonder how photographers get that glowing halo in their…


Photojojo

 
Comments Off on Meet The Deluxe Pop-Up Flash Bounceand His Light Perfecting Pals

Posted in Equipment


Horsetail Falls Moonset Light, Yosemite National Park

23 May
Horsetail Falls Moonset Light, Yosemite National Park

Horsetail Falls Moonset Light, Yosemite National Park

Much is said about light in landscape photography, especially golden hour, blue hour and moonlight. While most associate these lighting conditions with the end of the day it’s important to note they happen at the beginning of the day too and not just sourced from the sun. It’s a little bit rarer to see, as fewer photographers actually want to stay up or wake up to see golden moonlight. Case and point was my last visit to Yosemite National Park as I ran into 2 people photographing Horsetail Falls at 4am. I’m not complaining by any means as the view was spectacular and the golden moonlight was great. Granted the human eye can’t see the color of moonlight nearly as well due to human night vision being somewhat limited.  Something to consider the next time you’re sleeping in… what great moonlight are you missing?


Copyright Jim M. Goldstein, All Rights Reserved

Horsetail Falls Moonset Light, Yosemite National Park

The post Horsetail Falls Moonset Light, Yosemite National Park appeared first on JMG-Galleries – Landscape, Nature & Travel Photography.


JMG-Galleries – Landscape, Nature & Travel Photography

 
Comments Off on Horsetail Falls Moonset Light, Yosemite National Park

Posted in Equipment


Book Review: Shooting in Sh*tty Light

21 May

cover.jpg

Lindsay Adler and Erik Valind, both working professionals and educators, have written a beginner’s guide to photographic lighting with an unusual conceit at its core. By structuring a book around a list of common challenges – what they call the ‘top ten worst situations’ – they’ve created a digestible, useful ‘lighting 101’ guide. In this short review, Adam Koplan takes a look at their book ‘Shooting in Sh**ty Light: The Top Ten Worst Photography Lighting Situations and How to Conquer Them’.

News: Digital Photography Review (dpreview.com)

 
Comments Off on Book Review: Shooting in Sh*tty Light

Posted in Uncategorized


Spectral Studio: 20 Sq M Space Uses Light & Dark as Decor

20 May

[ By WebUrbanist in Design & Fixtures & Interiors. ]

illuminated apartment

In an Paris apartment with just over 200 square feet, it is almost impossible to imagine anything but the more bare essentials resulting a boring space. But that is where illumination enters the equation, flooding in to add depth and complexity to this abode. This, then, is a short story of light.

illumination study axon existing

The architects, Betillon | Dorval?Bory, examined the limited space available architecturally, but also scientifically, testing the type and quality of the natural light to be found (and then suggesting what should be carefully introduced) across the existing interior zones.

illuminate room two tone

A single wall was introduced, dividing the main bedroom area from daytime activity spaces like the kitchen, but not just (nor even primarily) as a visual barrier – it was intentionally and most-importantly designed to be a backdrop for two types of light.

illuminated night sleeping area

On the ‘night’ side: a diffused orange streetlamp glow of the after-hours city that we associate with evening, which washes the walls in a more monochromatic direction (suited for sleeping and showering). On the ‘day’ side, a pure all-purpose white of the kind found in active spaces like offices – one which allows us to see things in black and color as well (suited for cooking and gathering).

illuminated flat natural daylight

Notably, the ‘night’ side lights can also be turned off (or overpowered by daylight), allowing the entire place to ‘open’ into a single space. If there is a lesson to be learned here, it is that physical objects are not the only things that form (or inform) the nature of space. Spatial variety can come via intangible elements like illumination, which in turn can serve equally powerful functions in fleshing out a space – particularly a small place with little room for solid decor.

Share on Facebook


[ By WebUrbanist in Design & Fixtures & Interiors. ]

[ WebUrbanist | Archives | Galleries | Privacy | TOS ]


WebUrbanist

 
Comments Off on Spectral Studio: 20 Sq M Space Uses Light & Dark as Decor

Posted in Creativity


Light Painting Part Two – Photoshop

13 May

"1956 Le France Pumper"

In Part One of  the Light Painting Tutorial I went over how to do the photography part: equipment, camera settings, set up, lighting, potential pitfalls, and step by step instruction on how to do light painting shots.  In this article Part Two, we’re going to take a look at how to combine multiple exposures in Photoshop.

WHAT YOU’LL LEARN IN THIS TUTORIAL

  • how to create one big layered file of all your images
  • what layer settings to use to “turn the lights on” with each added image
  • how to get rid of any unwanted areas of each image
  • how to easily “dim the lights” on any shots that were too bright
  • saving your final combined image as a masterpiece

Combining images in Photoshop is surprisingly quick and easy

What you need to do this:

  • a series of images of the same subject, shot with the same angle of view (you didn’t move the tripod), with each image lit just a little differently
  • Photoshop (CS or Elements) or some other photo editor that uses layers
  • a basic knowledge of how to use layers, blend modes and masking in your photo editor
  • a computer with good memory and speed – creating multi-layered documents can sometimes slow down your computer if you have an old processor, not enough RAM (put as much in as your computer will hold, I have 6gb and want more but I’m maxed on my 6 year old MacBookPro) or your hard drive is overly full (you want your hard drive never to go over 75% full max, otherwise it will bog down).

Note: if your computer is slow you may not need a new one: just upgrade your RAM and get a bigger hard drive or empty a bunch of stuff off and see if that helps.

STEP ONE OPENING YOUR FILES AS LAYERS

If you are using Adobe Lightroom, you can open your original files directly from Lightroom into Photoshop (wherever I mention Photoshop you can use CS, Elements or your usual editor that has layers capabilities). I do find however that if you are shooting Raw opening 12 or more Raw files into Photoshop really tends to bog it down. So in this case I have exported JPGs first and then opened those into Photoshop. If you are opening from Lightroom directly follow these steps:

  • select all the images of your scene so they are highlighted
  • right click on one of the thumbnails
  • from the pop up menu choose “Edit in” and then “Open as layers in Photoshop” like shown below in Figure #1
open-as-layers-from-LR-to-PS

Figure #1

If you are using Photoshop you will follow almost the same steps using Bridge (or the mini browser where you can see your thumbnails)

  • select all the images of your scene so they are highlighted
  • go to the Tools menu
  • select Photoshop > Load files into Photoshop layers (as shown below in Figure #2)
Open as layers from Bridge

Figure #2

STEP TWO ALIGNING THE LAYERS

Once you have all your files opened as layers into one document in Photoshop you want to make sure they are perfectly aligned.  If you used a tripod and it didn’t move they should be pretty close, but we want to make sure they are perfect. Follow these steps:

eyeball-icon

Figure #3

  • Turn on just your bottom layer by clicking and holding the Option or Alt key on your keyboard, then clicking on the little eyeball icon (next to the thumbnail of the layer) of the bottom layer. That will make that one active and hide all the others. (See Figure #3 right)
  • Next one by one turn on each layer by clicking the eyeball next to them. If you notice that any of the images seem to jump a bit as you do that, you’ll want to run an alignment. If not but you just want to be sure anyway, continue on to the next step
  • Select all your layers, click the bottom thumbnail, then shift>click the top one so all layers are highlighted (as shown below in Figure #4 below)
  • Align the layers by going to the Edit Menu> Auto align layers (see Figure #5 below) and just choose the auto method from the pop up box. If it adjusts any of the layers you may have to crop the result to get rid of any odd edges.
Figure #4 left - Figure #5 right

Figure #4 left – Figure #5 right

STEP THREE BLENDING THE LAYERS

Now that your images are aligned perfectly we’re ready to do some magic!  In this section we’re going to “turn on the lights” from each image one by one. Here’s how:

Rename darkest image, put it as bottom layer

Figure #6

  • find your darkest image by going through each layer one at at time.  This should be the image you shot before you added light with your flashlight. The base image you created in Part One of the Light Painting Tutorial.  
  • drag the layer with your darkest image to the bottom of your layers panel.  Just grab the thumbnail for the layer and drag and drop it below the bottom one.  You can rename that layer “darkest” if you like by double clicking on the layer name and typing in your new one. See Figure #6 right.
  • turn on the layer just above the bottom one and make it your selected layer – use the eyeball icon, they should all be turned off except your “darkest” layer and the one above it now
  • change the blend mode of the selected layer to “lighten” – you do this by going up to the pull down menu in the upper left corner of your layers palette, right under the tab that says “Layers” and to the left of where it says “Opacity”. See Figure #7 below.
  • copy the layer style – right click on the layer itself and choose “copy layer style”
  • change the blend mode of all other layers to lighten – select all other layers, right click and choose “paste layer style”. That is the only way I know of to change them all quickly without having to do them individually, one by one. See Figure #8 below.
Figure #7

Figure #7

Figure #8

Figure #8

TURNING ON THE LIGHTS

Now if you click on each of the Eyeball icons for the layers above, you will see the lights turn on in the different spots you painted in each exposure. In the example of the firetruck here are a few views of the overall image as I turn on a layer above one at a time.

lights-on

REVIEW AND REFINING THE IMAGE

I’ve skipped a couple here, but you get the idea. Notice how as I turn each subsequent layer on a new part of the truck is magically lit up. There are a few issues however, as it’s never, or rarely perfect right out of the camera. But we can fix those things easily too using layer masks. Do you notice the following issues in the image above?

  • a few stray light bugs in places we don’t want them (on the fence to the right of the truck)
  • the sky got overly bright as well (caused by some of the exposures being longer than the “darkest” base layer)
  • there are some double images of the tree branches in a few places (caused by wind and the tree moving from one exposure to the next)

To fix any issues and clean up the image follow these steps:

Figure #9

Figure #9

  • turn on just the bottom layer again (alt/option click the eyeball for that layer)
  • turn on each layer one at a time, let’s do the one above the bottom one first
  • review the image and look for any issues such as – areas that got too light, stray light bugs, your body showed up in the photo, etc.
  • create a layer mask by clicking on the “layer mask icon” in the bottom of the layers panel. See Figure #9 right.  ***Important to note: you can do this two ways. Just clicking it directly will create a mask that shows the whole layer (mask will be white).  Alt/option clicking on it will make the layer hidden or “masked” (mask will be black). If you only have a few issues to “paint out” use the direct click method.  But if you have a lot of issues you need to paint out, I suggest using the second method so the mask hides the layer and then you just paint in the good areas. Either way you’ll get the same result just with less painting or adjustments needed so choose the method that is best for each layer.***
  • mask-selected

    Figure #10

  • paint on the mask to show or hide the parts you want – TIPS: hit the “D” key on your keyboard, that will set your swatches to the default black/white for foreground and background colors. Then hit “B” to get your brush tool. Select a soft edge brush so you don’t get a harsh line where you paint on the mask. Paint at 100% using Black to over areas you want to hide and switch to white for areas you want to show. To switch the foreground/background colors back and forth use the X key. Here’s what it looks like – make sure you are painting ON the mask not the image. You’ll be able to tell because there will be little corner markers around the mask and not the layer thumbnail. See Figure #10 right.
  • repeat for each layer – turn it on, add a layer mask, paint to hide and show the areas you want. TIP: if you want to see what it looks like without the layer mask (especially useful if you are using a black mask and painting IN areas you want to show), hold SHIFT and click on the mask itself. A red X will appear and the mask is just disable. Do the same to turn it back on. 
  • if any of your images appear too bright you can tone them down by simply lowering the opacity of that layer, or by painting over the parts that are too bright with the layer mask to partially hide them (just set your paintbrush opacity to 20% and brush over that area gently)

This is what my layers look like with the masks added and areas painted to show only the bits I want from each exposure. Remember to save your file in two formats:  PSD to preserve all the layers, and a final JPG you can use for printing or sharing online (you may have to make a smaller one for email sharing).

all-layers

SUMMARY AND REVIEW

Okay so it seems like a lot of steps but once you get the hang of it, then it really doesn’t take that long to make something you can wow your friends with. They’ll be asking you “how’d you do that?!” in no time! Let’s take a look at the steps in short form again:

  • open your files as layers into one document
  • align the layers in perfect registration
  • change the layer blend modes to “lighten” (all except the bottom layer)
  • add a layer mask to each layer and paint in areas you want, or hide areas you don’t want to appear in the final image
  • save as a layered PSD file
  • flatten and save again as a JPG (full resolution, no compression)

I hope you enjoyed this two part series, once again here is the final image.

"1956 Le France Pumper" Corpus Christi, Texas

“1956 Le France Pumper” Corpus Christi, Texas

Post originally from: Digital Photography Tips.

Check out our more Photography Tips at Photography Tips for Beginners, Portrait Photography Tips and Wedding Photography Tips.

Light Painting Part Two – Photoshop


Digital Photography School

 
Comments Off on Light Painting Part Two – Photoshop

Posted in Photography