 In the last article Balancing Flash and Ambient Light Using an Incident Light Meter I did not mention color temperature or any correction for the colorcast in the background. There were however requests for it in the comments section, so in this article we will cover three ways of balancing color for flash and ambient light (tungsten yellow/orange which is approximately 3200°K, flash which has a color temperature close to daylight or 5500°K).
Color Temperature Explained
Before you go into the process of correcting color imbalance you will need to understand color temperature. A basic description of color temperature is based on the color characteristics of visible light from warm (yellows) to cool (blues) and the ability to measure this in degrees Kelvin (°K). Degrees Kelvin is a numerical value assigned to the color emitted by a light source. Visualize a lamp filament that is heated using an electric current. It starts off as black and starts getting hot. At a particular point it will become hot enough to start glowing, typically a dark red. As it gets hotter, it will change from dark red to orange to yellow to practically white. It is important to understand that technically, red light has a lower color temperature but is described as warm, while blue light is a higher color temperature but is described as cool. So remember that the terms warm and cool describe color, not temperature. This is a fairly extensive topic but for a quick explanation this should help.
Read more on White Balance and color temperature:
- Practical White Balance and Why You Should Learn It!
- Introduction to White Balance
Since warm and cool are colors, we can change their characteristics by modifying color. In lighting we achieve this modification by using various colored gels of varying densities. Lets examine the first and simplest method.
Method One – Using Color Gels on the Flash
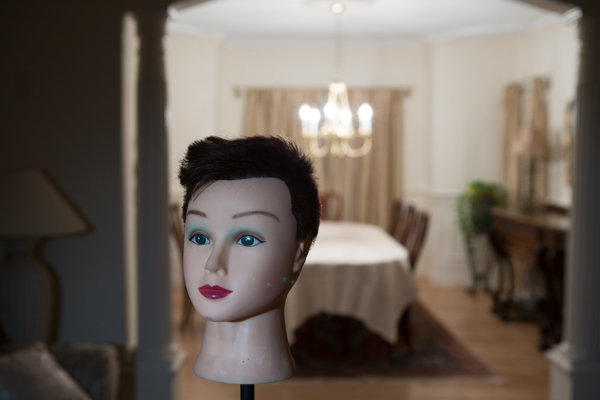
Here are two images of the same scene, one using Auto White Balance (AWB) and the next using Daylight White Balance (WB). The daylight WB is 5200°K while the AWB applied 3200°K. Clearly the Daylight WB is too yellow.

Image captured with camera set to Auto White Balance (AWB)
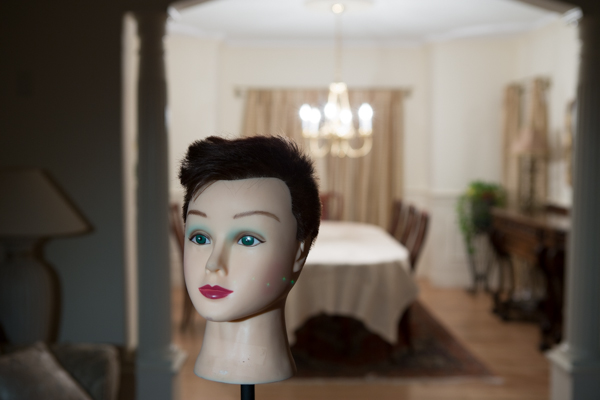
Same scene as above captured with the camera set to Daylight White Balance
The Problem
The background room is lit by tungsten bulbs (typically around 3200°K). We will use a flash to light the main subject (approximately 5500°K). This is a considerable difference that you will need to resolve. So if you can make both the light sources match in color temperature, you can then set the WB on your camera to that, and get a perfectly balanced image.
The Solution
To achieve this balance, you will use a color correction gel on your flash, to match the orange color of the tungsten bulbs. Theoretically both sources will now produce the same color. So if you set your camera’s WB to “tungsten” you will capture the background without any colorcast and it will look neutral. What about your primary subject? Since the flash output has been color modified to “tungsten”, the entire scene will look natural and devoid of any colorcast as long as the lights are close to the color temperature of tungsten.
Color correction is achieved using gels. These gels are manufactured by companies like Roscoe, Lee and ExpoImaging. Gels come in all sizes from large rolls to precut sheets. My preferences are the Rogue Gels made by ExpoImaging as they are the perfect size for flash heads and are attached using an elastic band. Each gel is marked for its strength and light loss. As a starter, for under $ 10 you can buy sample packs from most lighting supply stores.
Gels that create yellow/orange light are known as CTO gels (Color Temperature Orange). These gels are available in various strengths as follows:
- 1/8 CTO Converts 5500°K to 4900°K
- 1/4 CTO Converts 5500°K to 4500°K
- 1/2 CTO Converts 5500°K to 3800°K
|
- 3/4 CTO Converts 5500°K to 3200°K
- Full CTO Converts 5500°K to 2900°K
|
I recommend you start with a full CTO and adjust by adding or reducing the color temperature correction by either combining gels or using gels of lesser strength. Since these gels add color they also reduce the amount of light transmitted. Based upon the gel that you are using, you will need to compensate for the loss of light. The typical light loss is mentioned in “f” stops with each gel strength. This information is typically imprinted on the gel or provided on a backing sheet of paper. You should use this information as an initial guideline for compensating your exposure.
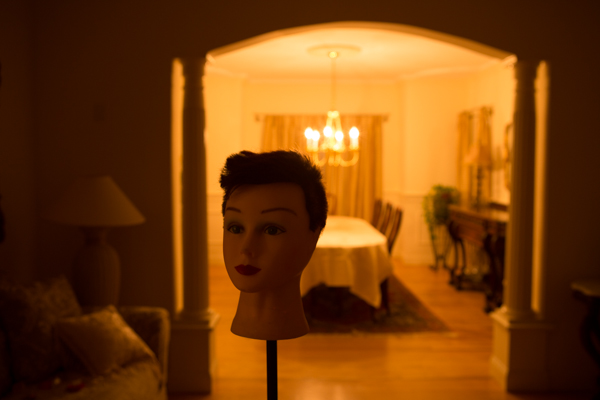
This method will work reasonably well. However, it is not the most accurate, as it relies purely on a visual color correction. See the result in the following image:

The camera White Balance is set to Tungsten and the flash is gelled using a Full CTO
Notice that the color of the subject is fairly accurate but the background is still a bit yellow/orange. The color temperature of the lights in the background may not be true 3200°K.
Method Two – Gels on the Ambient Light Source
In the second method, you will use gels over the offending lights if at all feasible. In this example consider it not feasible. However, you can use additional flash heads to overcome the problem of the tungsten colorcast. You do this by applying an opposing color gel to one or more flash light sources to fill the background. Keep in mind that based upon the size or the area and the intensity of the ambient light in the background, this too may not always be feasible. Take the additional flashheads (make sure they can be fired as slaves) and put a CTB (Color Temperature Blue) gel on each. What you are attempting to do is to negate the effect of the Tungsten by adding blue light to the ambient environment. Test your exposure and set the camera to “flash” white balance. Once again, you may need to add or subtract the gel intensity.
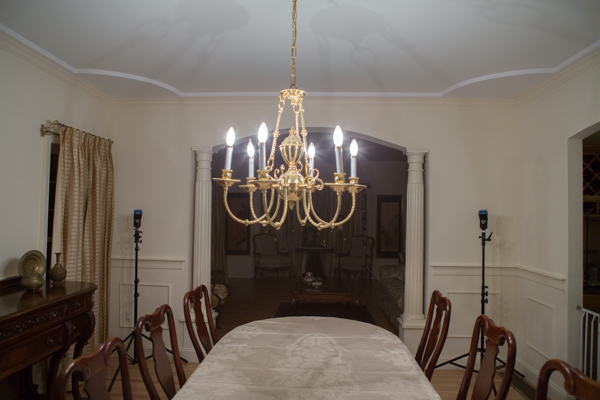
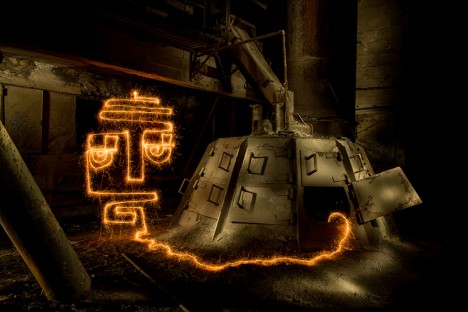
The set up: note how the flash heads are concealed from view and pointed into the room that is the background
The CTB gels like CTO gels are available in multiple strengths as follows:
- 1/8 CTB Boosts 3200°K to 3300°K
- 1/4 CTO Boosts 3200°K to 3500°K
- 1/2 CTO Boosts 3200°K to 3800°K
|
- 3/4 CTO Boosts 3200°K to 4100°K
- Full CTO Boosts 3200°K to near daylight
|
Once you are satisfied with the background color, go ahead and photograph the primary subject. Do not gel the main flash and leave the white balance on “flash”.

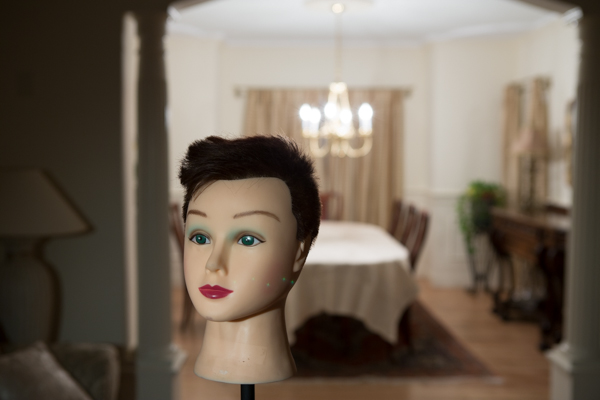
Color Correction using blue gels in the background
In each of the cases above there is still some color cast in the final image. This is because the lights in the background are not true 3200°K and we have been relying on tungsten color temperature for our corrections.
Method Three – Custom White Balance for Background and Matching Gels on Flash
Here you use custom white balance to establish an exact white balance setting for the ambient light. It is best to use a “white balance card” or a device like the X-Rite Color Checker Passport.

Image captured of a Color Checker Passport in ambient light
|

Color Checker Passport – Zoomed in for creating a Custom White Balance
|
Image of the Color Checker Passport after Custom White Balance was established
If possible, bring that image into Lightroom or Adobe Camera Raw and determine the actual color temperature. In this case, it is 2400°K, which, as you can see, is vastly different from the 3200°K tungsten. No wonder there was still a yellow colorcast in the first method. Use this measurement to establish the gel strength needed for the primary flash. If you cannot use Lightroom or any other software to obtain an accurate color temperature reading, you will need to do a bit of trial and error to determine how much CTO to use. In this case we need to get to 2400°K. A full CTO will drop 5500°K to 3200°K and a 1/8 CTO will drop an additional 600°K bringing the correction to 2600°K which is fairly close to what we need. Leave the camera set to the custom WB and gel the flash with one Full CTO gel and one 1/8 CTO gel to get a well balanced image.
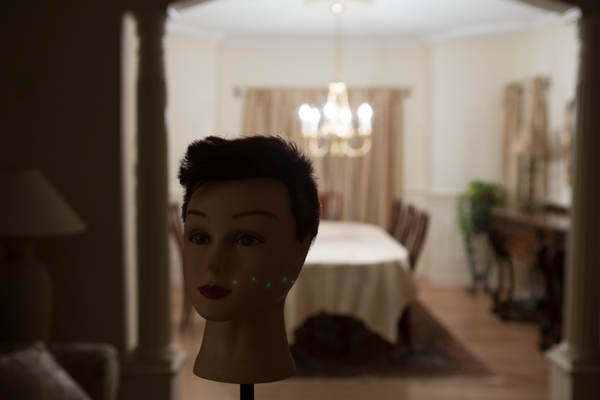
The correct White Balance for the background
Using a Full CTO on flash head
Flash with a Full CTO plus a 1/8 CTO – a well color balanced image
One full CTO and one 1/4 CTO – the subject is a bit warm
In Conclusion
Always keep a set of color correction gels in your bag if you use flash on location. Not only will you need them for indoor flash photography but the CTO gels are a ideal when using flash for portraiture at sunrise or sunset.
The post Balancing Color for Flash and Ambient Light using Gels by Shiv Verma appeared first on Digital Photography School.

Digital Photography School


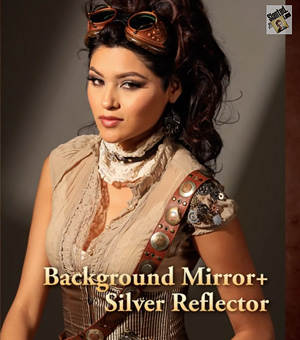 n keeping with our portrait theme this week is a video that goes over some great ideas for making one light portraits, using some advanced set ups. Keep in mind this is great if you only have on light and don’t want to invest in a more. The reflectors he’s using can be purchased relatively inexpensively, as can the mirrors. Probably the thing you’ll need to do this type of technique is more light stands and some clamps.


You must be logged in to post a comment.