RSS
 

Posts Tagged ‘know’

Three Uses for High ISO you Might Not Know

25 Jun

You may already know that the ISO setting is used to control your camera’s sensitivity to light. When you use a high ISO setting essentially you are telling your camera to become more receptive to the available light. This is most often used when you are photographing in low light situations in order to maintain a proper exposure. However, there are at least three other reasons you might consider using a high ISO setting when you’re either in a good light situation or on a tripod.

Freezing fast motion

when to us high ISO

Use a high ISO setting to freeze fast motion – 1/8000th ISO 1,000

The only way to freeze fast motion, like the wings of a hummingbird moth, is to shoot with an extremely fast shutter speed. The above photograph was shot with a shutter speed of 1/8000th of a second in order to freeze the insect’s wings. However, even in the bright mid-afternoon sun, a shutter speed that fast required bumping the ISO setting on the camera to 1,000 to maintain an even exposure.

Below, is an example of why shooting at 1/8000th of a second was necessary. Even at 1/800th of a second the insect’s wings were barely visible. In order to ensure that the motion was frozen it meant that more light was needed in a shorter amount of time and the only way to get this (without a faster lens) is to bump up the ISO on the camera.

when to us high ISO-4

ISO 500 1/800th – even at that speed the wings are blurry.

Night sky photography

when to use high ISO 4

Use high ISO to capture the stars

Many different techniques come into play when you want to photographing the stars, but one of the more important things to remember is to increase that ISO setting. The reason you want to photograph the stars with a higher ISO, even though you’re using a tripod, is that as the earth rotates, the stars move across the sky and you don’t want to capture that movement in your photograph (unless you are doing star trails)

By using an ISO in the 800 to 1,000 rang,e with a fast wide-angle lens, you will be able to capture enough stars to fill the sky.  For more on photographing the stars check out: How to Photograph the Stars.

Hand-holding a long lens

when to us high ISO-3

Use high ISO when shooting handheld with a long lens

If you’re shooting handheld with a long lens, you have to remember the shutter speed rule: 1/focal length (35mm equivalent).  This rule basically means that if you’re using a 300mm lens on a 1.5x crop factor DSLR then the minimum or slowest shutter speed that you can use is 1/450 (1/300 on full frame).

The bald eagle above was shot at a 450mm equivalent focal length using a shutter speed of 1/500th of second and an ISO of 1,000. Any slower on the shutter speed and you begin to run the risk of introducing camera shake.

What other uses can you think of for high ISO?

Do you ever shoot with an ISO of 800 or higher? What’s the highest you’ve ever shot? Share with us some examples and of course, if you have any other uses for high ISO that you think I’ve forgotten please share those below as well!

The post Three Uses for High ISO you Might Not Know by John Davenport appeared first on Digital Photography School.


Digital Photography School

 
Comments Off on Three Uses for High ISO you Might Not Know

Posted in Photography


Don’t Know What to Shoot? These 4 Photography Exercises Will Keep You Motivated

19 Jun

Whether you’re just getting into photography, or if you’ve been at it for years; you can keep yourself rejuvenated, and keep the creative juices flowing by always trying new things.

If you’re feeling uninspired photographically, that’s a sign that you need to shake things up by trying something completely different, or at least something that isn’t your usual style. You might be surprised at how small exercises can boost your creativity while teaching you new techniques and solidifying old principles in your mind.

Who knows, you might even discover a new passion!

To give your brain a little kick in the butt, challenge yourself to try some of these photography exercises. Even if they aren’t new to you, going out shooting with a new purpose feels refreshing and may lead to something completely new.

Fire Wave at Valley of Fire State Park, Nevada, by Anne McKinnell

Fire Wave at The Valley of Fire State Park, Nevada, taken from a high perspective on an opposite hilltop

1. Change your perspective

Photographers often get in the habit of shooting at eye-level which tends to make photos repetitive and somewhat common. We know this, and so we take the odd shot on our knees or even occasionally lying on the ground.

But is this really enough? Aren’t there other vantage points?

Challenge yourself to go out shooting and never shoot from eye-level for a whole day. Instead, find a new vantage point any time you take a picture. Get yourself up high above your subject, and crouch and shoot from a low angle. But that’s just the beginning. Ideally, you should try shooting your subject from a variety of angles.

Take one shot from below and one from above. Then, take one even lower, and one even higher, if possible. Then, step back a bit. Then step forward. Move to your right, and move to your left. Taking the same picture from many positions adds variety and will help you understand it better. Plus, you may discover a way of seeing something that you didn’t expect.

If you resolve to do this with every picture you take, you’ll begin to really understand the subtle effect that perspective has on an image, which points of view work for which subjects, and how this can inform your shooting style from here on out.

Fire Wave at Valley of Fire State Park, Nevada, by Anne McKinnell

Another perspective on Fire Wave, this time taken up close, from a low angle.

2. Create a story

Rather than trying to capture your subject in one single image, try doing a series instead. Create what LIFE Magazine coined a “photo essay” – a series of images surrounding a single subject or group of subjects, each of which pinpoints a different aspect of its nature. This can be as simple as zooming in on its finer details, or photographing it in different contexts. This method of doing things defines the subject not only by how it appears in a single moment, but also by the way it changes (and the way it stays the same) over several moments. It also helps to craft your visual storytelling abilities.

Choose one subject and cover it completely, the way a journalist would. Do this either by photographing every aspect of it you can think of, photographing it through the course of a day, or by revisiting it over and over throughout a week. Include shots at different distances and using different focal lengths – include some close-up details and some wide compositions – and whittle all the shots down to around ten final images, making sure that no two photos are alike. When you have your picks, try to organize them in an order that tells a coherent story, whether it’s narrated or implied.

Terlingua Ghost Town Texas by Anne McKinnell

These three photos are from Terlingua, a ghost town in Texas.

3. Shoot in Black and White

For a whole day, turn your camera to Black and White mode and don’t take it off. Of course, you can convert your RAW images to black and white after-the-fact in post-processing, but as an exercise, try shooting them in Black and White.

At first the limitation may seem frustrating, but Black and White photography requires a completely different way of seeing the world in terms of shape, form, and contrast, rather than through the common visual cues that you’re used to. Composing your photos in this way will invariably improve your compositions in colour photography, too. You can play with contrast settings in-camera or in post-processing to perfect the highlight to shadow ratio which defines a good monochrome image.

Bandon Beach, Oregon, by Anne McKinnell

Bandon Beach, Oregon.

4. Make manual long exposures

For this exercise, you’re going to take full advantage of digital photography’s instant feedback, and use it to play with making manual long exposures.

With your DSLR mounted firmly on a tripod, set the ISO to 100, set the aperture to the smallest opening (the largest f number like f/22 for example), and set the shutter speed to Bulb mode. When the camera is to Bulb mode, the shutter will stay open for as long as the shutter button is held down, but it’s a better idea to attach a wired remote shutter release to prevent camera shake.

Once you have your composition and your focus set, press and hold the button on the remote to hold the shutter open for a few counted seconds. Just guess how many seconds will be required based on the light level. Then, check your results. If the image is too bright, try again, but count half as many seconds. If the image is too dark, count twice as many seconds – or more, if necessary. Do this over and over again, in different scenarios and lighting situations. This practice will hone your ability to read the levels of light present at any given time.

You’ll get the most interesting results if there is a certain amount of movement in your frame, such as drifting clouds in the sky, crowds of people, or running water. The longer your exposure is, the more blurred that movement will appear to the point where water may seem like nothing more than mist, and people will disappear from the image altogether. If you have a solid neutral density filter your exposures can be even longer, creating more extreme effects.

Folly Beach Pier, Charleston, South Carolina by Anne McKinnell

Folly Beach Pier, Charleston, South Carolina – 2 second exposure.

Folly Beach Pier, Charleston, South Carolina by Anne McKinnell

Folly Beach Pier, Charleston, South Carolina – 30 second exposure.

Don’t wait until you start feeling uninspired to try these exercises! Keep your photography energized and creative by trying something new on a regular basis. Even if it doesn’t turn out to be your “thing”, it’s fun and you’re bound to learn something.

The post Don’t Know What to Shoot? These 4 Photography Exercises Will Keep You Motivated by Anne McKinnell appeared first on Digital Photography School.


Digital Photography School

 
Comments Off on Don’t Know What to Shoot? These 4 Photography Exercises Will Keep You Motivated

Posted in Photography


Adobe CC Announcements: What you need to know

19 Jun

shared:AdobeLogo.png

This morning Adobe announced a new photography-focused plan for Creative Cloud subscribers, new feature additions to Photoshop CC and two apps – an iPhone version of Lightroom Mobile and Photoshop Mix. We’ve written about all of these things individually, but if you’re thoroughly confused about what it all means, click through for the main takeaways.

News: Digital Photography Review (dpreview.com)

 
Comments Off on Adobe CC Announcements: What you need to know

Posted in Uncategorized


Everything you wanted to know covered in helpful Lightroom tutorial

10 Jun

shared:AdobeLogo.png

Adobe’s Lightroom 5 is a powerful program, but that power comes at the expense of a learning curve that some find pretty steep. In this excellent video shot at B&H, Photographer Robert Rodriguez, Jr. walks photographers through the functions and features of Lightroom’s Develop module in an hour-long hands-on tutorial as he covers just about every panel and slider in the Develop module. Learn more

News: Digital Photography Review (dpreview.com)

 
Comments Off on Everything you wanted to know covered in helpful Lightroom tutorial

Posted in Uncategorized


Get To Know Your Photographer by Steve Brill

12 Feb

I have been photographing weddings for around 6 years now, and have been very fortunate to be able to contribute in my own small way, in making these fantastic events a memory that my clients will treasure every time they look back at their photographs and albums. The added benefit for me is that my […]
dslrBlog

 
Comments Off on Get To Know Your Photographer by Steve Brill

Posted in Photography


All You Have to Know to Master the Basics of White Balance

04 Jan

As an amateur photographer, you can go a long, long time without knowing what white balance is or why knowing how to adjust it even matters. I had my first DSLR (my current DSLR is a Canon EOS 450D) for five years before white balance entered my photography glossary, and it took another few months until it felt necessary—or at Continue Reading

The post All You Have to Know to Master the Basics of White Balance appeared first on Photodoto.


Photodoto

 
Comments Off on All You Have to Know to Master the Basics of White Balance

Posted in Photography


Getting to Know Picasa – a Free Image Editor and Browser by Google

20 Dec

Getting to know Picasa

If you’re looking for an image browser and editor that is feature packed and easy to use then Picasa just may be the only bit of software you’ll ever need. It may not have all the advanced features you would expect from some of the more well-known image editors but it is a nice piece of software that punches way above its weight, and what’s more, it’s free and available for both Mac and Windows platforms.

Photo editing picasa 01

Before I get started I will state unequivocally that I have never in the past or present worked, in any capacity, for Google or any of its subsidiaries. Furthermore, I have never received payment of any kind for writing about their products. I wish!

I recently ran a digital photography course in Perth, Western Australia and was asked by my boss to use Picasa as the editing software. I was sceptical at first about what I could achieve with freeware, mainly because I was used to working with the Adobe Creative Suite, and initially protested. But after downloading and trialling Picasa, I was pleasantly surprised to find it’s actually quite a useful and feature-packed piece of software.

So what exactly is Picasa?

According to Google, it’s software that helps you “organize, edit and upload photos”. When you download and install Picasa, the first thing the software will do is trawl through your computer, and attached hard drives, looking for image files such as jpegs, bitmaps, tiffs. In fact Picasa recognizes most image file types, including Photoshop PSD. So what you’ll end up with is a large library of pictures organized chronologically in folders, which is handy for finding that holiday snap you took several years ago. How long this all takes will depend on how many images you have on your computer or hard drive, so be patient and wait until it has finished collating.

Browsing

Once Picasa has catalogued all your pictures you can then start to browse, organize, and edit, as well as having the option of grouping them into Albums. One of the nice things about Picasa is that it’s non-destructive. So edits you make to photos can be undone. Picasa also stores all edits as separate files so your original pictures are left intact. Picasa also scans your hard drive and updates itself whenever you add more pictures so it’s always up to date.

Picasa main screen 01

Picasa’s main browsing interface is simple and easy to navigate

You also have the ability to import photos directly from cameras and portable drives using the import function in the top left hand side of the browser. Simply connect the device to your computer and navigate to the photographs on your device. Once you have all your pictures imported, and in their respective folders, you are ready to start editing.

Picasa import button 02

Use the import function to download from a digital camera or portable hard drive

Editing and effects

To begin editing you simply double click on a picture in the Picasa browser. This activates the editing functions and you can begin making changes to your selected photograph.

There are five tabs at the top left-hand side of the editing window:

Use the import function to download from a digital camera or portable hard drive

Use the import function to download from a digital camera or portable hard drive

TAB #1 COMMONLY NEEDED FIXES

The tools in this tab gives you control over cropping, straightening, red-eye removal, basic brightness and contrast adjustments. There are some automated features too such as “Auto contrast” and “Im feeling lucky”, which all deliver varied results. The “Edit in Creative Kit” feature has been discontinued but there is the opportunity to edit online inside Google+. There’s also a “Text” tool for adding some titles and information to your selections as well as a “Retouch” tool for fixing blemishes and scratches.

TAB #2 CONTRAST ADJUSTMENTS

The second tab gives you more brightness and contrast options and a greater level of control. It includes sliders to adjust the amount of fill light and shadows in your picture, and you also have the ability to change highlights. There’s a temperature control feature but in reality this simply adds either a blue or sepia tint to the picture which simulates daylight or interior colour temperatures.

TAB #3 FILTERS

The third tab is where Picasa starts to offer some cool features. Here you will find a series of twelve preset filters such as sharpening, film grain and black and white. Most of the filters are adjustable so you can control the amount of each effect applied to a photograph.

TABS #4 and 5 MORE FUN FILTERS

Similarly, tabs four and five continue to offer you even more fun filters to apply to your photographs, with twenty four additional styles.

Picasa effect previews 04

The image filters in Picasa offer a wide range of modern and classic effects

In the picture below I applied the Orton-ish filter and a Vignette to get a softening, yet dynamic effect.

Picasa before and after 05

Video

So, you’ve messed around for a few hours and now have a dozen images you want to show off to friends and family. Well Picasa’s bag of tricks doesn’t stop there. In fact, there’s some very useful output options available should you want to either print, make a video, or simply upload your pictures to the web.

Picasa create video icon 06

Making videos is simple and fun in Picasa. Just click the “Create Video Clip” icon to get started

By selecting a group of pictures in the browser and selecting “Create Video Clip Presentation’ it puts your selected pictures onto a simple video timeline. You can then add titles, and even import a music sound track to go with your pictures. If you’re not happy with the selection order you can shuffle the pictures, and then output the file to one of several video formats, including high definition 1080P.

There’s also the option of making a collage for print, screen or for the web. There are tons of options and it takes very little time to come to grips with how it all works.

Other features

If you think that’s impressive, wait, there’s more! If you have a free Google+ account you can upload and share your pictures right from the Picasa browser, to Picasa’s Web Albums photo sharing site with very little effort. Just make sure you familiarize yourself with the privacy settings before you start uploading and always read the terms and conditions.

On the downside,

On the downside Picasa has limited raw editing features, so if you want to try something more advanced then you will have to look elsewhere. That said there’s enough features in this little program to keep most people happy.

Bottom line on Picasa

Picasa is really a fun and easy program to use and the learning curve isn’t too steep. If you need an application that is primarily for browsing and organizing, then this is a handy program. Although the editing capabilities are basic there are some useful features such as geotagging, keyword tagging, face recognition and a range of exporting options. But if you are a serious photographer that needs a program that can do some heavy lifting then perhaps you’ll need something more robust.

Picasa will certainly appeal to a broad demographic and it is really intended to perform many of the most common photographic tasks. It can also speed up the process of getting your pictures online. While I was reluctant to start using this program I have warmed to it. So if you need a photo organizer and editor that’s quick, easy and – dare I say – fun to use then perhaps give it a go.

Download it:

  • Picasa for Windows
  • Picasa for Mac OSX

The post Getting to Know Picasa – a Free Image Editor and Browser by Google by Mark Sutton appeared first on Digital Photography School.


Digital Photography School

 
Comments Off on Getting to Know Picasa – a Free Image Editor and Browser by Google

Posted in Photography


The 5 Stupidest Photography Errors You Don’t Even Know You’re Making

22 Nov

They can happen to anyone who thinks he’s a good photographer. They can even happen to a professional photographer who has had years and years of experience in the industry! What…is “they?” In this case, “they” is a reference to the absolutely worst photography errors that you don’t even know you’re making. No matter how good you are or think Continue Reading

The post The 5 Stupidest Photography Errors You Don’t Even Know You’re Making appeared first on Photodoto.


Photodoto

 
Comments Off on The 5 Stupidest Photography Errors You Don’t Even Know You’re Making

Posted in Photography


Everything You Need to Know about Posing

12 Nov

Looking to learn more about posing your portrait subjects?

In this lecture video from B&H Photo and Video wedding photographer Jerry Ghionis shares some great posing techniques and gives live demonstrations with models.

This video has a wealth of knowledge in it – Enjoy!

Post originally from: Digital Photography Tips.

Check out our more Photography Tips at Photography Tips for Beginners, Portrait Photography Tips and Wedding Photography Tips.

Everything You Need to Know about Posing

The post Everything You Need to Know about Posing by Darren Rowse appeared first on Digital Photography School.


Digital Photography School

 
Comments Off on Everything You Need to Know about Posing

Posted in Photography


Model Releases: What You Need to Know (With Samples)

11 Nov

When I quit practicing law ten years ago, I knew I was trading in my briefcase for a camera bag and the courtroom for a studio, but I had no idea that contracts were still going to dominate so much of my time. The importance of the contract between you and your client is pretty much a given, but just as important– if not more– is the model release. If you’ve been shooting professionally for any period of time, you already know (I hope) that securing a model release from the people you photograph is of utmost importance. What you may not be aware of, however, is why it is so important. It is an unfortunate reality that most people neither completely read nor understand the legal documents that they sign or have prepared for them. You may have an iron-clad model release in your bag of tricks, but you may not understand what exactly it’s releasing or the significance of the language. Having a fuller understanding of the basics will help you greatly in the long run, particularly when it comes to assessing whether you even need a model release, and convincing your subject to sign one if you do.

001-model-release

What It Is and Why It’s Important.

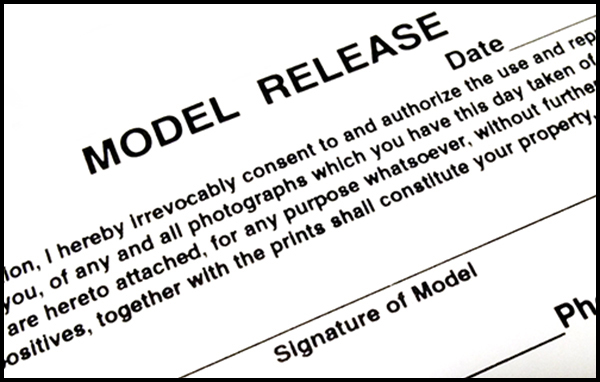
At its most basic, a model release is a contract. It is a written and signed agreement between you and the person you are photographing, the purpose of which is to protect– release– you from liability in future lawsuits which that person might file against you for legal claims like invasion of privacy, defamation of character, etc. The document stipulates the terms under which one party may use photos taken of another party. They are usually brief– no more than a paragraph– but they can get quite long, especially if the subject of the photo tries imposing additional conditions (e.g., no Photoshop). We’ll get into the specific contents of the model release in a bit. For now, though, know that a model release is a crucial piece of paper for any commercially used photograph.

How Do I Know if I Need It?

HOW WILL THE IMAGE BE USED?   When you start with the premise that the need for a model release is dictated by the use and not the content, you are left with a pretty basic set of questions that need answering. The first is, “Will this photo be used commercially?” If the answer is “yes,” you need a model release. If the answer is “no,” you do not. Simple, right?  Not quite. Keep reading. The simple fact of publication does not, in and of itself, automatically mean that the use is commercial. For instance, work that is going to appear in newspapers, educational books, and consumer or trade publications does not need a model release because it is editorial use– sometimes referred to as “fair use.” Commercial usage, on the other hand, can include advertisements, brochures, web use, greeting cards, catalogs, newsletters, etc. For commercial, licensed use, you absolutely, positively MUST have a model release.

What is and isn’t commercial use can sometimes be confusing. Assume that you have taken a photo of a popular local chef and not obtained a signed model release. Your friend is the publisher of a local newspaper and he pays you for the photograph for use in an article they are running about the restaurant. Because the photo is being used as part of a news story, this constitutes editorial use. The fact that money changed hands does not automatically render it a commercially used photograph. If, however, the restaurant’s PR agency wants to use the same photo as part of an ad campaign, you are going to need a model release. Same photo. Two uses. One needs the release and one does not. Ultimately, there is no way of knowing whether you need a model release until you can answer the question of how the photo will be used.

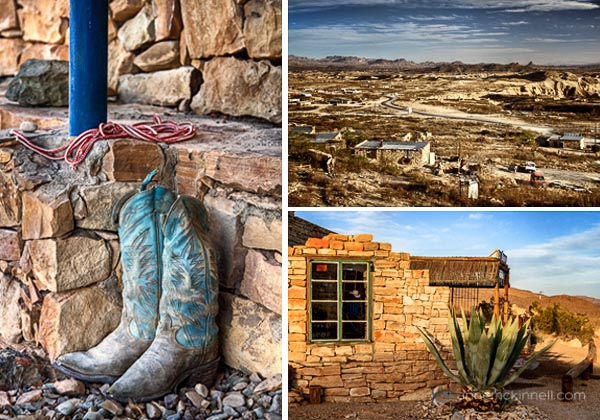
The examples below all illustrate how important the intended use is when determining whether you are going to need a model release. The protest image was taken as part of a news story about cuts to the state budget for publicly funded art programs. It was editorial use, and therefore no model release was required. The chess game photo was for a commercial publication on local tourism. It’s interesting that it required a model release for its original use, but not for its editorial publication here at dPS. The crowd shot at the bottom appeared in a news article about public education, which, as we now know, requires no model release.

The intended use determines whether you need a model release.

The intended use determines whether you need a model release.

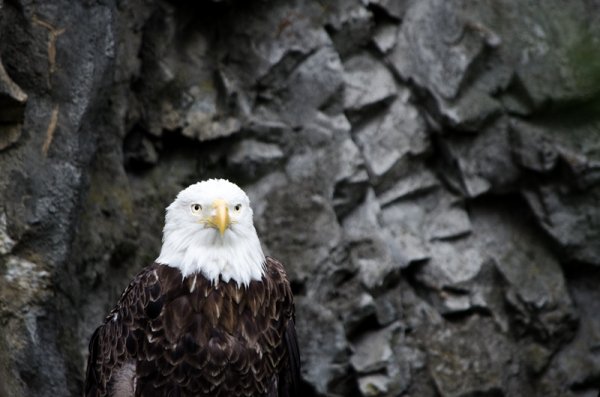
IS THE SUBJECT IDENTIFIABLE?  If you have determined that the use will be commercial, the next question you have to answer is whether the person in the photo is uniquely recognizable and clearly the subject of the photo. If not, there is no need for a model release. But just like the shifting boundaries mentioned above, what does and does not constitute “uniquely identifiable” is not always cut and dry. Remember, there are ways to identify or recognize someone in a photo other than just their face. Sometimes a silhouette, a tattoo, a uniform, or even a location can still identify a person without necessarily showing their face. You will still need a model release in these situations.

At first glance, the three photos below appear to have no recognizable subjects, which might lead to the conclusion that model releases would not be necessary, regardless of whether the use was commercial or editorial. Let’s assume that all three were classified as commercial use. As far as the Parkview High School students are concerned, let’s face it– their parents and friends can identify each of them easily, body paint, wigs, and sunglasses notwithstanding. Tattoos are also fairly distinctive, rendering it a moot point that you can’t see the tattoo artist’s face in the photograph. The ink on her arms could be enough for someone to recognize her. The artist in the park can theoretically be recognized, not because of anything distinctive about her from this angle, but because of the distinctive nature of her painting.

Are your subjects identifiable? You may think not, but you might have to think again.

Are your subjects identifiable? You may think not, but you might have to think again.

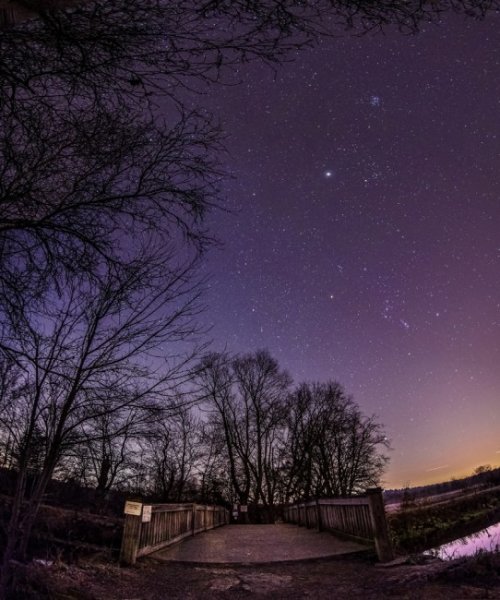
HOW AND WHERE WAS THE PHOTO TAKEN?  At first glance, it doesn’t seem like this question should make a difference, but it does. This is where things like travel, candid, and street photography come into play. Photos that I take in public places– streets, fairs, parks, festivals, etc.– generally do not require model releases, especially if they are destined to reside only in my portfolio or on my walls. Again, however, if I think there’s even a chance that I might someday want to use that photo commercially, I have to get a model release. That’s why I always suggest that photographers play it safe and get a model release whenever someone is recognizable and clearly the subject of the photo. You just never know what money-making images might be lurking in your archives until someone comes looking for them. It’s always easier to get it first, rather than to retrace your steps later and hope for the best.

In this final set of examples, we see how photos taken in public places may or may not require model releases. As noted, street photography– regardless of recognizable faces– will not require releases, unless they are intended for commercial use. From a legal standpoint, you can photograph anyone in a public setting, as long as you are not violating any other laws by doing so. That doesn’t mean it’s always a good idea, but that doesn’t make it illegal. When photographing children under the age of 18 for commercial purposes, however, a parent or legal guardian must sign the model release.

004-model-release-examples3

Be aware of special considerations for candids, children, and public places.

Commercial Use: A Simple Definition

Simply put, commercial use is that which is intended to enhance a business interest. I listed some of them earlier, but it all boils down to whether someone’s use of the photos in question is aimed at generating revenue. When I photograph an author for their book cover, it is clearly commercial. In addition to appearing on the back of the book, the photo may appear in advertisements for the book, as well as in bookstore windows promoting the book, or the author’s appearance at signings and other promotional events. All of this activity is clearly aimed at making money. It’s a pretty simple approach.

What complicates the issue, however, is the photo you take for no reason other than to post it in one of the galleries on your professional website. Clearly, you’re not selling the actual image, so no money is changing hands. You are, however, using that person’s likeness as an example of the type of work you do in order to hopefully bring in more business. Your interest in using the photo is clearly commercial in nature. The lines are blurred, from the standpoint that there is no actual monetary gain from the image itself in this context, but you do have a commercial goal in featuring it on your website. The same reasoning applies to hanging client photos in your studio. There is a commercial benefit to the extent that displaying samples of your work will encourage other potential clients to hire you. It is much better to err on the side of caution and have your subject sign a model release, than to spend your time defending against lawsuits and cease & desist letters.

What Should it Say?

This is where a bit of a disclaimer is in order. Remember that a model release is a contract. Most of the applicable principles are widely accepted, but laws do vary state-to-state and country-to-country. There are many excellent resources out there, so I strongly caution against simply writing your own. Why reinvent the wheel if you don’t have to? If you have questions or are unsure about any aspect of this, play it smart and consult with an attorney.

The most basic tenet of contract law is that there must be a “meeting of the minds.” In other words, a valid contract is a two-way street, obligating each party in some way. Hand-in-hand with this requirement is that of “consideration.” In a legal context, “consideration” simply means something of value. As the photographer, you are asking the person you are photographing to surrender any right or claim they may have to how, where, and when these photos are used. That can be kind of a big deal and you should be prepared to offer them something of value in return. It can be a nominal sum of money, or it can be prints, or anything else to which the two of you can agree. Contracts have been upheld for consideration as low as one dollar. The model release must acknowledge this consideration.

It is also important to remember that the photographer is hardly ever the actual publisher of the photo. The model release must therefore indicate that the subject is not only consenting to your use of the photos, but also that of whomever you authorize to use the photos. Let’s go back to our photo of the chef by way of example. Assume that the chef’s agent or publicist hired you to photograph the chef for the cover of his upcoming cookbook. Obviously, you are not the publisher. You will, however, be licensing the photo for use by the publisher. The only way you can do so is to make sure that the model release authorizes you to grant usage right to a third party.

As noted, a model release can– and should– be short, sweet, and to the point. I keep a stack of this model release printed on 3″x5″ card stock in my camera bag. It’s short enough to be effective and valid, without confusing the subject to the point that they refuse to sign it. I rely on this short release for more spur-of-the-moment photography, as opposed to this longer version for commissioned work.

One additional note on the paperwork– keep it forever. This isn’t like certain records that you can throw out after a certain amount of time. You will need the release if you ever want to license the image, but– more importantly– you’ll need it to defend yourself if you are ever sued.

Wrap-Up

Some people may be hesitant– or even unwilling– to sign a model release, and you have to be prepared to respect that decision. It is certainly easier when you have been hired to take their photos, rather than when you are roaming the streets shooting what interests you. I always make sure that my clients sign the release before we start the shoot. Keep in mind that what can seem like a complicated process, though, can be pretty easily broken down into a fairly quick analysis. Ask yourself if the photo is going to be used commercially in any way. If the answer is “no,” the inquiry stops right there and you are free to hang that photo as big as you want on your living room wall. If you think, though, that there is any chance that you might one day want to license the photo for commercial use, obtaining a signed model release is an absolute necessity.


Post originally from: Digital Photography Tips.

Check out our more Photography Tips at Photography Tips for Beginners, Portrait Photography Tips and Wedding Photography Tips.

Model Releases: What You Need to Know (With Samples)

The post Model Releases: What You Need to Know (With Samples) by Jeff Guyer appeared first on Digital Photography School.


Digital Photography School

 
Comments Off on Model Releases: What You Need to Know (With Samples)

Posted in Photography