RSS
 

Posts Tagged ‘know’

Wedding Photography Infographic: Everything You Need to Know

10 Apr

Wedding Photography is one of the most important things to consider before your big day. Wedding photos are something you will cherish for the rest of your life so it’s vital that you are completely satisfied with them. Take the time to choose the right photographer for your needs as well as communicating effectively with them during the process is Continue Reading

The post Wedding Photography Infographic: Everything You Need to Know appeared first on Photodoto.


Photodoto

 
Comments Off on Wedding Photography Infographic: Everything You Need to Know

Posted in Photography


Canon XC10: What you need to know

08 Apr

Canon’s new XC10 is the first product we’ve seen which is neither a stills camera with a video feature or a video camera that can capture stills. In terms of both specification and ergonomics it is a true ‘convergence’ product with the potential to shake up more than one market segment. We’ve been poring over the specifications for a while now – here’s what you need to know 

Articles: Digital Photography Review (dpreview.com)

 
Comments Off on Canon XC10: What you need to know

Posted in Uncategorized


Nikon 1 J5: What you need to know

02 Apr

While Nikon’s DSLRs tend to get the most attention, its 1-series mirrorless cameras have become more and more capable since their introduction in 2011. The company’s latest offering is the Nikon 1 J5, which sports a more upscale, classic look and some notable changes inside and out. We dug into its features and have put together a slideshow that displays the highlights. Read more

Articles: Digital Photography Review (dpreview.com)

 
Comments Off on Nikon 1 J5: What you need to know

Posted in Uncategorized


4 Photoshop Tools Every Photographer Should Know

01 Mar

When it comes to photo-editing programs, one of the most popular among both amateur and professional photographers alike is Adobe Photoshop. While it can appear more complex than Lightroom, and certainly takes more time to learn all of its tricks, Photoshop offers four post-processing tools that come in handy for retouching images. These tools are pretty easy to locate and implement, and in this article I’ll show you how they work, specifically while retouching the image of the Space Needle in Seattle (below). I have the privilege of having this view from my home office, but the problem is that if I take a photo using anything but a telephoto lens, I get telephone pole remnants and wires in my otherwise pretty cityscape image.

Here are the four Photoshop tools I use to retouch my Space Needle images. There are of course other ways to retouch this image to achieve the same or even better results, but these are quick and easy methods that also highlight essential Photoshop skills.

5 basic photoshop tools for photographers

Before we do anything to modify Photoshop images, the first thing to note is that within Photoshop, you can cause permanent changes to the pixels and details of your photos if you’re not careful. This is why you always want to make sure you are performing nondestructive editing so that you don’t overwrite the original image data.

There are several ways to do this in PhotoShop. For the tools I’m about to show you, the best technique for nondestructive editing will be to work within an adjustment layer or retouch on a separate layer. You can create a new layer by clicking on the New Layer icon on the bottom of the Layers panel. Repeat this every time before you employ a new editing process on your image and be sure to double click on the layer and rename it to help you remember what editing process you did on that layer.

5 basic photoshop tools for photographers

1. Spot Healing Brush

First of all, let’s tackle those thin, yet annoying, power lines in the upper left corner of the image. To start, we’ll use the Spot Healing Brush. One of three image healing tools that Photoshop offers, this brush creates a seamless repair to your image by replacing unwanted textures of the image with good textures from another area.

5 basic photoshop tools for photographers

To use it, head over to the Tools panel and select the Spot Healing Brush. It will be grouped together with other healing and patching tools. Be sure the Sample All Layers option is checked on the upper Options bar, as well as Content Aware (Photoshop versions CS5 or later) or Proximity Match (Photoshop CS4 or earlier). Next, zoom into the image’s problem area and click (or click and drag) on the areas you want to replace or heal. To adjust the size of the brush, press the left ([) and right (]) bracket keys on your keyboard. If you make a mistake, just hit Ctrl+Z (on Windows) or Command+Z (on Mac) to undo. In this example, I clicked and dragged the Spot Healing Brush across those thin power lines to erase them.

In this example, I clicked and dragged the Spot Healing Brush across those thin power lines to erase them, which is the quickest way of using it. However, be careful when attempting to spot heal in large chunks particularly near high-contrast edges, since some areas can appear improperly blended. For the sake of accuracy, a more effective approach could be using the spot healing brush to heal smaller chunks of the image, rather than attempting to heal the entire area in one go.

Other important settings to be mindful of are the Size and Hardness of the brush, which can be adjusted per the settings panel pictured below. Since the Healing Brush automatically blends pixels, it’s best to choose a higher Hardness value for best results.

Cloning Tool Settings

2. Clone Stamp Tool

Another alternative way to getting rid of the power lines is to use another Photoshop essential: the Clone Stamp tool, which is used for pixel-to-pixel cloning. Like the Spot Healing Brush, this tool can be used to replace unwanted areas of an image, but unlike the Healing Brush, it won’t do automatic content-aware blending. The Clone Stamping is best used to duplicate an item or pattern, remove a brand logo, or remove power lines, which is what I’m going to do in this example.

5 basic photoshop tools for photographers

To use the Clone Stamp tool, first create a new layer and then select the Clone Stamp tool from the tool bar. This tool works similarly to the Spot Healing Brush, but before you begin clicking away, position your cursor over the area you want to clone from and Alt-click (on Windows) or Option-click (on Mac) to define and sample the source of the clone. Be sure to re-sample and re-define as many clone sources as needed to provide a seamless cloning result.

Be sure to re-sample and re-define as many clone sources as needed to provide a seamless cloning result. To make sure the result appears realistic, it is important to zoom in and make sure the same pattern is not being cloned over and over again. Per the same settings as the Spot Healing Brush, be mindful of the Size and Hardness settings that you choose as these will determine how accurately the Cloning Tool samples and clones layers. When cloning an area with lots of patterns and details, it’s sometimes best to work with a low Hardness value and low cloning opacity for smoother results.

3. Magic Wand

Next, let’s get rid of the remnant of a telephone pole in the right hand side of the image. The easiest way to eliminate it would be a simple crop, but another way is to select and replace it using the Magic Wand Tool. This is one of Photoshop’s oldest selection tools and it causes many a photographer joy or suffering. The Magic Wand is incredibly easy to use, requiring just a click of its icon in the tool bar, followed by clicking on the area of the image that you want to select. Here’s where things can get complicated. The Magic Wand selects pixels based on tone and color, which means it has the tendency to select more areas of the image than you initially want. The simplest way to fix this is to play around with Tolerance in the Options bar. If the Magic Wand is selecting too much of an area, simply input a smaller value of Tolerance and then reselect the area.

5 basic photoshop tools for photographers

4. Content-Aware Fill

After the proper area of the telephone pole is selected, it’s time to fill in that area. Hit Shift+Delete on the keyboard, and the below pop-up box will appear. Make sure Content-Aware is selected, then press OK; Photoshop will then sample pixels in the surrounding area and fill in the selected area accordingly. The results may not be perfect, and this is where the aforementioned Spot Healing Brush and Clone Stamp tools can come in handy to make the filled in area more seamless.

5 basic photoshop tools for photographers

The final retouched image can be seen below. Using the Spot Healing Brush, Clone Stamp, Quick Selection and Content-Aware fill, the telephone lines in the upper left corner have been removed, as well as the remnant of the pole on the right-hand side.

5 basic photoshop tools for photographers

In this brief tutorial, I’ve introduced several very important tools that all photographers should be familiar with, but it’s also important to note that I haven’t explained every possible use of them. There are many other practical and creative ways to use these tools, and I encourage you to do further research to learn more about them. But for the sake of doing quick edits and getting familiar with the tools, these are approachable ways to get started.

googletag.cmd.push(function() {
tablet_slots.push( googletag.defineSlot( “/1005424/_dPSv4_tab-all-article-bottom_(300×250)”, [300, 250], “pb-ad-78623” ).addService( googletag.pubads() ) ); } );

googletag.cmd.push(function() {
mobile_slots.push( googletag.defineSlot( “/1005424/_dPSv4_mob-all-article-bottom_(300×250)”, [300, 250], “pb-ad-78158” ).addService( googletag.pubads() ) ); } );

The post 4 Photoshop Tools Every Photographer Should Know by Suzi Pratt appeared first on Digital Photography School.


Digital Photography School

 
Comments Off on 4 Photoshop Tools Every Photographer Should Know

Posted in Photography


5 Things You Should Know About Lightroom Before Starting

27 Feb

So you just installed Lightroom, now what?

You could spend some time just playing around and learning through doing, but if you’re looking for a nudge in the right direction here are a few simple concepts that I wish I’d thought about before starting my own Lightroom journey – hopefully it helps you! Five things you should know about Lightroom before you start:

#1 Your organizational strategy

organize-in-lightroom
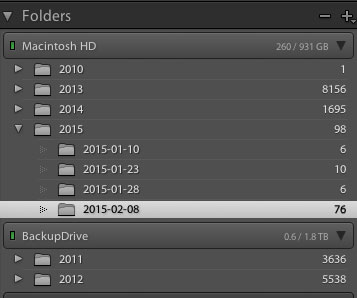
This might not seem important at first, but Lightroom is an amazing organizer of your photographs if you choose to use it as one. So before you start haphazardly uploading photographs into your Lightroom catalog try to come up with some sort of basic organizational strategy first.

Some ideas for organization include:

Organizing by date, by location of shoot, or by specific events. Think about your style of photography and the subject matter you plan on shooting. For example a wedding photographer would probably want to organize by date/bride-groom name, where as a wildlife photographer may organize by location/animal.

Lightroom has many different tools for organizing your photographs from colors, star rating and flags. You could for example use flags as a simple yes/no option to quickly cull images, while colors could be for various states of post production workflow (i.e. blue is for images that need to be processed and green is for images that are finalized and shouldn’t be touched).

This might sound overwhelming at first, but if you get into this habit early on, it will simply become a part of your Lightroom workflow, and trust me an organized Lightroom library makes things a lot easier when you’re dealing with thousands of photographs.

#2 How you want to import photos

This is a simple question, but one that you should know the answer to before you get started with Lightroom. When you first open up the import dialog box you’ll be asked whether you want to Copy as DNG, Copy, Move, or Add. Knowing the difference between these four options will help you make the best choice for your workflow. So here’s the Cliff’s notes version:

  1. Copy as DNG – Converts the file type to Adobe’s .DNG format. Read all about Adobe’s DNG format here.
  2. Copy – Retains the original file type of your image (on your computer or memory card) and copies it to a new location on your computer or hard drive.
  3. Move – Moves the image from one place to another on your computer (or from the memory card).
  4. Add – Adds the image to a Lightroom catalog without moving its physical location on your computer or copying it.

For a more detailed look at importing photographs in Lightroom check out: Quick Tip: Importing to Lightroom Made Easier

#3 How to use the Lightroom Develop Module

lightroom develop module
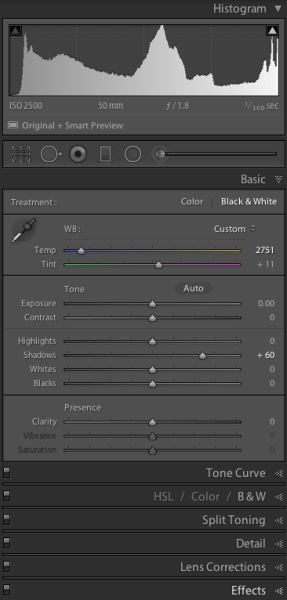
Now that you’ve got your organizational strategy situated you’re starting to get into the fun stuff, before you go all hack and slash post-production on your first photograph it does help to learn some basic fundamentals. Here’s three quick points to get you started.

  1. Learn what the basic tab does – The basic tab is the workhorse of Lightroom it is what will bring your image to life. At a minimum master these five Lightroom sliders and you’ll be on the road to successful image processing.
  2. Learn the art of local adjustments – Once you’re comfortable with Lightroom’s basic tab you’ll probably want to move onto learning things like how to apply adjustment brushes, graduated filters and radial filters to your images. These tools function in much the same way as the sliders within the basic tab, however, they allow you to have more isolated and local control over your images.
  3. Learn the finishing touches – Finally within the develop module you’ll want to learn a bit about the finishing touches that Lightroom is capable of providing. Things like the clone/heal tool, sharpening, and noise reduction are a good place to start. You may also want to learn about how to remove chromatic aberrations and correct for lens distortion as well. These types of tools are subtle, but powerful, and really will bring the entire image together as a final printable work.

#4 What are presets and how you should use them

While you may be tempted to start with presets it’s better that you learn your basic tab and various other tools first – why? Simply because all presets are created from these settings so once you learn those settings not only will you know a lot about the presets you’re choosing, but you’ll also be able to create your own.

When it comes to presets think of them as a starting point, not a finished product. Learn how to use them to speed up your workflow by creating your favorite looks within a preset, then applying what you know about the various sliders in the basic tab to fine tune the results.

For more info on Lightroom presets: A Concise Guide to Lightroom Develop Presets

#5 What your export settings should be

Here you are, ready to export your first photograph from Lightroom, and just when you thought you had everything figured out, this screen pops up. What do you do now?

Lightroom Export

First you’ll want to remember that Lightroom doesn’t save your processed images, only the instructions of how to process them, that’s why you need to export (export = “save as”) a file out of Lightroom. This image is separate from the original camera RAW file, and as a result will need its own name, and place of organization.

You’ll want to determine what file type and size you’re going to export, and whether or not you want Lightroom to automatically add a watermark to your photographs. These things are all going to be preferences for your own work and there’s no right or wrong way to go about doing it, but you should learn about the implications of each before you start exporting hundreds of photographs.

What Else?

What else would you tell someone who’s just getting their feet wet with Lightroom? Leave us a comment below and let us know!

googletag.cmd.push(function() {
tablet_slots.push( googletag.defineSlot( “/1005424/_dPSv4_tab-all-article-bottom_(300×250)”, [300, 250], “pb-ad-78623” ).addService( googletag.pubads() ) ); } );

googletag.cmd.push(function() {
mobile_slots.push( googletag.defineSlot( “/1005424/_dPSv4_mob-all-article-bottom_(300×250)”, [300, 250], “pb-ad-78158” ).addService( googletag.pubads() ) ); } );

The post 5 Things You Should Know About Lightroom Before Starting by John Davenport appeared first on Digital Photography School.


Digital Photography School

 
Comments Off on 5 Things You Should Know About Lightroom Before Starting

Posted in Photography


5 Tech Trends Photographers Should Know (Report from CES 2015)

08 Feb
SamsungTomorrow

By SamsungTomorrow

The dust has settled on the Consumer Electronics Show of 2015, but with the thousands of new tech products hitting headlines this January, what trends, exactly, should photographers be taking note of? Amid the 4K TVs, wearable technology and unusual inventions, the photography industry welcomed a few new announcements in cameras, lenses, drones, data storage and printing. Here’s what technology is headed to the imagining world in 2015.

Cameras

Cameras were admittedly, a disappointment at this year’s CES. There were a handful of compacts and extended zooms from Canon and Panasonic, but only two cameras advanced enough to interest enthusiasts and serious photographers.

Nikon5500b


The most exciting CES camera announcement comes from Nikon, as an update to their mid-range APS-C camera. The Nikon D5500 replaces the D5300 as the camera giant’s middle option out of three entry level models. While the tech guiding the image quality remains largely unchanged, the D5500 is the first DSLR to feature a touchscreen. The D5500 also continues the trend of smaller camera bodies, shrinking the size gap between DSLRs and mirrorless cameras.

Pentax also announced a DSLR, but hasn’t yet released the name or full technical specs. It does look to be the replacement for the K-50 and appears to have an APS-C sensor, but with only a handful of details, it’s hard to say where the new camera fits in.

Lenses

While cameras are getting smaller, lenses are following that same trend. Out of Pentax’s three new lens announcements, the most notable is actually the 18-50mm kit lens, because it is collapsable. When collapsed, it appears to be as small as a prime lens. While collapsable lenses have been around for some mirrorless cameras, it’s a refreshing update to bulkier DSLR lenses.

new_pentax_camera


Nikon is following the smaller-is-best trend as well, with a 300mm that they say is the lightest full frame fixed focal length AF lens. They don’t appear to be sacrificing features to get down to the smaller size either, offering 4.5 stops of image stabilization, ED glass, and electromagnetic aperture control. Technology called Phase Fresnel helps keep the size down while fighting distortion.

Nikon 300mm f4

Drones

2015 could be described as the year of the drone, at least for CES anyways. Several dozen new models were on display with a variety of different features. Some models include a built-in camera, including one capable of shooting 4K video or 12 megapixel RAW, the DJI Inspire 1, while others allow you to rig any camera and lens mount. The new Airdog follows you (or whoever is wearing the wristband) around automatically taking video. While most use a remote, the Hexo+ is controlled completely via smartphone app. More are also becoming capable of ariel stunts, though these models have yet to see a battery life long enough to make them practical.

DJI Inspire 1

One thing is for sure, soon there will be a drone on the market to fit nearly any ariel photography need, and the more widely available the technology becomes, the more affordable it will be as well.

Memory

While storing images isn’t exactly exciting, CES 2015 brought more than a few image storage solutions worth noting. Samsung and Seagate both introduced remarkably small external hard drives, though a few stand out as advancing beyond just big capacity in a tiny size.

Canon has finally given a name and full details to the system they’ve been hinting at since 2010, now known as the Canon Connect Station CS100. Using wi-fi to connect to phones and wi-fi enabled cameras wirelessly, images and video can be easily uploaded to the system. The CS100 is designed to be used with a TV to display family photos and videos, like a Roku box but for photos. The 1TB of storage won’t be enough for serious professionals, but it’s worth watching to see how the technology expands in the future.

Canon connect station

Toshiba also introduced a new form of memory cards. While they appear to be more gimmicky than actually useful, it’s an interesting change and indicates some potentially interesting advancements in the future. The cards can be read with a NFC-enabled Android smartphone, but it only allows you to see 16 thumbnails and how much space is available. Actually transferring photos would require adding a power source to the card, and NFC doesn’t have the bandwidth for that kind of transfer yet. Still, seeing the advancements offers an interesting glimpse into what might be possible a few years down the road.

Printing

While Polaroid certainly may not seem like a company making big CES digital photography announcements, their Zip Mobile Printer is worth taking a look.

Zip mobile printer

Printing 2×3 images wirelessly from any smartphone or tablet, the Polaroid Zip is keeping in tune with the manufacturer’s foundation on instant, easily-shared physical images. But perhaps even more interesting is that the printer doesn’t use ink. Developed by Zink, the photo paper is made with embedded dye crystals. Heat from the printer determines which colors are activated to make the print, which is smudge-proof. The entire printer is about the size of a smartphone.

While designed for smartphone use, it’s worth noting and perhaps wondering if something similar might be in store in upcoming years for use with wi-fi enabled DSLRs and mirrorless cameras. The images print in under a minute, without the need for ink – an advanced version could come in handy for event photographers or photo booth style applications.

If this year’s CES is any indication, cameras and lenses will continue to get smaller without sacrificing on image quality, while accessories continue to expand in unusual ways. From drones to wirelessly printing images without ink, it’s bound to be an interesting year for photography-related tech.

googletag.cmd.push(function() {
tablet_slots.push( googletag.defineSlot( “/1005424/_dPSv4_tab-all-article-bottom_(300×250)”, [300, 250], “pb-ad-78623” ).addService( googletag.pubads() ) ); } );

googletag.cmd.push(function() {
mobile_slots.push( googletag.defineSlot( “/1005424/_dPSv4_mob-all-article-bottom_(300×250)”, [300, 250], “pb-ad-78158” ).addService( googletag.pubads() ) ); } );

The post 5 Tech Trends Photographers Should Know (Report from CES 2015) by Hillary Grigonis appeared first on Digital Photography School.


Digital Photography School

 
Comments Off on 5 Tech Trends Photographers Should Know (Report from CES 2015)

Posted in Photography


3 Principles of Light Behaviour Every Photographer Needs to Know

01 Feb

In this short video by Ed Vorosky he covers three rules about the behaviour of light. When you understand these principles you can then use them better in your photography.

  1. Light travels in straight lines
  2. The subject receives less light as the distance to the light source is increased
  3. The larger the light source relative to the subject, the softer the light source

Watch the video for a more detailed description and demonstration of each:

So what does that mean for your photography? How can you use this information in practice?

googletag.cmd.push(function() {
tablet_slots.push( googletag.defineSlot( “/1005424/_dPSv4_tab-all-article-bottom_(300×250)”, [300, 250], “pb-ad-78623” ).addService( googletag.pubads() ) ); } );

googletag.cmd.push(function() {
mobile_slots.push( googletag.defineSlot( “/1005424/_dPSv4_mob-all-article-bottom_(300×250)”, [300, 250], “pb-ad-78158” ).addService( googletag.pubads() ) ); } );

The post 3 Principles of Light Behaviour Every Photographer Needs to Know by Darlene Hildebrandt appeared first on Digital Photography School.


Digital Photography School

 
Comments Off on 3 Principles of Light Behaviour Every Photographer Needs to Know

Posted in Photography


A Starter’s Guide to Film Photography: What You Need to Know

28 Jan

Photography has never been more accessible than it is now in the digital age. Every cell phone features a camera, and those cameras are quickly becoming more advanced. DSLRs are becoming more affordable while offering increasingly higher quality and functionality. And the advent of mirrorless cameras are packing more photo punch into smaller and easier to use packages. So why would Continue Reading

The post A Starter’s Guide to Film Photography: What You Need to Know appeared first on Photodoto.


Photodoto

 
Comments Off on A Starter’s Guide to Film Photography: What You Need to Know

Posted in Photography


Winter Wedding Photography Tips: All You Need to Know

12 Jan

Winter weddings bring a lot of photography challenges because of weather, chilly winds and dark skies even in the day time. But still, many couples decide to have a winter wedding to enjoy the special discount on venues, catering and inexpensive honeymoon. The first thing that comes to our mind with winter weddings is bad weather– snowfall, temperatures below zero Continue Reading

The post Winter Wedding Photography Tips: All You Need to Know appeared first on Photodoto.


Photodoto

 
Comments Off on Winter Wedding Photography Tips: All You Need to Know

Posted in Photography


7 Things You’ll Want to Know Before Turning Pro

18 Dec

Seven Things You’ll Wish You Knew Before Turning Pro

Babb Photo

Do you remember your first job? Your first, proper, grown up full-time job. You probably walked in on your first day, not really having much of a clue about what was expected from you. Your manager probably sighed to themselves at the thought of moulding your young, inexperienced self into a viable member of the workforce.

It probably took time but with some guidance, a bit of a learning curve, and probably a few mistakes along the way, you made it.

Now replicate that situation, but imagine you don’t have a manager, or any colleges to bounce ideas off of and to ask for advice. Welcome to your first tentative steps into self employment as a full-time photographer.

You might have been running your business alongside a day job for a while before making the leap. You might have found a support network and accountant, and you might have a good idea of your own processes and policies.

You never know what you don’t know though, so I picked the brains of a group of full-time, professional wedding photographers to find out what they wish they’d known when starting out.

Babb Photo 2

1) “It doesn’t matter how good you are at taking photographs if you’re no good at marketing your business.” – www.blincpicsphotography.com

Building a brand, working on your organic search engine reach, getting featured, focussing on word of mouth referrals, and paid advertising can all be great ways of getting your name out there. It can be a little overwhelming to know where to start though!

dPS has some great articles on marketing techniques in its archive here.

2) “Don’t be scared to say no. It’s okay to turn away business if it’s not a good fit for you.”  – Smashing the Glass

We’ve all been there, especially early on in our careers. You accept any job that crosses your path, including those who just need a photographer within their budget, rather than specifically wanting YOU and appreciating your value.

Sometimes you take jobs because they pay you money and you need money. In an ideal world, though, it’s all about creating value and making people see that value, and building your business to attract the clients you want to work with.

Babb Photo 3

3) “Creating a good workflow is essential. You need to establish good habits from day one.” – Tux and Tales Photo

You might not think you need a client management system to start off with, but you do need a way of tracking your client work flow.

You also need to establish procedures, processes, and a routine that helps you get things done. How will you know when to send out a final invoice? How will you gather feedback from customers to improve your service going forwards? How will you manage expectations? You could use PDFs that explain procedures to clients and set expectations, or you could publish information on your blog or website that explains the way you work and your timescales.

Just because you work for yourself doesn’t mean you can let go of good structure and procedures.

Also do your accounts weekly. Trust me.

4) “The most unique selling point you have is you.” – Jordanna Marston

Be true to yourself, trust your gut and don’t worry too much about what you think you should be doing. Be true to yourself and you will attract clients that connect with you.

The most successful wedding photography businesses I know have their owner’s personality stamped all over them. They have created a brand, they create work that they believe in and that’s authentically them.

Babb Photo 4

5) “When photography is your passion and your business, you can end up doing it 24/7.” – My Heart Skipped

Don’t forget to explore, discover, be curious and do other things that fill your heart with joy. That joy and creativity will feed back into your photography.

Of course the opportunity issue can occur too and you might find that you only end up shooting when you’re working, rather than shooting for pleasure. Find a balance. Do personal work and have other interests and sources of inspiration.

Babb Photo 5

6) “You can’t make a silk purse out of a sow’s ear.” – Andy Gaines

It’s tempting to focus on editing and throwing a filter on everything to find your style, but your style will come naturally when you’re making good work.

What makes your image is light, composition, expression and moment. Not the latest trend in post-processing.

Babb Photo 6

7) “Keep work and play time separate, not only for yourself, but for those you love.” – Paula Ohara

If you learn how to fully switch off, you’ll be fully switched on when you need to be.

Work/life balance is so important. A huge tipping point for me was when I designated a separate work space. I have an office in my house now, but there was a time that I worked from the corner of my living room. It’s really good to have that separation, so you can switch off at the end of the day.

Keep at least one day a week free for yourself. Sunday is my day off now and I try to take it easy on a Monday, if my work load allows it. In my first year or so I routinely worked seven days per week, to keep on top of my editing and my day job commitments.

Make balance a priority. Although I haven’t quite mastered it myself yet…

Are you a pro, do you have any other tips you’d add to this list?

googletag.cmd.push(function() {
tablet_slots.push( googletag.defineSlot( “/1005424/_dPSv4_tab-all-article-bottom_(300×250)”, [300, 250], “pb-ad-78623” ).addService( googletag.pubads() ) ); } );

googletag.cmd.push(function() {
mobile_slots.push( googletag.defineSlot( “/1005424/_dPSv4_mob-all-article-bottom_(300×250)”, [300, 250], “pb-ad-78158” ).addService( googletag.pubads() ) ); } );

The post 7 Things You’ll Want to Know Before Turning Pro by Laura Babb appeared first on Digital Photography School.


Digital Photography School

 
Comments Off on 7 Things You’ll Want to Know Before Turning Pro

Posted in Photography