RSS
 

Posts Tagged ‘improve’

How Understanding Your Learning Style Can Improve Your Photography

28 Apr

Lady in the blue hat walked into my shot and I chose to include her to emphasize the size of the trees and the distance of the park

Introduction

It’s an exciting time, going to the camera shop, discussing options, making the final choice, parting with a reasonable sum of money. Finally the anticipation of getting home and unpacking your shiny new camera gear. Suddenly all the dials and buttons seem so much more confusing, the manual may not explain things enough. The menus are complicated so it’s easiest to switch over to Auto mode and leave it there while you try to figure it out.

Six months later what’s happening with your camera? Are you still using it? Is it still on Auto or have you tried other modes? Did you decide it was too hard and the camera is gathering dust in a cupboard somewhere (this is more common than you may realize)?

Toi Toi silhouetted by sunset – an experiment in backlighting.

Learning to learn is a skill that also needs to be developed

Learning a new skill is difficult. It takes commitment to put time and effort into the learning process. It requires you to admit you are at the beginner stage, where you will struggle to produce the quality of work that you want. Learning is a process which requires you to put some thought and structure into working out a process that is right for you. Different people learn in different ways, so it’s helpful for you to understand how you prefer to learn. Why?

  •  Value: If you are spending money on a course or a workshop, you want to make sure you are going to get the best value out of it.
  • Time: Learning takes time, so when choosing an option, knowing your preferences helps maximize your benefits.
  • Fun: It’s more fun if you are learning in a way that you enjoy.
  • Return: You are more likely to invest the time and effort into something that makes sense to you and shows a return on your investment.
  • Pain avoidance: No one enjoys doing something painful or difficult for the sake of it.
  • Find the best sources: Information is everywhere but varies in quality – you need to sift the good from the not so good.

Narrow depth of field, focused on the sparrow using a 70-200mm lens at a distance.

Learning styles

While there are many theories on learning styles, there are three basic types that apply to most people:

  1. Auditory learners – learn by hearing and listening – you may prefer to read things out loud as you store information by the way it sounds to you.
  2. Visual learners – like to see what you are learning as either pictures or words – you understand and remember things that you see.  May use flash cards or similar for studying.
  3. Tactile learners – you learn best by being hands on – touching things, taking them apart, twiddling with the settings (probably not listening to a speaker while you are doing it).

Of course, most people are a combination of all of these styles but you will likely have a preference for one or two. Understanding them can help you make choices around developing your own personal approach to learning photography. There are many options. Some don’t need lots of money but others might cost quite a lot, and it’s difficult to know in advance if it will be worth it.

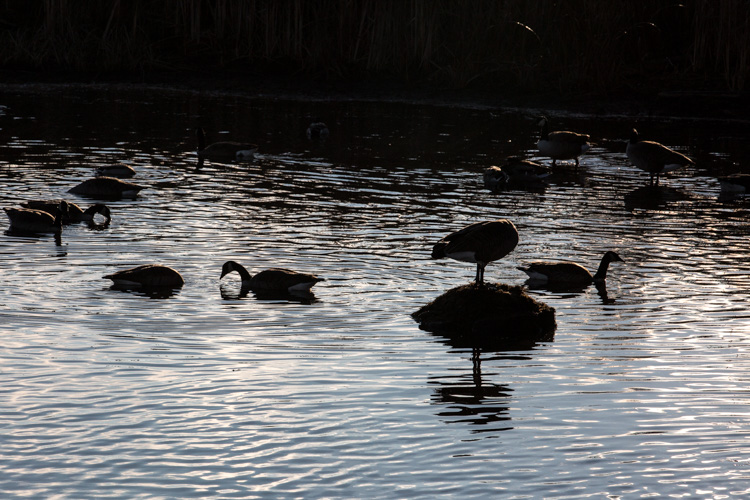
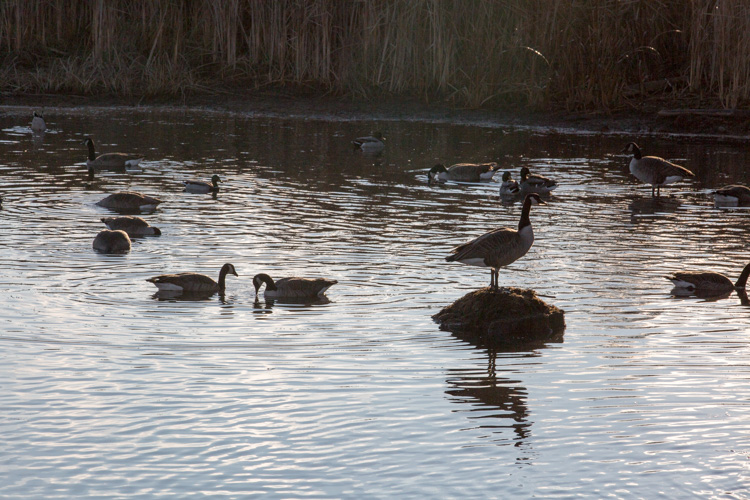
Swan Yoga – if you take time to sit and be with your subject, all sorts of interesting things might happen

Opportunities for learning photography

  1. Books, magazines and other printed material – can be purchased, downloaded in digital format or borrowed from libraries.
  2. Online tutorials – short tutorials on a specific subject.
  3. Video courses – can be watched for free online or many options can be purchased.
  4. Short workshops (a day or less) – attend in person – usually listening to a speaker plus opportunities for questions and hands-on experimenting.
  5. Long workshops (several days) – attend in person – some travel may be involved, often with a specific focus, planned talks plus time for independent shooting, discussion sessions, editing sessions.
  6. One-on-one tutoring – customized service offered by some professionals where you can have a training session targeted to a particular subject.
  7. Small groups – similar to one-on-one tutoring but with 3-5 students.
  8. Camera clubs – often organize workshops or field trips for members with the aim of learning for everyone, often a safe place to ask questions.
  9. Photography forums – online forums where photographers gather to post images and share information, might be general or around a specific subject (landscapes or birds).
  10. Online courses – structured learning courses hosted online aimed at a range of capabilities from beginner to advanced (rather than random videos) on specific topics.
  11. Formal education – University Degree courses in photography and other tertiary institutes are available.
  12. Apprentice or intern – offering to work for free assisting a professional and learning on the job.
  13. Mentor – someone experienced who is happy to answer questions, go for a bit of a photo walk, give you tips and advice (be nice and buy them lunch).
  14. Organize your own DIY photography retreat focused on specific techniques.
  15. PRACTICE!! – take your camera out and use it as often as you can.

Learning the hard way about photographing a subject in bright sunlight – washed out colors and harsh shadows as the result.

How to choose?

There are many choices listed above and even within just one of those options, there are many more choices – thousands of books available, tons of YouTube videos, loads of courses and workshop options. That workshop in Iceland might sound super exciting but are you okay with learning outside in some possibly dodgy weather, where you have to drive and hike for hours? Maybe you have to camp and will be tired and grumpy from getting up early in the morning to get the sunrise.

Would you prefer a structured classroom environment, where you can interact with students and the teacher for questions and discussion? Does it suit you better to watch videos at home after work, when the kids are in bed and you can pause them to write notes, or play the same step over and over until you understand it?

Practicing isolating a subject from the background and blurring with bokeh effect.

We are all busy people, with limited spare time to dedicate to our hobbies and passions. So it makes sense to maximize the value of your time spent learning. Understand what your personal preferences are and then take the next steps.

Learning factors

  •  If you like to read do you need to buy expensive printed books or magazines – does your library have them? Can you get them cheaper in digital format? Can you borrow them?
  • The voice of the person presenting a video course is important – do they speak in a language or an accent you can understand? Do they present in a style that you like? Are they to the point or do they waffle all over the place and take twice as long to get the point across? Is the video a “talking head” or are they demonstrating the subject matter in some way? Is it something you can listen to for hours without getting annoyed or a headache?
  • When attending a workshop is there time allocated for questions and discussion? What reviews do the workshop speakers get from other attendees?
  • Are there sample videos available for you to hear/see speakers present so you can get a feel for their delivery style and approach to the subject matter?
  • Do you get frustrated in a group of mixed ability? If you are new and need a lot of help do you feel uncomfortable asking questions, or if you are more advanced do you feel held back when beginners are present?
  • Is the subject matter relevant to what you want to achieve? Do you have a chance to clarify goals and outcomes with a workshop presenter or speaker in advance?
  • Do you have the time or money for more formal education? Is it really necessary or a nice to have in the overall scheme of things?
  • Does being in a group of strangers bother you or inspire you?
  • How much time or money do you have available?

All these factors can have an affect on how well you will learn. It would be a real shame to spend several thousand dollars on a workshop in an exotic location to find that you get very little out of it. Or you might discover the most helpful channel on YouTube that really resonates with you.

Using flash on a dull overcast day seemed like a good idea until you see the bright highlights in the final image

How do we learn?

Research tells us that the best way to learn is via a technique called “distributed practice” which is where you study in an intense burst and then take a break, and keep repeating this cycle. Photography lends itself well to this style as it is often taken up as a hobby to be done in spare time. So allocating a weekend or an evening when you have time to focus on a particular style or technique, and then having a break is actually okay.

Applying some variety to your learning process improves outcomes as well. You could apply this easily with photography by changing the subject matter you are shooting. Or take your camera into different situations. Moving between similar topics can help you see connections or understand concepts in a different way. Bear in mind that getting out of your comfort zone is an important learning opportunity too, so be prepared to push your boundaries as well.

NZ Native Tui – shot in an enclosure at a nature park

Teaching someone else also helps you retain knowledge more effectively too. Writing things down after a learning session is also a recommended way to improve knowledge retention. Perhaps start a photography blog and share your learning journey with others? Keeping track of your achievements is important to give you a sense of scale (i.e. how far you have come from being a complete beginner) and it also motivates you to move forward, knowing that you have mastered some learning steps.

Learning to see from a different viewpoint is important as a photographer, as is taking chances and experimenting – this is a chair

Summary

Ultimately everyone learns on their own but the learning doesn’t truly happen until there is a link between action and reflection (i.e. what was I trying to achieve and did I manage it?) You must be prepared to experiment, and with experimentation there comes failure.

No one likes to fail as there is a lot of ego tied up in success. So to truly learn you must suspend your ego, embrace failure and admit to yourself that you can improve. These days with digital it’s more or less free to shoot as many frames as you want. So other than the cost of time, it’s never been more cost effective to get into photography (after the initial hardware purchase, of course).

Both the foreground and background were important in this image, composition was a challenge

Spend some time on this

Learning also requires you to move out of your comfort zone and do different things, try new styles. It requires you to actively think about what you are doing, what outcomes you are trying to achieve, and analyzing how and why you did (or didn’t) achieve them. Yes, you can just go out and randomly shoot and put no more work into it than that. However, any improvement is likely to be slow. It’s difficult to produce work of a consistent quality if you don’t understand how you got there in the first place.

Take a bit of time to understand your best learning style, look at the available options, try a few out. Maybe ask for recommendations from other beginners. Accept that it’s okay to say, “I’m new at this and I need some help.” In general, many people are happy to offer advice, after all, they were once new at it too.

Playing with an old vintage lens with manual focus and odd imperfections that did strange things around the edges was a fun afternoon field trip.

Conclusion

Investing in your own personal learning process is important. Learning a new skill can happen via osmosis but improvement will be slow and the process is frustrating for many. So much so that they may give up completely as it was too hard. Having a considered structured approach gives you an achievable goal to aim for – it’s even better if you break it down into smaller milestones so you get some sense of accomplishment at each step.

Learning a new skill takes time, so why not ensure that your time is well spent in the learning you are doing. Often there is a cost involved, so investing time in understanding a good learning choice for yourself is also important. Keep in mind that your learning journey will never be finished, don’t get lazy or complacent once you reach a certain level of mastery, there will always be something new to try.

Most of all, it should be fun!

Long exposure as the tide was going out after sunset.

(Note:  All the images provided are ones taken by the author on her learning journey which started 10 years ago and is only now getting to the really fun stuff!)

The post How Understanding Your Learning Style Can Improve Your Photography by Stacey Hill appeared first on Digital Photography School.


Digital Photography School

 
Comments Off on How Understanding Your Learning Style Can Improve Your Photography

Posted in Photography


Upcoming Fujifilm GFX 50S firmware update promises to improve AF, exposure compensation

19 Apr

In addition to announcing a handful of new medium format GF lenses, Fujifilm also unveiled plans for the first major firmware update for the GFX 50S medium format camera. According to the Fujifilm press release:

“Fujifilm will release a free firmware update for the FUJIFILM GFX 50S later this spring, adding new functionality and improving operability. New functions include computer tethering via Wi-Fi and improved operability in exposure compensation and autofocus performance in difficult scenes.”

We recently reviewed the Fujifilm GFX 50S and while we gave the camera a gold award, it was noted that AF speed and reliability was one area ripe for improvement. We also were disappointed in the lack of a dedicated exposure compensation button, so perhaps this update will make accessing that functions less annoying. Furthermore, the addition of a Wi-Fi tethering feature should go a long way to making the GFX 50S appeal to studio shooters.

Articles: Digital Photography Review (dpreview.com)

 
Comments Off on Upcoming Fujifilm GFX 50S firmware update promises to improve AF, exposure compensation

Posted in Uncategorized


Five Ways to Improve Your Composition Skills

15 Apr

Composition is one of the most important skills you can learn as a photographer. The interesting thing about composition is that it’s all to do with observation and learning to see. You may need to invest in a book or two to help you understand the basic principles, but nothing more. It’s a much more cost-effective way of becoming a better photographer than buying a new camera or lens!

There are five things you can do right away to improve your composition skills.

Composition and photography

1. Learn how to use your camera properly

The aim is to know your camera so well that you can photograph without thinking about it. This comes through familiarity and practice.

Try this exercise. Close your eyes and pick up your camera. Which buttons and dials do you need to use to adjust aperture, shutter speed, and autofocus? How do you select the active AF (autofocus) point? How do you apply exposure compensation? If you don’t know the answers without looking, then read your manual. You should be so familiar with these settings that you can adjust them automatically, with no more than a glance at your camera.

Learn this simple approach

Digital cameras have lots of menu options and it’s easy to get caught up in adjusting settings. I suggest you ignore most of them and keep your approach simple. Here’s how:

  • Always shoot RAW format and set White Balance to Daylight or Auto and keep it there. Pick one camera profile and stick with it. You can adjust all of these settings afterward in Lightroom.
  • Don’t touch any settings such as lens corrections, contrast, dynamic range, noise reduction, sharpness or highlight preservation. These are all irrelevant if you shoot RAW.
  • Don’t switch between metering modes. Stick to one and learn how it works.
  • Understand your camera’s focus modes and when to use each one.
  • Learn how to select the active AF point so you can make the camera focus where you want.
  • Make sure you know how to switch to Manual shooting mode and when you should do so.
  • Learn how to apply exposure compensation, preferably without taking your camera away from your eye.

For most forms of photography, you don’t need to know anything more than that. The main exception is anything that involves fast action, as you may need to adjust your camera’s autofocus settings to suit. The idea is to know your camera so well that you can concentrate on observing the subject and finding the best possible composition.

Composition and photography

Some photographers say that the dials on cameras like the Fujifilm X-T1 (shown above) and old style film cameras help them adjust settings quickly.

Fiddling with your camera’s settings is a distraction. The more attention you pay to your settings, the less you’ll pay to the composition of your images.

2. Look beyond the obvious

The first viewpoint you find when you take a photo of something may not be the best or most interesting.

When you find a worthwhile subject spend some time with it. Try and look beyond what first attracted you to it. This is called working the subject.

  • What happens if you photograph it from another angle?
  • With another lens?
  • Or if you get closer or further away?
  • Is there anything interesting about the subject that you have overlooked?

For example, if you are taking someone’s portrait it might be because they have a captivating or beautiful face. But what else is interesting about them? Their clothes? Jewelry? Tattoos? Look beyond the face and see what you can find.

Composition and photography

I made some portraits of a friend of mine. But he also has interesting hands. After I made the portraits I asked him to hold his hands out and made this photo.

3. Educate your eye

You can learn a lot about composition by studying the work of master photographers. It’s time to pick some photographers whose work you like and get analytical. I like looking at photos taken decades ago. Photographers back then worked with much simpler equipment and didn’t have our technological advantages. Yet the best still created beautifully composed images.

So, how did they do it? When looking at somebody else’s work ask yourself these questions:

  • Are they working in black and white or color? How would switching from one to the other affect the composition?
  • What is the focal point of the image? Is it positioned in the frame according to the rule of thirds or could there be other principles at work?
  • What shapes and patterns do you see?
  • Is there any negative space in the photo? How much room does the subject have to breathe?
  • Is the photo balanced or unbalanced? What is the visual relationship between the various elements in the scene? Which are dominant and which are secondary in importance?
  • Can you tell what lens focal length the photographer may have used? How would using a different focal length affect the composition?
  • How did the photography create a sense of depth?

Questions like these deepen your understanding of the work of other photographers. The answers inform your work as you evolve as a photographer.

Composition and photography

This landscape scene was lit by the light reflected from the clouds and sky after the sun disappeared below the horizon. I first became aware of the beauty of this type of light when looking at the work of Galen Rowell, a famous adventure and landscape photographer.

4. Work with geometry and symmetry

Learn to look for shapes in your photos. A good place to start is with anything man-made, as we tend to build things with recognizable shapes like triangles, squares, and circles.

Repeating shapes create patterns and symmetry that can also form the basis of an interesting composition.

For example, when you look at this photo, what do you see?

At first glance, it’s a photo of an outdoor cinema screen in a Chinese village. But look closely and you start to see shapes. The rectangle of the screen is an obvious one. But did you notice the diamonds made by the pattern in the flooring? Or the organic shapes of the Chinese characters on the wall?

5. Use punctuation and gesture

Jay Maisel talks a lot about gesture and Bob Holmes talks about punctuation. Look up the work of these two photographers to learn more about these concepts.

Punctuation is the addition of something interesting, often a human figure, that completes a scene. The photo needs that little something extra to lift it above the ordinary. Punctuation is an important part of street and travel photography.

For example, this photo is completed and made stronger by the presence of the woman in the doorway.

Composition and photography

In his book “Light, Gesture & Color” Jay Maisel defines gesture as the thing that reveals the essence of the subject. Everything has it. Gesture takes us beyond the superficial to the essence of the subject and reveals itself through observation.

Imagine you are photographing a mountain. What do you see? Maybe it’s the shape of the mountain against the sky. The textures of the rocks scattered over the surface, the steepness of its cliffs, or the way that clouds wrap themselves around the summit. All these things are part of the gesture of the mountain, the things that make it what it is.

With people, gesture is a mixture of body language and attitude. If you are making a street photo it may be in the body language or appearance of somebody in the photo. If you are making a more formal portrait it is something in the model’s expression or body language that helps create mood or communicate character.

In this photo the pose and expression of the dancer are gesture.

Composition and photography - gesture

Punctuation and gesture are advanced concepts. But it’s worth thinking about how you can apply them to your photos, as they help make the composition of your images stronger.

Conclusion

Composition is an important skill. It takes time to master, but it’s worth the effort as the quality of your photos will improve immensely.

Do you have any other suggestions for ways to improve your composition skills? Please let us know in the comments. I’m looking forward to seeing what ideas you come up with.


Andrew is the author of the ebook Mastering Composition.

The post Five Ways to Improve Your Composition Skills by Andrew S. Gibson appeared first on Digital Photography School.


Digital Photography School

 
Comments Off on Five Ways to Improve Your Composition Skills

Posted in Photography


Why Wireless Tethering Will Improve Your Photography

20 Mar

As a photographer, shooting tethered is one of the best ways to improve your photography skills. Tethering helps you zoom into the details of your shots on a big screen so you can make adjustments as you go. It also encourages collaboration by keeping your photo subject or client engaged if they’re on location with you. In this article, I’ll explain what tethered shooting is and why wireless tethering with an app like CamRanger is the best choice.

What is tethering?

By definition, tethering is when a mobile device shares its internet connection with another device. This can be done through Wi-Fi, Bluetooth, or a physical connection cable (e.g. USB). Many mobile phones can tether to share their Wi-Fi with laptops or tablets. Similarly, cameras can tether as well. But in the case of tethered shooting with a camera, the purpose is to transmit images from the camera directly to another device such as a laptop computer or tablet.

CamRanger Wireless Tethering 11

The cheapest and most efficient way to shoot tethered is to use a wired connection. All you need is a standard USB cable that connects to your camera and tethering software such as Capture One, Adobe Lightroom, or DSLR Controller. Wired tethering is very cheap, and it’s extremely quick. There’s practically no delay between pressing the shutter on your camera and seeing the resulting image pop up on your screen. Get more info and a detailed step-by-step guide to wired tethering here.

What is wireless tethering?

However, the main disadvantage with wired tethering is the cable. It can easily get unplugged from your camera or laptop and mess up the tethered connection. The cable can also be a hazard on set, causing you or your photo subject to trip over it. This is where wireless tethering can come in handy. If you shoot on location and can’t be bothered with a cable limiting your movement, wireless tethering is an option you may want to explore.

When you tether wirelessly, you plug a device such as CamRanger into your camera and use it to create a wireless network. Any device such as a laptop or tablet can join that wireless network and your images are transmitted wirelessly every time you press the shutter button. You can even remotely control the camera from your tethered computer or tablet.

CamRanger Wireless Tethering 10

Why CamRanger is the Best Wireless Tethering Device

There are several wireless tethering devices available, and I tried many of them out in search of the one that would work best. My devices requiring connectivity included a Canon 5D Mark III, Canon 6D cameras, Android smartphone, and Apple laptop computer. Although it’s the most expensive, CamRanger is my wireless tethering device of choice. Here’s why:

1. Minimal stuff in the box

The contents in the CamRanger box are very minimal, consisting of just a few cables, a case, simple instructions, and the unit itself. I really loved the zippered case with a carabiner that easily fit all of the items. One thing that would be nice to have is the CamRanger hot shoe mounting device, which has to be purchased separately.

CamRanger Wireless Tethering

2. Intuitive setup

After unboxing CamRanger, setup is pretty simple. Begin by downloading the CamRanger app to your tethering device of choice. Currently, you can download the CamRanger app for iOS (iPhone and iPad), Android devices, Kindle Fire, and both Mac and Windows computers.

Next, switch on the CamRanger device so that it broadcasts a Wi-Fi signal. This might take a minute or two. Then connect your tethering device, with the app installed, to the CamRanger Wi-Fi network using the CamRanger’s serial number as the Wi-Fi password. Boom! You’re ready to shoot!

CamRanger Wireless Tethering 01

CamRanger desktop app allows for wireless tethering and remote camera control.

3. Compatible with Canon and Nikon

CamRanger will work with both Canon and Nikon DSLRs. For a full list of compatible cameras, check out their website.

How CamRanger actually works

Whenever you shoot tethered with CamRanger, the device stores image previews in a cache on your device. The actual files are still written to your camera’s CF or SD memory card like usual. While the wireless transfer of images can definitely be slow, this process can be sped up if you change your camera preferences to shoot in JPG only, or RAW + JPG. Transferring JPG images goes much faster than RAW images.

Another huge benefit of CamRanger is the option to switch the app into Client Mode. This allows you to hand your tethered device over to your client to preview images created in real time, without allowing them to remotely control your camera so you can keep shooting. It’s a clever feature that really adds value.

CamRanger Wireless Tethering 11

In practice, there are a few limitations of CamRanger to be aware of. First, note that wireless tethering still has a limited range of about 100-150 feet. If your camera and connected device drift outside of this range, you risk losing connectivity. Second, CamRanger does have a decent battery life of 5-6 hours by itself, but using it in conjunction with Live View on your camera can drain your camera batteries quickly.

CamRanger Positive Features

  • Very easy to setup and start using immediately
  • Built-in features include focus stacking, bracketing, and intervalometer
  • Minimal pieces, so it is easy to travel with
  • Lets clients easily see my images and give feedback
  • Reduces time in post-processing by making real-time adjustments when shooting
  • Eliminates the long, hazardous USB cable needed for wired tethering


What about built-in Wi-Fi?

If you have a camera with built-in Wi-Fi, you can probably remote control your camera and perform some tethering functions. As an example, I have the Canon 6D DSLR which has Wi-Fi connectivity. This is great for wirelessly transmitting images to my mobile phone and for doing some remote camera control via the Canon Camera Connect mobile phone app. However, no such app exists for my laptop, so I cannot wirelessly connect to my computer without using another device and USB cable. This is why I still use CamRanger to shoot tethered from my laptop, even with my Wi-Fi enabled camera.

CamRanger Alternatives

There are a couple of other popular CamRanger alternatives that also permit you to do wirelessly tethering. I tried both of these options out and found they weren’t nearly as comprehensive or reliable as CamRanger.

  • CamFi
  • Tether Tools Case Air

In Conclusion

Do you shoot tethered? What do you think about the pros and cons of wireless tethered shooting? Let me know in the comments below!

The post Why Wireless Tethering Will Improve Your Photography by Suzi Pratt appeared first on Digital Photography School.


Digital Photography School

 
Comments Off on Why Wireless Tethering Will Improve Your Photography

Posted in Photography


5 Things That Will Instantly Improve Your Photography

09 Mar

On now until March 21st (AUS time) get Anthony Epes’ Online Light Monkeys Photo Group – Yearly Membership – 55% OFF at Snapndeals. 

Having run photo workshops for several years now, I have noticed some familiar traits that many people share with their photography. So I’ve put together some tips that I feel will help you improve your photography – straight away. These little ideas have the potential to make a huge impact on your image creation.

5 Things That Will Instantly Improve Your Photography

1. Have patience

“Genius is patience. – Isaac Newton

Patience is a skill I think many amateur photographers sorely lack. This matters because photography is often a waiting game – waiting for the subject to get into position, for the light to change, or working the elements of your photo into a perfect composition. If you are not prepared to be patient, you’re not going to get many shots you like.

Many amateur photographers are so driven by the desire to have a full memory card at the end of the day that they don’t take the time to set up or wait for a great shot.

5 Things That Will Instantly Improve Your Photography

This could involve recognizing that the light isn’t great now, but it might change in an hour. Or it might be setting up a great composition and then waiting until the right person stands in a precise spot. It could be shooting a person or a scene over and over until you get an expression or angle that reveals something unique and interesting and creates a more impactful photo.

“You get more by waiting than you do by moving. You wait for the light to come and it will change the world in front of you.” – Peter Fiore

I believe a lot of it comes down to people’s expectations. For me, getting one amazing shot in a day’s shooting is a good result. Sometimes I go out and get nothing, sometimes I get a half a dozen, sometimes I just get one.

5 Things That Will Instantly Improve Your Photography
You need to be patient and take the time to work your scene and build a fantastic composition. Forget the next spot and the next subject. If you find something that really inspires you then stop, be patient, and work the scene until you’ve made the best photo possible. Take 10, 20, even 50 photos if you need to!

“Patience is not passive; on the contrary, it is active; it is concentrated strength.”– Edward G. Bulwer-Lytton

2. Free yourself from fear

“Everything you want is on the other side of fear.” – Jack Canfield

5 Things That Will Instantly Improve Your Photography

When you are involved in a creative act, you will at some point be faced with one of the greatest forces known to man – fear. It is pervasive in our lives, and it can create havoc with your photography.

For example, most of the photographers I teach have a fear of photographing strangers; this is very common. Now, you can either give into that fear and not photograph the subjects you really yearn to – or you can deal with.

I still get fearful sometimes after twenty-odd years in the business. Sometimes I go to new places and feel self-conscious, or get intimidated to shoot someone whose look I like. It doesn’t really matter what it is, fear is always fear and it can stop you from taking action if you don’t face it.

5-things-improve-your-photos-31

I deal with fear by just recognizing that it’s there. That fear has decided to show its face, and I just let it be there, knowing that eventually, it will drift off. I don’t let it stop me, that’s the key. After all, I love photography. I love the whole process of taking photos. Although this was said by an athlete, it is so relevant to photographers, and it’s worth reminding yourself that:

“You miss 100% of the shots you don’t take.” – Wayne Gretzky

Remember – on the other side of fear is possibly an amazing image.

3. Think geometrically

5 Things That Will Instantly Improve Your Photography

“The only joy in photography is geometry. All the rest is sentiment.” – Henri Cartier-Bresson

I read recently that Henri Cartier-Bresson would choose which images to print by examining his contact sheets and work out which have the best geometric composition. By looking at them when they were printed small, he could see the shape and form of the photo, rather than the subject. He would then choose his photos based on which of them had the best geometric composition.

Of course, the subject is important, their expression, the light, etc., but I like this idea of concentrating on the geometric elements of the photo. The reason being that all elements of the photo count, and having a strong organization of the shapes and forms, which is essentially the geometric elements of the photo, will create a strong composition.

“I like form and shape and strength in pictures.” – Herb Ritts

4. Stop fixating on your subject

5 Things That Will Instantly Improve Your Photography

I have noticed that many people learning photography become totally fixated on a subject that they love, but forget to compose the other elements of their photo.

For example, you see someone you think is awesome-looking. You start photographing them, without consideration for rest of the frame. You don’t look all the way into the corners of the composition, you overlap your subject with telephones or trees coming out of their head, nor do you notice lines running randomly out of the photo drawing the eye away from the subject.

Even though the frame may feel pretty small, often people don’t look at every part of the composition to see if the whole is working together. It is always about the whole image, not just what is currently fascinating you! It takes practice and concentration folks – all of the elements in your frame need to be relevant and work well with the subject.

5 Things That Will Instantly Improve Your Photography

5. Learn to become an observer

“To me, photography is an art of observation. It’s about finding something interesting in an ordinary place… I’ve found it has little to do with the things you see and everything to do with the way you see them.” – Elliott Erwitt

This tip is important. The best state of mind in which to take photographs is one of complete creative freedom, in the creative flow, where you are undistracted by your life outside of that very moment. Where you have forgotten about your to-do list and the thousands of emails you need to answer. You are just standing in the moment, looking around, noticing everything, and empty of thoughts about what else is going on in your life.

That’s easy right?

5 Things That Will Instantly Improve Your Photography

No, not always. For many, it’s super hard because what you do in your work and rest of your life requires skills which are exactly the opposite. Holding tons of small pieces of information, remembering, doing and rushing around with the business of life.

Much as we may like to think that photography is all about technique and kit, it is actually an inner game. I don’t really much care what gear you have, even though I love a new camera as much as the next person. The best photographers I’ve come across are completely in tune with their environment. They study the world around them and don’t constantly try to be in it doing, but instead, they look and observe.

This might be something you need to cultivate – and it’s totally possible to attain, even if it doesn’t come naturally. Something in you has been drawn to photography, to the visual world and to express yourself visually. So you already have potential inside of you to become a great observer.

5 Things That Will Instantly Improve Your Photography

Conclusion

Hopefully, these ideas have helped point you in the direction of deepening, developing and improving your photography. It’s so rewarding to work on simple ideas that have a great impact on your photos.

I’d love to know what you think of these tips, please comment below.

On now until March 21st (AUS time) get Anthony Epes’ Online Light Monkeys Photo Group – Yearly Membership – 55% OFF at Snapndeals. 

The post 5 Things That Will Instantly Improve Your Photography by Anthony Epes appeared first on Digital Photography School.


Digital Photography School

 
Comments Off on 5 Things That Will Instantly Improve Your Photography

Posted in Photography


5 Easy Ways to Drastically Improve Your Photographs for Beginners

11 Feb

It’s the easiest thing in the world to take a photo. You aim and press, and you’ve captured a moment, which in time will turn into a treasured memory. But did you know that with just a little bit more effort and barely any time, you can turn those captures into something more? Something that offers the subject the respect it deserves. Something that is a pleasure to look at even before the shimmer of nostalgia is sprinkled onto it by time, and something you’ll be proud to share.

With these five basic steps, you will notice an immediate improvement in your photos. Once you’ve started giving it just a little bit more thought, it’ll become a natural part of your photography.

Let’s begin!

1. Get low, get high — it’s all about perspective

The easiest and most natural way is to photograph from the level of your own eyes. There is nothing wrong with that, but it’s just one of many viewpoints — and perspective is essential to the way we relate to a photograph.

5 Easy Ways to Drastically Improve Your Photographs for Beginners - perspective

Shot at human eye level.

Want to expand your perspective? Don’t be afraid to move, crouch, or if you’re up to it, lie down before taking your photo. Climb up on a chair even. If you’re photographing a child, get down to their eye-level and see what a difference it makes to your photo.

5 Easy Ways to Drastically Improve Your Photographs for Beginners - perspective

Shot at bug level.

2. Less space, more content

Do you tend to point and shoot, without composing the photo? This leads to two very common outcomes. One of them being a lot of unnecessary space around the subject, the other we’ll discuss in step three below.

Does the person you’re photographing take up only a small portion of the image? Most of the time, that’s unintentional, and it just makes it harder to enjoy the look of the subject, whether it’s a person, flower, or a sculpture.

Try filling the frame with a face. Don’t be afraid to get closer (unless you’re photographing a venomous snake).

5 Easy Ways to Drastically Improve Your Photographs for Beginners - get close 5 Easy Ways to Drastically Improve Your Photographs for Beginners - get close

3. A view askew (off-centered)

The other common result of pointing and shooting is that the subject almost always ends up being in the center of the frame. Sometimes, that works beautifully, but most of the time it’s just boring.

If you’re photographing a person, try to place them (particularly their eyes) off-center in the image. Be aware of their movement or line of sight, and leave room for that. Meaning, place the subject to the side they’re not moving into or looking at, and put more space in front of them in the direction they’re facing.

5 Easy Ways to Drastically Improve Your Photographs for Beginners - off-center

The statue is entered in the frame here and the image is very static (boring).

5 Easy Ways to Drastically Improve Your Photographs for Beginners - off-center

In this image there is more room in front of the statue in the direction the hand is pointing, leaving room for the little bird to “fly”.

To learn more about composition, check out these composition tips.

4. When too much is just right

If you’ve been doing photography for a while, you’ve probably heard how important it is to control the exposure of your images correctly (in other words avoiding both too little and too much light. It’s a basic rule of photography, but let me suggest that you try breaking it.

In my experience, too little light is more of a problem than too much, and sometimes, too much is just perfect — especially if your subject is backlit.

Try it and see what you think!

5 Easy Ways to Drastically Improve Your Photographs for Beginners

5. Space is cheap

Don’t worry about taking too many photos. Really! One of the great things about digital photography is that you can snap loads of shots and choose among them later for the best ones to keep. Don’t miss a moment because you hoped to capture it perfectly in one go.

5 Easy Ways to Drastically Improve Your Photographs for Beginners

5 Easy Ways to Drastically Improve Your Photographs for Beginners

5 Easy Ways to Drastically Improve Your Photographs for Beginners

Try taking photos the way you would normally, then experiment with the steps presented above. When you look through your photos, choose the ones you like and delete the rest. Think a bit about why you like the ones you kept and why you chose to delete some. It’s a fun, easy, and cheap way to learn and to find your own style.

Lastly

As always, rules are meant to be broken! But remember that the more familiar you are with the rules, the more creative your breaking of them can be. If you try out any of these steps, I’d love to see your creations in the comments below!

googletag.cmd.push(function() {
tablet_slots.push( googletag.defineSlot( “/1005424/_dPSv4_tab-all-article-bottom_(300×250)”, [300, 250], “pb-ad-78623” ).addService( googletag.pubads() ) ); } );

googletag.cmd.push(function() {
mobile_slots.push( googletag.defineSlot( “/1005424/_dPSv4_mob-all-article-bottom_(300×250)”, [300, 250], “pb-ad-78158” ).addService( googletag.pubads() ) ); } );

The post 5 Easy Ways to Drastically Improve Your Photographs for Beginners by Hannele Luhtasela-el Showk appeared first on Digital Photography School.


Digital Photography School

 
Comments Off on 5 Easy Ways to Drastically Improve Your Photographs for Beginners

Posted in Photography


An Unconventional Composition Technique to Improve Your Photos

01 Feb

Last month I sat down and reread Michael Freeman’s book, “The Photographer’s Mind.” which I do occasionally. I find that by revisiting the words of other photographers I remind myself of the multitude of tools available to us. There’s so much we can do to create fresh and amazing photographs.

One of those ways is to push our skills and update our thinking. I think I’ve read through Freeman’s book about two or three times now. Every few years I take it off the shelf again. His books are insightful and interesting to read. Freeman offers up unique ideas for composition using both conventional and unconventional techniques. The books are readily available. You can also check out our review of one of Freeman’s other books here; “The Photographer’s Eye”. In this article, let’s journey through one of the concepts he discusses in his book, “Engineered Disorder”.

An Unconventional Composition Technique to Improve Your Photos

The details of the image are broken up into sections by the heavy shadows.

What is Engineered Disorder?

Freeman explains that Engineered Disorder is the active effort of a photographer to use non-conventional methods of composing photographs. Essentially, we are breaking the rules to create interesting images. Engineered Disorder means that we forget about conventional methods like unifying elements within the frame. We might allow ourselves to create uncluttered compositions. In one chapter Freeman talks about different methods of creating Engineered Disorder and bucking the system. He mentions using techniques such as disconnects, disruptive foreground, breaking the frame, superimposed layers and extremes of contrast. Maybe these terms sound complicated and a little too complex to understand, but they don’t have to be.

Let’s break down one of these techniques and see what’s involved in creating Engineered Disorder. We will discuss the use of extreme lighting or chiaroscuro to create disconnect within an image. It’s one of my favorite techniques. I love to include deep blacks and bright highlights in my compositions.

Chiaroscuro

Chiaroscuro – chi·a·ro·scu·ro – the treatment of light and shade in drawing, painting, and photography.

Using this technique means that we employ very hard lighting to break up the unity of a composition. The image becomes a series of pieces that communicate meaning but are broken up by dark shadows and bright highlights. Conventional composition techniques would say that using this type of technique makes for a bad photograph, but remember we are pushing the elements of composition.

An Unconventional Composition Technique to Improve Your Photos

The strong shadows in this image hide some details from the viewer. The leaf can only be viewed in pieces. This means a viewer has to pause and take in each part of the image separately and then piece together the whole scene. Making a viewer stop and study your image is important. Given the number of photographs out there you want to make viewers take some time to digest your images rather than scan through and move on. 


Experimenting with dark and light

Consider my careful experimentation with Chiaroscuro. This image portrays the common Canada goose in a much more unique fashion. In the opening moments of golden hours, these geese become elegant shadows. The different sections of light and dark create interesting graphic qualities within the image.

An Unconventional Composition Technique to Improve Your Photos

In this second image, I’ve used auto tone to create a more conventional image. While the actual shot is very similar, these two different treatments create considerably different photographs. Which one do you prefer?

An Unconventional Composition Technique to Improve Your Photos

A more conventional exposure.

Other examples

Here’s another example of Chiaroscuro. This is a photograph of a unique area near my home. Everyone calls this place The Badlands. The red and gray clay create these beautiful graphic designs which draw visitors to the area. The hills are in danger of being destroyed by visitors, but the area is truly beautiful. The shadows and the light create beautiful diagonal lines in this particular image.

An Unconventional Composition Technique to Improve Your Photos

This are is now off limits to visitors because of the damage caused by walking on the hills.

In this final image, the light and darks highlight different circular objects. Perhaps this image isn’t as disconnected as the others but it still presents a unique treatment for the door of a fishing boat. The image focuses on graphic design elements of the boat rather than the uses of the vessel. The image has been turned into an abstract and most viewers will need to analyze the image before they can determine the exact subject matter.

An Unconventional Composition Technique to Improve Your Photos

Conclusion – your turn

Experimenting with different techniques is never a bad thing. You can learn and improve your photos by playing with unconventional techniques. Creating these images certainly pushed the dynamic capabilities of my camera. Exposing for deep shadows can be a challenge all on its own, but it’s a lot of fun to try out these different techniques.

While we’ve only discussed one of the methods for creating Engineered Disorder, these three examples clearly highlight the technique. It’s better to fully understand just one compositional method rather than scratching the surface of several techniques. Give it a try, and go a little bit extreme. Break away from the conventional and search for ways to compose images that harness the power of Engineered Disorder in your photography. Please share your results in the comments below.

googletag.cmd.push(function() {
tablet_slots.push( googletag.defineSlot( “/1005424/_dPSv4_tab-all-article-bottom_(300×250)”, [300, 250], “pb-ad-78623” ).addService( googletag.pubads() ) ); } );

googletag.cmd.push(function() {
mobile_slots.push( googletag.defineSlot( “/1005424/_dPSv4_mob-all-article-bottom_(300×250)”, [300, 250], “pb-ad-78158” ).addService( googletag.pubads() ) ); } );

The post An Unconventional Composition Technique to Improve Your Photos by Erin Fitzgibbon appeared first on Digital Photography School.


Digital Photography School

 
Comments Off on An Unconventional Composition Technique to Improve Your Photos

Posted in Photography


7 Vital Tips to Improve Your Candid Street Photography

21 Jan

If people watching is in your nature, you owe it to yourself to try some street photography. It can be addicting, and the fleeting moments you can capture will be one of a kind. It is a genre of photography similar to fishing. The more you enjoy the process, and the more you cast your reel out there (is this correct fishing terminology?), the more you will catch.

Time and experience trump everything due to the difficulty, and while perseverance is the only way to do street photography well, there are some important tips and strategies that can set you off in the right direction. Here are some of my favorites.

7 Vital Tips to Improve Your Candid Street Photography Polka Dots and Pink Shoes, Subway, 2012.

1. Travel light and with minimal gear

Many of you will have a DSLR and a mid-range zoom lens. While it is fine to shoot street photography with this equipment and many do (and even more start out this way), lightening your load will make a huge difference. You will have more energy, your coordination will be better, and you will be faster and more willing to explore. You will also be able to photograph in situations where you would not want to bring a large camera.

Not only are micro-4/3rds and mirrorless camera systems lighter, but they look less intimidating to the people you are photographing. If you have a DSLR, consider using a 35 or 50mm prime, or a pancake lens for these reasons. Fortunately, you do not need the fastest versions of these lenses, so it will not be quite as expensive. A 35mm f/2 is usually about half the size of a 35mm f/1.4, and Canon’s 50mm f/1.8 is both small and only $ 125.

7 Vital Tips to Improve Your Candid Street Photography Greene Street, New York Street Photography

Prime lenses

Prime lenses will restrict you to a specific focal length, but this limitation can actually be quite freeing. By sticking to a focal length such as 35mm or 50mm (the two favorite lenses for most street photographers), you will learn to see how the lens sees.

You may miss out on certain moments by not having a zoom, but at the same time, you will be able to capture more quality images within the ideal distance for the lens that you are using. You will be quicker and more spontaneous with your camera. You will even start to think more about your perspective and framing without having the luxury of the zoom, and as the old saying goes, you will begin to zoom with your feet.

2. Raise your ISO

7 Vital Tips to Improve Your Candid Street Photography SoHo, New York Street Photography

It used to be taught that you always needed to use as low an ISO as possible. This is because the early digital cameras were terrible at high ISOs, particularly over 400. Luckily, new digital cameras blow the old ones out of the water in terms of high ISO ability. You can now shoot at ISOs of 1600 and 3200 with beautiful looking grain/noise, but the stigma of using high ISOs still exists.

For street photography, I will typically shoot at ISO 400 in sunlight, 800 in light shade, 1600 in dark shade, 3200 at dusk, and 6400 at night. With an entry level or less advanced camera, I would go down one stop in ISO, i.e. ISO 200 in sunlight and up to 3200 at night.

Benefits of high ISO

This gives us a huge advantage. Being able to raise our ISOs this high not only allows us to shoot handheld in dark situations, but it also allows us to simultaneously shoot with a faster shutter speed to freeze motion and a small aperture to maximize the depth of field.

Some photographers prefer a shallow depth of field, but in the fast moving world of candid photography, I prefer a large depth of field for a few reasons. First, if you miss the focus on your subject, they can still turn out sharp. If you are photographing at f/2.8 on the other hand, your image will be ruined if you miss the focus. Next, since context is very important in street photography, if you have multiple subjects at different depths or important background elements, it will allow everything in the frame to be relatively sharp.

I prefer to shoot at 1/250th of a second to guarantee that there is no motion blur in my subjects, although I will go to 1/160th or 1/125th in the darkest of situations. In bright light, I will shoot at 1/320th or 1/400th of a second. A high ISO is what allows me to shoot with these speeds, no matter what the lighting is like.

3. Pick a spot and wait

7 Vital Tips to Improve Your Candid Street Photography Broadway, New York Street Photography

Street photography and going for a walk go hand in hand. Sometimes you just want to take your camera and explore on a nice day. However, by constantly walking, you might be doing yourself a disservice. Instead, try to find some promising locations on the way and linger there for a while as you wait for something to happen.

Picking one spot does a few things. First, it allows you to combine a good location with an interesting moment. If you find a quality location and just take a quick photo and move on, you’re killing so much of the potential. By waiting, you give yourself more time for that magical moment to happen. It’s when the right location merges with the interesting moment, that a great photograph appears.

It’s when the right location merges with the interesting moment, that a great photograph appears.

You will also be faster at noticing your surroundings and quicker with your camera because you will be focused on looking around instead of walking. In addition, people will be coming into your scene and entering your space instead of you entering their space, so it makes the whole practice of street photography easier and less confrontational.

Camera snap

A small but important tip that goes hand in hand with this idea has to do with the camera snap. The camera snap is the quick, instinctive removal of the camera from their eye that photographers do immediately after clicking the shutter. It is the motion that tips your subjects off to the fact that you just took a photo.

By picking a spot and waiting for a subject, you can be as candid as possible. Just put the camera to your eye, take the image, and keep it there as the subject leaves your scene. This will make it seems like you were just photographing the background and waiting for them to get out of the way.

4. Know what to say if someone stops you

7 Vital Tips to Improve Your Candid Street Photography

No matter how you approach it, there is an inherent creep factor to street photography. Some of your subjects will understand and be flattered, while others will think you are the weirdest person on the planet. If you like to photograph your surroundings and culture, people are a big part of that. Including them in what you capture can be a big part of telling the story of your surroundings, and there is nothing wrong with it.

While tough situations are rare, particularly if you handle yourself in the right way, knowing what to say ahead of time is very important. If someone asks if you took their photo, own up to it and tell them what you were doing. Talk to them and explain why you found them interesting. This will flatter some people, but others will still not understand. I always keep a business card with me and offer to send the photograph if someone emails me for one.

Keep your cool

Always keep a smile on your face. If someone seems angry for any reason, there is no need to get defensive or angry back. You don’t have to explain that it’s in your legal right (depending on where you are photographing of course) unless it comes to that. That’s not the best thing to bring up right away because it can make people even angrier.

Instead, figure out how to diffuse the situation and tell them that you did not mean to make them uncomfortable. I’ve offered to delete a couple of photos over the years when I felt it was necessary. The ability to diffuse a situation is very important, even though I have only had one or two uncomfortable situations over a 15 year period of frequent shooting.

5. It’s not just about people

7 Vital Tips to Improve Your Candid Street Photography

It is a common thought that street photography is only about capturing people walking down the street, on a beach, or in public. That’s just not the case. Street photography is about candid photography of life and culture. While that can and should include people sometimes, other times it can be about nearly anything else. Capture daily scenes and backgrounds that you find to be interesting.

They can be weird images. Capture something unique. You do not always have to take the prettiest or most epically beautiful photograph. Capture something that makes someone think or that throws them off balance. Capture images for yourself, and ones that you know some people will not understand or like right away. It is not your job to please everyone. It’s your job to take a good photograph.

Be spontaneous and go for it

Be spontaneous. With other forms of photography, you can be a perfectionist about every detail. While it is also important to think this way for street photography, so many of these decisions are made in a split second. Let yourself go and be spontaneous with what you capture. Whenever you feel there is potential for a strong image, even if you aren’t sure, go for it. Many will fail, but some of those moments will end up being the best photos you have ever taken.

Go somewhere that you think will make it tough to capture an interesting photograph. Sometimes you will find that you will be able to capture unique content in areas that others would think of as quiet or boring. There are good photographs everywhere and the best photographers have a way of finding them anywhere.

6. Group your photos while editing

7 Vital Tips to Improve Your Candid Street Photography - Three Men, Gucci, New York Street Photography

This is not a tip that all street photographers adhere to. Some like each of their photographs to live on their own. However, many prefer to group their work by feeling, ideas, or themes. For some, the book is the ultimate form of display for street photography.

Group your photos based on feel and sequence them into a loosely based narrative of some sort. Come back often and add to and take away from it. Over time, you will notice that ideas will grow organically. It will help inform you about what to capture when you are out there. These ideas will develop as you grow as a photographer.

Before you think about putting together a book, purchase a simple cork board for your office wall and fill it with 4×6 and 5×7 images. Constantly print and replace them to create a cohesive wall of images. It is a lot of fun and a great way to view your work and your progress.

7. Explore the work of other photographers

7 Vital Tips to Improve Your Candid Street Photography

This is such a simple tip but it is immensely important. In your free time, look up the work of all types of street photographers and study their portfolios. Explore the content, the technique, and the styles that you like. Watch videos of these photographers in action to see how they approach the street. Go to gallery shows and look at real life prints to train your eye. This will give you a range of ideas for what to capture the next time you are out shooting.

The fascinating thing about street photography is that while the content is the same for all of us, what we each come back with is completely different. Studying the styles of different photographers will help inform what is possible for you to create.

It is inspiring and fun to do. Start a photography book collection or even purchase a couple prints for your walls. The more you surround yourself with it, the better you will become, the more ideas you will have, and the more inspired you will be.

Some photographers to start out with are Henri Cartier-Bresson, Garry Winogrand, Robert Frank, Helen Levitt, Lee Friedlander, William Eggleston, Walker Evans, Daido Moriyama, Martin Parr, Elliot Erwitt, Joel Meyerowitz, Mary Ellen Mark, Bruce Davidson, Saul Leiter, Trent Parke, Alex Webb, Vivian Maier, and Bruce Gilden.

Conclusion

Now go out there and have some fun. The biggest tip is that the more time you spend shooting, the better images you will come back with. So shoot with some regularity and do it in the way that you find the most fun so you will continue to practice.


If you’d like to learn more about Street Photography, then please check out my ebook The Essentials of Street Photography.

googletag.cmd.push(function() {
tablet_slots.push( googletag.defineSlot( “/1005424/_dPSv4_tab-all-article-bottom_(300×250)”, [300, 250], “pb-ad-78623” ).addService( googletag.pubads() ) ); } );

googletag.cmd.push(function() {
mobile_slots.push( googletag.defineSlot( “/1005424/_dPSv4_mob-all-article-bottom_(300×250)”, [300, 250], “pb-ad-78158” ).addService( googletag.pubads() ) ); } );

The post 7 Vital Tips to Improve Your Candid Street Photography by James Maher appeared first on Digital Photography School.


Digital Photography School

 
Comments Off on 7 Vital Tips to Improve Your Candid Street Photography

Posted in Photography


Improve Your Photos with the Very Best Photo Editing Apps

12 Jan

We snap photos so fine, we don’t need editing apps … but every now and then a photo needs a touch of sharpening, or a cooling filter, or a clip art robot, just to spruce it up.

Who are we kidding? We’re obsessed with editing apps. And so are you – we asked!

Read along to see our favorite editing apps, and the favorites of all of our followers.

You’ll be a pro editor in no time, whether you snap perfect pics or not.

(…)
Read the rest of Improve Your Photos with the Very Best Photo Editing Apps (638 words)


© laurel for Photojojo, 2017. |
Permalink |
No comment |
Add to
del.icio.us

Post tags:


Photojojo

 
Comments Off on Improve Your Photos with the Very Best Photo Editing Apps

Posted in Equipment


DEAL: 2 Amazing Courses to Improve Your Landscape Photography

21 Dec

Our 6th deal of our 12 Days of Christmas Sale brings you two amazing online video courses that will improve your Landscape Photography – at 60% off the regular price.

NewImage

Today only you can pick up these two courses for just $ 54 (normally $ 188).

This value packed Landscape Photography bundle includes:

Creating Impact Course by Varina Patel
Go beyond the basic rules to build stronger compositions with visual impact. The Creating Impact course will help you to establish your creative vision, develop a solid workflow that will make that vision a reality and help you take beautiful landscape photos.

This course normally sells for $ 134.

Practical Lightroom Tutorials by popular dPS writer and renowned Landscape Photographer Anne McKinnell.

Anne will teach you how to stop being overwhelmed by Lightroom and to start using it to transform the Landscape (and other) images that you take. Anne authored our popular ultimate guide to Landscape Photography article, and we’re sure you’ll enjoy these lightroom tutorials just as much!

This course normally sells for $ 49.

This Deal Won’t Last

You are going to love these courses – they have been developed by two of our favourite landscape photographers and contain so much practical information that will help you to take some beautiful photos.

Grab both of these courses today – with hours of video training and 40 online videos – for just $ 54. A Saving of $ 129!

This offer won’t last because tomorrow’s is just 24 hours away – so avoid disappointment and pick it up today here.

googletag.cmd.push(function() {
tablet_slots.push( googletag.defineSlot( “/1005424/_dPSv4_tab-all-article-bottom_(300×250)”, [300, 250], “pb-ad-78623” ).addService( googletag.pubads() ) ); } );

googletag.cmd.push(function() {
mobile_slots.push( googletag.defineSlot( “/1005424/_dPSv4_mob-all-article-bottom_(300×250)”, [300, 250], “pb-ad-78158” ).addService( googletag.pubads() ) ); } );

The post DEAL: 2 Amazing Courses to Improve Your Landscape Photography by Darren Rowse appeared first on Digital Photography School.


Digital Photography School

 
Comments Off on DEAL: 2 Amazing Courses to Improve Your Landscape Photography

Posted in Photography