
© James Brandon | All Rights Reserved
As photographers and artists, we all hit creative walls. We work and work to improve our skills, and we learn new things, and then it seems we hit a wall. Maybe our images start looking dull to us, like they are missing something. Sometimes I think we over complicate problems like this, searching for some magical trick out there that will give us the creative perspective we are looking for. If you are like me, you know that usually doesn’t work. Instead, here is a collection of tips you can go out and try today to improve your photography and creative eye. Pay no attention to the order, they are all completely random and spontaneous.
1. Visit an Art Museum | Fall in Love with Art
I can’t stress enough the importance of art appreciation as a photography. If you want to get better at photography, become an admirer and student of the world of art. Visit a museum and spend the day studying the work of great artists. Better yet, take a pen and paper with you. When a painting or work of art grabs your attention, jot down why. Write down everything you love about it, and the reasoning behind it. If you find something you don’t care for, write that down too.
Museums are abundant in most big cities. In fact, in a lot of cases, they are even free. If they aren’t free, there may still be ways to get in for free. For example, if you have a debit or credit card through Bank of America, you can get in free at over 100 museums nationwide.
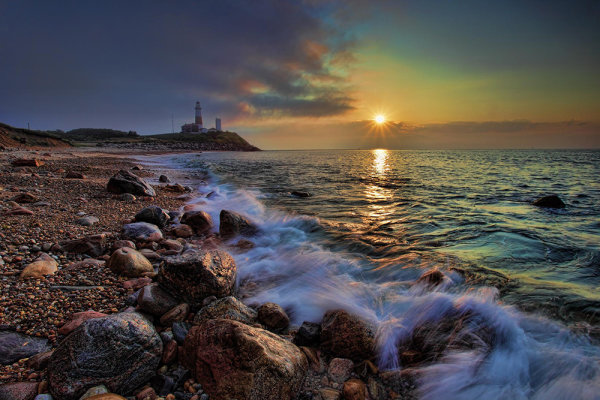
2. Freshen Your Perspective
Take a day and focus on perspective. Experiment with different camera angles that you may not have tried before. This tip is only limited by how far your willing to get out of your comfort zone. If your shooting a portrait session, bring a ladder with you. If you don’t have a ladder, climb a tree or find a perspective above your subjects head. Not only is this different, looking up is almost always flattering to your subjects features, especially if they are prone to double chins! If you are photographing flowers, consider shooting them from underneath. While this may get you dirty, I promise it will be rewarding. Play with the angle of the sun and capture the translucency of the flower as the sunlight pours through it. A fresh perspective can almost always give you that creative boost your looking for.
3. Take a Trip To Your Local Zoo
Visiting a zoo is one of my favorite things to do as a photographer. Mainly, because I’m doing it simply for me. There is no pressure. I don’t have a client that wants a certain type of image, I don’t feel the need to create a certain look or feel to the photos. It’s just me, my camera and hundreds of exotic animals at my fingertips! Zoos are cheap, and most of them have one day a week where you can even get half off.
Here’s a challenge: When you go, try and conceal the fact that the animals are at the zoo. That means I had to get creative with the way I framed my shots. This can be challenging at times, but it’s very rewarding. If there is a fence, an obviously fake looking rock or object, or if the surroundings just don’t click, don’t take the picture. Or, simply change your perspective until the framing works. This mindset will get your creative juices flowing, and I promise you will have a blast!
4. Minimize Your Possibilities
That’s right, minimize. While being able to shoot thousands of images is nice, it can also dull your creative thought process. With seemingly unlimited images you can just click away, firing off shots left and right all day long. With this mentality, you’re sure to get a few keepers. Right?
Consider this instead; next time you’re out taking pictures (and not for a client!), take the smallest memory card you have. One that will only allow you a very limited number of shots. And don’t take any other cards. Or, if you only have large capacity cards, just set a limit in your head of only taking 50 images the entire day.
All of the sudden, there is a certain and definite brevity in the amount of images you can take. You can’t just walk around snapping pictures at everything you see. This will take you back to the limitations of film, and you will have to carefully consider each shot you take. The flip side of this is that (again) your creative juices will begin to flow, and you will be more alert and keen to what is going to make a good image.
5. Take Your Camera Everywhere
In his book Visual Poetry, Chris Orwig states that, “Even without taking pictures, carrying a camera enhances life.” I couldn’t agree more. Carrying a camera is an instant way to put your senses on high alert. It causes you to look at the world as if your camera was always pressed to your eye. It gives you a reason to slow down, to take everything in, no matter where you are. Commit to carrying your camera with you everywhere, at least for a certain amount of time. Take pictures knowing full well that the world may never see them. Create photographs of everyday things, moments in time that normally wouldn’t require a photograph. The trick will be to see these subtle events in a new way, and to find a way to make them interesting. Even if you just use your camera phone, this tip is a solid way to improve your creative eye.
6. Always Be a Beginner
The moment you adopt the mindset that you’re the best at something (or even the best in your circle), that’s the moment you become unteachable. Great photographers like Douglas Kirkland always keep the mindset of a beginner. I’ve met my share of people who think they know it all. You know the kind. You try and tell them something that you’ve learned, and they shoot you down, saying they already knew that. Or they refuse to except anything new because they aren’t willing to change their ways. I’m telling you, this is a death sentence to your creativity. Set aside your pride and be willing to learn from others, even if you feel you’re at the top of your game. If are at the top, be willing to learn from others who aren’t.
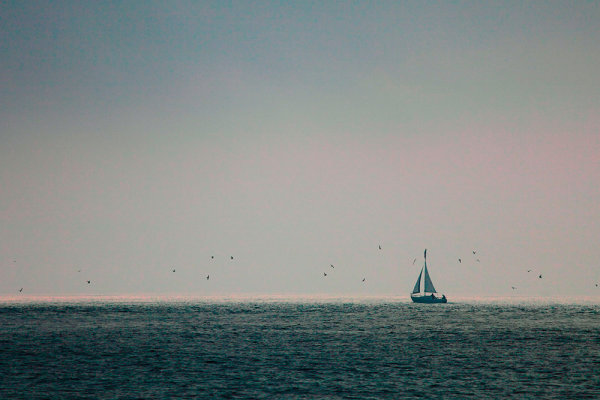
7. Pick a Color, Any Color
Pick a color and create a portfolio around that color. If you have time, do this with several colors. Go out and create images that obviously and predominately focus on a single color. If you choose blue, consider subjects where this color is evident. Focus on pictures by water, or the sky. Go out past sunset and into the realm of “nautical twilight,” when the setting sun casts shades of deep blues across the sky and earth. Find textured walls that are painted in different colors and shades of blue. If you choose yellow, scout out a field of sunflowers. Shoot subjects straight into the sun, bathing the frame in golden sunlight. You can make the color even more obvious in post processing by applying filters of your chosen color over the image.
8. Shadow an Admired Photographer
For the most part photographers are nice, generous, and giving people. Sure, there are plenty out there who won’t give the time of day to a photographer looking for a mentor, but who wants to shadow or even follow the work of someone like that? Find a photographer that inspires you and form a relationship with them. Offer to take them out to lunch. If you’re lucky, you will be able to learn from that person, and maybe even shadow them. Ask to hold lights for them during their photo shoots, or just carry around their gear. You will learn a lot just observing how they interact with their clients. If they shoot landscapes, the same applies. Offer to carry their gear as they scour the places they photograph. Invite them out for a photo walk and offer to buy dinner, or even a drink afterward. Becoming a great photographer is a tough road to take by yourself, having a mentor can make the difference between success and failure.
9. Discover the Golden Ratio
Also known as the Golden Mean, Divine Proportion, the Fibonacci Rule, the Rule of Phi, etc. The Golden Ratio is a common ratio discovered by Leonardo Fibonacci and found throughout nature, architecture, and art. The ratio is believed to make things appealing to the human eye. In nature, it is also believed to be the most energy efficient form of design among living things. There is some debate around it, but it is very interesting. The Golden Ratio is basically the “Rule of Thirds” on steroids. If you have a few minutes, visit YouTube and watch this very interesting (albeit sort of creepy) video of the Golden Ratio. Becoming knowledgeable on topics like the Golden Ratio can drastically increase your chances of creating images that attract viewers attention.
10. Find a setting, stick with it
If there is a setting on your camera you are unfamiliar with, go to your camera and dial over to that setting. Now, commit to yourself that you won’t take your camera off that setting until you are fully comfortable with it. If you are only comfortable with automatic, I wouldn’t suggest going straight to manual. But certainly get out of the automatic settings and into the creative ones. You should view the automatic settings on your cameras as poison to your creativity and photographic skill. These settings take away your say in how the image will look, just short of composing the frame and pressing the shutter. Start out with either Av (Aperture Value) or Tv (Time Value) or P (Program) mode. Dedicate at least an entire day to shooting under just that one setting. If you need help, there is always a wealth of information on this site, but the most readily available resource is your cameras manual. Most photographers don’t realize how much they can learn by simply reading the manuals that came with their cameras. I’ve been known to even read my manual on plane rides. What better time than when you have nothing else to do? Once you get one setting down, move to the next one, and work your way up to the infamous “Manual” setting.
11. Consider the Difference Between Inspiration and Creativity
There are a number of articles on the web similar to this one, giving a list of ways to get better at photography. Almost all of those lists will tell you to go online and troll the work of other photographers for inspiration. While this may be a good idea in moderation, I’m tempted to take the side of staying away from it. How are you going to develop your own style by mimicking the work of others? How are you going to exercise your creative juices when you get all your ideas off the coat tails of other artists? Owen Shifflett of Viget.com wrote an incredibly interesting (and incredibly popular) blog post called “Consumption: How Inspiration Killed, Then Ate, Creativity,” and I think any photographer or artist, new or seasoned, should read this article.
If you’re preparing for a portrait session of a family, avoid hopping online to scavenge other photographers sites for posing ideas and post processing looks. Where is the uniqueness in that? With the age of the internet, any bit of information is available at our finger tips within seconds. When we immerse ourselves in the work of other photographers, we end up ripping off our own creativity. Instead, sit down with a pencil and paper and start brainstorming. It’s going to be tough, it’s going to take some time, but what if out of all that, you came up with something completely unique? Something completely yours? After all, how do you think all these other poses came to be? What about all the filters, actions, and presets in your post processing? Think about it, and act on it.
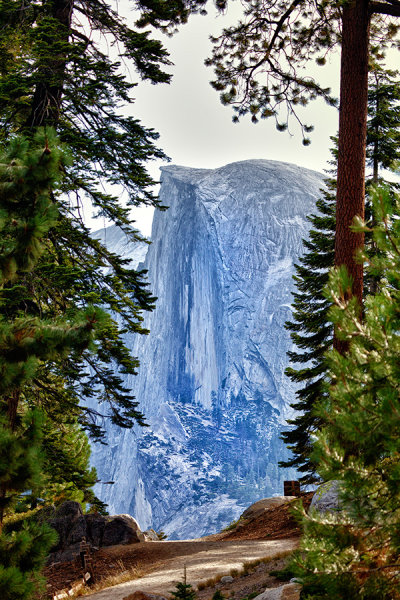
12. Find something you’re not comfortable shooting, and go after it
Getting better at anything involves getting out of your comfort zone. If all you do is photograph families and seniors, go out and shoot landscapes one weekend. All of the sudden, your images are going to require completely new camera settings. No more people to pose, no more assistants to hold your flash, no more backdrops or props, no more shallow depth of field or fast shutter speed requirements. Now you have to think about your subject in a complete new way. A landscape doesn’t listen to you. You can’t tell it to move the left or right, or use a flash to reveal a bit more light in a certain area. For the most part, landscapes require deep depth of fields, slower shutter speeds, tripods, and a whole new eye for composition and lighting. If you spend time photographing things your not used to, I promise you will come away with new ideas for what you are comfortable shooting. And a deeper understanding of your camera too.
13. Use a Tripod
So far (according to the latest poll here at DPS), somewhere around 70% of readers use a tripod less than 50% of the time. Personally, I know very few photographers who carry a tripod around with them. And you almost never see it with amateurs.
Something interesting happens when you attach your camera to a tripod. Suddenly, everything slows down. There’s no more snapping photos left and right and quickly filling up memory cards. When you use a tripod, you really have to take the time to compose your image. This mainly happens because you can no longer move the camera around freely. You now have to adjust the tripod to be level with the horizon. You have to move it left or right manually to adjust the position of your subject. Just by doing this, you have to actually slow down and really think about your image.
Go out and take 10 images hand held, then immediately take 10 more on a tripod. See which set comes out better. I’m willing to bet it will be the latter.
14. Join a Local Photography Club
One of the best things you can do as a photographer is network with other photographers. Sure, networking online is a great tool and shouldn’t be overlooked, but having face to face interaction with like minded people is so much better! There are plenty of ways to seek out local photographers. You can join the local PPA division in your city, or just google photography clubs in your area. One of the best clubs I ever joined was a local photography group through Meetup.com. This group has a wealth of very talented photographers and they hold around 4-6 events every month! Whether it’s just doing a photo walk around the city, or getting a VIP pass to the local sports stadiums, these groups are a blast to be a part of!
Conclusion
There you have it, 14 ideas you can implement immediately into your photography. Of course you can’t do all of these at once, but any time you feel you need a boost, be sure to check back here. If you have more ideas and/or tips, I’d love to here from you. If these tips have helped you in any way, I’d love to hear from you as well. Be sure to leave a comment below or send me a tweet (@jamesdbrandon) and let me know your thoughts. Be sure to suggest this page to any other photographers you may know. Thanks and happy shooting!

Post originally from: Digital Photography Tips.
Check out our more Photography Tips at Photography Tips for Beginners, Portrait Photography Tips and Wedding Photography Tips.
14 Ways To Significantly Improve Your Photography Today


Digital Photography School


You must be logged in to post a comment.