Facebook has announced a new rights management feature designed to give creators more control over their images. On Monday, Facebook product manager of the creator and publisher experience Dave Axelgard said, ‘We want to ensure Facebook is a safe and valuable place for creators to share their content.’ Key to that goal is the newly announced Rights Manager for Images.
Instagram is the dominant image-based social network at the moment, making it a valuable platform for creators…but it’s not without its controversy in the industry. Parent company Facebook is taking steps to address some of the criticism with its new Rights Manager for Images, which builds upon the existing Rights Manager to give photographers control over where their images appear on the social platform.
Rights Manager is a customizable tool found within the Facebook Creator Studio platform, which is built for creators to give them an element of control over their content across both Facebook and Instagram. The tool works by enabling users to add their content, after which Facebook will scan the two social platforms to find the content if it is posted on either.
Reposted content found on another user’s Page or profile can be removed or, in cases where it may be beneficial to the creator, the owner can either add an ownership link to the content or simply monitor the repost going forward. Creators have the option of adding exemptions for partners who have permission to share the content so that it isn’t flagged by the Rights Manager tool.
The newly announced Rights Manager for Images is described by Axelgard as a new version of the tool that is designed to offer management of photos ‘at scale.’ As with the original version of Rights Manager, Facebook requires creators to submit an application to get access to the tool.
The application includes selecting which Pages the user may want to protect, what type of rights owner they are (individual, publisher, etc.), the type of content that needs protected and similar details.
Facebook notes that this Rights Manager tool exists in addition to a number of other options creators have, including what it refers to as a ‘fast and effective’ intellectual property reporting system, as well as a policy for dealing with repeat copyright offenders and more. The tool ultimately gives creators the ability to prevent unauthorized sharing of copyrighted content, potentially bringing an end to reposts on Instagram.
It’s unclear how many creators have access to the Rights Manager, which addresses only one aspect of copyright issues on social media. Facebook has been criticized for failing to give Instagram users the ability to limit the sharing of public posts, something that was recently brought to public attention due to a couple of lawsuits earlier this year.
Facebook indicated earlier this summer that it may give Instagram users the ability to disable sharing or embedding posts, which would, for example, prevent media companies from embedding images to get around paying the photographer a licensing fee. The social media company complicated the matter in June when it clarified that its terms of service does not include sublicensing embedded content.
Though this may give creators more control over where their images are embedded, critics have said that it still places the burden on creators to find and police the use of their images due to Instagram’s readily available sharing and embedding tools. As well, the presence of these tools implies to users that they are allowed to embed public content on other websites without getting permission from the photographer first, potentially putting them at risk of unwittingly violating a photographer’s copyright.
Instagram told Ars Technica back in June that it was ‘exploring the possibility’ of offering users the option of disabling the embed tool. Such a feature remains unavailable at this time, however, meaning that Instagram users must make their images private if they don’t want users to have the option of sharing them.
The United States Library of Congress (LOC) is seeking COVID-19 pandemic-related images from photographers based in the United States, it has announced through the photo-sharing website Flickr. The LOC has teamed with Flickr to launch a new group dedicated to these images; anyone can add their images of pandemic life in the US to this group, which will be evaluated by Library curators. Some images will become part of permanent collections.
The opportunity to submit images is open to all photographers — both pro and amateur — located in the US or its territories, according to Flickr, which is home to the new ‘COVID-19 American Experiences’ group. Flickr users must join this group in order to submit their images for the LOC’s consideration.
Library curators will decide which images get added to the Flickr group photo pool and which go on to become preserved in permanent collections. Photographers seeking this distinction should assign a Creative Commons license to their images that will allow the LOC to display the photos on its website if selected, Flickr notes.
Participants are allowed to submit up to five ‘graphic artworks’ or photographs for consideration. The curators are looking for content specifically related to the COVID-19 pandemic, with Flickr noting that photographers can submit ‘photos that depict your experiences of the pandemic’ on a variety of topics, including things like street scenes, panic buying, elder care and similar things.
The photos can also depict emotions in relation to the pandemic, such as sorrow, grief or joy. There are a couple of big requirements, however, including that the images must be appropriate for viewers of all ages and that they must meet Flickr’s ‘safe’ guidelines, which means ‘acceptable to a global, public audience.’
The LOC explains that its goal is to expand how much documentation it has on the current pandemic, doing so by tapping the wider public community spanning many more aspects and parts of the US than the photographers and artists already higher for special projects.
As of September 10, the COVID-19 photo group has around 160 images featuring a variety of subjects, including pandemic-inspired graffiti, images of masks for sale, empty parks and restaurants, protesters, close theaters, people wearing masks, medical workers and more.
The Library of Congress is home to vast photo archives, including a large number of photos showing the last major pandemic to impact the world: the 1918 flu that claimed around 50 million lives. The public can view the Library of Congress photo archives on its digital collections website. The photos are joined by collections ranging from archived websites to old newspapers, audio recordings and maps.
On Tuesday, Microsoft introduced Video Authenticator, a new AI-powered tool that analyzes still images and videos to determine the likelihood that they feature digital manipulation. The tool is designed to address the growing problem of ‘deepfakes,’ a type of highly realistic manipulated content generated or modified by artificial intelligence systems.
Deepfake refers to images, videos and audio modified using AI tools. Though this technology can be used creatively, it is most associated with manipulating media to present something that didn’t happen in real life. This could include, for example, a video of a politician saying something they never said or doing something they never did.
Because these deepfakes are created using machine learning algorithms, the resulting content is typically very high quality and difficult (or impossible) for someone to discern from authentic media just by looking at it or listening to it. The solution to AI manipulation is another AI trained to spot the changes.
Microsoft has introduced Video Authenticator under its Defending Democracy Program, pointing out that dozens of ‘foreign influence campaigns’ targeting countries around the world have been identified in the past several years. These campaigns are intended to manipulate the public into certain beliefs or ideologies; others attempt to stir up debate and further polarize groups against each other.
Of 96 different campaigns identified (PDF) in part with support from Microsoft, 93% of them involved original content, which can be particularly difficult to detect. Microsoft explains that while ‘no single technology will solve the challenge of helping people decipher what is true and accurate,’ its Video Authenticator is an important tool that will help counteract disinformation by detecting subtle evidence of AI involvement in its creation.
Though Video Authenticator isn’t a long-term solution to what is inevitably an evolving technology, Microsoft explains that ‘in the short run, such as the upcoming U.S. election, advanced detection technologies can be a useful tool to help discerning users identify deepfakes.’
Video Authenticator works by analyzing every frame in a video, as well as still images, and assigning them a ‘percentage chance,’ also called a confidence score, that indicates its likelihood of having been manipulated. When analyzing videos, Video Authenticator presents users with a realtime percentage for each frame.
In a sample provided by Microsoft, the tool isn’t able to detect evidence of manipulation in every frame; some pass without triggering the system, while others may have enough greyscale elements, blending boundaries, subtle fading or other aspects to trigger the detection system.
Ultimately, Video Authenticator is just the start. Microsoft explains:
We expect that methods for generating synthetic media will continue to grow in sophistication. As all AI detection methods have rates of failure, we have to understand and be ready to respond to deepfakes that slip through detection methods. Thus, in the longer term, we must seek stronger methods for maintaining and certifying the authenticity of news articles and other media. There are few tools today to help assure readers that the media they’re seeing online came from a trusted source and that it wasn’t altered.
Microsoft isn’t making Video Authenticator available to the public in order to protect it against manipulation that may hamper the effort.
Video Authenticator is the latest example of a deep learning algorithm designed to counter the negative use of other AI algorithms. Last year, for example, Adobe Research and UC Berkeley introduced a method for detecting subtle face manipulations made using the Face Aware Liquify tool in Photoshop.
Conversely, we’ve also seen AI-based technologies that empower users to better protect themselves in this new digital landscape. Most recently, researchers with the University of Chicago SAND Lab released a free tool that uses AI to subtly ‘cloak’ images of one’s own face in order to poison facial recognition algorithms trained to recognize them.
Lomography is back with the announcement of its latest, well, back. The LomoGraflok 4×5 Instant Back is the world’s first Instant Back for 4×5 cameras designed for Fujifilm Instax Wide film.
Developed in collaboration with large format photography professionals as a substitute for the peel-apart Polaroid film discontinued back in 2016, the LomoGraflok 4×5 Instant Back works with all Graflok-equipped 4×5 cameras and uses a light-tightened film ejection unit to push out the Instax Wide film shots after capture.
Below are a few sample photos, shared by Lomography:
The device is constructed of plastic, is powered by four ‘AA’ batteries (LR6) and features an automated frame counter so you know how many shots are left. It measures in at 181mm (7.13”) tall, 120mm (4.72”) wide and 50mm (1.97”) deep, and weighs roughly 500g (1.1lbs).
Below is a guide on how to use the LomoGraflok 4×5 Instant Back:
The LomoGraflok is currently available to pre-order on the Lomography website for $ 134 (MSRP will be $ 149 once launched). The first units are expected to ship in April 2021.
In collaboration with Shutterstock, Google has announced the launch of licensable images on Google Images. This feature entered beta testing earlier this year and is now fully launched and integrated into Google Images, hopefully benefiting photographers. With the new ‘Licensable’ badge on Google Image search results, viewers can immediately identify which images can be licensed for varying uses and better understand the usage rights of individual images.
Shutterstock worked closely with Google to ensure the licensable images feature works effectively. Of the new features, Shutterstock’s VP of Content Operations, Paul Brennan, says:
‘Google Images’ new features help both image creators and image consumers by bringing visibility to how creators’ content can be licensed properly. We are pleased to have worked closely with Google on this feature, by advocating for protections that result in fair compensation for our global community of over 1 million contributors. In developing this feature, Google has clearly demonstrated its commitment to supporting the content creation ecosystem.’
When an image has specified license information on a website, the image can be displayed with the Licensable badge on image thumbnails in Google Images. This badge indicates to viewers that license information is available for the image and then provides a link directly to the license in the image viewer. From here, someone can learn how the image can be licensed and used.
Here you can see the ‘Licensable’ badge on the bottom left corner of images. When clicking on an image and accessing the image viewer, Google Images displays the creator, where the image can be licensed and also license details for the selected image. Image credit: Google
For Google to be able to discover and index images on a website, the images must be accessible without an account or by logging in. You must also follow Google’s Webmaster Guidelines and Google Images Best Practices. In addition to these existing steps, the new Licensable badge requires structured data or IPTC photo metadata to follow Google’s new guidelines. You can learn more about these requirements here.
Close-up image of the new image viewer in Google Images. Click to view larger. Image credit: Google
With the introduction of the Licensable badge, search results in Google Images can now be filtered to only display images that include licensing. Further, the dropdown Usage Rights filter has been streamlined, such that it now includes only options for ‘All’, ‘Creative Commons licenses’ and ‘Commercial & other licenses’.
It has long been far too easy for people to search for images on Google and use them without a license or permissions. Today’s changes to Google Images will hopefully reduce image misuse. At the very least, assuming a photographer has taken the steps to ensure their images are properly badged and filtered on Google Images, it will now be much easier for Google Images users to view creator information and licensing requirements.
The post 10 Cheap Photo Tricks for Creative Images appeared first on Digital Photography School. It was authored by Rick Ohnsman.
As the coronavirus crisis drags on, you may find that you’re getting out less to make photos. You could probably use some fresh and fun photo ideas as a pleasant diversion from the gloomy news. Whether you call these photo tricks, techniques, projects, or whatever, I suggest you give them a try and see what new and interesting photos you can make.
I think you’ll eat up these photo tricks with a fork and spoon! This is the last one in the collection, but be patient. Read the rest first, as there are some good ones; we’ll save this technique for dessert.
For a deeper dive
My intent here is not to get into great detail or give much “how-to” for these tricks. For some, I’ve already written complete articles and, where that is the case, I have linked to those articles so you can do a deeper dive into the subject.
For a few other tricks, I may not have written about them in-depth, but others have. The idea is that while these tricks may not be unheard of, this is a collection of photo tricks all in one place; it’s a jumping-off point for your photo exploration.
1. Bag a vignette
You may have heard of accessories called Lensbabies, a collection of adjustable and specialized lenses designed to give artistic, soft, blurred, and other looks to your image.
Now, I won’t pretend this trick will do for a few cents what specialized gear costing a few hundred dollars can do. But here’s a way to bag some interesting, Lensbaby-style images for dirt cheap.
This photo accessory costs a few pennies and easily fits in your pocket: the “Baggie Vignette.”
Here’s what you do:
Get a plastic sandwich bag and tear a ragged hole in the bottom of it. Pull the bag over your lens so that portions of the bag intrude into the edges of the image. Focus on your subject.
Viola, you have “Baggie FX.”
Play with the positioning, the size of the hole, various apertures, and lighting. Photo accessories don’t get any cheaper than this.
2. Bokeh with flair
Pronounce it how you like; bokeh refers to the look and quality of out-of-focus elements in a photo. Bokeh becomes especially noticeable when the out-of-focus elements are specular highlights.
Different lenses with different optics, different aperture blade shapes, and different numbers of blades will produce different kinds of bokeh, as will the photographer’s choice of aperture.
A wide aperture combined with out-of-focus highlights will give some nice bokeh effects. The pattern of the bokeh shape will depend on the lens. The Canon 50mm f/1.8 gives this kind of look.
Here’s a way to go a step further and make patterned bokeh. Lay a filter the size of lens you intend to use on a piece of cardboard, trace around it, and cut out the cardboard. Now cut a shape, such as a small star, into the center of the cardboard disc you made. Place the disc over the lens and tape it there, or sandwich it between the lens and a filter.
Here, a star pattern was cut in a “bokeh filter,” and the specular highlights in a piece of aluminum foil produced the star effect. Then the image was layered with another shot to create the final result.
With a wide aperture (a 50mm f/1.8 prime, the “nifty fifty,” works great), shoot something with some specular highlights and ensure those highlights are out-of-focus. The highlights will now be the shape of your “bokeh filter.”
Rather than make your own bokeh filter, you can also buy patterned bokeh filter kits with more elaborate shapes than you could probably cut yourself. For folks into 3D printing, this could also be a good project.
3. Reflect on this
You can take a still-life or product photo up another notch by shooting it on a reflective surface. You might think a mirror would be a natural choice for this, but because both the glass surface of a mirror, as well as its silvered backing, are each reflective, you will get two sets of slightly separated reflections if you shoot objects on a mirror.
A polished dark table proved just right for getting a reflection of the wedding rings. The jar of marbles was shot on a piece of black acrylic sheet and the bokeh effects were added with a string of Christmas lights in the background.
A better choice is a piece of acrylic plastic sheet, also known as plexiglass. You can get this in many colors, but I find a very dark black plastic sheet creates a look I like. (A piece of black tile would work well too, but I’ve not been able to find larger tiles.) Shoot with a black backdrop and you can isolate your subject nicely.
4. Big results with little lights
When we used film or less-sensitive digital cameras, big and often hot lights were needed for indoor photography. With the advent of LED lighting coupled with cameras offering low noise capabilities, we can now make images with very little light.
Also, when doing still-life photos, shutter speed can be anything you like: full seconds, or even minutes, if necessary. Now almost any lighting instrument can be used with some ingenuity. Small LED flashlights can also be used for light painting.
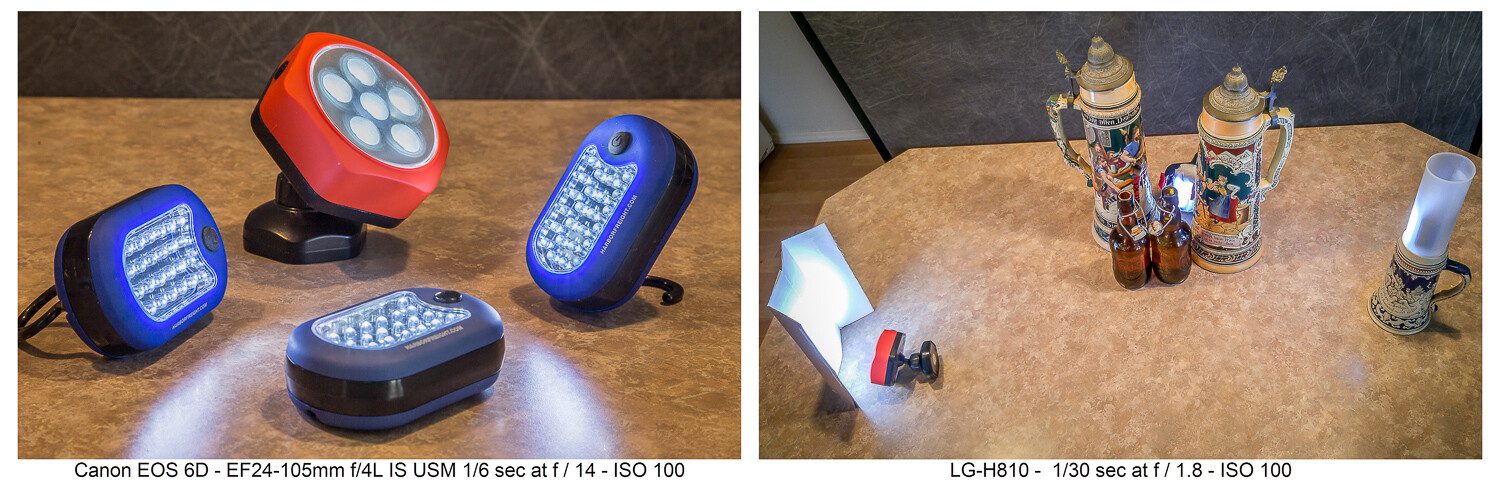
LED flashlights like these can be found cheap at the hardware store. The second image shows how they were used……to produce this image. Having limited light isn’t a problem when shooting still life where long exposures are fine. Canon 6D | Canon EF 24-105 f/4 | 3.2 sec | f/3.2 | ISO 100.
I have a collection of various flashlights (aka “torches”) and other LED lighting gear, which I’ve typically bought for just a few dollars online or at the local hardware store. Finding new ways to creatively use these little lights has allowed me to make some creative images. Take a look at this article which explores this topic further.
5. CD rainbow macros
Before you toss that scratched CD, add it to your bag of photo tricks. Mount a macro lens on your camera, or use whatever means you have to get close to your subject. Put the CD down with the reflective, non-printed side up. Then, with an eyedropper or other tool, place small water droplets all over the surface of the disc.
Waterdrops on a CD shot with a macro lens and lit in various ways can produce some colorful abstract images.
Focus your shot and get creative. The lighting is purely up to you. Perhaps try some shots in direct sunlight where the intense light will really pop the rainbow spectrum. Maybe try a small flashlight. Try a long exposure and light-paint the droplets. Anything goes when you’re making abstract images.
6. Oil and water abstracts
I wrote a complete article on this technique, which is another way to get some interesting and colorful abstract images. With minimal equipment and whatever lighting you like (even shooting outdoors with natural light), you can have a whole afternoon of fun.
Oil and water don’t mix, and that’s a good thing for this technique. A glass dish shot from above and through the mixture with some colorful objects in the background is the technique here.
7. Up in smoke
Add this to your collection of photo tricks to make some smokin’ hot images. An incense stick and some care with your lighting will get you going. Then take your shots to the computer where you can add additional effects. Have a look at my article here on DPS, “How to Make Interesting Abstract Smoke Photos,” for a full write-up on this technique.
This is a straight, side-lit shot of the smoke pattern rising from an incense stick.Take the straight shot on the left, mirror it in editing, and colorize it. Then you have a firebird! (At least that’s what I see. What do you see in this abstract?)The original smoke photo mirrored both horizontally and vertically and colorized in editing. Is this what they mean by “smoke and mirrors?”
8. Interaction with reflection and refraction
Find historic images of early photographers, and you might see them standing behind their cameras with black capes thrown over their heads. They did not have DSLRs, where the image entering the lens is reflected onto a mirror, through a prism, and then into the viewfinder right-side up. Instead, early photographers used the first “mirrorless” cameras, and the image came through the lens and displayed upside down on a ground glass at the back of the camera. The image was quite dim, which explains the need for the cape to better see the projected image.
The water-filled glasses refract the light while the black acrylic plastic sheet below reflects it. There’s a lot of light physics going on in these shots.
We won’t require you to take a course in optical physics so you can understand the behavior of lenses, light, reflection, refraction, or the differences in light transmission through various mediums. Just break out some glassware, pour in a little water, maybe use that piece of black plexiglass we mentioned earlier, find an interesting background, and go for it.
You are getting sleeeepy… The water in the glass refracts the light and flips the image, much like a lens.
If you do want to dive deeper into understanding light behavior, take a look at my article “How to Understand Light and Color to Improve Your Photography.” Maybe take a look at this one as well: “Just Dew It – Fun with Macro Dewdrop Photography.”
These tiny glycerin drops act as little lenses, focusing, refracting, and reversing the image behind them.
9. Zooming around
In our collection of photo tricks, this one is hardly a secret. You probably have done it before. No? Well, if not, and you have a zoom lens, it’s high time you tried the zoom blur effect.
The technique is simple enough. Set your exposure so you can get at least a one-second shutter speed, if not longer. This ought to be easy enough at night if you set the ISO to its lowest setting (such as ISO 100) and stop down the aperture to a small size (such as f/16 or f/22). If you’re shooting in the daytime and these settings alone don’t get you down to a second or more of exposure time, try adding a polarizing filter or a neutral density (ND) filter to reduce the light still further.
Lights at night make great subjects for the zoom blur technique. You’ll definitely need to work on a tripod.
You can do this technique handheld, but a tripod helps. Set your camera so you get the 2-second shutter delay, then with one hand on the zoom ring, trip the shutter. When you hear it click, zoom in (or out) during the exposure. Play with starting zoomed tight and then pulling out during the exposure, or starting wide and then zooming in. Lights at night can make for great looks. Try only zooming during the first or second half of the exposure. There’s no single way to do this, so play and discover what you can create.
Both these shots were zoomed during the exposure. See my fireworks article for the “Boom, Zoom, Bloom” technique.
10. Create a computer screen background
An interesting background can add to the story of your photo. If you have a good-sized computer monitor and are shooting a smaller object, being able to create a background on your computer screen opens all kinds of possibilities.
Create a unique background to go along with the theme of your photo by putting up something appropriate on a computer screen in the background of your shot.
Photographing screens would seem a simple process, but can be more tricky than you think. If you plan to do much of this, reading up on the best camera techniques for shooting screens would be time well spent.
Cheaper by the dozen
The title said 10 photo tricks, but I’m going to throw in two more for free and make it an even dozen. I really like the looks I can get with these last two.
11. Action sequences with Microsoft ICE
I wrote the article “Make Easy Panoramic Images with Microsoft ICE,” which focused primarily on how to use this free and very powerful tool from Microsoft to make panoramic images. That is good fun in itself and a very useful technique.
Toward the end of that article, I touched on something else you could do with ICE: sequential action images. These are great for showing the progressive steps of action, and ICE makes the technique quite easy. Follow the link, read through the article, and see how you can make images like this:
Pan with the action while shooting multiple images in continuous mode, then use the free Microsoft ICE software to assemble them. Quite easy, actually!
Here’s an alternative way to make sequential action photos with a completely different technique, one that’s more well-suited to capturing very fast action: “How to Use Multi-flash to Capture Compelling Action Photos.”
12. Phun photos with photoelasticity
Combine physics with fun and you get Phun, right? With this technique, you will be exploring what is called photoelasticity or, more specifically, birefringence.
Clear plastic tableware goes cosmic with this technique. Learn about birefringence.
You don’t have to understand what’s going on, and this isn’t hard to do. It just works and looks cool. Here’s what you’ll need to do:
Your light source will need to be an LCD computer monitor, TV or, for smaller subjects, a tablet, or even a cellphone. LCD screens emit polarized light, and using polarized light to backlight your subject is part of what’s needed to make this work.
Try to limit any other ambient light. The effect will be stronger if the LCD light is dominant in your shot.
Use subjects made of hard, clear plastic. Polystyrene is what is used for most clear plastic cutlery and drinkware, so these make good subjects. Often the plastic in cheap picture frames is made from similar materials. Glass objects will not work for this.
You will need a polarizing filter on your lens. Standard circular polarizing (CPL) filters work well.
Polarized light plus a polarized lens reveals the “mechanical stress patterns” within certain types of plastics. Clear styrene plastic usually works well.
Now, get ready to say “Wow!” Place your subject in front of the LCD light source. Bring up an image that will create a totally blank, white, bright screen so that light backlights your subject. You won’t see anything until you look through the camera viewfinder and through the attached polarized filter. Cool, huh?
Now rotate the filter. The computer screen will be white, black, or intermediate shades, while the plastic subject will show the rainbow birefringence effect. The patterns will be showing the mechanical stress within the plastic, with tighter patterns where the curves of the object are tighter.
Is it okay to still say “Groovy, man?” A second sheet of plastic was held in front of the lens, producing the colored background. Aside from some exposure and saturation adjustments, this effect is what you see through the lens while making the shot, not added later on the computer.
Just a tip when you are seeking potential subjects for this kind of photography:
Your LCD cellphone screen is a polarized light source. If you have a pair of polarized sunglasses, objects held in front of a blank white screen on the phone and viewed while wearing the glasses will show the effect if they are the right kind of material. You may have to tilt your head to get the same effect as rotating a circular polarizing filter.
Now go play
So there’s a dozen new things to try with your camera. You will also find that these kinds of photography will force you to use different exposure, focusing, camera control, lens selection, and editing skills than perhaps you normally might use.
Remember, even failed experiments can be lessons when you seek to determine what went wrong and then try again to get it right. Now go try some of these photo tricks, have fun, and post some of your images in the comments section. If you have any questions, feel free to post those, too.
The post 10 Cheap Photo Tricks for Creative Images appeared first on Digital Photography School. It was authored by Rick Ohnsman.
Google has teamed up with Canon to release a new integration for Google Photos that makes it possible to automatically back up your photos over Wi-Fi.
The integration works through Canon’s image.canon app for Android and iOS. Inside the app, you can connect your Google account and have images automatically upload to Google Photos when they’re transferred from your compatible Canon DSLR or mirrorless camera.
A full list of the cameras supported by image.canon
Unfortunately, this integration doesn’t come free. In order to wirelessly upload images to Google Photos, you must have a Google One subscription, which starts at $ 20/year ($ 2/month) for the 100GB plan and goes up to $ 100/year ($ 10/month) for the 2TB plan. Google is offering a free month to Canon users interested in testing out the new feature.
Researchers with the University of California Berkeley and Google Research have published a new paper detailing an AI that can remove unwanted shadows from images. The algorithm focuses on two different types of shadows — ones from external objects and ones naturally resulting from facial features — and works to either remove or soften them in order to maintain a natural appearance.
Whereas professional images are often taken in a studio with proper lighting, the average snapshot of a person is taken ‘in the wild’ where lighting conditions may be harsh, causing dark shadows that obscure parts of the subject’s face while other parts are covered with excessive highlights.
The newly developed AI is designed to address this problem by targeting those unwanted shadows and highlights, removing and softening them until a clearer subject remains. The researchers say their tool works in a ‘realistic and controllable way,’ and it could prove useful for more than just images captured in casual settings.
Professionals could, for example, use a tool like this to salvage images taken in outdoor environments where it was impossible to control the lighting, such as wedding images taken outdoors under a bright noon sun. In their paper, the researchers explain:
In this work, we attempt to provide some of the control over lighting that professional photographers have in studio environments to casual photographers in unconstrained environments … Given just a single image of a human subject taken in an unknown and unconstrained environment, our complete system is able to remove unwanted foreign shadows, soften harsh facial shadows, and balance the image’s lighting ratio to produce a flattering and realistic portrait image.
This project is designed to target three specific elements in these photographs: foreign shadows from external objects, facial shadows caused by one’s natural facial features and lighting ratios between the lightest and darkest parts of the subject’s face. Two different machine learning models are used to target these elements, one to remove foreign shadows and the other to soften facial shadows alongside lighting ratio adjustments.
The team evaluated their two machine learning models using both ‘in the wild’ and synthetic image datasets. The results are compared to existing state-of-the-art technologies that perform the same functions. ‘Our complete model clearly outperforms the others,’ the researchers note in the study, highlighting their system’s ability in a selection of processed sample images.
In addition to using the technology to adjust images, the study explains that this method can be tapped as a way to ‘preprocess’ images for other image-modifying algorithms, such as portrait relighting tools. The researchers explain:
Though often effective, these portrait relighting techniques sometimes produce suboptimal renderings when presented with input images that contain foreign shadows or harsh facial shadows. Our technique can improve a portrait relighting solution: our model can be used to remove these unwanted shadowing effects, producing a rendering that can then be used as input to a portrait relighting solution, resulting in an improved final rendering.
The system isn’t without limitations, however, particularly if the foreign shadows are presented with ‘many finely-detailed structures,’ some residue of which may remain even after the images are processed. As well, and due to the way the system works, some bilaterally symmetric shadows may not be removed from subjects,
In addition, softening the facial shadows using this technique may, at times, result in a soft, diffused appearance due to excessive smoothing of some fine details that should remain, such as in the subject’s hair, as well as causing a ‘flat’ appearance by softening some facial shadows.
As well, the researchers note that their complete system looks for two types of shadows — facial and foreign — and that it may confuse the two at times. If facial shadows on the subject are ‘sufficiently harsh,’ the system may detect them as foreign shadows and remove (rather than soften) them.
Talking about this issue, the researchers explain:
This suggests that our model may benefit from a unified approach for both kinds of shadows, though this approach is somewhat at odds with the constraints provided by image formation and our datasets: a unified learning approach would require a unified source of training data, and it is not clear how existing light stage scans or in-the-wild photographs could be used to construct a large, diverse, and photorealistic dataset in which both foreign and facial shadows are present and available as ground-truth.
Regardless, the study highlights yet another potential use for artificial intelligence technologies in the photography industry, paving the way for more capable and realistic editing that takes less time to perform than manual editing. A number of studies over the past few years have highlighted potential uses for AI, including transforming still images into moving animations and, in the most extreme cases, generating entire photo-realistic images.
As for this latest project, the researchers have made their code, evaluation data, test data, supplemental materials and paper available to download through the UC Berkeley website.
The post Great Android Apps for Adding Glitch Effects to Your Images appeared first on Digital Photography School. It was authored by Megan Kennedy.
In digital photography, glitches are usually avoided at all costs. However, there are some who welcome the whimsical aesthetic of glitch art. Here are four of the best Android apps that can be used to add artificial glitch effects to your images.
What is glitch art?
Generally, the word glitch refers to a visual or audio malfunction occurring in a media format.
Music, video games, and digital photography; all technology can succumb to glitches. While often viewed as an unwelcome occurrence, glitches have, over time, garnered a growing amount of creative interest. That’s where glitch art comes in.
Glitch art embraces the glitch as an artistic event spawned by the development of technology.
Glitch art is created by artists who embrace the nature of the glitch for its aesthetic and audible qualities. By either intentionally creating glitches or capturing them as they occur organically, artists elevate the status of the glitch from a technical irritation to an intriguing insight into the technology we surround ourselves with.
One of the earliest examples of glitch art was orchestrated by the art collective JODI. Founded by Joan Heemskert and Dirk Paesmans, JODI operated on experiments like deliberately causing errors on their website to evoke error messages. From there, artists have adopted the glitch aesthetic as a means of conveying ideas and exploring the technological landscape.
How is glitch art made?
Glitch art can be achieved in various ways.
For example, misalignment glitches are the result of a digital file being opened by a program that is ill-equipped to process that specific type of file.
Hardware failure glitches, on the other hand, are caused by tampering with the physical mechanisms of a machine itself.
Databending refers to the manipulation of file data with programs like hex editors.
An example of glitch art made with a hex editor.
The appreciation for glitch art has spread across the globe, with many glitch artists sharing their broad range of technical approaches to the format online. And with the growing number of glitch art apps available at little or no cost to the user, glitch effects have been an increasingly popular presence in art and social media.
Now let’s take a look at the best Android apps for creating glitch effects:
Glitch Lab
Glitch Lab operates on the central theme of being “simple to use yet at the same time endlessly configurable.” With an impressive amount of free presents and adjustments available to induce glitched imagery, all alterations can be tweaked with an easy-to-use interface, creating rich layers of visual chaos.
In addition, Glitch Lab offers some basic photo adjustments as well as a Generate function, which allows a user to generate glitch art from scratch, without the use of a photo as a starting point.
Glitch!
Simple to use and with a good amount of free features, Glitch! is one of the most popular glitch art apps available. With glitch effects like Scanner, Hacker, and Paintbrush, Glitch! realistically imitates manual glitching techniques. Premium functions include a Datamosh preset and video-based options.
Glitcho
The Glitcho app allows a user to glitch photos and videos in real-time, which can be handy for quick adjustments and previews. The app also offers a GIF-generating function, which animates some glitch effects applied to images.
Glitcho has a range of free glitch presets that can be applied to both photos and videos. The app also offers additional glitch effects that can be unlocked by watching ads or by upgrading to Glitcho Pro.
EZGlitch
Like Glitcho, EZGlitch provides glitch effects to create glitched photography and videography in real-time. The in-app purchases available in EZGlitch are balanced by the range of filters on offer at no charge to the user.
EZGlitch is also equipped with a simple-to-use Auto GIF function to generate animated glitchy GIF or MP4 files to save and share.
Conclusion
If you’ve recently looked for glitch-based editing apps on the Play Store, you’ll have seen a myriad of different options on offer.
While it may take some trial and error to find the glitch app that works best for you, these four apps are a great entry point, allowing for quick and easy glitch effects on your Android device.
The post Great Android Apps for Adding Glitch Effects to Your Images appeared first on Digital Photography School. It was authored by Megan Kennedy.
Google has announced it will soon make it possible for website owners to display more detailed licensing information of photographs in images that appear in Google Image searches.
Image License is currently in the beta stage, but the company plans to make it easier for those using Google Images to find out how to pay to use images that appear in searches, as well as allow photographers to have their conditions-of-use displayed. The idea is to encourage those using images to pay for them by making it clearer that they need to pay, as well as how to pay and who owns the picture. Although the feature isn’t currently in use, Google suggests photographers should begin preparing their websites for when the feature goes live.
A diagram showing how license information may show up in Google Images once the feature goes live.
Preparation involves attaching licensing information on your website and adding information to each image displayed on the site. Google has shared a guide on how to prepare your site and images in its Image License guide.
How the licensing link will be shown in the Google Images display pane
Google says it will be able to access and display information attached to images via structured data or by IPTC photo metadata to show searchers that an image is available to use. Google will also show a link to the license conditions page on your website if you’ve set one up.
Structured data needs to be coded into the web page, but IPTC (International Press Telecommunications Council) metadata can also be attached to individual images in imaging software before they are loaded onto the Internet.
These changes are set to go live this summer, so we should expect the feature to be activated very soon.


You must be logged in to post a comment.