RSS
 

Posts Tagged ‘Help’

11 Rules of Living by Dalai Lama to Help You Bring Zen to Your Photography

07 Mar

Note from the Editor: this article is a little different than our usual dPS how to tutorials, more in line with personal growth. But see if there aren’t some things you can use and apply to you photography to help you take better photos.

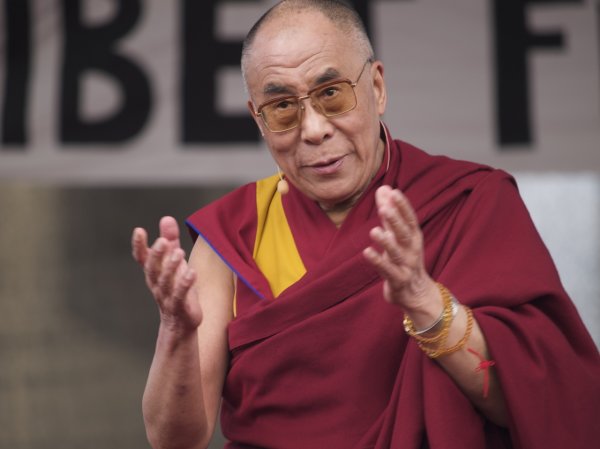
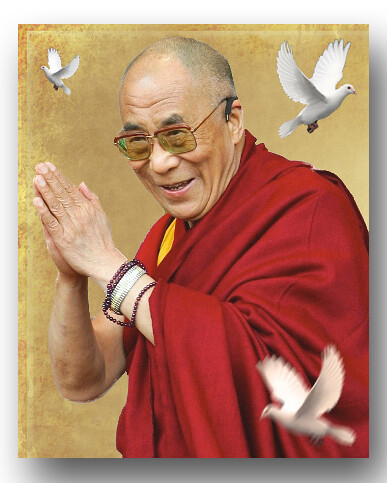
“Happiness is not something ready made. It comes from your own actions.” – Dalai Lama

Often times we feel a desire to start from scratch and achieve something remarkable. As spring is approaching, use this time of increased motivation to think about your goals as a photographer.

Jan Michael Ihl

By Jan Michael Ihl

Over a decade ago, The Dalai Lama shared with the world a set of simple guidelines to help you live a complete and meaningful life. In this article we look at 11 of those rules of living from a photographer’s perspective. Whenever you decide to take your time and set your priorities, read the advice of the world’s greatest wise man and project it on your own career and life activities.

1. Take into account that great love and great achievements involve great risk.

Quitting your day job to start a photography business is a risky step accompanied by doubts and fear of failure. But if you’re firm about becoming a successful photographer, you just need to step out of your comfort zone. The ride to success will probably be harsh, but on the other hand, it will be fun! Just listen to your inner superhero and try to enjoy the very process of taking risk.

2. Share your knowledge. It’s a way to achieve immortality.

This advice isn’t as difficult to follow as you may think. These days blogging is a great way for people to spread their knowledge and exchange ideas. Being an active member on a photography forum, or supporting a photography related project (for instance, Defrozo calls all photographers to help them build the ultimate photography marketing platform) are also good opportunities for any photographer to do good for the community. After all, what goes around comes around.

MD. Hasibul  Haque Sakib

By MD. Hasibul Haque Sakib

3. When you lose, don’t lose the lesson.

Screwed up a photo shoot? That’s not a reason for giving up, as failing can teach you so much more than success. Analyze your missteps, do your best to fix them, and prepare more carefully next time. Yes, that mistake can leave a bitter aftertaste for a long time, but after all, you would never feel good without feeling bad.

4. Follow the three Rs: Respect for self, Respect for others, Responsibility for all your actions.

Respect for self ensures determination, which is crucial to success. For instance, if you set your prices too low, people may think you’re not confident about your professionalism and thus, would not commit capturing their memories to you.

Even if you’re not sharing the values and interests of people you work with, there must be something they can teach you, respect that.

Even if you’re a solopreneur, being responsible and respectful is essential for running a successful photography business.

5. Remember that not getting what you want is sometimes a wonderful stroke of luck.

I have a friend who couldn’t afford a Canon 5D MarkII a few years ago, which pushed him to seek other ways to reach the image he envisioned. As a result, he improved his skills drastically and even won a prestigious photography contest. He now owns a studio now and his business is growing fast. My friend is pretty sure he wouldn’t have reached this point if he had bought that camera and let it do the job for him. The moral of this story is that something you consider a lost opportunity may in reality be a chance to win. Just stay positive and keep your eyes wide open.

Umberto Salvagnin

By Umberto Salvagnin

6. Learn the rules so you know how to break them properly.

Did you know that Picasso mastered the illusion of volume just to learn how to flatten it in his paintings? Like with any art, in photography any rule can be broken – as long as it’s broken intentionally. If you’re looking for an innovative approach and want to go out of the box with your composition and lighting, you have to know where the box’s limits are.

7. When you realize you’ve made a mistake, take immediate steps to correct it.

Everyone could make a mistake, but not anyone could immediately react and correct it. It’s all about taking responsibility for your own actions. If the final photos don’t meet the expectations of your customer and you know it’s your fault, do something to fix it and do it fast. A free compensatory session or a small sorry gift can help you own the situation. Quick reaction will speak of your integrity – it won’t be left unnoticed.

8. Spend some time alone every day.

I’m sure you know how it feels when creative ideas flow out of you like a stream. I think you can also remember the tough periods of creative block when it seems you’re unable to produce anything new or interesting. Every creative experiences these ebbs and flows of inspiration. Some solitude during your day can be a great practice to help you stay balanced and productive.

Jhoc

By jhoc

9. Once a year, go someplace you’ve never been before.

Seeing new places and faces, discovering new cultures and atmospheres is extremely important for any photographer. So do your best to not get stuck in the routine, and go to a new destination at least once a year, even if it’s a small village not far from your habitat.

10. Judge your success by what you had to give up in order to get it.

Success is always about making sacrifices and compromises. However, it’s up to you to decide how much to give up on the way to it. Your own photography business will require you to be a wearer of many hats, it will also soak up tons of your time and energy. But if it pushes you to compromise your loved ones or life values, stop and think whether it will be a success at all if it’s achieved this way.

11. Open your arms to change, but don’t let go of your values.

Change is an essential part of any business, especially when you work in the creative field. Embrace new technologies and don’t miss an opportunity to boost up your marketing, but don’t betray your values as they are the first to speak of your personality and brand.

Nick Kenrick

By Nick Kenrick

The Dalai Lama’s rules of living are not novelties, it’s something we’ve all heard at least once during a lifetime. However, we often forget or fail to apply these laws in our daily routine. So having these simple truths listed in one place which you can get back to once in a while may help you be a better person and achieve more in life. Do you agree? Share your own life lessons and favorite quotes in the comments!

googletag.cmd.push(function() {
tablet_slots.push( googletag.defineSlot( “/1005424/_dPSv4_tab-all-article-bottom_(300×250)”, [300, 250], “pb-ad-78623” ).addService( googletag.pubads() ) ); } );

googletag.cmd.push(function() {
mobile_slots.push( googletag.defineSlot( “/1005424/_dPSv4_mob-all-article-bottom_(300×250)”, [300, 250], “pb-ad-78158” ).addService( googletag.pubads() ) ); } );

The post 11 Rules of Living by Dalai Lama to Help You Bring Zen to Your Photography by Darlene Hildebrandt appeared first on Digital Photography School.


Digital Photography School

 
Comments Off on 11 Rules of Living by Dalai Lama to Help You Bring Zen to Your Photography

Posted in Photography


10 Fresh Photography Business Articles to Help You Thrive in 2015

02 Mar

Finally, spring came up and it’s a wonderful time of the year to start grow your business and improve yourself as a photographer. We do a little search to find the best fresh photography business articles from leading blogs which will help you to thrive in 2015. Here you’ll see 80 online and offline marketing strategies for photographers, the recipe Continue Reading

The post 10 Fresh Photography Business Articles to Help You Thrive in 2015 appeared first on Photodoto.


Photodoto

 
Comments Off on 10 Fresh Photography Business Articles to Help You Thrive in 2015

Posted in Photography


6 Eye-Catching Photos and How They Can Help You Improve Your Photography

17 Feb

Each photographer has their own way of approaching a scene, choosing which settings on their camera will best reflect their vision, and then crafting the final image. You get to make this series of decisions each time you take a photo, and it’s a highly personal experience.

But you can still learn a lot by going behind the scenes of a photo, and hearing how the photographer made their own decisions. Whether you pick up a new tip for creating an interesting effect, a new way of looking at a scene, or simply the inspiration to go and shoot, it’s both informative, and a lot of fun too.

So here are six of my favourite photos, and details about how they were taken. Get out your notebook, have your camera handy, and let’s go.

1. Waterfall in the Woods

Extremely essential camera skills 1

Vancouver Island, Canada – Settings: 14mm, f/10, 1.6 seconds, ISO 80

This shot is a great example of what happens when you pick a slow shutter speed. Moving water takes on this flowing look and adds a softer feel to the image.

If you want to get this effect, first set your shutter speed to a long value. Here the setting was 1.6 seconds – a value around there is a good place to start. Then you’ll need to adjust the rest of your settings to get a good exposure. This can be tricky sometimes, especially if it’s a really bright scene. A high (small) aperture, and low ISO can really help. But if that’s not enough, you may need to use a neutral density filter.

Then make sure you can keep your camera steady for the entire shot. The ideal would be to use a tripod, but it doesn’t even need to be a big, heavy one. This shot was taken with a point and shoot camera (the Sony RX100III) and the tripod was just a tiny tabletop tripod set up on the rocks.

Finally take the photo, and enjoy a beautiful waterfall image that really grabs your viewers’ attention.

2. The Bee and the Flower

Extremely essential camera skills 2

Edmonton, Canada – Settings: 85mm, f/4.0, 1/3000th, ISO 200

This photo has two elements to pay attention to, the first being the composition. The bee is very small, but you can still easily make it out. That’s thanks to negative space. All of the blue, empty sky is negative space that draws your eye towards the subject. One of the keys to finding negative space in a scene is to move your feet. Walk around, looking to see if you can find an angle that helps simplify your frame by incorporating negative space. Don’t stop there, though. Change your position even further by climbing up high, or, as in this case, lying on the ground. Yep, this photo was taken lying flat on the grass. Don’t be afraid to get messy in the pursuit of a great shot.

The second thing to note about this shot is the shutter speed. There’s a very fast setting chosen here (1/3000th of a second) and that allowed the bee to be in sharp focus, even when it was moving very fast. A slower shutter speed could have led to motion blur of the subject, losing that crisp, sharp detail. When shooting fast moving objects, make sure your shutter speed is set appropriately.

3. The Internet Man

Extremely essential camera skills 3

Jodhpur, India – Settings: 50mm, f/1.6, 1/320th, ISO 400

There’s a great story behind this image. On a trip through India we found ourselves in Jodhpur, known as the Blue City. The walls of many of the houses are painted a vibrant blue, and it made for some incredible images. But this portrait was not taken on a photo walk, but rather after we made our daily visit to the internet shop.

After we finished up on the computer, we got to chatting with the man who owned the shop. He was a wonderful guy, with a great face, so we asked for a portrait. He was happy to oblige, and by standing in the doorway of his shop we got both a beautiful blue background, and catchlights in his eyes from the light coming in the door (catchlights, those white specks in the eyes, are a great way to add life and sparkle to your subjects’ eyes).

One final note on the settings: using a low aperture value can help your subject stand out from the background, especially if you can’t bring them very far forward from the background. In this image f/1.6 was used, which is definitely very low, but it really helped create some background separation.

The best part of the story? After we took his photo (and gave him a copy of the file) he thanked us, and told us that he’d pray that we’d have a son before returning to India. Well, we did have a son. Now we just have to go back, don’t we?

4. Cows in the Field

Extremely essential camera skills 4

The Sacred Valley, Peru – Settings: 200mm, f/7.1, 1/1600th, ISO 800

Learning how to use lens compression to your advantage can make for some really impressive shots. This image is a great example of this technique.

Very simply, when you use a longer focal length (like the 200mm used in this photo) it makes the distance between objects in the frame appear to be less. It makes the background appear closer to the foreground, and in this example it makes the hills appear very close to cows. Essentially, it compresses the space in the image.

Here you can see how it makes the hills really fill the frame and create a strong, patterned background that contrasts nicely with the organic shapes of the cows.

In your own photography you can use a long lens to make clouds appear much larger and closer to your subject, or make your friends look like they’re stepping on top of a building, Godzilla-style. There’s no limit to the creative effects you can achieve when you use compression.

5. Down the Stairs

Extremely essential camera skills 5

Krabi, Thailand – Settings: 17mm, f/5.0, 1/400th, ISO 400

If long lenses make objects appear closer to each other in your frame, what about wide angle lenses?

Here’s a great example. This shot, taken while looking down a few of the 1,272 treacherously steep steps of the Tiger Cave Temple, makes you feel like you may just fall down them, along with the photographer.

The wide angle lens (17mm) helps to create that feeling. The wide angle exaggerates the distance between objects, especially at the edges. Take a look at those hand rails at the edge of the frame. They look very far apart, especially compared to the distance between the hand rails further down the stairs. But this exaggeration at the edges helps to turn the rails into leading lines, drawing your eye down the stairs, and creating that falling feeling.

So if you want to add some drama to an image, or exaggerate perspective, grab a wide angle lens. Place objects near the edges and make use of the stretching it causes.

6. Camel at Sunset

Extremely essential camera skills 6

Jaisalmer, India – Settings: 70mm, f/7.1, 1/400th, ISO 125

Doesn’t a great silhouette image just grab your attention? It’s so different from how we normally see the world that it can add a big impact to your work.

But a silhouette is a prime example of how your camera can easily be fooled by light, and how you, the photographer, need to know how to control it.

In this example your camera might very well try to expose for the camel, or somewhere in between the camel and the sunset, and you’ll wind up with something really bright, or sort of dark, but it probably won’t look like a nice, crisp silhouette.

So what to do? Take control. When aiming for a silhouette you’ll want to expose for the sky, not the subject. Then you can either use exposure compensation to dial in the exposure you’re looking for, or better yet, jump into full manual control and choose your settings to get exactly the exposure and depth of field you want.

Hopefully this peek behind the decisions and settings of these photos gives you a few tips to take some great shots of your own. The more you learn about how all the settings on your camera affect the look and feel of your images, the better decisions you’ll be able to make. Best of all, this stuff doesn’t have to be hard to learn, and you’ll get to use the knowledge to create better images for the rest of your life.

googletag.cmd.push(function() {
tablet_slots.push( googletag.defineSlot( “/1005424/_dPSv4_tab-all-article-bottom_(300×250)”, [300, 250], “pb-ad-78623” ).addService( googletag.pubads() ) ); } );

googletag.cmd.push(function() {
mobile_slots.push( googletag.defineSlot( “/1005424/_dPSv4_mob-all-article-bottom_(300×250)”, [300, 250], “pb-ad-78158” ).addService( googletag.pubads() ) ); } );

The post 6 Eye-Catching Photos and How They Can Help You Improve Your Photography by Lauren Lim appeared first on Digital Photography School.


Digital Photography School

 
Comments Off on 6 Eye-Catching Photos and How They Can Help You Improve Your Photography

Posted in Photography


Photo Journaling Can Help you Become a Better Photographer

11 Feb

MonicaDayDPS-Journal-01

Let’s face it, photographers are artists. We love creating works of art in our photography. We love to express ourselves with our camera. We create photographs based on what our mind sees. You can take five different photographers with the same setting or model and get five completely different photographs. We are artists and photograph in our own unique ways. It’s important for us to continue to learn and grown and keeping a journal is an amazing way to do that. Your photo journal will serve two purposes. The first is to document your growth as a photographer. The second is to show where you were mentally when you took your photos. You’ll love being able to reference this information in the future.

Why Journal?

MonicaDayDPS-Journal-03

I learned photography by shooting with a 35 mm Pentax camera I picked up from a pawn shop. I didn’t have the luxury of looking at my screen (or chimping) after each shot. I had to shoot a roll of film, bracket, and then review the contact sheet to see what worked. I did this for months until I was able to predict what my settings needed to be in a variety of situations. I kept a journal of my photos and wrote down the settings that corresponded with each shot. I learned to do this while in art school. Nowadays, you don’t have to do this, but keeping a journal is still an amazing way to see your progress.

How Do You Journal?

MonicaDayDPS-Journal-02

There’s really no right or wrong way to do this, the key is to just do it. Basically, you’ll be writing consistently and adding your photos. When you have an awesome shoot – journal it. When you have a sucky shoot – journal it. Attach your photo and write about your feelings, the settings, the occasion, your equipment, anything new you tried, and anything else you might find relevant. The key is to write about anything that might give insight into how you created that photo. I’ll often add my inspiration sheets to the journal page. It’s just a nice way of referencing where you were pulling your inspiration at that time in your life. I encourage you to date your entries as well.

Just get started and you’ll develop a system that works for you. You can get as creative as you’d like. This is YOUR journal.

Creating Your Journal

MonicaDayDPS-Journal-05

The first thing you want to do when creating your photo journal is to find a book of some sort that you’ll be using. I like big sketch books. These give me plenty of room to attach my photos and to write about them. Next, get to snapping! That’s right. Take photos. Make it a habit to take photos weekly or even daily. You might not use all of these in your journal but you’ll have them to pull from. Take care that you are attaching your photos in a way that they won’t fall out. Double sided tape is excellent. You can even use photo corner adhesive pieces so that you can remove your photos if you ever need to later.

This journal is an expression of yourself, for yourself. You can get creative with it, or keep it simple. This is for your reference only.

MonicaDayDPS-Journal-04

Photo journaling is an excellent way for you to work on your photography and know where you need improvement. It’s a great way to express yourself and keep from being burned out. Photo journaling is a great way to get yourself shooting out of your norm, and even try new things. I encourage you to try this for a while and see how it changes your world. I’m sure you won’t be disappointed.

googletag.cmd.push(function() {
tablet_slots.push( googletag.defineSlot( “/1005424/_dPSv4_tab-all-article-bottom_(300×250)”, [300, 250], “pb-ad-78623” ).addService( googletag.pubads() ) ); } );

googletag.cmd.push(function() {
mobile_slots.push( googletag.defineSlot( “/1005424/_dPSv4_mob-all-article-bottom_(300×250)”, [300, 250], “pb-ad-78158” ).addService( googletag.pubads() ) ); } );

The post Photo Journaling Can Help you Become a Better Photographer by Monica Day appeared first on Digital Photography School.


Digital Photography School

 
Comments Off on Photo Journaling Can Help you Become a Better Photographer

Posted in Photography


10 Recent Articles with Real-world Tips to Help You Grow as a Photographer

19 Jan

As 2015 came into play, we thought it might be a good idea to make a list of some recent educational resources to share with you. In this period of added motivation and energy the beginning of the year usually brings, take time to upgrade your photographic skills and build up some business muscle. The following 10 articles are full Continue Reading

The post 10 Recent Articles with Real-world Tips to Help You Grow as a Photographer appeared first on Photodoto.


Photodoto

 
Comments Off on 10 Recent Articles with Real-world Tips to Help You Grow as a Photographer

Posted in Photography


10 Essential Little Items To Help You Shoot On-Location

29 Dec

In the past, we have talked a lot about the big, important items of gear every photographer needs- like a Camera or a proper case to transport it. Today’s post however is dedicated to all the items that don’t seem like they can make a big difference. But trust me, they do. A Good Backpack I cannot stress enough about Continue Reading

The post 10 Essential Little Items To Help You Shoot On-Location appeared first on Photodoto.


Photodoto

 
Comments Off on 10 Essential Little Items To Help You Shoot On-Location

Posted in Photography


9 Tips to Help you get Sharp Focus at Night

12 Dec

Autofocus is so good on modern cameras that most photographers use it all the time. It seemingly never lets you down. But, let’s say it’s nighttime and you are going to do some shooting. You find a good spot. You set up your tripod. You go to focus your camera using the autofocus. You can feel the camera’s focus ring twisting back and forth, trying to focus. But it never gets there. The camera keeps hunting for a focus spot but never finds one.

Uh-oh.  What are you going to do now?

Tower Bridge, March 2011

Actually, this problem doesn’t arise only at night. Your camera will typically have trouble focusing in any really dark scene. So here are some tips for dealing with that situation and focusing your camera when it is dark:

1. Aim for the bright spot

Sometimes you can still use your autofocus. Even though it is dark, most night scenes will have a bright spot or two. They might be streetlights, or a lit-up building, or even the moon. That bright spot can be used to set your autofocus.

To do so, find a bright spot that is reasonably close to your desired plane of focus (i.e., the same distance away as your focal point). Autofocusing on that point should take care of your problem. Just focus on that bright spot in a normal fashion and your camera is now focused on something the same distance away as your subject. You should then be able to take your picture with proper focus.

Green Park, November 2012

2. Focus on the edge

Most cameras focus using something called contrast detection. That means the camera will have the best chance at finding something to focus on if you aim at the area of high contrast between something bright and the dark background.  So don’t aim your focus point at the middle of the bright spot in your frame. Rather, focus on the edge of the bright point. The camera will use the contrast between the very light and the very dark tones to focus.

CaCoast

3. Use a flashlight

If you are attempting to autofocus on a relatively close subject, you can use a flashlight to assist with the focus. This is one of the many reasons to keep a flashlight in your camera bag.

To do that, shine your flashlight on your subject. That will lighten it up enough for the camera to focus on it. Set your focus, then you can turn off the flashlight and take your shot.

4. Recompose after focusing

Assume you now have your focus set using the methods set forth above. But to get that focus, you had to move your camera away from your desired composition to focus on the edge of a bright spot. Move your camera back to your desired composition to get the shot. Don’t refocus as you do so though – just move the camera and take the shot with the focus you’ve already set. (You will need to either hold the shutter button part way down, use focus lock, or focus and then turn off the AF so it doesn’t attempt to refocus once you have recomposed – or see #5 below.)

BigBendNight

5. Use back-button focus

It is times like this, when you want to take a shot with out refocusing, that back-button focus really pays dividends. If your camera allows it, go into the menu and set up your focus so that it is not triggered when you press the shutter button halfway down, but rather is triggered when you press a button on the back of your camera. That way since your focus is not set with the shutter button, when you take the picture by pressing it there is no chance that your camera refocuses.

6. Manually focus using the lens scale

If there is nothing for you to use to set your autofocus, you might have to use the dreaded manual focus. But don’t worry, it is not difficult. In the dark, it is often easier to focus manually than hunt for something to use for autofocus.

Higher-end lenses make it easier to manually focus. In a high-end lens there should be a scale on the front that tells you the distance (in both feet and meters) at which you are focused. Use that to set the focus.

You might need a flashlight to see the scale.  This is yet another reason to keep a flashlight in your camera bag.

TopOfLens

7. Manually focus by guestimating

If you cannot find a point to focus on, and your lens does not have a distance scale, all is not lost. You can guestimate and get it right in a lot of cases.

To do so, make sure you are shooting with a high aperture value (small opening, large f-number). That will create a wide depth of field to give you some wiggle room in your focus. Specifically, the wide aperture will make a wider range of things acceptably sharp in your frame.

In addition, be sure you are shooting with a wide angle lens. This is not the time to try anything telephoto. The wider angle of view creates a more forgiving environment for your focus.

With a wide aperture and the wide angle of view, you have a broader latitude in your focusing. Now manually focus your camera. If you are shooting a broad scene that extends to infinity, set the manual focus just shy of infinity. The latitude you built-in will make things acceptably sharp all the way to infinity and a certain distance in front of your focus point as well. That will give you the best chance of having the whole scene in focus.

St. Paul, November 2012

8. Use Live View

If you can see anything on your camera’s LCD using Live View, then you can use that to manually focus. This is frequently better because you can zoom in on your subject and clearly see if you have nailed the focus. Try using this whenever possible, as it allows a degree of control over focus that is not otherwise possible.

9. Remember you get a do-over

One of the beautiful things about digital photography is that shooting is free. Unless your scene is moving in front of you, you get a free do-over. Use it liberally. Take a shot, look at it on the LCD, and if the focus isn’t right, just do it again. If your camera allows it, go ahead and zoom in on the preview to clearly see the detail and whether or not you have nailed the focus.

Destin

Conclusion

These tips will help you set your focus at night or when you are in a very dark scene. In fact, some of these tips will also help in broad daylight when the camera thinks it is dark because you are using a 10-stop neutral density filter. Try them when your autofocus is hunting but not finding the focus. You should be able to nail the focus in almost any situation.

googletag.cmd.push(function() {
tablet_slots.push( googletag.defineSlot( “/1005424/_dPSv4_tab-all-article-bottom_(300×250)”, [300, 250], “pb-ad-78623” ).addService( googletag.pubads() ) );
} );

googletag.cmd.push(function() {
mobile_slots.push( googletag.defineSlot( “/1005424/_dPSv4_mob-all-article-bottom_(300×250)”, [300, 250], “pb-ad-78158” ).addService( googletag.pubads() ) );
} );

The post 9 Tips to Help you get Sharp Focus at Night by Jim Hamel appeared first on Digital Photography School.


Digital Photography School

 
Comments Off on 9 Tips to Help you get Sharp Focus at Night

Posted in Photography


Tips to Help You Prepare for a Successful Portrait Session

08 Dec

One of my favorite types of photo shoots is families with kids. It’s fun to spend an hour talking and laughing with people while taking photos. I enjoy being a small part of creating images that will preserve their precious memories for the rest of their lives. But these types of sessions don’t always work out as you might like, and even when you think you have all your ducks in a row something might pop up at the last minute that sends everything into a tail spin. Fortunately, with a bit of planning and preparation you can put a few things in place that will help your portrait sessions be freeing, fulfilling, and fun for everyone involved.

kids-bridge

Set Expectations

Whether you are taking photos of friends, family, clients, or even your own kids, one of the most important things you can do is make sure you are going to deliver what they want. Your subjects will have their own preconceived notions of what types of pictures they are looking for, and they might not always be the same as what you have in mind. If you can make sure everyone is on the same page before you even take out your camera, the entire process from posing, to shooting, to editing, will be much, much smoother.

Whether you know your subjects or not, it’s important to make sure they are familiar with, and approve of, your own picture style and portrait process. Showing your subjects some of your existing work is a good way to give them an idea of your style and help them see if you would be a good fit. This can be as simple as sending them some sample photos by email, directing them to an online portfolio, or sitting down and having a conversation about the type of photo shoot they are wanting.

Every photographer has a unique approach to his or her craft, and interacts with people in their own way. Do you take classic headshot portraits or do you like to experiment with various poses? Do you let subjects, especially kids, run around and play or do you like to control every element of the photo shoot? Do you shoot outdoors, in a studio, or a mix of both? Will they be able to share the photos online with a watermark, or do you require them to order physical prints? This might seem a bit too nitty-gritty, but dealing with these issues up front will save you a lot of hassle and headaches down the line.

couple-sunset

Not all photographers have their own website, but if you do you can include information such as the types of sessions you normally do, how much you charge, where you are willing to travel, etc. This information is good to know, but it often takes a little more to see if you are really the right person for your subjects. Think of the last time you went to a restaurant: did you just order right from the menu, or did you ask your waiter some questions about the food before deciding what you want? To address this, it’s good to have some sort of dialog with your subjects before you take a single photo. You can encourage people to contact you via email or a form on your website, send you a text or tweet, or post questions on a public Facebook page. It might seem like a lot of work to go through all this, but the more you work to set proper expectations for your subjects, the smoother the entire process will go.

One of the best ways to safeguard yourself against liability in case your subjects are unhappy, is to use a contract. This is especially important if you plan on charging money, and critical if you are doing something big like a wedding or bar mitzvah. If people are paying big bucks for your services, it’s essential that everyone is on the same page upfront. Without a formal contract wherein all parties involved agree on the services to be provided, things can devolve into he-said-she-said after your clients get the photos. Don’t think of this as a punitive measure, though – approach the contract as an opportunity for both you and your clients to help safeguard against miscommunication and make sure what you are going to provide aligns with what they want.

kids-flowerpot

Scout the Location

If you shoot indoors, this step is obviously not all that important. But if you plan on taking pictures outdoors it is critical that you know the area first. Just because you drove past a nice park or a friend told you about a rustic barn, doesn’t mean these places will be good locations for photo shoots. Go to the locations in person, get out of your vehicle, and walk around to see what things are like. If at all possible, do this at the same time of day you plan on taking pictures to make sure the light is similar, and ask yourself questions such as:

  • Where is the light coming from?
  • What features of the location are shaded?
  • What background elements can I use in the shots?
  • What existing features (fence, wall, bench, pond, tree, staircase, etc.) can I use for posing my subjects?
  • Are there lots of people around, and if so, what angle can I shoot from to avoid them in the background?
baby-basket

Normally this spot is full of people, but we picked a time to do the shoot when it was relatively quiet.

Even if you have already been to a location such as a field, beach, or alley, it’s still a good idea to check it out before your photo session if you have never used it specifically for taking pictures. If you approach the location with a critical photographer’s eye you will notice many things that have probably escaped your gaze previously, but could severely impact the photo session if not taken into account. It’s also a good idea to have a backup location in mind in case of bad weather, but make sure your clients are well aware of this and are able to meet you there if you do have to change plans.

Bring Blankets (and more)

This last tip might sound trite, but it has saved me on many occasions. And every time I forgot to bring blankets, I wished I had. Since I do most of my photo sessions outdoors there are many things simply out of my control. Some of these can be mitigated, like using reflectors or a flash if the light is poor, or having your subjects wear warm clothes if a cold front comes through the night before, but it’s amazing how many times a simple blanket has saved the day when all hope seemed lost.

Blankets can give your subjects something to sit on, wrap themselves up in, or just play with as you are snapping their photos. Blankets can comfort fussy children, diffuse a tense situation, or even (and yes this has happened to me more than once) cover up the mess left behind by a flock of geese the day before. They can also serve the practical function of adding a bit of color to your photos, or complementing the clothes that your subjects are wearing.

There are other items that come in handy as well. Recently I was photographing a couple and their infant son, and though I had already scouted the location at the specific time the shoot was to take place, I did not take into account one critical element: dew on the ground. I wanted to get some shots of their son holding his head up and looking around, but since the grass was all wet it nearly turned our fun photo shoot into a chore for the parents as well as the child. Thankfully I brought an old piece of canvas along, which not only gave the boy a soft dry surface to lay on, but was also big enough to accommodate the whole family on some wider shots.

baby-canvas

The ground was too wet to lay on, so I asked his parents if we could use a simple piece of canvas. They obliged, and the final result turned out quite well.

If you are taking pictures of children, bring some toys that they can play with, or kid’s books for them to read. Better yet, contact their parents beforehand and have them bring their own favorite toys and books from home. I also like to have some sundry joke items like fake teeth or googly eyes to help make kids smile, which tend to work well for teens and adults too. If your subjects are a bit older, they might want to wear a favorite jacket, bring an artifact such as a football or set of golf clubs, or even have their photo taken with a pet. While you might not be able to provide all of these yourself, a little bit of preparation beforehand will give you an idea of what they want and help you go about planning for the shoot so you are not caught off guard.

child-book

This boy’s favorite book not only gave him something to do while taking photos, but it will be a nice reminder when his parents look back on this picture years later.

These tips are things that have worked for me, but are there other tips you have for successful photo shoots? Share your ideas in the comments section below.

googletag.cmd.push(function() {
all_slots.push( googletag.defineSlot( “/1005424/_dPSv4_mob-all-article-bottom_(300×250)”, [300, 250], “pb-ad-78623” ).addService( googletag.pubads() ) );
} );

googletag.cmd.push(function() {
mobile_slots.push( googletag.defineSlot( “/1005424/_dPSv4_mob-all-article-bottom_(300×250)”, [300, 250], “pb-ad-78158” ).addService( googletag.pubads() ) );
} );

The post Tips to Help You Prepare for a Successful Portrait Session by Simon Ringsmuth appeared first on Digital Photography School.


Digital Photography School

 
Comments Off on Tips to Help You Prepare for a Successful Portrait Session

Posted in Photography


DSLR versus Mirrorless: Guide to help you decide which is right for you?

07 Dec

Recently there has been a great deal of buzz in the photographic community regarding a few terms that might sound a little odd or strange, like “mirrorless” or “micro four thirds.” These refer to different types of cameras that might not be as popular as standard DSLR models right now, but many think are the future of photography. However, just understanding what everything means can be an exercise in frustration, especially when all you likely want to do is buy a camera you can enjoy using.

Nadir Hashmi

By Nadir Hashmi


To that end, I’m going to try and dispel a bit of the confusion regarding mirrorless cameras and hopefully give you some information so as to make an informed choice the next time you are in the market for a new piece of photography gear. We’ll explore some of the history of how cameras are constructed, as well as discuss some of the benefits and drawbacks to this new technology, but I’m going to stop short of making the subjective judgement call about whether mirrorless cameras are better than DSLRs. For me it’s not about which camera is better than the other, it’s about finding one that works with your style and lets you shoot the photographs you want. You can debate all this in the comment section if you like, but what I’m here to do is simply present information and try to be as unbiased as possible.

a6000

The Sony a6000 mirrorless camera has all the features of most standard DSLRs, but is much smaller and weighs far less. (Image courtesy Sony)

What is a mirrorless camera?

To understand the word mirrorless it helps to know a bit about the way most DSLR cameras are built. Almost all Canon, Nikon, Sony, and Pentax interchangeable-lens cameras share a similar industrial design: light enters through the lens and gets bounced off a mirror, through a special prism, to end up at the viewfinder. When you click the shutter button, the mirror flips up, which allows light to hit the actual image sensor on the camera, and voila your photograph is taken. This process might seem like a high-tech solution, but it’s actually a bit of an anachronism. Long before digital cameras existed, most of their film-based counterparts employed this same method to get light to the viewfinder, because it was a useful way to compose your photo before clicking the shutter. But thanks to advances in modern technology, this flip-up mirror method is no longer necessary, and a whole new breed of cameras is beginning to make inroads into modern digital photography. These new models have no flip-up mirror, and thus the term “mirrorless” was born.

There are many different types of mirrorless cameras on the market: some have interchangeable lenses, others offer a single built-in lens, and some with their own types of image sensors and other characteristics that are suited to more niche markets. But the one thing they all have in common is the absence of a flip-up mirror.

CameraDiagramDPS

Believe it or not, you probably already own a mirrorless camera. All smartphone cameras are mirrorless, as are most point-and-shoot models. Instead of a tiny little viewfinder that you hold up to your eye, you can see a preview of your image right on the phone or on the back of the camera itself. And if you like shooting your DSLR in “Live View” mode, where you look at the rear LCD screen to compose your shots instead of the viewfinder, you are essentially using it as a mirrorless camera already. (The click you hear when you enter Live View is the mirror flipping up. It stays like that until you exit Live View.) In fact, many of the higher-end mirrorless cameras have even gone so far as to replicate the traditional eyepiece viewfinder, but instead of reflecting incoming light from a mirror, it simply shows a very tiny version of what would normally be displayed on the back of the camera.

OMD-EM1

The Olympus OM-D EM-1 is a mirrorless camera that also includes a traditional-style viewfinder. (Image courtesy of Olympus)

Sensor size

Another component of mirrorless cameras that is a bit more technical in nature, but just as important to understand, is that of sensor size. In digital cameras the image sensor is essentially a piece of digital film that captures light, in much the same way actual film does. Full-frame DSLR cameras have image sensors that are the same size as a piece of 35mm film, but most consumer-grade DSLRs, and virtually all mirrorless models, are crop-sensor cameras. This means that the image sensor is smaller, which has two notable implications:

  1. They are not as sensitive to incoming light as full-frame cameras.
  2. They affect the way lenses behave when it comes to focal lengths and depth of field.

The most common format of mirrorless cameras are in a category developed by Olympus and Panasonic called Micro Four Thirds, which refers to the size and shape of the image sensor itself as well as the types of lenses that can be used on these models. Other mirrorless cameras use an APS-C sensor, which is the same size sensor used in common DSLRs such as the Canon Rebel T5i and Nikon D3200 (however, even Canon and Nikon use slightly different image sensor sizes), but there are some models such as the Sony A7R that use full-frame sensors as well.

SensorSizeDPS

In terms of surface area, full frame image sensors reign supreme. But cameras with smaller sensors are still quite capable, and there is more to a camera than the size of its sensor.

While it’s doubtful we will see crop-sensor cameras (whether micro four thirds or APS-C) reach the same high ISO sensitivities as full-frame models, many of them today are perfectly capable of shooting at values such as 3200 or 6400 without too much degradation in image quality.

As for the lens behavior, shooting on a crop sensor camera means that your focal lengths will not look the same as on a full-frame camera. For example, on a micro four thirds camera a 30mm lens behaves similar to a 60mm full-frame lens. A 100mm lens acts like a 200mm, and so on. For most people this is fine, and they learn to adapt to the differences in lens behaviour over time. For some photographers this a significant detriment that, combined with how depth of field behaves a little different on crop versus full frame cameras, ends up being a deal breaker.

As I mentioned earlier, it’s not about finding out which type of camera is better – that question is unanswerable. Instead, it’s important to simply know the various details of micro four thirds and other mirrorless cameras, in order for you to make an informed decision if you are thinking about purchasing new gear.

lumix-gh4

Even though the Panasonic Lumix GH4 is uses a smaller micro-four-thirds sensor, it produces photos on par with most APS-C sensors and even shoots 4K video. (Photo courtesy of Panasonic)

However, one benefit of crop sensor cameras that is important to note is their price; they are significantly cheaper than their full-frame counterparts. The cheapest full-frame camera costs around $ 1500 and they can easily cost many times that amount. On the other hand, some micro four thirds models start at a couple hundred dollars which makes them much more affordable for most people. It’s important to know that mirrorless cameras are not just for beginners, or those who like to shoot in Auto. Many photographers are buying these cameras, and some professionals have even switched entirely from heavy, expensive, DSLR models to their much lighter and more portable mirrorless counterparts.

As you can see, thanks to advances in modern technology the age-old flip-up mirror design in most cameras is not really needed anymore, but we are still a little way off from mirrorless replacing traditional DSLR designs entirely.

Benefits of mirrorless cameras

These new types of cameras offer some significant benefits over traditional DSLRs, but come with some important limitations as well. Remember, we’re not here to discuss which one is better – that’s something that only you can answer, given your unique needs as a photographer. It is important to know that mirrorless cameras do have some notable selling points, but also some drawbacks as well.

Size

K?rlis Dambr?ns

By K?rlis Dambr?ns

Perhaps the most significant difference between mirrorless and traditional DSLRs is their size: because the flip-up mirror mechanism, combined with the light-reflecting prism, are no longer needed these cameras are typically much smaller in size and weigh less too. This can be important if you are someone who likes to take your camera with you wherever you go, especially if the weight of your DSLR starts to drag you down after a day of shooting. It also means the lenses are smaller too, so you can fit several in your camera bag whereas before you might have only had room for one or two.

More accurate image preview in the viewfinder

Another benefit that mirrorless cameras enjoy over DSLRs, is a viewfinder that displays a more accurate representation of what your final photograph will look like. If you look through the viewfinder of your DSLR and adjust settings like ISO, aperture, and shutter speed, you might notice that the image in the viewfinder doesn’t change. It’s not until you actually take a photograph that you see what effect your alterations had on the photograph. At that point you can look at the picture on the rear screen and judge whether you need to change things for subsequent pictures. Because mirrorless cameras use electronic viewfinders, you can see in realtime the effect that things like aperture and ISO adjustments will have on your pictures before you press the shutter. This can have a dramatic effect on how you shoot, as it removes some of the guesswork with your camera settings.

The mirrorless Fuji XT1 uses an APS-C size sensor but is much smaller than traditional DSLRs, making it a compelling option for photographers who value portability along with excellent image quality.

The mirrorless Fuji XT1 uses an APS-C size sensor but is much smaller than traditional DSLRs, making it a compelling option for photographers who value portability along with excellent image quality. (Photo courtesy of Fujifilm)

Focus peaking and sound

There are other benefits to mirrorless cameras as well such as focus peaking (the ability to see, when focusing manually, the exact pixels on your image that are in focus), quieter operation due to the lack of a flip-up mirror, and fewer overall moving parts which means a longer theoretical lifespan. But in order to get an accurate view of the situation, let’s take a look at some of the disadvantages as well.

Drawbacks of mirroless cameras

Things are looking quite promising over in Mirrorless Land, but it’s not all sunshine and roses just yet. There are some notable drawbacks to this technology, and if you don’t look at all the details you might end up with a camera that is ill-suited to your needs as a photographer.

Battery life

Currently one of the most significant limitations is that of battery life: they just don’t last as long. The only time a traditional DSLR draws power, when not in Live View mode, is when it is actively metering the scene or writing picture data to the memory card. No power is used at all if you hold the camera up and look through the viewfinder, and because of this it is fairly common to get up to a thousand pictures or more on a single battery charge. Power usage is a bit different on mirrorless cameras for two reasons. First, batteries are smaller because the cameras themselves are smaller, and second they essentially operate in live view mode 100% of the time. Mirrorless cameras generally get a couple hundred shots on a single battery charge, which is nothing to sneeze at, but nonetheless a significant difference between them and their old-school brethren.

Canon7DMarkII

DSLRs might be based on old technology, but don’t count them out just yet. They are preferred by many photographers, and still have some advantages over mirrorless cameras. (Photo courtesy of Canon)

Focusing system

Another limitation that is worth mentioning is the focusing system. Most mirrorless cameras use a technology called contrast detection, which is simply not as fast as the traditional phase-detection method used in DSLRs. While the former gives you access to a wider area of the frame in which to focus, it simply cannot match the speed of the latter which limits the appeal of mirrorless camera for things like sports and fast-moving wildlife photography. Some manufacturers are starting to utilize phase detection in their mirrorless models, as well as hybrid systems that offer the best of both worlds, but for now it’s safe to say that standard DSLRs are generally better suited for sports, wildlife, and other types of action photography.

Other

Of course there are other limitations such as fewer lens options, LCD screen refresh rates that can’t always keep up with DSLR viewfinders, and more, but as technology advances much of this is being addressed.

Which is best for you?

Will mirrorless cameras ever reach full parity with DSLRs? Some think so, but others are not fully convinced. The important thing to remember is it’s not about what other people think; it’s about what matters to you. If you find a camera you like, and it serves your purposes as a photographer, then it really doesn’t matter whether it’s a DSLR, micro four thirds, full frame, medium format, or plain old 35mm film camera. If it can take the pictures you want to take, then it’s probably the right camera for you.

googletag.cmd.push(function() {
mobile_slots.push( googletag.defineSlot( “/1005424/_dPSv4_mob-all-article-bottom_(300×250)”, [300, 250], “pb-ad-78158” ).addService( googletag.pubads() ) );
} );

The post DSLR versus Mirrorless: Guide to help you decide which is right for you? by Simon Ringsmuth appeared first on Digital Photography School.


Digital Photography School

 
Comments Off on DSLR versus Mirrorless: Guide to help you decide which is right for you?

Posted in Photography


5 Tips to Help You Take More Natural Looking Portraits

05 Dec

Writing for dPS has afforded me several opportunities, the best one being getting to converse with photographers – hobbyists to professionals and everything in between – from all over the world.

lynseymattingly3

Each time an article I write is published, I get the loveliest emails and comments, and I do my very best to respond to each of them. The question I get most often is one I ask other photographers all the time: How do you make your pictures look like……..that? The question may be worded differently, but ultimately it is the same:

  • How do you get your colors to pop?
  • What lens do you use?
  • How come the people all look so happy/comfortable/natural in your pictures?
  • What’s your editing process?

When we ask another photographer these questions, we are all asking the same thing: How do you make your pictures look like that?

When an image grabs you – makes you take an extra second to look at, to admire it, or to wonder if your own images look that great, (or throws you into a jealous rage over picture envy (please tell me I’m not the only one) – it’s as though the photographer has such a defined style, their entire message comes across in that one photo staring back at you. Since my style is candid portraiture, or lifestyle photography, or whatever the latest buzzword is we are calling it now, my subjects’ expressions and poses are what I typically get asked about most. Or maybe that’s just the only part I can explain very well, as the science and equipment piece of it is just not my cup of tea.

lynseymattingly8

So here are the five things I say and do during a portrait shoot that I feel make the biggest difference in the comfort level of my clients, and ultimately is the reason I occasionally strike gold. It’s these things that are the answer to how I make my pictures look like that.

#1 Explain the process

Before I take a single picture – whether my subjects are nine or 90 years old – I tell them exactly what to expect from the session, and what I expect from them. It nearly always goes like this: “I’m going to take some pictures. I’m going to take some pictures of just the kids, some pictures of just Mom and Dad, and some pictures of everybody. You can smile if you want to smile, but you don’t have to if you don’t want to, and at the end I’m going to give you a little prize.” This short little introduction often immediately puts my clients at ease and I am able to set the tone of the whole shoot based on their response.

lynseymattingly6

If I am photographing kids, I always sit down on the ground so I am closer to their level, but I say this exact thing to children and adults alike. Yes, I carry around lollipops. My gear bag has an entire area just for that, and people I have photographed before know it. A lollipop is a tiny treat and while it’s fun and funny, though not usually a huge motivator for teenagers and certain adults, you’d be surprised how far it gets me. Obviously for most, it’s not the prize itself, but rather that I am acknowledging that this is going to be a bit of work, and it’s going to have an end point. It’s an offering to them, silently asking for them to go all-in for photos and perhaps have a little patience with me.

Also important is that I tell them they don’t have to smile. I don’t want anyone smiling because they think they have to – smiles out of obligation makes for terrible pictures. I want them to smile because we are having so much fun, they do it instinctively.

lynseymattingly1

#2 Strive for interaction and reactions, not poses and smiles

If I have to choose between a picture of every face looking at me, smiling, or one of a family looking and laughing at each other, I will chose the latter every day and twice on Sunday. It is my personal and professional belief that 50 years from now, those images of people being themselves with their loved ones will be much more treasured than portrait studio shots that only show everyone together. I do my best to set-up a moment and let my subjects take it where they want. I can’t declare their reaction to something, so therefore I set the tone for funny or serious, or as I would say to a child: a loud picture or a quiet picture. I see myself as a third wheel on a great date – I’m along for the ride, I just happen to be photographing it.

lynseymattingly5

#3 Shoot everything

I am a massive over-shooter. I carry more memory to a quick portrait shoot than some photographers would pack for a day-long wedding. Changing a card mid-shoot is completely normal for me. This no doubt adds to the backend of my process, as I have so much more to sort through, but this means I can feel confident enough to guarantee my clients a minimum number of images. This also means, I very rarely have a client ask: “Did you get it?”.

I shoot looking through the viewfinder, and not. I line up the shot and then peek my head out so my subjects aren’t just staring at a black box. I make funny faces. I have a fake sneeze that can get even the most serious of baby giggling and that requires several sneezes, shots, and me not having a camera affixed to my face. I shoot an average ratio of one to 30. Meaning for every 30 images I shoot, one of them will get edited and delivered to the clients.

This would be terrible if I shot film. To be honest sometimes it’s a little overwhelming the first time I upload all of the images from a shoot. Often it’s even a lesson in self-loathing, wondering how on earth I will ever get through them, and why do I do this to myself every – single – time. In the end, it always works out. Plus, I always have the images I was hoping I caught.

lynseymattingly9

#4 Be a giant cheerleader during a shoot

I am a giant cheerleader during a shoot, to the point that it’s a bit eye-roll-inducing. If it’s dark and gloomy out, I show-up saying this is what we call perfect, even, light! If it’s bright and sunny, and miserably hot? What a perfect day for photos!

Every single thing my clients do during a photo session is perfect and if it’s not, I tell them I’m going to fix it. I want my clients on the other side of that lens to feel beautiful, and like they are doing a perfect job. Having them feel awkward, or be in poses or positions that feel unflattering, will make for bad pictures. Being told that they are doing a great job and that the pictures are coming out perfectly, gives clients the confidence to be themselves. I’m their friend during a shoot – kids and adults alike. And if I’m not behaving in a way that people would want to hang-out with me when I am not taking photos, why would they want to hang-out with me when I am?

lynseymattingly7

#5 Know you are just a piece of the process

I don’t want to get all cheesy on you or anything, but I don’t feel like any picture I have taken of someone is mine. The photo belongs to the person in it, and whomever they chose to share it with. I don’t do any printing. When someone pays for a photography session with me, they get the high resolution images as jpg files, and a release to print and use them as they would like. I honestly feel like this creates a comfort level that I didn’t see when I used to offer prints only. They know they are going to get the best of what I shoot and they aren’t going to have to pick a favorite for an expensive enlargement. They know there isn’t going to be a hard sale in a few weeks where we look at everything together. I don’t put watermarks on my images ever and I encourage them to share their pictures on social media. In fact, I often share their pictures on social media.

lynseymattingly2

Here’s why: if they didn’t hire me, show-up, look great, have fun, etc., I wouldn’t have the pictures to show in the first place. I’m only a piece of any picture I’ve ever taken. You may argue, what if someone steals your images? To do what? Claim them as their own? I have never run into a situation where that would truly hurt me. If there is a wild rampage of stealing other photographer’s images out there and mine are being stolen, I would honestly be a little flattered. That means they’re good! I’ve already been paid for my work. Though I would never use an image where my client hasn’t signed a release allowing my use, I don’t see how getting my images out there is anything but free advertising. I want my clients to love their photos so much they print them all in large sizes to hang up for their friends to see. I want them to talk about how fun the shoot was, how happy they are to get all of the images, and how they will hire me again and again. Those people know who took the pictures, and that’s all that really matters.

How do you help clients feel comfortable during a photo shoot? Share your comments and suggestions with us below.

googletag.cmd.push(function() {
mobile_slots.push( googletag.defineSlot( “/1005424/_dPSv4_mob-all-article-bottom_(300×250)”, [300, 250], “pb-ad-78158” ).addService( googletag.pubads() ) );
} );

The post 5 Tips to Help You Take More Natural Looking Portraits by Lynsey Mattingly appeared first on Digital Photography School.


Digital Photography School

 
Comments Off on 5 Tips to Help You Take More Natural Looking Portraits

Posted in Photography