RSS
 

Posts Tagged ‘Guide’

A Beginner’s Guide to Abstract Flower Photography

30 Sep

Abstract flower photography can stop you in your tracks. But unfortunately, when it comes to abstract flower photography, you probably don’t know where to start. What equipment do you need? What techniques do you use?

The world of abstract flower photography can seem distant and difficult.

abstract flower photography aster

Actually, it is no harder than any other genre of photography. It can be a lot more rewarding, though. You just need to know how to get started.

In this tutorial, you’ll learn the fundamentals of abstract flower photography. You’ll learn about the required equipment, as well as several key techniques for getting powerful abstract images. When you finish, you’ll be ready to go out and start applying these tips immediately.

Sound good? Read on.

What is abstract flower photography?

I’m going to define abstract flower photography simply as this – photographing flowers in a way that the viewer doesn’t immediately see the flower.

abstract flower photography swirls

That is, an abstract floral focuses not so much on the flower itself, but on parts of the flower: the curve of the petals, the color of the flower center, the play of light on the stamens.

To do powerful abstract flower photography, you have to stop thinking in terms of flowers, and start thinking in terms of shape, color, and light. This isn’t complicated. It’s easy to do, once you get the hang of it. The tips I share below will help you to do just that, so keep reading.

Equipment

To get beautiful abstract flower images, you need two things: a camera and a macro lens.

The type of camera doesn’t matter. These days, essentially all cameras are capable of capturing stunning images. In abstract flower photography, it’s the lens that counts.

So what lens do you need?

Any sort of macro lens will do. I’ve taken excellent abstract flower images with cheap, sub-300 dollar lenses. I’ve also used my much more expensive Canon 100mm f/2.8L lens.

The thing is, abstract flower photography isn’t really about sharpness and perfectly rendered detail. It’s about composition, light and color.

abstract flower photography daisy

A tip worth mentioning is that the shorter the focal length of a macro lens, the closer you need to be to your subject to get life-size images. So, for instance, 60mm macro lenses can be a problem when you’re trying to get a close-up of a rose and you keep casting your shadow on the petals by accident.

You may have also heard that for abstract flower photography you need a tripod.

abstract flower photography silhouette

I would disagree. I don’t use a tripod for abstract flower photography, myself because I find that it’s too limiting. I need to explore the flower through the lens, change my composition, take a few photographs, and change my composition again. You can’t do that with a tripod.

Have you got your camera and a macro lens? If so, you’re ready for the bulk of this tutorial on quick and easy tips for stunning abstract flower photography.

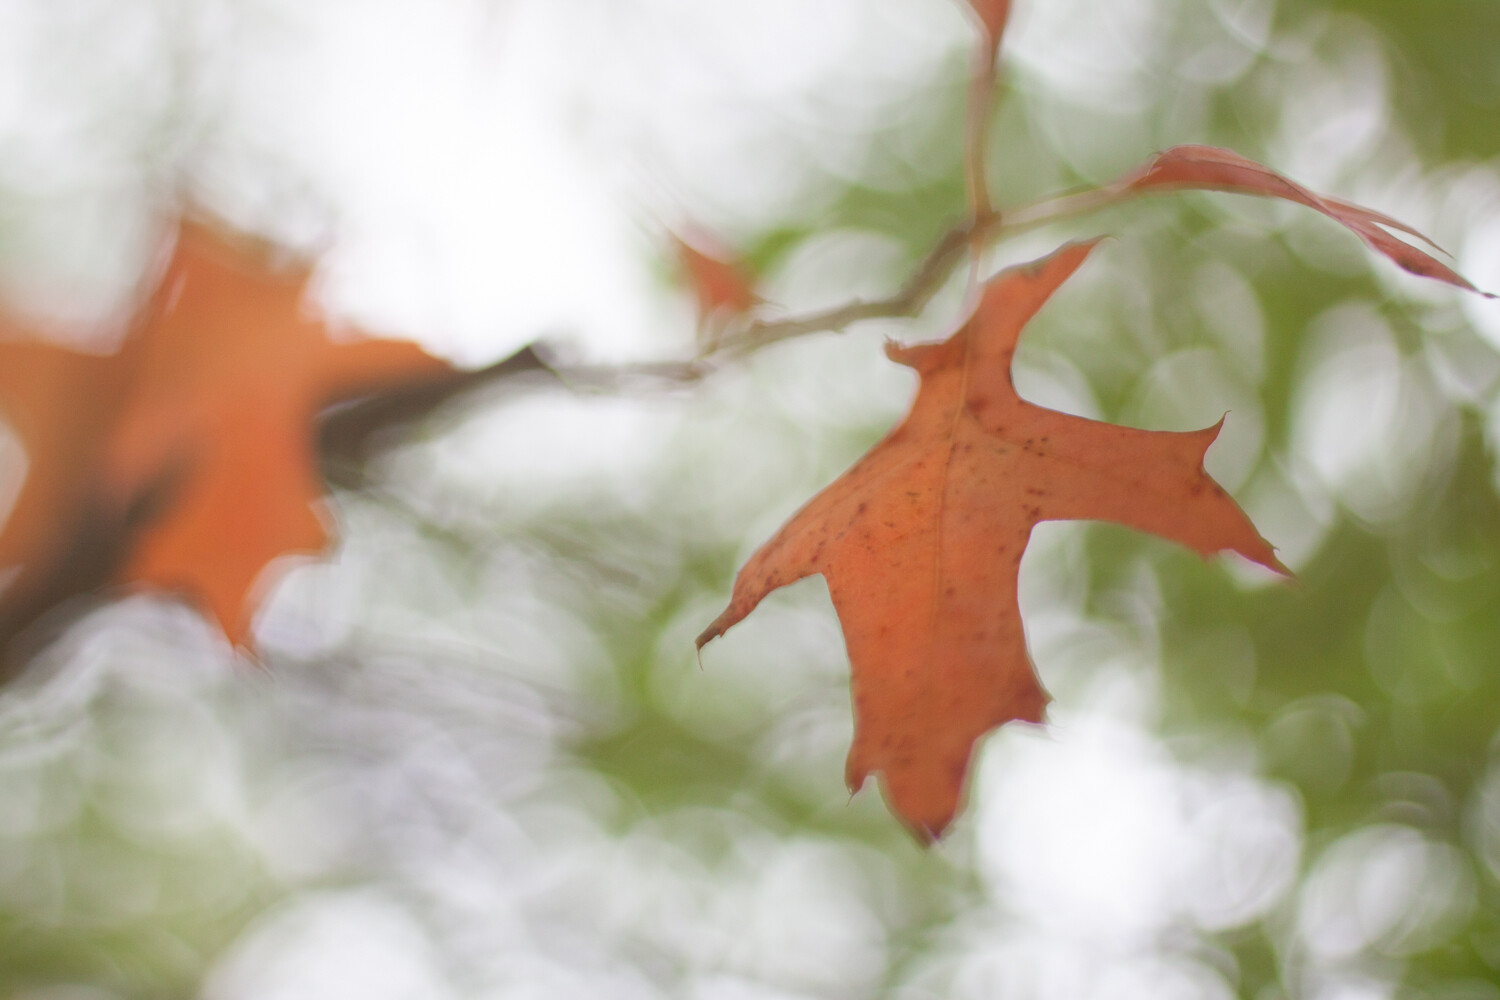
Tip 1: Shoot on cloudy days

If you’ve done natural light macro photography before, you’ll know that you can get beautiful macro photographs at a few different times of the day. First, when it’s cloudy. Second, during the golden hours: just after sunrise and just before sunset.

abstract flower photography tulip

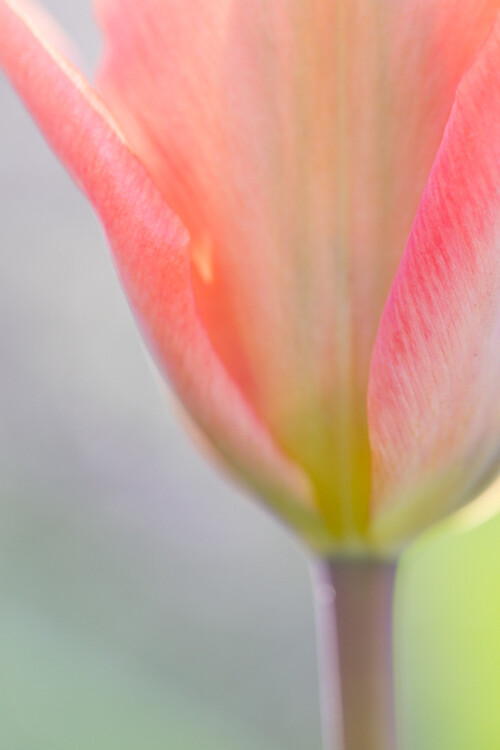
I photographed this tulip on a cloudy spring day.

For abstract photography, I recommend that you only shoot on cloudy days.

On cloudy days, the light is even, resulting in colorful, deeply saturated images. And in abstract photography, color is key. In fact, out of all the images featured in this article, all but one were taken on a cloudy day.

abstract flower photography tulip

Once you become a more experienced abstract flower photographer, you can start to experiment with other types of light. But until then, stick to cloudy days. Your results will speak for themselves.

Tip 2: Get close. Really, really close!

In abstract flower photography, you cannot just take a snapshot of your subject. Your goal must be to show the viewer something new, something unexpected.

The way to do this is to get close. Really, really close.

abstract flower photography pink

As I said above, you must think in terms of shapes, color, and light. The way to start is to magnify your subject.

Take that macro lens and crank it up to its highest magnification setting (which should be 1:1, if you have a true macro lens). Then get close to a flower. Look through the viewfinder of your camera, and just move the lens around.

abstract flower photography tulip center

What do you see?

You probably won’t immediately notice a stunning composition. I spend a lot of time looking through my lens without taking any pictures. There’s a lot of experimentation involved, and that’s okay. Which brings us to Tip 3…

Tip 3: Use a shallow depth of field

The depth of field is the amount of an image that is actually in focus.

Images with only a small amount of the subject in focus have a shallow depth of field. Images with a large amount of the subject in focus have a deep depth of field.

Depth of field is controlled by your camera’s aperture setting, also known as an f-stop. A low f-stop (f/1.4 to f/5.6) gives you a nice, shallow depth of field.

On most cameras, you will be able to choose your f-stop. For abstract flower photography, I usually keep it in the f/2.8-3.5 range but feel free to experiment a bit depending on your creative vision. Just keep that depth of field nice and shallow.

abstract flower photography black-eyed susan

Why do I recommend having so little of the image in focus?

In abstract photography, you must photograph flowers so that the viewer doesn’t immediately see the flower. You must work in terms of light, color, and shapes.

By using a shallow depth of field, you emphasize those elements and take the focus off the flower itself. You shift the focus to the shape of the flower, the color of it, and the light falling on the flower.

abstract flower photography aster

This is what I focus on in my final tip.

Tip 4: Look at the shape of the flower

As I mentioned above, it’s essential that you think about light, color, and shape.

Out of these three elements, I think that shape is most important in abstract flower photography. This is because flowers have naturally interesting shapes: sinuous curves, perfect circles, radiating lines.

The photographs are there. You just have to find them.

abstract flower photography coneflower

For instance, flowers tend to have such beautiful, soft petals. You can use these to your advantage in your photography. Think about the petals, not as parts of a flower, but as twisting lines. Try to see these shapes moving about through the flower.

Carefully set up a composition that uses these lines. Keep it simple—one or two lines is all you need.

Only once you’ve composed deliberately, keeping the shape of the flower at the forefront of your mind, should you take the image.

abstract flower photography black-eyed susan

Conclusion

Capturing beautiful abstract photographs can be an intensely rewarding experience.

Make sure you have the right equipment. Then, if you shoot on cloudy days, get super close, use a shallow depth of field and, above all, think in terms of the flower’s shape, you’ll be well on your way to taking stunning abstract flower photographs.

Have any more tips for abstract flower photography? Share them in the comments!

abstract flower photography orange

The post A Beginner’s Guide to Abstract Flower Photography appeared first on Digital Photography School.


Digital Photography School

 
Comments Off on A Beginner’s Guide to Abstract Flower Photography

Posted in Photography


A Guide to Using Natural Light for Macro Photography

21 Sep

Working with natural light can seem daunting. Yet as a macro photographer, I love natural light. I’ve spent years studying it, playing with it, observing it, and watching it fall.

I use it in all of my photographs. In fact, the last time I picked up a flash was over five years ago.

natural light macro rose abstract

But how do you take advantage of natural light? Are there some simple principles that can be learned and quickly applied, so that you can take stunning macro photographs in no time?

Actually, yes!

In this short tutorial, you’ll learn all about natural light for macro photography. I’ll explain the types of natural light that I like, the types that I avoid, and how you can best use natural light in your own photographs.

When you’re finished reading, you’ll have the know how to use natural light like a pro!

natural light macro birch leaf in clover

Five Types of Natural Light in Macro Photography

There are five types of natural light that all macro photographers should know:

  • Sunny light
  • Cloudy light
  • Evening frontlight
  • Evening backlight
  • And evening shade

Let’s discuss each in turn.

natural light macro poppy

Sunny Light

By sunny light, I am referring to the light that you find at noon on a clear day.

It’s very bright, very strong, and really contrasty. So, let me just get this out of the way and state it simply.

Do NOT use sunny light for macro photography!

natural light macro clematis

I couldn’t bring myself to take a photograph in direct sunlight. I just dislike it too much! So I photographed this clematis in the evening.

I know that it’s very tempting. After all, bright sunlight is very powerful, and everyone loves to get out on sunny days.

The problem, however, is that direct sunlight is extremely tough for cameras to deal with, resulting in blown out (that is, totally white) highlights and underexposed (very dark) lowlights. It also creates shadows that are unpleasant to look at.

Now, there are some genres of photography that make use of a sunny type of light. Street photography, for instance, relies heavily on the gritty, contrast-heavy look that sunny light provides.

natural light macro aster

Macro photography, however, requires softer light such as the next type of light.

Cloudy Light

Cloudy light is pretty self-explanatory. This is the kind of light when there are clouds, at any time of the day.

natural light macro fall leaves

What does this mean for your photography?

Clouds diffuse the light, causing it to become pleasant and soft. This is an ideal type of light for bringing out colors in your subject. I work a lot with flowers, and I go crazy over cloudy light.

There’s nothing better than a nice cloudy day for flower photography.

natural light macro tulip

I photographed this flower under cloudy skies.

Therefore, if you enjoy doing flower-focused macro photography, cloudy light is for you. Shooting in cloudy light will ensure evenly illuminated subjects, lovely colors, and really pleasing images.

Yet sometimes you might want to create images which are slightly less soft. You might want to work with more striking light, which brings us to . . .

Evening Frontlight

Evening frontlight is found during the golden hours of photography. The golden hours are the first two hours after sunrise, and the final two hours before sunset.

During this time, the sun casts a beautiful golden glow over the world. If you venture outside, and you make sure that the sun is behind you (point your shadow at your subjects), you’ll find that you’re looking at a beautiful landscape.

natural light macro red flower

Is this type of light good for macro photography?

In a word, yes. Such natural light tends to look lovely and soft when rendered by a camera.

I must admit, however, that I am not the biggest fan of evening frontlight. I find that it’s a bit too bright. I also prefer more dramatic lighting. Which brings me to my favorite type of light.

Evening Backlight

Evening backlight is extremely similar to evening frontlight. Except, rather than having the sun behind you, you have it directly in front of you.

I love evening backlight for macro photography. I’m drawn to its dramatic presence and warmth. I suggest that you try it, yourself.

natural light macro aster backlight

I photographed this aster in evening backlight.

To use evening backlight, you simply point your camera into the light. I recommend placing the subject between yourself and the setting sun so that the sun is obscured by the subject. Or put the actual sun slightly outside the image, so that it can be felt rather than seen.

Of course, these images aren’t for everyone. But I personally find them to be stunning!

natural light macro backlight

Yet if you’re looking for something a little less punchy, I do have one final recommendation.

Evening Shade

Evening shade is pretty self-explanatory, as well. Your subject is shaded by some object (a tree, a building, the photographer) in the evening.

What makes evening shade natural light so special? I like the evening shade for one specific reason.

If you can shade your subject while using an unshaded background, your images will really pop. The background will be rendered as liquid gold, while your subject is lit fairly evenly.

natural light macro daisy abstract

I photographed this daisy in some evening shade. The background was lit by the setting sun.

Don’t believe me? Try it!

Conclusion

Natural light may seem difficult to work with, but I hope that after reading these tips, you are feeling far more confident in your abilities.

natural light macro dahlia

Simply remember to avoid sunny light, and you’re halfway there. Use cloudy light if you want soft, evenly illuminated subjects and beautiful colors. Use evening light if you want a bit more drama.

Which type of natural light do you prefer? Share your opinions and images in the comments below.

natural light macro leaves

The post A Guide to Using Natural Light for Macro Photography appeared first on Digital Photography School.


Digital Photography School

 
Comments Off on A Guide to Using Natural Light for Macro Photography

Posted in Photography


How to Photograph a Wedding – A Guide to Equipment, Shooting, Editing and More

07 Sep
  • Have you ever entertained the thought of being a wedding photographer?
  • Or have you ever been asked by a friend to photograph their wedding?
  • Or have you already taken the leap into wedding photography and it’s not quite going the way you hoped?

If you you answer yes to any of these questions – our brand new Wedding Photography ebook is for you!

Best of all – if you grab it this week it’s 50% off the normal retail price – so it’s your for just $ 9USD!

This beautifully designed eBook was written by Lily Sawyer who many of you will know as a regular writer for dPS.

Lily is also a professional photographer and draws on her experience of photographing more than 500 weddings, events and portrait sessions to share some practical advice for anyone hoping to embark on a similar journey into wedding photography.

7 Chapters of Practical Wedding Photography Advice

Included in this eBook are 7 chapters covering:

  • How to be a good wedding photographer
  • Equipment for wedding photography
  • A step-by-step guide to photographing a wedding day
  • Editing and batch processing
  • Products you can offer your clients
  • Pricing and how to find your happy place
  • Marketing your business

Click through for more details and to preview sample pages and to grab your copy of the eBook.

We think this is one of the best risk-free instantly downloadable resource you can buy to help you on your journey as a wedding photographer – no hype, no over-promising or relentless hustle speak – just realistic advice and practical tips.


Download it Now $ 9USD

P.S. As with all our books and courses, we offer a 60-day money back guarantee, so you can buy it confidently today, risk-free.

The post How to Photograph a Wedding – A Guide to Equipment, Shooting, Editing and More appeared first on Digital Photography School.


Digital Photography School

 
Comments Off on How to Photograph a Wedding – A Guide to Equipment, Shooting, Editing and More

Posted in Photography


A Guide to Shooting Long Exposure Landscape Photos

11 Aug

Here’s a 21-minute photography guide from Gordon Laing that looks at the long exposure technique. This is where you increase the shutter speed of your camera, letting in light to the sensor over a longer duration to create unique effects.

Long exposure photography

Long exposures are often used for smoothing out moving water, or smudging clouds as they drift past in the wind. Whatever the reason, long exposures can produce dreamy and magical results, and they are a key weapon in any landscape photographer’s arsenal.

“It’s also very forgiving in bad weather,” says Laing. “It allows you to grab moody-looking images on overcast days, or even in the pouring rain.”

Laing also points out that all of the normal compositional rules of landscape photography apply to your long exposure images. A long exposure is most-often used to enhance a particular scene, rather than create something that varies so drastically that the composition is different.

There is no set duration, either. You could shoot anything from a couple of seconds to multiple minutes (such as by using the LEE Filters 15-stop Super Stopper).

A longer duration will bring out more movement in the image, but you may find that the effect is too strong or that camera shake is introduced by something as simple as the wind buffeting your tripod.

Check out the full video above for a great guide to long exposure landscape photography from Laing. If you want more check out these dPS articles on the topic:

  • How to Avoid Blurry Long Exposure Images with Proper Tripod Setup
  • Long Exposure Photography 101 – How to Create the Shot
  • Long Exposure Photography 201 – How to Edit a Long Exposure Seascape
  • How to Choose the Correct ND Filter for Your Desired Long Exposure Photography Effects
  • Recommended Gear for Doing Long Exposure Photography at Twilight and Dusk
  • How to Select a Subject for Long Exposure Photography

The post A Guide to Shooting Long Exposure Landscape Photos appeared first on Digital Photography School.


Digital Photography School

 
Comments Off on A Guide to Shooting Long Exposure Landscape Photos

Posted in Photography


Buying guide update: The Sony RX100 VI is the best travel camera

20 Jul

The Sony Cyber-shot DSC-RX100 VI earned high marks in our recent review and has earned a spot at the top of our Best Cameras for Travel buying guide, thanks to its long zoom and excellent still and video quality. Click through below to see all four of our updated buying guides:

Read our updated buying guide: Best Cameras for Travel

Read our updated buying guide: Best Cameras for Video

Read our updated buying guide: Best Pocketable Enthusiast cameras

Read our updated buying guide: Best Enthusiast Long Zoom cameras

Articles: Digital Photography Review (dpreview.com)

 
Comments Off on Buying guide update: The Sony RX100 VI is the best travel camera

Posted in Uncategorized


A Guide to Photographing Birds and Wildlife in a Wetland Area

13 Jul

A short drive from my home north of Fairbanks, Alaska lies a small wetland. It’s a bog-like mosaic of ponds and water-filled inlets lined with cattails and thickly growing willows. Though much of the year, here in the sub-arctic, the ponds are frozen with a thick layer of ice, during our brief summers the wetland comes alive with birds.

From mid-May until late June, I try to stop by for an hour or so each morning, camera in hand. In reality, an hour is not enough for photographing birds and wildlife, but I know the place well, and can quickly move into the most promising locations. Knowing a place is actually one of the best tools a wildlife photographer can have at their disposal. But there is more to it.

A Guide to Photographing Birds and Wildlife in a Wetland Area - bird photo

This is one of my most-published bird photos. Rusty Blackbirds are a species of conservation concern, and they are common breeders at my local wetland. Images of them in their breeding plumage are relatively rare, so this photo has been in demand. Know your area and the species that live there!

Photographing birds and wildlife

Bird photography has exploded in popularity in recent years. As high-quality, super telephoto lenses have become more affordable, wildlife photography has grown approachable. No longer is it limited to pros or wealthy amateurs who could afford the $ 10,000 USD price tag on the big lenses by Canon and Nikon.

Whether you are shooting with an f/4 bazooka, or a more manageable, compact telephoto lens, field technique, and composition will play the most important role in your success. Here are a few tips for your next visit to your local lake, pond or wetland for photographing birds and wildlife.

Ethics

A Guide to Photographing Birds and Wildlife in a Wetland Area - sandpiper in the water

Pectoral Sandpiper on its way to the Arctic to breed.

First, the most important rule of wildlife photography is – don’t harm your subject! If you are approaching a duck on a pond, and the duck moves away from you, you’ve come too close, too quickly. Back up and try again, this time approaching more slowly.

If the bird flushes, you’ve screwed up badly. You’ve wrecked any opportunity for photos and stressed the bird unnecessarily. Don’t approach birds on nests, they are particularly vulnerable.

In short, be aware of the impact of your actions, and remember that the well-being of the animals you are photographing is more important than the images.

Equipment

A Guide to Photographing Birds and Wildlife in a Wetland Area - 2 photographers with big lenses in the water

Lenses

While a monster 500mm or 600mm f/4 lens is not a necessary piece of equipment for quality bird and wildlife photography, a decent telephoto is definitely an important part of any wildlife photographer’s kit.

There are advantages and disadvantages to different types of telephotos. Big, fast lenses like the aforementioned 500-600mm f/4 options, allow faster shutter speeds at lower ISOs, have exquisite sharpness, and a wonderful, shallow depth of field for isolating your subject. But they are large, cumbersome, heavy, hard to use hand-held, and cost more than a good used automobile.

Smaller lenses, like the increasingly popular telephoto zooms, are more compact, easier to carry and have optics that are improving with every generation. Canon’s 100-400mm and Nikon’s 80-400mm and 200-500mm, are good options. Third party manufacturers have also joined this race in a big way with high-quality 150-600mm lenses coming from both Sigma and Tamron. These lenses still aren’t cheap, but you probably won’t have to take out a second mortgage to afford one.

My choice: For years, I used and relished in using a big Canon 500mm F4. This big white lens was sharp with a beautiful, dreamy bokeh, and its enormous size had great snob-appeal. But as I have begun focusing my efforts on remote areas, the size and weight became a serious hindrance, and more often than not, I found I was leaving it behind in exchange for something smaller.

This winter, even though it broke my heart a little bit, I sold it and the rest of my Canon gear. I now shoot two systems, Sony mirrorless for landscape and night photography, and the Panasonic Lumix system for wildlife and most travel photography.

The micro four-thirds sensor on the Lumix buys me a built-in 2x crop factor. I’m using the Lumix G9 with an Olympus 300mm f4 (600mm equivalent) which, in my opinion, is easily comparable in sharpness to the big Canon lens. So far, I don’t miss the bazooka even a little bit.

bird in the grass

Camera Settings for Wetland Wildlife

Fast shutter speeds are very important for creating sharp images of wildlife with long telephotos. In bird and wildlife photography, particularly in wetland environments, the subjects are in constant motion. I am almost always shooting above 1/1000th of a second, and often much faster.

The aperture serves two purposes, allowing in more light (and thus faster shutter speeds), and controlling the depth of field. Very often in bird photography, you want to isolate your subject from a cluttered backdrop. So shooting wide open, or nearly wide open is important.

Some lenses have a notable loss of sharpness with a wide aperture, so be aware of your own equipment and its limitations. With my own gear, whether it was the Canon 500mm F4 of my previous life or my current Olympus 300mm F4, I find I’m comfortable shooting wide open, or nearly so. Play with your own equipment and see what works for you.

A Guide to Photographing Birds and Wildlife in a Wetland Area - bird in a spruce tree

An f/4 aperture on my Olympus 300mm allowed me to isolate this singing Swainson’s Thrush from its forest environment.

Use the ISO to balance your previous settings. As most cameras on the market these days can easily handle ISO settings of 800, 1600 or above, feel free to crank it up a bit.

Focus settings are also important. When shooting wildlife I almost always use single point focus (so I can grab the subject’s eye), and AI Servo, continuous or tracking focus mode. If the animal moves, I want my camera to automatically stay focused where I want, and not have to constantly be pressing and re-pressing my focus button.

Use a high frames per second shooting rate, and set your camera for burst mode. While my Lumix G9 is capable of nearly 30 fps with the electronic shutter, I rarely go that high. Instead, I opt for a standard high-speed shutter of about 9 frames per second. That is more than enough to assure a fast burst, without cluttering up my memory cards with hundreds of unnecessary shots. A frame rate of anywhere from 5-12 frames per second is sufficient.

Field Techniques

A Guide to Photographing Birds and Wildlife in a Wetland Area - white egret

Getting Close

The first, and most important, skill for getting close to wild birds is really a non-technique, technique. It’s called “patience”. When I have the time to dedicate to a shoot, I will frequently take a small waterproof pad, plop it down on the waterline of my local pond, spritz myself with a generous dose of insect repellent, put the camera on a tripod, and sit down. There, I will remain, sometimes for hours.

In time, the local birds relax after my initial appearance and go back to doing what they do. Often, they will paddle close, forgetting (or not caring) that I’m sitting there, clicking away. Wearing neutral colors will help you blend in. Or if you are really into it (or your subject is very skittish), you can make a “blanket blind” by taking a piece of camouflage cloth, cutting lens holes into it, and throwing it over yourself after you sit down. This simple type of blind will help mask your fidgety movements and obscure your human-outline.

A Guide to Photographing Birds and Wildlife in a Wetland Area - ducks in the water

The other even simpler technique for getting close is to go shoot somewhere the wildlife is accustomed to people. At popular birding areas, wildlife refuges, and national parks, wildlife is frequently used to people being around. The animals will be much less shy, allowing a closer approach.

Regardless of where you shoot, move in slowly, a few steps at a time, pause for a minute, and then move in a bit further. When you see the animal show signs of stress, stop and wait for them relax before approaching again.

Your goal as a bird and wildlife photographer should always be to photograph animals exhibiting their natural behavior. A stressed-out bird, flying or swimming away, will be inherently less interesting than one that is relaxed, or interacting with other animals.

Get Low

A Guide to Photographing Birds and Wildlife in a Wetland Area - bird with long beak

I was laying on my stomach for this shot, my lens just inches from the ground.

The biggest mistake I see wildlife photographers make is shooting from too high a perspective. When standing upright, you will be aiming down on wetland birds that are sitting on the water. This is never the best angle.

Instead, kneel, crouch, sit or even lay down on the ground. The low angle will provide a better separation between your subject and its surroundings, and can create a pleasing blur of foreground and background.

Focus Carefully

Always focus on the eye. While it’s a general rule, with plenty of exceptions, when your subject’s eye is not in focus, you’ve missed the shot. Using a single focus point, select the animal’s eye, focus, and then click the shutter.

Find a Good Background

A Guide to Photographing Birds and Wildlife in a Wetland Area - bird in the water swimming

In the cluttered habitat of a local wetland, it can be hard to find a place where you can isolate the subject from the background. Distance helps. When the bird is well away from its background (this is where getting down low comes in) the backdrop will fade to a nice blur, which is frequently exactly what you will want.

A Guide to Photographing Birds and Wildlife in a Wetland Area - bird in a tree

There was no cropping out this tangle of branches surrounding this White-crowned Sparrow, so I just used them to emphasize the new, green buds and tell a little story about the time of year I made the shot.

Sometimes, particularly when photographing songbirds in the pond-side brush, there is a chaos of branches that disrupt the scene. Shooting with a wide open aperture helps narrow the depth of the field providing some separation. But sometimes showing the habitat becomes a necessary part of the shot. Compose carefully, don’t center the bird, and let it blend in with the scene.

A Guide to Photographing Birds and Wildlife in a Wetland Area - duck swimming

You Don’t Have to Be Close

Sometimes a full-frame portrait isn’t what you want. Some of my favorite wildlife shots show some context and tell a bigger story about the place where the animal lives. In this type of shot, good compositions are vital. You need to show the scene in a pleasing way, and avoid distractions.

A Guide to Photographing Birds and Wildlife in a Wetland Area

I wasn’t particularly close to this Horned Grebe when I made this photo, but the nice reflections and good light provided an interesting setting.

When your subject is too far away for a portrait, think about how it is interacting with its surroundings, and find a way to place it in the broader scene. Think of these as landscape shots that include a wildlife element.

A Guide to Photographing Birds and Wildlife in a Wetland Area

Conclusion

Wildlife photography can try one’s patience. I’ve spent many hours, sitting still, being devoured by mosquitoes, watching, waiting, and taking zero pictures. On such days, I can leave utterly dejected and frustrated. On other days, that patience pays off, with a wild animal in beautiful light, or with some fascinating or humorous behavior.

Wildlife photography is a lot more than just using a long lens. It’s about understanding the animals and the place. It’s about knowing how to compose, to get low, to hide, and being patient. And your local wetland, like mine, is the best place to practice, and maybe the best place to get something remarkable.

Sometimes, you’ll just get something meme-worthy! The two images below, of a beaver at my local wetland, I made within seconds of one another. In the first, he’s blowing a raspberry at me, in the second, he’s laughing at me. What a jerk! (Never underestimate the power of humor in your images).

A Guide to Photographing Birds and Wildlife in a Wetland Area - beaver sticking his tongue out

A Guide to Photographing Birds and Wildlife in a Wetland Area - beaver laughing

The post A Guide to Photographing Birds and Wildlife in a Wetland Area appeared first on Digital Photography School.


Digital Photography School

 
Comments Off on A Guide to Photographing Birds and Wildlife in a Wetland Area

Posted in Photography


Buying Guide: The best instant cameras

09 Jul

The instant camera market has taken off in recent years and there are a lot of great options ranging from around $ 60 all the way up to several hundred dollars. Over the course of many fun weekends, we’ve shot with virtually all all of them, to find out which is the best. Below is a breakdown of the 4 instant formats:

Instant format Manufacturer Image size Shot per pack
Instax Mini Fujfilm 46 × 62 mm
1.8 × 2.4 “
10
Instax Square Fujfilm 62 x 62 mm
2.4 x 2.4 “
10
Instax Wide Fujfilm 99 x 62 mm
3.9 x 2.4 “
10
I-type Polaroid Originals 79 x 79 mm
3.1 x 3.1 “
8

Ultimately, this rebirth of the Instant camera market can be attributed to one word: Fun! There’s something about about having a tangible object to share that makes these cameras hugely enjoyable. They also make great gifts. Here are our recommendations:

Our pick: Fujifilm Instax Mini 70

The Fujifilm Instax Mini 70 strikes the perfect balance of price to features to make it our top overall pick – plus it makes use of the most affordable instant format. Available in six colors, the Mini 70 is among the most compact and lightweight instant cameras on the market, and also among the prettiest (in our opinion). The CR2 batteries it uses can be a little annoying to find, but battery life overall is great. And unlike rechargeable instants, the Mini 70 should still have some juice in it even if left on a shelf for several months.

But most importantly, it’s really easy to use. Users simply select their shooting mode – normal, macro, selfie, landscape, self timer or high key – and the camera does the rest. And unlike some of its competitors, focus is motor-driven (three positions) and set by the camera when your mode is selected. Exposure is fully automatic, though there is a +2/3rd EV option (that’s the high key mode). Overall, the Mini 70 does a good job balancing flash with ambient light thanks to a variable shutter.

Of course, for a little more cash, you can drive away in the Instax Mini 90, which adds negative exposure compensation, the ability to disengage the flash in normal mode and a bunch of creative modes. However its higher price and its more complex operation has us feeling you’d be better off spending that extra money on more film for your Mini 70.

Also recommended: Fujifilm Instax Wide 300

We prefer the quality and tonality of Instax film to I-type and if you are going to shoot Instax, why not shoot the largest format possible? If you follow that logic, than the Wide 300 is the instant camera for you.

The most affordable Instax Wide camera available, we’re big fans of its comfortable grip, automatic operation (with positive and negative exposure compensation modes), motor-driven focus (2 positions) and straightforward operation. Yes, it is enormous, but that’s par for the course with this format.


  • Our pick: Fujifilm Instax Mini 70
  • Also consider: Fujifilm Instax Wide 300

Instax Mini cameras

  • Fujifilm Instax Mini 9
  • Fujifilm Instax Mini 25/26
  • Fujifilm Instax Mini 90
  • Leica Sofort
  • Lomography Lomo’Instant
  • Lomography Lomo’Instant Automat
  • Lomography Lomo’Automat Glass
  • MiNT InstantFlex TL70 2.0
  • Polaroid Pic-300

Instax Square cameras

Fujifilm Instax SQ6 (SQ10)
Lomo Instant Square

Instax Wide cameras

Lomography Lomo’Instant Wide
MiNT Instantkon RF70 (just announced)

Polaroid I-type

Polaroid Orignal OneStep2

Articles: Digital Photography Review (dpreview.com)

 
Comments Off on Buying Guide: The best instant cameras

Posted in Uncategorized


Guide to Choosing Subjects and Compositions for Flower Photography

09 Jul

How does the budding flower photographer go about selecting subjects and choosing compositions? In this article, I will give a detailed answer to this question. First, I will discuss the different types of flower photography subjects. Then I will give guidelines for creating stunning compositions.

All throughout this article, I will emphasize producing clean, dynamic images.

flower photography macro tulip

Subjects

Choosing a subject in flower photography may seem easy – flower photographers shoot flowers, right?

While this is true, it’s important to consider several factors about any particular flower. Among these is the color of the flower, the condition of the flower (is it dying and/or dirty?), and the shape of the flower.

flower photography macro yellow orange abstract

Color

Considering color is simple. The more colorful the flower, the more interesting the image is going to be (generally speaking, of course). I like to use bright colors, placed before a brightly colored background.

flower photography macro tulip abstract

It can also be useful to think in terms of complementary colors. These are the red/green, blue/orange, and yellow/purple combinations. When they are placed together in the same frame, the results can be powerful.

Condition

Another important consideration is the condition of the flower. Before taking your photograph, you should inspect your potential subject carefully.

flower photography macro backlit

Ideal flowers are at peak bloom: petals spread wide, edges crisp and unblemished. I try to avoid photographing flowers that are on their way out because more often than not I’m disappointed with the resulting images.

The best flowers are also free of dirt. I often wipe dirt off carefully with my finger. If there are insects, I gently blow them away from the flower center. Another tactic is to obscure the blemishes or dirt by shooting soft-focus images or silhouettes.

flower photography macro silhouette

This flower wasn’t in peak condition, so I chose to shoot a silhouette, emphasizing the shape over the condition.

Shape

This final aspect of flower photography is more difficult to explain, but it is important, so I’m going to give it a shot. Certain flower shapes are better than others for flower photography.

More specifically, the flowers that will get you the most pleasing images are often those with clear patterns and bold, dynamic shapes.

Consider the rose. It is one of my favorite flowers to photograph. Why? The petals are dynamic, flowing and changing. They also have a clear pattern, and therefore imbue your images with a sense of organization.

flower photography macro rose

Another flower that I love to photograph is the tulip. Its structure is simple but bold, and it has large petals that curve slightly. It isn’t chaotic or messy. The viewer’s eye can easily trace its shape without getting lost.

flower photography macro tulip

The rose and tulip sit in contrast to flowers such as zinnias, which are rather chaotic and therefore difficult to pin down in an image. Which is not to say that a good zinnia image is impossible; it’s just a lot more difficult.

Compositions

When composing flower photographs, it is a good idea to keep a checklist in the back of your mind. In every flower photography image, try to incorporate at least a few of the guidelines provided below.

Simplify

My first tip is the most important – simplify!

Figure out what it is about the flower that you like, and focus on that, removing any extraneous elements, be they extra flowers, stems, petals, etc. Make sure that any distracting elements are not present.

flower photography macro pattern abstract

Use Symmetry

While you shouldn’t always strive to use symmetry in your flower images, it can be a good starting point. Flower centers are often symmetrical or nearly symmetrical. This is something that you can use, composing with the flower smack-dab in the center of your image, anchored by its center point.

flower photography macro symmetry

I used this flower’s symmetrical center to create a bold composition.

Have a Clear Point of Focus

Without a clear point of focus in your images, the viewer will be lost. Their eyes will wander from place to place without really being drawn into the image.

How do you create a point of focus? You ensure that at least one part of your image is sharper than the rest. You also compose with this point of focus in mind, making sure that the rest of your image merely complements this point of focus (rather than dominating it or detracting from it).

flower photography macro abstract

Here, the eye is drawn straight to the in-focus petals of this flower.

Use a Clean, Pleasing Background

Above, I discussed the importance of colorful subjects. But the subject isn’t the only thing that should be colorful. It’s also important to have a colorful background, or at least a pleasing one.

This can be a bit of a balancing act because you don’t want the background to overpower the subject. White and black backgrounds can work well, as can backgrounds that are a colorful but uniform wash.

macro photography flower trout lily

I aimed for a uniform, calming background when taking this trout lily photograph.

Tilt the Camera

One last tip for creating dynamic compositions is to try tilting the camera.

Rather than having the flower sitting statically within the frame, by tilting the camera, you communicate a sense of movement. The flower seems to be emerging from the frame in a very pleasing way.

flower photography macro black-eyed susan

Notice how tilting the camera to shoot this Black-Eyed Susan resulted in a more energetic image.

Conclusion

When doing flower photography, it is important to carefully consider both the subject and your composition. By keeping your subjects colorful and clean, and by aiming for simple, clean compositions, your flower photography will instantly improve.

The post Guide to Choosing Subjects and Compositions for Flower Photography appeared first on Digital Photography School.


Digital Photography School

 
Comments Off on Guide to Choosing Subjects and Compositions for Flower Photography

Posted in Photography


Quick Beginner’s Guide to Processing RAW Files in Photoshop Adobe Camera Raw

07 Jul

Do you shoot RAW but then open it without processing? When you take a photo in RAW format, regardless of the name each brand gives to it, what you’re doing is saving a bunch of data without processing it inside your camera. This way you have more information to work with during your post-production stage.

But having too much of something can sometimes seem daunting when you don’t know how to approach it and as a result be a limiting factor instead of opening up your possibilities.

Adobe Camera Raw – Processing Raw Files in Photoshop

This quick introduction guide explores the basic tools of Adobe Camera Raw (ACR) so that you can step into post-processing this digital “negative” and understand its possibilities but also its limitations, as not all can be fixed.

ACR Raw Post-processing Photoshop Basic Adjustments

Whenever you open a RAW file in Photoshop it won’t open in the interface that would normally go to when opening a JPG or a TIF file. It will open it in a window known as Above Camera Raw (ACR). Here you’ll see a lot of options that can look intimidating and give you the impulse to just click open and work directly on Photoshop.

However, if you do so then you’re missing out on a lot of opportunities, most importantly its non-destructive qualities. Please note, that I’m not going to explain the tools in the order you’ll find them in the ACR panel because some of them are related to each other and therefore it’s clearer to explain them together regardless of their position.

Quick Guide to Processing RAW Files in Photoshop Adobe Camera Raw

EXPOSURE

The first slider you will see is Exposure. This would be the equivalent of changing your shutter speed or f-stop settings up to five steps up or down. What this does influence the brightness of your entire image. Look at the example below to see how far you can push it in either direction.

Quick Guide to Processing RAW Files in Photoshop Adobe Camera Raw - exposure

CONTRAST AND CLARITY

The next slider you’ll find is Contrast, this refers to the relationship between the lighter and darkest areas of your photo. If you slide it to the right you will increase the contrast which is why a plus sign (+) will appear next to the amount. Moving it to the left will decrease contrast, therefore a minus (-) sign appears. This will flatten the image as there will be less tonal range in between dark and light tones in your image.

A few sliders below Contrast you’ll find Clarity. This is a tool I really like because it gives a nice punch to your photos but it’s easy to overdo it and having them look unnatural, so just be careful. I am mentioning it here because it also adds contrast but this is only to the mid-tones (technically it finds and enhances edges in the image), plus it gives a sharp/unsharp effect to the image.

Note: Clarity is not an actual sharpening tool.

Here’s an example pushing both tools to the limit in either direction so you can see that even if they are related, the result is not the same.

Quick Guide to Processing RAW Files in Photoshop Adobe Camera Raw - contrast and clarity

HIGHLIGHTS AND WHITES

Then there is the Highlights slider which I’ll explain together with another one, Whites. I’m doing this because they are closely related. The names are actually quite accurate but somehow their use is still difficult to grasp. Having said that, I’ll try to make it more clear.

The Highlights slider controls the tonal range from the lighter parts of your image, like this:

Quick Guide to Processing RAW Files in Photoshop Adobe Camera Raw - highlights slider

The Whites slider should have its name in the singular to make it more clear because what it does is set the white point of your image, in other words, the brightest pixels.

Quick Guide to Processing RAW Files in Photoshop Adobe Camera Raw - whites slider

So if you move the white point of the image, it will have an effect on the range of the highlights. Let’s see them work together.

Quick Guide to Processing RAW Files in Photoshop Adobe Camera Raw - highest highlights

Quick Guide to Processing RAW Files in Photoshop Adobe Camera Raw

SHADOWS AND BLACKS

In between those sliders you’ll find one called Shadows which together with Blacks works the same way as Highlights and Whites, but in the other side of the light scale.

Therefore, the Blacks slider sets the black point of the image and affects a wider tonal range than the one affected by shadows that refers to the darkest parts. Check the example below to have an illustration of how they work.

Quick Guide to Processing RAW Files in Photoshop Adobe Camera Raw

SATURATION AND VIBRANCE

Saturation is the next slider on the list. It has an impact on all the colors of your image so keep an eye on the entire image while you are applying it and not just on a detail or a zoomed-in portion. If dragged completely to the left you’ll lose all color and leave your image black and white. Dragged all the way to the right, Saturation can reach very intense colors.

However, if you only want to affect the colors that are dull, to begin with instead of the entire image, then you should use the Vibrance slider. This one can also have a big effect, to the point of reaching unnatural colors so be careful. Look at the difference:

Quick Guide to Processing RAW Files in Photoshop Adobe Camera Raw

When you’re happy with your image, you can just save the changes and leave it as is or you can open the image in Photoshop to continue working on it.

However, if you’re choosing the latter I suggest that instead of just clicking Open Image, press the shift key so that the button changes to Open Object. This way you’ll open your image on Photoshop as a Smart Object and you can come back to these ACR options and make some more adjustments later if you need to.

To learn more about it I invite you to check my tutorial How to Create with a Good Workflow Using Smart Objects in Photoshop.

Conclusion

I hope this makes it more clear for you. Remember that ACR offers other menu possibilities and there are various menus and tools that were too much to cover in this quick, beginner’s guide. So use this as a base and then keep exploring!

The post Quick Beginner’s Guide to Processing RAW Files in Photoshop Adobe Camera Raw appeared first on Digital Photography School.


Digital Photography School

 
Comments Off on Quick Beginner’s Guide to Processing RAW Files in Photoshop Adobe Camera Raw

Posted in Photography


Beginner’s Guide to Natural Light in Landscape Photography

06 Jul

Photography is all about light. The same scene with the same composition can look completely boring under one set of lighting conditions and very dramatic under different conditions. Good light makes the difference.

But does that imply there is also such a thing as bad light? I don’t think there is such a thing. The key is to understand what kinds of images to make under the lighting conditions you are presented with when you are photographing.

White House in Arnarstapi Harbor, Iceland - Beginner’s Guide to Natural Light in Landscape Photography

An overcast sky creates a soft landscape with no shadows.

Understanding the three characteristics of natural light will help you use the light to your advantage and make images with an impact no matter what conditions you have to work with.

The Quality of Light

By quality of light, I am referring to how hard or soft the light is.

Hard light happens during midday when the sun is high in the sky and there are no clouds to filter the light. This kind of light is harsh and bright, but it can also create interesting shadows and contrast.

Shadow on the Dunes - Beginner’s Guide to Natural Light in Landscape Photography

Harsh mid-afternoon light casts a dramatic shadow on this sand dune emphasizing its shape.

Soft light happens on a cloudy day when the clouds diffuse the light making it even with no shadows or bright spots. It also occurs in the shade.

Even on a day when there are no clouds, when the sun is lower in the sky the light passes through more atmosphere which softens the light. This is why golden light at the edges of the day is softer then midday light.

The Color of Light

The color of natural light from the sun changes during the course of the day. Before the sun rises, when the first light of the day appears in the sky, the light is a cool blue. During sunrise, the light is golden. As the sun gets higher in the sky, it is bright with little color tint at all.

Organ Pipe Cactus - Beginner’s Guide to Natural Light in Landscape Photography

During Golden Hour, the last of the day’s light casts a warm golden light on these cacti.

At the end of the day the opposite thing happens. When the sun is low on the horizon before sunset, you get the golden glow. After sunset is twilight when the light is a cool blue (blue hour).

Saguaro Cactus by Anne McKinnell - Beginner’s Guide to Natural Light in Landscape Photography

Once the sun has set, the light becomes a cool blue and the landscape is soft with no shadows.

The Direction of Light

Front light is when the light comes from behind you and hits the front of your subject directly. Front light can be unforgiving, washing out colors and minimizing textures. So if you are going to use it, it’s best to do so when the sun is low in the sky when it is warmer and softer.

Angel Peak New Mexico by Anne McKinnell - Beginner’s Guide to Natural Light in Landscape Photography

Front light hits the mountain, but it is a soft light since it is also at golden hour.

Backlight is when the sun is directly in front of you and behind your subject, lighting it from behind. I love backlight because the deep contrast between the highlights and shadows is so dramatic.

Backlighting is also perfect for making silhouettes when you have subjects with great shapes.

Organ Pipe Cactus by Anne McKinnell - Beginner’s Guide to Natural Light in Landscape Photography

The cactus is lit from behind creating an interesting silhouette during sunset.

Sidelight is when the sun is beside you, lighting your subject from the side. This kind of light is excellent for emphasizing shape and texture.

The sidelight on this saguaro cactus emphasizes it’s shape and texture.

What to do when …

So how do you use this information to your benefit? When you are out photographing consider the characteristics of the light you are presented with and use that to decide what kinds of photographs to make.

Harsh mid-afternoon light

The light is high in the sky, extremely bright and harsh with only a little color. This is a good time to look for shadows or photograph in the shade.

Shadow Patterns by Anne McKinnell - Beginner’s Guide to Natural Light in Landscape Photography

Harsh mid-afternoon light can create interesting shadows.

An overcast day with dull light

This kind of midday light has little color, but it is soft with no shadows; think soft. This kind of light is perfect for making soft flower photos, close-ups with even light, or waterfall photos where direct light would cause unwelcome bright spots.

If there is any texture to the clouds in the sky, that is good. But if the sky is pure white, eliminate it from the frame.

Skogafoss Iceland by Anne McKinnell - Beginner’s Guide to Natural Light in Landscape Photography

Waterfalls are a perfect subject for an overcast day.

Golden Hour

The sun is low in the sky casting beautiful soft warm light at golden hour, so it’s hard to go wrong in this situation. Think about the direction of light. Front light will create a warm glow on buildings and mountains, sidelight will emphasize the shape of hills, backlight will create dramatic silhouettes and you could create a sunburst by using a small aperture.

Spider Rock, Canyon de Chelly National Monument, Arizona - Beginner’s Guide to Natural Light in Landscape Photography

The day’s last light casts a golden glow on the edge of the canyon.

Blue Hour

The sun is below the horizon giving you soft, even, cool light. The direction of light does not apply here. Combine this type of light with a long exposure to emphasize the soft feeling if you have any moving elements like water or clouds. Combine twilight with city lights for more drama.

Li River and Karst Mountains in Guilin, China - Beginner’s Guide to Natural Light in Landscape Photography

There was barely any light in the sky at all during this 15-second exposure.

The best way to learn how different types of light affect your images is to photograph the same subject under various conditions. Pick something that is easily accessible to you and photograph it with front light, sidelight, and backlight. Photograph it at midday, during golden hour and at twilight. Photograph it under harsh mid-afternoon light and on a cloudy day when the light is soft.

Understanding these characteristics of natural light will ensure that you can make the most of the lighting conditions you have and create photos with impact at any time of day.

The post Beginner’s Guide to Natural Light in Landscape Photography appeared first on Digital Photography School.


Digital Photography School

 
Comments Off on Beginner’s Guide to Natural Light in Landscape Photography

Posted in Photography