RSS
 

Posts Tagged ‘Guide’

Buying Guide: The best lenses for Fujifilm X-mount mirrorless cameras

25 Apr

Whether you’ve bought an inexpensive Fujifilm X-A5 with a kit lens, or a higher-end body like the X-T3, at some point you’re going to want some new glass. Whether you’re shooting portraits or want a versatile travel zoom, we’ve got you covered.

Before we go on, keep in mind that these lenses are for X-series cameras only. Fujifilm’s GFX medium format bodies use a different mount, which we’re not covering in this buying guide.


For each of the categories below the winner was the lens which we found to offer the best combination of quality and value. In most cases, we’ve also provided a more budget-friendly option, as well as a choice for those with more to spend.

  • Best kit lens replacement
  • Best prime / single focal length lens (all-around)
  • Best prime / single focal length lens (for portraits)
  • Best wide-angle zoom lens
  • Best telephoto zoom lens
  • Best macro lens
  • Best lens for travel

Here at DPReview we use a lot of lenses, but we can’t test every single product on the market. So if we’ve excluded your favorite lens, or if you disagree with any of our selections, please let us know in the comments below.


Best kit lens replacement

Standard (kit) zooms are just what they sound like – versatile, general-purpose lenses that start with a fairly wide angle of view and allow you to zoom in to a focal length traditionally used for portraits.

Our pick: XF 18-55mm F2.8-4.0 R OIS LM

If your camera didn’t already come with it, we’d suggest upgrading to the excellent 18-55mm F2.8-4.0 OIS. The 18-55mm is a significant step up from Fujifilm’s XC 16-50mm and 15-45mm kit lenses, albeit not quite as wide as either.

Check prices | More info

Also consider:

Money no object:
XF 16-55mm F2.8 R LM WR

It’s big, it’s heavy, it’s unstabilized, but more importantly, the 16-55mm F2.8 is optically excellent. It’s one of the most powerful ways to get the most out of your camera.

For more flexibility:
XF 18-135mm F3.5-5.6 R LM OIS WR

At time of publication, the 18-135mm is the best way of adding a lot more flexibility to your camera. Just bear in mind that it has a slightly slower aperture than the 18-55mm and doesn’t go any wider, so think carefully about what you’d gain.

Check prices | More info Check prices | More info

Best prime / single focal length lens (all-around use)

Removing the complexity of a variable focal length often allows for prime lenses to be smaller, lighter and sharper, while letting more light through and being more useful in dimly lit situations.

For all-around use we’d recommend a semi-wide-angle lens that can lend itself to a range of subjects.

Our pick: XF 23mm F2 R WR

The 23mm F2 isn’t the sharpest lens in the Fujinon lineup, but it’s small, relatively fast and sensibly priced. It makes for a respectably small combination with most X-series cameras and provides decent low light performance and some control over depth-of-field. The equivalent focal length of 35mm makes this a perfect everyday lens for walk-around shooting.

Check prices | More info

Also consider:

Small/light/affordable:
XF 27mm F2.8

The 27mm lens offers a 40mm equiv. field-of-view, which can be great fun to shoot with. At F2.8 it’s not going to give much of a benefit in terms of light capture or depth-of-field compared with a kit zoom. Its major appeal is size: it’s convenient and discreet when paired with most X-series cameras.

Money no object:
XF 23mm F1.4 R

The Fujifilm 23mm F1.4 is optically excellent, making it a great do-everything prime. It’s not especially fast to focus but if you want the quality and improved low light performance it brings, then that’s the trade-off.

Check prices | More info Check prices | More info

Best prime / single focal length lens (for portraits)

Prime lenses are just a single focal length; removing the complexity of a zoom often allows for these lenses to be smaller, lighter and sharper, while letting more light through and being more useful in dimly lit situations.

For portraits we’d recommend a mid-telephoto lens that lets you shoot head-and-shoulders shots from a comfortable working distance.

Our pick: XF 56mm F1.2 R

The 56mm F1.2 is designed to give the same angle-of-view and depth-of-field as a classic 85mm F1.8 lens does on full frame. It’s one of the slower-focusing lenses in the system, but it’s impressively sharp and well-matched for portrait shooting. There’s a more expensive ‘APD’ version if you need smoother background blur.

Check prices | More info

Also consider:

For a bit more breathing room:
XF 90mm F2 R LM WR

The 90mm F2 isn’t cheap, but it’s extremely sharp, is faster to focus than the 56mm and gives plenty of control over depth-of-field. It also gives a longer working distance, which some people will prefer.

The inexpensive option:
XF 50mm F2 R WR

The 50mm’s equivalent focal length of 75mm is a bit shorter than the 56mm’s, but the magnification difference is minimal in normal use and it’s much less expensive, faster to focus and still pleasantly sharp. It’s also small enough to carry with you at all times.

Check prices | More info Check prices | More info

Best wide-angle zoom lens

Wide-angle lenses are often useful for taking photos of interiors, landscapes and architecture.

Our pick: XF 10-24mm F4 R OIS

The 10-24mm F4 is a mid-range stabilized zoom that extends out to a usefully-wide 15mm equivalent. It’s not cheap but the optical quality, solid build, constant aperture and inclusion of OIS help explain the price.

Check prices | More info

Also consider:

Money no object:
XF 8-16mm F2.8 R LM WR

If you need to go wider or brighter than the 10-24mm, there’s the 8-16mm F2.8. It’s well-corrected and generally superb optically. Just be aware: it’s big, heavy, and cannot accept screw-in filters.

Check prices | More info


Best telephoto zoom lens

Telephoto lenses start out being fairly zoomed-in, and allow you to zoom in even further so you can fill your frame with more distant subjects.

Our pick: XF 55-200mm F3.5-4.8 R LM OIS

Although the range makes it sound like a budget ‘two lens kit’ filler, the Fujinon 55-200mm is a well built, fast-to-focus mid-price option. We used it as our autofocus test lens for many years and were impressed with its performance.

Check prices | More info

Also consider:

Budget option:
XC 50-230mm F4.5-6.7 OIS II

The 50-230mm is a low-cost stabilized tele-zoom. Be aware of that F6.7 maximum aperture at the long end of the zoom: it’s not going to let in a lot of light, so your images are likely to be noisy in all but the best light.

Money no object:
XF 50-140mm F2.8 R LM OIS WR

The 50-140mm F2.8 makes a lot more sense when you realize it covers roughly the same range as the classic 70-200mm sports lenses do on full-frame cameras. It’s fast, well-built and offers image stabilization, and is much easier to wield than most lenses with this focal length.

Check prices | More info Check prices | More info

Best macro lens

Macro lenses allow you to focus very close to small subjects, which is handy for photographing flowers or bugs.

Our pick: XF 80mm F2.8 R LM OIS WR Macro

The 80mm F2.8 Macro is sharp, stabilized and gives a useful working distance, meaning you’re not bearing-down on your subject. A flexible, attractive choice for close-up shooting.

Check prices | More info

Also consider:

Money no object:
Zeiss Touit 50mm F2.8M

We’ve been impressed by what we’ve seen of the Zeiss Touit series but they’re significantly more expensive than their Fujinon counterparts. We prefer the 50mm Macro to Fujifilm’s rather slow-to-focus 60mm F2.4 if you need something wider than the 80mm.

Check prices | More info


Best travel zoom lens

If you want a versatile lens that can handle most shooting situation, then consider a travel zoom. You still start out with a fairly wide field-of-view and can zoom in almost as much as many telephoto lenses. This is convenient, but these lenses tend to let less light through them, so aren’t as useful in dimly lit situations, and they may not always give you the sharpest results.

Our pick: XF 18-135mm F3.5-5.6 R LM OIS WR

The 18-135mm offers a flexible range for whatever you encounter while traveling, which is fortunate, since it’s essentially your only choice at present. It would be nice if it went a little wider, but it covers a hugely useful range, offers image stabilization and a weather-resistant design, making it a solid choice for traveling.

Check prices | More info

Also consider:

Worth waiting for?
XF 16-80mm F4 R OIS WR

If you haven’t got a specific trip already planned, it might be worth waiting for the forthcoming 16-80mm F4. Constant F4 may not sound too exciting on an APS-C camera but the 24-120mm equivalent range may prove more useful than the 27-203mm equiv reach of the 18-135, especially if the quality is better.

Articles: Digital Photography Review (dpreview.com)

 
Comments Off on Buying Guide: The best lenses for Fujifilm X-mount mirrorless cameras

Posted in Uncategorized


The dPS Ultimate Guide to Food Photography

18 Apr

The post The dPS Ultimate Guide to Food Photography appeared first on Digital Photography School. It was authored by Darina Kopcok.

What was once a weird little niche in photography is now a worldwide phenomenon. Food photography is only growing in popularity if the 32 million posts currently on Instagram are anything to go by.

Food photography is here to stay, but it’s not an easy genre to master.

Our guide gives you some of the top tips and tricks to help you get mouth-watering results.

1 - Ultimate Guide Food Photography - Darina Kopcok - DPS

Equipment

Cameras

2 - Ultimate Guide Food Photography - Darina Kopcok - DPS

The first thing to think about when you’re on the hunt for a new camera body is the size of the sensor.

Whether you decide to buy a camera with a cropped sensor or invest in a full-frame, your budget will likely determine your choice.

The important thing to know is that your camera and lenses behave differently when they have a cropped sensor than a full-frame.

Every camera has a crop factor. This is a number used to describe how much the camera is cropping your image in relation to the standard 35mm.

A full-frame camera matches the 35mm cropped standard of a traditional film camera. It has a sensor size of 24mm x 36mm. A cropped sensor is smaller than this and is therefore cheaper for camera manufacturers to make. It doesn’t match a lot of lenses and the final images look different.

The Canon Rebel, for example, has a crop factor of 1.6. This means that you multiply 1.6 times the focal length of your lens to get the actual focal length that it will look like your pictures were taken at.

On a full-frame camera, a 50mm lens behaves like a 50mm. Put that same lens on a camera with a cropped sensor, it behaves more like an 80mm.
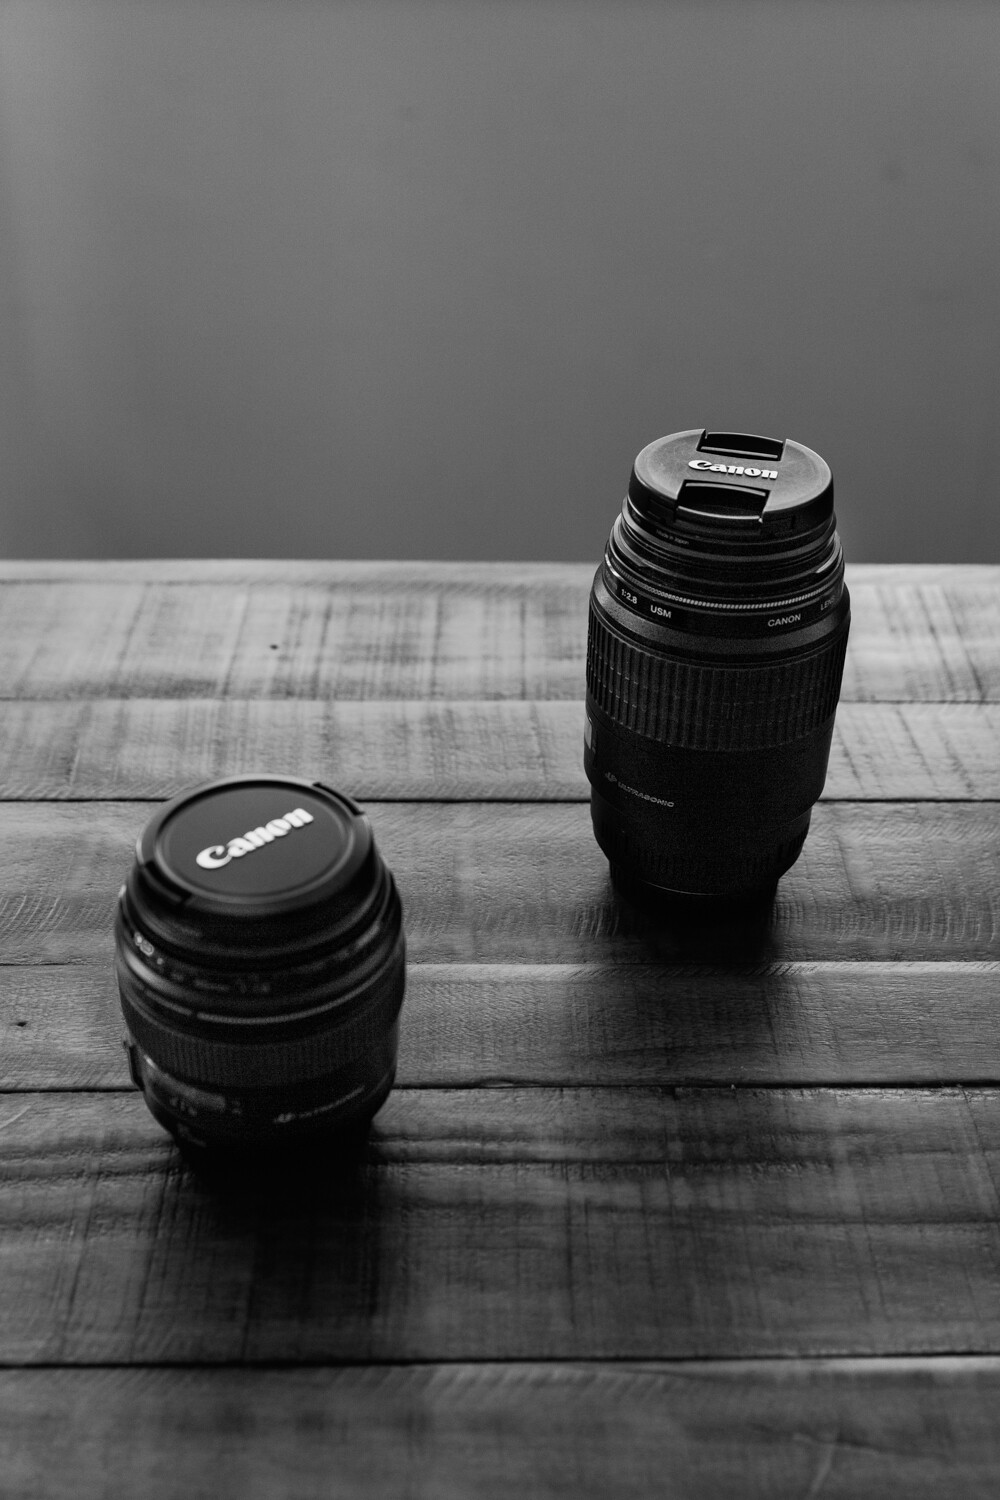
Lenses

3 - Ultimate Guide Food Photography - Darina Kopcok - DPS

Lenses are where you should spend the most significant part of your budget. You should look at them as a long-term investment in your craft.

Here are the factors to consider:

Sharpness

Your biggest concern when shopping for a lens is sharpness.

Prime lenses are preferred when shooting food because they are sharper than zoom lenses.

Zoom lenses have more moving parts that enable the zoom to function. This tends to result in lower image quality and sharpness.

Prime lenses are usually ‘faster’. They have a larger maximum aperture, which enables quicker shutter speeds.

They also give you a much tighter depth of field, enabling you to isolate your subject and get that really nice blurred background we all love in food photography.

The 50mm Lens

The 50mm can also be a useful lens, especially if you don’t have a zoom. This lens is good for overhead shots and tablescapes. However, it can give you some distortion when taking a portrait-style shot. In food photography, the 50mm is actually considered a wide-angle lens.

The 50mm f/1.8 is often referred to as the “nifty-fifty” because it gives you decent results for a very low price. If you’re just starting out and your budget is tight, get this one.

The 24-70mm Lens

Although primes are ideal, it’s actually very useful to have one zoom lens in your kit, such as a 24-70mm.

It’s very sharp for a zoom lens, and really versatile. Many food photographers consider this a staple in their kit.

4 - Ultimate Guide Food Photography - Darina Kopcok - DPS

The 60mm Macro

If you’re shooting with a cropped sensor, then a 60mm macro is a great choice.

On a cropped sensor, it’s more like having a 100mm. If you upgrade to full-frame, you can use it like you would a 50mm.

This lens allows you to get 3/4-angle view shots of your subject with a nice bokeh on a cropped sensor.

You also won’t get the distortion at this angle that you would when shooting with a wider focal length, like a 50mm.

The 100mm Macro

An excellent lens to have in your kit is a 100mm macro lens. This lens is not only for macro or close up shots, although it’s great at these, too.

By pulling further away from your set, you can get very nice portrait-style shots as well. The focal length will give you a great blurred background.

If you go for the 100mm/105mm macro lens on a cropped sensor you will be shooting at a focal length of 150mm.

This will be a very tight crop, which can be a problem if space is an issue.

Tripods

A tripod is a must for food photography. It helps you create consistent images and frees up your hands to style according to what you see through your camera.

The biggest requirement in a tripod is stability. A tripod needs to be able to handle the weight of your camera and lens.

When shopping for a tripod, look for one with both adjustable height and orientation. This is where you have a center column that you can move.

Make sure that it has rubber feet to avoid slippage, and that it has a high payload.

Payload refers to the amount of weight the tripod is able to withstand. It needs to bear the weight of your camera, lens, and any other additions such as a bracket or extension arm.

Food Styling

The objective of food styling is to make food look it’s very best. Most food needs a bit of doctoring to make it look presentable for the camera.

Here are some things to consider when approaching food styling:

Use the freshest food possible

The food you shoot needs to be as fresh as possible so that it looks appealing in your images. When shopping for your ingredients, take care to buy the freshest and best-looking items available.

Always have your scene, lighting, and camera ready before placing your food on set.

When you’re adjusting with your lighting and camera settings, use a substitute in a similar color and shape as your food as a stand-in. Replace it with your “hero” (your main food subject) at the last moment, so that it looks as fresh and appetizing as possible.

5 - Ultimate Guide Food Photography - Darina Kopcok - DPS

Buy more than you need

When shopping for groceries, be sure to buy more than you think you’ll need for the shoot. Food dries out, melts, goes brown, or otherwise begins to look unappealing within a short time frame.
It needs to be replaced with fresher items.

Depending on the food, you may also need a lot of the items to fill the frame.

Plating

The most important factor when choosing the dishes on which you will present your food is the size.

Objects can look very different to the camera than to the eye and often look bigger than we expect. For this reason, it’s a good idea to choose smaller dishes than you would ordinarily use.

Present your subjects on salad plates or smaller dinner plates. Large plates can dwarf the main subject and dominate the frame.

6 - Ultimate Guide Food Photography - Darina Kopcok - DPS

Garnishes

Herbs and spices, and items such as croutons, can enhance your food shots.

Sprigs of various herbs like rosemary can be tied together with kitchen string to make little bouquets you can use to add context to your food story.

You can enhance a plain bowl of soup with a drizzle of cream and a sprinkling of chopped chives.

The key is that your garnishes should make sense within the wider context of your scene. If you’re shooting salmon with a lemon dill sauce, then don’t garnish it with basil.

When using herbs, use the freshest possible and replace them as you shoot. They wilt or oxidize quickly. Cut herbs can be kept fresh in the refrigerator much longer when wrapped in some wet paper towel.

7 - Ultimate Guide Food Photography - Darina Kopcok - DPS

Props

You need to have a collection of food photography props.

A prop is any item you use on set to enhance the image. In food photography, this is typically kitchenware, like plates and flatware, serving bowls and utensils, and linens.

When selecting your props, think about your food photography style and what types of props would complement it.

If your style is really clean and elegant, or more refined, such props would not make much sense and you’d be better off with more delicate pieces.

In general, stay away from very bright colors and bold patterns, as they distract from the food. Colorful pieces can add a point of interest, but they need to work with the overall composition and feel of the photo.

Don’t use a lot of props. A couple of the right props can have a lot of impact in telling a visual story, but too many will distract the viewer and dominate the image.

When selecting your props, start with one or two pieces, perhaps a neutral salad plate and a vintage knife or spoon. If in doubt, keep it simple.

8 - Ultimate Guide Food Photography - Darina Kopcok - DPS

Backgrounds

You’ll need a variety of interesting backgrounds on which to place your food.

Use a variety of items for your backgrounds, like fabric, craft paper, or large floor tiles. You can also get creative and make your own.

Buy sheets of wood and paint or stain them yourself. There are also some great online resources for buying professional food photography backgrounds and they ship worldwide.

When shooting food, neutral or cool-toned backgrounds like blue generally work best.

Lighting

Lighting modifiers

Whether you use natural or artificial light, you’ll need to modify your light source.

One important item in your kit is a diffuser. This is a panel of sheer white material that you place at the edge of your table to soften the light that hits your scene.

You’ll also need some simple tools to bounce and absorb the light. You can buy a professional 8-in-1 reflector kit, with foldable discs in a variety of materials to use in your shoots, as pictured below.

The silver reflector, for example, can brighten your food, while the gold reflector will add warmth. It usually comes with a diffuser as well.

For a DIY version, you can also use simple black or white cardboard purchased from a craft or dollar store. White brightens your scene, while the black absorbs the light.

9 - Ultimate Guide Food Photography - Darina Kopcok - DPS

Lighting styles

You should have an idea of what you want your final image to look like before you pick up your camera. Do you want the light to look soft and dimensional, or are you looking for striking contrast?

The greater the contrast between light and dark, the more dramatic your image will be. Often, your subject will dictate the light you choose.

The next time you shoot, photograph your subject in both soft and hard light and note the difference. How does each approach affect the final result? Many photographers tend to gravitate to one or the other as part of their style.

Side lighting

This is when your light is coming from directly beside the food.

Side lighting is a good approach for a lot of your food photography. It works for most set-ups and is easy to use.

Place a reflector or bounce card on the opposite side to the light. Depending on how much shadow you want on the side of your food, move it closer or farther away, or use a smaller or larger reflector.

When shooting white and airy scenes, you still want some shadow to add dimension.

10 - Ultimate Guide Food Photography - Darina Kopcok - DPS

Backlighting

Backlighting is when you position your light behind your food.

If you imagine the face of a clock, it’s at 12 o’clock. This is an ideal position for beverages or soups, as it adds a sheen and highlights the liquid properties of food.

In general, backlighting is very flattering to food. It makes it gleam and brings out its texture.

However, it can be tricky to work with because it can cause your image to be too bright at the back, and too dark at the front. Too much contrast means the back of the photo will be blown out, with a loss of detail blurring into the main subject. Not enough contrast will result in a blown out photo or one that looks washed out, which is what happens when you shoot with too much light.

11 - Ultimate Guide Food Photography - Darina Kopcok - DPS

Side backlighting

Side backlighting is a combination of the first two types of lighting. It’s the best of both worlds and the easiest to work with. Here, our light is placed between 10 and 11 o’clock.

With this lighting style, you get the surface shine provided by backlighting without the risk of overexposure. You also don’t have to reflect as much light onto the front of the food because the light is coming at more of an angle.

When using side backlighting, you’ll have to play around with the height of your light relative to your scene, depending on how you want the shadows to fall.

The closer your light source is to your set, the softer the fall-off will be.

12 - Ultimate Guide Food Photography - Darina Kopcok - DPS

Camera Angles

Camera angle can have a powerful effect on your final image.

Before you pick up your camera, you need to think about what kind of food or dish you are shooting and which camera angle will help bring out its best features.

There are three main camera angles used when photographing food: overhead, 3/4 angle, or straight-on.

The 3/4 Angle

The 3/4 angle is when your camera is placed anywhere from 25 to 75 degrees in relation to your subject.

The 3/4 angle is a popular angle because it’s so versatile. You can usually show the front and surface of the dish, as well as the sides.

You see this angle a lot in commercial food photography.

13 - Ultimate Guide Food Photography - Darina Kopcok - DPS

The Overhead Angle

The overhead angle is the 90-degree angle. This has become a very popular angle lately due to Instagram.

This angle definitely has several positives. It’s good for fitting several elements into a scene, like in a tablescape. This also makes it a great storytelling angle. You can see a variety of props, ingredients, or dishes of food in the frame when you shoot from overhead. It is also often easier to compose your shot using this angle than a 3/4 angle or straight-on.

However, the overhead angle doesn’t work for every type of food shot. It eliminates depth, which gives a more graphic pop to an image but is not suitable for every type of food.

With the overhead angle, what you most emphasize is the shape of the food and various elements of the scene.

14 - Ultimate Guide Food Photography - Darina Kopcok - DPS

The Straight-On Angle

This straight-on camera angle is most suitable for “tall” foods, like burgers or stacks of brownies or pancakes. It emphasizes the height of a dish.

When you’re shooting burgers and sandwiches, the bun or the top piece of bread hides what is inside, so taking the shot from anywhere above the food doesn’t make sense.

Remember, the objective is always to focus on the best features of the food.

15 - Ultimate Guide Food Photography - Darina Kopcok - DPS

Composition

Compositional tools can help us make better photographs, however, not each tool will work for each image.

Before you begin to shoot, know the goal of your image. What is the mood?  What is it that you want to convey? What is the purpose of your shot and how will it be used?

Good food photography evokes the viewer’s emotions. Composition is one of the main tools that help us do this.

Line

Line is the most basic element in visual composition. Lines lead the eye through a photograph to key focal points and elements and keep the viewer’s eye focused on the image.

There are a couple of things to be aware of when working with lines. When using lines to direct the viewer’s eye, they should point to the main subject, or into the frame.

Lines should also never point outside of the frame, as the eyes will be forced to leave the image. This weakens the image and can cause the viewer to lose interest.

Rule of Odds

The rule-of-odds states that when photographing a group of objects, having an odd number of elements in the frame is much more visually interesting than having an even number of elements.

Odd numbers create a sense of balance and harmony and provide a resting point for our eyes, whereas even numbers of objects can divide our attention and compete with each other.

When there are more than five elements in an image, it becomes difficult for the mind to register the higher number. For this reason, it’s a good idea to compose many elements into groups of odd numbers whenever possible.

16 - Ultimate Guide Food Photography - Darina Kopcok - DPS

Rule of Thirds

The Rule of Thirds is intended to help you place the main elements and focal point within the composition.

Think of an imaginary grid that divides the image into nine equal parts, like a tic-tac-toe grid. The ratio is 1:1 per rectangle.

Rule of Thirds is a great place to start. It helps add harmony to your images and helps you take the first steps in composition as a new photographer. In fact, it can work for many images, particularly landscapes.

When it comes to food photography, however, this rule can be limiting. You can end up making images that are unbalanced and awkward.

The Phi Grid is a similar concept that is more powerful than the Rule of Thirds. Both grids look almost the same, but the centre lines of the Phi Grid are closer together.

The Phi Grid

17 - Ultimate Guide Food Photography - Darina Kopcok - DPS - Phi Grid

Phi Grid

The Phi Grid is an expression of the Golden Ratio. It helps you create a balanced and naturally pleasing image.

The Phi Grid follows the ratio of 1:1.618, a ratio that is a constant in nature and one we automatically gravitate toward.

It appears throughout the natural world, from a nautilus shell to the number of petals in a flower.

You can find the golden ratio everywhere in the world around us, though no one can explain exactly why it exists this way.

You can use this knowledge in your photography. Thinking about how the eye moves through an image and incorporating some expression of the golden ratio will help you create images that the brain will recognize as aesthetically attractive and harmonious.

Negative Space

18 - Ultimate Guide Food Photography - Darina Kopcok - DPS

Positive space is the space taken up by your main subject. Negative space is an area where your eyes can rest. It provides balance, a bit of breathing room, and emphasizes the subject.

Negative space can portray movement and give context to an image. It may also give the viewer the idea that there is a story beyond what the eye is seeing.

In food photography, there is a tendency to shoot with a lot of negative space due to text placement, particularly when it comes to magazine work, product packaging, or advertisements.

When an image doesn’t make use of negative space, it can feel a bit claustrophobic and cluttered. Also, when there is too much going on in an image, the viewer is unsure of where to look.

Repetition

19 - Ultimate Guide Food Photography - Darina Kopcok - DPS

Repeating elements also add interest to an image. Repetition can occur spontaneously in the subject or can be created by added elements such as props and supporting ingredients.

Sometimes patterns can become monotonous, so breaking up a pattern can create a stronger photograph.

There are various ways to create a break in pattern, such as with a break in color, shape, size, or texture. Where you place this break is crucial; you want to place it in one of your focal points or along intersecting lines.

Color

Color is an important part of a composition. It evokes emotions and creates a sense of mood within an image.

Cool and dark colors such as navy blue and black recede, while light or warm colors like yellow bring objects forward.

Backgrounds and surface colors that are too bright can detract from our subject; they should be chosen according to the mood you want to create, as well as in harmony with your chosen elements.

Color combinations can be monochromatic when they are tonal variations within a single hue. This approach has its place, but utilizing complementary colors is a great technique to apply to food photography.

Complementary colors appear directly opposite each other on the color wheel, such as red and green, or blue and orange.

The color scheme you choose to work with will, in part, be dictated by the food you are shooting.

Your colors should also be balanced in terms of not having too many colors in a frame, which will appear chaotic.

Texture

20 - Ultimate Guide Food Photography - Darina Kopcok - DPS

One of the best ways to add interest to your photographs is with texture. It adds contrast and detail and enhances food subjects.

Texture occurs naturally in food, but can also be used effectively in backgrounds and surfaces, and your props and linens, as long as it’s not overdone.

Lots of texture in the food, linens, and backgrounds composed together can look too busy and overwhelm the viewer.

Editing Your Images

Adobe’s Lightroom is an excellent post-processing program. It’s more intuitive and easier to learn than Photoshop.

I recommend using Lightroom to do your global adjustments and then to fine tune your image in Photoshop if need be. For example, if you need to work on specific areas of the image.

Let’s look at the most important tools:

The Histogram


21 - Ultimate Guide Food Photography - Darina Kopcok - DPS

It’s important to have a basic understanding of the histogram to make the proper adjustments to the exposure and tones in your image.

A histogram maps out the tonal range of an image. Brightness is graphed on a grayscale. Every pixel in the image is assigned to a value.

Black is on the left, while white is on the right. You can find the shades of grey in between.

The distribution of the tones in the histogram will tell you about the overall exposure of the image.

A big peak in any of these regions means that the image has a lot of pixels at that particular density. An open gap in the histogram means that there are no pixels at that density.

Check if you have a strong peak at the black or white end of the histogram. If you do, your image could be underexposed or overexposed.

Generally, most images look best if they contain both dark and light values. Otherwise, they may lack contrast and look flat.

Cropping

22 - Ultimate Guide Food Photography - Darina Kopcok - DPS23 - Ultimate Guide Food Photography - Darina Kopcok - DPS

It’s a good idea to crop and straighten your image before you start making global adjustments.

To straighten an image, start in the Transform panel and click on -> Auto.

If this doesn’t work, you can try one of the other settings, or do it manually under the Crop Tool.

To access the Crop Tool in Lightroom, click on the grid symbol under the Histogram in the top panel. Or hit R for the keyboard shortcut. This will allow you to crop your image by bringing in the corners with your cursor.

Note that when the lock is closed on the lock symbol, the tool will crop each side of the image evenly.

If you would like to freeform crop, simply click on it to unlock it.

White Balance

24 - Ultimate Guide Food Photography - Darina Kopcok - DPS

White Balance in a very important aspect of post-processing your food pictures.

I recommend shooting with a grey card and adjusting your white balance in post-processing. This removes incorrect color casts and ensures that your whites are truly white.

A grey card is a piece of grey plastic you can buy at a camera supply store. It is exactly 18% grey, which is what your camera looks for when metering a scene.

Take a picture with your grey card in the scene. In Lightroom, take the White Balance eyedropper and click on the grey card. It will automatically read the proper white balance.

The Basic Panel

25 - Ultimate Guide Food Photography - Darina Kopcok - DPS

This panel is where you may end up doing a lot of tweaking before you settle on a final look.

Exposure affects the brightness of the range of tones in your image, however, playing with your shadows and highlights, and your whites and blacks will give you a more precise balancing of tones than simply relying on the Exposure slider.

Check if the bright areas look muddy, or the shadows still need more light. Move the sliders to points where the image looks good overall.

You will likely need to go back and readjust your exposure slider once you have made edits with the other sliders.

Vibrance & Saturation

Vibrance is also an important slider in editing food photography.

It’s a better editing tool than Saturation because it’s more subtle. It adjusts the less saturated colors without intensifying the already saturated ones.

Vibrance will first boost the saturation of the muted colors and then the other colors.

Whether you actually use the saturation slider depends on the image. In general, a conservative approach is what works best when editing food photography.

If you decide to use this slider the slider, nudge it up a tad, to about +5 or +6.

Tone Curve

26 - Ultimate Guide Food Photography - Darina Kopcok - DPS 27 - Ultimate Guide Food Photography - Darina Kopcok - DPS

New users often find the Tone Curve challenging,  but it’s one of the most powerful tools found in Lightroom.

The Tone Curve is a graph that maps out where the tones in your images lie. The bottom axis of the Tone Curve starts with Shadows at the far left side. It ends with Highlights on the far right end. The mid-tones fall in the middle, in a range from darker to lighter. They get darker as you move lower, and brighter as you move up the axis.

You can control the lightness and darkness of your tones. Adjust the Point Curve itself or the Region Curve.

The Region has sliders for each part of the tonal range. As you drag each slider, the curve, and the image both change.

To make adjustments with the Point Curve, click on the area you want to affect. This will create an anchor point at which to control the tone.

Dragging the point up lightens that tone; dragging it down darkens it.

28 - Ultimate Guide Food Photography - Darina Kopcok - DPS

Assess the mid-tones in your image to see if they are already bright.  If not, click on the middle of the tone curve and bring the point up.

If they are too bright, bring the curve down. Check the other parts of your image.

If you’re just getting started with learning the Tone Curve, play around with the Region sliders first. Take note of how the various sliders affect the curve.

Whichever approach you choose, be sure to watch the histogram as you make changes. This way you’ll make sure that you are not losing important detail.

HSL

HSL stands for HueSaturation, and Luminance. This is where you balance the colors in Lightroom.

Color adjustments are usually more subjective than tonal adjustments. This is because color gives a photograph a sense of mood.

There are two ways to make color adjustments in this panel. You can adjust them all at once under HSL/All. Or each color individually under the Color tab at the top of the panel.

The Hue tab or section at the top of the panel is where you choose how warm or cool you want each color in your image to be.

For example, I find that greens almost always look off. I slide the greens slightly more towards the left or right to get them looking more realistic.

To add more warmth – meaning more yellow – to your greens, slide it to the left. For a cooler hue, sliding it to the right adds more blue.

The Saturation slider in the basic panel adjusts the color of the whole image. But the saturation sliders here adjust each color individually.

If you adjust a color to be more saturated, this will affect the saturation of that particular color throughout the whole photo.

Whether you’re working in the basic panel or the HSL panel, saturation requires a light hand.

Lastly, Luminance affects the brightness of the color. These sliders are more valuable than the saturation sliders, so work with these first.

Editing in Lightroom is all about balance. The same goes when working with Hue, Saturation, and Luminance adjustments.

Sharpening

Sharpening should be the last editing step. It adds contrast between pixels and edges, which creates definition and a more refined look.

However, you don’t need to apply sharpening to the whole image because, in food photography, there is not much point in sharpening the props and the background.

The focus is on the food, so that is what you sharpen.

To do this in Lightroom, mask out the image to select the areas of the image you want to sharpen. Hold down the Alt/Option key while clicking on Masking in the Sharpening panel.

Lightroom will show you where the sharpening is being applied in white. Your image will look like an x-ray.

Slide it to the right. The further right you go, the less the image will be sharpened.

29 - Ultimate Guide Food Photography - Darina Kopcok - DPS

You will find that you will be in the +70-80 range for sharpening for food photography.

In Conclusion

There is a lot to learn when it comes to shooting food, but hopefully, this guide has given you an overview of what’s involved and some ideas about how you can improve your images.

The more information you have, the more empowered you can be in your creative decisions.

Above all, lots of practice is what is going to take you to the next level in your food photography.

The post The dPS Ultimate Guide to Food Photography appeared first on Digital Photography School. It was authored by Darina Kopcok.


Digital Photography School

 
Comments Off on The dPS Ultimate Guide to Food Photography

Posted in Photography


A Beginners Guide to Exposure When Mixing Flash and Continuous Lights

14 Apr

The post A Beginners Guide to Exposure When Mixing Flash and Continuous Lights appeared first on Digital Photography School. It was authored by Ana Mireles.

Have you ever struggled with high contrast situations? Perhaps you’ve encountered shadows so dark or big that they steal the attention from the subject? That’s because sometimes you need to add a second light to your images. However, if they are different types of light, it can be difficult. Keep reading for a beginners guide on how to expose when you’re mixing flash and continuous lights.

Taking a photograph means to capture and register the light, so understanding how to do that is key to obtaining a good result. In this tutorial, I want to talk about continuous light and flash lighting, and how you can set your exposure to register both. First, I’ll explain what I mean by these terms.

Types of lighting

Continuous lighting

Continuous light (also called constant light) is the light that is on for the entire duration of the photo. This can be natural light when you’re outside, but can also be window light when you are inside. It can also be artificial light such as a table lamp or even professional photography lighting. Basically, it ranges from the sun to a candle – as long as it is continuous.

Flash lighting

Then there is flash lighting, which is only available for a quick moment when triggered. It can be from a professional strobe light, an off-camera flash, or the flash integrated into your camera. You can use these two different lights exclusively or together to complement your lighting. You can use them to create a special ambience or to achieve a particular effect. In this tutorial, I’ll explain how you can set your exposure when you use both continuous and flash lighting in the same shot.

Mixing the lighting styles together

I want to show you a situation in which I used continuous natural light as the main light and then filled in the shadows with an off-camera flash.

This first shot I took with only sunlight coming in from a window on the left and behind the camera. The camera settings used were ISO 2OO, f/8, and 0.3 sec. It’s enough to light the bowl of fruit; however, the dark shadows it has cast on the wall are not appealing.

Photography is about representing our tridimensional world in bidimensional ways. To do this, we make use of different things. One of them is shadows because they give depth. So we don’t want to eliminate all of the shadows – we want to control how many there are, how dark they look and their direction. If I slow the shutter speed to let in more light and try to ‘fill in’ the dark shadows to soften them, it overexposes the main subject.

If I slow the shutter speed to let in more light and try to ‘fill in’ the dark shadows to soften them, it overexposes the main subject. It happens here at ISO 2OO, f/8, and 2 seconds.

Therefore, it needs another source of light from the right. You can add this light source using either another continuous light or with a flash. I did this image with ISO 200, f/8, 0.3 seconds – the same settings I used for the correct exposure using only the continuous light. This solved the problem of one set of shadows but ended up creating new ones on the opposite side, so I need to fix the exposure again.

Since the flash is just a shot of light that lasts for a fraction of a second, it doesn’t make a difference how long your shutter speed is open like it does when shooting with continuous light. You can set your shutter speed as slow as you want or as fast as the synchronization limit allows you (in my case is 1/250 sec). The flash lighting exposure needs to be regulated by the aperture.

I used ISO 200, 1 sec, f/11 for this image.

In this image, I used ISO 200, 1 sec, f/16.

If you set the shutter speed to the light coming in from the left, meaning the continuous sunlight coming from the window, and set the aperture according to the light coming from the flash on the right side, you can control the complete illumination of the scene.

Conclusion

You can decide which shadows are good to keep and which ones to fill and by how much. In summary, have an image with depth and enough information both in the highlights and the shadows to either keep as shot or post-produce to your liking.

Exposure ISO 200, 1/250, f/8

*Extra tip

As you may have noticed on the examples, every light has a different color temperature, that’s why some photos have warmer or colder tones. This is a broad topic that I can’t manage to cover in this one article, but I did want to mention it. When you’re mixing different types of lighting you may need to deal with this. Sometimes the auto-white balance of the camera does a good enough job. However, if it doesn’t, I advise you to do some more research about it.

The post A Beginners Guide to Exposure When Mixing Flash and Continuous Lights appeared first on Digital Photography School. It was authored by Ana Mireles.


Digital Photography School

 
Comments Off on A Beginners Guide to Exposure When Mixing Flash and Continuous Lights

Posted in Photography


A Beginners Guide to Auto ISO and other Camera Modes

10 Apr

The post A Beginners Guide to Auto ISO and other Camera Modes appeared first on Digital Photography School. It was authored by Rick Ohnsman.

The What, When, Why, and How of Auto ISO

So, you understand how to interactively use Aperture, Shutter Speed, and ISO settings to achieve proper exposure. You know how to control things like depth-of-field and the freezing or blurring of motion. Perhaps you also understand the camera modes: Aperture Priority, Shutter Priority, or Manual and know when using them which settings are fixed and which can fluctuate. But how often do you adjust ISO adjustment? The idea that you might let the ISO speed “float” with each shot is alien to many photographers. So what is Auto ISO? When and why might you want to use it, and how can you set it up to make better shots?

Fast action in changing light conditions is a good reason to use Auto ISO.

Back to basics – the Exposure Triangle

From the dawn of photography and the simplest pinhole camera to the most sophisticated modern DSLR, there have been three constants – Aperture, Shutter Speed and what we now measure with ISO – the Light Sensitivity of the media onto which the image gets recorded. All cameras are essentially boxes with a hole in them. The size of the hole (aperture), the length of time the hole is opened (shutter speed), and the sensitivity of the recording medium (ISO). When we allow light into the box to create an image on the sensitive media, we are making an “exposure.” It makes up the “Holy Trinity” of photography – The “Exposure Triangle.” Perhaps you knew all this? If so, feel free to skip ahead in the article, otherwise, keep reading.

From the simplest to the most complex camera, three things – Aperture, Shutter Speed, and ISO are the factors affecting Exposure.

A “correct” exposure

There are two basic things to consider when making an exposure:

  1. What is the correct amount of light to let into the “box” rendering all tones in the subject and capturing everything from the blackest shadows to the brightest highlights, and
  2. How can we use the three components of the triangle most creatively?

The first consideration is technical, the second creative.

A histogram shows us the 256 shades of gray for a given image. At the far right are the shadows, on the far left, the highlights. In theory, an image which stays “between the goalposts” such that none of the tones go off either edge is a “correct exposure.” In editing, we can redistribute the tones so long as they have not gone to “0” which is total black, or 255 which is total white. At those extremes there is no detail to recover; it is either totally black and “blocked up,” or totally white and “blown out.”

Learning how to interpret a histogram will greatly aid you in your growth as a photographer.

Creatively using the controls

How to use the elements of the exposure triangle creatively brings in some secondary considerations of how aperture, shutter speed, and ISO affect our image. Aperture is the hole in our “box” while the f/stop is the term we use to define the size of the hole. A good way to remember which is the “bigger hole” is is to think about any f-number as a fraction. If you like pie, would you rather have a ½ pie or a 1/16 slice?

Therefore, the bigger f/numbers like f/22 represent smaller apertures (holes), while the small f/numbers like f/2.8 or f/4 represent the larger apertures.

Creatively, we can use smaller f/stops to increase depth-of-field and larger ones to limit it. In a portrait, we might want an unfocused, simplified background with a limited depth-of-field, so a large aperture would be a good choice. In a landscape photo where we want front-to-back sharpness, a small aperture may be better.

The shutter speed you choose also offers creative possibilities. Remember, shutter speed is represented in whole or fractions of as second. A shutter speed of 1/2 second is a longer time the shutter remains open than 1/250th of a second. You might think of the shutter speed as the “slice of time” we expose the light-sensitive medium to light. Short (faster) shutter speeds will help us freeze motion by capturing a “thinner slice of time.” Longer (slower) shutter speeds can allow us to “stretch time” and cause moving objects to blur.

Adjustable ISO? What a concept !

Of the three components of the triangle, ISO choice has implications, but probably less so than the others. Like an audio amplifier, lower settings keep the background “noise” less while higher settings which amplify the signal also introduce more noise and distortion. ISO measures how sensitive we make the sensor in a digital camera. In the film days, film sensitivity was fixed. Put in a roll of ASA 64 film and that was what you lived with for the whole roll. It had less grain than did an ASA 400 roll, but it was also less light sensitive.

In the digital world, ISO can be changed whenever we like, even from shot to shot. Now making an exposure truly becomes a “three-ball juggling act.” We can change Aperture, Shutter Speed, or ISO with each shot if we like. We still must use those to make a “correct” exposure, but we can also better consider the creative implications of our choices. We can also choose which controls we want full control over and which we might relinquish to the camera. Auto ISO coupled with newer, better, and “less noisy” sensors has changed the ballgame. Let’s go back to our three-ball juggling analogy.

Which of the three “exposure balls” will you choose to “let float?”

Learning to juggle

Watch a video clip of a juggler throwing three balls, and you will see at any given time, one ball is in the air, and the other two are in each of his hands. He has “control” of two of them, and the third is in “float.”

Now, when you use Auto ISO, it becomes that “third ball,” the component you let be in “float.” Fortunately, ISO has the least creative potential, and with modern cameras, the least penalty of choice. So it often makes sense to let it be the “ball in float.”

Let’s bring this back to the practical. You’re shooting dancers on the stage in an auditorium. The stage lighting varies with each scene and even as the dancers move to different spots. They are not allowing flash here, so you must live with the lighting conditions.

You want a reasonably high shutter speed to freeze the motion and a moderately small aperture so you have sufficient depth of field. Which of the three “balls” makes the most sense to let “float?” Auto ISO to the rescue! Situations where lighting changes quickly and the action you’re capturing won’t wait while you manually adjust settings is perfect for using Auto ISO.

Setting things up

I shoot with a Canon 6D most of the time so I will use that as my point of reference and for the menu shots below. How, (or even if your camera supports Auto ISO at all) will vary between make and model so you will need to dig a bit deeper to learn that. You might even have to get out your camera manual! The method may differ with your camera, but if you can grasp the general concept, the rest is simply navigating your camera’s menus.

Setting up Auto ISO on a Canon 6D.

Usually, there will be a button or menu where you can set Auto ISO. If you go to the low end of the scale, past the lowest (smallest) numbers of ISO you will likely find “A” for Auto ISO. Set the camera there.

Now you will want to set some “boundaries” as to when and how Auto ISO will be implemented and how high you will allow it to go. You should know that the higher ISO settings may allow you to shoot in very low light but may also introduce more image noise. How much is too much noise and what settings are impractical will depend on your camera and you. Shoot some high ISO images and evaluate them, so you know how much is too much for your liking.

With this information, you will want to find the menu item where you can set the specifics for how Auto ISO behaves. On my Canon 6D, I tap the Menu button and then roll the small top dial to the third camera menu icon from the left. I then roll the larger Control dial down to the second item, ISO speed settings, and hit the Set button to get to the menu below.

Again, your camera may differ, but you will set several things here:

  • Confirm the camera is in Auto ISO – ISO Speed
  • Set the full ISO speed range the camera will use – ISO Speed Range
  • Choose the lower and upper limits of ISO you will allow – Auto ISO range (you will usually enter the lowest ISO as the minimum and the highest as that ISO you think will not have excessive noise). For my 6D, I typically enter 100-3200 here.
  • Choose the minimum shutter speed you will allow before Auto ISO changes the ISO setting – Min. shutter spd.

Setting limits on how Auto ISO operates.

For this last setting, whatever you enter here is the slowest shutter the camera will allow before jumping to a higher ISO setting.

You will note “Auto” is an option here. If you pick this, your camera will detect the focal length of your lens when the image is about to be made and use the formula 1/focal length to set the minimum.

The idea here is you should not shoot slower than this (especially if handholding your camera) if you want to prevent camera shake blur. For example, let’s say if you are shooting a 24-105mm zoom lens and are zoomed all the way in. If Min. Shutter Speed is set to Auto, your camera will start to increase the ISO if the required shutter speed drops below 1/100th.

How it works in each mode

So you have this all set up. Now how will it operate? It depends on what camera mode you are shooting in. Let’s look at each.

Full Auto (Green) Mode

What you Can Adjust – Nothing, in Full Auto Mode the camera adjusts Aperture, Shutter Speed, and is in Auto ISO.
What the Camera Adjusts – Everything. This is a true “Point-and-Shoot” Mode with the camera making all adjustments.
Exposure Compensation Possible? – No
Pros/Cons – You are letting the camera make all your exposure and creative decisions. You are in Auto ISO and perhaps didn’t know it!

Program (P) Mode

What you Can Adjust – Everything, but as you adjust one item, the others will change too depending on lighting.
What the Camera Adjusts – Everything. The camera will seek to maintain proper exposure.
Exposure Compensation Possible? – Yes
Pros/Cons – This can be confusing when used with Auto ISO. I don’t recommend it.

Aperture Priority (Av or A) Mode

What you Can Adjust – Aperture. Lock in your Aperture setting and Shutter speed will adjust to maintain exposure. If the required shutter speed is lower than your minimum, ISO will increase up to the maximum you have set.
What the Camera Adjusts – Shutter Speed and then ISO
Exposure Compensation Possible? – Yes
Pros/Cons – If control over depth of field is your priority, this is the best option. Used in combination with the minimum shutter speed setting, it allows you to lock in the Aperture, set a base for the shutter speed, and have the camera adjust ISO increase when light goes below the shutter speed minimum you set.

Shutter Priority (Tv or S) Mode

What you Can Adjust – Shutter Speed. Lock in your Shutter Speed setting and Aperture will adjust to maintain exposure. If the required aperture is more than the maximum for the lens used, ISO will increase up to the maximum you have set.
What the Camera Adjusts – Aperture and then ISO
Exposure Compensation Possible? – Yes
Pros/Cons – If control over shutter speed is your priority, this may be the best option. Used in combination with the minimum shutter speed setting, it allows you to lock in the Shutter speed. The camera will adjust the aperture as needed and call on an ISO increase when you reach the maximum aperture of the lens used.

Full Manual (M) Mode

What you Can Adjust – Shutter Speed and Aperture. Lock in both your Shutter Speed and Aperture settings and ISO will adjust to maintain exposure. The exposure display will stay centered and ISO increase or decrease as needed to maintain proper exposure. If the required ISO exceeds the minimum or maximum set, the indicator will move off center showing an under or overexposure.
What the Camera Adjusts – ISO
Exposure Compensation Possible? – Camera Dependent
Pros/Cons – This gives maximum creative control to set both shutter speed and aperture and thus control both freezing/blurring of motion and depth of field simultaneously. ISO will “float” to adjust exposure up to the limits set. With some cameras, no exposure compensation is possible in this mode. However, with newer cameras, the “center point” may be adjusted thus supporting compensation.

When to use Auto ISO

When you have time to be a bit more leisurely with your image making, you can slow down and think through each of your settings. What are your objectives? Freezing action? Increasing or limiting the depth of field? Is the light changing?

When time permits, and you have a good understanding of each element in the exposure triangle, use full manual and set your ISO to the lighting conditions, staying as low as possible to limit noise. For landscape, portrait, still life, architecture, or other kinds of work where time permits and lighting is reasonably constant, Auto ISO isn’t much additional help. Ditto if you’re doing long exposures on a tripod where shutter speeds will be longer.

Shooting these ballet dancers under frequently changing stage lighting without flash is a challenge. Auto ISO helps tremendously.

Where Auto ISO really shines is in conditions where the action is fast, the light is changing or particularly low, and you are blasting away without time to think through each setting.

In that case, Auto ISO may be the helping hand you need. If lighting permits and your camera supports exposure compensation in Full Manual, this could be the ideal method. Lock in both Shutter Speed and Aperture where you like and shoot, counting on Auto ISO to handle any fluctuating exposure conditions.

Sometimes Auto ISO in combination with Aperture Priority will be a good choice. I work part-time at an auto dealership photographing cars for the web. Set up like this, I can go from shooting the exterior of the car in bright sunlight to the much darker interior with no adjustments, letting Auto ISO kick up the speed for the darker interiors.

Being able to move from a bright outdoor shot to a much darker interior shot and letting Auto ISO adjust the exposure speeds up my work in this situation significantly. On the older Canon 50D I use, I’m in Aperture Priority, my f/stop is at 4.5, and Auto ISO handles the rest.

Sports and Action can be an excellent time to use Auto ISO, especially in changing lighting conditions. It was a mixed cloudy day, and the light on the river where these kayakers were running was changing. I wanted to be sure my shutter was fast to freeze the action. Shutter priority plus Auto ISO was the ticket.

A mixed-light day with the kayakers moving from sun to shade, and fast action. With the need for servo focus, and shooting with a long telephoto in continuous mode… it was a challenge! I let Auto ISO handle exposure allowing me to concentrate on following the action.

What if Auto ISO goes wild?

Some photographers, especially those trained with the mantra “Auto Anything is Bad,” have a hard time invoking Auto ISO. Good photographers control everything, right? What if the camera goes up to a crazy high setting and all my images are too noisy?!!

It could happen. But, then again, remember you can limit the upper end of the ISO setting.

Also, newer cameras have such good sensors that your “upper limit” may be much higher than you think. Finally, what if you shoot at too slow a shutter speed and get blurry shots or don’t get the depth of field you wanted? There are many good noise reduction programs, but no apps I know of to fix a blurry, out-of-focus, shot with insufficient depth of field. I’ll take a noisy image over an out-of-focus image any day!

Conclusion

If you’re an old film guy like me and Auto ISO feels funny, or you’re worried about what it will do, or just haven’t been able to fully get your head around it, I suggest you relax and give it a try. Take your camera out on a non-essential shoot, turn on Auto ISO and just play. I’m going to bet you might just come away with a new trick.

The post A Beginners Guide to Auto ISO and other Camera Modes appeared first on Digital Photography School. It was authored by Rick Ohnsman.


Digital Photography School

 
Comments Off on A Beginners Guide to Auto ISO and other Camera Modes

Posted in Photography


Making the Shot: Your Guide to Creating Stunning High-Speed Splash Photos Without Flash

02 Apr

The post Making the Shot: Your Guide to Creating Stunning High-Speed Splash Photos Without Flash appeared first on Digital Photography School. It was authored by Rick Ohnsman.

1 - High-Speed Splash Photos Without Flash - Rick Ohnsman

The making of one of my most successful shots started with a little photo play on a hot summer day, and a try at some high-speed splash photography.

The image above, “Red Bell Splashdown,” went on to win first place in the Corel International Food Photography Contest.

Let’s take a look at the “making of” methods used to create the shot so that you too can have fun with this quite simple technique.

Freezing motion

There are essentially two ways to freeze motion with a camera:

  1. Use a Fast Shutter Speed such that the “sliver of time” you are capturing is very short and the object being captured moves very little, if at all, during the extremely short duration the shutter is open, or
  2. Use the very Short Duration of a Flash so that the object you are photographing gets illuminated for a very small sliver of time. The duration time of an electronic flash can be extremely short. For example, a Speedlight like the Canon 580EXII at 1/128 power is less than 1/19,000th of a second!

I’ve used the flash method, and indeed it can produce some dramatic results. I will perhaps show that process and the results in a future article. For my splash photos, however, I wanted to keep it simple and do it outdoors where water splashes wouldn’t require any clean-up or endanger my photo gear. When I did these shots, I was using my Canon 50D which has a maximum shutter speed of 1/8000th of a second. I figured this should be enough to get the job done.

2- High-Speed Splash Photos Without Flash - Rick Ohnsman

Let the sun shine in

Obviously, getting a proper exposure with a very high shutter speed would involve several possibilities:

  1. Use a fast lens with a wide aperture – I was shooting with a Canon 50mm f/1.8 prime lens, so a wide aperture was possible. However, I still needed a decent depth of field, so opening it up all the way wasn’t a good option.
  2. Use a high ISO – Cranking up the ISO can aid in getting a fast shutter speed but at the penalty of more image noise. I didn’t want that if I could avoid it.
  3. Shoot in very bright light. Normally, shooting under mid-day summer sun would not be something a photographer would do, but in this case, blazing sunlight (and lots of it) was the perfect solution.

3- High-Speed Splash Photos Without Flash - Rick Ohnsman

The set-up

I wanted to use colorful subjects for the shoot. Bell peppers – easily found at the supermarket in red, yellow and green – seemed a good choice. I also picked up some other colorful fruits – strawberries and limes. To accommodate the size of the objects and also give me a flat glass “window” to shoot through, a 10-gallon aquarium was just right.

Wanting to get light not just from above but from below as well, I put a large 5-in-1 reflector on the table where I wanted to shoot, silver side up. I placed the aquarium on top of that out in the bright noon sun. I filled the tank with water about halfway and allowed the bubbles to settle out while I set up the rest of the equipment.

4- High-Speed Splash Photos Without Flash - Rick Ohnsman

I put a pepper in the water and let it float while I took a look through the camera to frame the shot. I could see I would need a plain and preferably dark background, so I put a piece of black paper behind the tank. The paper was still too bright with the direct sun on it, so I used another reflector, black side down, at the back to the tank to shade the paper backdrop. I had my camera on a tripod and moved it to get as much of the front of the tank in the frame as I could, being sure I could focus that close.

5- High-Speed Splash Photos Without Flash - Rick Ohnsman

To be able to drop my subjects into the tank and also trigger the shutter, I rigged up a Youngnuo RF-602C radio trigger so that I’d be able to fire the camera remotely. A wired remote with a long enough cord could have also worked.

Camera settings

I put the camera in Manual Mode. To get a good combination of the fast shutter speed needed, decent depth of field, and not too high an ISO, I found that shooting at ISO 400, F/6.3 and the key – fast shutter speeds between 1/2000 and 1/3200th of a second was about right. Letting a pepper float in the tank where I anticipated it to be when dropped, I set the focus and then locked it in manual. I also put the shutter in high-speed continuous mode so for each drop I’d get a burst of about 5 shots.

6- High-Speed Splash Photos Without Flash - Rick Ohnsman

Splash-down!

So, good to go, I dropped the peppers, strawberries, and limes, trying to fire the bursts in synchronization with my drops. My wife Kathy came out to join in the fun and did some of the drops. We quickly found it was necessary to squeegee and wipe the front of the glass between shots to clean the drops off the front of the glass from the previous shot. So it went: drop, shoot, squeegee and repeat. For each drop, one frame of the 5-shot burst might be good, but often not. Timing is crucial. With practice, while we gained some skill, luck was still a huge element. There was lots of shooting to get the keepers. We tried it with the peppers and fruits in different combinations too. I easily made over 200 shots that afternoon.

7- High-Speed Splash Photos Without Flash - Rick Ohnsman

Cleaning up your act!

Straight out of the camera, the raw shots were less than impressive. Of course, Raw files look flat, and so I knew they’d improve greatly with a basic Raw edit. There were also more drops, splashes, bubbles and other particles in the water than I wanted. However, the important thing – the action – was properly frozen and sharp!

My Red Bell Splashdown image used settings of ISO 400, f/4.0, 1/3200th sec. The rest was using editing tools to adjust the exposure, get good rich color and deep blacks, and eliminate distractions. My editing tool of choice is usually Adobe Lightroom. With the Adjustment Brush and the Spot Removal Tool, I was able to clean up the image to create the impact I was after.

8- High-Speed Splash Photos Without Flash - Rick Ohnsman

Other considerations and possibilities

With any photo shoot, it’s always a good idea to critique your work and consider, “What might I have done better? Differently? What variations might I want to try?”

Seeing I had used a shutter speed of 1/3200th for my splash shots, I was curious how much difference there might be at the maximum shutter speed of my Canon 50D which is 1/8000th. I didn’t want to set up the fish tank and all of that for this second experiment, so I tried something simpler.

This time, I poured liquid into glasses in the bright summer sun. This process was simple enough. I clamped the glasses in a stand, put up a black backdrop behind them, set up the camera in a similar fashion to the previous splash shots, and did the pours. This time my settings were ISO 400, f/3.5, 1/8000th of a second.

When checking the shots afterward, it was apparent that the freezing effect was even more pronounced. However, at such a wide aperture, my depth of field was much more shallow.

9- High-Speed Splash Photos Without Flash - Rick Ohnsman

What might I try next time?

I’d like to give different color backgrounds a try. Using black made editing much easier, and when cleaning up the shots, it was simple to “black out” any distracting elements. I’m not so sure that would be as easily achieved with a color background. Trying it with a white background for a high-key look might also look interesting.

10- High-Speed Splash Photos Without Flash - Rick Ohnsman

Of course, using different objects for the splash photos is also fun. In fact, we did do that when during the splash photo session my Mini-Schnauzer, Schatzi, wanted to play and decided to bring us her favorite ball. Looking at the “face” on the ball, I thought it might be fun to try it in a splash drop as we’d done with the peppers. When seeing the result – which looked like the “creature” was exhaling bubbles during a dive – it made me laugh.

11- High-Speed Splash Photos Without Flash - Rick Ohnsman

So, give this high-speed shutter technique a try. Take it outside in the bright sun, crank up the shutter speed as high as you can and have some fun. It’s a great way to improve your camera skills, learn the relationships between ISO, Aperture, and Shutter Speed, and then test your editing skills when tuning up your shots. I’m confident you’ll get some images of which you’ll be proud.

The post Making the Shot: Your Guide to Creating Stunning High-Speed Splash Photos Without Flash appeared first on Digital Photography School. It was authored by Rick Ohnsman.


Digital Photography School

 
Comments Off on Making the Shot: Your Guide to Creating Stunning High-Speed Splash Photos Without Flash

Posted in Photography


A Beginners Guide to Taking Portraits of Elderly Clients: Part 2 – Lighting and Posing

23 Mar

The post A Beginners Guide to Taking Portraits of Elderly Clients: Part 2 – Lighting and Posing appeared first on Digital Photography School. It was authored by Clinton Moore.

Welcome to part two in our series on photographing older clients. In part one, we looked at rapport building and the practical aspects of preparing for your shoot. In this article, you’ll learn about lighting and posing techniques to enhance your photos of elderly subjects.

Lighting older clients utilizes most of the same lighting principles that you apply to younger clients, but there are a few extra tricks that will ensure a stress-free and flattering shoot.

Lighting practicalities

For this article, we’re going to assume that you are shooting at the subject’s home – often a requirement when shooting older clients. This means that you won’t have access to a full studio setup and will have to improvise based on space.

Lost in space

If you’re lucky, your older client may still be in the old family home with beautiful high ceilings so you can set up and bounce light to your heart’s content. Unfortunately, many will have downsized and are often in smaller apartments. Others may be in nursing homes with less space than your average bathroom and have everything they own crammed within this space.

In tight spaces, the best bet is to try and get outside. However, this is not always possible for less mobile clients.

Also remember, if you’re doing a shoot in a nursing or retirement home, you’ll possibly need to gain permission from the village manager. There’s a lot of protection around older residents (and rightfully so), which means the home is not likely to take kindly to a stranger turning up unannounced and taking photos of vulnerable people.

This is not one of those situations where it’s easier to ask for forgiveness than it is to get permission first!

Flash versus continuous lighting

As a photographer, flash is probably your go-to for artificial lighting when outside the studio, but take a moment to consider continuous lighting. While a strobe is more portable and powerful than most affordable continuous lights, they can be quite disorienting for older clients – particularly those with dementia. The last thing you want is to distress the person you’re hoping to make a smile.

With the affordable price of LED lighting these days, continuous lighting is now incredibly accessible and has the added benefit of remaining cool for your client as opposed to older lights. Advances in chip-on-board LED technology also means you don’t have to worry about heavy and expensive HMI lights when you want that classic Fresnel look.

Soft versus hard light

The aim of the shoot will determine your lighting style.

It’s going to be rare to hear an older person say “please make me look old and grizzled,” so your aim is likely to create a flattering image of your subject by leaning towards soft, highly-diffused light. You can achieve this by using light from large light sources such as softboxes and umbrellas. The bigger the source, the better! You want that light to wrap around their face.

Unless it’s the desired look, contrast is your enemy when photographing elderly people as it accentuates their wrinkles and any other parts that are sagging. This might be great for gritty street photography, but it’s unlikely an older person wants you to portray them like that in a paid portrait.

Think less George Hurrell, more Anne Geddes (but leave the flower pot at home).

Of course, the final decision should always come from a mixture of trying to convey your client’s personality and meeting the brief agreed upon in your pre-shoot consultation.

Lighting setups

We’ll look at two classic lighting setups which aim to create a flattering portrait. While there are limitless portrait lighting options, not all will work with older clients due to wrinkles, sagging, and posture issues.

3-point lighting

The classic three-point lighting setup provides you with a huge amount of flexibility to sculpt the subject’s face in a flattering light.

For older clients, aim to have your key light only a little stronger than your fill light. This reduces contrast and provide a more flattering light that wraps around the face. Fill light is your friend when it comes to older clients.

Short lighting (left) generally provides a more flattering photo for an elderly subject than broad lighting (right).

Although you’ll be using more fill than normal, it’s still important to be aware of the effects of short and broad lighting, as aging isn’t always kind to the face shape. You can use short lighting to make a wide face appear more slender. This is usually the more flattering option for older faces.

Broad lighting can add some width to a skinnier face, but it tends also add more emphasis on wrinkles.

For older clients, it can also pay to lower your lights a little more than you might with a young client. The shadows cast by higher lights emphasize wrinkles and sagging skin.

Placing the lights higher as you might do with a younger client can create shadows that highlight features such as wrinkles and crow’s feet.

By lowering the lights, the face softens, and you can fill in the eyes which tend to sink with age. It never hurts to throw a reflector under the subject’s chin to lift the shadows.

Dropping your key light by just a small amount can have a dramatic difference to the final image.

You will then get a final shot that creates a warm and inviting portrait.

Combining all the changes and tossing in a reflector under the subject’s chin creates a final image that presents them in favorable light.

Clamshell lighting

Clamshell lighting can create a very dramatic look, but with large diffused light sources it can also light an older face in a flattering way while still providing a dynamic effect.

In this setup, we have a large softbox angled at 45-degrees acting as the key and an umbrella as the fill. You may also want to experiment with a beauty dish as the key light for a more striking look.

The clamshell is a simple setup and can be achieved with just one key light and a reflector to act as fill if need be.

While exposing correctly is a no-brainer no matter how you’re lighting, it goes double for a clamshell setup as excessive underlighting creates a ghoulish look like something out of a horror movie. A safe way to avoid this can be to use a simple reflector or bounce board as your fill if you’re not comfortable with setting exposure on artificial lights.

Failing to set your fill light correctly will result in underlighting that creates a scary look unlikely to be desired by your client.

As you can see, by reducing the fill light to a little more than half the exposure of the key light, you get a more balanced look.

Ensuring that you have your fill light set lower than your key light will create the classic clamshell look.

Combined with good posing, this lighting setup can provide a great option for taking a square-on image of an older person. The resulting shot can convey an introspective, but intimate feel.

By exposing correctly and positioning your client beautifully you will get a final shot that has a great introspective feel.


Elderly portrait idiosyncrasies

Although having a couple of basic lighting setups will get you 80% of the way to photographing elderly clients, there are still a few little hurdles to be aware of that may otherwise cause chaos on your shoot.

Glasses and reflections

Glasses are the bane of your existence when working with elderly clients. A pair of spectacles loves nothing more than to capture the reflection of your lights. And God help you if you’re dealing with bifocals!

Glasses! Guaranteed to destroy any portrait without some planning.

You can always ask your subject to remove their glasses completely, but many will feel that they look wrong without their glasses after having worn them for so many years.

Managing glasses always requires a bit of compromise to bring your client’s eyes back into the image, but three of the best options are:

1. Tilt Down – Ask you subject to tilt their glasses down just a little. This can be combined with tilting their head down as well. Don’t go overboard with this unless you want them to look like Santa or a librarian.

You will largely remove the reflections by asking your subject to lower their chin and tilt their glasses down. However, be careful not to overdo it!

2. Raise Your Lights – Raising your lights a little higher reduces the chance of picking up a reflection. Of course, the trade-off here is that you will get more shadows. It can help to balance the change with a reflector.

Raising the lights resolves the reflections issue, but creates a new dilemma due to the heavy shadows that now appear.

3. Lensless Glasses – Possibly the best solution. Bring along a pair of glasses with the lenses removed. Hey presto, no more reflections to worry about. The issue here, of course, is that they may not be the style of glasses that work with your subject’s face.

Managing baldness

Sure it happens to younger folks as well, but if you’re photographing older clients, you’re going to encounter a lot of bald heads. The issue here is that a bald head will act like a big reflective surface and create a hot spot.

To resolve this:

1. Lower Your Lights – by lowering the height of your lights you reduce the reflections on their head. Of course, the problem here becomes the balancing act that has to take place if your subject also happens to be wearing glasses!

2. Remove Rim Lights – When dealing with baldness it’s worth considering doing away with your rim light entirely. Find alternate ways to separate your subject from the background.

3. Powder – Having some neutral powder on hand is always handy to reduce the shine of a bald head. If you’ve got a particularly proud male that won’t wear “makeup,” take a photo without any powder applied and show them the attention drawn to their head.

Exposing hair

Jumping back to the 3-point lighting setup, this all comes down to the rim light. As mentioned above, the rim light is the enemy of the bald head. However, it also wreaks havoc with grey hair. Be extra careful not to overexpose with grey hair as you will quickly blow the highlights much more easily than you would with colored hair.

Posing older clients

Posing older clients is tricky because, as we discussed in part one, there is a range of what constitutes being “elderly.” People around 65 years of age will probably be able to do many of your standard poses with great results. However, significantly older clients may have restricted mobility and health issues that prevent them from standing for long periods.

Stools are for fools

Assuming you are working with a client over the age of 80, it’s best to consider basing your shoot around them sitting down. The first thing to do is turf that stool that you use with your younger clients.

Older clients need the back support of a chair and could fall off something as unstable as a stool. They also may not have the core strength to support themselves on a stool leading to some very bad slumping.

Clients over the age of 80 with mobility issues are also likely to have recliner style chairs that they can easily disappear into.

Shooting front-on with your client in a large chair or recliner will tend to make them look small and wider if they are allowed to sink back.

Shooting this image, particularly front-on, will make the client appear small and can have an unflattering effect on their thighs (which will spread when seated in this manner).

To remedy this issue prop your client up with some pillows to create a better posture. If the client is quite frail, ask a family member to do this so that you don’t cause any harm.

Place pillows behind the client or ask them to sit towards the edge of the chair to shift their posture.

By bringing the client forward and focusing on the head and shoulders framing, the resulting image is more flattering.

By moving the client forward they will be less likely to slump resulting in a more flattering image.

Safe and secured gear

One of the major causes of injury in elderly people is falling over. Often they will be very used to everything being set up in their home a particular way. As such, moving furniture around and bringing in big gear can pose problems.

Firstly, only move furniture with their permission and, of course, put it back when you’re done! Ensure that you’ve left a clear path to the front door and the toilet in case of emergencies.

Secondly, secure your gear! At the very least put sandbags on your light stands and tripod. If you’re using anything that has cords, pull out that gaffer tape and stick it down.

Sandbag those lights and gaffer those cords so that you don’t end up responsible for a trip to the E.R.

An uninjured client is a happy client, so take those extra few minutes to make sure the area is safe.

Flattering posing angles

Great, you’ve got everything setup safely, now it’s time to pose your client.

Again, assuming you are dealing with a client who is older than 75, posing is about compromises.

Few people look great square-on, so start by asking your client to turn their body slightly away from the camera. Next, ask the client to turn their head back to the camera with their body facing the key light.

It’s often best to avoid having older clients tilt their head as this can cause bunching of the skin under the neck. Instead, keep the head perpendicular to the body and focus on asking them to push their jaw slightly forward to stretch their neck.

If your client is really concerned about their neck wrinkles, it will be best to shoot from slightly above the client and ask them to angle their chin down. Similarly, if a male client is worried about baldness, shooting from slightly lower than eye level reduces the focus on their head.

For clients who are unable to shift their neck or body due to age, a front-on shot can still be flattering, but you will want to try and shift the weight forward.

Move your subject as close to the edge of the chair as is safe while supporting their back. Clients who struggle to support their weight may benefit from placing their hands on their thighs

Prop the client up with pillows behind their back and ask if they are able to place their hands on their knees to support their weight while leaning forward a tad. Experiment with placement on the knees and thighs to find the position that allows for the most natural shoulder alignment.

Conclusion

Photographing elderly clients is a great way to bring together all of your basic lighting and posing principles with a few extra challenges thrown in to boot!

Experimentation is always key as you will have to work with the physical restrictions of your client’s age and the practical limitations of their home. By having a clear idea of your client’s expectations, the two of you can find a way to achieve an image that makes everyone happy.

Moreover, remember that sometimes they’ve earned those wrinkles and are damn proud of it!

The post A Beginners Guide to Taking Portraits of Elderly Clients: Part 2 – Lighting and Posing appeared first on Digital Photography School. It was authored by Clinton Moore.


Digital Photography School

 
Comments Off on A Beginners Guide to Taking Portraits of Elderly Clients: Part 2 – Lighting and Posing

Posted in Photography


A Beginners Guide to Taking Portraits of Elderly Clients: Part 1 – Preparation and Rapport

17 Mar

The post A Beginners Guide to Taking Portraits of Elderly Clients: Part 1 – Preparation and Rapport appeared first on Digital Photography School. It was authored by Clinton Moore.

1 - Taking Portraits of Elderly Clients

You often hear it said that outstanding photography is about storytelling. An image may not have perfect lighting ratios or razor sharpness, but if it connects with you that can be all that matters.

Working with elderly clients can be the ultimate storytelling journey as these folks have experience in spades!

In this first of a two-part series on working with elderly clients, we’ll explore the practical and rapport building aspects of creating a story through the click of a shutter. Part two focuses on lighting and posing techniques.

How old is old?

2 - Taking Portraits of Elderly Clients

Remember that there is a spectrum of seniors. Most do not think of themselves as frail or grizzled. Get to know your stereotypes and your subject.

One place where your point of view can get in the way of a great image is generalizations around age. You’ve fallen into this trap the minute you conceptualize your client as “old” or “elderly.”

They tend to hate these terms. Can you blame them?

It’s important to step back and remember that there is a spectrum of the elderly. A 65-year-old is probably going to be at a different place in their life, both physically and mentally, to a 90-year-old. This includes everything from their health and mobility to their attitude about what they desire in a portrait.

Just try getting a 90-year-old to go for a brisk walk down the beach at dusk as you do in your standard family portraits.

Step back and remember that you need to get to know where your client is at before you even pick up your camera. After all, age is a state of mind.

Rapport building

Older clients tend to take a bit more time to photograph. They’ve been around the block a few times, and they want to get to know you a bit first. Also, they’re generally not trained models looking for a glamour shot for their Instagram feed.

For them, a photograph is an event, not an addiction.

3 - Taking Portraits of Elderly Clients

Older generations may only have had one formal photograph in their lives. Don’t assume they will be comfortable around the camera just because they’re there.

Communicate their way

You may be used to connecting through a world of emails and social media, but this isn’t always the case for older clients. For many older clients, their first instinct will be to pick up the phone (and we’re not even talking about a cell/mobile half the time!).

So be sure to place your phone number prominently on your website and any other form of marketing. This creates a sense of trust that you’re not going to just run off with their money.

Of course, many older clients do have email but may likely hold you to a higher standard of communication than you are used to on social media. Make sure you address them formally (i.e. “Dear John”), don’t use modern abbreviations or slang, and please check your spelling and grammar!

Creating comfort

When shooting a portrait, comfort should be your number one priority regardless of your client’s age. However, for older clients, you may have to do a little more than just making bad jokes from behind the lens.

Take the time to meet with your client before the shooting date. Sit down with them and be willing to share a bit of your personal story. This means more than just your shooting style. Tell them about where you come from, your family, or your interests.

This old school type of business approach might seem a little strange if you’re used to more modern online interactions. However, for older clients, it builds trust.

Try to keep in mind that older generations didn’t grow up with cameras being thrust in their face every second of the day. So your first job is really to make them feel safe. It’s entirely possible that the photo shoot was the idea of their children, and the client themselves may not be entirely on board.

So be sure to make them feel comfortable. Communicate your process and timeline clearly, and then stick to it!

4 - Taking Portraits of Elderly Clients

Sitting down with your client can be the most interesting part of the whole process. Take the time to do it right.

Understand their goal

Who paid for the shoot? One of the tough parts about working with older people is that they may not actually be the client!

If their children are footing the bill, understand what they want from the session in addition to the older persons desired outcomes. Often this is going to be a case of compromise. This highlights the importance of communication and preparation.

Now assuming the older person is your client, the first step is to determine how they want to be portrayed. While this should be standard practice regardless of age, there are a few areas here that can trip you up.

If they’re quite old, this portrait could be the photo destined for the tombstone. No one will say it out loud, but people may be thinking it. As such, family members might have differing, but strong opinions about how things should look.

Keep in mind that some clients might want to be photoshopped back into their 20s, whereas others may proudly want their wrinkles on display. As always communication is vital!

Be careful about imposing your ideas of old age photography onto the session. Try to avoid the cliché shots of the serious or delirious old person. Instead, let their personality shine.

5 - Taking Portraits of Elderly Clients

Avoid the clichéd shots and post-processing that portray older subjects as worn or child-like. Let their personality lead your images.

Get out of their face

Want to make an 80+-year-old client feel immediately uncomfortable? Get right up in their face with a lens. Aside from the fact that it’s probably not going to give a very flattering look, it can feel intimidating.

They may also not be over the moon about being surrounded by multiple light stands, softboxes, flags, and reflectors.

During your initial consultation, find out what level of gear will allow them to feel comfortable. If that means just the natural light through a window, then work with that.

Posed versus candid photographs

One of the most important initial questions pre-shoot is whether the client wants posed or candid shots.

While the client’s wishes should mostly steer this decision, you need to take a few factors into account.

Client’s who are experiencing dementia, particularly frontal dementia, may struggle with a posed photo shoot. Frontal dementia affects a person’s ability to plan and organize. So your usually simple instructions such as “open your eyes and smile on the count of three,” may quickly descend into chaos.

That said, if you’re doing a family shoot, a little bit of this chaos (provided no one gets too embarrassed) can be a great natural ice-breaker.

When in doubt ask yourself what style of shoot will best allow the client’s personality to shine through. A shot of grandpa tinkering away in his workshop might be infinitely more valuable than a stale headshot for the family.

6 - Taking Portraits of Elderly Clients

Sometimes the best photograph won’t be the perfectly lit, composed and exposed image. A family snapshot can be infinitely more iconic if it captures your subject’s personality.

Length of sessions

When shooting significantly older clients, keep sessions as short as possible.

The process of having to concentrate on a range of different instructions can be quite fatiguing. There’s also a good chance that their preparation for the shoot started well before you arrived.

As mentioned before, clients suffering with dementia can also experience a phenomenon called “sundowning” which is a tendency to become more confused towards the end of the day.

See again the importance of making sure you know your client before you organize anything?

7 - Taking Portraits of Elderly Clients

Jot down everything you can during your pre-consultation to create a fleshed-out idea of your client and their needs.

Mobility and location of sessions

Although a 60-year-old client can probably go anywhere you can think of; a 90-year-old client can’t. Something as small as a flight of stairs can pose a massive hurdle to a significantly older client.

Plan where you are going beforehand and give your client plenty of time to get there.

Asking them to cross a park to get to a beautiful spot you usually take your clients could end up taking more time than you had intended for the entire shoot.

As you can see, the minute you leave the client’s home, things get a bit more complicated. However, don’t let that discourage you from venturing outdoors. Just do the groundwork beforehand and make sure everyone involved is on the same page.

8 - Taking Portraits of Elderly Clients

Be realistic about the areas an older person can access. A few steps may as well be a mountain for some. It never hurts to send your assistant to check it out first.

Conclusion

Working with older clients is a delightful experience. Their sincerity is hard to miss. To ensure you have the best chance at a successful shoot, take the time to prepare more than just your lighting diagrams. Focus on understanding the client’s goals and personality. Collaborate with the family where necessary, and make their comfort your number one priority.

Next time we’ll be looking at some ideas around lighting and posing older clients.

Do you have any other tips you’d like to share? If so, please do so in the comments section.

The post A Beginners Guide to Taking Portraits of Elderly Clients: Part 1 – Preparation and Rapport appeared first on Digital Photography School. It was authored by Clinton Moore.


Digital Photography School

 
Comments Off on A Beginners Guide to Taking Portraits of Elderly Clients: Part 1 – Preparation and Rapport

Posted in Photography


Fujifilm X-T30, Sony a6400 added to ‘Best Cameras under $1000’ buying guide

15 Mar

We’ve added the Fujifilm X-T30 and Sony a6400 to our ‘Best Cameras under $ 1000’ buying guide. Both of these cameras offer a lot of bang for your buck, with impressive stills and video capabilities for $ 900 body only.

While we’re yet to publish our full reviews of these cameras, we’ve added our initial impressions on both cameras in this updated guide. Look for our final reviews of both cameras in the near future.

Best Cameras under $ 1000 buying guide

Articles: Digital Photography Review (dpreview.com)

 
Comments Off on Fujifilm X-T30, Sony a6400 added to ‘Best Cameras under $1000’ buying guide

Posted in Uncategorized


Your Guide to Photography User Agreements

14 Mar

The post Your Guide to Photography User Agreements appeared first on Digital Photography School. It was authored by Darina Kopcok.

Copyright and image usage can be a complex and confusing arena even for experienced photographers.

When you shoot for a client, you not only need a contract outlining the deliverables, but you also need a user or licensing agreement. You also need a user agreement if a brand or organization comes across one of your images on the Internet and wants to use it in some way.

User Agreements by Darina Kopcok-DPS

So what exactly is a user agreement and why do you need one?

A user agreement is a type of contract in which you as the photographer grant specific usage rights to a client or collaborator. They may only use the image within the bounds of this agreement.

Under most copyright laws, photography is as protected as any other artwork. In photography, you’re not “selling” your image or giving up your copyright. You’re giving someone a license to use the images for a specific purpose and time frame. In effect, you’re the “lender,” and they are the “borrower.” This is basically what happens when someone purchases stock photography.

The two types of licenses

There are two types of licenses: exclusive and non-exclusive.

An exclusive license does not allow the photographer to license the image or images to other third parties during the duration of the agreement.

A non-exclusive license allows the photographer to license the same image to other third parties under separate agreements during the same time frame.

Clients often want an exclusive license to ensure the images created for their brand don’t appear elsewhere. In some cases, so they don’t end up being used by their competitors.

However, be aware that they should be required to pay a premium for this exclusivity. This is why usage rates can go very high, depending on the client and their visibility in the marketplace.

When you give exclusivity to a client, it prohibits you from earning more income from your images by licensing it to other third parties, or through stock photography.

For example, I license my images through Offset, a division of Shutterstock. They offer high-quality stock photography for a much higher price point than microstock agencies.

I make a decent side income from being a contributor with them, without having the thousands of images required by other agencies to make stock photography worthwhile. Since most of my commissioned clients want exclusive usage, I don’t submit the images I license to them to stock also. Instead, I submit non-similar rejects from the shoot and even shoot specifically for my stock portfolio.

User Agreements by Darina Kopcok-DPS

What should go in the user agreement?

When you’re writing up a user agreement and setting your price, it’s crucial you consider the end use of the image and the visibility of the brand using it.

Licensing an image to a nationwide restaurant chain should have a different price and terms than the mom-and-pop taco joint down the street.

One example of how the details of a user agreement can become critical is when you’re dealing with a start-up or a growing small business.

If you provide licensing for several years or in perpetuity (forever ongoing), what happens if that business suddenly takes off and gains extensive exposure? Your image will become worth a lot more, but you won’t see an extra penny if you’ve given perpetual usage away.

The rule for user agreements is the wider the audience for the image, the more the image is worth to the brand.

When faced with a client who has good prospects to grow, keep your licensing period shorter and track when it expires via a spreadsheet.

The user agreement should also specify whether the license is exclusive or non-exclusive, and describe its intended use.

I don’t recommend granting unlimited use for an image; otherwise, a brand can use it across every conceivable platform – in advertising, on billboards and for product licensing.

Be very specific about how they can use your images. More and more clients are asking for universal and unlimited rights. If this is the case, they should be prepared to pay for it.

Specify the time frame in which the licensee is allowed to use the image. If they want to use the image beyond this time frame, they will have to purchase another license from you.

Another important tip is don’t provide a user agreement until the images have been paid for in full. Let the client know this policy and state on your invoice that the images cannot be used publicly until you have received payment in full.

User-Agreements-Darina Kopcok-DPS

Educate your clients

As with other types of contracts, a user agreement protects you as the creator of an image. It also prevents misunderstandings between you and a client that can lead to bad feelings and legal hassles if someone feels their expectations haven’t been met.

Unless a client has worked with photographers before, they may not understand the ins-and-outs of copyright law or why they need to sign a user agreement. Educating the client is vital.

If someone is questioning your contracts, they likely are not understanding the process.  A local small business or startup brand may need your help in understanding the transaction.

User-Agreements-Darina Kopcok-DPS

Conclusion

When negotiating a user agreement, it’s important to communicate with self-confidence and to recognize your work has value to your clients.

At the same time, remaining respectful and professional can lead to building a mutually beneficial relationship – with more opportunities and income down the line.

If you have any other licensing and user agreement info you’d like to share, please do so in the comments section.

The post Your Guide to Photography User Agreements appeared first on Digital Photography School. It was authored by Darina Kopcok.


Digital Photography School

 
Comments Off on Your Guide to Photography User Agreements

Posted in Photography


A Beginner’s Guide to Stunning Close-Up Photography

14 Mar

The post A Beginner’s Guide to Stunning Close-Up Photography appeared first on Digital Photography School. It was authored by Jaymes Dempsey.

Do you want to take incredible close-up photos?

Here’s the truth: Capturing incredible close-up photos doesn’t have to be hard. In fact, it can be extremely easy – if you know what to do.

In this article, you’ll discover the secrets to gorgeous close-up photography. You’ll learn about the required gear (Hint: You probably have everything you need!). You’ll learn the tips and tricks for stunning images (and you’ll love trick number 3).

Bottom line? I’ll make sure that you leave with the know-how to take truly beautiful close-up images.

Let’s get started.

Step 1: Pick any camera and lens for close-up photography

First of all, the big question: Do you need expensive, specialized gear for close-up photography?

The short answer?

No.

You can capture incredible close-up images with almost any camera & lens combination.

Because here’s what you need for stunning close-up photography:

A camera (any modern DSLR or mirrorless camera will do just fine). 

A lens that allows you to focus close to your subject (more on this in a moment). 

That’s it.

You don’t need a tripod. You don’t need a focusing rail. You just need a camera and a lens.

Now: What counts as a close-focusing lens?

First, for a technical answer (that you’re free to ignore): I like lenses that give the subject a magnification of (at least) 0.20-0.25.

But here’s the thing:

Most lenses will actually get you pretty close to your subject – if you give them the opportunity.

So don’t worry too much about your lens choice. Just use what you have.

If you want to make sure you’re getting as close as possible, I recommend you test out a few of your lenses. Then pick the one that focuses closest.

Now, for a brief aside:

If you want to get especially close to your subject, then you can invest in a macro lens.

A macro lens isn’t necessary for close-up photography. But it does let you focus extremely close.

A great inexpensive option is the Tokina 100mm macro (for Nikon and for Canon).

Once you have a good close-up photography set-up, it’s time for the next step…

Step 2: Start with flowers for some stunning close-up photos

Close-up photography is thrilling.

And there are tons of subjects out there, just waiting to be photographed.

But if you’re a beginner, I recommend you start with one particular subject…

Flowers.

Flowers are easy to get ahold of. They’re not a super challenging subject. And you can capture some stunning close-up flower photos.

You can shoot flowers indoors or outside.

But I recommend you start outside.

This is for two reasons:

First: Natural light is stronger than artificial light. Which means you’ll be able to get brighter, colorful photos without much difficulty.

Second: Being out in nature is a great part of the close-up photography experience.

But, if it’s winter where you live? Don’t despair.

You can still take some great close-up photos of flowers.

Just buy a bouquet of flowers at your local supermarket.

Then you’ll be ready to do some close-up photography.

Is there a particular flower that you should start with?

I’d suggest you start with some bright, colorful flowers. I’d also suggest you start with flowers that are large.

Roses are a great choice.

Tulips are another option.

Once you have your flowers, it’s time for the next step…

Step 3: Find the best light for stunning close-up photography

You need to be careful about your lighting choices.

Because amazing close-up photography requires good light.

What do I mean by good light?

You want to portray the colors of your subject. And you want to portray some beautiful details (e.g., the curves of the flower petals).

This gives you a few lighting options:

First, you could use cloudy light.

Cloudy light is soft and diffused. This means that it will capture nice, saturated colors. You’ll also be able to portray some nice detail.

Just try to shoot toward the middle of the day. Otherwise, the sky might get too dark. And you need a lot of light for close-up photography.

Second, you could shoot on a sunny day. This will give you plenty of light for stunning close-up photography.

But be careful: The light on a sunny day can be very harsh.

So if you do choose to shoot on a sunny day, take photos in the early morning or late afternoon. That’s when the light is soft and golden.

(These times are often referred to as the “golden hours.”)

If you’re shooting inside, I’d recommend you go with the same set of options. Shoot on a cloudy afternoon or on a sunny morning/evening.

But make sure you place your subject near a window. Otherwise, you won’t have enough light to capture gorgeous details!

Step 4: Follow these close-up photography secrets to get amazing photos

You know how to select the perfect gear. You know how to find the best subjects. And you know how to choose the best light.

It’s time for you to actually take some close-up photos.

But how do you get the best photos possible?

Here are a few tricks you can use…

Shoot on a level with your subject for the most compelling photos

In close-up photography, it’s important you choose a great angle.

You want to portray your subject in a way that shows off its shapes and colors. And you want to take an intimate portrait – one that brings the viewer into the subject’s world.

That’s why I recommend that you shoot on a level with your subject.

What do I mean by this?

Simply position your camera so that it’s ‘eye-to-eye’ with your subject. You want to feel like you’re looking straight at the subject.

Only then should you take the shot.

You’ll probably have to crouch down low to capture this angle. You might even have to lie on the ground.

But…

…It’ll be worth it, in the end.

Shoot toward the sky for the best backgrounds

The best close-up photos have simple, uniform backgrounds.

Simple backgrounds don’t take away from the subject. Instead, they emphasize it.

So here’s a trick for some nice, simple backgrounds:

Get down low, so that you’re on the same level as your subject.

Look through your camera.

Then scoot around the subject, paying careful attention to the background.

Does the sky appear behind your subject?

If so, then that’s the photo you should take!

If not, you can try getting even lower. But don’t go too low – you want to remain as level with your subject as possible.

This works best on cloudy days. Your subject will have a nice, white background.

But you can use the sky as a background on sunny days, too. Just be careful not to shoot into the sun (because that will cause unwanted flare effects).

Use manual focus to portray the little details

Here’s your final close-up photography secret:

Use manual focus.

Why is this?

Manual focus allows for incredible precision when focusing.

And when you’re shooting at high magnifications, you need to focus as precisely as possible.

Here’s why:

In close-up photography, your depth of field is limited.

(The depth of field is the amount of the photo that’s actually in focus).

You can get the petal of a flower in focus, but then the stem will be blurry.

Or you can get the stem of the flower in focus, but then the stem will be blurry.

So you have to ask yourself:

What do I want to get in focus? What do I want to emphasize in this photo? 

And then make sure you focus on that.

Unfortunately, lenses don’t autofocus well at high magnifications.

So you need to use manual focus, instead.

Start by switching your lens from autofocus (A, AF, or M/A) to manual focus (M or MF). There will be a switch on your lens body.

Then carefully roll the focusing ring between your fingers.

When focusing manually, don’t try to rush. Slow down. Glide from focus point to focus point.

You’ll quickly get the hang of it.

And you’ll be taking incredible close-up photos in no time!

Taking stunning close-up photos: The next step…

If you’re looking to take stunning close-up photos, I have good news for you:

You’re almost there.

You have the gear.

You have the knowledge.

You know how to find good light.

You know how to find strong backgrounds.

And you know how to focus carefully.

All that’s left…

…is to get out there and start shooting.

Do you have any close-up photos that you’re proud of?

Share them in the comments!

The post A Beginner’s Guide to Stunning Close-Up Photography appeared first on Digital Photography School. It was authored by Jaymes Dempsey.


Digital Photography School

 
Comments Off on A Beginner’s Guide to Stunning Close-Up Photography

Posted in Photography