RSS
 

Posts Tagged ‘Getting’

4 Reasons Why You Aren’t Getting Sharp Images

04 Sep

Capturing sharp images is something most photographers aim to do, regardless of what genre you do. While it sounds easy on paper, it’s not quite as easy to come home with sharp images; especially when you are photographing in challenging conditions.

There are several reasons why you’re images aren’t as sharp as you’d like them to be but the good news is that most of them are both quick and easy to fix. In this article, we’ll look at the most common reasons and what you can do to avoid making these mistakes again.

#1 The Shutter Speed is Too Slow

The shutter speed is to blame for a lack of sharp images in 99% of the cases. A shutter speed that is too slow results in the image becoming blurry.

moody mountain scene - 4 Reasons Why You Aren’t Getting Sharp Images

A shutter speed of 1/320th of a second captured with a 24mm lens was quick enough to get this image sharp.

This is a common mistake and it’s easy to forget to change the shutter speed when you’re in the field. There’s so much to remember, right? The ISO, the aperture, composition, light… and then the shutter speed. Don’t worry though; spending time using and learning the camera will make this much easier within no time at all.

The exact shutter speed you need depends on the situation. However, a rule of thumb is to never use a shutter speed slower than 1 over the focal length for handheld photography. That means that you shouldn’t use a shutter speed slower than 1/70th of a second with a 70mm lens, or slower than 1/16th of a second for a 16mm lens.

This isn’t an exact science though and while the tip above can serve as a guideline, you still should make it a habit to zoom in on the image preview to double check if the image is sharp.

natural scene at sunset - 4 Reasons Why You Aren’t Getting Sharp Images

I used a tripod to capture this 91-second exposure

If you need to use a slower shutter speed to achieve a certain look or due to the dim conditions, it’s essential that you use a tripod. This makes it possible to increase the exposure time without worrying about the image being blurry.

#2 Your Lens is Not Good Enough

Unfortunately, an unsharp image can’t always be blamed on human error. Sometimes the camera equipment is to blame. While I often preach that camera gear won’t make you a better photographer, it is true that it does make a difference to the image quality.

A budget lens isn’t as sharp as a professional lens and sometimes this becomes quite visible. For this reason, it’s advisable to do some research about the lens before purchasing it and make sure to read what people are saying about the image sharpness.

#3 The Camera is Vibrating

So what about the times when you’re using a slow shutter with the camera placed on a tripod, and you know for a fact that the lens is good enough? The cause might be camera vibration.

road with big trees arching over - 4 Reasons Why You Aren’t Getting Sharp Images

When capturing the image above I could not for the life of me figure out why almost every image was slightly blurry when I zoomed in on the LCD screen. I used a 70-200mm with a semi-slow shutter speed, the camera was mounted on a solid carbon fiber tripod and I used a remote shutter release.

After several attempts and trying to understand what was happening I realized it was due to me not standing still when taking the image. This caused small vibrations in the unstable ground I was standing on and resulted in the camera vibrating slightly.

Camera vibration becomes more visible and is easier to cause the longer the focal length you are using. Had I used a 14mm I would most likely not have noticed it at all.

There are many reasons why you might be having some camera vibration. The example above is perhaps not the most common. It could be caused by wind, waves, the tripod is placed in a river or on a bridge, or perhaps it is from you pressing the shutter button (so get a remote trigger).

#4 The Weather is to Blame

Other times you can’t blame either yourself or the camera gear. Sometimes the weather is to blame and it makes it impossible to capture a sharp image.

The most common reason is lots of particles in the air and high temperatures. Now, I’m not going to pretend I’m smart enough to explain how this works (I’m sure someone wants to take on this task in the comments) but it’s a common issue when photographing distant subjects.

mountains in the mist - 4 Reasons Why You Aren’t Getting Sharp Images

Make sure to zoom in 100% when using a telephoto zoom to see if you’re getting sharp images.

A good practice is to use Live View and zoom into 100% magnification to check for sharpness. This should give you a good idea of whether or whether not it’s possible to capture a sharp image.

Conclusion

So I hope these tips have you to get sharp images next time you’re out shooting. Use this as a checklist of things to look out for and go over them one by one to ensure you have everything sharp.

If you have any other tips of reasons why others might be experiencing unsharp images, please share them in the comment area below.


Be sure to read my eBook The Ultimate Guide to Long Exposure Photography if you’re curious about working with slower shutter speeds. 

The post 4 Reasons Why You Aren’t Getting Sharp Images appeared first on Digital Photography School.


Digital Photography School

 
Comments Off on 4 Reasons Why You Aren’t Getting Sharp Images

Posted in Photography


Upper Yosemite Falls Moonbow – Getting The Shot

27 Jul
Upper Yosemite Falls Moonbow - May 9 2017

A large moonbow arcs across the mist from Upper Yosemite Falls, Yosemite National Park

There are quite a few photos in my portfolio that I look back upon and question my sanity due to the absurd conditions I’ve endured to capture them. This particular photo is up there on the insanity scale.  This past winter has seen extraordinary snowfall levels in the Sierras and now that Spring has rolled around the water levels are quite high in Yosemite Valley due to the snow melt.  That translates to huge waterfalls and under the right conditions moonbows (rainbows at night via moonlight).

I’ve taken moonbow photos from the Upper Yosemite Falls trail several times, but this year was like none other. I took up position in a new spot this year with a good friend Brian Hawkins. Our hike started off innocently enough with a hike that started at 4:30PM and later ended at 5:30AM. The reason for the long duration of the shoot was a combination of bringing a lot of gear (3 Canon DSLRS, 2 tripods, and 4 lenses plus extra layers of clothes) and the interest in shooting multiple time lapses + stills. Time lapse sequences run a couple hours and the moonbow wasn’t going to appear until 11:30PM.

Start of the Upper Yosemite Falls moonbow hike (4:30PM)
End of the Upper Yosemite Falls moonbow hike (5:30AM)

Now that I type it all out It really is rather nuts. I, of course, don’t think this before the hike because I have selective memory issues or quite simply my elevator doesn’t go to the top floor when it should.

Hiking with a full photo backpack means slow going on a hike that is 1.5 miles with a 1250 foot elevation gain. Leaving “early” affords me the time to properly stake out the right location, set up all 3 cameras, eat and start shooting. On the way up the focus is squarely on the task at hand and making it to the setup spot early.

Waiting in heavy mist and gusty winds.

Are we having fun yet? Waiting in heavy mist and gusty winds. Only 4 hours to go.

The most painful part of the excursion is the wait. This year this was particularly true given the setup spot quickly became inundated with heavy mist from the falls when the wind kicked up (10mph gusts). Without exaggeration, we were waiting in a windy rainstorm. A sane person might consider moving to avoid the heavy mist, but once you’ve invested the time to set up multiple cameras and climb down steep side trails it quickly becomes a less attractive option. This, of course, was constantly second-guessed throughout the night as conditions remained miserable. Eventually, we called uncle and left the cameras running but took shelter a 1/8th of a mile away on the main trial to stay dry.

So what does one think during the hours of waiting for the moonbow to appear and during the moonbow sequence run? Let me tell you in order of thought.

  1. I am so freaking wet and cold.
  2. I should have brought more layers to stay warm and dry.
  3. It’s so wet I’m not sure any of this footage will come out.
  4. I don’t think I could have carried anything more.
  5. What the f*ck are you thinking that this would be a good idea!
  6. I’ve never seen conditions so good for moonbows, but it’s too good. There’s too much water.
  7. What was that noise!? F*ck it better not be a mountain lion. Crap it was just my jacket hood rubbing against my head.
  8. I can’t feel my fingers. I should use those hand warmer things. Cr*p they’re in my camera bag back in the heavy mist. Forget it I’d rather have cold hands than get wet again.
  9. I wonder if my batteries died. I better go check.
  10. Upon returning repeat all the above thoughts
  11. I am so freaking cold. I am never going to do this again. I don’t know what I was thinking.
  12. Now that it’s so wet and windy how am I going to retrieve all my gear
  13. Holy sh*t! I can’t believe I’m here at 3AM


Then after all of this, I get to my camera to see the most amazing sight, Yosemite Falls roaring full of water with the biggest moonbow I’ve ever seen. All those earlier thoughts are lost as I get more stills taken. The results, like the photo above, are like a narcotic that wipes my mind clear. With my “photo-high” in place packing up is less cringeworthy albeit still miserable. Trying to remember, pack and not leave behind gear and accessories for 3 cameras is tough enough, but particularly mentally challenging when cold and tired. Fortunately, years of experience and more importantly being a little too anal for my own good make this a little easier.

Unlike years past the extra effort of trying to dry off gear took some extra time. It also required another round of gear packing. By the time this was all complete the hike down could begin at 3:50AM.

Canon 5D Mark IV + Canon 11-24 drenched from the heavy mist off the falls.
Canon 5D Mark II + Canon 16-35mm Mark II drenched from the heavy mist off the falls.

Brian Setting Up While Nice and Dry
Brian Soaked After Retrieving Gear

The hike down was cold, but dry and thus in my mind “warm”. On the way down thoughts of mountain lions hiding in the shadows quickly subside, instead focusing on not twisting an ankle due to fatigue or carelessness. Also important is to not step on the many millipedes that crawl across the trail. In between dodging millipedes, I’m left wondering how well my footage and stills came out. Cold and tired I’m thinking it’s doubtful anything could have come out and back to questioning why I thought this was a good idea.

Millipede on the trail

Millipede on the trail

Fast forward 7 hours as I write this and it’s become apparent several shots came out, but I won’t know how much until I’m back home. Between three cameras it’s likely it worked out. I really shouldn’t do this again, but come next year I’m sure all this will be mentally blocked and I’ll be making a similar hike/moonbow shoot just like I did in 2011, 2012, 2013, 2014, 2016 and this year. Apparently, I’m a slow learner.

Authors Note: Excuse the typos if any as I typed this on my phone and I’m still very sleep deprived.

Gear Used On This Shoot

Camera 1
Canon 5D Mark IV, Zeiss Distagon T* 15mm f/2.8 ZE, Gitzo Carbon Fiber tripod (small) with canon timer remote controller TC-80N3

Camera 2
Canon Mark IV, Canon EF 11-24mm f/4L USM lens, Gitzo Carbon Fiber tripod (large) with canon timer remote controller TC-80N3

Camera 3
Canon 5D Mark II, Canon EF 16-35mm f/2.8L II USM lens, JOBY GorillaPod for SLRs with canon timer remote controller TC-80N3


The post Upper Yosemite Falls Moonbow – Getting The Shot appeared first on JMG-Galleries – Landscape, Nature & Travel Photography.


JMG-Galleries – Landscape, Nature & Travel Photography

 
Comments Off on Upper Yosemite Falls Moonbow – Getting The Shot

Posted in Equipment


3 Elements of Getting Shallow Depth of Field Images

01 Jun

Depth of field is one of the things that beginners often struggle with understanding. So I found a couple of videos on YouTube to help you out.

Depth of Field Basics

In this first video from B&H Photo, Kelly Mena explains the three elements that affect depth of field and how they work. The three elements are:

  1. The aperture
  2. Focal length of your lens
  3. The subject to camera distance

Okay, that explains things really well. Let’s look at another video example showing the same three elements.

Depth of Field the Easy Way

Next up, is this video by photographer Ray Scott. He gives some great image examples showing both ends of the spectrum from shallow to wide depth of field and how to combine the three elements to best control your background and foreground focus.

If you have had trouble understanding how to get a shallow depth of field, I hope this has helped you get a better handle on it.

The post 3 Elements of Getting Shallow Depth of Field Images appeared first on Digital Photography School.


Digital Photography School

 
Comments Off on 3 Elements of Getting Shallow Depth of Field Images

Posted in Photography


How to Practice Your Photography Skills by Getting Creative in the Kitchen

26 Apr

Do you ever get trapped in the marketing frenzy? Is the lack of professional equipment or fancy subjects preventing you from improving your photography? It’s easy to make excuses, but it’s better to get creative.

Keep reading to see that you don’t need to go any further than your own kitchen to practice and level up your photography skills. In this article, I’ll show you some tips and tricks to improve your shooting and lighting using things you find in the kitchen.

Improve photography skills creative food photography tutorial

Exposure settings: f/22, 1/60, ISO 4000, focal length 55m.

The basic knowledge you need to understand and master in photography is exposure. This refers to finding the correct amount of light for your photograph. There are three variables that you need to take into account when making a photograph. They are known as the exposure triangle as they are always connected; they are the aperture, shutter speed, and the ISO.

Since they are linked, when you are adjusting one leg of the triangle you have to compensate with one of the others. Having said this, you can also do the exercises I’m proposing even if you are not yet familiar with shooting in Manual Mode.

Aperture and Depth of Field

As I was saying, the correct exposure depends on three related factors, I’m going to start with aperture, but keep in mind that whatever you move here you need to compensate equally with one of the others.

If you’re not confident yet doing this manually, you can set your camera to Aperture Priority Mode (A or Av) and that way your camera will decide the correct settings to fit the aperture you want.

Aperture refers to a hole in your lens through which the rays of light come together and pass towards the sensor. Obviously, the bigger the hole the more light goes in and vice versa.

However, it also has an impact on the depth of field so you need to learn and practice how to control it.

Improve photography skills creative food photography tutorial depth of field

Left image: f/2.8, 1/2500th, ISO 1600, 55mm
Right image: f/11, 1/125th, ISO 1600, 55mm.

When you are closing the aperture, the f-number goes up (like f/16, f/11) which results in a bigger depth of field. As you can see in the examples.

Improve photography skills creative food photography tutorial depth of field aperture

Left image: f/2.8, 1/1000th, ISO 1600, 55mm.
Right: f/11, 1/60th, ISO 1600, 55mm.

Remember that the distance between the camera and the subject as well as the focal length also impact the depth of field, so try out different settings and keep practicing.

Improve photography skills creative food photography tutorial depth of field fstop

Exposure: f/2.8, 1/250th, ISO 1600, 55mm.

Exercise to practice

Try shooting different objects in your kitchen using different aperture settings. See how it looks at f/2.8 or wide open, compared to using a smaller aperture of f/11 or f/16. You may need a tripod to keep the camera steady.

Shooter Speed and Motion

Another factor is the shutter speed. As its name indicates, it’s the speed at which the shutter opens and closes when you take your photograph. This is more straight-forward to understand than the aperture. The more time the shutter remains open, the more trajectory from the moving object will be captured resulting in a blur. The faster you set your shutter speed, the moving object will be sharper as it will appear frozen.

Improve photography skills creative food photography tutorial shutter speed motion

Left: f/11, 1/640th, ISO 5000, 50mm.
Right: f/11, 1/80th, ISO 400, 50mm.

If you’re not confident shooting in Manual Mode, you can set your camera to Shutter Priority (Tv or S). This way your camera will decide the correct settings to fit the shutter speed of your choice.

Improve photography skills creative food photography tutorial shutter speed

Exposure: f/8, 1/125th, ISO 1600, 50mm.

Exercise to practice

Try finding some moving objects in your kitchen; flowing water out of the tap, have a friend pour a liquid into a cup for you, a fan blowing, etc. Shoot it at all kinds of different shutter speeds and see what it looks like at 1/30th versus 1/2000th. Remember to stabilize the camera when using a shutter speed less than your focal length to maintain sharpness.

The last exercises are about controlling the resulting image with the light that you have to work with, but the next step to level up your photography is about manipulating the light. That’s the idea for the next activities.

Quality of light: Hard versus soft

Depending on the distance and size of the light source, as well as the type of bulb or accessories (light modifiers) that you use with it you can have either hard or soft light in your scene.

Hard light is created by direct sunlight, for example. Or if you’re talking about artificial light it refers to small light bulbs with no light modifiers that are placed farther from your subject. It results in dark shadows with clearly defined edges as well as contrasted colors. It’s not necessarily flattering for portraits, but in still life scenes, it can create a very special mood.

Improve photography skills creative food photography tutorial hard light

Exposure: f/8, 1/30th, ISO 400, 50mm. Notice the hard, well-defined shadows of the kitchen tools here. This is hard lighting.

Soft light is therefor the opposite. It casts diffused shadows that fade away gradually instead of having a defined edge. When you’re working with natural light this is what you get on a cloudy day because the clouds work as a giant diffuser.

However, when you are working with artificial light there are many different ways to soften it. You can move the light closer to the subject or use a bigger light source (or modifier). But talking about hacks you can do in your kitchen, you can simply put a sheet of oven paper (also known as baking paper) in front of your light like I did here to spread out the light (diffuse it) and make it softer.

Improve photography skills creative food photography tutorial soft light

Exposure: f/8, 1/15th, ISO 400, 50mm. Notice the lack of well-defined shadows here, this is soft lighting.

Exercise to practice

Pick a subject in your kitchen and photograph it using both hard and soft light. Window light through curtains or which is not direct sunlight is a good source for soft light. A flashlight or bare light bulb can make for a hard light source – try both.

Lighting style – high key

While on this subject, there is a particular style of lighting with soft light called high key. These are images with mostly light colors and white with soft or no shadows in the image. You can also overexpose the white background a bit to enhance the effect.

A quick trick from your kitchen to achieve this look is to use the light from the extractor hood above your stove. Most stoves have one and it usually gives a diffused gentle light. I find this very useful to do high key images:

Improve photography skills creative food photography tutorial high key lighting

Exposure: f/22, 1/125th, ISO 100, 167mm.

Try creating a high key look at home with items in your kitchen.

Reflection

Another way of diffusing light is by using reflectors, however, they can also serve other purposes. In this case, I was using the natural light from the window coming in from behind the bottle and placed a chopping board as a black background, this brings out the contours of glass objects.

The problem was that the lime wasn’t getting much light and this flattened the entire image. By using an aluminum BBQ-oven cooking tray I bounced the light back into the front of the lime and gave the final result that subtle, but needed punch. Look at this before and after.

Improve photography skills creative food photography tutorial reflector

Left: f/8, 1/30th, ISO 400, 50mm.
Right: f/8, 1/30th, ISO 400, 50mm.

Try it at home

So try a few of these in your own kitchen and see what you can learn by playing around and practicing.

As you can see you don’t need any professional equipment or even cooking skills, you only need to be creative! These are just some examples of what you can do but you can also work on your composition, cropping, colors, contrast and much more.

Share any other kitchen hacks or exercises that help you improve your photography in the comments section below.

The post How to Practice Your Photography Skills by Getting Creative in the Kitchen appeared first on Digital Photography School.


Digital Photography School

 
Comments Off on How to Practice Your Photography Skills by Getting Creative in the Kitchen

Posted in Photography


Tips for Getting Sharper Real Estate Interior Photographs

23 Feb

Photography is a key part of advertising a property for real estate sales. But just as stunning images show the property looking its best, the opposite is also true. Poor photography, with blurred, sloping rooms, and out of focus images does little to inspire viewings.

Here are some basic, but important, steps to help you improve the quality of your interior photos. You’ll see what causes photographs to turn out blurry, and get some handy tips on equipment and techniques to avoid falling into these traps.

Preparing for the shoot

The best techniques for getting sharp photographs can be let down by poorly working equipment, or badly chosen or untidy scenes. So it’s important to start your session with good preparation and follow your check-list. Here are a few things that should be on your list.

1. Check your equipment

Make sure your equipment is okay, batteries are charged, extra lights working, tripod joints tight and in good condition, and that the lens is completely clean. Loose tripod joints, broken lights, and dirty lenses make problems for you later, so good preparation is worthwhile.

2. Make sure everything is clean and tidy

Dirty windows still look dirty in photographs, so take a household cleaning cloth and some glass cleaner. Cleaning everything is always easier than removing debris in post-production.

3. Set the scene

Tidy and set the scene, removing unwanted items from window sills, adjusting furniture positions and cleaning the windows. Don’t forget to look through the window too – a washing line of underwear probably isn’t what your client wants to see!

Think about the final image and what you want, then keep that in your mind throughout the photography session.

Using a tripod

Three common issues ruin a real estate photograph: blur, poor focus, and sloping rooms.

Blur and bad focus often come from camera movement during the long exposures you need when photographing interiors. Rooms appear sloping when the camera is not level.

You can resolve all three problems by securely mounting the camera on a sturdy tripod, which is why a tripod is highly recommended when photographing interiors.

Here are some pro tips for using a tripod:

  • Hang your camera bag from the center of the tripod (if it has a hook, as seen above) to increase stability.
  • Set the tripod exactly where you’ve decided to take the photographs, and extend the thicker sections of the legs first as they provide most stability. Avoid extending the center column as this is the least stable section and will reduce the stability of the tripod.
  • Give the tripod a gentle prod to make sure it won’t slip on the floor or wobble.
  • Mount the camera on the tripod, ensuring that the base plate and mounting are tight and cannot move around.
  • Adjust the tripod head until the camera is perfectly level and the image doesn’t slope to the left or the right. By getting the camera level, you ensure the room won’t look as if it slopes sideways.

For more on getting sharp images with a tripod, read: 5 Tips to Get Sharp Photos While Using a Tripod.

Eliminating sources of camera shake

There are also other sources of blurriness in photos. One of these is called mirror shake.

DSLR cameras have a mirror which sits in front of the camera sensor and helps you see the view through the lens by reflecting the image up to the eyepiece (through a prism). The mirror snaps up and out of the way when you take the photo, creating vibrations that can cause blurring.

You can eliminate this problem by setting it in the up position before taking any photographs. Look in your camera menu for the Mirror LockUp setting.

Left: The mirror is down in this image. Right: the mirror is up here exposing the camera’s sensor.

Conclusion

With good preparation and technique, and the right equipment, you can consistently get sharp, crisp interior photographs. When you set out to capture that image, remember:

  • Set the scene by making the room look neat and clean.
  • Make good use of a tripod.
  • Choose an appropriate lens.
  • Keep your camera stable and free from vibration.

The video tutorial expands on some of these tips, as well as showing other helpful hints for getting sharp photographs like choosing an appropriate lens and focusing correctly.

Watch the video to learn more about tripods, lenses, focusing, and keeping the camera steady.

Please share any other tips you have for taking sharper interior photographs of real estate in the comments area below.

Disclaimer: HDRsoft is a paid partner of dPS

The post Tips for Getting Sharper Real Estate Interior Photographs by David Robinson appeared first on Digital Photography School.


Digital Photography School

 
Comments Off on Tips for Getting Sharper Real Estate Interior Photographs

Posted in Photography


Getting Started with Landscape Photography – 4 Easy Tips for Beginners

13 Feb

One of the things I like most about photography is that there is always more to learn. It keeps the mind active and the creative juices flowing. But the wealth of information out there can be overwhelming for beginners in landscape photography. Where do you start?

There are a few easy things you can do that will have an immediate impact on your photography so you can start making better images right away. Let’s focus on those and leave the more technical stuff for later.

1. Pay attention to the light

There is no such thing as bad light. The key is to understand what kinds of images are suitable under various lighting conditions.

Red Rock State Park, Arizona by Anne McKinnell - Getting Started with Landscape Photography - 4 Easy Tips for Beginners

During golden hour, the day’s last light makes the rocks glow.

The Golden Hour

This is the time right after sunrise and right before sunset when the sun is low in the sky and casts beautiful golden light. Start here! It’s hard to go wrong with golden light, which is the most popular time of day for photography.

Ajo, Arizona by Anne McKinnell - Getting Started with Landscape Photography - 4 Easy Tips for Beginners

The cactus in the foreground is in the shade while golden hour light reflects off the mountain in the background.

Bright Midday Light

The opposite of golden hour, the harsh direct light you find at midday can be the most difficult to work with – unless you photograph in the shade.

Just look for interesting subjects that are in the shade and leave the sky out of the frame. The even soft light is great for close-ups and flower photography.

Bush Lupin - Getting Started with Landscape Photography - 4 Easy Tips for Beginners

Flowers photographed in the shade.

There are more types of light to work with and different times of day to photograph, but start with these for the quickest results.

2. Remove distractions

Pay attention to the things in the background of your images and try to simplify the background as much as possible. Sometimes there is an unwanted object, like a trash can for example, that you might not notice unless you are looking for it. These things can often be hidden behind your main subject simply by moving to one side, photographing from a higher or lower perspective, or getting closer.

Try to simplify your composition as much as possible with fewer items in your scene. Find a way to photograph your main subject on a clean background.

Big surf on the Oregon Coast. Getting Started with Landscape Photography - 4 Easy Tips for Beginners

To make this image, I had to change my perspective to eliminate debris on the sand as well as other rocks and birds from the frame.

Beware of tree branches or other things that poke in to the edge of your frame. Before you take your shot, try to remember to do an “edge check”. Look around the edges of your frame and make sure it looks clean.

3. Look for one thing

Your photograph cannot be about everything. You need to decide what is most interesting in your scene and make your photograph about that. Get closer to it.

One exercise that will get you in this habit is to go on a photo walk with the purpose of looking for one particular element of design. You’ll find that when you set your mind on one thing, you’ll start to see it everywhere. Here are some ideas to get you started:

Textures and Patterns

Often beginning photographers will try to capture an entire vista in one photograph and don’t notice the details. But the more you train your eye to notice the details, the more interesting your photographs will become.

The best thing about photographing textures and patterns is that you don’t have to go far to find them. Your subject can be anything from rocks to grass or peeling paint. I’m sure you can find subjects with wonderful textures close to home. Try to fill your frame with the pattern.

Weston Beach, Point Lobos State Reserve, California - Getting Started with Landscape Photography - 4 Easy Tips for Beginners

Filling the frame with the pattern of colorful rocks.

Lines

Look for horizontal lines, vertical lines or diagonal lines. Try to find lines that lead the way to some interesting subject.

Colors

Take a look at the color wheel and notice complementary colors. Those are the ones that are opposites on the wheel such as blue and orange, red and green, or yellow and purple. Any scene with complementary colors is always striking (which is why so many photographers carry around a red umbrella or a red jacket for their partner to wear in a grassy or forest scene).

Bamboo Forest - Getting Started with Landscape Photography - 4 Easy Tips for Beginners

Complementary colors plus diagonal lines.

4. Make time to practice

It doesn’t take long to develop good habits and learn what makes an interesting photograph. But it can be hard to remember if you only go shooting once in awhile. Try to make a habit of doing it every day, even if it’s only for fifteen minutes. By doing this, you’ll reinforce the habit and find yourself seeing the potential for great images all around you all the time.

Spider Rock, Canyon de Chelly National Monument, Arizona - Getting Started with Landscape Photography - 4 Easy Tips for Beginners

Golden hour – there is still enough light to photograph the depths of the canyon while the last of the day’s light reflects off the top of the highest rock.

Conclusion

There are more technical things that you’ll want to start learning soon such as; how the exposure triangle works, understanding depth of field, picking the right shooting mode, focus settings, and more. It’s endless (which is a good thing).

But for now, these tips will get you on the right track so you are happy with your images right from the beginning. Have fun!

The post Getting Started with Landscape Photography – 4 Easy Tips for Beginners by Anne McKinnell appeared first on Digital Photography School.


Digital Photography School

 
Comments Off on Getting Started with Landscape Photography – 4 Easy Tips for Beginners

Posted in Photography


5 Tips to Getting the Most out of a Photography Conference

04 Jan

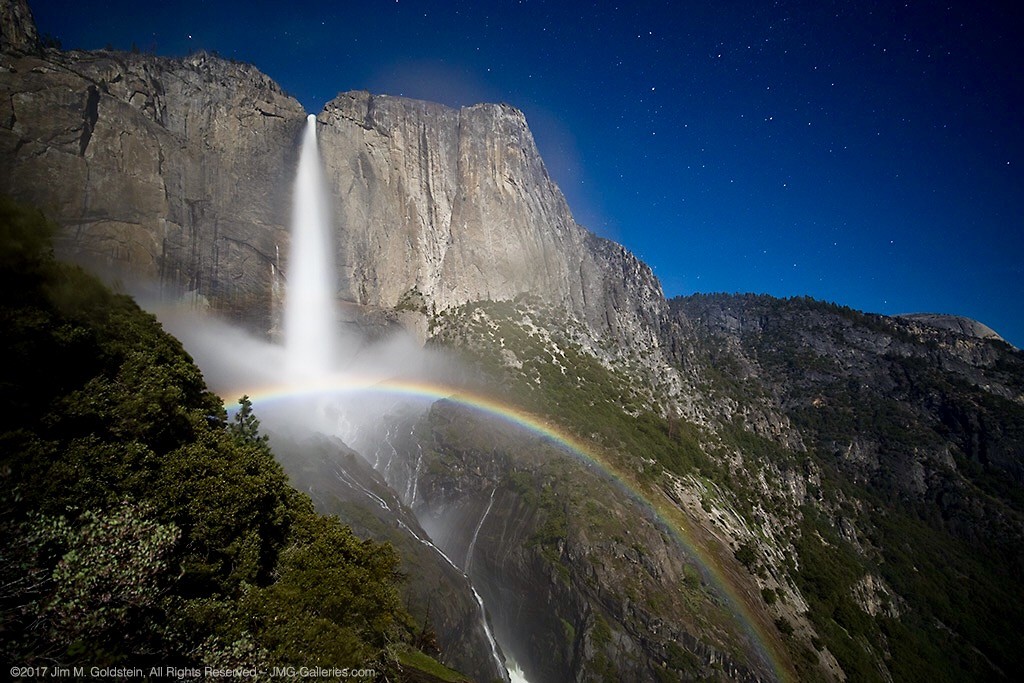
One of the best ways to rapidly improve your photography skills and broaden your photographic community is to attend a photography conference. But, if you’ve never been to a conference before, just the idea of going can be intimidating. The rewards are great though, so read on for five tips that will help you select the right photography conference for your needs plus get the absolute most out of it once you get there.

Tip #1: Know your goals

Before you plunk down your deposit, evaluate your own specific goals for attending the photography conference. First, think about what you want to learn when you are at the conference. Obviously, if you’re a wildlife photographer and the conference focuses solely on street photography, it’s probably not right for you. But, if the conference offers many different learning options, you’ll need to do some investigating before you decide whether or not to attend.

Photography Conference Tips - northern Nevada landscape

I’m primarily a wildlife and nature photographer so when I evaluate a conference, I look for courses that will support my goals. I want to become a better landscape photographer too so I look for classes that will help me do that as well. Canon 7D Mark II, 24-105 II @ 70mm, f/11, 1/400th, ISO 100, handheld, stylized in Lightroom.

The instructors

Start by checking out the bios and websites of the instructors. Ask yourself if they are making images that inspire you. Do their images look like the images that you aspire to make yourself? Read their blogs and watch their videos too to get a good idea of whether their teaching style suits your learning style. If you find a few instructors that are simpatico, check out their courses at the conference.

Photography Conference Tips Instructors

I signed up for a Photoshop course at AdobeMax with Glyn Dewis but, since I didn’t know much about him, I looked up his website and read his About page first. Turns out he was an excellent instructor.

The course offerings

Now, review the course offerings. Is there content that you need to learn? Most photographers want to improve their existing skill set, whether that’s learning how to make better-exposed images or how to mask in Photoshop.

Does the conference offer courses at the right skill level for you? If you’re not sure, reach out to either the instructors or the conference organizers.

Photography Conference Tips - Course description

I use Lightroom and Photoshop in my work often so discovering how two different photographers use these tools felt like a course that would teach me a great deal. Plus, Julieanne Kost is my photography hero!

Learning new things

Learning new things is important too so look at courses that are completely out of the box for you.

If you’re a wildlife life photographer and you invest your time in a 90-minute course on street photography, you might be surprised at how that affects your work the next time you head out on an African safari. It can help you get “unstuck” if you’re mired in a creative rut.

After the class, you might even be inspired to continue learning street photography.

Photography Conference Tips - Schedule

When I attend a photography conference, my goal is to improve skills I already have but also to learn new things. At AdobeMax I did a bit of both, with courses on public speaking and Photoshop.

Tip #2: Networking

A huge reason to go to a photography conference is to expand your photography community. One thing I really love is that I can connect with people I’ve only ever met online. Meeting “live” at a conference is almost like a reunion. Of course, you can make new friends too, plus you can meet expert instructors in person.

Big conferences versus small ones

When you’re evaluating a conference, if networking is a big part of why you’re attending, definitely reach out to past conference attendees to gauge their experiences. At a 12,000-person conference like AdobeMax, it’s not as easy to hob knob and make new friends.

At a smaller, 400-person conference like Out of Chicago, making new friends is a snap. You’ll be in the same courses with the same people over and over. You’ll probably be best friends and be planning a photography trip together before the weekend even ends.

Photography Conference Tips - OOC community

The Out of Chicago Community page has over 1000 members. That makes it easy to reach out to people to ask if the conference would be a good fit for you. Most photography conferences have similar social media community pages.

Instructor accessibility

Likewise, at a huge conference, the instructors might not be so accessible for you to chat with, except at special times. And at those special times, since 12,000 people are waiting to speak with them, it will be a mob scene rather than a cozy tête-à-tête.

At a smaller conference, your instructors will probably be eating lunch right next to you. Bigger conferences draw bigger names though. So while you might not make as many personal one-on-one connections, it might be worth it if you’re going to learn from someone you hold in extremely high esteem.

Tip #3: Take advantage of every opportunity

In addition to seminars and hands-on courses, most photography conferences offer opening and closing keynote speeches. Big-name photographers or well-known industry experts usually give these talks. You might think of these things as “free” – just regular stuff included in your conference that everyone gets – but don’t  think that way.

Often the keynote speeches are the best parts of the conference. The opening keynote sets the stage for the week and lays out all of your opportunities for learning. The closing keynote caps the week with a review of what you did learn, and a reminder to go out and practice it.

Photography Conference Tips - Photowalk

AdobeMax didn’t offer any photo walks while I was there. So instead, I photographed the expo hall one morning while the light was amazing. Canon 5DIV, 24-105 II @ 31mm. 1/100, f/14, ISO 640, handheld, stylized in Lightroom.

Photo Walks

Another great add-on is photo walks. They help combine learning and networking into one fun outing. As you can imagine though, these are more prevalent in smaller conferences than large ones. Herding 12,000 attendees with cameras around the Vegas Strip doesn’t typically make for very good picture-taking.

On the other hand, 400 attendees walking through the Chicago Loop is a drop in the bucket. If photo walks are important to you, check into smaller, regional conferences. Either way, don’t skip these if they’re offered at the conference you’re attending.

Vendors

Every conference has a vendor or exhibition area where you can check out the latest and greatest gear and technology. Make sure you plan time into your schedule to visit this area. I usually grab a quick lunch on the go and use the 90-minute lunch period checking out all the different booths.

Photography Conference Tips - Interactive

Just outside the AdobeMax vendor area, there were lots of interactive activities for creatives, like this “chalkboard.” Canon 5DIV, 24-105 II @ 24mm, f/6.3, 1/100th, ISO 640, handheld, stylized in Lightroom.

At small conferences, you’re more likely to be able to rent a piece of gear for the day and test it out on a photo walk. Sometimes vendors offer discounts and even have product on hand that you can buy and take home with you.

At a large conference, you probably won’t be able to do more than review the gear at the vendor booth and talk to the rep. However, at a large conference, the vendor area often has a carnival-like feel to it, with interactive creative and technology exhibits set up to draw you in.

Tip #4: Conference bonuses

There will almost always be a party and often that party will include free food, drinks, and entertainment so go! It’s a bonus. Don’t skip it. Remember, if you’re goal is to network, the party is where you’ll meet fellow photographers and instructors.

Bring your camera

Photography Conference - Party

While night-time concert photography isn’t even remotely one of my fortes, I had a blast photographing this band at the AdobeMax Bash. Canon 5DIV, 24-105 II @ 105mm, f/5, 1/320th, ISO 8000, handheld, stylized in Lightroom.

That party – and probably a good bit of the conference – will be a blast to photograph so bring your camera. A lot of people won’t. Some people will bring them, but will never take them out of their camera bags. You, on the other hand, should keep your camera in hand and happily shoot away.

Even if you’re a wildlife photographer, and the images won’t go into your portfolio, making images of the conference will help you solidify everything you’ve learned over the course of the weekend.

Photograpjy Conference Tips - dragon's breath

Serving up dragon’s breath dessert at the Adobe Max Bash. Canon 5DIV, 24-105 II @ 24mm, f/4.5, 1/320th, ISO 10,000, handheld, stylized in Lightroom.

Swag

Hopefully, it doesn’t surprise you that you will get swag (free stuff!) at a photography conference. There might be a raffle or contest where you can win big door prizes – like lenses, tablets, and cameras. There will surely be a bag of goodies handed to you when you check in.

Most often you’ll get a reusable bag containing a sample pack of printer paper, a tee shirt, stickers, magnets, lens cleaning cloths, candy, water bottles, and lots of flyers. Now I know it’s tempting to just pitch most of it but before you do, review it all. There will be coupons and promo codes and it’s possible that there might be one for 20% off the business cards you always order or a BOGO (buy one get one) for your favorite ink or fine art paper.

Photography Conference Tips - Swag

A notebook and pen, courtesy of Adobe, in my AdobeMax swag bag.

Tip #5: Maximizing your trip

This is pretty much my favorite part of going to a photography conference. Most of them are only three or four days but there’s no rule that you can’t play hooky from work a bit longer. I recommend that you pick a conference near a cool destination. After the conference ends, stay in the area a few more days and put everything you learned to practice.

Wild horses couldn’t drag me away

Photography Conference Tips - wild horses

Wild mare and foal in the Onaqui Mountains in Utah. Canon 5DIV, 100-400 II @ 400mm, f/10, 1/60th, ISO 200, handheld, stylized in Lightroom.

After the AdobeMax conference in Vegas this past October, I headed off on a week-long wild horse photography road trip. I drove through Nevada, all the way to Utah, meeting half a dozen friends along the way, and flew home from Salt Lake City.

No surprise that for me that maximizing the conference was about heading off to photograph wild horses! For you, it might be photographing the Vegas Strip at night, or creating panoramas of the nearby Grand Canyon.

Which photography conferences are your favorites?

While AdobeMax was pretty amazing, my favorite is still the Out of Chicago Summer Conference. Of course, I’m biased since the conference is run by some of my good friends.

Photography Conference Tips - Chicago

Chicago has so much beautiful architecture, it’s perfect for magical photo walks. Canon 5DIII with 24-105 @ 24mm, f/8, 1/125th, ISO 250, handheld, stylized in Lightroom.

Which photography conferences are your favorites? Please take a minute and list the conference name in the comment section, and why you recommend it so that other photographers can benefit from your experience.

The post 5 Tips to Getting the Most out of a Photography Conference by Lara Joy Brynildssen appeared first on Digital Photography School.


Digital Photography School

 
Comments Off on 5 Tips to Getting the Most out of a Photography Conference

Posted in Photography


Getting Your Priorities Straight – A Guide to Selecting Your Shot Priority

11 Oct

A major goal when starting out in photography is to get off Auto mode and onto the semi-automatic Aperture and Shutter Priority modes. Is it daunting at first? It can be, but I promise that wrestling creative control away from your camera and into your hands is one of the first and greatest joys of digital photography.

I teach people that a deeper reason exists for the name priority mode. The obvious one is you’re prioritizing control of shutter speed or aperture and surrendering control of the other. But also, you can teach yourself to base this decision on your shot priority.

Getting Your Priorities Straight – A Guide to Selecting Your Shot Priority

Flag dancers in Liberty Square – Taipei, Taiwan. Shot priority: Freeze motion. Shutter speed: 1/500th.

This article identifies four major shot priorities: to freeze motion, to imply motion, to create a shallow depth of field, and to create a deep depth of field. The goal is to get you to ask which of these is your priority for your next shot and then to select the appropriate mode and settings to achieve that.

Shutter Priority Mode

Shutter priority mode is marked with an “S” on Nikon and Sony cameras and “Tv” on Canon mode dials. Like your eyelid, the shutter opens and closes to expose the camera sensor to light. Through selecting this mode, you can choose how long it opens.

With Shutter Priority mode, you’re prioritizing shutter speed as the crucial element for the image you want to take. Your camera will then select a corresponding aperture to create a correct exposure. It is the mode to use when your priority is either freezing motion or implying motion.

Getting Your Priorities Straight – A Guide to Selecting Your Shot Priority

Traditional dance performance at Haemi Fortress, South Korea. Priority: Freeze motion. Shutter speed: 1/1000.

Priority #1 – To freeze motion

Much of the time when shooting, you require sharp images in crisp focus. Shutter speed is the most critical factor affecting image sharpness; however, requiring image sharpness isn’t a fully-fledged shot priority. Here, we’re talking about freezing fast motion.

Select this mode to freeze action in sports fast-moving water in landscapes, and other fast motion. For example, a runner could be frozen with a shutter speed of 1/500th of a second, whereas motorsports might require 1/2000th or faster.

Getting Your Priorities Straight – A Guide to Selecting Your Shot Priority

For this image of flag dancers in Taipei’s Liberty Square, I selected a shutter speed of 1/800th to freeze the motion. As well as freezing the dancer, the fast shutter speed also froze the flag and ensured the writing was crisp and legible.

Getting Your Priorities Straight – A Guide to Selecting Your Shot Priority

At the ghats by the River Ganges in Varanasi, India’s holiest city, I saw a procession of ladies heading downstairs and a cow heading up towards them. The animal looked ready to charge at them! I had just been shooting a game of cricket so my camera was already set to 1/1000th in Shutter Priority mode. I began shooting as the cow charged at the last two women before veering away. The cow and the women’s facial expressions were frozen, preserving a fleeting moment.

Priority #2 – To imply motion

Using Shutter Priority mode, implying motion is a beautiful effect that you can easily apply to your images. Everything from slight motion blurs to light trails to dreamy water effects are possible with a variety of moving subjects.

Imagine that you’re shooting handheld street photography and you chance upon a pair of dancing street performers. You decide you want people viewing your images later to be able to get a sense of the action, so choose to imply motion as your shot priority. Because a shutter speed of 1/500th would freeze the performers, you could try 1/250th and work down from there until the desired motion blur is achieved.

Getting Your Priorities Straight – A Guide to Selecting Your Shot Priority

While working as a tour photographer in South Korea, I was tasked with capturing tourists prepare green tea leaves. To imply motion, I took a sample shot at 1/50th and then worked down until I achieved this blur. This image was 0.4 seconds – admittedly pushing the acceptable limits of handheld photography – but thanks to my lens’s image stabilization and steady hands, I ended up with this interesting shot.

Now imagine you’re on the rooftop of a tall building at nighttime and you have a tripod. Because of the added stability a tripod allows, you can open up your shutter for significantly longer. Through selecting the right settings, you can achieve crisp backgrounds, blurred subjects, and light trails that build on top of each other.

Getting Your Priorities Straight – A Guide to Selecting Your Shot Priority

A nighttime cityscape of Seoul’s Han River and Namsan Tower featuring blurred white and red light trails. I used a shutter speed of 15 seconds to allow the light from numerous cars to reach my sensor, accumulating into long streaks of light in the final image. No golden rule exists for the number of seconds, so just enjoy experimenting.

Aperture Priority Mode

Aperture Priority mode is marked with an “A” on Nikon and Sony cameras and “Av” on Canon dials. Like an iris in a human eye, aperture represents the hole that opens to expose the camera sensor to light. Through selecting this mode, you can choose how wide or narrow to open the aperture. The lower the f-number, the wider the hole. Controlling aperture is mainly used to affect what is known as depth of field.

You’ve seen portraits where the subject is in crisp focus but the background is beautifully blurry; this is called a shallow depth of field. Also, you’ve seen fantastic landscapes that are in sharp focus throughout the image from front to back; this is a deep depth of field.

Through selecting Aperture Priority mode, you’re marking aperture as the crucial element for the image you want to take. Your camera will then select a corresponding shutter speed to create a correct exposure. It is the mode to use when your priorities are creating either a deep or shallow depth of field.

Getting Your Priorities Straight – A Guide to Selecting Your Shot Priority

Stall owner at the Mother’s Market in Imphal – Manipur, India. Priority: Shallow depth of field. Aperture selected: f/2.0.

Priority #3 – To create a shallow depth of field

As a travel photographer specializing in portraits, creating a shallow depth of field is often my priority. This allows me to have my photo subject (i.e., a person’s face, and more specifically their eyes) in crisp focus, while the background melts away in a dreamlike blur. To achieve this effect, you want to select a low aperture value.

If you’re shooting with a kit lens, the lowest value available to you might be f/3.5. However, with a fixed focal length lens (prime), this will be lower, making this type of lens perfect for portrait photography. Let’s take a look at the two example images below.

Getting Your Priorities Straight – A Guide to Selecting Your Shot Priority

A Hindu lady showing her devotion during the Ganga Aarti ceremony – Varansi, India. When I’m out meeting people and taking portraits, I make sure my Sigma 35mm 1.4 Art lens is on my camera body. The aperture selected for this shot was f/1.4, ensuring a beautifully blurry background.

Getting Your Priorities Straight – A Guide to Selecting Your Shot Priority

A resident of Houtong Cat Village – Northern Taiwan. Aperture selected: f/2.8. This is a great example of shallow depth of field. The front of the cat’s paws are blurred and so is the back of its body. There is just a thin focal plane in sharp focus. The lower the aperture value selected, the thinner this slice of the focal plane becomes. For this shot, I spot focused on the cat’s left eye, ensuring that this was the sharpest spot of the image.

Priority #4 – To create a deep depth of field

By contrast, a deep depth of field enables front to back sharpness throughout an image, making it the shot priority to select for landscape photos. If the lowest aperture values provide the thinnest focal planes and the blurriest backgrounds, then surely the highest aperture values provide the best landscape settings, right? Wrong. Your lens may be capable of f/22 but please don’t select it.

The highest aperture values can create image distortion. I recommend not going above f/16 for landscape photography with a tripod, and not going above f/11 handheld. A solid choice for handheld landscapes is actually f/8 because it provides a mid to deep depth of field while enabling a lower ISO and faster shutter speed for a sharper image.

Getting Your Priorities Straight – A Guide to Selecting Your Shot Priority

Beautiful Itsukushima Shrine at Miyajima, one of “The Three Views of Japan” – Hiroshima Prefecture. A higher aperture value creates a narrower hole through which light reaches your sensor. A deep depth of field is one of the main effects, which in landscape photos creates front to back sharpness. For this image, I selected an aperture of f/7.1 and spot focused on the pool of water in the foreground.

Getting Your Priorities Straight – A Guide to Selecting Your Shot Priority

On the road to “Zero Point”, the end of the road heading north in the Sikkimese Himalayas, and looking back toward Yumthang Valley – Sikkim, India. This is a simple handheld landscape shot, for which I selected f/8 because my shot priority was a deep depth of field.

Conclusion

Remember these four major shot priorities and put them into practice using the Aperture and Shutter priority modes. Don’t forget to share your work and comments below.

The post Getting Your Priorities Straight – A Guide to Selecting Your Shot Priority by Ben McKechnie appeared first on Digital Photography School.


Digital Photography School

 
Comments Off on Getting Your Priorities Straight – A Guide to Selecting Your Shot Priority

Posted in Photography


6 Tips for Getting Consistent Results Shooting in Low Light

05 Oct

It’s often challenging for photographers to get consistent results in low light. Problems encountered may include camera shake, out of focus photos, and noisy images. There are three main reasons that these things happen.

How to Get Consistent Results Shooting in Low Light

  1. You may not be using shutter speeds fast enough to hand-hold your camera without getting camera shake.
  2. Your camera may struggle to focus properly in low light.
  3. Your photos might be noisy because of high ISO settings, underexposure, or a combination of both.

With this in mind, let’s look at some steps you can take to get consistent results when shooting in low light conditions.

1. Take your camera off full automatic

If you’re using your camera in a fully automatic exposure mode, such as portrait or night scene, it’s time to stop. You have little or no control over your camera’s settings by using these modes. That stops you from getting the best results in low light.

The only modes I recommend that you ever use are Aperture Priority, Shutter Priority, Program Auto or Manual (the last one only if you really know what you’re doing).

How to Get Consistent Results Shooting in Low Light

For best results in low light avoid your camera’s fully automatic exposure modes!

2. Avoid using the built-in flash

Fully automatic exposure modes may also engage the camera’s built-in flash in low light. The problem is that built-in flash doesn’t provide high-quality light.

Don’t get me wrong. There will always be circumstances where it’s more important to get the photo than to worry about its aesthetic qualities. If you’re photographing a friend or loved one in the dark, it’s better to use the flash and capture the moment, however ugly the light, than not capture it all. But if you want to create beautiful photos, then you will want to either learn to use off-camera flash or make the most of the available light.

I made this photo at dusk using an off-camera flash with a softbox. There’s no way you can replicate this quality of the light in this image without the right equipment.

How to Get Consistent Results Shooting in Low Light

3. Use Image Stabilization

Image Stabilization lets you take sharp photos using longer shutter speeds than you could with a non-stabilized lens. This is useful to know if your photos tend to suffer from camera shake in low light.

There are two types of Image Stabilization. Canon and Nikon build it into their lenses. That means the technology only works if you have the right lens. As most kit lenses are image stabilized it is likely you own at least one image such lens you can use in low light.

Other manufacturers, like Olympus and Panasonic, place the image stabilization mechanism in the camera body. The advantage of this system is that it works with any lens. If you’re not sure how image stabilization works with your camera then check your manual for the details.

Most image stabilization systems give you a four-stop advantage. Let’s look at what that means in practice.

Let’s say you’re using an 18-55mm kit lens on an APS-C camera. Ideally, without image stabilization, you need a shutter speed of around 1/125 second to achieve a sharp image with a hand-held camera (some photographers may argue you could use a slower shutter speed). An image stabilization system that gives you a 4 stop advantage means you can drop the shutter speed to 1/8th of a second and still get a sharp image. That’s very helpful in low light.

For example, I made this photo in a dimly lit museum with a non-stabilized 18-55mm lens at 1/160 second, f5.6, ISO 1600. If the lens was image stabilized I would have had the option of using ISO 100 and 1/10th of a second, giving me a much cleaner image with less noise.

How to Get Consistent Results Shooting in Low Light

4. Don’t be afraid of high ISO

Most modern digital cameras give you excellent performance at high ISOs. It’s quite possible your camera is capable of giving great results at ISO 3200, 6400, or even higher. You won’t know until you try. This is another good reason for taking your camera off fully automatic. Now you can decide what ISO to use, rather than leaving it up to your camera.

The best thing to do is test your camera at all its high ISO levels to find your noise tolerance level. For example, you might find that ISO 6400 is the highest setting you’re comfortable using. Once you’ve decided this, you know the ISO range you can work with for your camera.

This photo is taken at ISO 6400, the highest ISO I’m comfortable using on my camera. I had to use the high ISO setting because the photo was taken indoors in low light.

Low light

5. Use a prime lens

If you don’t have one already then it’s worth considering buying a prime lens. For example, most 18-55mm kit lenses have a maximum aperture of f/5.6 at the 55mm end. But on a 50mm prime lens that maximum aperture could be f/1.8 (or even wider). That’s a difference of over three stops (eight times more light), which means that you can take photos in much lower light conditions.

The only caveat is that there is much less depth of field at wide apertures. But you can use this to your advantage by exploring the use of bokeh in your low light photos. I made this photo of a Chinese lantern, taken at night, using an 85mm lens set to f/2.

Low light

6. Use a tripod

A tripod comes in really handy for taking photos of landscapes and cityscapes in low light. All the methods listed so far, such as using a high ISO, Image Stabilization, prime lenses and so on, have disadvantages. Noise increases at high ISOs, wide apertures don’t give much depth of field, and even Image Stabilization has its limits.

The benefit of a tripod is that you can use your camera at its lowest ISO setting (giving good image quality), and a small aperture such as f/8 or f/11 (allowing for a greater depth of field).

Shutter speeds will slow right down at these settings. Again, use this to your advantage. Slow shutter speeds are great for landscape photography because moving parts of the landscape, like water, become a silky blur. With cityscapes, the light from passing traffic becomes long streaks of light.

A tripod also opens up techniques like long exposure photography (photos taken with shutter speeds between a minute and eight minutes long) and painting with light (using flash or torchlight to illuminate the scene during a long exposure).

Low light

I used a tripod to create this landscape photo, which needed an exposure of 30 seconds at f/8 and ISO 100. The water blurred during the exposure, which helps add mood and atmosphere to the photo.

Conclusion

The key to getting consistent results shooting in low light is understanding the limitations of your equipment and taking control of your camera to make it do what you need, rather than what it wants. With a bit of work and patience, you can learn to take great photos in low light. The benefit is that low light conditions are often beautiful. Most places and landscapes look beautiful at dusk. Shooting at these times will help you take moody photos.

Do you have any ideas for shooting in low light? Let us know in the comments!


If you enjoyed this article and would like to learn more about the creative side of photography then please check out my ebook Mastering Photography. It shows you how to take control of and be creative with your digital camera, no matter what your skill level!

The post 6 Tips for Getting Consistent Results Shooting in Low Light by Andrew S. Gibson appeared first on Digital Photography School.


Digital Photography School

 
Comments Off on 6 Tips for Getting Consistent Results Shooting in Low Light

Posted in Photography


5 Top Value Lenses for Getting Started in Wildlife Photography

12 Sep

Getting started in wildlife photography is one of the more expensive genres of the photo industry. The lenses and cameras that are often in the bags of pros are more often than not in the higher tier price brackets. However, to get started you don’t need to spend a fortune to gear up with some great lenses for wildlife photography.

Lenses are the thing to invest in when starting out in wildlife or as any photographer for that matter. The glass you purchase can stay with you for many years, while often cameras are updated far more regularly. Meaning, if you spend your money wisely you won’t have to outlay again.

wildlife photography lenses

Now of course as you gain more experience and want to invest it into your work, you might outgrow some gear or wish for more pro features. But when you’re getting started, the lenses I’ve listed below are a great base to build on and invest in, that will not only provide excellent quality results but also hold their value within your gear bag. These lenses will cover a range of shooting situations so you can capture the natural world in all manner of ways to really follow your creative vision.

1 – The Telephoto Zoom 70-200mm

Firstly, we are going to start with the telephoto zoom. For most wildlife photographers this is one of the most used lenses in their arsenal, offering flexibility to compose portraits of wildlife to more landscape style images to put your subjects in the environment.

5 Top Value Lenses for Getting Started in Wildlife Photography

The 70-200mm zoom is an excellent investment.

As an investment, the 70-200mm is a key lens to get hold of as it offers so much in the way of performance and flexibility. Most people will feel that 200mm is a little shot for wildlife, but with practice and development of your stalking skills, especially when paired with an APS-C camera it’s a great place to start.

The f/2.8 is the most coveted version due to its fast aperture for gorgeous bokeh (out of focus areas) as well as its autofocus speed. The f/2.8 version is a higher cost lens retailing new at around $ 2000 but secondhand (especially a slightly older version) can be had at excellent prices. If they are still a little out of the price range, think about the f/4 version. Smaller and lighter they are also a lot cheaper, still offering top performance for getting into wildlife photography.

5 Top Value Lenses for Getting Started in Wildlife Photography

The 70-200mm is perfect for working with largest animals.

2 – The Prime Option 300mm F/4

If you want something a little longer think about looking into a 300mm f/4 prime lens. These fixed focal length lenses don’t zoom, so you have to move your feet to get the composition correct. However, due to their nature as primes they have excellent optical performance, offering wonderful sharpness as well as a reasonably fast aperture for creating pleasing portraits with your of focus areas as well as working in less than perfect light.

5 Top Value Lenses for Getting Started in Wildlife Photography

300mm f/4 lens.

The 300mm f/4 is a lens that has been on the market for a long time now and both Nikon and Canon lenses can be easily found for an excellent price secondhand even from dealers with included warranties. The 300mm f/4 was the telephoto that I used when I became more serious with my photography and it helped me on the path to shooting professionally. So I can vouch for its excellent qualities.

wildlife photography lenses

3 – Ultra Telephoto Zoom 100-400mm

If prime lenses aren’t your thing then the 100-400mm (or the Nikon 80-400mm) might be a better fit for your style of shooting. The excellent range makes it a very versatile lens for wildlife photography, giving you the ability to switch from close portraits to environmental shots in an instant.

5 Top Value Lenses for Getting Started in Wildlife Photography

80-400mm Nikon lens.

Buying new gives you the best options for getting a top spec lens, with the latest iterations having excellent sharpness, autofocus and image stabilization, whilst older models are slightly weaker in all aspects. If you are looking to invest in one of these I’d recommend trying to get hold of the latest model as it will last you a long time and really provide you with a top lens for getting some great wildlife images.

I would certainly recommend these as name brand lenses over third party manufacturers, as they are far better optically engineered. Often when starting out with wildlife photography, some people go for the longest superzoom they can find like the 150-600mm or 50-500mm. But these suffer from optical quality and often lead to frustrating results.

5 Top Value Lenses for Getting Started in Wildlife Photography

The 80-400mm is a great compact wildlife photography lens for travel.

4 – Wide Angle 10-20mm

When shooting wildlife photography, going wide a great way to create far more interesting images than super telephoto shots. Of course, as that isn’t always an option, spending a vast amount of money on a super wide especially if you are not focused on shooting landscapes as well can be overkill.

5 Top Value Lenses for Getting Started in Wildlife Photography

Canon 10-18mm lens.

Luckily both Nikon and Canon have excellent low-cost APS-C wide angle lenses that really offer great performance and functionality at decent prices. The new Nikon 10-20mm and the Canon 10-18mm are perfect candidates for wide angle wildlife shooting. Their ultra-wide view can pull the viewer into an entire landscape, while the close focuses of a mere 0.2m allow you to get up close and personal with your subjects (often wirelessly triggering) for impact filed images.

5 Top Value Lenses for Getting Started in Wildlife Photography

The 10-20mm is perfect for wide landscape shots or wildlife in the landscape.

wildlife photography lenses

Shot using the 10-20mm wide-angle lens.

These lenses cost around $ 300-500 so are brilliant options to give a wide scope to your shooting potential.

5 – Macro Lens 100/105mm

If you are interested in getting in close and looking at details as a wildlife photographer you’ll want to look into a macro lens for close up shooting. These specialist optics offer 1:1 life size reproduction ratios that are awesome for shooting insects and plants.

5 Top Value Lenses for Getting Started in Wildlife Photography

105mm macro lens being used in the garden.

The 100mm focal length is where you really want to invest as it offers the best in terms of performance, as well as a good working distance to help reduce the chance of your disturbing your subjects and getting in the way of your own lighting. The 100mm macro is a slightly more expensive lens but having been on the market for a while there are often many secondhand copies available offering discounts on the new price of around 30-40%.

It’s a truly great investment as these lenses are among the sharpest on the market with optical perfection that makes them a staple in many pros bags. The lenses are also great for a variety of non-macro tasks as well, with them often being used by portrait photographers for their flattering compression that makes beautiful backgrounds.

Conclusion

That’s a round up of a few of the top lenses to invest in if you are getting started in wildlife photography. They maybe slightly higher in price than some of the third party alternatives or lesser models, but these lenses will hold their own for many years, meaning the extra savings and investment will pay off with certainty in the long term.

wildlife photography lenses

If you do wildlife photography what lenses did you start off with? Which do you recommend? Please share in the comments section below.

The post 5 Top Value Lenses for Getting Started in Wildlife Photography by Tom Mason appeared first on Digital Photography School.


Digital Photography School

 
Comments Off on 5 Top Value Lenses for Getting Started in Wildlife Photography

Posted in Photography