Many cities have places with great panoramic views of the city vistas from above. For example, in the U.S., New York has the top of the Empire State Building or Rockefeller Center. Similarly, Chicago has observation decks in both the Willis Tower (formerly the Sears Tower) and the Hancock Building. In Europe, there are great views of Paris from Montparnasse Tower. You can capture London from the top of St. Paul’s Cathedral, or now the observation deck of the Shard (the new tallest building in London), and the list goes on.
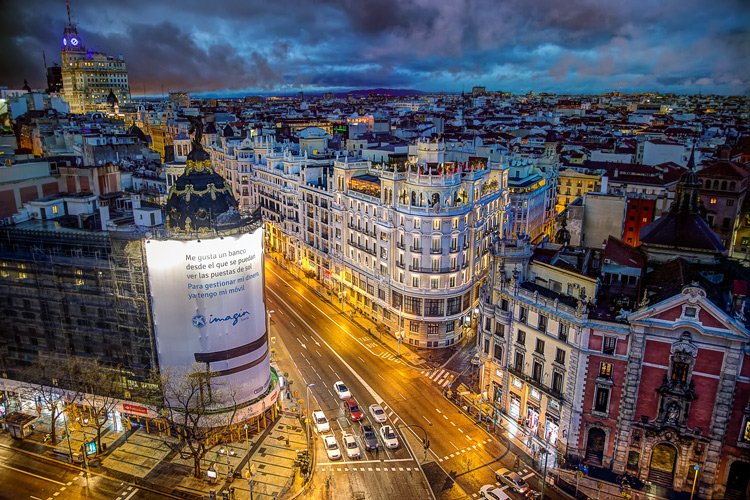
The Gran Via in Madrid, Spain, from the Circulo des Bellas Artes
But these shots present certain challenges. Often tripods are not allowed. Sometimes you have to shoot through glass. And when should you go? What settings should you use? In this article, we’ll work through these issues so you can get great shots from these city overlooks.
What? I Can’t Use My Tripod?
Sometimes you are allowed to use a tripod, and sometimes not. Each building has its own rules. To make things even more interesting, some buildings seem to have different rules depending on when you visit (or perhaps the mood of the security guards). So you will need to be prepared to shoot without a tripod.
If you go up the building in the middle of the day, that might not matter very much. There will be enough light to support a fast shutter speed, and you can get away with hand holding. But if you are shooting in dim light or at night, you will want to use a longer shutter speed. That will require some sort of stabilization.
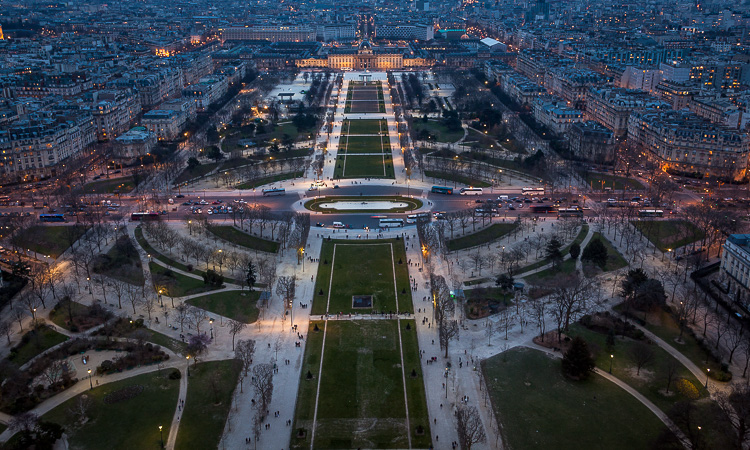
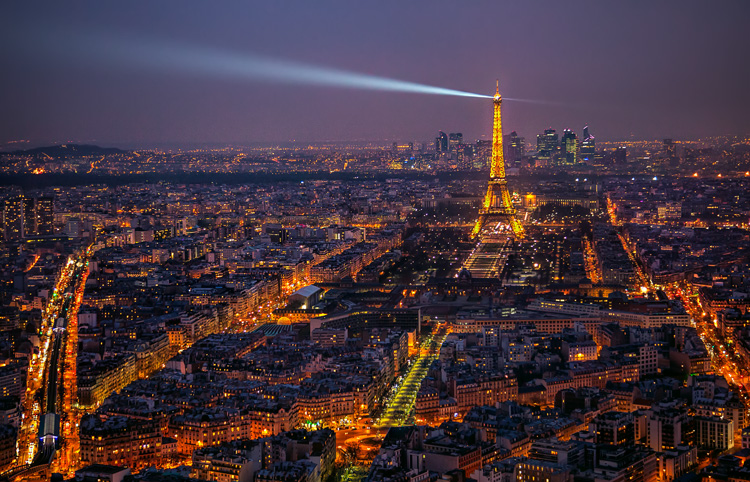
Paris from the Eiffel Tower
In almost every case, you will find something available at the top of the building to support your camera. Sometimes you have to resort to using the the floor (which can work if you press your lens up against the window), but often there is some sort of shelf to use. Many buildings have plexiglass panels at the top, with small gaps between them, and you can hold your camera against the sides of the panels to steady it.
Shooting Through Glass
Oftentimes, you are photographing from an enclosed structure surrounded by glass. That means reflections are going to be a problem. I wish there was a magic bullet to solve this problem, but there isn’t. I do have a few tips to help you minimize the reflections though.
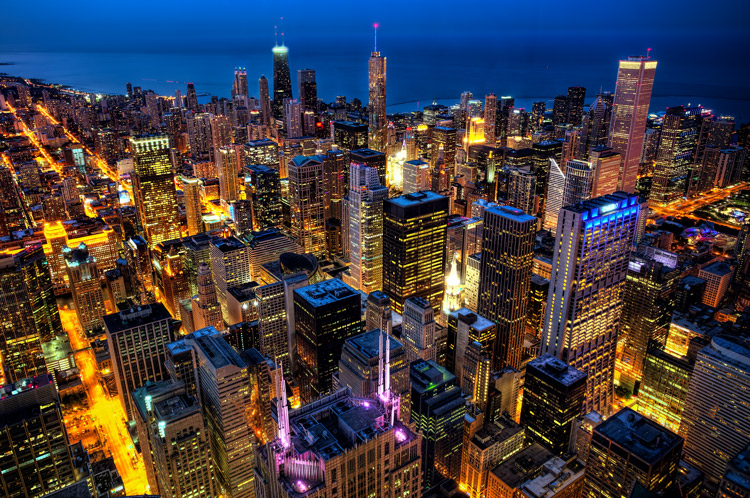
Chicago from the Willis Tower (formerly known as the Sears Tower)
Before resorting to that, see if there is any way to shoot unobstructed. As mentioned above, some buildings have plexiglass panels on top. There are often carve-outs in the panels that you can shoot through, which you should definitely use. If not, check to see if you can shoot between the panels. That will avoid the whole issue with reflections.
If not, you are going to need to take steps to minimize reflections. Let’s start with one that should be obvious (but I always see people doing it). Do not use your camera’s flash. First of all, the flash is useless in this situation. Everything will be too far away for the flash to have any effect. More importantly, the flash will cause reflections and glare in the glass.
Next, hold your camera directly up against the glass. This will minimize reflections. In addition, make sure your point of focus is set far away from you and that your camera is not trying to focus on the reflections.
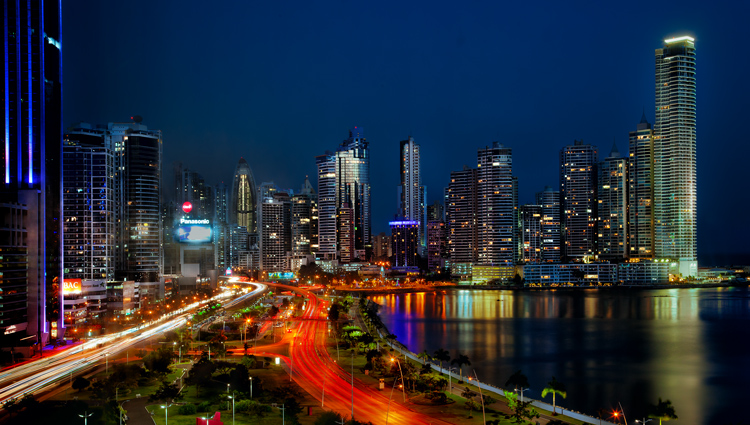
Panama City, Panama from the Intercontinental Hotel (shot through glass)
If you are on your own (like in a hotel room or somewhere you can set up), then make sure all the inside lights are off, and use the curtains to block any light coming from the room. Some photographers hold a black cloth against the window with a hole cut in the center to shoot through. If you have the opportunity and time to prepare, that is the best option.
Usually, you will find yourself in a public place where such steps are not possible. In that case, just use your body or hand to block any areas of glare or bright light.
After that, just take a few pictures and see if there are any reflections in the final result. Zoom in on your LCD to take a close look. If you find any reflections or glare, just adjust your position slightly to try to get it out and shoot again. You would also try a polarizing filter.
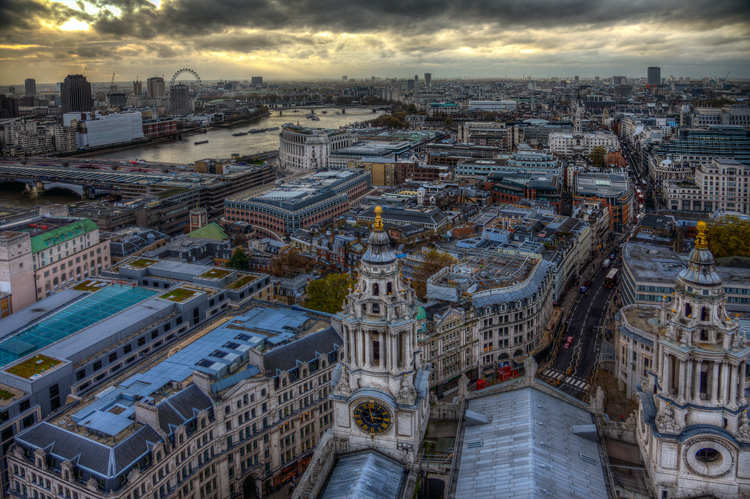
London from the top of St. Paul’s Cathedral
What Camera Settings Should I Use?
Your exposure settings will depend on how much light is available at the time you are shooting. While I obviously cannot give you exact exposure settings, I can give you a few ideas to maximize your light and get the best exposure.
First and foremost, remember that you don’t need to use a small aperture for these shots because you do not need a deep depth of field. Your focus will be set at infinity. Nothing in your shot will be within 50 feet/15 meters of you. Too see this for yourself, take a look at the distance scale on the top of your lens (assuming it has one). It will show you that everything farther than about 30 feet/10 meters is set at infinity (in fact, the focus will be at infinity even sooner for wide angle lenses). There will not be a wide range of distances in your shot that require a deep depth of field. Therefore, if you find yourself in need of more light to create your exposure, widening the aperture is a good place to start.
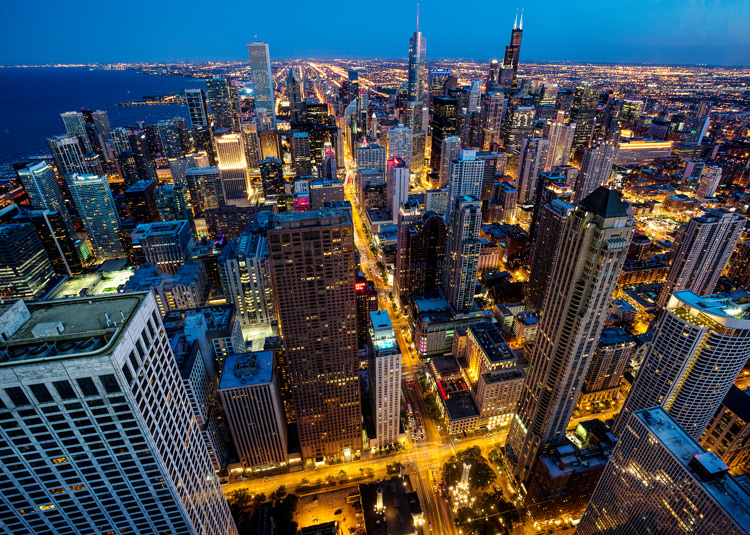
Chicago from the Hancock Building
Your other two exposure settings (shutter speed and ISO) will depend entirely on whether you can use a tripod. If you cannot use a tripod, raise the ISO until your shutter speed is fast enough to hand hold. Remember you can cheat a little bit and use a slower shutter speed than usual by propping your camera on something. But blur from movement during the exposure will ruin the picture. Remember that digital noise can be fixed in post-processing, but camera shake cannot. Raise the ISO as much as you need to get a supportable shutter speed.
If a tripod is allowed, things are much easier when it comes to exposure settings. You can use as slow a shutter speed as you want. That will also allow you to reduce the ISO, and use a smaller aperture as well. In fact, you may want to keep the the ISO low and the aperture small to force the camera to use a long shutter speed. That will capture traffic trails, create some movement in the clouds, and other effects.
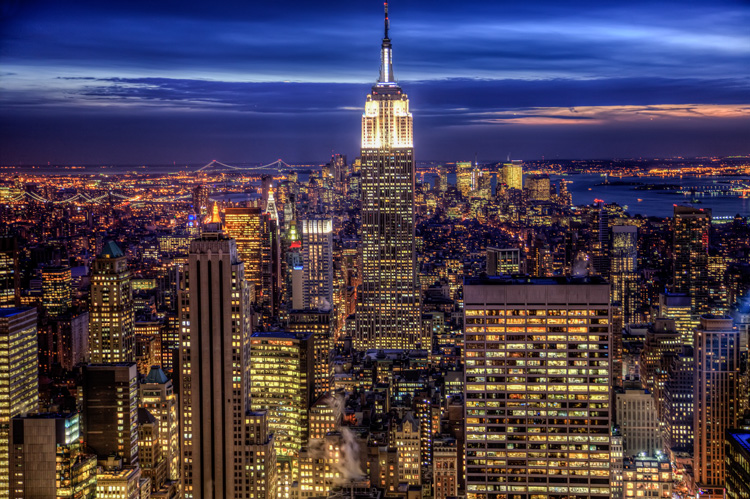
New York, from Rockefeller Center (Top of the Rock)
Finally, consider bracketing your photos, especially if you are shooting at night. The scene before you will contain bright lights and dark portions. This will challenge your camera’s dynamic range. Even if you will never use any sort of blending or HDR, you might be pleasantly surprised by the overexposed or underexposed images.
Making a Composition from a Jumble of Buildings
When you are up high in a building overlooking the city, you will have a great view, but that doesn’t necessarily mean a great picture. The key to success is creating a composition out of what is before you, in other words to generally find a center of interest. That is, find something to key on that will anchor the picture. Sometimes it is obvious – like when you are staring at the Empire State Building or the Eiffel Tower – but other times it isn’t. You’ll just have to find something to center your picture on. It could be a building that stands out, perhaps a bridge, or even a leading line.
In doing so, don’t overlook the usual compositional rules. Start with the Rule of Thirds. Put your horizon line on either the top third or the bottom third. After that, you might consider placing an important, or prominent, feature on one of the vertical third lines.
Paris from the Montparnasse Tower
Just these two concepts – ensuring you have a center of interest and following the Rule of Thirds – will go a long way to ensuring success. After that, you can find lines, shapes, and forms to work around. Experiment with different focal lengths and angles. Remember that nothing is moving so you can keep experimenting all you want.
When to Go
Deciding when to go capture you city view from above will have more to do with how the pictures turn out, than anything else you do. Avoid going in the middle of the day. Travel schedules don’t always allow that, but that is the worst time for these pictures.
If you are going to a public observation deck, when you can go will be limited by the opening hours of the building. They are generally not open early enough for sunrise, so that won’t be an option. Almost all locations are open for sunset and a few hours of darkness, so that is often an option.

London from the tower of Westminster Cathedral
The best time to go is just before sunset. You will have the best of all worlds with one ticket. You can capture the sunset and twilight. After that, just wait around for a little while for some night shots.
But in any case, go. It is an easy way to get great shots of whatever city you happen to be visiting. Get up high and capture the city from above.
googletag.cmd.push(function() {
tablet_slots.push( googletag.defineSlot( “/1005424/_dPSv4_tab-all-article-bottom_(300×250)”, [300, 250], “pb-ad-78623” ).addService( googletag.pubads() ) ); } );
googletag.cmd.push(function() {
mobile_slots.push( googletag.defineSlot( “/1005424/_dPSv4_mob-all-article-bottom_(300×250)”, [300, 250], “pb-ad-78158” ).addService( googletag.pubads() ) ); } );
The post Tips for Doing City Photography from Above by Jim Hamel appeared first on Digital Photography School.


You must be logged in to post a comment.