In Lighting 101, 102 and 103, we learned to control our flashes. In the Strobist Lighting Cookbook, we're expanding that approach to learn to move in a fluid way between flash and continuous light. Read more »
Strobist
In Lighting 101, 102 and 103, we learned to control our flashes. In the Strobist Lighting Cookbook, we're expanding that approach to learn to move in a fluid way between flash and continuous light. Read more »
Strobist
 |
Flash manufacturer Phottix has announced it will introduce an Odin ll transmitter for Pentax users in April. Designed with ‘direct cooperation’ from Pentax engineers, Odin claims the trigger has been extensively tested on the 645Z medium format camera and the company’s flagship K-1 DSLR. It also said to be compatible with the K-5 and K-7 models.
The Odin ll transmitter will allow users to control the Phottix Indra studio heads as well as the Juno manual hotshoe flash unit. The press release doesn’t mention the Mitros + TTL flash unit, though it should be able to control that off-camera via the Odin system—if not via the hotshoe. Users will also be able to use Strato ll, Atlas ll and the Ares ll receivers to control and trigger third party flash units.
As with other Odin ll transmitters, the Pentax model will offer 32 channels and five groups with which to control off-camera heads via a wireless 2.4GHz radio system, and high speed sync will be supported with shutter speeds of up to 1/8000sec.
The Odin ll for Pentax will cost $ 140, and orders are being accepted now for April delivery. For more information, visit the Phottix website.
Press Release
Bringing the power and control of the Phottix ecosystem to Pentax users
Phottix’s flagship Odin II TTL Flash Triggering system has expanded to include a new transmitter control unit (TCU) compatible with Pentax cameras. Developed with direct cooperation from Pentax engineers at Ricoh Imaging in Japan, the Phottix Odin II for Pentax brings the power, control, and ease of use of the Phottix TTL lighting ecosystem to Pentax users. Tested extensively with the Pentax 645Z Medium Format DSLR Camera and the ground-breaking Pentax K-1 DSLR, the Phottix Odin II gives Pentax users more creative control over their art.
Harness the Power of the Phottix Ecosystem
The Phottix Lighting Ecosystem System offers solutions for every photographer, from lighting minimalists to studio professionals. With the Odin II for Pentax, users can trigger and control the power level of the Indra 500TTL Battery Powered Studio Light in both TTL and Manual modes as well as adjust the modeling lamp all from the top of their camera. Also compatible are the newly introduced Juno Manual Speedlight and receivers from the Phottix Odin, Strato II, Atlas II and Ares II flash trigger systems.
“The Odin II for Pentax enables us to take our 645Z from the studio to on-location! Even in full sun, the Odin II’s HSS support allows us to Take control of ambient light and get amazing results from our 645Z and Indra 500 combo!”
Yaneck Wasio, Wasio Photography
Tame the Sun and Ambient Light
The Odin II allows Pentax users the ability to use High Speed Sync and shoot at speeds of up to 1/8000s on compatible cameras. When paired with the Phottix Indra500 TTL, shutter speeds are no longer a limitation.
Enjoy an Interface Built for Photographers By Photographers
The Odin II for Pentax user interface was built off feedback from photographers across the globe. Features such as individual buttons for each group – A, B, C, D, E, and an analog thumbwheel give users quick and direct access to their strobes from the top of their camera when they need it most.
Stand Out from the Crowd
The Odin II features 32 channels as well as a Digital ID function to completely eliminate interference and outside triggering. Digital ID is a four digit code that secures the connection between compatible Phottix products and will only allow triggering signals from products using the same four-digit Digital ID code. Now there is far less to worry about when shooting in crowded situations like sporting events or concerts.
Price and Availability:
The Odin II for Pentax retails for $ 139.95 and is available for preorder now at major retailers and will start shipping to customers in April.
Technical Specifications:
* Indra 500TTL compatibility requires a free firmware update available on Phottixus.com
Articles: Digital Photography Review (dpreview.com)
$ (document).ready(function() { SampleGalleryV2({“containerId”:”embeddedSampleGallery_0972431050″,”galleryId”:”0972431050″,”isEmbeddedWidget”:true,”selectedImageIndex”:0,”isMobile”:false}) });
Sony just released a new flagship radio-triggered wireless flash for its full-frame E-Mount cameras. The HVL-F60RM has a built in radio receiver, which means it can be triggered simply via a FA-WRC1M Wireless Radio Commander attached to your E-mount body. It’s a powerful unit with a guide number 60m at 200mm, ISO 100. The flash covers a zoom range of 20-200mm and promises to provide “uniform wide-range zoom coverage without shading with continuous shooting up to 220 flashes.”
The HVL-F60RM does not replace the HVL-F60M flash, which remains in Sony’s lineup for A-mount cameras. The RM version is designed specifically for E-mount (though it will work with A-mount, but without AF Assist), but even for A-mount it has the added benefit of not requiring a separate radio receiver mounted to the flash to be triggered wirelessly.
Several improvements have been made to make the RM version worth your money. First, you don’t need a separate radio receiver attached to your flash. Also, heat resistance has been increased by “as much as” 4x, recycle time has been reduced to 1.7 seconds, and a new External Battery Adaptor (the FA-EBA1 seen in the gallery above) can drop that recycle time even further to just 0.6 seconds.
Additional features include non-directional wireless radio communication from up to 30 meters away, support for up to 15 flash units (assigned to up to 5 groups) when the flash is mounted to a compatible camera and used as a transmitter, an LED Light and AF Illuminator, and a dust and moisture resistant design that “allows flash shooting even in challenging environments.” But there’s one important thing to keep in mind…
Sony removed the AF assist beam from the original HVL-F60M that projects a red grid upon your subject to quickly help the AF system achieve focus on subject in total darkness, say, on the dance floor at a wedding. This is a huge omission and sad oversight. We have yet to see if any light is triggered – Sony’s claim that there’s an AF illuminator indicates that at least some AF assist light is triggered. But a blinding LED is not what subjects at events in the dark want thrown in their faces. Instead, Sony should’ve built in a an AF assist grid that’s projected onto nearby subjects for quick AF in low light. Since Sony’s AF pixels on most modern a7/a9 bodies actually use blue color filters, a blue AF assist grid would be ideal, and wouldn’t even bother subjects you’re focusing on significant.
We hope Sony develops a radio transmitter that projects a blue grid for AF-assist in the future, for fast AF in total darkness
Sadly, all Sony E-mount cameras will do with this flash is project a bright LED on your subject for focus, making it difficult to shoot professional events in low light. That’s a huge shame, and our last remaining hope is that Sony develops a radio transmitter to be mounted on-camera that projects this AF grid to help achieve focus quickly.
Here’s a quick video intro to this new flash:
To learn more, head over to the Sony product page for either the HVL-F60RM flash or the FA-EBA1 external battery. The HVL-F60RM costs $ 600 USD (€700), while the FA-EBA1 External Battery Adaptor will run you $ 250 USD (€300). Both products will begin shipping in April.
Press Release
New HVL-F60RM Combines Overwhelming Continuous Flash Performance with Advanced Operability and Wireless Control
SAN DIEGO, Feb. 22, 2018 – Sony Electronics, a worldwide leader in digital imaging and the world’s largest image sensor manufacturer, has today announced a new flagship addition to its digital imaging range with the launch of the HVL-F60RM Flash.
Addressing the needs of the increasing numbers of professional photographers adopting the Sony ? system, the HVL-F60RM offers high-power flash output, reliable continuous performance and advanced control features with integrated radio control options.
The HVL-F60RM has a guide number of 60[i] and covers illumination angles from 20mm[ii] to 200mm[iii] providing uniform wide-range zoom coverage without shading with continuous shooting up to 220[v] flashes. The use of heat resistant materials and the deployment of new advanced algorithms means that heat resistance has been increased by as much as 4x[iv] compared to the previous model, HVL-F60M.
Further improvements have been made to the recycle time which has been reduced to 1.7 seconds[v] or just 0.6 seconds[v] with the new External Battery Adaptor, product code FA-EBA1. A unique benefit of previous Sony flashes, Quick Shift Bounce is included, allowing the photographers to quickly shift from horizontal to vertical orientation, 90 degrees left or right, upward by up to 150 degrees, and downward by 8 degrees for flexible positioning and optimum lighting for a wide range of scenes.
Independent light output level (LEVEL -/+) buttons allow direct control of output or compensation, supporting an efficient workflow. A comprehensive display facilitates adjustments and flash output level confirmation, and also provides intuitive access to flash output settings for paired wireless flashes.
Functions can be freely assigned to the unit’s four-way controller, center button, and control wheel for easy access when required. Furthermore, TTL flash output can be memorized and recalled in manual mode when needed for immediate use or use after minor adjustment. This is another feature that can simplify manual workflow and save time.
The dust and moisture resistant design[vi] of the HVL-F60RM allows flash shooting even in challenging environments and a new optional Rain Guard[vii], product code FA-RG1, provides added protection to the connection between the flash and camera[viii]. Another example of the complete attention to detail that has gone into the design of the HVL-F60RM, is the metal foot of the Multi Interface Shoe™ connection which has been re-designed for increased rigidity and reliability.
A pre-requisite for leading-edge studio set-ups, the wireless radio communication is non-directional so receiver flash units can be positioned anywhere up to approximately 30 meters[iii] away from the camera, even in situations where reflectors or other obstacles would interfere with optical communication. A HVL-F60RM mounted on a compatible camera[ix] functioning as transmitter can be paired with off-camera units functioning as receivers. Multiple flashes are supported with the user able to use up to 15 flash units, assigned in to up to 5 groups[x] or wireless flash control and the use of a pairing system effectively prevents interference from other electronic devices.
The new HVL-F60RM will be available in North America in April, 2018 priced at approximately $ 600 US or $ 730 CA.
The new FA-EBA1 will be available in North America in April, 2018 priced at approximately $ 250 US or $ 330 CA.
The new FA-RG1 will be available in North America in April, 2018 priced at approximately $ 25 US or $ 30 CA.
[i] 200mm at ISO100 in metres
[ii] 14mm with wide panel
[iii] 35mm full-frame equivalent
[iv] Sony test conditions
[v] With Ni-MH batteries, Sony test conditions
[vi] Not guaranteed to be 100% dust and moisture proof
[vii] Not to completely protect against water ingress. When the camera is held in the portrait orientation or at a tilt for photographing, in particular, it may fail to protect water ingress
[viii] With this unit attached, the camera may fail to record audio during video shooting, depending on the model. For the camera models to which this precaution applies, visit http://www.sony.net/acc/rg1/.
[ix] Refer to the Sony support page for camera compatibility information. http://www.sony.net/flash/f60rm/
[x] In the Group flash mode. Up to 3 groups in the TTL or Manual flash mode
Articles: Digital Photography Review (dpreview.com)
 |
| Photo by veeterzy |
Storage speeds on smartphones, Chromebooks, VR headsets and automotive devices are about to make a huge leap forward. Standards group JEDEC has announced the new UFS 3.0 flash storage standard, which doubles the theoretical speed of the current UFS 2.1 standard to 2.9 GB/s, all while lowering power consumption and allowing for operation at a greater range of temperatures.
This theoretical maximum likely won’t be achieved by production devices, but the standard does require the host device to use hardware that supports these blistering fast transfer rates.
What does this actually mean for smartphone cameras? If you are only capturing still images, you won’t see much of a difference; but for video shooters, this could be huge. The new standard allows for 4K video capture at 60 frames per second or even 8K resolution without putting nearly as much stress on your device.
 |
In combination with larger storage capacities—Samsung, for example, has promised to include 512GB modules in its upcoming smartphones—this new standard could make ultra high-resolution video recording on mobile devices standard. If you later want to transfer the recorded footage to another device or computer, the faster speeds help with that, too.
And, finally, the new standard also offers lower power consumption and increased reliability in a wider range of operating temperatures.
As usual, it’s not clear when we will see the first UFS 3.0 ready devices; the new standard will probably take a while to implement on a wider scale. But given Samsung is by far the biggest NAND memory module manufacturer, there is a good chance the Korean company will be among the first to offer the new standard in its smartphones. Something to look forward to in the Galaxy S10, perhaps?
Articles: Digital Photography Review (dpreview.com)
If you are confused by the massive range of flash heads produced by Chinese manufacturer Godox, you’re in luck. Professional photographer Robert Hall has produced a very useful video that aims to explain the differences (and similarities) between them all.
In the video, Hall goes through the functions of five ranges of heads, points out who they are designed for, and then talks about each of the 17 models Godox produces in all, covering the features each of the heads do and don’t have. He includes an amazing amount of detail and specification, making clear what you get with each model. He even provides a spreadsheet that lists prices, output, recycle times and flash duration, as well as other features and physical characteristics.
The video has information on the DP, SK, QS, GS and QT studio and portable heads, and if you can’t take all the information in quickly enough Hall has written a lot of it in the video’s description.
Articles: Digital Photography Review (dpreview.com)
 |
At CES 2018, Western Digital has introduced what it calls the world’s smallest 1TB flash drive, a tiny USB-C model sporting the SanDisk brand. This flash drive isn’t yet available on the market; instead, it’s acting as a demonstration of Western Digital’s latest advances in storage innovation.
The SanDisk 1TB USB-C model has a “classic” long flash drive form factor—not the newer form factor that fits almost entirely within a USB port—but the company managed to squeeze a full terabyte of storage into this still-tiny size, though it hasn’t provided additional details such as speed, cost, or anticipated launch date.
 |
In addition to showcasing the 1TB USB-C drive, Western Digital has launched the SanDisk Ultra Fit USB 3.1 Flash Drive, a model it calls the smallest 256GB USB drive in the world. This drive features a low-profile form factor and a read speed up to 130MB/s.
The flash drive is currently listed on the SanDisk website for $ 150 USD, but is still shown as not-in-stock.
Articles: Digital Photography Review (dpreview.com)
 |
Broncolor has launched the RFS 2.2 F for Fujifilm cameras. The new transmitter-receiver was made in collaboration with Godox, making it possible for Fujifilm owners to use broncolor’s pack systems and monolights. When used with supported products, namely broncolor’s Move and Siros lines, RFS 2.2 F supports high speed flash sync speeds up to 1/8000s. The device is also backward compatible with Senso, Scoro, and other RFS 2-enabled products.
The transceiver, which was previously launched for Canon, Nikon, and Sony, features a rotary control wheel alongside a backlit LCD and PC sync/hot shoe pass-through. Likewise, the RFS 2.2 F supports up to 99 studio channels with up to 40 lamp groups per channel. Radio connectivity range spans up to 100m / 300ft.
Broncolor says the RFS 2.2 for Fujifilm is available as a preorder for $ 112, with shipping planned to start “later in December.” But as The Phoblographer noted yesterday, Godox itself offers a very similar Fujifilm HSS transmitter for less than half the cost, at $ 46.
Articles: Digital Photography Review (dpreview.com)
Using a flash or speedlight on-camera can be daunting at first. This was certainly how I felt when I first purchased my Nikon speedlight. My biggest worry was calculating all the light ratios involved to get a proper exposure as you cannot take into account the actual flash output when metering in-camera. I was also nervous about using a light meter – all that trial and error and faffing, the thought of it all used to make me quake in my boots and swear I’d forever be a natural light photographer. But that was not to be, thankfully.
My main reservation about using flash is the harshness of the light. I hate the “flashed” look on people’s faces, the shadows under the jaws, the bright circular catchlights right in the middle of the iris. As well, the flatness of the face with the direct flash obliterating all possibility of sculpting shadows on the face.
But I live in London where it rains quite a bit, it’s hardly sunny at all, and half the year is cold. All these factors affect natural light and I felt I just had to put aside my reservations and take the leap. And I’m so glad I did.

Let me share with you how I use flash to help me achieve the look I am after and without having to do the mental calculations of light ratios!
It may only be a little plastic thing that goes on top the flash head but I find it makes a difference. The light is less harsh – I know many will disagree about whether it softens the light or not as that is mainly due to the size of light and distance to subject – but I notice a softness from a diffused flash head compared to a bare one.

Left: without a diffuser. Right: with a diffuser.
I only use a flash bare and pointed towards the camera when I am using it as a kicker light and want starburst effects coming from it.
Set your flash to manual and choose the power. I’m usually at 1/32 or 1/16 and leave it there. Adjust the flash power only when absolutely necessary. Instead, make the frequent necessary adjustments to your camera settings.
Now I know there are many big fans of ETTL / TTL mode out there. I have tried it too. However, I have gone back to Manual as I find the TTL does not give me the look I want. Essentially, I only want my flash to be a fill light, not the main light and never too strong so that you can see a huge difference between the light coming from the flash and the ambient light. The ETTL / TTL mode is too smart for my needs and increases the output to a pretty high level if it senses that the ambient light is too weak, and vice versa. I felt I’d get an inconsistent output of light for the look I am after although that output may be “correct” in terms of the calculations.
For portraits, I find that the greater the contrast between the dark background and the illumination of the subject with a flash gun, the more I dislike the image. For dancing shots (like at a wedding), however, where I want to illuminate the subject well and freeze the action, I DO point my flash directly at the subject, stop down my aperture to between f/5.6 and f/8 and lower my shutter speed between 1/20th and 1/60th in order to capture ambient light and light trails or background blurring to give the effect of movement.

This image was created using a bare bulb flash (no diffuser) located behind and pointing directly at the couple (off-camera flash). I also had a second flash on-camera with a diffuser, and the flash aimed upward.

This image was created with a diffused flash pointed directly at the couple (camera in front of the couple, flash on-camera) while they were dancing. The motion blur was created by using a slow shutter speed and “dragging the shutter” after the flash has fired.
What I’m after is always a natural look, which, depending on where the main light is coming from, may not be achieved well without some kind of fill or reflected light to illuminate areas that are too dark for my intentions. This is the reason why I always bounce or angle my flash gun for most scenarios other than dancing as explained above.
On some newer models, there is also a little white pull-out bounce card that is extremely useful if your ceilings are too high for the light to bounce off or you just want to point reflected light in a particular direction. When I shoot weddings where the rooms have very high ceilings or dark beams and ceilings. So I pull out the bounce card and use it to deflect the light coming from the flash. The handy swivel action helps me direct the reflected light wherever I want it to go.

My speedlight with the white bounce card extended.
As an aside, I use this setup for off-camera flash too. When I’m putting two speedlights opposite each other in a room to provide directional light during speeches, I point the flash heads upwards and pull out the diffuser so that all the reflected light is pointed inwards towards the center of the room.
The head of most speedlights can swivel right and left up to 90 degrees each way and forward and upward to 90 degrees in incremental angles. It is an awesome functionality that you should take advantage of especially for fill flash.
In the photos below, bright sunlight was coming from camera right at 45 degrees on a bright day. All I wanted was a bit of fill flash on their shadowed faces, just enough to lift the shadows a tad. What I really wanted to avoid was for the image to look like there was another light source other than that from the sun. To achieve this, I angled my speedlight upwards towards the back by one increment.

As you can see, these photos below have very strong sunlight coming directly at the subjects and towards the camera, a very strong backlit light. It is extremely difficult to overpower this type of light without using a strong flash. What I did was angle myself slightly to one side and pointed my flash directly at the subjects’ faces to try and counteract the sunlight.
This is when I adjust my flash power and increase it accordingly. The result is not as clean and sharp as if I had a big softbox firing at 70% ratio to the sun’s power but it still shows the faces clearly enough with some diffused hazy light in the background, which was also my intention for these shots.

Compare the two images below. The one on the left was taken in a big open space with a dense foliage background which blocked the light. There was enough light here to illuminate their faces that I could have done away with the flash altogether, but I pointed the flash backward to add just a tiny bit of light over my head. I don’t think it made a huge difference but it made me feel better and consistent!
The image on the right was taken in a shaded open area surrounded by tall trees which diffused the light coming from the background. Without the trees, it would have had the unfiltered effect as above, but despite the trees, this is still very much a backlit position as the background was very bright still. More fill light was needed there so I pointed the speedlight slightly upwards, with one increment down towards the subjects but not directly at their faces.

You can see the same flash angle as above on these close-up portraits below.

In the same spot as above, I wanted a look that was a little moodier than those close-ups so I pointed the speedlight directly upwards this time. So although their faces are still amply lit up, the image to feels like they are being enveloped by the diffused light behind them.

The couple wanted a shot showing the lake and the trees in the far distance. The distance was too great to get the couple and the background sharp enough without using a really small aperture and a lot of artificial light (flash). Note that we were also in the shaded part of the lake which made it more difficult. I decided therefore that I would take a cozy shot that focused mainly on the background. The couple looking towards the trees, although they are not the lit focal point, they are still clearly visible and sharp. I pointed the speedlight slightly forwards to give them just a hint of light and shot with a small aperture.
Contrast the top image below to the photo directly underneath it where the depth of field has changed massively – the background now is blurry and the couple is in focus. This had the same angle of flash, slightly forwards, but of course, my camera settings changed to a wider aperture and lower ISO to balance the exposure. Now with the couple still in the same shaded spot, the angled flash was clearly essential here. Had I pointed the flash directly to their faces, it would have been too obvious and would kill the natural light ambiance that I was aiming for.

For this ring shot below, we sat on a bench with the sunlight coming from camera left. I put the ring on my phone to get a dark background and a nice reflection. With ring shots, I always stop down to at least f/7 with a macro lens. Therefore I need to make sure there is plenty of light for the shot as macro lenses tend to suck light.
I also always use a speedlight pointed directly opposite the main light. So in this case where the light is at camera left at 8 o’clock (if you’re looking at a clock face with the diamond at 6 o’clock), I swiveled my flash head to the opposite at around 4 o’clock to give off a bit of reflected light on the right side of the ring.

Likewise, on the photo below, you can clearly see where the sunlight is coming from so I pointed my speedlight slightly upwards to camera left, opposite the sunlight. This angle helped me achieve a gradual decrease of light from right to left as opposed to a dramatic one where you can see a clear cut-off from light to dark.

If you haven’t tried using flash like this before, I encourage you to do so. Experiment and see how it could work for you. You don’t need to learn the lighting ratios and calculations off by heart to be able to get images you are after, although that could be handy.
Sometimes all you need is confidence, common sense, and a willingness to try. I hope you found this little tutorial useful. If you have more tips, share them in the comments below.
The post How to Use an On-Camera Speedlight as Fill Flash for Portraits by Lily Sawyer appeared first on Digital Photography School.
Learning to use off-camera flash allows you to create and shape light, giving you plenty of new opportunities for dramatic photography.
But for many photographers, starting up with flash can be intimidating. It’s not just a matter of aiming a flash at your subject and hoping for the best. Choosing the wrong angle or positioning for your flash can have a negative effect, casting unflattering or irregular shadows.

A tennis player lit by off-camera flash cross lighting
I remember when I was starting out with off-camera flash I would sometimes get images where the light simply didn’t look right. But when it’s used effectively, flash adds to an image – it shouldn’t make the lighting seem unnatural or otherworldly (unless, of course, that’s the effect you’re going for – to each their own!).
But where’s a good place to start? Where should you put your flash in order to get good light? This article will show you one method you can use called cross lighting that you can use to create dramatic images with off-camera flash.
For both beginners and pros alike, cross lighting is a very quick and simple setup that results in a dramatic, well-lit shot.
Like the name implies, this setup features two light sources on opposite sides of the subject. Hitting your subject from both sides adds a sense of depth to the image, while still producing natural-looking light.

An example showing an off-camera flash cross lighting setup for a portrait of a tennis player.
Typically you want your light that will provide the most illumination, also know as the key light, placed in front of the subject and a bit to one side. For portraits, you will typically want to use a modifier on your light, such as a softbox or umbrella. This isn’t a requirement – but it will help soften the shadows and create more flattering light on the subject.
The purpose of this key flash is to light up the subject’s features and put a sparkle of catch light in their eyes.

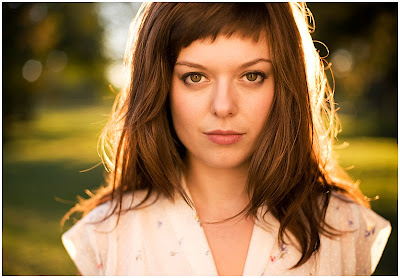
We convinced this model to act as our stand-in for a few quick portrait shots. Here is an image with only the key light, an off-camera flash positioned to the right of the camera.
The second light is placed behind the subject on the opposite side as the first one. The purpose of this light is to create an “edge” of light around your subject. This is traditionally called a “rim light” or a “separation light” since it helps to separate the subject from the background.

By adding a second light to the left of the camera and behind our model, we’ve created a rim of light that separates him from the background for a much more pleasing and dynamic image. Notice the highlight on his hat and hand on the left side.
Voila! This quick setup is an easy way to get started and start exploring the creative potential of a shoot. As you begin to snap pictures, you may find something about your setup that you want to change, but the cross lighting gives you a solid foundation from which to build.

We’ve flipped the orientation of the lights for this shot – while keeping the same cross-lighting style. Now our key light is on the left, and the rim light is provided from the right.
One of the reasons I love using this setup for off-camera flash is that it takes away the guesswork and provides a solid foundation of light that you can then begin to work with and modify.
And also that it takes only moments to set up! When you start lugging around multiple flash units, light stands, and modifiers, it’s nice to have a consistent starting position that provides even lighting.

An overview of our setup, with the flashes oriented for cross-lighting and our subject right in between.

The final shot, where the light has given a sense of depth to make the subject stand out from the clutter behind him.
It’s a good idea to get the correct flash power for your key light dialed in before adding your second flash. Trying to figure out the correct outputs for two lights at the same time and adjusting in your camera on the fly is a recipe for a headache.
One of the reasons this setup is so easy and versatile is because you don’t necessarily need to use two flash units – the sun can step in as either your key or secondary light.
This approach is particularly effective at golden hour. As evening falls and soft, warm light floods across the fields, you have a ready-made separation light. Many natural light photographers are already familiar with this and use this rim light in their shots.

The key light here is an off-camera flash fired into an umbrella just outside the left edge of the image. The sun, coming from the right, acts as the secondary light. The key here is in balancing the flash with the natural light.
The benefit of adding an off-camera flash as a key light is that you can create a much more dramatic image with dark, rich colors. Colors lose their vibrancy as they get brighter. By keeping the exposure low and using your off-camera flash to light up your subject, your background can be full of vivid contrast and color.
The sun doesn’t always have to play second fiddle to your flash. You can create the same effect by using the sun as your key light – coming in at your subject from a slight angle – and then using your off-camera flash as the rim or separation light.
The biggest drawback here is that you can’t adjust the power of the sun quite as easily as you can on the back of your flash! However, taking the time to learn how your camera settings can make a picture darker or lighter, and how you can use this skills in conjunction with your off-camera flash, will give you allow you to build the shot you want.
Here’s the last variation of this setup. By setting up your off-camera flash on one side of the subject and angling a reflector just right on the other, you can mimic the effect of two light sources. This approach might take a bit of practice and a steady hand, but it’s a fun way to learn what you can accomplish as you learn how to control light.

Here we used a reflector to provide the key light from the left side of the shot, while the sun comes from the back right.
Learning to maneuver and shape light is a fun challenge. Being able to quickly and reliably get top-notch results with flash is an important aspect of photography – especially if your model or clients are waiting impatiently for you to get your lighting figured out.
By starting with cross lighting and working from there, you have a reliable method for nailing some great shots. Please share your comments, questions and cross lighting images in the comments section below.
The post How to use Off-Camera Flash to Create Dramatic Images with Cross Lighting by Frank Myrland appeared first on Digital Photography School.
Using flash is already complicated enough, but adding in a fast shutter speed makes it even harder. In these two videos, you will learn about your camera’s flash sync speed and why it’s limited. Then you’ll see what you can do to solve it and use faster shutter speeds using something called high-speed sync.
In this first video, Matt Granger explains the mechanics of what is going on inside your camera and why it has a maximum flash sync speed. With the use of some great slow-mo clips, you will see inside the camera to learn exactly what happens when you press the button.
In this next video, J.P. Morgan from The Slanted Lens will walk you through exactly what high-speed sync is and why it’s needed. You’ll learn how your camera shutter works and why your camera sync-speed won’t let you use fast shutter speeds with flash without high-speed sync (often referred to as, HSS).
He is using the some of following gear:
If you need more help using your flash check out these dPS articles:
The post What is Flash High-Speed Sync and Why Do You Need it? by Darlene Hildebrandt appeared first on Digital Photography School.
You must be logged in to post a comment.