RSS
 

Posts Tagged ‘Five’

Five Steps to Benefiting From Social Media Networks for Your Photography

21 Aug

This article is about how I think you can use social media network sites for your best benefit. I am suggesting there is one single thing which you should concentrate on that you can get there with just five steps.

As I have already suggested, I do recommend photography-centric social media networking sites. The one I have used most is Flickr, but I am not endorsing that particular site. Search “social media networks photography” (or similar), and almost any of the sites found will do the job, in largely similar ways. Play around, you might find one which better suits your style, your way of thinking.

Five Steps to Benefiting From Social Media Networks

And much more!

WHAT DO YOU WANT?

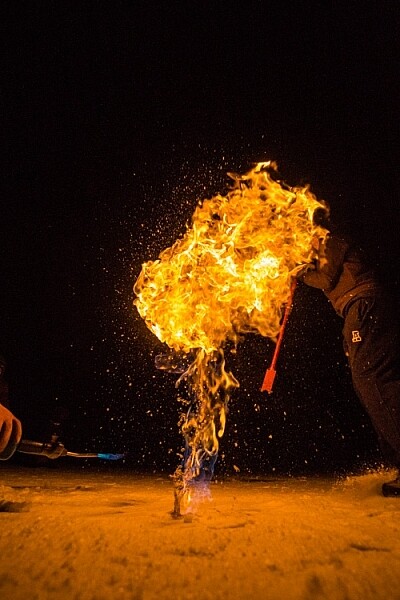
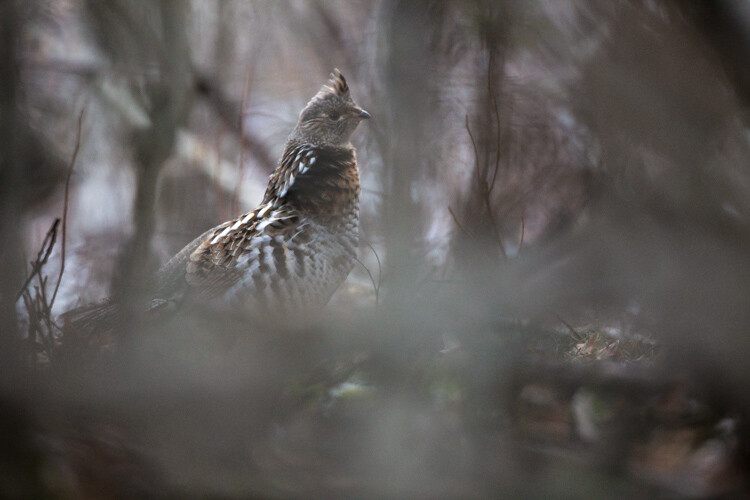
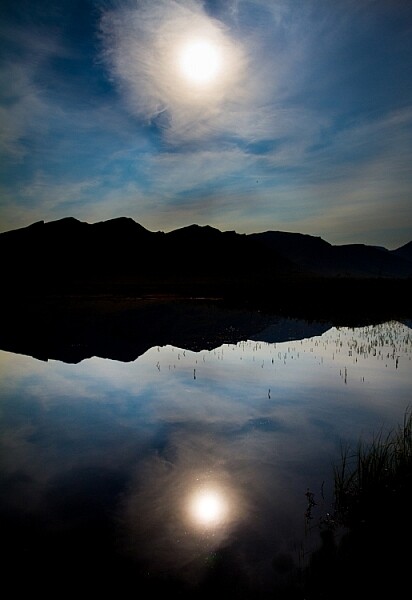
This photograph has over 14,000 views and has been added as a favorite 600 times. It is my most viewed and most faved photograph on Flickr. How can that be? Really? What are its merits which cause it to be so lauded?

Five Steps to Benefiting From Social Media Networks

Girls of Bahrain.

The truth is that its photographic merits are VERY limited. I could give you an explanation of why this image has been such a success, but that is not important. What matters is that it helps make the point that “views” and “faves” and even casual comments such as “Great capture, cool shot” mostly mean very little whatsoever.

That is an extreme way of putting it but I’ll stick with it and avoid drawing it out and giving a long justification. However, I think those numbers below mean very little. Though it might have some interest, it is not what you would call a good photograph.

Five Steps to Benefiting From Social Media Networks
THIS IS WHAT YOU WANT!

I have never properly thanked the person concerned, maybe the mention in this article will make up for that.

King of the souq.

I shared this photograph. The comment I received was:

“Another very “Richard Messenger”ish shot. Do all your subjects coincidentally make the same expression, or do you somehow force it out of them? Haha. His somewhat-there-but-still-flat-sort-of-smile looks very familiar to previous portraits you’ve taken.”

I think I knew the truth pretty much straight away, but it took a little while longer to fully accept it. At some point I linked the comment with Rick Sammon’s adage that “The camera points both ways” and realized why too many of my subjects did, indeed, have that same expression. They were simply reflecting my expression.

It is very difficult to make that sort of realization on your own. People pay thousands of dollars to gain such insights. I had received the comment, and great insight, from an honest person, with clearly good intentions, who expressed themselves kindly AND who happened to be right. What more can you ask? Good comments are priceless.

Five Steps to Benefiting From Social Media Networks

Comments please.

What I want, and what I think will move your photography forward too, is comments. Receiving AND making comments has certainly helped me. Unfortunately, it is very unlikely that you can simply post your photographs, however stunning they may be, and expect people to start commenting. You will need to do a little work.

NEED RELIGION?

Five Steps to Benefiting From Social Media Networks

Do unto others.

The Golden Rule is among the values espoused by most religions and philosophies. Of the various versions, this seemed a good, simple way of expressing how to approach making comments.

“Try to treat others as you would want them to treat you.”

Or, on a perfect day, we could turn to Lou Reed.

“You’re going to reap just what you sow.”

However, you want to put it, in terms of religion, philosophy, or pop culture, it is a good principle to hold in mind when you are making comments.

STEP ONE – JUST TAKE A LOOK

Five Steps to Benefiting From Social Media Networks for Your Photography

Just look … think …

You might want to start on the nursery slopes for the first day or two, week or two even. There is a lot to be learned by looking at photographs and keeping the following in mind.

  • Why do you like a particular photograph?
  • How do you think it was taken?
  • What is it that appeals to you?
  • When was it taken?
  • Which equipment was used?
  • Why was it taken?
  • Where?
  • … and so on

STEP TWO – COMMENT!

Here’s the thing. I am not going to burden you with long paragraphs of explanation, give real world examples, or quote academic research. I am just going to tell you that the person making a comment often learns more than the one receiving the comment.

Five Steps to Benefiting From Social Media Networks for Your Photography

Will she? Won’t she?

When you are ready to abandon all buoyancy aids, this is where you jump into the swimming pool. You now begin to sow, so try to treat others as you would want them to treat you. Keeping in mind Kipling’s six mates, you now start to comment.

Just taking the example of Flickr, there are a massive number of groups, with all sorts of specialized interests. You will probably find it productive to browse around, join them, and start making comments within the different rules of each group. Nothing ventured, nothing gained!

My personal rule is that I do not hang around. If a thought does not start to form very quickly in respect of a photograph, I move on. It is, of course, totally up to you, but I suggest that you do not spend too much time scratching your head.

Five Steps to Benefiting From Social Media Networks for Your Photography

What can I say?

As many a politician would testify, “no comment” is better than a rubbish comment.

Then, as a guideline, you might follow a Rule of Threes. Start off by simply trying to say three things (even just two) which you like about the photograph. Three positive comments stating what you think of the scene, how it makes you feel, what you think the story might be, and what compositional aspects you like. You may find it best to stick to only positive comments for a week or two. It is possible that you will start to get reciprocal responses, but you cannot guarantee it.

(To avoid all sorts of complications, but not without some mild embarrassment, I am commenting on my own photographs).

Five Steps to Benefiting From Social Media Networks for Your Photography

River bed scavenger.

  • An unusual and very appealing photograph.
  • I get the impression that the woman is almost lost in what is a much bigger space.
  • The texture is amazing, and the limited color palette really helps draw attention to that.
  • I really like the way the two patches of dry land balance and seem to point to the solitary figure.
  • It is one of those photographs where you immediately start to wonder what the story is and ask what she is doing.

STEP THREE – GETTING TECHNICAL

Then the next step is to start making a comment or two on technical aspects that you think are good, and which you think contribute to the photograph.

Five Steps to Benefiting From Social Media Networks for Your Photography

Innocence captured.

  • This is a lovely picture of innocence.
  • The contrast between her smooth skin and the textures in the shot work well.
  • The muted colors enhance a mood of loneliness, maybe even sadness.
  • It is really effective to see how you have used the bars, and the shape of the doorway in the background to suggest a frame within a frame.
  • The depth of field seems to be perfect, throwing her face into the highlight, concentrating the viewer’s focus.
  • I would be really interested to know what you did in processing this shot.
  • The subject is central, but I think there is plenty happening around the frame to make the image dynamic enough.

STEP FOUR – THEM CHANGES

Finally, you might tentatively start to suggest things that you might change, or which you think might be helpful. Remember – do unto others!

Five Steps to Benefiting From Social Media Networks for Your Photography

Hey, did you happen to see…?

  • I have never seen this view of the Taj Mahal before. It remains instantly recognizable even though it occupies a very small part of the frame. You did really well to find the shot.
  • Having seen your photographs before, I know you do limited manipulation in processing, so very well done on capturing the bird in just the right place.
  • Lovely evening (?) light, with good exposure keeping just the right amount of detail in the right places.
  • I cannot see the EXIF data and would be very interested to know what focal length you used. It looks like a wide angle to get the tree in the frame, yet the Taj Mahal seems quite close.
  • Any suggestions regarding such a good photograph will necessarily be tiny details. If you had just dipped your knees even an inch, I think it would have been even more perfect to have a gap between the top of the right-hand minaret and the tree branch.
  • I wonder of a small crop, perhaps a sixth off the top and the left side, may have concentrated the view.

STEP FIVE – RESPOND

You can always hint, or just ask directly, “Can you please comment on my photos?”. However, my experience is that once you have commented on their photographs, people tend to feel inclined to comment back. Again, this is my personal rule, but I would strongly argue that it is a good one. I try to always respond, or at least acknowledge any comment.

Admittedly, I have not always taken criticism well, but I think I’ve learned to give it more credence, to encourage it. One example of this is if the person commenting suggests something that I can change … a crop, a processing adjustment, changing to black and white … whatever, just do it and post the result. If there is a way of tagging the person, that is likely to help sustain the conversation.

Without being religious or philosophical, can I just give the same advice again, in a different, rather parental way, PLAY NICELY! and remember to say Please and Thank You.

TAKE IT FURTHER

Five Steps to Benefiting From Social Media Networks for Your Photography
There are a quite a lot of places which are specifically aimed at giving a critique of photographs. As you might have spotted, these include the Digital Photography School Facebook group.

CONCLUSION

The single thing you should concentrate on is making and receiving comments. Getting worthwhile comments is your aim. Take some gentle steps, apply The Golden Rule, and you might just develop a good community. You really can benefit hugely from making and receiving worthwhile comments when it comes to social media networks.

The post Five Steps to Benefiting From Social Media Networks for Your Photography by Richard Messsenger appeared first on Digital Photography School.


Digital Photography School

 
Comments Off on Five Steps to Benefiting From Social Media Networks for Your Photography

Posted in Photography


Five useful photo apps for travelers

12 Aug

Photo apps for travelers

Photographers take great care in choosing the right gear for a trip. Why not make sure your smartphone is well equipped for photography too? After all, it’s probably the camera you’ll have with you in the event that your DSLR battery comes up short, or your shoulders need a break from the weight of your photo bag.

While the stock camera app will serve most people just fine, there are a huge number of photo apps that go a step further – offering unique shooting features and clever editing options. Whether it’s a late summer getaway or just a trip to the park, these five iPhone apps (a couple of which are available for Android, too) can help you get a better shot to remember the journey by.

SKRWT
iOS/Android | $ 1.99

Travels often take photographers to new cities, but accurately rendering tall buildings and structures with the iPhone’s wide-angle lens alone can be problematic. SKRWT (pronounced Screw It — seriously) is handy for correcting perspective and lens distortion.

When you compose a shot that is angled upwards at a building, for example, the resulting picture often shows lines that converge at the top. SKRWT focuses exclusively on straightening horizontal or vertical lines so the picture depicts more of what the eye perceives. With SKRWT, applying corrections takes a bit of user input, including prepping the image for the vertical correction filter and moving the slider to align the image with the grid. The app provides full auto cropping, vignette correction, ratio adjustments, and an EXIF reader alongside Mobile, Wide, Fisheye, and GoPro modes.

You can save the corrected photo to a dedicated gallery or directly to your camera roll. SKRWT also features two in-app extensions: MRRW (pronounced Mirror), a mirroring tool, and 4PNTs (pronounced Four Points), a four-point-perspective tool for skewing and transforming images. Both apps are available as in-app purchases for 99 cents each.

If you find yourself drawn to taking photos of local architecture and wishing you could correct some of the distortion on the fly, SKRWT is a nice option.

Hydra
iOS | $ 4.99

Hydra shoots, processes and merges multiple images in an effort to produce a higher quality image. It offers five capture modes: HDR, Video-HDR, Lo-light, Zoom, and Hi-Res. Depending on available light, Hydra can merge up to 60 frames to create a single high-resolution shot, with an output of up to 32-megapixel images.

Hydra’s best use case is dimly lit, moody landscapes or interiors where you are able to hold your phone stock still — the app will not complete a shot if there’s too much motion. The HDR mode captures up to 20 images in challenging lighting conditions while the Video-HDR setting uses single-image tone mapping or a special sensor mode (for the iPhone 6), and then offers a choice of light intensities and video resolutions.

Zoom mode aims to correct motion blur, though as with other modes, it’s best to hold your phone steady to avoid unexpected results. Hydra is designed for specialized circumstances as a complement to rather than a substitute for the built-in iPhone camera app, but it’s great to have on hand for quiet, dark places.

Think you may end up printing low light photos from your trip? Hydra is worth having on hand.

ProCam 4
iOS | $ 4.99

ProCam 4 is a classic photographer’s app that aims to pack plenty of manual controls — as well as a robust photo editor — into your iPhone. Its wide assortment of settings comes in an easy-to-use format that won’t throw you off track when you’re in a hurry. The shooting app, which includes both photo and video mode, offers specialized settings like Night Mode, Burst Mode, Slow Shutter, Video, and Time Lapse.

You can manually select ISO, shutter speed, exposure, bracketing, white balance, and stabilization. A histogram helps with exposure settings, and in addition Raw support, manual focus, and focus peaking are offered. If you have an iPhone 7 Plus, try shooting some Wigglegram 3D photos with the iSight Duo camera — two photos taken at the same time by each of the phone’s cameras alternate in quick succession to produce a 3D effect that you can save as a GIF or video. In addition to broad shooting options, you can also edit photos and videos with controls for saturation, white balance, exposure, brightness and contrast, perspective correction, and a mix of special effects filters.

If your smartphone is occasionally asked to stand in for your dedicated camera, ProCam is worth downloading for its complete set of manual controls.

Google Street View
iOS/Android | Free

While you’re hiking the trail or strolling the city, anytime is a good time to create a Google Street View 360-degree photo. You can shoot it right from the app on your iPhone — no special equipment needed. The app does most of the work of indicating when to shoot as you pick a scenic spot and start rotating your body to follow the orange circle on your screen. Start with your phone’s camera and follow the app prompts until you have all angles of your image filled in.

As you shoot, the circle automatically repositions itself to help you complete your photo. When you’re done, the app stitches the panels together. Then, publish to Google Maps to share your photo spheres. The app lets you manage public and private images, observe contributions from others, and view your captures in Cardboard mode with a VR viewer. You can also share your photo spheres on Facebook, Twitter, or privately via email.

Those who rarely use their smartphone camera may still enjoy Google Street View’s easy 360-degree photo creation and documentation features. Plus, it’s a handy way to scope out nearby locations for photo opportunities.

Enlight
iOS | $ 3.99

Enlight is an advanced mobile photo shooter and editor that works independently or with the iOS photos app to offer advanced editing options and visual effects. With its hide-show main menu, coupled with a tap-and-drag interface, you get total control over your photo’s details, tone, color, and special effects. Each menu item opens into a variety of options, letting you crop, adjust, apply filters, sharpen, and add a host of artistic elements using adjustable presets, tools, and masks.

Masking features let you blend effects, while artistic and film-based presets let you add grain, black and white conversion, sketching effects, patterned surfaces, and more. A photo mixer lets you merge two photos together for double exposure, and montage. Enlight’s art filters can transform your photo into a watercolor, oil painting, or sketch. Want to start with the basics? No problem: Simple improvements like crop, skew, color adjustment, and healing are available, and then easily combined with decorative borders and frames, vignette lighting, gradients, and vintage filters. Top it off with doodles, decals, special effects, and customized text.

If you’d like your camera to come with a side of stylized editing options, consider Enlight.

Best free and paid options

These five apps work well, especially for the popular, specialized shots and circumstances for which they were designed. But if you only want to download one or two before you hit the road, here are our picks.

Best free option

The only free app in the group — Google Street View for iOS or Android — is a standout in its own right. With this app, dipping a toe into 360-degree image creation requires no special camera or photographic skill. The app’s integrated instructions provide everything you need to start shooting and posting impressive scenic landscapes that viewers worldwide can enjoy. If you’re carrying a dedicated camera, it provides a nice way to complement your traditional photos with something a little bit different – and with no penalty of carrying an extra device.

Best paid option

On the paid side, ProCam 4 gets the nod as the best app for its range of pro-level options, including detailed shooting controls, DSLR-style functionality, Raw support, and a variety of editing features.


The apps above are a tiny sample of creative mobile photo shooters and editors. If you have a favorite that was not mentioned, be sure to share it in the comments.

Articles: Digital Photography Review (dpreview.com)

 
Comments Off on Five useful photo apps for travelers

Posted in Uncategorized


Five reasons to choose a PC over a Mac for photo and video editing

18 Jul

Photographer Manny Ortiz uses both Windows and Mac computers to edit his photos and video work, so when it came time to choose his next laptop he had a choice: 15-inch MacBook Pro or spec-ed out Dell XPS 15. He chose the PC, and in this video he offers the top 5 reasons why he made that choice.

Most Mac vs PC opinions are put out there by people who are heavily invested on one side, which is what makes Ortiz’ point of view refreshing. He has no loyalty. He uses both systems regularly, and spends the last part of the video praising the Mac for its various strengths. Still, when it came time to plunk down a couple grand on a new machine, he chose the PC.

Here’s why:

  1. Money – The spec-ed out Dell cost $ 1,000 less than an equivalent MacBook Pro
  2. Ports – The new MacBook Pros have been lambasted for their lack of ports, and Manny doesn’t hold back either. The dongle life is not for him.
  3. Ability to Upgrade – With the MacBook, what you buy is what you get. If you’re thinking of upgrading the RAM, or swapping out the SSD, forget about it. With the latest builds, it’s all but impossible.
  4. Touchscreen – This one is very subjective, but for Manny, the touchscreen on the XPS is a big win.
  5. Nvidia GTX 1050 GPU – Manny isn’t implying the Radeon Pro chips in the MacBook Pros aren’t great, but he’s had nothing but good experiences with the Nvidia GTX 1050 inside the Dell.

And that’s it. Obviously, there are a lot of other factors you could mention here—wins for both the PC and the Mac—but for Manny the decision was simple. The hardware on the PC was better, and he was getting it for $ 1,000 less.

Ever since the new MacBook Pros with their lack of ports came out, many photographers have been talking about switching to PC for their mobile editing needs. Have you considered it? And why would you choose one over the other? Let us know in the comments.

Articles: Digital Photography Review (dpreview.com)

 
Comments Off on Five reasons to choose a PC over a Mac for photo and video editing

Posted in Uncategorized


Five Tips for Fun Family Photos

06 Jun

It’s family photo time!

Grab a tripod for your phone or DSLR, a shutter remote (if you don’t want to mess with the self timer) and some candy to bribe the kiddos.

We’ve got just a few tips from arranging your pretty faces, to going totally nuts, that’ll ensure a fun time taking the pics and an even funner time enjoying them forever.

p.s. Family photos make perfect Father’s Day gifts for dads and grandpas. Save 20% on all photo prints at Parabo Press through 6/7 with the coupon PJDAD.
(…)
Read the rest of Five Tips for Fun Family Photos (433 words)


© laurel for Photojojo, 2017. |
Permalink |
No comment |
Add to
del.icio.us

Post tags:

The post Five Tips for Fun Family Photos appeared first on Photojojo.


Photojojo

 
Comments Off on Five Tips for Fun Family Photos

Posted in Equipment


Five Ways to Improve Your Composition Skills

15 Apr

Composition is one of the most important skills you can learn as a photographer. The interesting thing about composition is that it’s all to do with observation and learning to see. You may need to invest in a book or two to help you understand the basic principles, but nothing more. It’s a much more cost-effective way of becoming a better photographer than buying a new camera or lens!

There are five things you can do right away to improve your composition skills.

Composition and photography

1. Learn how to use your camera properly

The aim is to know your camera so well that you can photograph without thinking about it. This comes through familiarity and practice.

Try this exercise. Close your eyes and pick up your camera. Which buttons and dials do you need to use to adjust aperture, shutter speed, and autofocus? How do you select the active AF (autofocus) point? How do you apply exposure compensation? If you don’t know the answers without looking, then read your manual. You should be so familiar with these settings that you can adjust them automatically, with no more than a glance at your camera.

Learn this simple approach

Digital cameras have lots of menu options and it’s easy to get caught up in adjusting settings. I suggest you ignore most of them and keep your approach simple. Here’s how:

  • Always shoot RAW format and set White Balance to Daylight or Auto and keep it there. Pick one camera profile and stick with it. You can adjust all of these settings afterward in Lightroom.
  • Don’t touch any settings such as lens corrections, contrast, dynamic range, noise reduction, sharpness or highlight preservation. These are all irrelevant if you shoot RAW.
  • Don’t switch between metering modes. Stick to one and learn how it works.
  • Understand your camera’s focus modes and when to use each one.
  • Learn how to select the active AF point so you can make the camera focus where you want.
  • Make sure you know how to switch to Manual shooting mode and when you should do so.
  • Learn how to apply exposure compensation, preferably without taking your camera away from your eye.

For most forms of photography, you don’t need to know anything more than that. The main exception is anything that involves fast action, as you may need to adjust your camera’s autofocus settings to suit. The idea is to know your camera so well that you can concentrate on observing the subject and finding the best possible composition.

Composition and photography

Some photographers say that the dials on cameras like the Fujifilm X-T1 (shown above) and old style film cameras help them adjust settings quickly.

Fiddling with your camera’s settings is a distraction. The more attention you pay to your settings, the less you’ll pay to the composition of your images.

2. Look beyond the obvious

The first viewpoint you find when you take a photo of something may not be the best or most interesting.

When you find a worthwhile subject spend some time with it. Try and look beyond what first attracted you to it. This is called working the subject.

  • What happens if you photograph it from another angle?
  • With another lens?
  • Or if you get closer or further away?
  • Is there anything interesting about the subject that you have overlooked?

For example, if you are taking someone’s portrait it might be because they have a captivating or beautiful face. But what else is interesting about them? Their clothes? Jewelry? Tattoos? Look beyond the face and see what you can find.

Composition and photography

I made some portraits of a friend of mine. But he also has interesting hands. After I made the portraits I asked him to hold his hands out and made this photo.

3. Educate your eye

You can learn a lot about composition by studying the work of master photographers. It’s time to pick some photographers whose work you like and get analytical. I like looking at photos taken decades ago. Photographers back then worked with much simpler equipment and didn’t have our technological advantages. Yet the best still created beautifully composed images.

So, how did they do it? When looking at somebody else’s work ask yourself these questions:

  • Are they working in black and white or color? How would switching from one to the other affect the composition?
  • What is the focal point of the image? Is it positioned in the frame according to the rule of thirds or could there be other principles at work?
  • What shapes and patterns do you see?
  • Is there any negative space in the photo? How much room does the subject have to breathe?
  • Is the photo balanced or unbalanced? What is the visual relationship between the various elements in the scene? Which are dominant and which are secondary in importance?
  • Can you tell what lens focal length the photographer may have used? How would using a different focal length affect the composition?
  • How did the photography create a sense of depth?

Questions like these deepen your understanding of the work of other photographers. The answers inform your work as you evolve as a photographer.

Composition and photography

This landscape scene was lit by the light reflected from the clouds and sky after the sun disappeared below the horizon. I first became aware of the beauty of this type of light when looking at the work of Galen Rowell, a famous adventure and landscape photographer.

4. Work with geometry and symmetry

Learn to look for shapes in your photos. A good place to start is with anything man-made, as we tend to build things with recognizable shapes like triangles, squares, and circles.

Repeating shapes create patterns and symmetry that can also form the basis of an interesting composition.

For example, when you look at this photo, what do you see?

At first glance, it’s a photo of an outdoor cinema screen in a Chinese village. But look closely and you start to see shapes. The rectangle of the screen is an obvious one. But did you notice the diamonds made by the pattern in the flooring? Or the organic shapes of the Chinese characters on the wall?

5. Use punctuation and gesture

Jay Maisel talks a lot about gesture and Bob Holmes talks about punctuation. Look up the work of these two photographers to learn more about these concepts.

Punctuation is the addition of something interesting, often a human figure, that completes a scene. The photo needs that little something extra to lift it above the ordinary. Punctuation is an important part of street and travel photography.

For example, this photo is completed and made stronger by the presence of the woman in the doorway.

Composition and photography

In his book “Light, Gesture & Color” Jay Maisel defines gesture as the thing that reveals the essence of the subject. Everything has it. Gesture takes us beyond the superficial to the essence of the subject and reveals itself through observation.

Imagine you are photographing a mountain. What do you see? Maybe it’s the shape of the mountain against the sky. The textures of the rocks scattered over the surface, the steepness of its cliffs, or the way that clouds wrap themselves around the summit. All these things are part of the gesture of the mountain, the things that make it what it is.

With people, gesture is a mixture of body language and attitude. If you are making a street photo it may be in the body language or appearance of somebody in the photo. If you are making a more formal portrait it is something in the model’s expression or body language that helps create mood or communicate character.

In this photo the pose and expression of the dancer are gesture.

Composition and photography - gesture

Punctuation and gesture are advanced concepts. But it’s worth thinking about how you can apply them to your photos, as they help make the composition of your images stronger.

Conclusion

Composition is an important skill. It takes time to master, but it’s worth the effort as the quality of your photos will improve immensely.

Do you have any other suggestions for ways to improve your composition skills? Please let us know in the comments. I’m looking forward to seeing what ideas you come up with.


Andrew is the author of the ebook Mastering Composition.

The post Five Ways to Improve Your Composition Skills by Andrew S. Gibson appeared first on Digital Photography School.


Digital Photography School

 
Comments Off on Five Ways to Improve Your Composition Skills

Posted in Photography


Fotodiox Pro launches five GFX lens adapters

21 Feb

Fotodiox Pro has launched five new lens adapters for the forthcoming Fujifilm GFX medium-format system. This will allow lenses from other systems to be used with the GFX 50S, though as Fotodiox’s website points out, not every lens will give great results. All tilt-shift lenses and many full-frame lenses longer than 50mm will cover the GFX’s sensor, but anything wider will produce vignetting.

The new lineup features adapters for the Canon EF-Mount, Nikon F-Mount, Olympus OM-Mount, Mamiya 645, and Contax. The adapters are priced at $ 150 with the exception of the Mamiya 645, which is priced at $ 170.

The adapters are made entirely from metal with chrome-plated brass mounts and a ‘precise fit and solid connection.’ The company also says it uses ‘enhanced craftsmanship and high-tolerance construction for demanding professionals.’

Finally, Fotodiox cautions, ‘This is a manual adapter, so lens functions that rely on electronic communication with the camera body (autofocus, AE metering, image stabilization, etc.) will be disrupted.’ All five lens adapters are available from the company’s website now.

Via: ThePhoblographer

Articles: Digital Photography Review (dpreview.com)

 
Comments Off on Fotodiox Pro launches five GFX lens adapters

Posted in Uncategorized


Throwback Thursday: Five camera accessories you probably didn’t need

27 Jan

Five camera accessories you probably didn’t need

Plenty of useful camera accessories come on to the market every year – but among them are some real duds. So let’s take a look back at some of the worst offenders, shall we? The first product that comes to mind, at least around here, is the Sony Party-shot.

The Party-shot, introduced in 2009, was actually pretty clever. You popped on a compatible camera (originally the Cyber-shot DSC-WX1 and TX1) and off it went. The ‘personal photographer’ could rotate 360° and tilt up or down 24°, and would use the camera’s Face and Smile Detection features to follow subjects and take a photo at the right moment. It even used the Rule of Thirds for proper composition! The Party-shot was portable, making it the thing to talk about at parties (no pun intended).

Oh, and be sure to watch this:

Five camera accessories you probably didn’t need

No more waving your arms or calling out your childrens’ names to get them to look at the camera, thanks to the Look Lock by Tether Tools. It’s a simple enough gadget: it’s a smartphone holder on an articulating arm that attaches to your camera’s hot shoe. What you put on the screen is up to you. It can be videos, photos or, God forbid, clowns.

To give credit where it’s due, Samsung produced several DualView cameras that had an LCD panel on its front plate to essentially do the same thing. And it did have a clown mode.

Five camera accessories you probably didn’t need

Back in 2007 SanDisk released special ‘Ducati’ edition memory cards as well as a USB stick. This wasn’t just an unusual marketing scheme: at the time these ‘turbo-charged’ cards were also significantly faster than SanDisk’s other offerings at the time. They were also pricey, with that 8GB CF card going for $ 315 and the 4GB SD card priced at $ 130. That snazzy 4GB USB stick was $ 125.

In case you’re wondering about that SD card, it’s what SanDisk called ‘SD Plus’. The card could split open, exposing a hidden USB connector, so you could plug the card right into your PC. Not surprisingly these cards broke quite easily, and the ‘Plus’ designation now means ‘above average’ in SanDisk’s lineup.

Like many things, the partnership between SanDisk and Ducati didn’t last long, which is why I still treasure the 8GB SanDisk Extreme Ducati Edition CF card that I hide in my desk.

Five camera accessories you probably didn’t need

Back in the late 1990s transferring photos from camera to computer was a pain in the butt. You had to hook up a serial cable and those big 1.3 Megapixel files chugged along at a whopping 115kb/sec.  Then a company called SmartDisk said ‘why not make a device that lets you put that SmartMedia card into your floppy drive!’ And so the FlashPath adapter was born. 

The concept was pretty simple. Just pop two watch batteries into it, put the SmartMedia card into the side and insert it into your PC’s floppy drive (remember those?). That assumes that you’ve installed the proper drivers for Windows 95/98 or Mac OS, of course. The FlashPath wasn’t blazing fast, but by our estimates it was about double the speed of a serial cable, so it did save time. Not long after the FlashPath arrived, Sony did the same thing for its Memory Stick format. And not long after that, floppy drives started to disappear from PCs, starting with the iMac.

Five camera accessories you probably didn’t need

There have been plenty of accessory lenses for iPhones, but none is more ridiculous than the Turtleback iPhone SLR jacket. This $ 249 accessory, introduced in 2012, let you attach a Nikon F or Canon EF lens to the front of your iPhone 4. To make that happen you had to first attach a case to the phone and screw on an depth-of-field adapter ring, and then you could attach the lens of your choice. It goes without saying that using the SLR jacket required two hands, otherwise something terrible would happen to your iPhone.

We tested the SLR jacket at the time and it earned 2/5 stars, due mainly to do the fact that the iPhone is actually taking a photo of the focusing screen in the depth-of-field adapter, so you see the pattern of the screen and lots of dust. To its credit, Turtleback did offer an app which automatically flipped the image (since there’s no mirror, the image is upside-down) and calibrates the iPhone’s camera to maximize image quality.

Did we miss your most favorite, least useful camera accessory? Let us know in the comments.

Articles: Digital Photography Review (dpreview.com)

 
Comments Off on Throwback Thursday: Five camera accessories you probably didn’t need

Posted in Uncategorized


The Five Most Essential Camera Settings and How to Use Them

14 Dec

Modern cameras, from phones to high-end DSLRs, are designed to make decisions for us. And for the most part, they do a pretty darn good job of it. Slap your SLR into AUTO mode and more often than not you’ll get images that are sharp with decent exposure. If you are just looking to document your world, then go for it, snap away. The drawback is that images taken in AUTO tend to look similar to one another, with a uniform depth of field and exposure. If you want to move beyond the automatic camera settings, you need to understand your camera, how to use it, and most importantly, what impact changing those settings will have on your final image. Here are five of the most essential camera settings, what they mean, and how they impact the photograph.

Five Most Essential Camera Settings

ISO

Five Most Essential Camera Settings

This night image required I use a fast shutter speed to retain detail in the flame, so I had to use a high ISO (3200). In the next detail shot, you can see the noise, in the original RAW file. (By the way, this image shows what happens when you free methane from a bubble in the ice of a frozen pond in the boreal forest, and then set it alight.)

First, the acronym ISO is terrible, because it’s basically meaningless in terms of photography. It stands for “International Standards Organization” a European non-governmental organization that makes sure industries apply the same standards. In the case of photography, they want to make sure that an 800 ISO on a Canon is the same as on a Nikon, Sony or Fuji. If that standard didn’t exist, then settings wouldn’t be applicable across camera brands. So if I set my Canon to make an image at 1/100th sec at f/2.8 and ISO 400, and you set your Nikon to the same setting, we wouldn’t get the same exposure. Thankfully all the major manufacturers do subscribe to the ISO standards.

Yeah, yeah, but what is ISO? It is the measure of the sensitivity of your camera’s digital sensor to light. The lower the number the lower the sensitivity, the higher the number the more sensitive the sensor becomes. If you are shooting in a low light situation, say a poorly lit room or a dusky evening, an ISO setting of 100 will require that more light reaches the sensor than if you were to use a setting of 400, 800, or 1600.

Five Most Essential Camera Settings ISO

Note the noise in the detail of the person’s clothing and in other shadowed areas.

Drawbacks of high ISO

So why not shoot at high ISOs all the time? Two reasons: 1. High ISOs often create digital noise on the image, (though camera sensors are getting better and better) and 2. Sometimes you may want to force a slow shutter speed, in which case you want low sensitivity to light. This may be the case when you are trying to capture blurred motion such as water, wind or to create pleasing blurs in sports photography.

  1. High ISOs often create digital noise in the image, (though camera sensors are getting better and better)
  2. Sometimes you may want to force a slow shutter speed, in which case you want low sensitivity to light. This may be the case when you are trying to capture blurred motion such as water, wind, or to create pleasing blurs in sports photography.

In short, ISO is one of the three tools you have at your disposal to manipulate your exposure.

Shutter Speed

The length of time your camera’s sensor is exposed to light is the shutter speed. Many cameras have a mechanical shutter that snaps open and closed allowing light to reach the sensor, others use a digital shutter that simply turns on the sensor for the set period of time before switching it off again. Shutter speed has a huge impact on the final image. A long shutter speed will create blur in moving subjects. As a landscape photographer, I use long shutter speeds often to blur water, expose starlight, or capture wind motion.

Five Most Essential Camera Settings

For this image, I used a 0.5 sec shutter speed to blur the waves somewhat, but retain detail.

Five Most Essential Camera Settings shutter speed

A 30-second shutter speed blurred the Yukon River in this image, into a mirror-like surface.

Short or fast shutter speeds have the effect of stopping motion. Use a shutter speed of 1/2000th of a second and the motion of a runner or a cyclist will be stopped dead.

Five Most Essential Camera Settings shutter speed

This image of a bike passing used a shutter speed of 1/500th of a second. It was just enough to be sharp overall while retaining some sense of motion in the spinning tire.

Your use of the shutter has to be thoughtful to create a good image. Think about the final image you want to create. Does it have blurred components or is it all sharp? Do you want to stop, or convey the sense of motion? Consider, experiment, then decide on your shutter speed.

Aperture

Five Most Essential Camera Settings aperture

An f-stop of f/11 at 17mm was sufficient to make the entire image, from inches in front of the lens to the cliffs in the distance, sharp.

The aperture, or f-stop, may be the most confusing aspect of photography for many photographers because it affects images in unexpected ways. Essentially, the aperture is how big the hole in the lens is. The smaller the hole, the less light is allowed in, the larger it is, the more light gets through. What often confuses people is the numbering system: the smaller the number, the larger the hole. So f/2.8 is a larger opening than f/4, f/5.6, f/8, f/11 and so on. Lenses with a wide maximum aperture (a small number like f/2) are considered “fast” meaning they are capable of allowing in more light.

But it’s not just about light, and how wide a lens can open. The aperture also affects image sharpness. Most lenses (dare I say all?) are sharper, a few stops down (called the sweet spot). A lens with a maximum aperture of f/2.8 will create a sharper image at f/8, then at f/2.8. The higher quality the lens, the less this matters, but it is noticeable on most lenses.

Five Most Essential Camera Settings aperture

A very shallow depth of field in this image brings the grouse hiding in the brush into focus while the surrounding chaos of branches blurs into a haze.

Depth of Field and application

Next, the aperture also controls the Depth of Field. The DoF is the amount of the image from close to far that is in focus. A lens, when set wide open, say f/2.8, will have less DoF than when the same lens is set to f/11.

Like shutter speed, your use of aperture should be purposeful. Have a landscape image that you want in focus from front to back? You better select a high f-stop (like f/11). How about a portrait where you want a clean, soft background but a tack-sharp eye? Then use a small f-stop (like f/2.8 or f/4) and watch that focus point.

The aperture has a direct impact on shutter speed. A large f-stop will require you to use a longer shutter speed to attain proper exposure. Just as lower f-stop, will allow you to use a fast shutter speed. These two are completely interrelated, there is no escaping it, so you NEED a strong understanding of both.

White Balance

White balance, like ISO, relates to the sensor, but in this case, it has to do with the color of the light, rather than its brightness.

Different light sources have different color tones. Our eyes often don’t detect these differences, but you can bet your camera will. Have you ever seen a photo of a home interior lit by soft-white bulbs, but including a window? Usually, the interior of the room looks natural while the light outdoors looks artificially blue. That’s white balance. The camera (or photographer) decided to use the interior light (the warm-toned bulbs) as the natural color, but then the natural light

The camera (or photographer) decided to use the interior light (the warm-toned bulbs) as the neutral color, but then the natural light outdoors appears blue. When the white balance is set wrong, the colors are off. They look too yellow, blue, or orange. When it’s correct, everything looks natural, or as our eyes detect it.

Five Most Essential Camera Settings white balance

Here is the camera’s AUTO selection for the White Balance. The colors of the aurora borealis appear too purple and yellow.

Five Most Essential Camera Settings white balance

In this version, using the same post-processing for exposure, I adjusted the white balance further into the blue range, making the colors of the lights appear more natural and pleasing.

What about Auto White Balance?

I’ve got a confession to make here. I almost always use the AUTO white balance setting on my cameras. Cameras are pretty darn good at assessing color tones and deciding on the appropriate white balance. When it does get it wrong, I can check the image on the LCD and make the correction for the next shot. Second, I shoot exclusively in RAW format which means that I can make adjustments to the white balance in the computer. I trust the image on my computer screen more than I trust the tiny LCD on the back of my camera.

That said, there are times to adjust the camera’s white balance settings. The first is if you are shooting JPEGs. That image format will not allow you to effectively adjust white balance later, so it’s got to be right in the camera. The second is when stacking images either for high contrast scenes or for panoramas. When stacking images, slight changes in color tones will make combining them into HDR or panoramas much more difficult or impossible. You can also use White Balance if you purposefully want to make an image look cool or warm, or if you are using artificial lights. (Now THAT subject warrants an article of its own…)

Be mindful of your White Balance, know what it does and how it will impact your image, then decide how, or whether to use it.

Exposure Compensation

ak-homer-109266-sunset-139

Here I used Exposure Compensation to make sure that the image was bright enough to show details in the foreground while assuring that the bright sunset in the background was not blown out.

These two images show how useful Exposure compensation can be. The image below was made in bright sunlight, but a purposeful underexposure of three stops reduced the mountains to black but retained detail in the sky, making a surreal image.

Know your camera well

Exposure Compensation is a tool you should know how to adjust without even lowering the camera from your eye. Exposure compensation allows you to very quickly, add or subtract light from an image. Too dark? Use Exposure Compensation to add a stop of light. Too bright? Exposure Compensation can quickly reduce the exposure. How it is set depends on your camera settings.

I use Aperture Priority mode most often on my camera. That means I select the aperture, and the camera decides the shutter speed. If I adjust my Exposure Compensation, the camera will retain my chosen aperture and simply adjust shutter speed up or down to get the desired exposure. If I were to use Shutter Priority, as I sometimes do, the camera will adjust the aperture. In AUTO the camera will make that decision for me.

I use Exposure compensation constantly. It is my go-to method for fine-tuning my exposure in the field. On my Canon DSLR, I can adjust it with a simple twitch of my thumb on the rear wheel of the camera. Other cameras have their Exposure Compensation controls on the front, a wheel near the shutter button, or some other system of buttons on the back. Know how your camera works, and learn to adjust this quickly and efficiently. Understanding this important tool will mean you don’t miss your chance to get the shot right when you are working in the field or studio.

Conclusion

These five camera settings are the most important things to understand on your camera. Experiment with them so you know how they affect your final image, and know how to change each quickly and without fuss. Once you do, you’ll have taken charge of your photography, and be on your way to creating purposeful images.

If you have comments or questions please share post them below.

googletag.cmd.push(function() {
tablet_slots.push( googletag.defineSlot( “/1005424/_dPSv4_tab-all-article-bottom_(300×250)”, [300, 250], “pb-ad-78623” ).addService( googletag.pubads() ) ); } );

googletag.cmd.push(function() {
mobile_slots.push( googletag.defineSlot( “/1005424/_dPSv4_mob-all-article-bottom_(300×250)”, [300, 250], “pb-ad-78158” ).addService( googletag.pubads() ) ); } );

The post The Five Most Essential Camera Settings and How to Use Them by David Shaw appeared first on Digital Photography School.


Digital Photography School

 
Comments Off on The Five Most Essential Camera Settings and How to Use Them

Posted in Photography


Five reasons to buy the Sony RX100 V (and four reasons to reconsider)

27 Nov

Introduction

The Sony RX100 V is the world’s most advanced pocketable camera with a 1″-type sensor, and it’s also the most expensive. With a spec sheet that is unmatched in its segment (and in some cases, in the entire market), the RX100 V is going to be looked at by a great many folks, and is indeed going to be a great camera for a wide variety of photographers. But there are also photographers for whom the RX100 V is probably not your best choice – so we’ve put together some reasons you might want to pick one up, and also reasons you might want to save those pennies for something else. Let’s dive in.

Reason to buy: You need to capture very fast things

The 24 fps burst rate lets you capture just the right moment. Photo by Rishi Sanyal

You might be interested in an RX100 V if you photograph or record very fast-moving things, primarily because of the camera’s ridiculous 24 fps burst speed for stills and 960 fps mode for slow-motion video. But because of the zoom range, you’ll have to be fairly close to the action – our own Barney Britton has been saying the V is the world’s best crash cam. Or maybe you’re a watermelon-exploding enthusiast. Okay, or maybe you want to catch just the right moment of your kid’s break dancing class. Whatever it is, kick the AF into continuous and ‘Wide’ area, the burst rate into 24 fps, and motor away.

Reason to reconsider: Postage-stamp-sized batteries

CIPA-rated to 220 shots, the battery life is, generally speaking, a weak point on the RX100 V.

The Sony RX100 V soldiers on with the same NP-BX1 battery pack that the very first RX100 used, and with the massive increases in processing power and capability that Sony has shoehorned into the body, the claimed battery life is a third less than the original model. What’s more, the RX100 V continues Sony’s tradition of slow battery discharge if the battery is left in the camera, so if you’re only looking to use the camera occasionally, you may find you’re all ready to capture the moment, but the camera isn’t ready for anything but a charge.

And if the RX100 V is already proving difficult to fit into your pocket (I can’t be the only guy wearing skinnier-than-normal jeans these days), you might be loathe to carry another battery or two as well.

Reason to buy: You need a B video cam that can run and gun or be built up as needed

You could conceivably use the HDMI out on the RX100 V to build a rig up, or just use it as a run-and-gun pocket video cam.

The RX100 V is probably not the best choice out there for a primary video cam for most people (though this is not always going to be true), but with 4K video, focus peaking, zebra, log gamma and oversampled 4K, the only thing you’ll be missing is better audio – and there’s always an external solution for that.

Don’t discount that you can also do clean HDMI out, and then combined with said external audio solution, have a pretty powerful package, even if it takes some work to get there.

Reason to reconsider: You have big hands

If Sasquatch was after a camera, it wouldn’t likely be the RX100-series (a big, double-grip DSLR might be a better bet). The RX100 V comes, out of the box, with no grip, a slippery casing, and buttons smaller than the sensors of point and shoots of yester-decade. Although a touchscreen isn’t always the answer, we feel that being able to utilize such a big block of space on the rear of the camera as a control point is something Sony will have to do sooner or later to improve usability as the features keep coming. 

Reason to buy: You want the best point-and-shoot there is

The RX100 V’s 315 on-sensor phase-detect AF points cover 65% of the frame.

With AF-C in wide mode and rapid continuous shooting in Raw + JPEG, the only thing between you and something you want to photograph is the RX100 V’s startup time, which isn’t too bad (unless you’ve just changed the battery).

Sony’s told us that plenty of folks buying their RX100 cameras are actually mid-to-high end DSLR owners. And while there’s an argument that that demographic may want maximum control all the time, there’s also something to be said for leaving the big camera at home and just focusing on a moment in front of you as it unfolds instead of prepping settings and always watching, and always re-prepping, and repeat.

Reason to reconsider: You just don’t need it

Stock up on storage if you plan on using those 24 fps bursts.

I will confess – the allure of 24 fps burst shooting while at the Sony launch event for the RX100 V was somewhat tempered by the 128GB memory card I used, as well as the total picture count at the end of the night – near 3,000. That ended up being more than I would shoot with any other camera, simply because I could. One thing’s for sure – there’s no arguing that 24 fps will help you catch just the right moment in the middle of whatever is happening in front of you. But there’s also no arguing that it will just be overkill for many people, and many people’s hard drives. Even dropping the burst rate to 10 fps ended up being enough for me.

Reason to buy: You want the best image quality in the smallest pocketable package

You already have a cell phone with you all the time anyway, and it probably takes decent pictures. Well, the RX100 V will at least fit into a coat pocket (or cargo pants…those are still around, right?) and take photos that will blow any smartphone out of the water.

True, ‘digital bokeh’ simulations are catching on, and will actually offer more blur artificially than the RX100 V can manage optically. But they still can’t match the dynamic range, sharpness and sophisticated JPEG performance in low light that the RX100 V offers. Digital bokeh or not, physics is still physics, and the 1″-type sensor will collect way more total light than any current cell phone.

(There’s also one smaller 1″-type sensor camera on the market, the Canon G9 X, which is capable of good stills quality – but with a necessarily slower lens and less processing power to keep the whole package more compact.)

Reason to reconsider: You just need more zoom

The 24-70mm equivalent zoom lens on the RX100 V may be quite bright, but it may be too short for many people. If you’re hoping to shoot your kids’ soccer matches from the sidelines, there are way better options out there (the Panasonic ZS/TZ100 comes to mind).

Sure, the 24-70mm focal length is an absolute staple for professional wedding and press photographers, but you also often see those very same photographers carrying another huge camera with a 70-200mm equivalent zoom, just to cover absolutely everything. You can get by for a great many things with the RX100 V, but if you’re planning on getting one single camera to do it all, from travel photography to portraits to landscapes, there is probably a better option out there for you.

Reason to buy: You absolutely must have a viewfinder

All RX100 models since the Mark III have had a built-in, pop-up electronic viewfinder.

The RX100 V (and Mark III/IV) are the only truly pocketable 1″-type sensor compact cameras with a decent built-in viewfinder. Panasonic’s ZS100/TZ100 is also a fairly compact camera, but its field-sequential EVF is pretty lackluster. If you do lots of shooting in bright light outdoors, or just find that framing your masterpiece with fingerprint smudges and facial oils overlaying it is unacceptable, the RX100 V’s pop-up viewfinder is worth a peek.

Articles: Digital Photography Review (dpreview.com)

 
Comments Off on Five reasons to buy the Sony RX100 V (and four reasons to reconsider)

Posted in Uncategorized


Fast Five: Sony Cyber-shot RX100 V Review

03 Nov

Introduction

The Sony RX100 V is the company’s newest addition to its lineup of premium compact cameras. As with the previous two versions, it has a 1″-type sensor, 24-70mm equivalent F1.8-2.8 lens but gains 24fps burst shooting in both JPEG and Raw with full autofocus and autoexposure(!), oversampled 4K video recording, and plenty more. In short, the RX100 V has an incredible amount of technology stuffed into an easily pocketable package – but despite major increases in performance, we find that some of its more peripheral qualities could still use some attention.

Key Specs

  • 20MP 1″-type stacked BSI-CMOS sensor
  • 24-70mm equiv. F1.8-2.8 zoom lens
  • 24fps burst shooting in JPEG + Raw, with full AF and AE
  • 315-point phase-detection autofocus system
  • Detailed 4K video capture with well-controlled rolling shutter
  • Good quality high frame rate video capture

Where to begin, besides the original? The first RX100 made quite the splash when it was released back in 2012, and rightly so – it was the first camera to take a reasonably large, 1″-type sensor and place it within a camera body you could easily put into a pocket. There were, of course, pocketable compact digital cameras before it, but the RX100’s much larger sensor was the key here for really allowing it to stand above the crowd.

The RX100 V’s large sensor allows it to capture far more dynamic range than your typical smartphone and smaller-sensor compact, especially useful in challenging lighting conditions. Processed to taste from Raw using a preliminary build of Adobe Camera Raw. 24mm equiv. ISO 125, 1/500 sec, ISO 125. Photo by Carey Rose

The original RX100 brought us one significant step closer to the diminutive, high-quality 35mm film compacts of the 1990s. The RX100 V is a fitting member of the RX100 line in this regard, offering very good image quality and impressive capability in a camera that you can easily forget is in your purse or daypack.

The 24-70mm equivalent lens reach of the RX100 V is something of a standard for professionals with large F2.8 zooms, and is plenty flexible for all kinds of shooting – but some users might be left wanting for even more reach. Straight-out-of-camera JPEG at 70mm equiv. ISO 125, 1/640 sec, F4. Photo by Carey Rose

The RX100 V becomes the world’s first fixed-lens compact (at least, the first you can actually buy) to offer a 1″ sensor with phase detection autofocus, and it does so across 65% of the frame with a total of 315 points. As far as video, the RX100 V shoots oversampled 4K clips, resulting in impressively detailed footage.

Sony’s launch presentation for the RX100 V showed that this series of cameras is increasingly being chosen by existing mid-to-high-end DSLR shooters looking for a carry-everywhere compact. The RX100 V works exceedingly well as a capable point-and-shoot camera, but as with previous models, we’ve found ourselves frustrated when trying to take greater control over it for decisive-moment shooting.

“The RX100 V has the potential to be just about all the camera any enthusiast might ever need.”

That is, frankly, a shame. For all that Sony has done to make this a worthy upgrade from the Mark IV, it’s also the things they haven’t done that bear mentioning as well. There are still just too few controls on this camera, there still isn’t a touchscreen (to more easily take advantage of that snazzy new PDAF system), the user interface is still unfriendly and the sluggish speed at which the camera reacts (or doesn’t react) to some inputs stands in stark contrast to how unbelievably fast it can pull images off the sensor.

Specifications compared

  Sony
DSC-RX100 V
Sony
DSC-RX100 IV
Canon G7X
Mark II
Panasonic
LX10
MSRP $ 999 $ 899 $ 699 $ 699
Lens range (equiv) 24-70mm 24-70mm 24-100mm 24-72mm
Aperture range F1.8-2.8 F1.8-2.8 F1.8-2.8 F1.4-2.8
Autofocus 315-point phase detection Contrast detection

Contrast detection

Contrast detection

Control dials Lens ring (stepless)
Four-way/dial
Lens ring (stepless)
Four-way/dial

Lens ring
(stepped/
stepless)
Exposure Comp
Four-way/dial

Aperture ring Command dial Lens ring (stepless)

Viewfinder 2.36M-dot 2.36M-dot No No
Rear screen Tilt up/down Tilt up/down Tilt up/down
Touchscreen
Tilt up touchscreen
Video capability 4K/30p
1080/120p
4K/30p
1080/120p
1080/60p 4K/30p
1080/120p
Built-in ND Filter Yes
(Auto for stills)
Yes
(Auto for stills)
Yes
(Auto for stills)
No
Burst Shooting 24 fps 16 fps 8 fps 10 fps
Battery life (CIPA) 220 280 265 260

Here, you can clearly see Sony’s focus for this new model – speed and autofocus (regarding pricing, Sony has recently dropped the cost of the Mark IV to $ 899 from its original MSRP of $ 999, which the Mark V has launched at). However, you can see the extra processing has had a fairly detrimental effect on its rated battery life. More on that later.

Always at hand – the Mark V is the latest RX100 to feature impressive technology in a carry-everywhere package, but the price you ultimately pay (besides the steep MSRP) is in terms of ergonomics and controls. Processed from Raw using a preliminary build of Adobe Camera Raw at 30mm equiv. ISO 500, 1/500 sec, F2.5. Photo by Carey Rose

One of our earlier posts stated that the RX100 V has the potential to be just about all the camera any enthusiast might ever need. We still think that rings true, but as usual, there’s some caveats to take into account. Let’s take a closer look.

Articles: Digital Photography Review (dpreview.com)

 
Comments Off on Fast Five: Sony Cyber-shot RX100 V Review

Posted in Uncategorized