RSS
 

Posts Tagged ‘Features’

Adobe Camera Raw 9 released with Merge to HDR and Panorama features

23 Apr

With the launch of Lightroom 6 and Lightroom CC, Adobe has released Camera Raw 9 with some of the some added features. Merge to HDR and Panorama are now available in ACR, using Raw image data to automatically assemble HDR and panoramic images, which are output as DNG files. This eliminates the need to edit files before merging them in Photoshop. Read more

Articles: Digital Photography Review (dpreview.com)

 
Comments Off on Adobe Camera Raw 9 released with Merge to HDR and Panorama features

Posted in Uncategorized


Adobe Announces New Lightroom CC – What Features are You Most Excited About?

23 Apr

Lightroom CC

Well yesterday Adobe pulled the trigger on the much anticipated release of the new Lightroom 6, which is actually called Lightroom CC (part of the Creative Cloud). It will still be available as a stand alone product but many people, myself included were eagerly downloading the new version as soon as it was available.

We’ll have one of our writers doing a more involved look at the new features soon but I wanted to see what you are most interested in with this new version.

LR-CC-03

New Photo Merge feature in LR CC

What features were on your LR wish list?

So tell me in the comments below – what things were you hoping Adobe would build into this incarnation of Lightroom? Did you get all the features you wanted? What’s still missing in your opinion?

Was there anything you wanted removed?

What new features are you most fired up about?

In watching some of the live broadcast of the announcement I picked up on a few of the new features and was eager to try them out, most of all the Merge to HDR (Pano also available). It takes your bracketed shots which you previously had to take to either Photoshop or another plugin to work with – and now Lightroom merges them into a gorgeous 32-bit file which comes back in as a DNG no less! So you have all the editing power of a 32-bit file at your fingertips without every leaving Lightroom CC – I’m sold!

I ran a couple sets through the HDR to test it. Was pretty impressive and super easy. I’ll have to dig into it more later.

LR-CC-02 LR-CC-01

Previously on the set of images above I had to mask the sky back in – but using LR local adjustments and the new HDR Merge I was pretty happy with the result which took about three minutes.

Some of the new features I’m excited about and keen to try are:

  • The Merge feature (to Pano and HDR – it even handles alignment, auto tone and deghosting)
  • Add to Collection on import
  • Filter in Collections (search)
  • Enhanced video slideshows (I use it now for easy shows, this looks like it can make them look better now too)
  • Auto-straighten on the crop tool
  • New finer control using the graduated filter and radial filter. You can now brush out, or mask (hide) part of it to bring back buildings, trees and areas you do not want affected by the filter. Brilliant!

See a complete run down of all that’s new on the Adobe site.

LR-CC-04

New brush option on graduated filters, very slick!

How about you?

We’ll have more on the new Lightroom in the coming weeks but for now tell us what you think in the comments below.

googletag.cmd.push(function() {
tablet_slots.push( googletag.defineSlot( “/1005424/_dPSv4_tab-all-article-bottom_(300×250)”, [300, 250], “pb-ad-78623” ).addService( googletag.pubads() ) ); } );

googletag.cmd.push(function() {
mobile_slots.push( googletag.defineSlot( “/1005424/_dPSv4_mob-all-article-bottom_(300×250)”, [300, 250], “pb-ad-78158” ).addService( googletag.pubads() ) ); } );

The post Adobe Announces New Lightroom CC – What Features are You Most Excited About? by Darlene Hildebrandt appeared first on Digital Photography School.


Digital Photography School

 
Comments Off on Adobe Announces New Lightroom CC – What Features are You Most Excited About?

Posted in Photography


My Favorite Features in Adobe Lightroom 6 (CC)

22 Apr

The long awaited next version of Lightroom is out and below is my list of favorite features and improvements:

Note before you upgrade I recommend reviewing  Steps to Save Your Ass With Lightroom Catalog Changes

1. Graduated Filters – Brush function

A new Brush function has been added to Graduated Filters so that you can create custom edges versus a linear edge.

Graduated Filter Brush Function

2. Performance: Optimized Multi-Processor and Multi-Core Support + GPU  Utilization

This version of Lightroom has improved export performance that leverages more of your available system resources.  This means that Export is faster, but it also means that you’ll have less resources available during Export for other tasks such as other Lightroom, Photoshop and other application tasks. If you batch export this should be of great benefit for you.

Additionally if you use a 4K or 5K monitor Lightroom CC’s utilization of your computers Graphics Processing Unit (GPU) will result in marked performance improvements.

Requirements to use the GPU in Lightroom CC:

  • 64-­bit only
  • OpenGL 3.3 and up
  • Mac OS 10.9 and higher
  • Windows 7 and higher

Additional system requirements for Lightroom CC / Lightroom 6

3. In Application Panoramic and HDR

To do Panoramic or HDR merging you no longer need to bounce out of Lightroom to Photoshop. You can now do these functions in Lightroom. As an added bonus there is now a built in preview functionality. In regard to panoramic photos the coolest feature is the “Auto Select Projection” mode that automatically selects the best result between the Spherical, Cylindrical and Perspective modes.  One negative to note you won’t be able to batch process multiple panoramic or HDR photos, but you can repeat this function one after the other with each process running in tandem similar to past multi-exports running in tandem.

Panoramic Selections

Lightroom CC Pano Preview

Mono Lake Milky Way Pano

HDR Lightroom Selection

Lightroom CC HDR Preview

Lightroom CC HDR Image Comparison

4. Facial Recognition

Lightroom now contains facial recognition which is quite nice if you’re photographing events or family. Seeing that I’m known to take tons of photo of my two young boys this will come in handy. By assigning names to each person in your photo you’re essentially applying keywords behind the scenes. With an eye toward privacy names of those in your photos are not exported with keywords unless you adjust your preferences.

Lightroom CC Facial Recognition

Lightroom CC Facial Recognition

Lightroom CC & Photoshop CC Keywords

Lightroom CC & Photoshop CC Keyword Comparison After Lightroom Export

5. Improved Metadata Categorization (Date, Location, etc.)

Now Lightroom does a better job of automatically organizing your photos referencing Dates and Locations. If you utilize GPS in your photos you’ll now be able to make use of the Map module in an easier fashion. Similarly if you search or categorize by dates you’ll find Lightroom CC / 6 a little easier to work with.

6.  Adobe Slate – Publish to the Web

If you’ve yet to hear of Adobe Slate you may want to take note. If you utilize Lightroom CC as part of your Creative Cloud subscription you can publish images and stories to Adobe Slate, a visual blog publishing platform.

Copyright Jim M. Goldstein, All Rights Reserved

My Favorite Features in Adobe Lightroom 6 (CC)

The post My Favorite Features in Adobe Lightroom 6 (CC) appeared first on JMG-Galleries – Landscape, Nature & Travel Photography.


Related Stories

  • My Favorite Features in Adobe Lightroom 6 (CC) – Enclosure
  • 6 Steps to Save Your Ass With Lightroom Catalog Changes
  • 6 Steps to Save Your Ass With Lightroom Catalog Changes – Enclosure
Feed Ads by FeedBlitz
powered by ad choices


JMG-Galleries

 
Comments Off on My Favorite Features in Adobe Lightroom 6 (CC)

Posted in Equipment


Firmware update enhances Nikon D4s features, including unlimited continuous shooting

22 Apr

Nikon has issued updated firmware for its D4s professional DSLR, altering the way numerous features operate on the camera. Changes include removing the limitation on the number of images that can be captured in a single continuous burst in the manual and shutter priority exposure modes. Firmware version 1.20 replaces versions 1.00 and 1.10, and appears to fix quite a range of glitches as well as adding functionality to the camera’s operation. Read more

Articles: Digital Photography Review (dpreview.com)

 
Comments Off on Firmware update enhances Nikon D4s features, including unlimited continuous shooting

Posted in Uncategorized


6 of the Most Essential but Underused Camera Features

08 Apr

If you are just getting started in photography, you’ll be pleasantly surprised to find these six often overlooked features in the menu of your DSLR. While each one can be used to create professional quality results, extensive experience is not required to leverage their usefulness. Best of all, there’s no need to upgrade to a high end model. These settings are now found on even the most entry-level camera bodies. With the ability to take full control of your camera, you’re more likely to get the shot right at the time of the exposure.

1 roar

1) Flash Exposure Compensation

The pop-up flash gets a bad rap, and this is unfortunate as it’s actually a very useful tool when set properly. Out of the box, it simply provides too much light, resulting in a bright, washed-out appearance. The trick is to adjust the flash exposure compensation to a reduced output. As a starting point, bring it down to negative two (-2). This creates a soft quality of fill flash that’s immediately more pleasing. Should you need even less light, you can further reduce the flash to negative three. While it’s rarely necessary, you could even add intensity to the flash by raising it towards the positive. Just remember, effective use of flash is meant to soften, not eliminate shadows.

2 fill flash

2) Two Second Timer

This rarely used setting can open up a whole new world of creative possibility for you. It’s typically found in the “drive” menu, along with single shot, multi-shot burst mode, etc. If you’re in a place that doesn’t allow tripods, it’s still possible to take sharp photos, even with long exposure times.

Select the two second timer and rest the camera on a chair, or the ground. You can use the folded camera strap to angle the camera upwards if necessary. When you press the shutter, the camera will move initially. Don’t worry, you have two seconds for it to settle down before the camera actually fires. This is also helpful for tripods that are not as stable as they should be. If you don’t have a cable release, the timer is a terrific wireless alternative.

3 two second timer

3) Histogram

Think of the histogram as a visual cheat-sheet for photographing bright tones. To render a subject as true white, you want the data on the right hand side to be as close to the edge of the graph (histogram) as possible. This will indicate a crisp exposure rather than a muddy, grey appearance. As you change the exposure to let in more light, the histogram will inch towards the right. Keep adjusting your settings until it’s literally just a hair from the outer wall. You are now maximizing all of the wonderful dynamic range of which your camera is capable.

Once the data actually collides with the right hand wall of the histogram, you’ve technically overexposed part of your scene. This means there is no detail in the highlights, but rather a hotspot that is impossible to recover, even with sophisticated software. While this data is valuable, it doesn’t tell you exactly where the trouble spot is in your scene. This is where the “highlight alert” becomes a helpful aid.

4 histogram

4) Highlight Alert

By default, many camera models have the highlight alert turned off so you’ll need to enable it in the menu. Commonly referred to as “the blinkies”, this feature alerts you to the precise location that’s overexposed. With this knowledge, you can make a quick adjustment to the exposure, or even change your composition to eliminate the unwanted area. That translates to more consistent exposures with no washed-out areas. You’ll also be rewarded with less time in the digital darkroom, trying to fix problems that could have been prevented in the field.

5 waterfall

5) Live View

If you’ve ever struggled to achieve autofocus at night, or desire more accuracy for macro work, Live View will be your new favorite mode. With it, you can zoom in on a tiny portion of a subject at 5x and 10x magnification. This extreme close-up gives you the ability to carefully micro-focus on whatever is most important in your scene. Just note, the enlarged view on your LCD is not representative of your lens’ effective focal length. Upon pressing the shutter, the entire scene will still be captured in sharp detail. You’ll be amazed at the level of precision possible. For the ultimate in control, use this with manual focus and a sturdy tripod.

6 macro

Live View is not only useful for focus, but composition as well. For example, if your DSLR lacks a tilt or swivel screen, shooting from ground level can be a real challenge. With a live image on the LCD however, there’s no need to crane your neck for viewfinder access. The same idea can be applied to those crowded situations when you must raise the camera over your head. Instead of shooting blind, you can use Live View to better compose the shot.

6) Single AF Point

7 goose

Allowing the camera to automatically choose your focus point is one of the biggest causes of blurry photos. Don’t get me wrong, you can still use autofocus, but it works most consistently when you manually set the autofocus point. Otherwise, the camera will choose incorrectly, leaving the fence post sharp and your subject out of focus. While some cameras offer clusters of focus points, a simpler approach will often work to your advantage. By placing a single active AF point on what you want sharpest, you eliminate the guess work, and your percentage of keepers will soar.

Do you have any other hidden gems on your camera you’d like to share? What have you discovered in the menu of your camera?

googletag.cmd.push(function() {
tablet_slots.push( googletag.defineSlot( “/1005424/_dPSv4_tab-all-article-bottom_(300×250)”, [300, 250], “pb-ad-78623” ).addService( googletag.pubads() ) ); } );

googletag.cmd.push(function() {
mobile_slots.push( googletag.defineSlot( “/1005424/_dPSv4_mob-all-article-bottom_(300×250)”, [300, 250], “pb-ad-78158” ).addService( googletag.pubads() ) ); } );

The post 6 of the Most Essential but Underused Camera Features by Chris Corradino appeared first on Digital Photography School.


Digital Photography School

 
Comments Off on 6 of the Most Essential but Underused Camera Features

Posted in Photography


Microsoft Image Composite Editor 2.0 offers new panorama features and improved interface

09 Feb

Microsoft’s Research’s Interactive Visual Media Group has announced the release of Image Composite Editor 2.0. The software’s latest update, taking advantage of the company’s Photosynth technology, can seamlessly stitch together ‘gigapixel images’, create panoramas from video, and automatically fill in areas of missing photographs. Read more

Articles: Digital Photography Review (dpreview.com)

 
Comments Off on Microsoft Image Composite Editor 2.0 offers new panorama features and improved interface

Posted in Uncategorized


50MP Canon EOS 5DS and 5DS R offer maxed-out resolution, slimmed-down video features

07 Feb

Canon has officially unveiled the EOS 5DS and EOS 5DS R, both of which offer a 50.6MP full-frame sensor inside virtually the same body as the EOS 5D Mark III. The effect of the EOS 5DS R’s low pass filter has been cancelled out, but aside from that difference the two cameras are identical. Like the EOS 5D III the new cameras offer 1080/30p video but do not feature headphone jacks sockets or clean HDMI out. The 5DS and 5DS R will be available from June for $ 3699 and $ 3899 respectively. Read more

Articles: Digital Photography Review (dpreview.com)

 
Comments Off on 50MP Canon EOS 5DS and 5DS R offer maxed-out resolution, slimmed-down video features

Posted in Uncategorized


Fujifilm X-T1 Firmware Update: New Features

26 Jan

Fujifilm X-T1 firmware upgrade

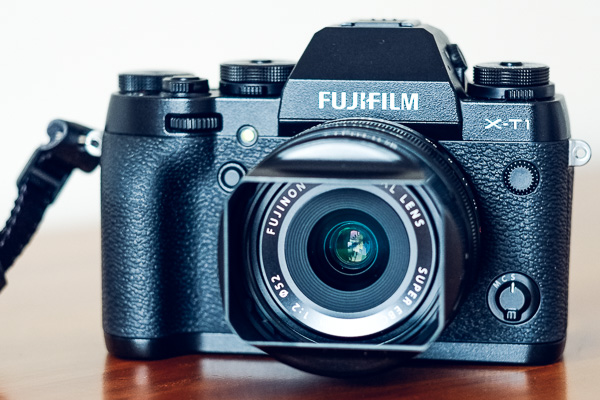
In December 2014 Fujifilm released the latest firmware upgrade (version 3.00) for its X-T1 camera. More than a minor upgrade, the new firmware adds a number of new features that greatly enhance the camera’s capabilities. Let’s take a look at ones most likely to be of interest to X-T1 owners.

By the way, if you’d like to learn more about firmware (for all makes of camera) then read our article Updating Your Camera’s Firmware – What is it and Why It’s Important.

Electronic Shutter

A new electronic shutter allows you to take photos at shutter speeds of up to 1/32000 second (the fastest mechanical shutter speed available is 1/4000 second). This enables you to take photos in bright light with prime lenses at wide aperture settings, something the lowest available ISO speed of 200 (when shooting Raw) makes difficult.

Sports and action photographers shouldn’t get too excited though, as the rolling shutter effect may cause distortion in moving subjects.

Another advantage of the electronic shutter is that it is completely silent, something that street photographers (and others who prefer to work unobtrusively) may appreciate.

AF+MF

The X-T1’s autofocus is extremely accurate but there may be times when you want to override it. Now you can do so by enabling the new AF+MF feature. When it’s activated (you need to be in AF-S mode) press the shutter button half-way down to activate autofocus, then turn the focus ring on the lens to override the camera. Essentially, it lets you switch from auto focus to manual focus without having to move the Focus mode selector.

This will help you out in those rare instances when the camera’s autofocus fails to lock on the subject, or if you want to shift the point of focus (perhaps to utilize the depth-of-field bar that appears in the viewfinder).

Classic Chrome Film Simulation

Film Simulation settings are one of the strengths of the Fujifilm system and they seem to have been thought through a bit better than the equivalent settings from other manufacturers. The result is that the Fujifilm cameras have gained a reputation for creating excellent quality JPEG files.

Classic Chrome is Fujifilm’s latest Film Simulation setting, giving a faded, slightly vintage, high contrast look to the photo that you might expect from an older type of slide film.

Classic Chrome is also available in the latest versions of Lightroom and Adobe Camera Raw.

Fujifilm X-T1 firmware upgrade

A photo processed using the Velvia Film Simulation setting.

Fujifilm X-T1 firmware upgrade

A photo processed using the Classic Chrome Film Simulation setting. Note the difference in the hue and saturation of the colours. 

Natural Live View

The view of the subject seen through the X-T1’s electronic viewfinder (or on the LCD screen in Live View) is affected by the white balance and Film Simulation settings selected by you, the photographer. While this may help you visualize how the final photo will look, I’m sure you may miss the neutral view presented by optical viewfinders. Natural Live View fixes this by giving you a neutral view of the scene unaffected by Film Simulation, contrast or white balance settings.

The new EVF Color and LCD Color menu options also lets you change the hue of the electronic viewfinder or LCD screens.

Quicker Access to AF Frame Buttons

Now you can switch the active autofocus frame using the four selector buttons on the back of the camera, without having to press the bottom button beforehand. This makes adjusting the AF frame while looking through the viewfinder much easier.

The only downside is that the selector buttons can no longer be used to access functions such as white balance and Film Simulation selection. You can compensate for that by adding them to the Quick menu.

Fujifilm X-T1 firmware upgrade

With the new firmware upgrade, you can select the active autofocus frame using the four selector buttons, without having to press any other buttons first.

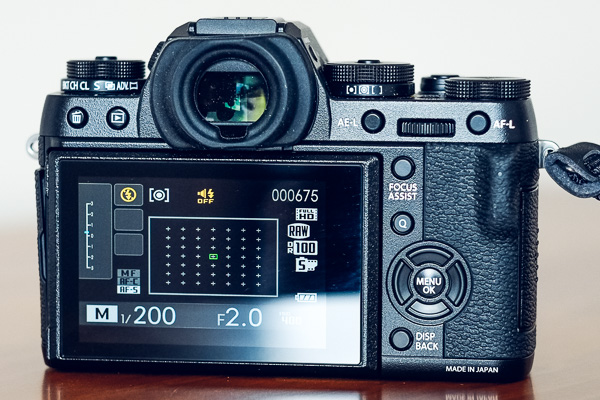
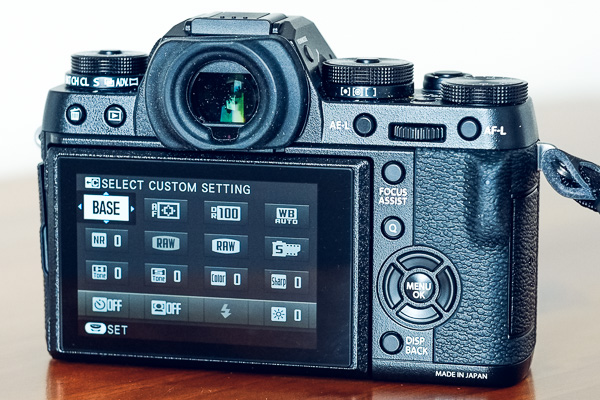
Customized Quick Menu Layout

Pressing the Q button on the back of the camera brings up a Quick menu with sixteen functions. The idea of the Quick menu is to give you rapid access to the most used menu items without having to navigate your way through the camera’s menu system. Now, with the latest firmware upgrade, you can choose which functions (from a list of 25) you’d like to appear in the Quick menu, and which order they are displayed in.

Fujifilm X-T1 firmware upgrade

The default Quick menu displayed with earlier firmware versions. After upgrading to version 3.00 you can customize the Quick menu with the settings you need to access the most.

More New Features

The full list of new features is available on the Fujifilm website.

Which firmware version do I have?

To see which firmware version your X-T1 camera has (I believe this works for all Fujifilm cameras) turn the camera off, hold down the Disp/Back button and turn the camera back on. The camera displays the currently installed firmware versions for both the body and lens.

Fujifilm X-T1 firmware upgrade

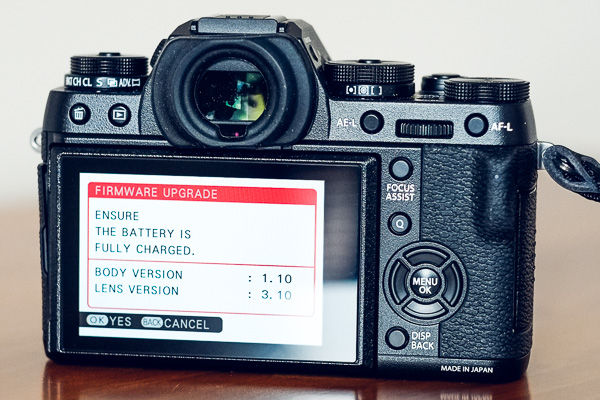
This Fujifilm X-T1 has firmware version 1.10 installed, and hasn’t yet been upgraded to the new firmware.

How do I install new firmware?

Start by going to this page on the Fujifilm website, scrolling to the bottom and clicking I Agree. You can download the new firmware file on the next page, which also contains instructions on how to load it into your camera. You’ll need a newly formatted memory card to do so.

Have you tried out the firmware update for the Fujifilm X-T1 yet? Please let us know what you think of it in the comments.


Mastering PhotographyComposition and line

My ebook Mastering Photography: A Beginner’s Guide to Using Digital Cameras introduces you to digital photography and helps you make the most out of your digital cameras. It covers concepts such as lighting and composition as well as the camera settings you need to master to take photos like the ones in this article.

googletag.cmd.push(function() {
tablet_slots.push( googletag.defineSlot( “/1005424/_dPSv4_tab-all-article-bottom_(300×250)”, [300, 250], “pb-ad-78623” ).addService( googletag.pubads() ) ); } );

googletag.cmd.push(function() {
mobile_slots.push( googletag.defineSlot( “/1005424/_dPSv4_mob-all-article-bottom_(300×250)”, [300, 250], “pb-ad-78158” ).addService( googletag.pubads() ) ); } );

The post Fujifilm X-T1 Firmware Update: New Features by Andrew S. Gibson appeared first on Digital Photography School.


Digital Photography School

 
Comments Off on Fujifilm X-T1 Firmware Update: New Features

Posted in Photography


Upcoming GoPro Hero4 firmware will enable new photo and video features

09 Jan

GoPro has released details about upcoming firmware updates for its Hero4 action cameras; the new firmware versions will be delivered next month, enabling new photo and video features like in-camera time lapse creation. Read more

Articles: Digital Photography Review (dpreview.com)

 
Comments Off on Upcoming GoPro Hero4 firmware will enable new photo and video features

Posted in Uncategorized


Blocks Camera features modular design with swappable components

18 Nov

Blocks Camera of California has introduced its Blocks+ multi-functional camera. The Blocks+ features a modular design allowing photographers to swap in components, referred to as ‘blocks’, for various types of recording like 3D and 360-degree video. The blocks also include battery modules that can be added for extra battery life. Learn more

Articles: Digital Photography Review (dpreview.com)

 
Comments Off on Blocks Camera features modular design with swappable components

Posted in Uncategorized