RSS
 

Posts Tagged ‘Equipment’

The 10 Best Pieces of Creative Photography Equipment

10 Jul

The post The 10 Best Pieces of Creative Photography Equipment appeared first on Digital Photography School. It was authored by Simon Bond.

Your dSLR is an incredibly creative tool, which when used correctly can give you dramatic results. A lot of techniques can be achieved with your camera body and a lens, such as panning, zoom bursts or bokeh. With some more equipment, you can really hit the ball out of the park. In this article, you’ll discover what that equipment is and some of the techniques that equipment will allow you to practice. So read on and discover the ten best pieces of creative photography equipment.

Digital blending is a powerful technique that can enhance sunset photos.

1. Tripod

This is almost always one of the first additional pieces of equipment a photographer will purchase, and with good reason.

A tripod allows for a lot of creativity, and you’ll want to get a good tripod. Avoid getting a cheap tripod that has unsteady legs, and instead, invest in a heavier sturdy tripod. If you’re traveling and need a lighter backpack you can compromise a little. You still want a strong tripod, and preferably a hook on the central tripod pole that allows you to add more weight to the tripod once it’s set up.

Now, let’s look at some of the techniques a tripod will allow you to try:

  • Digital blending – Digital blending requires a set of bracketed images for best results. While it’s possible to do this handheld, your results will be improved a lot by using a tripod.
  • Cloning – You can layer several photos together showing yourself or someone else.
  • Light painting – Use your own light sources, or external light sources such as car light trails to light paint across your photo.
  • Astrophotography – Even longer exposures will be needed for astrophotography, together with a lens that has a large aperture.
  • Long exposure – Long exposure also does interesting things during the day. Experiment with moving water, or perhaps on a windy day moving clouds.

A strobe is required to take this type of photo with a water drop.

2. Strobe

Strobes are a great piece of creative photography equipment. They are a little intimidating to learn, with many people preferring natural light. The advantage of learning to use them is great, so push yourself out of your comfort zone. The first step for many will be placing a strobe onto your camera, and bouncing light off a ceiling to produce a well-balanced exposure. Strobism requires more commitment than that though. Look to invest in radio triggers and receivers so you can practice off-camera flash with multiple strobes. Experiment with modifiers like snoots, umbrellas, softboxes and color gels.

The following are a couple of techniques you’ll need your strobe for:

  • Water droplets – Capture a water droplet mid-air by photographing it with a strobe. The idea is to bounce the light off a background behind the droplet, and the light will shine through the droplet.
  • Low-key – Use snoots and a darkened background to create low-key photos. This will often be portrait photos. The bright flash will light your main subject, allowing you to underexpose the background to be black.
  • Stroboscopic – Get repeated images in the same photo by using a high-speed pulse of multiple flashes. A tripod is also needed for this technique.

LED light sticks can be used to create light patterns, like the ones in this photo.

3. LED light stick

There are lots of ways you can create light paintings. The LED light stick is a game-changer for this genre. This is an immense piece of creative photography equipment. This is long exposure, so of course, a tripod will also be required. You can now use this gear to create more abstract light paintings, or use it for portrait work.

The great thing about these devices is they’re fully programmable. You can design the exact light you want to paint, how much color, stripes, pictures or patterns. At the moment the two main LED light sticks on the market are the pixelstick and the magilight.

Lensball photography is a lot of fun, this photo has used post processing to make the ball “float”.

4. Lensball

The lensball acts as an external lens optic, possibly one of the most creative lenses you’ll own. The price is right as well. How many lenses have you bought for less than $ 50? At first glance, this piece of creative photography equipment might not look that useful beyond a few landscape photos. How wrong you’d be, though. It’s like saying a 50mm lens can only ever be used for street photography. So look through your glass sphere, and try out a few of these photography styles with it.

  • Floating ball – Capture the ball in mid-air, this requires some photoshop work, and you’ll need to learn how to set up the three photos you’ll need to create this type of image.
  • Portrait – A little trickier to achieve. You’ll need to exploit techniques that avoid showing the background if you want to focus in on the ball, so the portrait appears within the ball. Alternatively, use the ball as more of a prop within a regular portrait photo.
  • Landscape – Use the lensballs’ fisheye like properties to capture a unique lensball landscape, and give locations that have been photographed many times before a creative twist.

Infra-red photography can create interesting scenes on a sunny day.
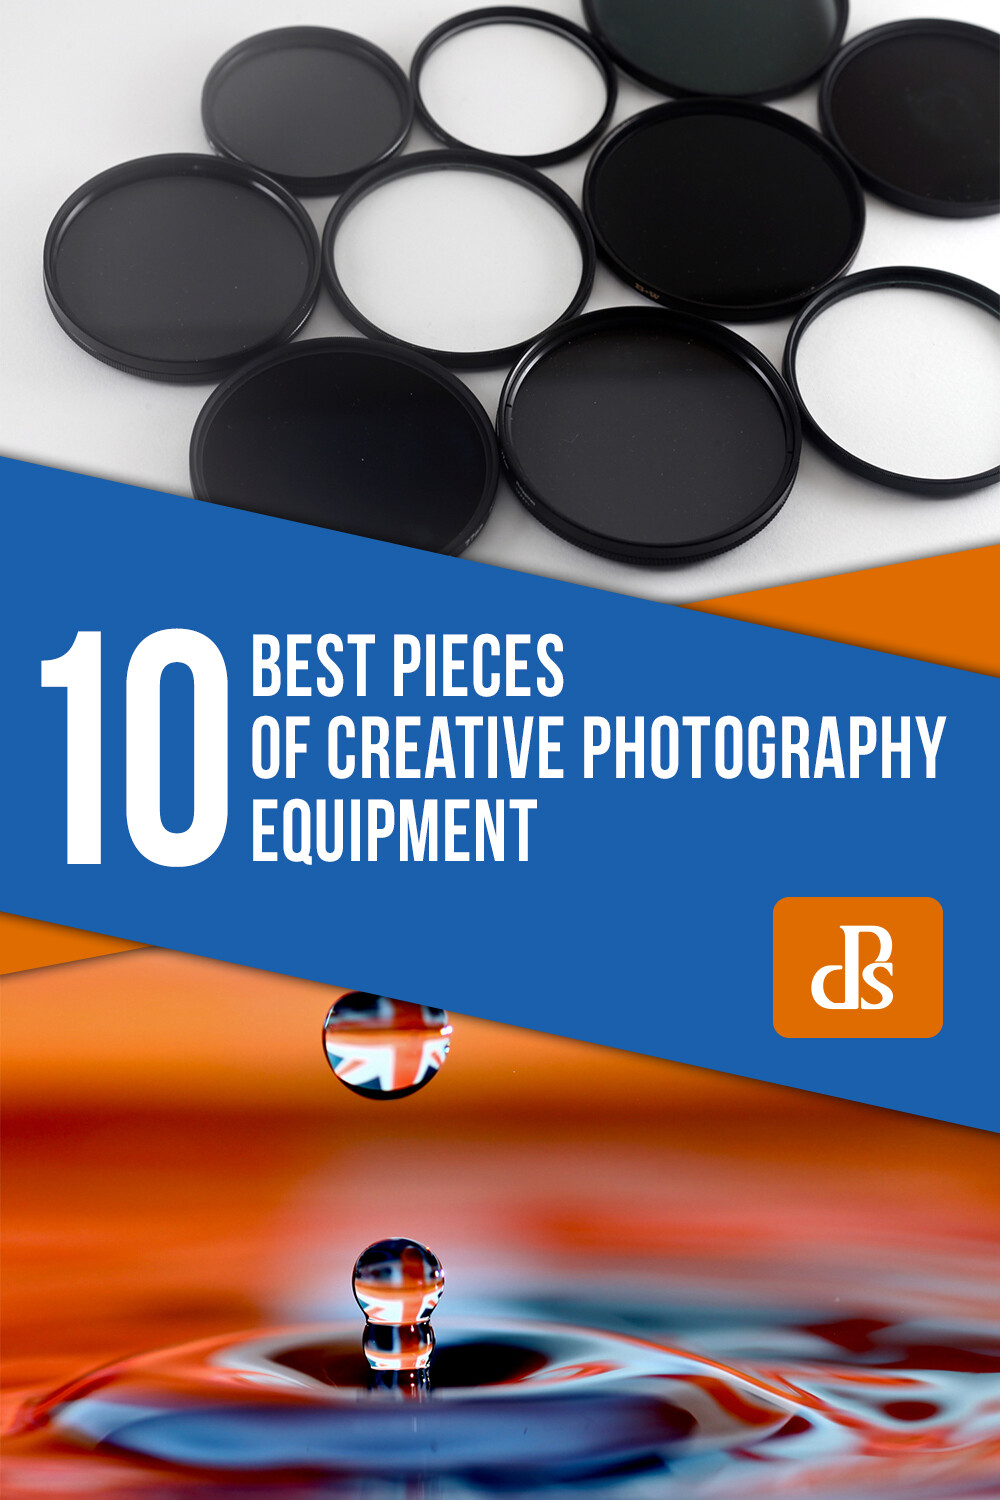
5. Filters

Is there a need for filters when post-processing is so powerful? The answer to that is certainly “yes” since the aim is to get as much of the photo you wish to achieve in-camera. You can add filters to the front of your camera that modifies the light coming into your camera, usually by reducing it, but there are other effects as well. Filters can be used for the following forms of creative photography.

  • Infra-red – Filter out all light except for infra-red. Doing so will likely mean you need to use a long exposure, and you’ll then need to post-process your results. The photo will appear red, so you’ll need to adjust the color channels so that the red areas of the photo become white.
  • Long exposure – The use of a strong neutral density filter will allow you to take daytime long exposures, with some very interesting effects.
  • Adding color – You can use filters to make your photo sepia or add more color to the sky during sunset. This is an area where post-processing offers an improved solution though.
  • Starburst – These filters make points of light into a starburst. The same effect can also be achieved by using a smaller aperture.
  • Softening – Portrait photos can be enhanced by using this type of filter, giving them a Hollywood glow. Alternatively, you could stretch a stocking over the front of your lens, and it will also soften the photo by diffusing the light.

Prisms will create double exposure-like images from a single photo.

6. Prism

Like the lensball, the prism alters the light coming into the camera through refraction. Other than holding this glass object in front of your camera lens that’s where the similarities end.

A prism is nevertheless an interesting object that can be used for creative results. You’ll be doing two things for your photographs with a prism. The first is redirecting the light to create interesting double exposure-like images with a single exposure. The second is projecting a rainbow spectrum of light onto a surface of some description, maybe even someone’s face.

Fractal filter

Fractal filters are to prism photography what LED light sticks are to light painting. They come as a set of three different filters, each offering slightly different results. So this is a handheld filter and one that works very well for portrait photos.

Wire wool is fun to use, but be careful with it.

7. Wire wool

Wire wool allows you to light paint with an urban industrial twist.

You’ll use the wool to create lots of flying metal sparks that light paint across your photo as they hurtle through the air. This is a really fun technique to try out, but the issue is safety. You’re creating 1000’s of red hot metal shards, and each of these has the potential to start a fire. You’ll need to exercise an abundance of caution when taking this type of photo. Avoid locations that could start a forest fire during the dry season.

The technique can also be used for portrait photography. Once again, ensure the safety of those involved in your photoshoot by making sure water is on hand just in case.

So how do you use wire wool to create these sparks? Check out this guide and learn how to do it.

8. Metal tube

Another piece of creative photography equipment you can hold in front of your camera lens is the metal tube! The diameter of the tube you’re holding will affect the result you get. The typical pipe to use is the copper pipe often used in household plumbing.

The idea is to photograph through this, and you’ll create a ring of fire within your photo. This ring of fire is in fact flare, and you’ll be able to use it to frame something or someone in your photo. The most obvious application of this photo is for portrait work.

This photo uses umbrellas to frame the subject.

9. Umbrella

This is a popular item for portrait photographers and can be used as a prop. There are several different ways you might use this with a model. If you’re photographing their whole body, the umbrella will take up a small part of the frame. Alternatively, you can use the umbrella as the entire background of your frame, with the model’s head and shoulders featuring in the photo. Not all umbrellas are designed the same.

The best options are the rainbow-colored umbrella, the traditional paper umbrellas, or the transparent umbrellas. The transparent umbrellas also offer the option of an object you can hold in front of the lens, with the spokes acting as a frame for your main subject.

Water droplets were added to the stem of this plant. The background was also added.

10. Water

Is water really creative photography equipment?

Taking water to the location you’re going to photograph makes it equipment. To do that, you’ll need to fill a bottle of water and take it with you to your location. Why might you decide to do this? The most obvious reason is to create reflections in your photo.

In order to do that, you’ll need to find somewhere that creates a natural puddle, and in a location that forms an interesting reflection. Not much water will be needed for this. A good wide-angle lens can make the most of a small reflection puddle.

Water has other uses as well, the following are some ideas you can try:

  • Splash – Use water to add dynamism to your portrait work by throwing it at your model, with their permission of course!
  • Droplets – In droplet form get your macro lens out, and see the little worlds within the droplet caused by refraction.
  • Ice – Take photos of object frozen in ice, to give your still life photos a different feel.


Which creative photography equipment will you use?

There are many items you can use to boost your creativity. Perhaps you use a magnifying glass or a mirror to add something to your images, or even an empty picture frame. There are lots of ways you can curate your photo by adding creative photography equipment to the scene. Have you tried any of the items listed in this article? What’s your favorite item to use, and are there items you use that are missing from this list? Please share your ideas and photos in the comments section of this article, so everyone in the digital photography community can enhance their photography.


10 Best Pieces of Creative Photography Equipment

The post The 10 Best Pieces of Creative Photography Equipment appeared first on Digital Photography School. It was authored by Simon Bond.


Digital Photography School

 
Comments Off on The 10 Best Pieces of Creative Photography Equipment

Posted in Photography


Essential Photography Equipment For Beginners?

03 Jul

Every photographer is unique in their own photography style and gear preference. To get you started on your photography journey, this article will help you choose the only really essential photography equipment for beginners. You will also find specific brands and explanations for why they were chosen. This photography basics bundle has everything you need to get started! I will Continue Reading

The post Essential Photography Equipment For Beginners? appeared first on Photodoto.


Photodoto

 
Comments Off on Essential Photography Equipment For Beginners?

Posted in Photography


Your Guide to Studio Lighting Equipment

07 Jun

The post Your Guide to Studio Lighting Equipment appeared first on Digital Photography School. It was authored by John McIntire.

There’s a lot of studio equipment to get familiar with and with it, a lot of terms to learn.

If you’re new to studio lighting, it is easy to get intimidated by the amount of stuff you have to learn. The jargon alone is enough to make your head spin. Fortunately, none of the things you need to be successful in the studio are particularly complicated, there is just a lot of it. The purpose of this article is to serve as a primer to introduce you to some of the most basic studio lighting equipment, and terms you will need to navigate a photography studio.

This is not a comprehensive list, and with new tools and techniques being invented all the time, it could never be.

A little warning: Some of these terms are used differently by different photographers. Others get interchanged with one another. While it can be confusing at times, it’s not necessarily wrong. However, it is useful to know about when you hear someone refer to a flag as a gobo or refer to ambient light as continuous light.

Types of light

Strobe – A studio strobe is a dedicated flash unit. They can sometimes be referred to as a monobloc or monolight. Usually mains powered, more battery-powered offerings are being brought onto the market all the time. Power output between models can vary greatly, with cheaper strobes offering as much power as a cheap third-party flashgun.

Strobes are powerful flash units that pretty much dominate studio photography.

Continuous light/Hotlight – Continuous lights serve the same lighting functions as strobes, but they don’t flash. Instead, they are high-powered lamps that can usually be fitted with modifiers in the same way as strobes. While mostly associated with video, continuous lights still have their place in stills photography. There are a lot of LED lights coming onto the market at the moment, and many of them are viable options.

The hotlight moniker comes from the fact that they tend to get very hot. Be careful with modifiers that sit close to the bulb as they present a fire hazard. This does not apply to LED lights.

Flashgun/speedlight – Flashguns are any small light with a hot shoe mount for placing on top of your camera. They are highly portable, and some come with reasonably high power outputs. Although their versatility is ultimately limited to their size and power output, they are still an extremely useful tool for any photographer interested in off-camera lighting.

Flashguns are small but competent light sources that are invaluable for portable studios.

Light functions

Key light – Your key light is the main light with which you are shaping your subject. This will usually be the brightest and most prominent light in your scene.

Fill Light – A fill light reduces the intensity of shadows created by your key light, thereby decreasing the overall contrast in your scene.

Rim light/backlight – Rim lights light your subject from behind to help separate them from the background. Often, rim lights are positioned so that only a sliver of light is visible on the sides of your subject.

Background light – As it says on the tin: background lights light the background.

Hair light – Hair lights are used to add emphasis to your subject’s hair. They can also be used to help bring up the exposure of your subject’s head if it is blending into the background.

Ambient light – This is any light that is present before the addition of any other lighting sources. This could be from lights in the room or daylight from a window or outside.

Modifiers

Umbrellas – Umbrellas usually come in silver or white and can be attached to your strobe via a mount. By firing the strobe into the umbrella (which reflects the light back to your subject), you are creating a much larger light source which creates a softer light. Although mostly directional, umbrellas can have a lot of spill, and they aren’t the easiest modifier to control.

Umbrellas are your most basic modifier. They are good for soft, diffused light, but they are hard to control.

Translucent Umbrellas/Shoot-thru Umbrellas – Translucent umbrellas don’t reflect light, but are instead made of diffusion material which you aim the light through. This softens the light, much in the way of other modifiers, but without the benefit of directionality.

Translucent umbrellas also provide soft light, but they aren’t as directional as softboxes.

Softboxes – Softboxes come in a variety of shapes and sizes. Once attached to your light, a softbox acts to shape and soften the light so that it is more flattering. Softboxes also tend to be quite directional, and they are easy to control and further modify.

Softboxes are the workhorse of the photographic studio, and they come in all shapes and sizes.

Strip boxes – Strip boxes are softboxes, but they are long narrow rectangles that produce a much narrower beam of light. These are great for lighting a subject from behind for a rim lighting effect.

Striplights are a useful type of softbox that offer very directional light.

Octaboxes – Also a type of softbox, an octabox is octagonal in shape. The rounder light source is useful for shaping the light for portraits. Octaboxes also tend to be quite large, making them an ideal modifier for portraits.

Reflectors (the modifier kind) – The reflector is a modifier that goes directly on your strobe. They channel the light in a specific angle for very directional light. They are also a very hard light source. Most are designed to take a variety of grids.

Reflectors, like this 110-degree reflector, provide a very directional and very hard light source.

Snoots – Snoots are modifiers that are designed to focus your light in a very narrow beam. They are great for both hair lights and background lights.

Snoots direct your light into a very tight and controlled beam.

Barn doors – Barn doors are fitted with two to four flaps for you to manually adjust the aperture the light is let through. These flaps can help you narrow the focus of your light on a specific aspect of your subject (such as their hair), or they can be used to flag the light from hitting a spot that you don’t want it to.

Beauty dish – Beauty dishes are directional modifiers that are somewhere in between soft and hard light. They are great for beauty photography (hence the name) as well as fashion and portraiture altogether. They often come with grids and diffusion socks to give you even more options in how to use them.

Beauty dishes offer a contrasty light somewhere between hard and soft.

Grids/Honeycombs – Grids are modifiers for your modifiers. Placed on a reflector, or softbox, or beauty dish, they narrow the beam of light further and help to ensure that the light is only falling on your subject (or where you want it to).

Grids help you to further modify the directionality of your light.

Gobo – A gobo is placed in front of a light source to change the shape of the light. This can be as simple as narrowing the beam and be as complicated as creating complex patterns. The easiest way to explain this is to imagine a Venetian blind with light streaming through. Now imagine the pattern on the wall. The blind is acting as an effective gobo and shaping the light.

CTO Gels – Color correction gels are used when you need to correct the color temperature of a given light. For example, if you have a gridded beauty dish that is particularly warm (like mine), and you want to use another light as a hair light, that second light might be very cool compared to your key light. By placing an orange CTO gel on your hair light, you can match and balance the color output of both lights.

Color Gels – You can also use gels towards a creative end. You can gel your lights to produce just about any color that you want to.

Reflectors (the reflective kind) – Reflectors are an important part of any studio kit. These allow you to reflect light from your key light back onto your subject. They are a means of creating a fill light without using a second dedicated light source. Reflectors come in many shapes and sizes, from the ubiquitous 5-in-1 reflectors to fancy tri-flectors sometimes used in beauty portraits.

Reflectors and diffusers are two vital tools when it comes to shaping and controlling your light in the studio. Also shown here is a reflector stand.

Diffuser/Scrim – A diffuser is a piece of translucent material that you place in front of a light source to alter the shape of the light or to reduce the intensity of the light. Some diffusers do both.

Flags – Flags are used to block (or flag) light from falling in your scene where you don’t want it to. You can use them to stop excess light falling on your background, or you can use them to reduce the exposure on the parts of your subject that aren’t the focal point. For example, sometimes, I like to use flags to help underexpose everything from the neck down in close portraits. This helps to ensure that the face is the main focus of the image.

Studio accessories

Light stands – Simply a stand to hold your light source. Ensure you have one that can hold the weight of your light. A high-powered, dedicated strobe requires a lot more support than a speedlight.

This image shows a boom arm attached to a lighting stand on a dolly. It’s a fantastic and versatile bit of kit.

Dolly – A light stand with wheels. Most useful.

Boom arm – A boom arm is a light stand that you can position at any angle between completely vertical and completely horizontal. These are useful to get your lights high up and also to place your light at angles a traditional light stand wouldn’t be able to manage. You can mount different varieties of boom arms to other light stands as well as permanent fixtures like walls.

Reflector Stand – A dedicated stand designed to hold a reflector in place.

Background/backdrop – A backdrop is any surface that you place your subject in front of. These range from paper and vinyl rolls to bare or decorated walls to pieces of painted canvas.

This image shows a painted canvas background. At the top of the frame, you can just see grey and white vinyl rolls on a motorized support system.

Background stand/support – Any support system designed to hold a backdrop in place. These can be free standing or wall mounted.

Clamps – Clamps and other fastening devices come in all shapes. You can (and should) use these to hold all manner of things in place. Backgrounds, flags, reflectors, gels, and many, many other things need to be held in place. For example, bulldog clips are indispensable for holding canvas backdrops up, whilst double-headed clamps can affix to a table and hold a flag or reflector.

This image shows a selection of clamps and clips that will you always find a use for in the studio. The double-headed clamp is holding up a piece of black foam core for use as a flag.

Rails – In bigger studios, you might see lights fixed to fittings on the walls and ceiling. These rails allow you to move your light relatively freely around a space without the hassle of a light stand.

They also help to keep cords out of the way of you and your subjects.

Other

Quality of Light – Quality in this instance refers to the physical characteristics of light. These include shape, intensity, and color.

Lighting pattern – A lighting pattern is a specific technique in which a light is placed in a prescribed manner for predictable and established results. Examples of these include butterfly lighting, Rembrandt lighting, and split lighting.

PC Sync Socket/Cable – The PC sync is a means to connect your camera to a flash with a cable. You can use this option in lieu of triggers.

Triggers – Triggers are devices that allow a camera to communicate with your lights and ensure that your flashes fire while the shutter is open. These range from very basic models with just one function, to complex devices that allow for full control over the settings of multiple lights.

Triggers allow your camera to communicate with your flash so that they work in sync with one another.

Slave mode – In slave mode, a flash will detect the light from another flash via a sensor and fire. This is great in situations where you have multiple lights, but only one basic trigger.

Mount – A mount is the means in which a modifier is attached to a strobe. A lot of lighting manufacturers have their own proprietary mounts associated with their systems (Bowens, Profoto, Elinchrom, etc.) So you will need to ensure that any modifier that you buy will fit the system that you own.

This is the shape of the commonplace Bowens S-mount.

Modeling light – Many strobes come fitted with two bulbs. One is a flashbulb, where your strobe light comes from, and the other is a modeling bulb that is on whenever the strobe is not flashing. This makes it easy for you to see what the light is doing to your subject. As a bonus, if you’ve cut out all ambient light (like you should in a studio environment), modeling lights give you the ability to see.

That’s a start

While this list is not, and can never be, a complete list of studio lighting equipment, it should serve as a decent primer to get you started in the world of studio photography. If you feel that I’ve missed something important, please add it in the comments below.


The post Your Guide to Studio Lighting Equipment appeared first on Digital Photography School. It was authored by John McIntire.


Digital Photography School

 
Comments Off on Your Guide to Studio Lighting Equipment

Posted in Photography


8 Pieces of Architecture Photography Equipment You Need

22 Mar

The post 8 Pieces of Architecture Photography Equipment You Need appeared first on Digital Photography School. It was authored by Simon Bond.

A great subject for photography is Architecture. Whether you’re a commercial photographer, or you enjoy photographing interesting buildings for fun, this is a great area of photography to explore. In this article, you’ll learn about some of the essential equipment you’ll need. Through using this equipment, you’ll be able to get great results each time you photograph. So read on and find out what architecture photography equipment should be in your camera bag.

A tripod combined with a decent wide-angle lens. This is a great architecture photography equipment combination.

1. Tripod

The tripod is a great piece of gear to have, and that’s certainly true for architecture photography. If you’re photographing indoors, or as it’s getting dark, it’s essential you have this. Even when the light is good, using a tripod will improve your results. The following are the main reason you’ll want to bring a tripod with you.

  • Interior photography – The lower light levels for interior photography mean using a tripod is necessary. You’ll need to use slower shutter speeds while keeping the aperture at around f/8.
  • Manual focus – The best way to gain the sharpest focus is to use live view, and then manual focus. This is easiest to achieve with the camera on a tripod.
  • Bracketing – There are many occasions you’ll need to take bracketed photos to balance the light across the scene. When photographing towards the light, or if there is a bright light source such as a window, you’ll need a range of exposure to use in post-processing to balance the scene. In this case, you will need a tripod.
  • Blue hour – A great time for exterior architecture photography is Blue Hour. During this time you’ll need to take long exposure photos from a tripod.

Bracket and clamp

An alternative piece of architecture photography equipment is the bracket and clamp. This can be used as an alternative to the tripod, and you can use it to secure the camera to a structure such as a metal railing. There are locations where a tripod won’t be allowed, and in some cases having a bracket and clamp instead, will allow you to secure the tripod for your needs.

2. Wide-angle lens

The next most widely used piece of architecture photography equipment is the wide-angle lens. This will almost certainly be needed for interior work and is often needed for exterior work as well. Those photos taken in a room, where you need to capture the entire room, will need a wide-angle lens of at least 17mm on a full-frame camera. A lot of architecture is often large in scale, so a wide-angle lens is needed to capture the full size of the architecture you’re photographing. The exception comes when you are some distance from the subject you’re photographing, in this case, a longer focal length would then be required.

The interior of the grand mosque in Abu Dhabi. This requires a wide-angle lens to capture how impressive it is.

Which wide angle lens?

Here is a selection of some of the best wide-angle lenses you can use. Depending on the system you have, you may go for a different lens from this list.

  • Canon 17-40mm f/4L – A great lens at a budget-friendly price. This lens is wide enough for most situations.
  • Sigma 14-24mm f/2.8 DG HSM Art – Great quality lens, made to fit numerous camera manufacturers. Great focal length – and if you need it – a large aperture.
  • Nikkor 14-24mm f/2.8G ED – An excellent lens for those using Nikon cameras. Once again, very wide at 14mm.

3. Bubble level

Getting a bubble level is a good idea to ensure your camera is completely lined up. You’ll find that with a wide-angle lens the distortions they produce can make it difficult to see if the camera is truly level. Using a bubble level, which can easily attach to the hot shoe, you’ll have a quick and easy visual reference. In some cases, you may have a bubble level built into your tripod head. This is a great alternative to a separate bubble level.

4. Strobes

The use of strobes is not just for portraits, you can use them in architecture photography as well.

Strobes are excellent at close quarters, but perhaps not for outdoor use with a larger structure.

You’ll get the best use out of these when you’re doing interior photography.

They’ll come in handy when you have a bright window, and a dark room. You can now use the strobes to light up the room, by bouncing light off the ceilings or walls. This will balance the light across the photo, and can either supplement or replace the need to bracket your photos.

Take care when bouncing the light off a surface that isn’t white, as the light from the flash could potentially color cast the room, in the color the strobe has bounced off.

5. Tilt-shift lens

You’ll be photographing your architecture at a wide angle, and it’s likely you’ll be aiming up from street level. This causes problems for architecture photography due to lens barrel distortion. The result is you’ll have buildings that bow inwards towards the center of your image. This is a problem that can be solved using a tilt-shift lens. It’s also possible to correct this distortion in post-processing, so the tilt-shift lens is not strictly needed. It’s best to get your photo as correct as possible in camera though, so using a tilt-shift lens is best.

This photo has not been adjusted for barrel distortion since the minarets lead the eye into the center of the image. It is an example of where a tilt-shift lens could be applied, as this would fix this distortion.

6. Cable release

You’ll want to get the sharpest results possible for architecture photography. You will take the majority of your photos from a tripod to achieve increased sharpness.

However, when you press the shutter, you’ll move the camera a little. To avoid this, you’ll need a cable release cord or a remote control shutter release. Using these tools ensures your camera will be completely steady when you expose.

Those using DSLR cameras should remember to lock up their mirrors ahead of exposure. If you were using live view to compose and focus your photo, then the mirror will already be locked up.

A cable release is a great piece of architecture photography equipment to have.

7. Post-processing

Post-processing is an important part of architecture photography. Post-processing software might not be physical gear, but it’s easily as important. To get successful architecture photos you’ll need to learn how to sharpen your image in the right area, and how to apply noise reduction software. One of the most useful post-processing techniques you can learn is digital blending, this is essentially manual HDR photography. A correctly blended image will have a lot more impact with certain areas of the photo made brighter and distracting highlights such as window light reduced in brightness. So which software is worth having?

  • Photoshop – The Goliath of the post-processing world, a package widely used by the best photographers and with good reason. You’ll need this for digital blending, and through Adobe Camera Raw you’ll be able to do some sharpening and noise reduction work.
  • Nik collection – A really great set of programs that can be used to polish your photo in post-processing. A combination of Nik color EFEX, Dfine, and Pro sharpener can lead to great results.
  • Raya pro – You’ll need Photoshop to use this, but this excellent tool will make digital blending much easier, and there are guides that go with this program to help improve your work.

Learn to use Photoshop effectively. Your photographs will improve.

8. Filters

A good set of filters are great pieces of architecture photography equipment. It could be argued the need for filters is diminished due to the advance of post-processing. Those that are best at post-processing will tell you to use filters though because it makes life a lot easier once you get the photos onto your computer. The two main filters worth having in your bag are a circular polarizing filter, and a graduated neutral density filter.

  • Circular polarizing filter – This is great for adding vibrancy to your scene, especially useful for outdoor architecture photography. This can be used to enhance or reduce the amount of reflection in your photo.
  • Graduated neutral density filter – Used to balance the light across the scene, these are primarily used by landscape photographers. In architecture photography, you can use the dark portion of this filter to balance the light across the scene. A window will often be too bright in your photo, so you can position this filter on your lens, to reduce the brightness in a portion of your photo.

There are many types of filters, these can all help your photography.

Which architecture photography equipment do you use?

There is a wealth of good camera equipment available for you to use. Which pieces of architecture photography equipment do you find best? Do you have experience of using some of the items in this list? What other items are in your photography bag, and why would you recommend them?

At digital photography school we’d love to see your images of architecture photography, so please share them in the comments section.

The post 8 Pieces of Architecture Photography Equipment You Need appeared first on Digital Photography School. It was authored by Simon Bond.


Digital Photography School

 
Comments Off on 8 Pieces of Architecture Photography Equipment You Need

Posted in Photography


When and How Often Should You Upgrade Your Photography Equipment?

13 Mar

The post When and How Often Should You Upgrade Your Photography Equipment? appeared first on Digital Photography School. It was authored by Lily Sawyer.

We have all heard of the shiny object syndrome have we not? Perhaps you have even fallen victim to it? It’s an easy trap; especially when we are newbies. I have certainly been a victim of it when I first started and was always thinking that my photography would improve if only I had better gear. Right? Wrong! However, your photography will be better if you have the CORRECT gear.

dps-when-to-upgrade-photography-equipment

From my experience of photographing professionally over a decade, I have realized a few things. One of which is that YOU control your gear – your gear does not control you. In other words, you can definitely produce mind-blowing images with the gear you currently have if you know how to use them correctly. Add a hint of creativity into it, and you are taking your images to the next level.

If you are a photographer, the very fundamental things you need to master would be understanding the exposure triangle, lighting (whether that be natural or artificial) and shooting in Manual mode. The first one underpins the last one. Without a solid understanding of the exposure triangle, you may struggle to shoot in Manual mode.

There is nothing wrong with shooting in semi-automatic modes like Aperture Priority or Speed Priority, but you get yourself in tricky scenarios if you rely entirely on shooting on Automatic mode. Your images will be inconsistent, and you will encounter problems in post-processing. Shooting in semi-manual mode still requires an understanding of what those modes do, so why not go the full haul and take the time to understand the exposure triangle.

With that preamble out of the way, I’d like to address the question “When and how often should you upgrade your equipment?” I offer my thoughts below which could greatly differ from other people’s opinions. That is all fine. It’s a free country, and we can exercise free speech.

Things to consider when buying equipment for the first time

dps-when-to-upgrade-photography-equipment

1. Your budget

Sit down and think about how much you can afford without getting into debt. If you are buying gear to learn on, I would not suggest getting into debt to buy your first equipment. It is true that professional, full-frame cameras are better, but do you need them to learn how to shoot? Absolutely, not! Can you only produce good pictures with these top-of-the-range cameras and not with old second-hand models? Of course not.

2. Your subject

Think about what you want to shoot. Your lens choice depends on what subject you want to learn to shoot. For example, if you want to shoot landscapes, don’t buy a zoom lens. If you want to shoot portraits, don’t buy a super-wide-angle lens. If you want to learn both, explore your zoom options. This brings me to the issue of whether to buy the camera body and lens separately or buy a kit.

Brands often offer a kit bundle to save you money on them and have a variety of options to choose from. This isn’t necessarily a bad choice, but it could also be a big waste of money.

A bundle often has a camera, a wide to medium zoom and a longer zoom. These are fine if you want to shoot outdoors in ample light. However, you will quickly realize that if you want to do indoor portraits, these lenses perform below par. These kit lenses are generally the cheaper range with a variable aperture starting from f/3.5 going up to f/5.6 maximum aperture as you go longer on the focal length. These would be inadequate for very dim lighting or indoor ambient light without flash. Ideally, you would need apertures of f/2.8 and wider.

If you opt for buying a camera body separately, then you have more options, both new and second-hand. Just make sure you check the shutter count of the second-hand ones to ensure they have not exhausted the upper range of shutter click guaranteed by the manufacturer before the shutter mechanism starts deteriorating. Most second-hand sellers provide this information; if not, you must ask.

Buying the correct lens for your photography purpose will put you in good stead right off the bat. Why? Because if say you want to photograph portraits, buying the right lens will help you achieve beautiful portraits. Portraits I’m sure you have seen done by other people compared to if you were to shoot them with the wrong lens. You’d forever be wondering why you could not quite achieve the look you want.

3. Accessories

Don’t go all-out buying every accessory on the market. These can be quite tempting but will burn a hole in your pocket and use money up earmarked for your main equipment. You would be better off buying the best main camera and lens your budget can afford and one or two essential accessories than spreading out your budget and making compromises on everything.

If you want to be a landscape photographer, for instance, buying a tripod and a remote shutter is a must otherwise there is little point in even trying. If your interest lies in still life, get a reflector. You don’t always need a tripod for still life photography, but a reflector always comes in handy. If you want to photograph people indoors, I’d say get a flash gun, even if you only want to use natural light. There will come a time when you realize that relying solely on natural light gets you into a pickle eventually and is no longer enough.

However, you mustn’t forget to buy absolute essential accessories – no matter what you are shooting:

a. Memory cards – don’t skimp on these. You want decent ones that you would be able to entrust your images!

b. A padded bag – there’s no point in shelling out good money for equipment and not have the proper protective bag for them!

dps-when-to-upgrade-photography-equipment

When should you upgrade your equipment?

1. Initial investment

This question kind of depends on your initial investment decisions. You see, brands often come out with new camera models every year or more to entice people to keep upgrading. However, while it is true that some of these new models have improved features, nowadays, things are being invented and improved at an alarmingly fast rate. So if you follow the trends, you’ll soon be out of pocket.

My advice would be to buy the best lens you can afford with your money and buy a camera with the remainder of the budget. New cameras keep coming out every year, but lenses stay the same for many many years! They hold their value more compared to camera bodies too. Not all good lenses are expensive. You can buy the 35mm f/1.8 (DX only) and the 50mm f/1.8, and they are excellent lenses for the money.

I have written an in-depth article on lenses which may help you decide when purchasing either as a first-time buy or an upgrade. See them here and here.

2. Upgrading

Upgrading is a good mentality to have but not to do often. Do have a plan for upgrading (which you may have to do eventually), but do not upgrade every time a new model is churned out.

Consider the following when upgrading:

  1. Have you used your camera for the purpose that you have bought it for?
  2. Is it now inadequate for your needs? Are you finding that you need better features now that you have mastered it? For example, you may want a camera with better noise-handling ability, silent mode or a swivel LCD to enable you to take high-up shots, or perhaps one with dual slots?
  3. Are you at a point when you require another camera so you can use your first one as a back-up?
  4. Is your current camera now broken or have broken parts? Then yes, now would be a good time to upgrade! However, if you really love it, you may want to opt for repair.

My first full-frame professional range camera is the Nikon D700. I have bought newer models since, but you know what? I still use the D700 for my own family photos; especially outdoors. I love the colors the sensor produces, and in my opinion, they have never been able to replicate it in the newer brands. The RAW images I get from that camera are the closest to that film-look that I love and the edits required are minimal. However, it’s poor in handling noise, it’s big and brick-heavy and only has one card slot. However, I won’t ever part with it and am happy to use it for personal shots until it breaks.

dps-when-to-upgrade-photography-equipment

Conclusion

I hope these considerations help you in your purchasing and upgrading decisions! Comments and suggestions of more factors to consider are welcome below!

The post When and How Often Should You Upgrade Your Photography Equipment? appeared first on Digital Photography School. It was authored by Lily Sawyer.


Digital Photography School

 
Comments Off on When and How Often Should You Upgrade Your Photography Equipment?

Posted in Photography


Essential Photography Equipment For Beginners

11 Mar

Every photographer is unique in their own photography style and gear preference. To get you started on your photography journey, this article will help you choose the very essential photography equipment for beginners. You will also find specific brands and explanations for why they were chosen. This photography basics bundle has everything you need to get started! I will start Continue Reading

The post Essential Photography Equipment For Beginners appeared first on Photodoto.


Photodoto

 
Comments Off on Essential Photography Equipment For Beginners

Posted in Photography


Newborn Photography Basics and the Equipment to Use

04 Feb

The post Newborn Photography Basics and the Equipment to Use appeared first on Digital Photography School. It was authored by Lily Sawyer.

Many newborn photographers, especially those who specialize in purely newborn photos, have their own studio.

newborn-portable-studio-kit-equipment-dps-lily-sawyer-photo

Parents come to them with their newborns, and their studios are fully kitted-out with lights (unless they are a natural light only photographer), backdrops and props. Some newborn photographers also travel to clients’ home and bring with them their own portable studio.

When I started photography, I did all sorts under the sun. Weddings, families, children, events, birthdays, newborns, maternity…Cake-smash is the only obvious thing I can think of that I haven’t done.

Over time, I cut down on the others and focused on weddings. Now don’t get me wrong, I still do these photography genres, but reserve them for past and annual clients and referrals.

What I’ll share with you is my way of doing newborns, my preferences and the equipment I use. There are other ways and styles, so please don’t take this as gospel and the only way to do newborns. It’s just the style that I prefer. Instead, take this as some advice (if there’s any you find helpful), and as a choice out of the many styles out there.

Before we dive in, let me first say that I didn’t go into newborn photography without reading up on it and learning about safety. Safety is critical. You can’t wing it. Instead, you have to understand risks and take necessary precautions with your equipment, process, and workflow. Baby safety is of utmost importance, over and beyond poses, props and style.

newborn-portable-studio-kit-equipment-dps-lily-sawyer-photo

Choose a style

Your style dictates your equipment. If you want very natural looking photos, no poses, or plenty of candid captures, then you probably won’t need much equipment such as stands, backdrops, or softboxes. All you need are the basics – a camera, the correct lenses (24-70 or 50mm and a macro for close-ups like a 60mm), memory cards, batteries, reflector, speedlight (if using as a back-up).

If you like props, then it’s the opposite. You may need to use everything but your kitchen sink – baskets, bowls, wraps, flowers, textured rugs, fabrics, or toys. These are on top of all other photography equipment.

My preference is going to clients’ homes. I’ve done newborn shoots in my studio, but I prefer setting up in baby’s own home. I take my time and make sure everyone is comfortable and happy, especially the baby. Also, allowing for feeds and soothing. I know most specialist studios have the workflow scheduled to a T, taking an hour maximum and moving on to the next baby. That is fine too and makes good business sense.

1. Props

My style is simple and classic with a few props – namely blankets and wraps, sheepskin, and a basket. That’s it. I use soft fabrics to wrap the babies, so they feel secure. Sometimes I might add something extra depending on the situation, like these newborn twins, where I thought angel wings and a crown would look sweet, or a little flower hairband. Just don’t go over the top. Less is more when it comes to photographing newborns.

I also put them on a sheepskin or blanket to add texture. Usually, the sheepskin or blanket sits on top of a basket, so the babies are shaped curled up. I place the baby curled in there to represent the womb shape. The basket either sits on a beanbag on the floor or on the bed, which must be big, depending on the setup.

I like to keep props to a minimum and focus on the baby’s face, expressions, hands and feet, hair and the lighting.

newborn-portable-studio-kit-equipment-dps-lily-sawyer-photo

2. Poses

Never force a pose on a baby. I do 2-3 poses maximum. If the baby is not comfortable with a pose or not wanting to cooperate, I drop it (the pose not the baby!) and move on to an alternative. I like the bottom up pose, fetal position with baby curled up in a basket, mother and baby/father and baby poses.

3. Lighting

There are many lighting setups. However, I take a softbox with me, speedlights, transmitters, a stand for the softbox, and a reflector. My set-up is simple. I prefer everything on the floor, so that’s where I place the beanbag. A rectangular softbox on a stand sits at a 45-degree angle to the bean bag. Opposite the softbox is a reflector. I use a speedlight in the softbox rather than a strobe for portability. Don’t forget the adaptor for the speedlight to sit on. That’s it. Simple. This way, you can shoot whether there is natural light available or not, whether there is a window in the room , or it’s pitch black!

4. Backdrop

A basic portable backdrop stand kit, with two stands and a bar across to clamp on some fabric, has served me well. Choose material that doesn’t crease! Once I used a black cotton fabric which was so wrinkled I spent ages photoshopping the creases out and painting over the fabric. Luckily it was black and was possible in Photoshop. I sometimes use the backdrop on the beanbag with the baby on top to get a seamless fading background. I prefer a darker background to light colored ones.

newborn-portable-studio-kit-equipment-dps-lily-sawyer-photo

5. Other special items

I like to do the shoot as a story, so I always include other shots of the baby’s nursery. This story may include special newborn greetings cards, booties, or the most special toy gift for the baby. I check with the parents as to what they want capturing. These unique items are also why I prefer to shoot newborns in their homes – the shots become so personal to them and therefore more special.

6. Candids

I often end the session with natural, unposed shots of the family especially if there’s a sibling. That way, they have some memories together of their first few days as a family.

7. Editing

Unfortunately, in my experience, newborn editing takes up much time. Perhaps that’s because I like a more artsy look and there’s a lot of softening to do on the background to match the softness of the newborn skin. Not to mention cleaning up the newborn skin, which is often wrinkly and spotty with milk spots, or very red too. I aim to give the family a variety of images, so they have a good bunch of memories of those first days.

Conclusion

I hope this has given you a snippet of what newborn photography could look like for some. It’s different for others, but this is what I do. I’ve evolved from brightly lit newborn photos to moody, dark tones. Yours can be different. Just make sure it is something you love. Do share your thoughts in the comments below.

The post Newborn Photography Basics and the Equipment to Use appeared first on Digital Photography School. It was authored by Lily Sawyer.


Digital Photography School

 
Comments Off on Newborn Photography Basics and the Equipment to Use

Posted in Photography


Thieves steal more than $50,000 in equipment from camera store in less than a minute

24 Dec

This past week, Hunt’s Photo and Video, a small camera store located in Manchester, New Hampshire, had thousands of dollars worth of camera gear stolen from its stands and cases overnight.

Detailed in a video produced by NBC10 Boston, CCTV footage shows four thieves breaking through the front of the store with the help of an axe. Once the entrance is cleared, the thieves run inside with four containers and smash the display cases to access the gear. The thieves subsequently fill each container with thousands of dollars in camera equipment and slide them across the floor as they make their way towards the exit.

In less than a minute, the smash and grab netted the thieves more than $ 50,000 in equipment, according to Mike Mitchell, VP of Hunt’s Photo and Video. The high quality CCTV footage captured a partial identification on one of the thieves when their mask was lifted, but hasn’t led to any definitive identifications as of the publication of this video.

Four months prior to this break-in, Hunt’s experienced a nearly identical break-in wherein the thieves made off with another $ 50,000 in gear. Local authorities are working alongside Hunt’s Photo and Video to identify and capture the suspects and believe the two break-ins are related to each other.

DPReview has contacted Hunt’s for more information on what was stolen and what the serial numbers are. This article will be updated accordingly if Hunt’s responds with the information.

Articles: Digital Photography Review (dpreview.com)

 
Comments Off on Thieves steal more than $50,000 in equipment from camera store in less than a minute

Posted in Uncategorized


Photography Equipment Tips for an Africa Photo Safari

06 Dec

The post Photography Equipment Tips for an Africa Photo Safari appeared first on Digital Photography School. It was authored by Andrew Sproule.

There’s no doubt that booking and planning for an Africa photo safari is an exciting time, especially if it’s your very first venture. As a photo safari tour leader, I’m used to the process. Nevertheless, I still behave very much like a child in anticipation of what Christmas brings. As your departure date draws nearer, your thoughts move to packing for your trip. Although the appropriate clothing is essential, these trips are really about amazing wildlife encounters, shared experiences and capturing memories. It’s time to think about your photography equipment, – your gear.

It’s time to pack your camera bag!

Author’s Note

Before I dive in, I would like to state that this article represents my tips for maximizing your experience while on an Africa photo safari. It’s a guide with a mix of opinion and facts based on my on-location, in-the-field experience. It’s a summary, an introduction and not a laboratory review and therefore should be treated as such.

Secondly, I always recommend photography enthusiasts choose a safari designed explicitly with photographers in mind. General ‘tourist’ safaris have their place, but they’re much more likely to be governed by a species timetable. Lion, check. Move on. Buffalo, check. Move on. You get the picture. On a dedicated Africa photo safari trip, not only will you share a vehicle (often customized for photographers) with liked minded people, you’ll also benefit from being able to spend much more time with an individual animal or group of animals. You’ll be able to witness unusual behaviors and explore different angles and lighting situations. Explicit and invaluable guidance and advice are also on tap.

Thirdly, you’ll notice that I’ve included my camera settings below a number of the images. These settings worked for me in those particular situations, under certain conditions to produce the type of image I was after. I suggest you use these posted settings as a guide only. Instead, think about how these images might look if you were to adjust the shutter speed, aperture or ISO. Then, take that information into the field with you. The relationship between these elements can create widely different outcomes and also help you to define your style.

Leopard, Botswana. Canon 1DX, Canon 70-200mm(at 105mm), f/2.8, ISO 400, 1/125th sec handheld. Image © Andrew Sproule

Cameras for an Africa Photo Safari

Notice I have stated ‘cameras’ in the title and not ‘camera.’ I recommend you take at least two camera bodies with you. On the surface, this may seem like overkill or even a touch extravagant, but there are valid reasons why.

Firstly, it’s peace of mind. Imagine the heart-sinking moment if your camera fails. That emotion is tenfold if it happens on day one of a two-week photo safari! Whether you take two DSLRs, two mirrorless cameras, a combination of both, or an alternative solution, possessing a backup prevents any unnecessary anxiety. Before I purchased a second camera body, I used to hire one for my Africa trips. I still do this on occasion. It’s a great way of testing and trialing gear in the field beforehand and working out what works best for you.

Secondly, Africa is an extraordinarily harsh and dusty environment. Sand and dust particles are the enemies of sensitive camera sensors. Consequently, eliminating the need to swap lenses while on location can be a huge plus.

Furthermore, having two cameras armed with different lenses (for example a telephoto lens and a mid-range zoom), you’ll find it easy to switch between them. Switching between them is useful when wildlife comes too close, or if you are pulling away for a wide shot of wildlife in context of its habitat. Being able to adapt to shifting conditions can mean the difference between capturing, or not capturing the shot.

Not everyone is in a position to take two cameras. It also doesn’t matter whether your camera is full-frame, crop-sensor or another type, as there are pros and cons to all. What is fundamental is that you know your camera intimately. Practice on your dog, your cat or deer in a local park. Whatever you can. The more familiar you are with your camera’s features, the quicker you’ll be able to adjust to conditions that unfold in front of you with confidence.

Lenses for an Africa Photo Safari

Super-telephoto lenses with a focal length of 300mm plus are the staple for most Africa photo safaris. For crop-sensor cameras, 300mm should be ideal. If you intend to photograph birds as well as large game, the longer the focal length, the better. Full-frame cameras usually need lenses of 400m+.

Wild dog, Botswana. Canon 1DX, Canon 500mm, f/5.6, ISO 200, +2/3 EV, 1/160th sec, monopod. Image © Andrew Sproule

Although my go-to lens is a 500mm, I believe the versatility of zoom lenses make them ideal for African safaris. There’s such a wide variety of birds and mammals of a degree of varying sizes and distances that a good lens option would be something like the 100-400mm.

A short-zoom lens in the range of 24-70mm is also a great option as it provides the flexibility to pull away to present wildlife within its environment, adding real context to an image. Because I’m also a landscape photographer, I also favor super-wide lenses in the range of 16-35mm or 14-24mm.

Much of Africa’s wildlife is active in the early mornings and late evenings meaning you’ll be battling low levels of light. Lenses with larger apertures, such as f/2.8, allow more available light into the camera, so you’ll be able to use a reasonably high shutter speed for much longer. These lenses are a luxury item though, so an alternative solution is to increase the ISO. Doing so most certainly increases noise, but most photographers would rather have a sharp shot with an acceptable amount of noise than an out of focus shot with no noise. In many cases, you can eradicate most noise in post-production.

Filters for an Africa Photo Safari

I often use filters when composing landscape images, and on an Africa photo safari there are most certainly circumstances when the use of a filter is advantageous. For filters that reduce glare, saturate colors and darken skies, I recommend using a polariser filter.
If you need help to correctly expose bright skies, while preserving exposure detail in the foreground, then I recommend an ND filter.

Camera Support on an Africa Photo Safari

Burchell’s Zebra, Kenya. Canon 1DX, Canon 500mm, f/4, ISO 200, 1/50th sec, bean bag. Image © Andrew Sproule

Bean Bags

Bean bags are my go-to support, especially in East Africa. They are a simple, yet extremely effective support for your camera. Bean bags can be used to rest your lens on a vehicle’s doorsills, window frames, roof rails and the actual roof itself. Also, wildlife is often on the move, so you’re not limited to one position within the vehicle. Many reputable Africa photo safari tour operators provide beanbags. However, that said, it is always worthwhile double-checking beforehand. Bean bags can pack light and get filled with rice or beans on arrival. Some photographers prefer to fill their beanbags with lightweight polystyrene balls before they leave. It’s bulkier but a lightweight alternative. I’ve been using a couple of Kinesis SafariSacks 4.2™ for a while. As well as being a great support, the quick release straps secure the bags in place, so you never lose them in the bush.

A typical East Africa safari vehicle. Image courtesy of Governors Camp, Maasai Mara, Kenya

Unfortunately, bean bags are not a universal solution, contrary to what you may have read in certain books or magazine articles. Although they’re a fantastic solution in East Africa, they’re not as useful in Southern Africa (including South Africa, Botswana, Zambia, and Zimbabwe). The reason is that the vehicles there are radically different. Safaris in Southern Africa use open Land Rovers and Land Cruisers with no sides at all – often there isn’t even a windshield! So, there is nothing on which to rest the beanbag. In Namibia, both open Land Rovers and closed vehicles are in common use.

A typical Southern Africa safari vehicle. Image courtesy of Motswari Private Game Reserve, South Africa

Monopod

If a bean bag is not an option, a monopod offers a lightweight and more practical alternative to use within the confines of a safari vehicle. Especially in Southern Africa. You don’t need to extend it entirely, and it takes the strain from your arms and shoulders while seated. It’s surprising how effective it can be. I have tested many monopods over the years and have found that Gitzo Monopods™ best suit my needs. I also use a Really Right Stuff™ lever-style, quick release that makes the process of taking lenses on and off the monopod very fast.

Tripod

A tripod is useful or even an essential piece of kit for evening photography, longer exposures or for around the camp. Although, the wide-spread tripod legs make them impractical and ill-advised for most safari vehicles. However, if you’re in an open vehicle on your own, or perhaps with one other, a tripod can be rigged to provide an excellent platform for larger lenses. To avoid badly damaging your camera from vehicle shake, always remove your camera from the tripod while on the move.

Some airlines take a dim view of tripods, and you may find it difficult to persuade them to let you take it in the cabin as part of your hand luggage. If it’s going in the hold, it can take up more of your baggage weight allowance.

Clamp

I often use a ball head or gimbal head on a Manfrotto® Superclamp that can be bolted almost anywhere, including a vehicle’s roof bars. If I’m on my own, or part of a tiny group, I may even have several of these clamps placed in strategic points around the vehicle making it extremely easy to switch from side to side and back to front.

Manfrotto 035 Superclamp. Image courtesy of Manfrotto®

Storing Images while on an Africa Photo Safari

Laptop

You could easily take 300-500 images a day. Trigger-happy photographers may even have over 1,000, so a small laptop with external hard drives are useful for securely backing up your photographs. If weight restrictions allow, two hard drives that mirror each other is a great solution. Remember to pack essential items such as connecting cables, chargers and memory card readers.

Memory Cards

An alternative solution to external hard drives is to bring extra memory cards. You can file these away at the end of each day. That way, you are safe in the knowledge that your data remains untouched until you arrive home. If you don’t like the idea of swapping out memory cards too often, go for larger capacity ones such as 32GB. That said, I don’t like to put all my eggs in one basket, and therefore I opt for 2 or 3 smaller cards in favor of one larger one.

Accessories for an Africa Photo Safari

Batteries

Get to know what you can expect out of your camera with regards to battery life and take enough spares to get you through each day. Cold is a battery’s nemesis, so make sure they’re not getting too cold overnight. I have two spare batteries for each camera body, and that’s always been more than adequate for my purposes.

Lens Cleaning Cloth

Remember lens cleaning cloths. I would also recommend a camera and lens cover that helps protect your camera in the event of a rain shower and for protecting your gear against the dust mentioned above.

Others

Don’t forget your smartphone, binoculars, head torch, notepad and pen, personal medication, malaria medication, toiletries, money, your passport, and visa.

For detailed, up-to-date information on vaccinations and more, you are best to consult an official website.

Packing for an Africa Photo Safari

I recommend packing high-value items like cameras, lenses, and laptops in your hand luggage. Some airline safety requirements require you to pack batteries in your hand luggage, so ensure you charge your items, as airport security often requires you to demonstrate that laptops and cameras are all in full working order. A simple rule of thumb is to pack items essential to your photography, travel, and health in your hand luggage.

Pack your gear very carefully with disruption in mind. Some Africa photo tours can consist of two or three successive flights to get to various destinations in Africa. There may be two or even three layers of airport security on each of these flights. You may be required to unpack large cameras, lenses, and laptops. If you can, avoid placing smaller accessories on top of larger items that you may need to take out repeatedly and re-pack. Pack cables and batteries together in small pouches rather than loose in your bag.

Your camera bag should be large enough for your gear but small and light enough for all cabin limits. When packed you should be able to safely lift your bag in and out of the overhead lockers without assistance. Check the maximum sizes and weights for all the airlines and be aware that different flights often have different rules.

For small internal charter flights within Africa, total baggage allowance (hand luggage plus hold luggage) can be as little as 20kg and bags must be soft and pliable.

Typical Southern Africa internal charter flight. Image courtesy of Moremi Game Reserve, Botswana

Final Thoughts on an Africa Photo Safari

An Africa Photo Safari is an incredible experience. For many, it is a-once-in-a-lifetime opportunity both to experience incredible scenery and wildlife and to take amazing photographs.

There’s no doubt that it can be a daunting experience packing expensive and essential photography equipment for a safari. Even for seasoned photographers. Just remember to seek out advice. If you are booked on a photographer-specific tour, you can request support from your guides and or Africa safari tour facilitator. They have the experience and knowledge to help you make it the through this process with as little stress as possible.

The post Photography Equipment Tips for an Africa Photo Safari appeared first on Digital Photography School. It was authored by Andrew Sproule.


Digital Photography School

 
Comments Off on Photography Equipment Tips for an Africa Photo Safari

Posted in Photography


Real Estate Photography: Get Better Results with the Right Equipment

25 Oct

Real estate photography throws many challenges your way, just like any type of photography.

You deal with perspective issues and light and shadow extremes that confound even the best cameras. You also need to be critically aware of your surroundings and probably have very limited time to do the job.

The good news is, creating pleasing photos of interior rooms no longer requires a great deal of investment and experience. Nowadays, it only requires a few specific items, a few pointers, and a little practice.

In this article, you’ll learn how to get better results with the right equipment to take your real estate photography to the next level.

Choosing the right Equipment for Real Estate Photography - Image 1

Which camera to choose for Real Estate Photography

Smart Phones

While the main choices for real estate photography are between DSLR or mirrorless cameras, you may hear an argument in favor of modern smartphones too.

While smartphone cameras are useful for some scenarios, they are not well suited to real estate photography.

Some of the main downfalls of smartphones include:

  • Smartphone Apps process the image for you, resulting in a processed JPG image that you have little or no control over. The ‘lossy’ nature of JPG discards much of the original information, limiting what you can do in post-processing.
  • The sensors are tiny, with the pixels packed in tight, reducing the dynamic range and causing more noise.
  • Lenses are tiny and generally made of plastic. They lack the precision of milled glass lenses, and are easily scuffed or scratched. Lens quality plays a big part in achieving good quality images, so it’s unrealistic to expect the same performance that you’d get from a camera lens.

Smartphones perform well under ideal lighting conditions; however, interior real estate photography presents some of the most challenging light you’ll find in photography.

Use your smartphone as a tool to find great compositional angles, but not as your main photographic equipment.

See other ways a smartphone can be used here.

Choosing the right Equipment for Real Estate Photography - Image 2

DSLR and Mirrorless Cameras

Whether your preference is a DSLR or mirrorless camera, your primary choice is format: Full Frame, Crop-sensor or Micro 4/3.

Each format changes the field of view (FOV) of a given lens. You can think of the FOV as the ‘zoom’ of the lens.

Full-frame equates to the standard 35mm film view of analog cameras and is the standard measurement still used today.

Crop-sensor cameras have smaller sensors, creating a ‘zoom’ effect of 1.5X or 1.6X. Micro four-thirds (M4/3) cameras increase the ‘zoom’ by 2X.

In practical terms, a 50mm lens on a full frame camera produces almost the same field of view as a 35mm lens on a crop-sensor camera. That same field of view results from a 25mm lens on a Micro 3/4 camera.

It’s vital to understand that different sensor sizes impact the focal length of a lens.

When reading advice on which lens to use, always remind yourself it’s the ‘equivalent’ focal length, then do the calculations as described above for your own camera’s sensor size.

The good news is that if you already own a recent model DSLR or mirrorless camera, you likely don’t need a new one.

It’s true that “recent” is a bit vague here, but in my experience, mirrorless cameras up to five years old, and DSLRs made during the last ten years should be more than capable.

Lens choices

Many photographers say prime lenses (non-zooms) produce a better quality image than zoom lenses. A good zoom lens, however, may be more convenient for real estate photography.

A decent quality zoom that starts from a wide angle (say between 12mm to 24mm) provides more compositional flexibility than a fixed lens.

Small rooms inside houses may be a little cramped, restricting the space available to set up a tripod and camera. Using a wide-angle lens of around 12-24mm may be necessary to give the required field of view to capture a small room.

In larger rooms, and when photographing outside, 35mm may give a better view of the property. There’s no definitive ‘right’ answer to field-of-view as it all depends on the surroundings and how much space you need.

If you find yourself with distorted lines and dark areas around the edge of your image shot with a wide-angle lens, these may be fixed in post-production.

Cheaper lenses, especially zooms, have more optical weaknesses, so if you’re going to invest in new gear, you might get more benefit from upgrading your lens instead of your camera body.

Choosing the right Equipment for Real Estate Photography - Image 3

One indication of lens quality is a low aperture number such as f/2.8. A lower number aperture opens the lens wider than lenses with high numbers like f/5.6.

While this allows more light to enter the sensor, the focus plane becomes narrower, causing some of the room to be out of focus, which is not ideal for real estate photography. Use an aperture of f/8 or f/11 to allow more of your room to be in focus.

Chromatic aberration (CA) is caused by light dispersion as it travels through the lens. In plain English, it’s that pink/green color fringe you sometimes see around the edges of objects, most noticeably in areas of high contrast like window frames. Cheaper lenses have more problems with CA.

Using a better quality lens shows less CA, but the laws of optics means fringing can still happen occasionally. Most photo software includes functions to reduce or remove this, although it’s great to avoid it as much as possible in the first place.

Camera features to look for

Camera features to look for buried in just about every modern camera menu are the five features and functions that can seriously help for real estate photography images.

The first four of these features help you overcome the problems posed when photographing scenes with a high dynamic range (HDR). In these situations, all cameras struggle because they can’t match our eye’s adaptive responses.

The fifth, the digital level, helps with the challenge of perspective. Inside and out, houses have vertical and horizontal lines. If they’re just a little off-center, the whole photo looks lopsided and uncomfortable to the viewer.

1. AEB (Automatic Exposure Bracketing)

Automatic Exposure Bracketing is a specific setting that instructs the camera to take multiple shots of the scene while changing the shutter speed of each shot – all with one press of the shutter release button.

You can change the shutter speed for each shot manually, but it is faster (and potentially more precise) to let the camera’s onboard technology do it under your guiding hand.

2. EV Range (Exposure Value Range)

The reason to take this automatic series of shots is to capture all details, from bright windows to darker interior areas, although some cameras have more limited AEB capabilities than others.

Here are the two camera features to consider:

  • The number of bracketed shots: This is the number of exposures the camera takes when you press the shutter release in AEB mode.
  • Exposure Compensation: This is the spacing of exposure compensation between each bracketed exposure taken in AEB mode. These two factors combine to determine the total exposure range possible.

You need to look at both features to determine whether the camera’s EV range capability is sufficient for your needs. For real estate photography, look for AEB settings that let you choose five shots in 2-steps or nine shots in 1-step.

Choosing the right Equipment for Real Estate Photography - Image 4

3. Continuous shooting

It is important that your camera can shoot continuously to minimize the number of times you release the shutter manually. Doing so avoids accidental camera movement or shake.

4. Luminosity histogram

The histogram offers clear information to ensure we cover the full dynamic range. While it may seem confusing at first, it’s straightforward once you know what it’s showing us.

Choosing the right Equipment for Real Estate Photography - Image 5

Having an EVF (electronic viewfinder) somewhat reduces the need for a histogram but not entirely. Even with an EVF, it’s hard to determine highlight or shadow clipping by eye. Capture all the bright and dark areas correctly by using histograms.

5. Digital level

If your camera has a digital level, it’s quite handy. Not all camera models do, so you may need to look in the manual to find it. Once activated, a horizontal line runs across the scene in your viewfinder.

You can instantly see if the camera is at an angle and if so, make the needed adjustments to avoid a sloping room.

Choosing the right Equipment for Real Estate Photography - Image 6

While you’re checking the horizontal lines, don’t forget the verticals. Tilting the camera up or down causes vertical lines, like walls, to look slanted.

Pro tips on using the digital level

  • Take time to inspect the scene in live view, making manual corrections if necessary even if they contradict the digital level.
  • Use a tripod so you can step away from the camera while seeing the live view screen and the room.
  • Double-check your composition for framing, height, and perspective.
  • Shoot from below eye level. An excellent place to start is between your chest and hip height, but there may be times to raise the camera. You might, for instance, want to show a particular view or other details you wish to highlight.

Flash and Lighting Equipment

Speedlights

The built-in flash on your camera is unlikely to be strong enough to balance interior and exterior light levels because of the high dynamic range present in most real estate interiors.

The built-in flash may create unwanted, deep shadows in the room. You’ll get a better effect by mounting a Speedlight flash on the hot shoe, then bouncing the light off the walls or ceilings.

With some practice, it becomes easier to find the right bounce position for each room.

Another technique for using Speedlights is taking them off camera via a wireless connection. This way, you can position the lights just where you need them.

Studio lights

Finally, there are studio lights.

While these are effective and give results that look professional, pro lighting equipment is expensive. The lights are also bulky and heavy and often need a power supply. Moreover, using them correctly requires considerable practice and skill.

The exposure bracketing technique, where you use the camera’s AEB features listed in the previous section, offers a less demanding way of achieving light balance for an interior scene.

Taking bracketed exposures becomes a natural part of your photography workflow, and you don’t have to worry about carrying heavy lighting equipment, or learning how to use it.

The bracketed exposures are then merged to HDR in post-processing to get a correctly exposed image. While Photoshop and Lightroom offer HDR merge, many real estate photographers prefer using Photomatix Pro.

This specialized HDR software offers natural-looking presets optimized for property interiors.

A tripod

If you get good, sharp results from handheld shots, using a tripod may seem unnecessary. However, no one can hold a camera steady for the slower shutter speeds used for interior real estate photography.

The minimum shutter speed for handheld shots is normally1/60 second as a rule-of-thumb, while interior scenes require much longer exposures.

Choosing the right Equipment for Real Estate Photography - Image 7

What to look for in a tripod:

  • Ball heads – These let you quickly change angles and orientations without having to fiddle too much with either camera or tripod.
  • Rubber feet – When you’re working on slippery, polished floors there’s less chance of the tripod sliding out of position. Rubber feet also protect fragile surfaces.
  • Lightweight and sturdy – Look for solid construction with tight joints and rigid legs. Top-of-the-range tripods (such as carbon-fiber models) carry a higher price tag, but less expensive aluminum versions do the job equally well with a little care. Any tripod is better than no tripod at all.

A good tripod gives you more compositional freedom, as you can position them just about anywhere. Attempting to keep the camera perfectly still without a tripod limits you to existing stable surfaces.

A remote shutter release

A remote shutter release untethers you from the camera, providing freedom of movement.


Choosing the right Equipment for Real Estate Photography - Image 8

While the most obvious function of the remote release is preventing camera shake when you press the shutter button, there are other, less apparent advantages too:

  • The tripod stays steady, even on a soft surface.
  • You can step aside to avoid casting shadows, or to remove your reflection from windows or shiny surfaces.
  • Your hands are free to hold distractions out of the frame, such as cables or plant fronds.
  • You can move around to assess composition from different angles or spot potential distractions.
  • You may need to monitor the road so you can shoot during a gap in traffic.

As an alternative to a remote shutter release, you can use a cable release or the camera’s automatic timer.

Some other helpful equipment

Beyond the main equipment needed for real estate photography, there are a few other items to make your job easier and more efficient:

A traditional bubble level – While the digital level is handy, some people may prefer external units that slot into the hot shoe or some tripods that have bubble levels built-in.

Choosing the right Equipment for Real Estate Photography - Image 9

Gaffer tape – Use it for quick cleanups such as removing pet hair or holding back a curtain or cable. Use tape to mark the position of your tripod once you find a good composition.

Avoid using duct tape as the adhesive is too strong and it doesn’t peel off cleanly. Gaffer tape leaves no residue on most surfaces.

Cleaning cloths – You need a cloth for your lens, but also one to remove dust specks from surfaces or to polish water marks off bathroom fittings.

A lens hood – Use a short hood on your wide-angle lens to cut down the flare from windows or other bright lights.

Choosing the right Equipment for Real Estate Photography - Image 10

Conclusion

Despite its challenges, anyone can learn to take great real estate photography photos by starting with the right equipment. Using the right equipment also sets you up for success, and with just a little bit of practice, you can discover what works best for you.

If you have any questions to ask me about equipment for real estate photography, please ask me in a comment below.

HDRsoft is a paid partner of dPS.

The post Real Estate Photography: Get Better Results with the Right Equipment appeared first on Digital Photography School.


Digital Photography School

 
Comments Off on Real Estate Photography: Get Better Results with the Right Equipment

Posted in Photography