Exposure blending is a popular technique often used to create high dynamic range photography.
This article is about using the same technique but for the purposes of creating an image that contains all of the elements of a scene that you might not have been able to capture in one exposure.
Of course, we would all like to capture what is in our mind’s eye in one exposure and we strive to do so to reduce the amount of time we spend post-processing. But that doesn’t always work out and blending exposures can be a quick and easy way of creating the image you want.
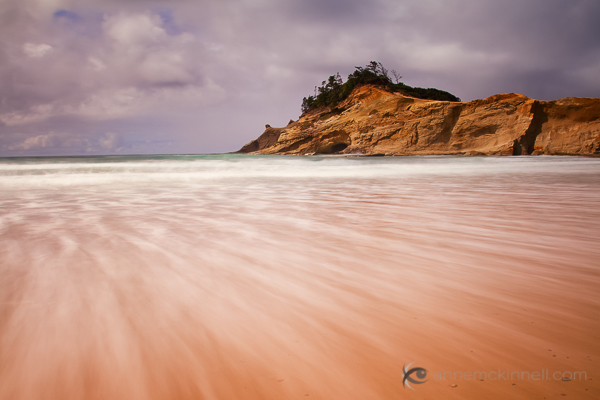
Here’s an example. I was recently visiting Cape Kiwanda on the Oregon coast and I wanted to make a long exposure image that would show the motion of the water rushing back out into the sea before each incoming wave.
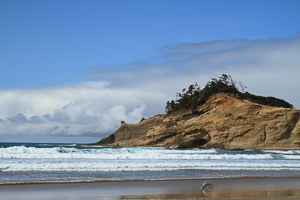
I started out by taking some fast exposures to discover the composition I would ultimately use. This is what the scene looked like when I first got to the location — in fact, this is my first frame.
I quickly decided on the long exposure technique so I put on my 10 stop neutral density filter which would allow me to make a 4 second exposure in the middle of a sunny afternoon.
The difficulty was that the wave had to be just right and I had to open the shutter at exactly the right moment to get the effect I was after.
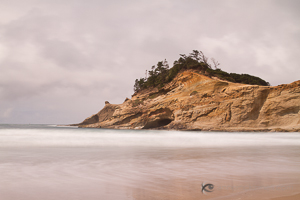
This attempt turned out okay but it wasn’t as dramatic as what I hoped for.
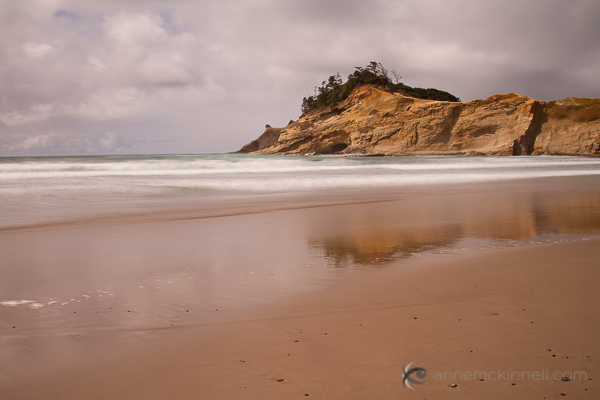
After making this image, I decided that I wanted more foreground in my composition so I used a wider focal length and tilted my camera down a bit.
I made a number of images that were close to what I wanted but the foreground was not exactly as I had hoped.
Then, I finally got the big wave I was waiting for!
Unfortunately the wave was too big and even though I had pushed my tripod down in the sand the amount of water caused my tripod to sink a little while the shutter was open. That wasn’t a problem for the foreground, since it was blurred anyway, but the background was blurred in that image as well.
I spent half an hour making images at this location trying to get exactly what I wanted in camera. That is not a particularly long period of time — often I spend much longer in one location. But since I had the components I needed to make my final image, I decided to move on to other subjects.
These are the two images I ended up combining for the final product.
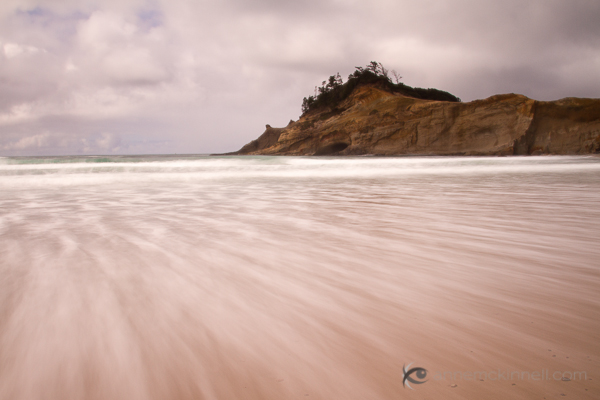
You can see how the rock in the image above is out of focus due to my tripod sinking in the sand.
In post processing, I took both of the above images and opened them in Photoshop Elements. I selected the one with the foreground I wanted, copied it, and pasted it on top of the other image so each image was on it’s own layer. Then I created a layer mask and used the gradient tool to blend the two images together.
Watch this video to see me blend these two images together in Photoshop Elements.
After blending the exposures, I made some final adjustments to contrast and colour to create the final image:
Remember, photography is an art and you have the artistic license to do whatever you want whether that is documenting a scene exactly as you see it in front of you, or creating something that is different than what you saw with your own eyes using any technique you see fit.
Post originally from: Digital Photography Tips.
Check out our more Photography Tips at Photography Tips for Beginners, Portrait Photography Tips and Wedding Photography Tips.
How to Blend Exposures to Enhance Your Composition

Digital Photography School
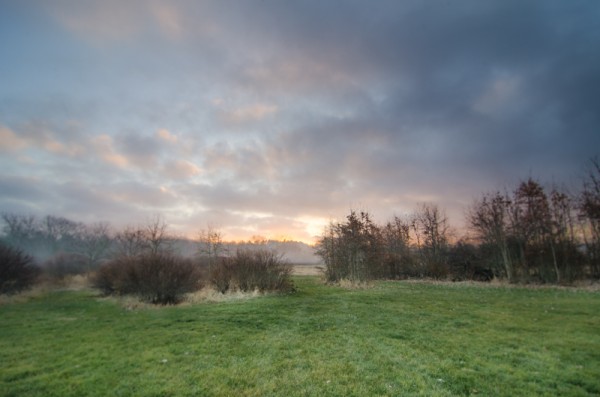
 Photo by stevacek
 Photo by MarvinOS
 Image by MarkyBon
 Image by Loving Earth
 Image by vividiti
 Image by Lush.i.ous
 Image by Aeloux


You must be logged in to post a comment.