RSS
 

Posts Tagged ‘Effects’

How to Use Plastic Wrap to Create Neat Color Special Effects

26 Sep

In this article I’ll show you how to use a common household item, plastic wrap, to make creative images with colored filter special effects.

Plastic wrap (a blanket term for Saran Wrap, Glad Wrap and Cling Wrap) is a clear plastic film typically sold in rolls or boxes with a serrated edge. Usually used for sealing food items like sandwiches to keep them fresh for longer, plastic wrap is an incredibly versatile material. Great for a picnic or practical jokes, it’s also a useful tool for creative photography.

If you’re looking to add something a little different to your portfolio, plastic wrap is a simple, low-cost option. Using a rubber band, a camera, and some markers, you can easily create a colored filter out of plastic wrap – adding an experimental edge to your photographic repertoire.

How to Use Plastic Wrap to Create Neat Color Special Effects

The science

Like many great scientific discoveries, plastic wrap was discovered by accident. Ralph Wiley, a lab worker at The DOW Chemical Company was having trouble washing out a beaker which contained a substance he couldn’t scrub clean. He called the substance “Eonite” named after an indestructible substance created by chemist Eli Eon in the Little Orphan Annie comic book strip. DOW researchers adopted the substance, using it to create a greasy, dark green film they called “Saran” and shared it with the military to spray on fighter jets as a guard against sea spray.

How to Use Plastic Wrap to Create Neat Color special Effects

A very subtle red and blue colored filter adds a little color to this image of a Ferris wheel.

Saran works by polymerizing vinylidene chloride with acrylic esters and unsaturated carboxyl groups to create chains of vinylidene chloride. What does that mean? Simply put, the process results in a film with molecules bound so tightly that very little can penetrate it. The chemists at DOW eventually removed Saran’s green color. They also removed an unpleasant odor the Saran emitted when exposed to oxygen. It was first sold for household use in 1953.

How to Use Plastic Wrap to Create Neat Color special Effects

A surreal green shade created with a plastic wrap filter colored with green marker.

Plastic wrap in art

While handy in the lunchbox or fridge, plastic wrap is also a great material to experiment with creatively. Artists have used plastic wrap in sculpture, painting and as a prop for photography. Many well-known fashion designers have created clothing from layers of plastic cling film for the runway.

Because of its relatively clear composition, plastic wrap is great for forming a barrier between your camera lens and foreign materials. Recently, I applied a layer of Vaseline to plastic wrap stretched over the front of my camera lens. The result was a fine, misty effect without the agony of a greasy camera.

How to Use Plastic Wrap to Create Neat Color special Effects

This image was captured using plastic wrap over the lens with a red section on the upper half and a green colored portion below.

Creating a colored special effects filter

You will need:

  • A piece of plastic wrap at least 30cm in length and width.
  • Camera and lens.
  • Permanent markers.
  • A few rubber bands.

Adding color

To create a colored filter for your camera, first you will need to add some color to your plastic wrap! The easiest way to do this is to stretch the plastic wrap over your lens and color in the plastic within the circle. However, this method is a little risky. If the plastic wrap is pierced, you will end up drawing on your lens or lens protector (cap).

Instead, take your lens cap or lens and place it on the plastic wrap. Trace a circle around the outside. Now you’ll know where you should color your plastic wrap to get full coverage of the lens. To minimize the use of plastic here, you can trace multiple outlines of your lens on the same sheet of plastic wrap as I’ve done below.

How to Use Plastic Wrap to Create Neat Color special Effects

Use the same sheet of plastic wrap to create different effects, making it easier to keep for later and minimizing waste.

Finally, add color to the sectioned-off portion of plastic wrap, make sure you use quality permanent markers. Low-quality texters won’t leave any visible color on the plastic wrap and the ink from non-permanent markers simply slides off the plastic (onto your hands or something worse).

You can color in your circles any way you would like. For a full effect, color in the whole interior of the marked out circle with one or two colors. For a softer gradient, draw a light squiggle. You can color in the center of the circle and leave the perimeter clear, or vice versa. Don’t be afraid to experiment here!

How to Use Plastic Wrap to Create Neat Color special Effects

The effect of a portion of plastic wrap colored entirely green and placed over the front of the lens.

How to Use Plastic Wrap to Create Neat Color Effects

Coloring only the outer perimeter of the plastic wrap filter produces a fish-eye effect.

How to Use Plastic Wrap to Create Neat Color special Effects

Create an eerie atmosphere with a thick layer of red permanent marker.

Time to photograph

When you are happy with the colors of your circles, select one and lay it carefully over the front of your lens. Fix the filter in place with a rubber band, but don’t pull the plastic wrap too tightly or it will split.

When the filter is fixed properly to the lens, it’s time to get photographing. Because your camera will have difficulty focusing with the layer of colored plastic wrap in the frame, you should use manual focus over automatic. Because the filter will cut down the light reaching your sensor, you may also need to increase your exposure time or adjust your aperture accordingly.

Also, be sure to check the rubber band is fitted snugly around your lens. You don’t want it to come flying off, especially when photographing portraits!

How to Use Plastic Wrap to Create Neat Color special Effects

How to Use Plastic Wrap to Create Neat Color Effects

Using colored plastic wrap can add an effect imitating the light leaks produced with partially exposed film.

Finishing up

Once you are happy with your photos, take them back to have a look on your computer. As I mentioned before, the filer may cut down the amount of light reaching your sensor. This could result in photographs that lack contrast. Photoshop is your friend here.

Open your images in Photoshop and adjust the Curves layer to increase contrast. For more intense colors you may also want to adjust the Vibrance and Saturation of the image with the Vibrance and Saturation tool.

How to Use Plastic Wrap to Create Neat Color Effects

Adjust the Curves tool for more contrast in your images.

How to Use Plastic Wrap to Create Neat Color Effects

Adjust the Vibrance and Saturation tool for more intense colors.

Your Turn

Once you’ve got some quirky plastic wrap photos, please share them in the comments below. And remember to keep your filters for later. You never know when you might need them. Fold them down or scrunch them into a loose ball, they last for ages. Have fun.

How to Use Plastic Wrap to Create Neat Color Effects

An apocalyptic scene created with red ink that completely covers the plastic wrap filter.

How to Use Plastic Wrap to Create Neat Color Effects

How to Use Plastic Wrap to Create Neat Color Effects

Loosely fixing colored plastic wrap to the lens, mirrors the view through a window on a rainy day.

Pulling the plastic wrap taut reduces glare.

An image with a slower shutter speed creates light trails as if looking through a window with raindrops on the outside.

The post How to Use Plastic Wrap to Create Neat Color Special Effects by Megan Kennedy appeared first on Digital Photography School.
Digital Photography School

 
Comments Off on How to Use Plastic Wrap to Create Neat Color Special Effects

Posted in Photography


Cooling Cities: L.A. is Painting Streets White to Combat Heat Island Effects

15 Sep

[ By WebUrbanist in Architecture & Cities & Urbanism. ]

Thanks in part to heat-absorbing materials and colors, cities tend to be warmer than their natural surroundings, and in hot places with lots of dark roads like Los Angeles that can prove a serious public health hazard.The mayor has pledged to reduce temperatures in the city by 3 degrees over the next 20 years, in part by dealing with urban heat island effects in new and different ways.

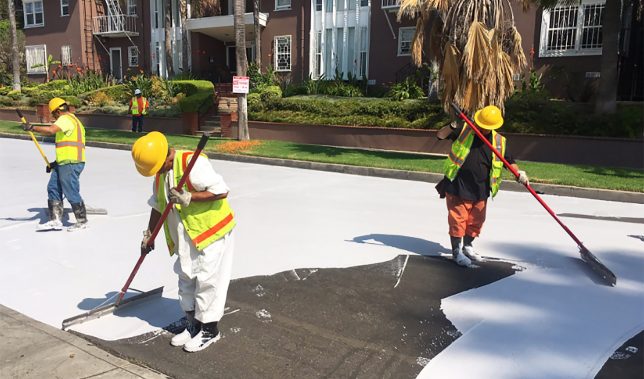
As part of this promise to help make bring down temperatures for its millions of residents, LA is trying something that could dramatically change its urban landscape: repainting roads in white. The aim is to reflect rather than absorb heat and so far the results are extremely promising.

“We found that on average the area covered in CoolSeal is 10 degrees cooler than black asphalt on the same parking lot,” said Greg Spotts, the assistant director of the Bureau of Street Services for San Fernando Valley, an area with particularly severe heat problems.

It’s not just about open public spaces either: reducing exterior temperatures has impacts on adjacent interiors. Heat reductions outside and mean cooler spaces inside area homes and businesses. In turn, this can help residents and owners save on cooling costs. It also isn’t just a daytime problem: heat captured during the day is released into the night air, keeping things hotter around the clock.

The process doesn’t come cheap, however: each coat lasts for around seven years but prices out around $ 40,000 per linear mile. If it works, though, the cost could be offset in part by savings on other fronts, in addition to making for a more healthy metropolis all around. Meanwhile, other strategies are also in play — the city is looking to make roofs brighter, for instance, and bring more green into the mix. (via Inhabitat and L.A. Times, images by Greg Spotts and Giuseppe Milo).

Share on Facebook


[ By WebUrbanist in Architecture & Cities & Urbanism. ]

[ WebUrbanist | Archives | Galleries | Privacy | TOS ]


WebUrbanist

 
Comments Off on Cooling Cities: L.A. is Painting Streets White to Combat Heat Island Effects

Posted in Creativity


How to Use a Prism to Make Creative Photo Effects

14 Jun

In this article, I’ll give you some ideas and tips on how to use a prism to make some really cool and creative photo effects.

How to Use a Prism to Make Creative Photo Effects

Prisms

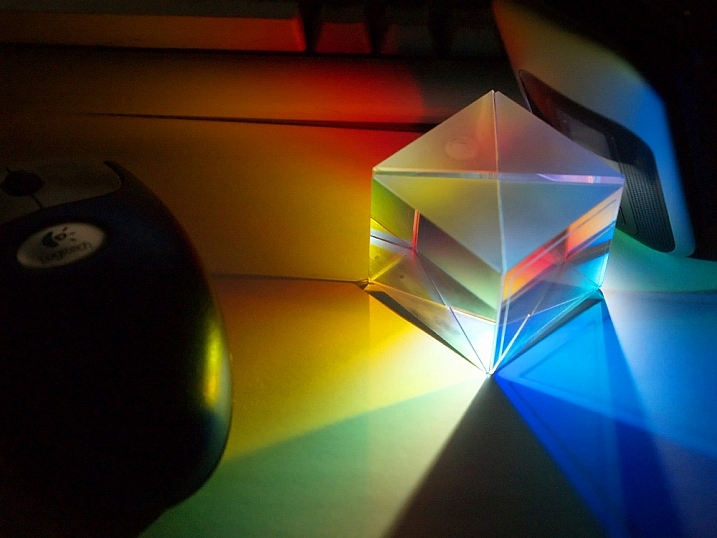
Have you ever seen the beautiful rainbows dispersed by hanging suncatchers and wondered, how would that look in a photograph? Unfortunately, the small prisms used on most suncatchers don’t fill enough of the camera frame to render a detailed image. But where there’s a will, there’s a way!

Triangular prisms, usually found in college science labs have become an increasingly popular tool for adding beautiful reflections and light to a photograph. Plus, because prisms are small, they are easy to pop in a camera bag, ready for your next shoot.

How to Use a Prism to Make Creative Photo Effects

How to Use a Prism to Make Creative Photo Effects

How to Use a Prism to Make Creative Photo Effects

The physics

You may be familiar with triangular prisms from high-school demonstrations on the characteristics of light. The physics goes something like this – when a beam of light (made up of different electromagnetic waves with varying wavelengths) hits a piece of glass straight-on, the light passes right through it.

However, if the beam of light comes into contact with a glass surface at an angle, the wavelengths bend, which is a phenomenon called refraction. Then, when the beam exits through the other side of the prism, the wavelengths bend again. The amount the light bend depends on the wavelength itself. Red bends at one angle, and violet bends another and so each color is dispersed into the rainbow we see when we look through a prism.

As photographers, we exploit the inherent properties of light whenever we take a photo. The assembly of glass elements in camera lenses directs light from a scene, translating it to the digital sensor. But by adding a prism into the mix (in front of the lens) you can introduce some interesting creative effects to your photographs. Light that would usually meet the outer lens element first, hits the prism, dispersing the light before it’s directed into the camera.

What you will need

  • A camera
  • One triangular prism
  • A lens cloth
triangular prism - How to Use a Prism to Make Creative Photo Effects

A triangular prism like this one is available on Amazon for only a few dollars.

This project only has two ingredients – a prism and a DSLR camera. For this project, I used a triangular prism I purchased on eBay for a few dollars. A prism that can be manipulated with one hand is ideal. My preference is one that is approximately 3″ x 1″ (8cm x 2.5 cm). Keeping a lens cloth close by is useful for fingerprints on the glass that can show up in the image.

How to Use a Prism to Make Creative Photo Effects

How to Use a Prism to Make Creative Photo Effects

How to Use a Prism to Make Creative Photo Effects

Method

Using a prism to create interesting effects in-camera requires a little trial and error and a bit of co-ordination. Holding the prism over the front lens element is the easy part. It’s getting the effect right that’s a little fiddly. I’d recommend using a tripod as it can be a bit vexing having to juggle the camera in one hand and the prism in the other. I would also recommend using Live View to give you an accurate indication of what impact the prism is making, without being blinded by wayward reflections from the sun streaking through your viewfinder.

If you’ve ever shot through glass materials before, you’ll know that your autofocus can really start to struggle. First, focus the camera on your subject using autofocus, then switch to manual focus mode. That way, the subject in the background will already be sharp, without having the camera flail around trying to focus on the prism itself.

Slowly rotate the prism, monitoring the effect on the LCD screen. Angling the prism away from the lens, or changing your position in relation to the sun can also add different effects. Experiment with the distance between the prism and the camera lens too. When you find a reflection in the image you like, take a snap!

Now that you have the basics down, try changing up the prism! I am constantly switching between my triangular prism and a glass wine stopper I chanced upon in an op-shop. The hexagonal prism adds a greater kaleidoscopic effect but tends to distort the image more, so it’s fun to experiment and see what works best.

How to Use a Prism to Make Creative Photo Effects

How to Use a Prism to Make Creative Photo Effects

A wine-stopper I found at an op-shop makes for a great tool in prism photography.

How to Use a Prism to Make Creative Photo Effects

You don’t always need sunny weather for prism photography, this abstract image of a crane was taken on a cold, rainy afternoon.

Your turn

So pick up a glass prism and give this a try. Please share your prism photographs in the comments below.

The post How to Use a Prism to Make Creative Photo Effects by Megan Kennedy appeared first on Digital Photography School.


Digital Photography School

 
Comments Off on How to Use a Prism to Make Creative Photo Effects

Posted in Photography


Researchers create method for photorealistic Prisma-style effects

28 Mar

Popular app Prisma applies painting styles to photographs using neural networks, turning a snapshot into an artwork in the style of ‘The Scream,’ for example. But what if you could transfer photorealistic effects from one photo to another? Researchers at Cornell and Adobe have successfully demonstrated a method that will translate a variety of styles from a reference photo to another image, including things like lighting, time of day and weather.

Input image on the left, reference style image in the center, output image on the right. It’s not incredibly realistic-looking, but more realistic than your average Prisma treatment.

Images via Fujun Luan

This could open up a whole new world of possibilities for ‘lazy’ photo editing. Say you snapped a photo of a rock formation in the middle of the day, but you’d rather it had the orange glow of golden hour. With this method, you could apply the textures and colors of a reference style image, i.e. some other rock formation at sunset, to your own image.

This photo-style-transfer method augments the neural-style approach Prisma takes by constraining the colorspace of the transformation applied to the source image. Taking a content-aware approach and classifying features like sky and water in each image helps to avoid mismatched textures and distortions.

Advanced photographers would likely be wary of making such drastic edits to their photos. However, the technology might appeal to someone who wants to apply the effects of professional lighting to a badly lit photo of an interior, for example.

What do you think? Could this technology be useful to you? Let us know in the comments.

Articles: Digital Photography Review (dpreview.com)

 
Comments Off on Researchers create method for photorealistic Prisma-style effects

Posted in Uncategorized


Lighting 102: Side Effects

01 Aug

Let's jump off this train for a minute and think about our different lighting controls in context with each other. More specifically, let's look at size and distance.Read more »
Strobist

 
Comments Off on Lighting 102: Side Effects

Posted in Photography


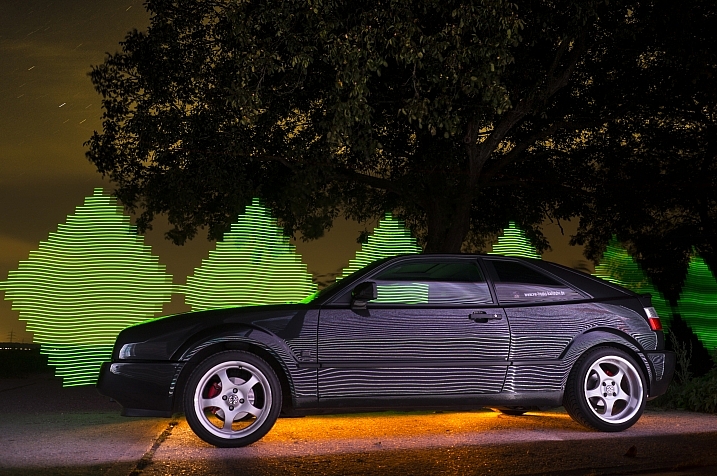
26 Unique Special Effects Photos to Spark Your Creativity

19 Mar

This week on dPS we are all about special effects. Check out the others that have already been published here:

  • How to Photograph the Full Band of the Milky Way
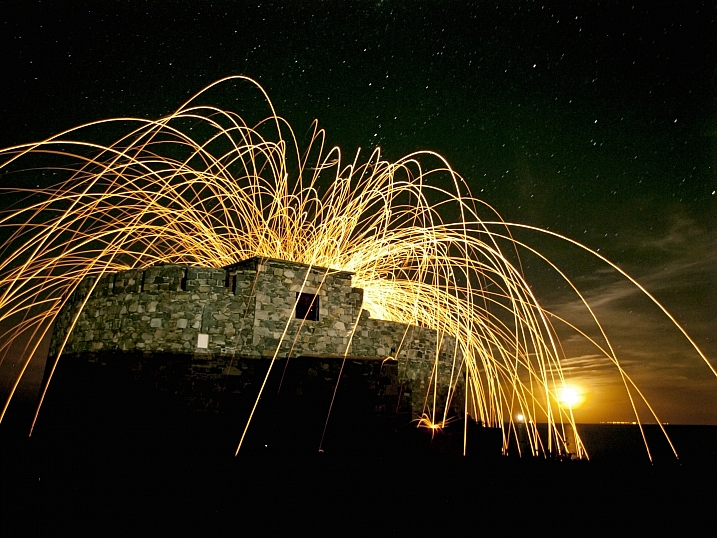
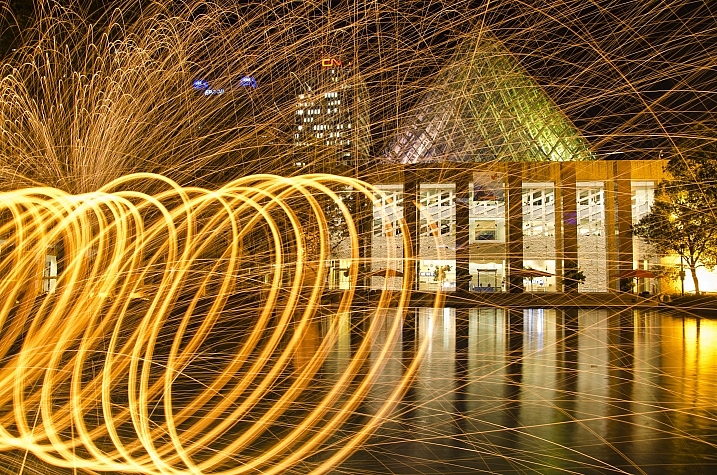
  • Fire Spinning with Steel Wool – A Special Effects Tutorial
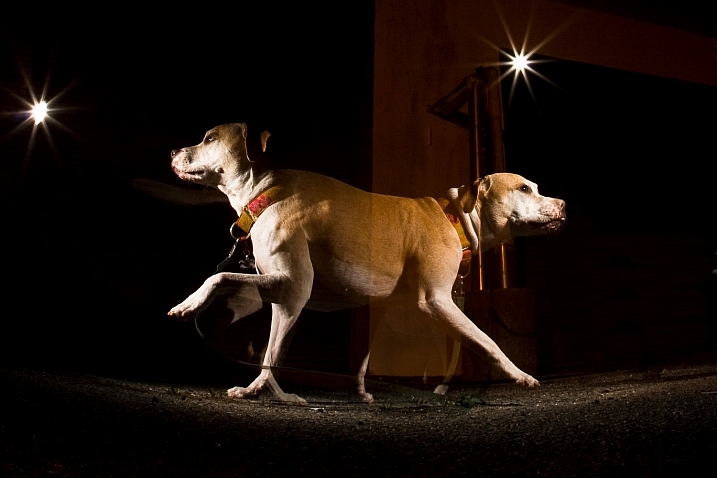
  • Special Effect – How to Create Multiple Flash Exposures in a Single Frame
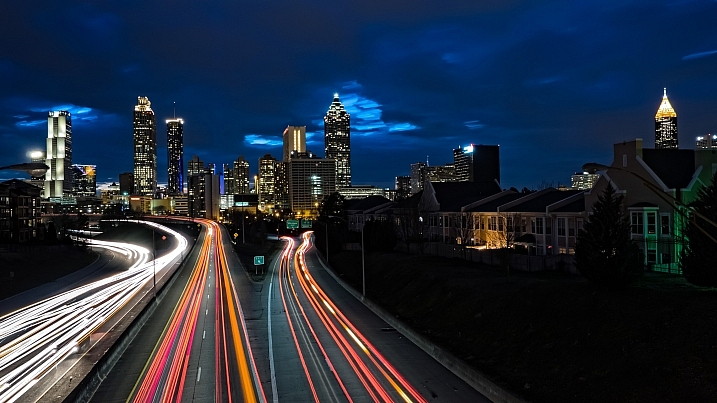
  • Stacking Light Trails for Night Photography Special Effects

Now it’s time to look at some special effects images:

I Am Dabe

By i am dabe

Redfishingboat (Mick O)

By Redfishingboat (Mick O)

Mike Boening Photography

By Mike Boening Photography

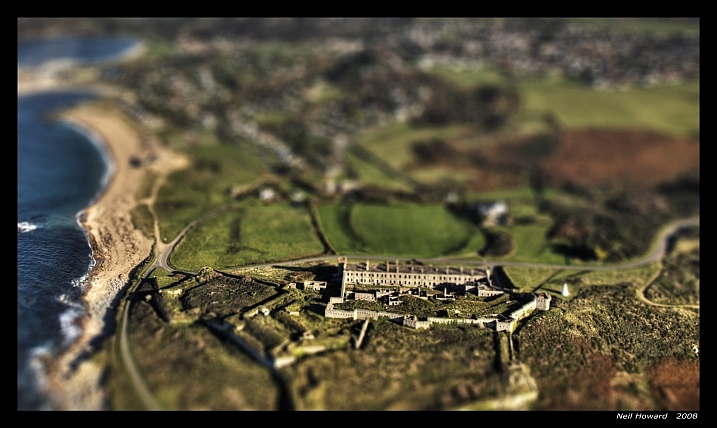
Neil Howard

By Neil Howard

Terry Lawson

By Terry Lawson

Louish Pixel

By Louish Pixel

Taichiro Ueki

By Taichiro Ueki

Thierry Marysael

By Thierry Marysael

John Watson

By John Watson

Nick Kenrick

By Nick Kenrick

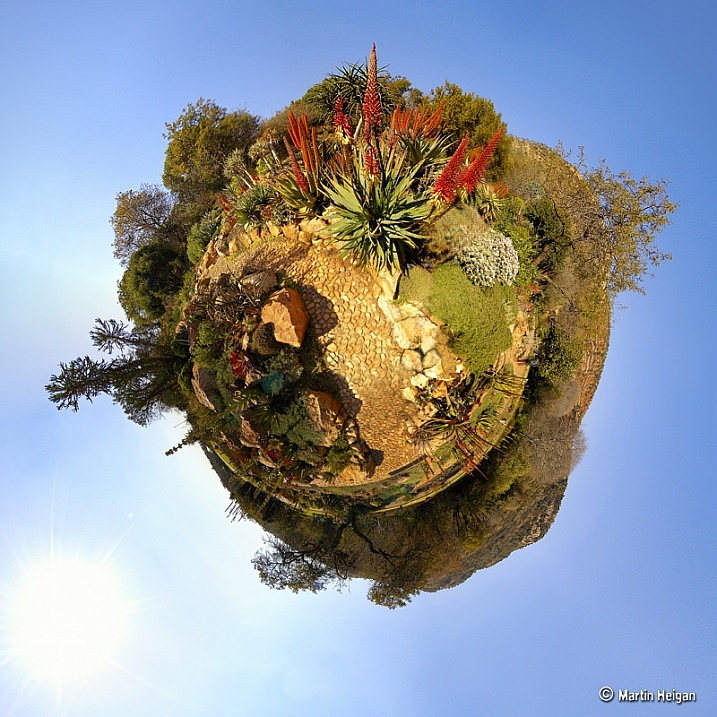
Martin Heigan

By Martin Heigan

Mibby23

By Mibby23

Mickaël

By Mickaël

Inefekt69

By inefekt69

Knowsphotos

By Knowsphotos

Disco's Place

By Disco’s Place

Dennis Crabtree

By Dennis Crabtree

Wayne Stadler

By Wayne Stadler

Liz West

By liz west

TJ Gehling

By TJ Gehling

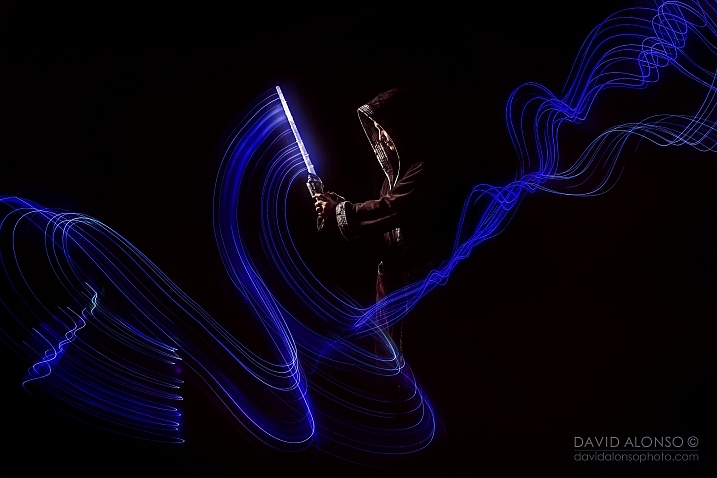
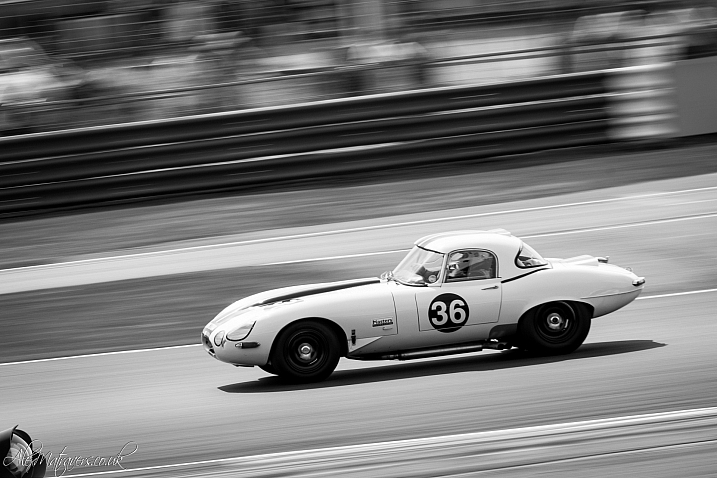
Alex Matravers

By Alex Matravers

Howard Ignatius

By Howard Ignatius

David Bokeh

By David Bokeh

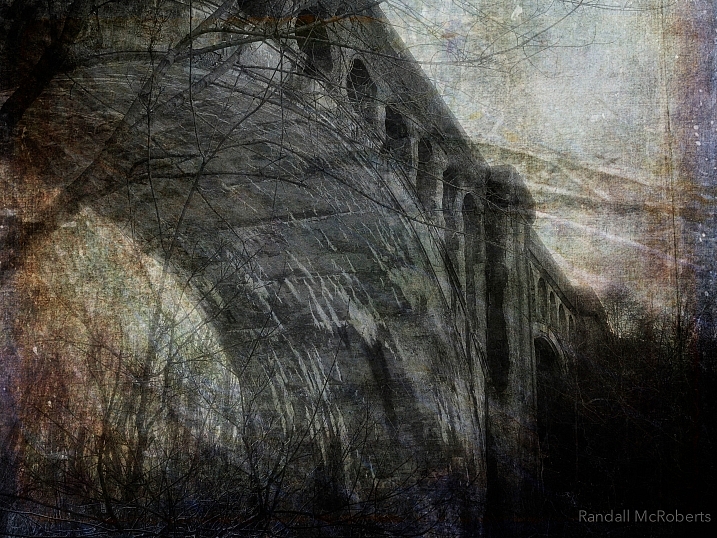
Randy McRoberts

By Randy McRoberts

Manuel Paul

By Manuel Paul

Alex Matravers

By Alex Matravers

googletag.cmd.push(function() {
tablet_slots.push( googletag.defineSlot( “/1005424/_dPSv4_tab-all-article-bottom_(300×250)”, [300, 250], “pb-ad-78623” ).addService( googletag.pubads() ) ); } );

googletag.cmd.push(function() {
mobile_slots.push( googletag.defineSlot( “/1005424/_dPSv4_mob-all-article-bottom_(300×250)”, [300, 250], “pb-ad-78158” ).addService( googletag.pubads() ) ); } );

The post 26 Unique Special Effects Photos to Spark Your Creativity by Darlene Hildebrandt appeared first on Digital Photography School.


Digital Photography School

 
Comments Off on 26 Unique Special Effects Photos to Spark Your Creativity

Posted in Photography


Weekly Photography Challenge – Special Effects

19 Mar

This week on dPS we are all about special effects. Check out the others that have already been published here:

  • How to Photograph the Full Band of the Milky Way
  • Fire Spinning with Steel Wool – A Special Effects Tutorial
  • Special Effect – How to Create Multiple Flash Exposures in a Single Frame
  • Stacking Light Trails for Night Photography Special Effects
  • 26 Unique Special Effects Photos to Spark Your Creativity

how-to-multiple-flash-exposures-2781

Weekly Photography Challenge – Special Effects

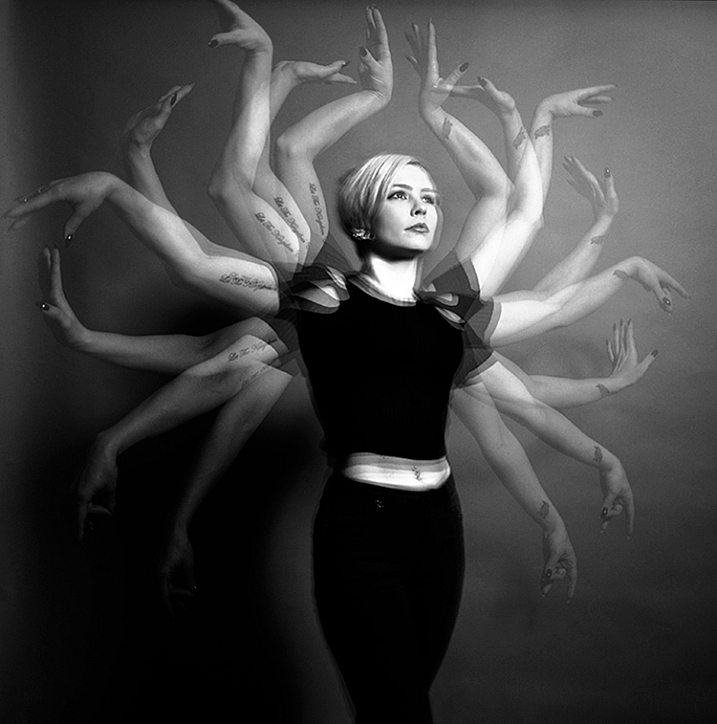
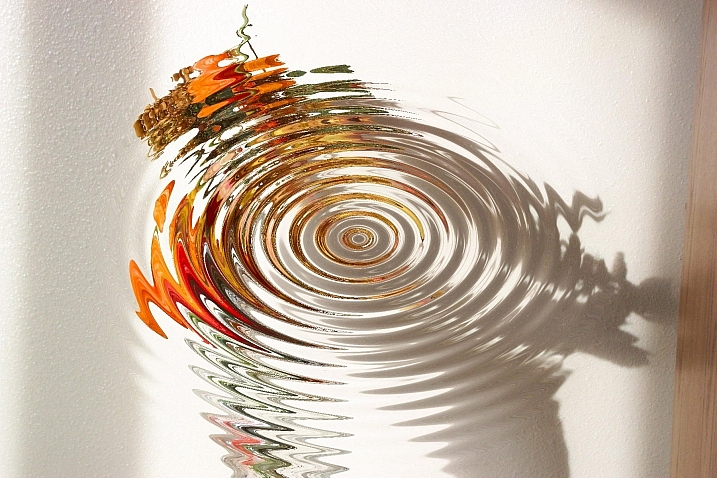
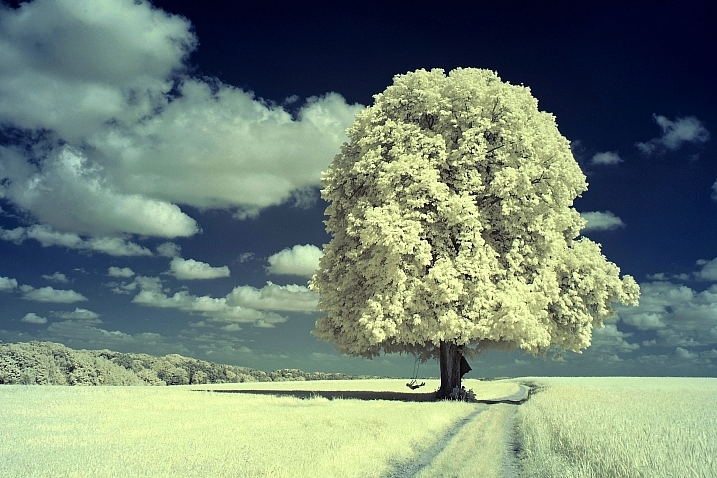
As you can see from the list of articles above, there are many ways to make special effects, and have some fun with photography. We have more great ones coming your way this week, so keep reading!

This week try something different, a idea you’ve not tried before, or a post-processing technique. No idea is too crazy (just be safe!), and you never know what you get until you try – so this is a great time to experiment.

Joy_n_the_jungle

By joy_n_the_jungle

Enzio Harpaintner

By Enzio Harpaintner

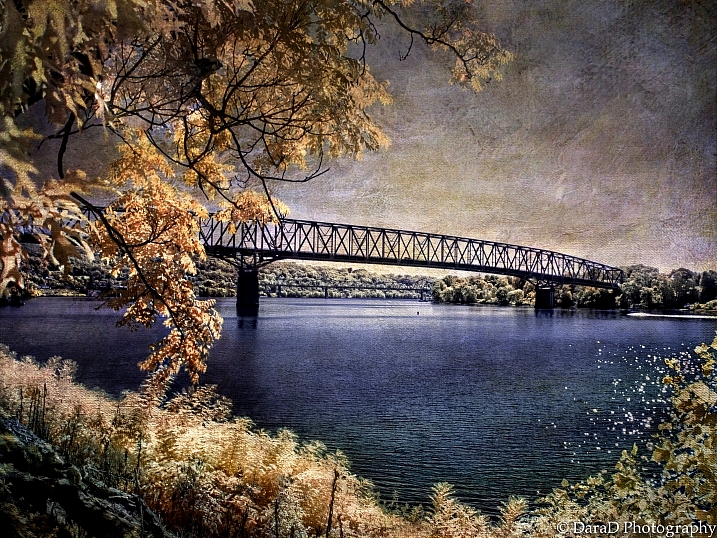
Dara

By Dara

Share your images below:

Simply upload your shot into the comment field (look for the little camera icon in the Disqus comments section) and they’ll get embedded for us all to see or if you’d prefer upload them to your favourite photo sharing site and leave the link to them. Show me your best images in this week’s challenge. Sometimes it takes a while for an image to appear so be patient and try not to post the same image twice.

SurFeRGiRL30

By SurFeRGiRL30

Shannon Dizmang

By Shannon Dizmang

Refeia

By refeia

Neil Howard

By Neil Howard

If you need more ideas watch this video from the Cooph team (Cooperative of Photography) on how to shoot the elements:

googletag.cmd.push(function() {
tablet_slots.push( googletag.defineSlot( “/1005424/_dPSv4_tab-all-article-bottom_(300×250)”, [300, 250], “pb-ad-78623” ).addService( googletag.pubads() ) ); } );

googletag.cmd.push(function() {
mobile_slots.push( googletag.defineSlot( “/1005424/_dPSv4_mob-all-article-bottom_(300×250)”, [300, 250], “pb-ad-78158” ).addService( googletag.pubads() ) ); } );

The post Weekly Photography Challenge – Special Effects by Darlene Hildebrandt appeared first on Digital Photography School.


Digital Photography School

 
Comments Off on Weekly Photography Challenge – Special Effects

Posted in Photography


Stacking Light Trails for Night Photography Special Effects

18 Mar

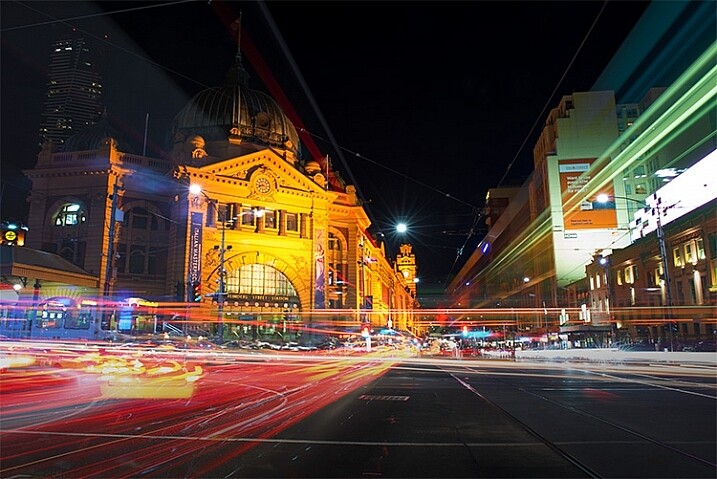
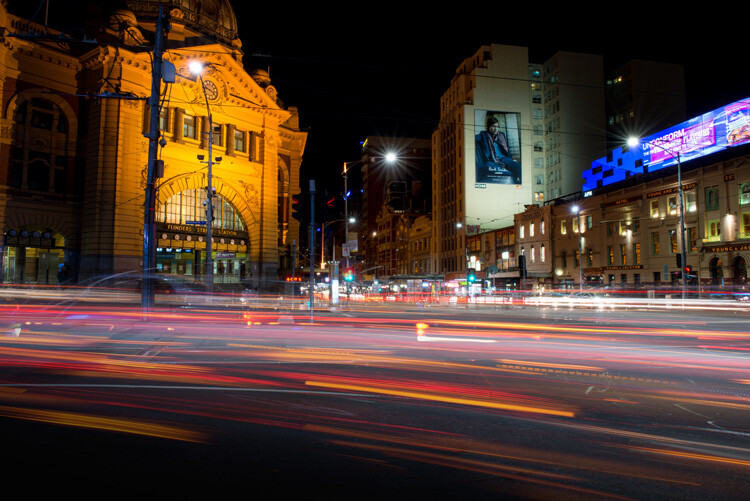
In Melbourne there is an intersection that’s iconic for taking light trails phtos. It is the corner of Flinders Street and Swanston Street, in front of Flinders Street Station.

15-Leanne-Cole-Light-Trails

Light Trails in front of Flinders Street Station. There are 23 images in this stacked light trail.

It isn’t a hard image to take, you just need a camera and a tripod. To get a really good photo, you want to pick a time when there is going to be a lot of traffic. You want the traffic to be moving, as cars caught in a traffic jam will not give you the light trails you’re after. The cars need to be moving constantly, and not standing still for too long.

Pick a place that you think will give you the best advantage. Set the camera up on the tripod, and try to take as long of an exposure as you can. To get the trails, you need to have exposures for several seconds, up to 30. You could do them for longer, but you would need other equipment (like a neutral density filter to cut the light). Most of the images shot for this article had an exposure of around eight to 10 seconds.

Sounds fairly easy, but there are many things that can make it hard. The time of year can inhibit you, as daylight savings will affect when the best time for traffic is, and how busy the roads are. If you go to a place on the weekend, you might find there aren’t as many cars as there would be during the week.

To get the light trails in front of Flinders Street Station, you need to be there at dusk, or after the sun has gone down. In summer that means not many cars or trams. However, there are ways to get around that.

Stacking Light Trails

One of the best ways to get light trails, is to stack many images together.

From the intersection that was mentioned previously, the corner in front of St Paul’s Cathedral is the most popular. There are other places, but that seems to be the one that most use. You will have to work out a great place to photograph them where you live.

14-Leanne-Cole-Light-Trails

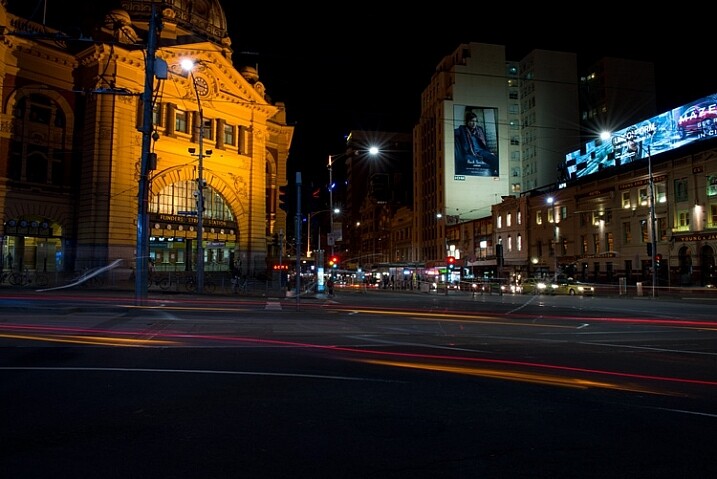
A single image, and as you can see there aren’t that many light trails.

Set your camera up on the tripod, this is necessary so you will get identical photos. Set the aperture to what you want. The ISO can be low, on 100 or 200, so you can get longer exposures. If you want longer, remember you can put your aperture to the smallest possible, like f/22.

Once you have a shutter speed that is several seconds, it is time to start taking your photos. Take one photo, then repeat until you have at least 10. You can do this with as many images as you like, however, Adobe Photoshop might not like you using too many. I’ve done it with four images, and as many as 23.

When you get home

Put all your photos onto your computer. You can use Lightroom to do this, but to do the actual stacking you will need Adobe Photoshop or any program that allows you to use layers.

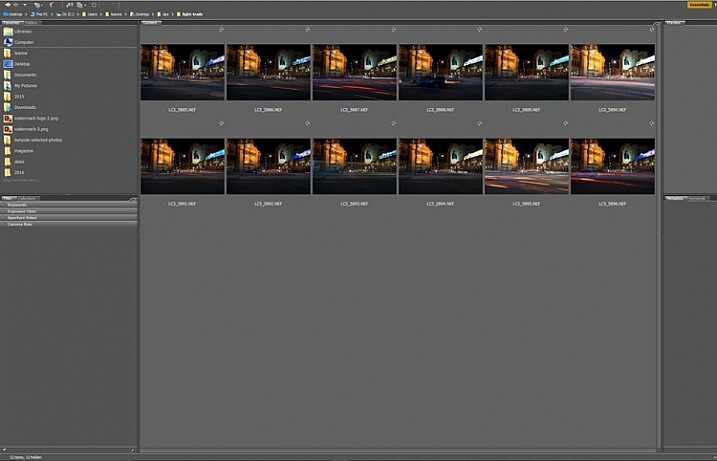
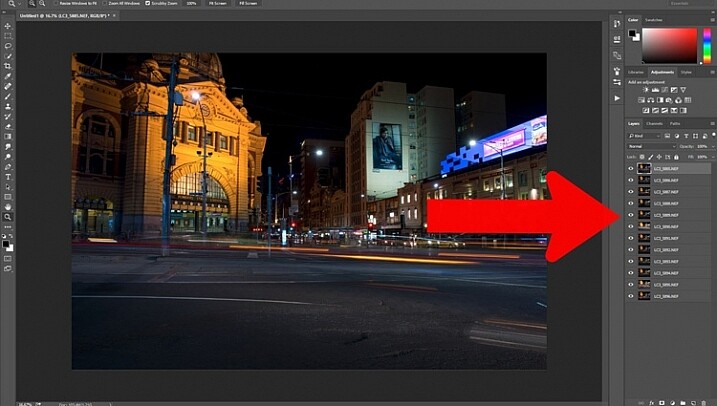
Once you have all the images ready to use, select all the ones you want. If you are using Lightroom to begin with, go to: Photo > Edit in > Open as Layers in Photoshop. In Photoshop open Bridge and select the images you want to use.  Go up to Tools > Photoshop > Load files into Photoshop Layers.

01-Leanne-Cole-Light-Trails

Select all the images you want to use for the light trails.

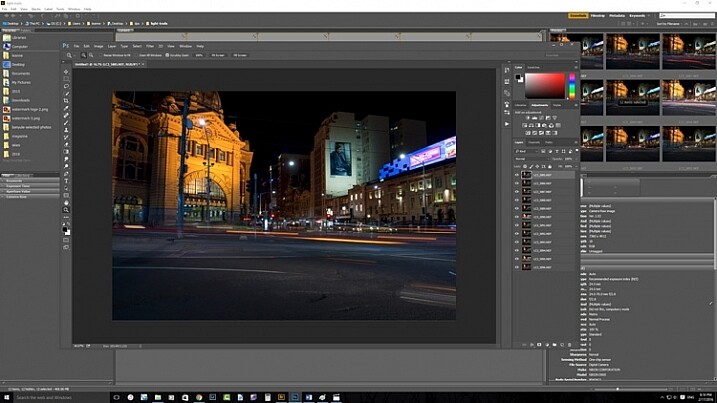
It can take some time for the layers to all open, especially if you are using raw files, and there are a lot of them.

02-Leanne-Cole-Light-Trails

All the layers are opened in Photoshop.

The magic happens

Once the layers are all loaded, you need to select them all. You can do this by selecting the bottom layer, then pressing the shift key and clicking on the top layer. This will select them all.

03-Leanne-Cole-Light-Trails

Select all the layers so they can be used.

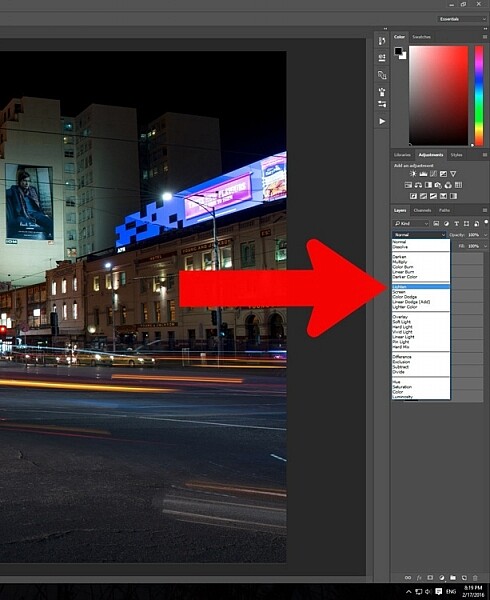
Once selected, go to the Blending Mode Options in the Layers panel. The default setting is Normal. Click on it for the drop down menu, select Lighten, and click.

05-Leanne-Cole-Light-Trails

Select the lighten blend option.

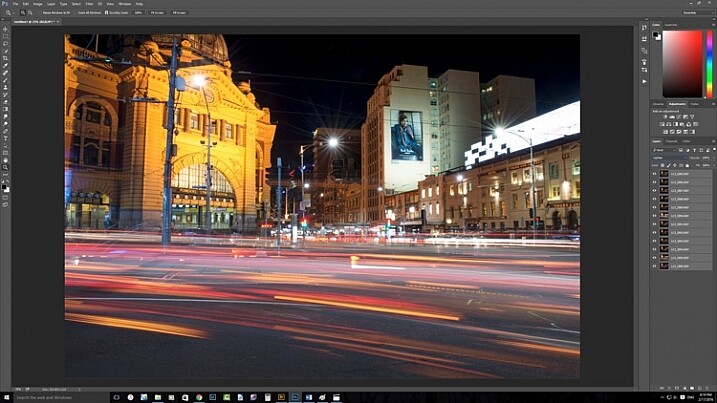
You should notice that the image now has far more light trails. All the trails, from all of the images have come through now.

06-Leanne-Cole-Light-Trails

Lots more light trails apply.

You now have a stacked light trail image.

Getting rid of unwanted lights

Sometimes when you do this, it can change a lot more than just the light trails, it may lighten other buildings too much as well. You can correct this.

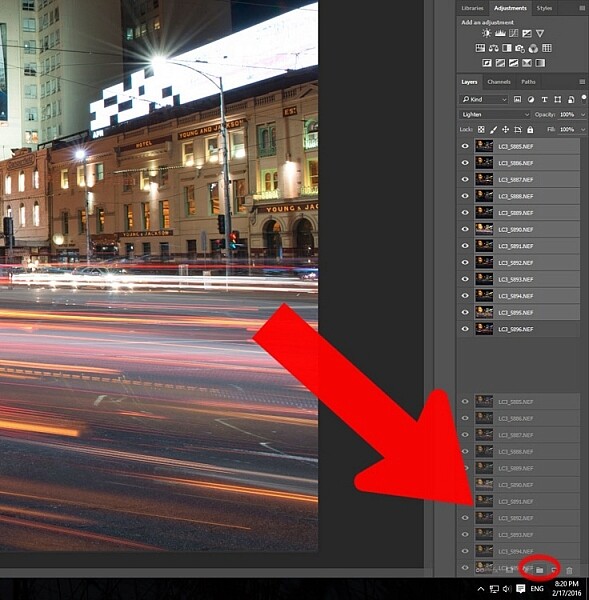
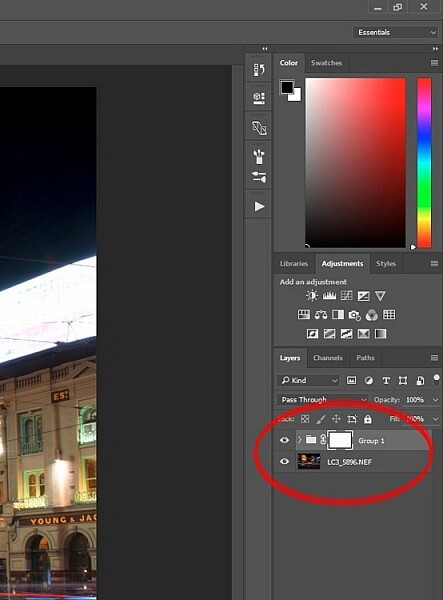
Select all the layers, except the bottom one, and put them into a group. You can do this by dragging them down to the group icon at the bottom of the panel, or right click on the select layers, and when the menu pops up click on Group from Layers.

07-Leanne-Cole-Light-Trails

Put all the layers, except for the first one, into a group.

Add a mask to the group from the bottom of the Layers panel. Select the brush from the tools on the left, or press Ctrl b (just B on Mac). Make sure foreground colour is set to black. Making sure the mask is selected, paint over the areas where there is too much light to mask those areas.

08-Leanne-Cole-Light-Trails

Once the mask is added you can use the brush to remove the unwanted lights.

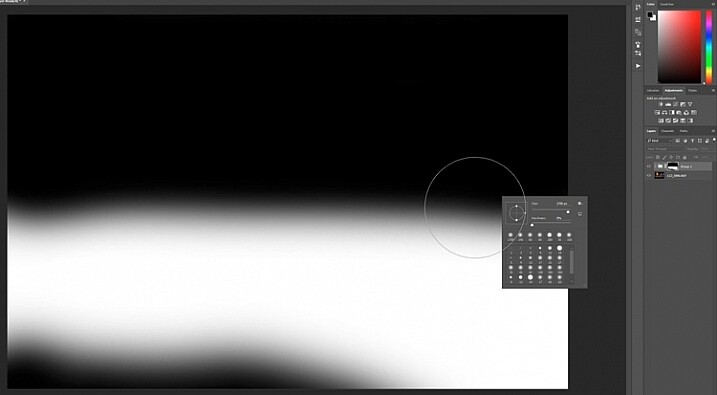
10-Leanne-Cole-Light-Trails

If you alt click on the mask you can see what you have done. The black is where you have removed the unwanted lights.

Finishing the image

The image is now completed, unless you want to do more to it. But, as far as the light trails go, you really don’t need to do any more.

11-Leanne-Cole-Light-Trails

The final image.

This is a great technique which can be applied to many areas. You could use it for ships on the water, or trains going in and out of the city. It can also be used on waterfalls to make them seem fuller. Why don’t you try and see how else you can use this technique.

Here are some other images to give an idea of how to use this technique.

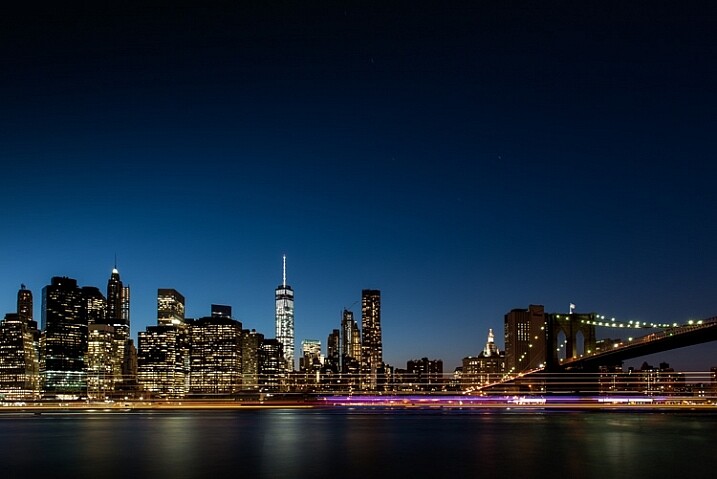
12-Leanne-Cole-Light-Trails

Boats on the water in the foreground of the Manhattan skyline. Four images.

13-Leanne-Cole-Light-Trails

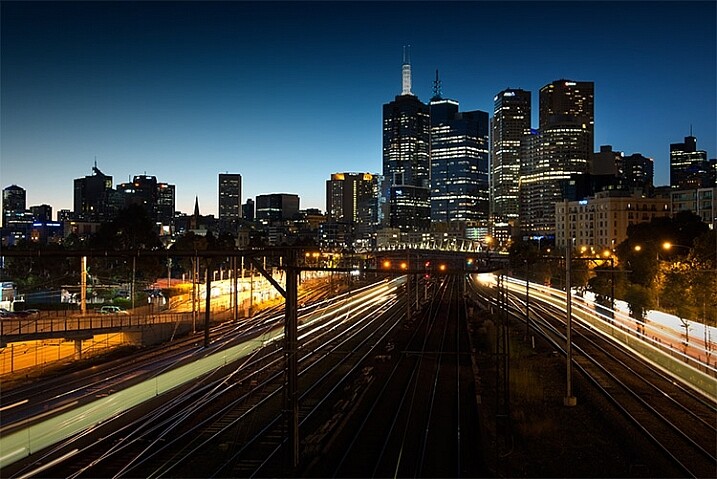
Trains coming into and out of the city. Three images.

This article is part of a series that we will be featuring this week on dPS all about special effects. Check out the others that have already been published here, and look for another new one every day:

  • How to Photograph the Full Band of the Milky Way
  • Fire Spinning with Steel Wool – A Special Effects Tutorial
  • Special Effect – How to Create Multiple Flash Exposures in a Single Frame

googletag.cmd.push(function() {
tablet_slots.push( googletag.defineSlot( “/1005424/_dPSv4_tab-all-article-bottom_(300×250)”, [300, 250], “pb-ad-78623” ).addService( googletag.pubads() ) ); } );

googletag.cmd.push(function() {
mobile_slots.push( googletag.defineSlot( “/1005424/_dPSv4_mob-all-article-bottom_(300×250)”, [300, 250], “pb-ad-78158” ).addService( googletag.pubads() ) ); } );

The post Stacking Light Trails for Night Photography Special Effects by Leanne Cole appeared first on Digital Photography School.


Digital Photography School

 
Comments Off on Stacking Light Trails for Night Photography Special Effects

Posted in Photography


Fire Spinning with Steel Wool – A Special Effects Tutorial

17 Mar

Sometimes you can find ways of taking amazing pictures without spending much money at all, and one of the best examples of this is a technique called fire spinning. This usually involves just a couple of basic items, available at any hardware store and grocery market, and with a little creativity you can create some pictures that are downright otherworldly.

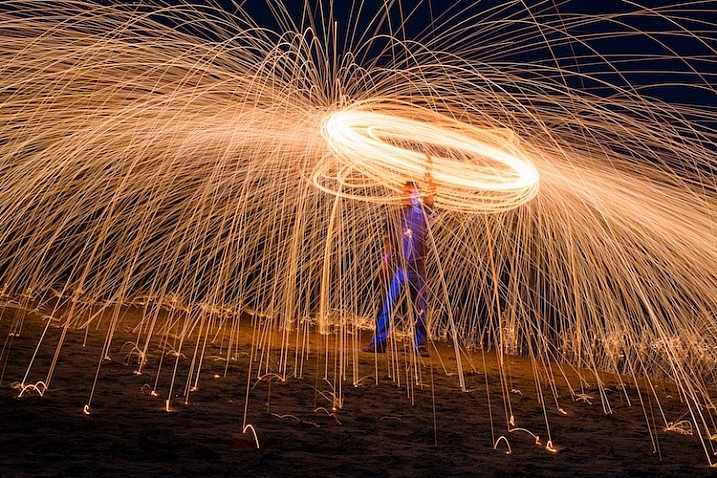
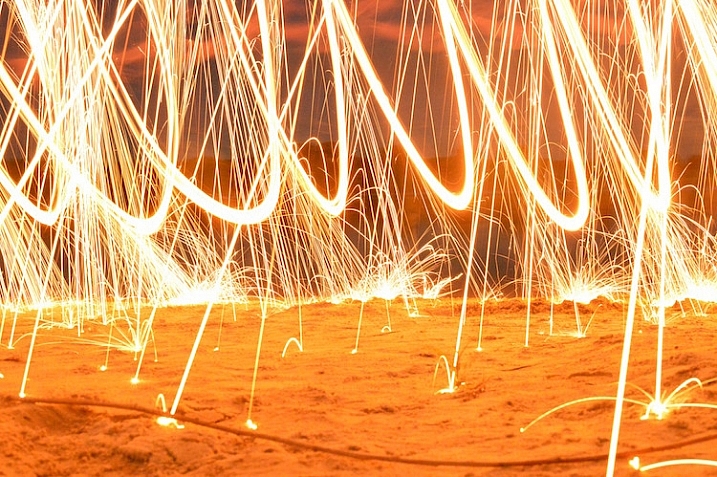
50mm, f/13, 30 seconds, ISO 200

50mm, f/13, 30 seconds, ISO 200

Safety warning – please abide:

Before I go into detail about what it takes to create an image like this, I need to make it abundantly clear that fire spinning is dangerous, not only to yourself, but the area around you, and even your camera equipment.Please follow these safety precautions:

  • Take care to only do this where you have plenty of open space, and nothing around you that will catch on fire.
  • Make sure that you wear thick clothing such as full-length pants, closed-toe shoes, a long-sleeved shirt, and something to cover your eyes (glasses or safety goggles) and hair.
  • Never do this in a field of grass or near a house, dry wood or brush, or near anything that could potentially catch on fire.
  • Also make sure to put plenty of distance between your camera and the sparks, as they fly farther than you might think!

The images you see in this article were all taken at night, on a deserted beach where nothing else could start burning, and my camera was far enough away from the subject to avoid any wayward flying sparks or smouldering embers.

What you will need

You may already have some of the items necessary for a fire spinning photo, but if not, you can easily find everything you need for only a few dollars. You can add additional things such as multiple chains and whisks to create different effects and styles, but for a basic fire spinning shoot you can start with the following trinkets:

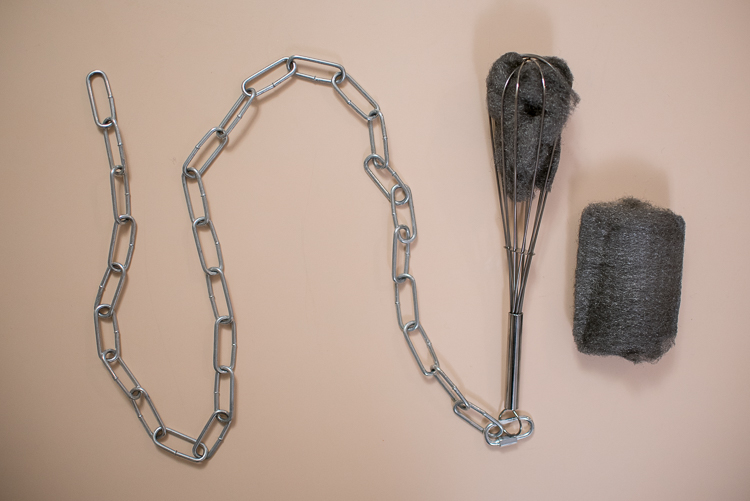
A chain, wire wisk, connector, and steel wool are all you need to create amazing fire-spinning images.

A chain, wire whisk, a connector, and steel wool, are all you need to create amazing fire spinning images.

  • A few lumps of fine steel wool (thick stuff works okay, but the finer steel wool is better: 0-0000 grade)
  • A small chain, roughly half a meter in length (1.5′)
  • A wire whisk commonly used in baking
  • A small clasp or carabiner to faster the chain to the whisk
  • Something to light the steel wool on fire (cigarette lighter, grill lighter, etc.)

Other items necessary for the shoot include:

  • A tripod for your camera
  • A wide-angle lens (I shot the top picture at 50mm, but I would have preferred something wider like 35mm)
  • A flashlight, so you can see as you’re setting up your camera and planning the shoot
  • A friend who is willing to hold a spinning fiery object attached to a chain

Once you have all the things you need, preparing for your photos is fairly simple. Stuff a wad of steel wool into the whisk (fluff it up a bit so it gets some air), attach the whisk to the chain, and you’re all set. Fine steel wool is better (I used grade 00 for these images) because it will burn easier, and send more sparks flying around during your shoot. The basic idea involves lighting the steel wool, which will cause it to smoulder, then spinning it around in the air, which will cause sparks to shoot off in every direction.

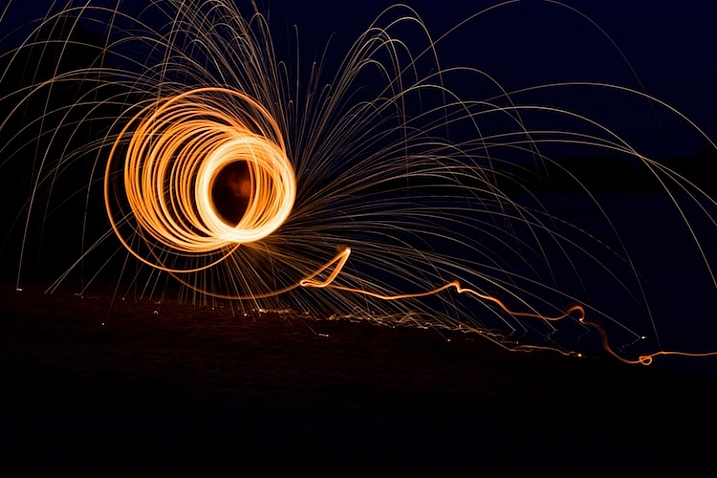
While the steel wool won’t exactly burn like a piece of paper, twirling it in the air will cause sparks to fly all around. By using a long exposure on your camera, you essentially take a time-lapse image of the sparks, which results in an incredibly dynamic image not unlike something you might see during a fireworks display at an independence day celebration.

fire-spinning-single-spiral

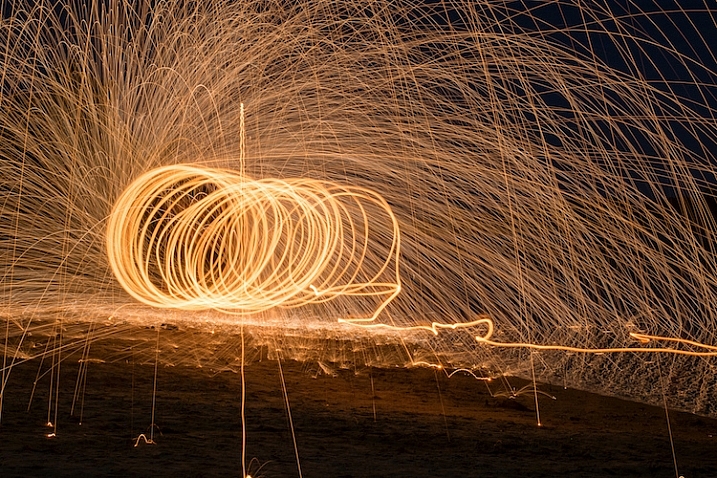
50mm, f/9.5, 20 seconds, ISO 200

The fire-spinning method

After your chain, whisk, and steel wool are ready, you will need to find a location, and decide how to frame your shot, which is why it can be handy to have a friend help you out. You can do fire spinning photos by yourself, but it really helps to be able to direct someone else who’s doing the spinning, so you can get everything positioned exactly how you want in the shot. It helps to draw some lines in the sand or dirt so your helper knows precisely where to stand, and depending on how dark it is, you may need to use your flashlight to help get everything positioned just right.

The rest of the process is fairly simple, but it will probably take a great deal of trial and error to get the shots you want. Set your camera and tripod low on the ground, several meters away from your friend, and have him shine a flashlight on his body so you can lock focus (either use autofocus to lock, then switch it to manual – or try back button focusing). Large apertures should be avoided, since you want a very wide depth of field, and you don’t need to worry about gathering enough light because the sparks will be plenty bright to show up even with small apertures. Use a long exposure time of 20 or 30 seconds, and a low ISO of 100 or 200.

When you are ready to take the shot, have your friend hold the lighter under the steel wool until it starts glowing. That’s your cue to press the shutter button, then just stand back while your friend spins the chain and the sparks start flying. One final trick is to use your camera’s 2-second self-timer so your friend has a bit of time to light the steel wool on fire before the actual exposure begins.

fire-spinning-beach-sparks

35mm, f/10, 6 seconds, ISO 200

Once you get the hang of the basics the rest is all about finding a technique that works, to get the shots you want. You can try lots of variations to get different photos such as:

  • Stand in place and twirl the chain in a circle
  • Stand in place and twirl two chains, one on each side
  • Walk across the frame while spinning the chain to create a giant glowing tube
  • Have multiple people in the shot spinning multiple chains
  • Flash an off-camera speedlight on rocks or other background elements to add depth to the shot
50mm, f/13, 20 seconds, ISO 200

50mm, f/13, 20 seconds, ISO 200

With a little practice you can get some astounding results, and it’s always good to shoot in RAW so you can tweak the colors, and pull some details from the shadows later on if you want. If you search online for “fire spinning photos” (or steel wool spinning) you will find thousands of images, using all sorts of variations on this basic technique. I realize it’s somewhat cliché to say this, but the possibilities really are endless.

Have you ever tried fire spinning before? What are some of your favorite tips and tricks that others should know? Share your thoughts and any of your favorite photos in the comments section below!

This is the second of a series of articles we will be featuring this week on dPS all about special effects. Check out the last one: How to Photograph the Full Band of the Milky Way

googletag.cmd.push(function() {
tablet_slots.push( googletag.defineSlot( “/1005424/_dPSv4_tab-all-article-bottom_(300×250)”, [300, 250], “pb-ad-78623” ).addService( googletag.pubads() ) ); } );

googletag.cmd.push(function() {
mobile_slots.push( googletag.defineSlot( “/1005424/_dPSv4_mob-all-article-bottom_(300×250)”, [300, 250], “pb-ad-78158” ).addService( googletag.pubads() ) ); } );

The post Fire Spinning with Steel Wool – A Special Effects Tutorial by Simon Ringsmuth appeared first on Digital Photography School.


Digital Photography School

 
Comments Off on Fire Spinning with Steel Wool – A Special Effects Tutorial

Posted in Photography


How to Simulate Tilt-Shift Lens Effects Using Lightroom

24 Jun

We’ve all at one point been enamoured by the effects produced by tilt-shift or PC (perspective control) lenses.

Even in wide-angle shots, the extremely narrow field of focus transforms the scene into a surreal miniature world. It can be hard to decipher whether it’s actually a close-up of a tiny model scene, or the result of the visual trickery that a tilt-shift lens can produce.

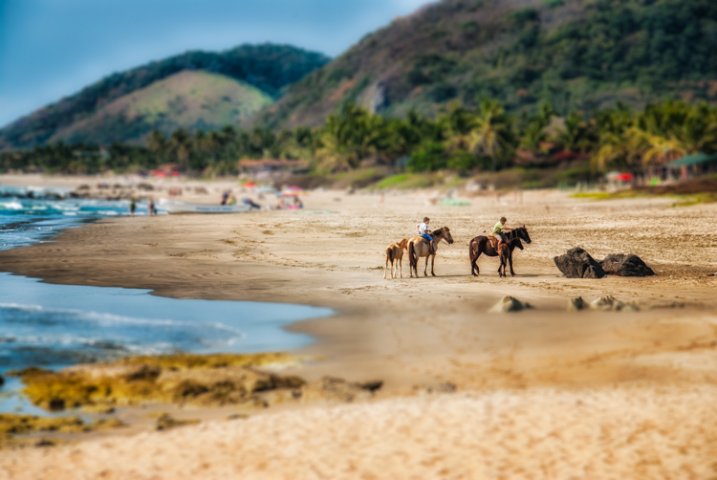
Tilt-shift effect applied to a beach scene.

The tilt-shift effect can be used on more than city street scenes. Use your imagination and be creative!

Besides the nifty miniaturization effect, these high-end specialty lenses are imperative for professional architectural photography. Tilt-shift lenses are basically split into two, parallel to the lens, elements and enable you to tilt the front of the lens barrel in relation to the rear portion, or slide it parallel.

Without actually changing the physical location of the camera, these adjustments allow you to alter the perceived perspective. The most practical application of this effect is to eliminate certain types of distortion, especially the keystone effect.

The keystone effect refers to the convergence of parallel lines which occurs when a camera’s sensor is not parallel to them. You have seen this distortion a million times when the camera was pointed upward at a tall building. It looks as if the building is about to fall over backwards, and it creates the illusion that it is wider at the bottom and continually narrows to the top. The same thing happens with horizontal lines but is often less noticeable, or detrimental to the image.

Although tilt-shift lenses have other practical uses, these are the two that can be replicated effectively in post-processing: creating a miniature effect, and fixing certain kinds of lens distortion.

Eliminating Converging Lines Distortion

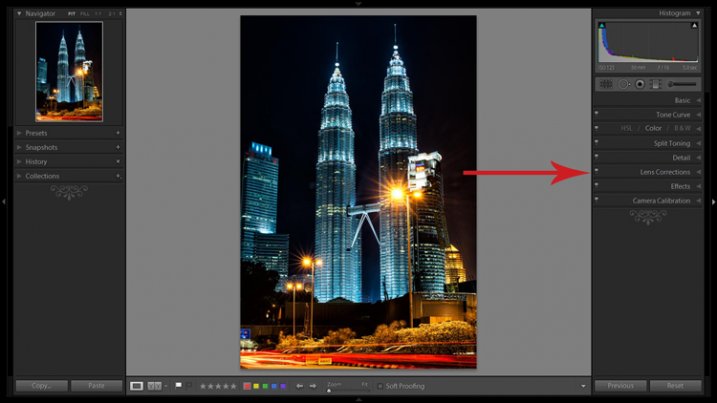
Correcting lens distortion in Lightroom (LR) is fairly straightforward with a couple of considerations to keep in mind. I’ll use a night shot of the Petronas Tower in Kuala Lumpur, Malaysia as an example.

1. Straighten first.

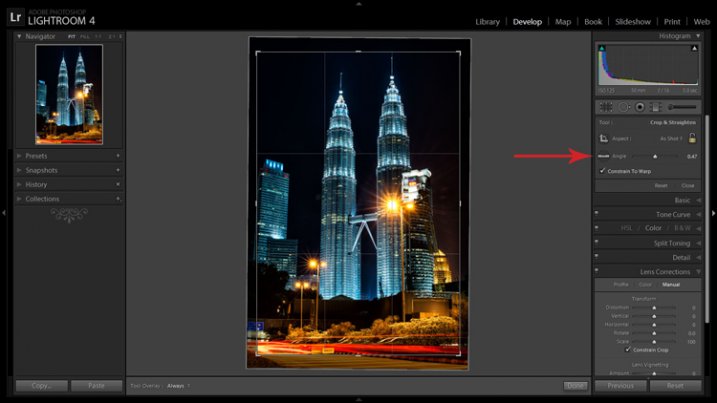
If the image you are working with has a distinct horizontal or vertical line which you know to be level or plumb, use the Straighten tool located within the Crop tool (keyboard shortcut R) to align the image before making any lens corrections.

The Level tool can be found beside the Align slider or activated by holding CTRL key.

The Level tool can be found within the Crop panel beside the Align slider, or activated by holding CTRL key.

To align the image using a vertical line, it must be near the center of the image due to the distortion which you are about to fix. With the Crop tool active, you can either grab the Level tool located beside the Angle slider, or hold down the CTRL key and drag the cursor along the chosen line and LR will rotate the image to level or plumb.

Note: new in LR6 or LRCC is the Auto function of the crop tool which attempts to do this for you. Alternatively, the Rotate slider in Lens Corrections can be used with similar results.

2. Open the Lens Corrections panel and click on the Manual tab.

Distortion corrections are made in the Lens Corrections panel.

Distortion corrections are made in the Lens Corrections panel.

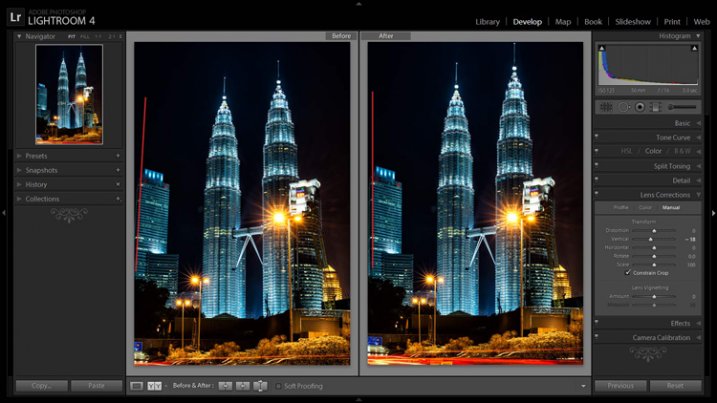
3. Check the Constrain Crop box.

Note: As is often the case in life, you don’t get something for nothing. When LR manipulates the image to fix these lines, it must also crop it. You can also crop it manually after you adjust the image, but it is easy to inadvertently leave a little gray strip somewhere along the edge of your image by not cropping it enough.

4. Adjust the sliders

There are several ways to adjust sliders: dragging the slider itself, clicking the name of the slider and using the +/- keys, clicking the value on the right of the slider and dragging the cursor left or right, clicking the value and entering the desire value or clicking the value and using the arrow keys to make micro adjustments. I recommend the latter for accuracy.

5. Show the grid

Hovering the mouse over any of the sliders will show a grid over the image to help guide your adjustment. For this image, a -18 compensation straightens the lines right up.

A before and after showing corrections for converging lines.

A before and after showing corrections for converging lines.

If you plan on shooting architecture and utilizing this feature instead of dropping $ 1,400 on a tilt-shift lens, it may benefit you to activate the crop tool (keyboard shortcut R) to get an idea of how much LR cropped your image. This will give you a point of reference while composing scenes in the future.

Creating a Miniaturization Effect

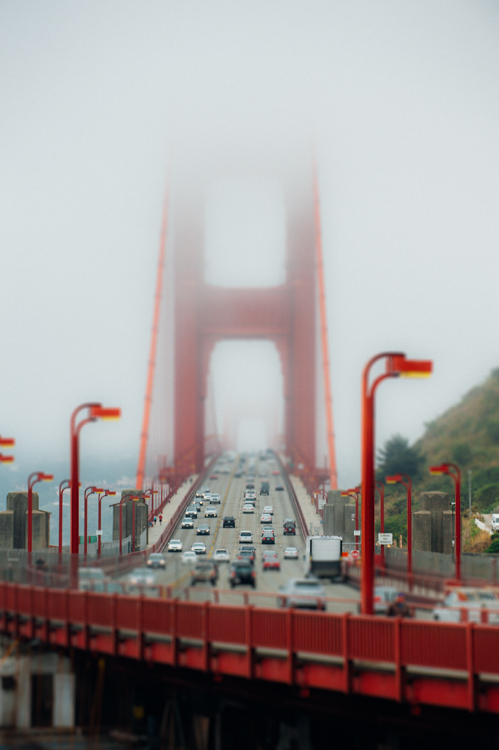
The tilt-shift effect of severely softening most of an image to isolate a small sharp strip can be simulated in post-processing very effectively. Although there are a couple of different ways to achieve this effect in Lightroom, I find the following to be the easiest and most effective.

Golden Gate Bridge with the tilt-shift effect applied.

The tilt-shift effect can add another level of interest to certain photographs.

Keep in mind that not every photo is a good candidate for this effect. You can find good advice about image selection in the article An Introduction to Tilt-Shift Photography.

1. Process the image as you normally would.

Boosting sharpening, contrast and saturation can help exaggerate the effect.

2. Activate and setup the Adjustment Brush (keyboard shortcut K).

Drag the Sharpening slider all the way down to -100. I also like to reduce Clarity which adds a bit of glow and exacerbates the effect.

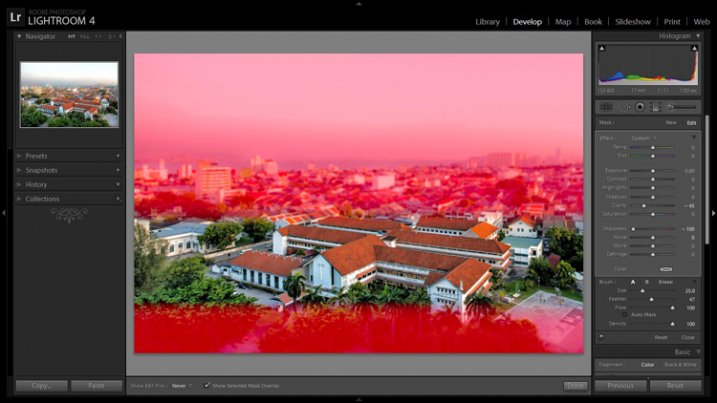
3. Show the Mask Overlay box (keyboard shortcut O)

This will allow you to clearly see where the effect is being applied (shift+O will rotate through different mask colors, you may find red is better one image whereas green may work on another).

5. Adjust the brush settings

Setup such things as brush size, flow, etc. Spend a few minutes experimenting with different combinations of these settings to find what works best for your image. CTRL+Z (CMD+Z on Mac) is your friend here.

6. Blur most of the image less a small strip

Holding down the shift key while you click and drag the brush horizontally across your image will apply the effect in a straight line. The goal is to blur the entire image except for a small strip. Make one line across the upper boundary and one line across the lower boundary of the strip you wish to isolate. You can then release the shift key and paint in the remainder of the areas. The in focus strip should account for 20 per cent or less of the image area. If the strip is too big, the effect will be weak.

Holding down the shift key will keep the brush level to paint a straight line.

Holding down the shift key will keep the brush level to paint a straight line.

7. Repeat to increase the effect.

Repeating the previous step several times will compound the effect. To repeat the step, click on New at the top of the Adjustment Brush panel – this will remove the mask to reveal the most recently applied effects, and allow you to add a new pin (brush strokes) and repeat the process.

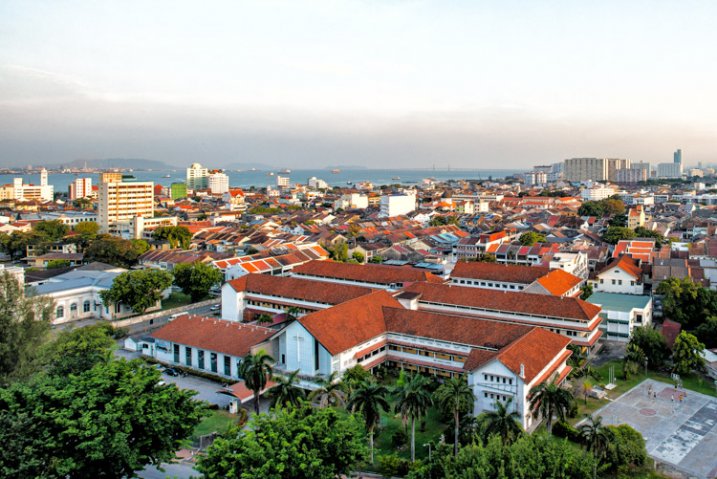
Before applying the effect to a photo of Penang, Malaysia.

Before applying the effect to a photo of Penang, Malaysia.

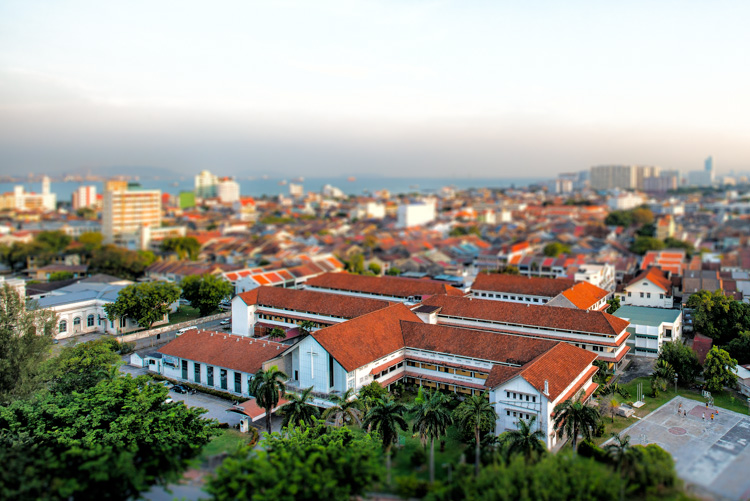
After application of the miniaturization effect.

After application of the miniaturization effect.

The effect can also be applied using the Graduated Filter tool but I find it ends up blurring the entire image to some extent and is less effective.

This is a starting point from which to experiment with the effect. Everybody’s tastes differ, so although the general process will remain constant, go crazy with the other variables and see what happens!

googletag.cmd.push(function() {
tablet_slots.push( googletag.defineSlot( “/1005424/_dPSv4_tab-all-article-bottom_(300×250)”, [300, 250], “pb-ad-78623” ).addService( googletag.pubads() ) ); } );

googletag.cmd.push(function() {
mobile_slots.push( googletag.defineSlot( “/1005424/_dPSv4_mob-all-article-bottom_(300×250)”, [300, 250], “pb-ad-78158” ).addService( googletag.pubads() ) ); } );

The post How to Simulate Tilt-Shift Lens Effects Using Lightroom by Jeremie Schatz appeared first on Digital Photography School.


Digital Photography School

 
Comments Off on How to Simulate Tilt-Shift Lens Effects Using Lightroom

Posted in Photography