RSS
 

Posts Tagged ‘Editing’

How to Experiment with Different Editing Styles to Find Your Own

02 Nov

Photography is an art form and like every art form, it goes through its fair share of evolution. Hence, it is only fair that as photographers (artists of this trade), we too go through an evolution process of defining and redefining our artistic flair. This redefinition can take place in many different ways. It can be technical (going from digital to film or vice-versa) or it can be business (changing genres of what you photograph). Another way you can evolve as a photographer is with your editing style. And it is perfectly okay and acceptable to make one or all of these changes in your personal photographic journey.

memorable-jaunts-experimenting-with-editing-styles-article-for-digital-photography-school-1

For a photographer, his or her images are the art form. Experimenting with the images is creatively satisfying.

There comes a point in one’s career when you really take a hard look at what your journey has been. What you have been through to get here and where you are headed. While you may call this a mid-life crisis of some sort, I call it reassessing your strengths, talents, and goals.

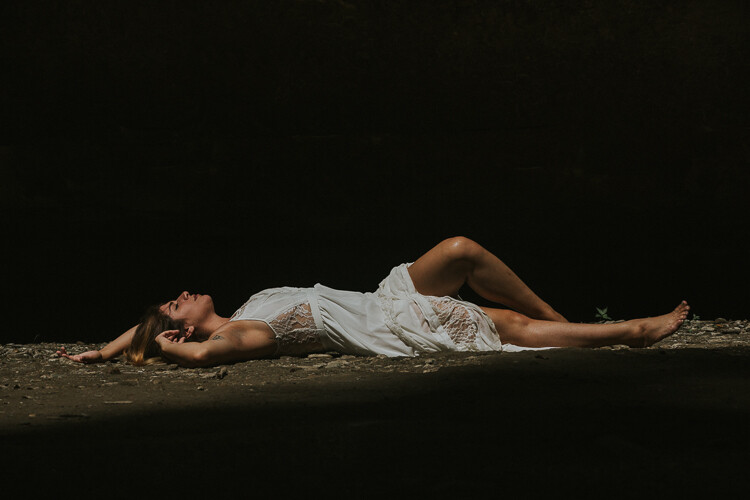
A few years ago, while I was searching for what style of photography appealed to me, I was instantly drawn to bright and airy images with lots of light and emotion. This kind of images really inspire me and make me happy. But of late, I have been drawn to more moody contrasty images that are still full of emotion. I don’t consider this a flaw or a failure of my part but instead, choose to look at it as a natural evolution in my journey as an artist.

memorable-jaunts-experimenting-with-editing-styles-article-for-digital-photography-school-1-4

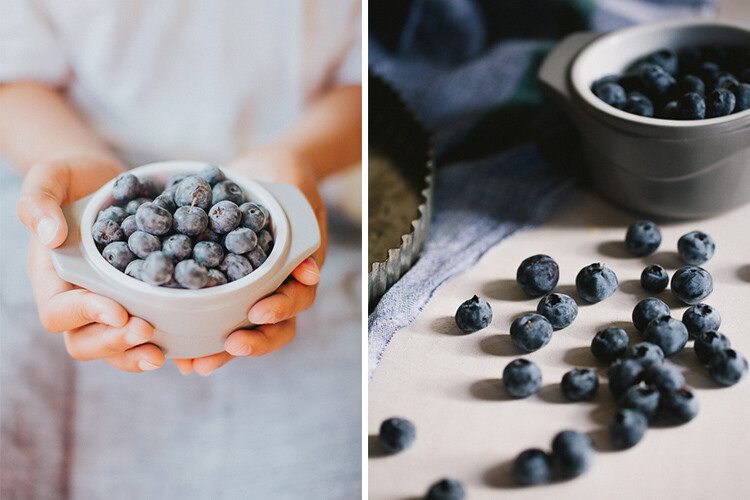
The same subject shot two different ways. I love them both equally and feel like both represent the message/story I wanted to convey about summer’s favorite produce – blueberries!

If you are at such crossroads, I encourage you to fully explore each of these paths and find a way to integrate it with your existing work. I have found that, if done correctly, your clients (or fans) will also value this evolution process as a sign of internal growth of your talent.

There are a few ways to go about this discovery.

1 – Identify your personal editing style

What style of images are you most drawn to? In other words, when you seek inspiration what sort of images do you gravitate towards? For me, images that are full of emotion and personality really call out my name! That is my first requirement; what story is the photographer trying to communicate.

Then I look for processing – is it dark and moody, or full of light and crisp? I like airy, light images just slightly more than dark and moody ones but they both appeal to me. My personal opinion – I am not inspired by sepia or warmer toned black and white, it’s just my personal preference. If that is what moves and motivates you, you own it and rock that style!

memorable-jaunts-experimenting-with-editing-styles-article-for-digital-photography-school-1-5

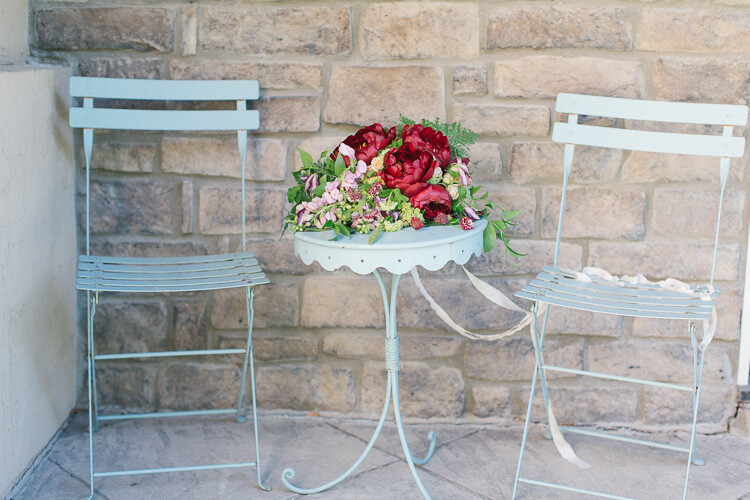
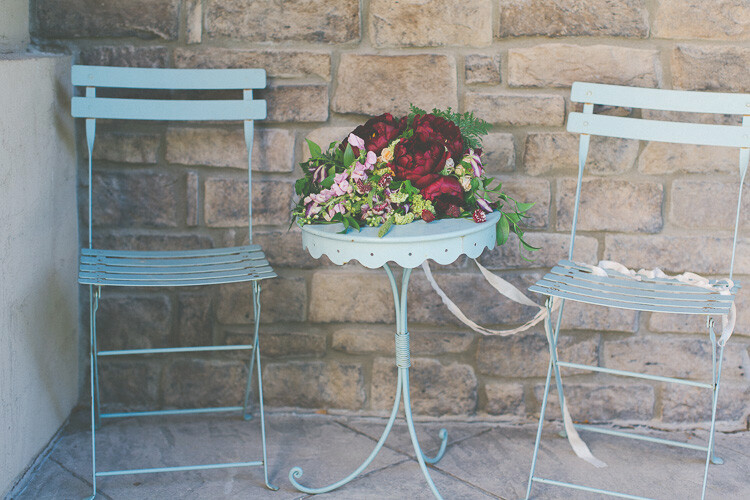
A clean, crisp, bright edit brings out the freshness of the florals against the blue backdrop of the chairs.

2 – Research all other styles that inspire you

There are a few common editing styles that seems to surface over time. This is by no means a comprehensive list, just some that I noticed as I browsed through the internet and Pinterest for inspiration.

Matte Finish

Those images that appear as if a slight hazy filter has been placed consistently over the image.

Matt style typically has black which is not sure 100% as it it were printed on matt paper.

Matte style typically has blacks which are not sure 100% as if the image was printed on matte paper. (see original image below)
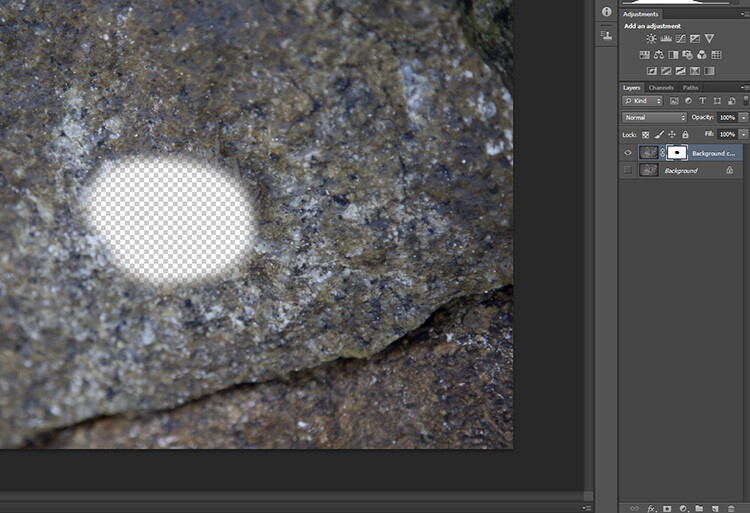
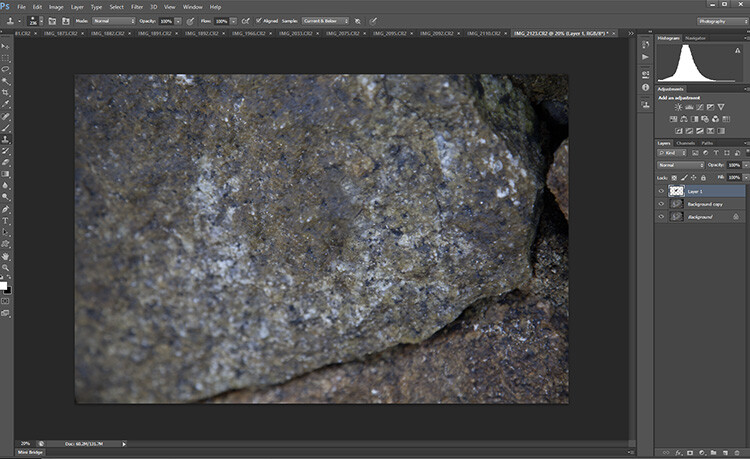
Original image

Original image

matte-style2

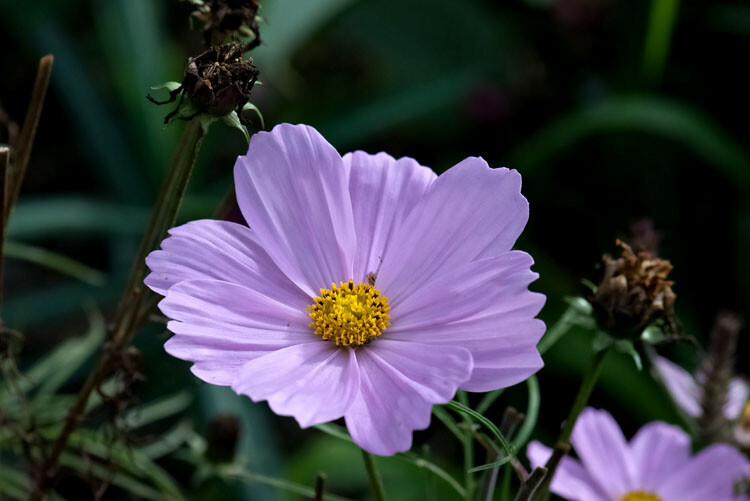
A slight haze like finish that is predominately seen over the florals (especially comparing to the earlier image).

Desaturated Look

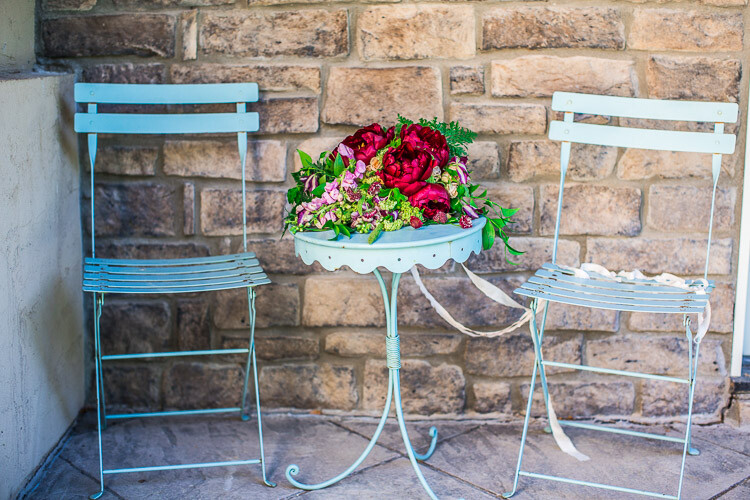
Images where all the colors are very muted. This style seems to be quite popular lately, especially images where the greenery (i.e. trees and brushes) are toned down in the saturation of green tones.

memorable-jaunts-experimenting-with-editing-styles-article-for-digital-photography-school-6

A desaturated look where all the colors are muted from the original vibrancy seen in the first image of this series. The reds are toned down, the greens and blues are also muted (reduced in intensity).

HDR

As Per Wikipedia, HDR or High Dynamic Range is the effect to reproduce a greater dynamic range of luminosity than what is typical of standard digital imagery. I have seen this typically with urban night shots but in theory, this effect can be applied to any image.

memorable-jaunts-experimenting-with-editing-styles-article-for-digital-photography-school-7

HDR here almost has the opposite effect of desaturated colors…the greens, reds, and pinks seem to pop in this image.
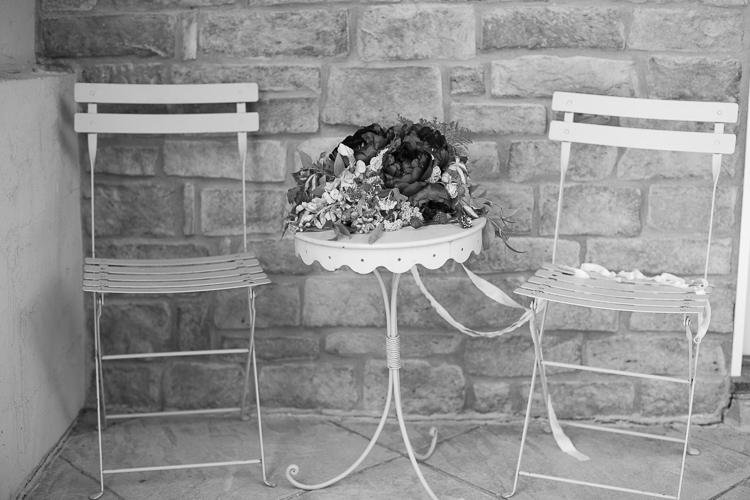
Monochrome

This quite simply means single color and is most commonly used in black and white images.

memorable-jaunts-experimenting-with-editing-styles-article-for-digital-photography-school-8

3 – Identify artists that do these things well and follow them

There are many artists that excel at one or more of these types of editing styles. Once you have identified the ones you want to experiment with, find those artists and follow their work. You will begin to see a pattern in their shooting and editing style that may provide you with the right amount of motivation to try and achieve a certain look for your own portfolio and images.

4 – Shoot for a particular style and close to your vision

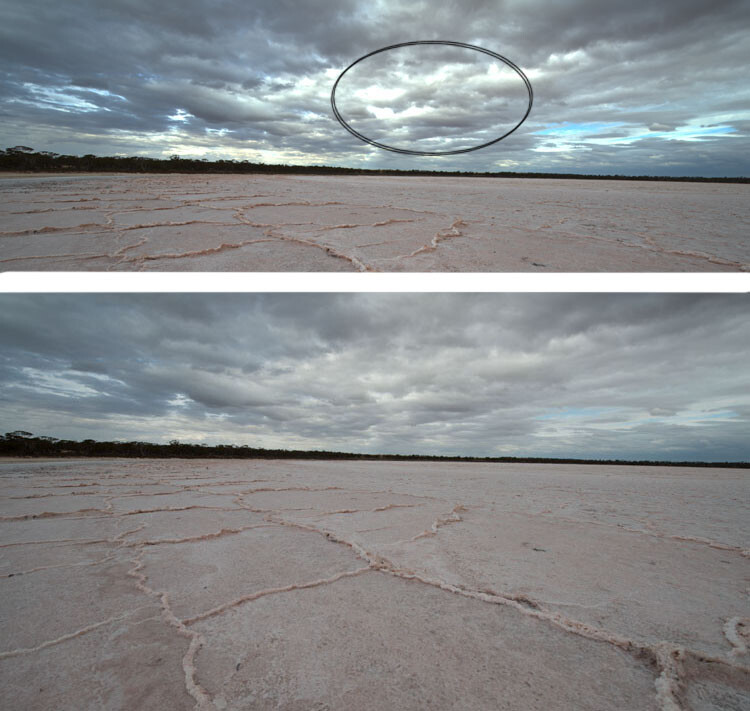
This ties in with the above two points. Once you have identified the type of look you want to achieve, take the time and effort to set up all the parameters needed to achieve it. For example, if I am aiming for a dark and moody look to my image I will look for lighting, textures, and tones that will support that type of imagery. I will not set up the shoot in the brightest part of my house where sunlight fills the room.

memorable-jaunts-experimenting-with-editing-styles-article-for-digital-photography-school-1-2

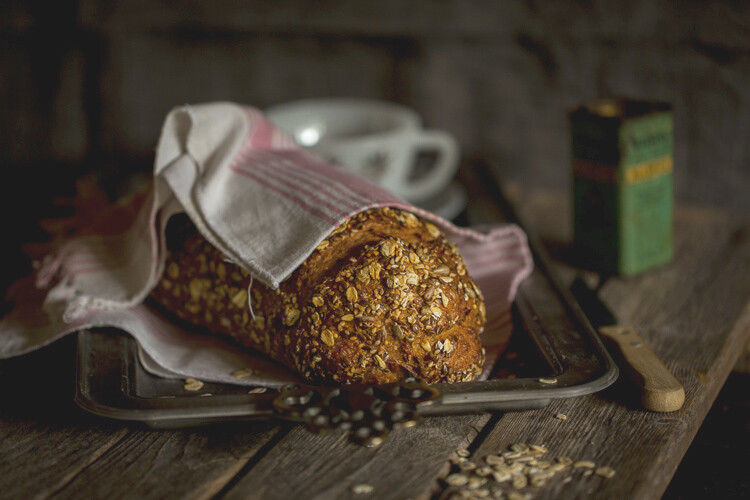
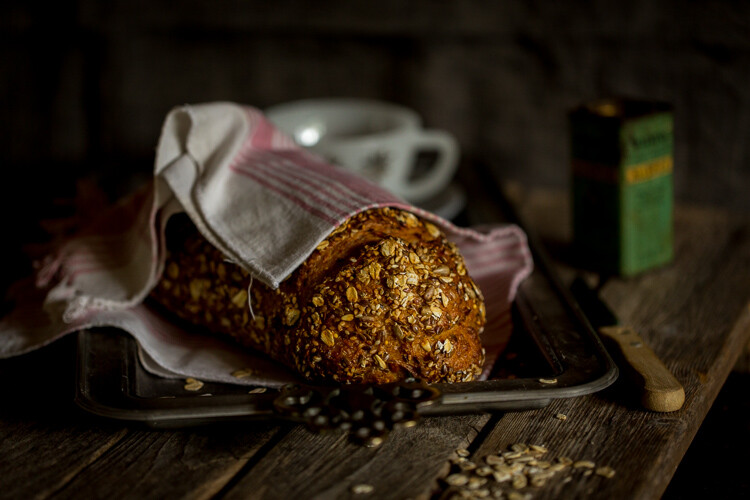
This food editorial shot was set up in my basement studio on a dark cloudy day to minimize the amount of light hitting the overall scene. Additionally the dark tones of the bread and the wood board compliment the look, feel, and tone of this image.

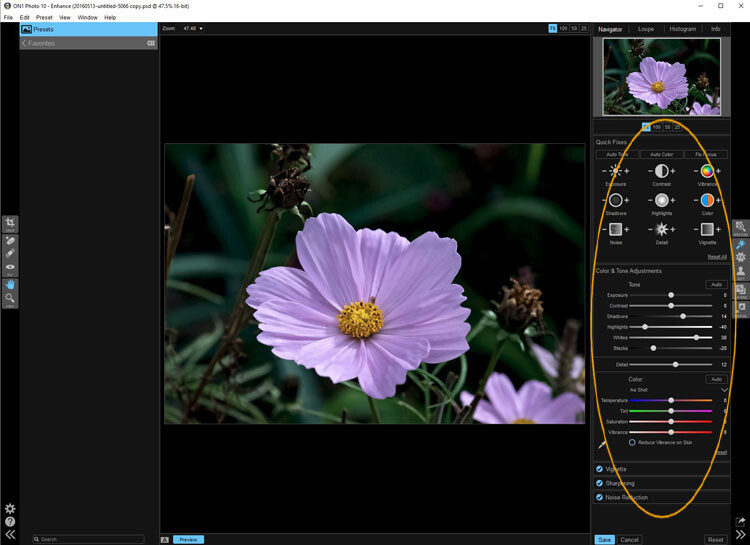
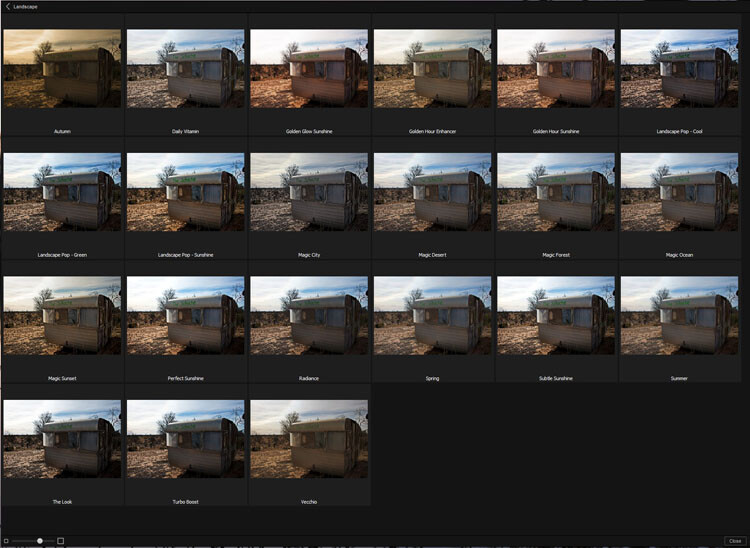
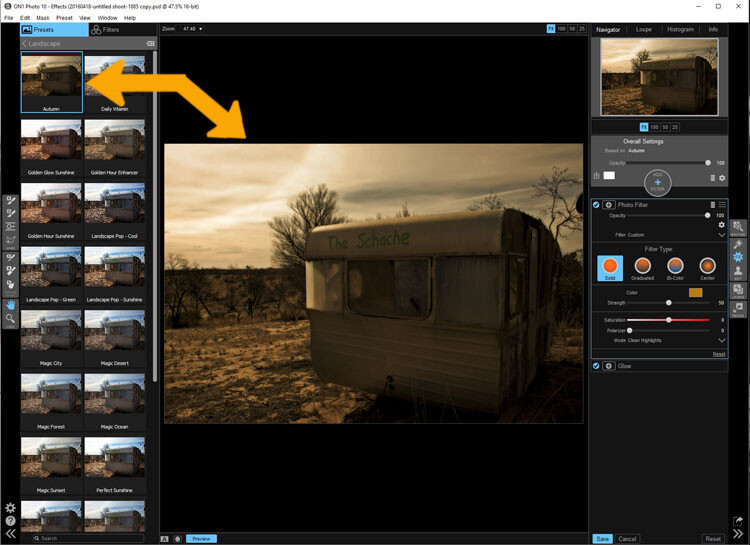
5 – Invest in LR presets or PS actions or experiment

There are numerous editing aids out there for almost every style of photography. Just google the kind of look you want to achieve and chances are someone has created a template/preset/action for that effect. Some editing aids are free while others cost money. Depending on your personal preference, you can choose to use these aids or not. My primary editing software is Lightroom and sometimes I will use a free preset just to see if I like that style of editing before I go down the path of additional research and experimentation with my own shooting style.

Conclusion

At the end of the day, there are many different ways to look at your creativity and your photography style. There will always be those of us who go through life with the mindset of – Don’t fix what isn’t broken – while others follow the logic of – Change it up, mix it up, rock that boat…fall in the water and you will learn to swim! No matter what camp you belong to, the message I want to leave with you is that do that what makes photography fun, interesting and creatively challenging for you!

googletag.cmd.push(function() {
tablet_slots.push( googletag.defineSlot( “/1005424/_dPSv4_tab-all-article-bottom_(300×250)”, [300, 250], “pb-ad-78623” ).addService( googletag.pubads() ) ); } );

googletag.cmd.push(function() {
mobile_slots.push( googletag.defineSlot( “/1005424/_dPSv4_mob-all-article-bottom_(300×250)”, [300, 250], “pb-ad-78158” ).addService( googletag.pubads() ) ); } );

The post How to Experiment with Different Editing Styles to Find Your Own by Karthika Gupta appeared first on Digital Photography School.


Digital Photography School

 
Comments Off on How to Experiment with Different Editing Styles to Find Your Own

Posted in Photography


How to do Non-Destructive Editing in Photoshop

26 Oct

Picture this, you are about halfway through editing a beautiful urban landscape in Photoshop. You’ve already put hours into the image when suddenly you notice that a particular area of the image doesn’t add up. A wall you were working on has accidentally been Clone Stamped to look as if it were hanging at an unnatural angle. It just looks wrong. After repeatedly hitting the undo button you discover that Photoshop can only remember so much, and you are stuck with this disastrous looking edit. All you can do now is waste more precious time trying to fix the problem or close the program and start from square one. If only there was some other way – enter non-destructive editing in Photoshop.

Non-Destructive Editing in Photoshop

Now you see me…now you don’t! Editing with a non-destructive workflow means that you can edit your photos without leaving a trace on the original file.

What is non-destructive editing?

Fortunately, there is a better way! Non-destructive editing (sometimes called NDE for short) is a method of editing in Photoshop that allows you to make changes to an image without overwriting the original image data. This means that you will always be able to backtrack on adjustments made to an image as needed, retaining flexibility and keeping the resolution of the original image intact.

You may have already encountered non-destructive editing while following online tutorials that instruct you to use a particular adjustment layer to make modifications rather than editing the actual image.

Non-destructive editing is not one single technique. You can perform it in numerous ways in Photoshop depending on the desired outcome of an image. For this article, we will have a look at some of the most basic methods used by photographers for doing non-destructive editing .

Duplicating the background layer

No matter what image you have opened in Photoshop, the first step is always to duplicate the background layer. If you do happen to make an adjustment directly onto the image the background layer will remain untouched. Then you can start afresh with all your adjustment layers intact.

To do this, open an image in Photoshop. Move the curser to the thumbnail image in the Layers panel and right click on the shaded area that says Background. Now select the Duplicate Layer option and select OK at the screen prompt. A new layer will appear above the Background layer in the layers panel titled Background Copy.

non-destructive editing duplicate layer

nondestructive editing Photoshop

non-destructive editing

Working with adjustment layers

Simply put, adjustment layers apply colour and tonal adjustments to an image without permanently changing any pixel values. To activate the adjustment layers panel click Window on the top menu bar and select Adjustments. It will bring up a panel with lots of adjustment options such as levels, hue/saturation, brightness/contrast, gradient overlays and black/white.  This is the go-to panel for digital editing and in most cases, it will provide all the editing tools you will need.

Non-Destructive Editing in Photoshop

Select one of the adjustment layers by clicking on an icon. The name of the icon will appear if you rest your mouse on it for a moment. In this example, I have chosen Curves to adjust the contrast in my photograph. Clicking that icon will cause the Curves panel to pop up with the available settings within that adjustment.

non-destructive editing curves

Non-Destructive Editing in Photoshop

Notice that there is now a new layer in the layers panel which is sitting above the one called Background. This means that any layers below the Curves layer will be affected by this adjustment. To limit the effect of an adjustment to a single layer only, right click on the adjustment layer and select Create Clipping Mask. A small arrow pointing down indicates that the adjustment layer will only affect the one that is sitting directly underneath it.

Non-Destructive Editing in Photoshop

Using Smart Filters

Adding a filter to an image can be done non-destructively and will allow you to undo the effects of it later if you change your mind. Click on the layer you would like to apply a filter to and click on the Filter drop-down menu located on the top main toolbar. Select Convert for Smart Filters and a pop-up will appear saying that you must turn the selected layer into a Smart Object. Hit OK and a tiny document shaped icon will appear in the bottom left-hand corner of the selected layer thumbnail image.

non-destructive editing convert smart filters

non-destructive editing smart object

After you select a filter from the Filter Gallery (via Filter > Filter Gallery) and apply it to the image, you will see two new items beneath the selected layer. Clicking on the eye icon next to the Filter Gallery layer will toggle the filter on and off, and double clicking near the Filter Gallery text will open the Filter Gallery adjustments. Right clicking on the Filter Gallery Layer will bring up a menu. If you want to remove a filter altogether, select delete and the filter mask will disappear without degrading your image.

non-destructive editing

Use Layer Masks instead of the Eraser Tool

Masking is one of the more common tools in the Photoshop master’s kit. Using a layer mask allows you to you hide or mmask off parts of an image rather than using the eraser tool to permanently remove parts of an image. To apply a layer mask, open an image, select the layer you want to edit and click on the small icon at the bottom of the layers panel.

non-destructive editing mask

Non-Destructive Editing in Photoshop

A close-up of the Layer Mask button.

A mask will appear next to the layer you have selected, with a small chain icon between the thumbnail and the mask. When you have the image icon selected any effects applied to the image will occur as normal. However, if you select the mask, you will find that painting onto it (with black) will hide parts of that layer.

Close up of the selected mask layer - note the white lines around the corners of the layer.

Close-up of the selected layer mask – note the white lines around the corners indicating which part is active.

Non-Destructive Editing in Photoshop

With the background layer turned off (not visible) you can see that part of this layer is missing, or hidden by the layer mask where it is black. Black conceals or hides, white reveals.

Now, if any hidden portion of the image is painted over in white on the layer, it will be visible again. If you then delete the mask all the hidden areas will reappear.

Dodging and burning non-destructively

The Dodge and Burn tools are used to lighten and darken areas of an image, but applying these effects directly to an image is destructive, preventing you from being able to edit the changes later.

To dodge and burn non-destructively, start by opening up your photo. Duplicate the background layer, then select Layer > New > Layer from the top menu bar. A dialogue box will pop-up, make sure your settings are the same as those shown below and hit OK. A new layer will be created.

Non-Destructive Editing in Photoshop

Create a new layer

Use the settings you see below. That will fill the layer with gray and change the blend mode to make it effective for dodging and burning.

non-destructive editing

Use these settings for your dodge and burn layer.

You can give this layer a nickname to help you remember what it is doing. You can always do it later if you forget, by double-clicking on the layer name. I usually call this layer “dodge/burn”.

Now simply select either the Dodge or Burn tool and apply any adjustments to this new layer. Though you are now editing one layer above the actual image, you have adjusted the blend mode so that the opacity of the grey Dodge/Burn layer is completely transparent, and any changes you make to this layer now appear to only adjust the image, without impacting the quality of the original pixels.

non-destructive editing dodge burn layer

Result of the dodge and burn layer

Result of the dodge and burn layer

Using the Clone Stamp non-destructively

The Clone Stamp is another great tool used to remove bits and pieces you may not want in an image. Normally it works by moving pixels in the original image around but, you guessed it, that is a very destructive technique!

To use the Clone Stamp Tool non-destructively simply create a new layer as before. Next, select the Clone Stamp Tool and in the Sample drop-down menu select the Current & Below option. Now the Clone Stamp Tool will sample everything in the image but only apply any changes to the top most layer.

clone tool

non-destructive editing

The clone layer looks like this.

clone tool non-destructive

The result of the clone layer being applied looks like this.

Conclusion

There are plenty of other methods to edit non-destructively. But as the basics show, non-destructive editing is mostly about using new layers that are placed above the original image rather than adjusting the original image itself. It may seem clunky at first, but it will soon become an automatic part of your workflow. The next time you find yourself with an awkward edit you’ll be glad you can simply turn a layer off rather than starting all over again.

How do you use edit non-destructively in Photoshop?

googletag.cmd.push(function() {
tablet_slots.push( googletag.defineSlot( “/1005424/_dPSv4_tab-all-article-bottom_(300×250)”, [300, 250], “pb-ad-78623” ).addService( googletag.pubads() ) ); } );

googletag.cmd.push(function() {
mobile_slots.push( googletag.defineSlot( “/1005424/_dPSv4_mob-all-article-bottom_(300×250)”, [300, 250], “pb-ad-78158” ).addService( googletag.pubads() ) ); } );

The post How to do Non-Destructive Editing in Photoshop by Megan Kennedy appeared first on Digital Photography School.


Digital Photography School

 
Comments Off on How to do Non-Destructive Editing in Photoshop

Posted in Photography


Macphun announces Luminar photo editing app for Mac

20 Oct

Macphun, the company behind Aurora HDR, has announced Luminar, an all-in-one photo editing app for Mac. The photo editor was designed for users of all skill levels, and includes a user interface that can be tailored to each user’s specific needs.

Luminar includes a variety of tools for processing images, including native Raw processing, more than 35 photo filter sets including Photo Filter Emulation and Cross-Processing, presets, layers, brushes and masking, spot healing, noise reduction and ‘personalized darkrooms’ called Workspaces. Macphun also mentions a sky replacement tool to tease some of the other more advanced features the software will offer.

Macphun says it will open Luminar to pre-orders on November 2 with the official launch scheduled for November 17. New customers will pay $ 59, while existing customers will be charged less at $ 49. Those who pre-order the software will receive an exclusive video series dubbed Photography Essentials and Marketing Guide for Photographers by Will Burrad-Lucas.

Via: Macphun Blog

Articles: Digital Photography Review (dpreview.com)

 
Comments Off on Macphun announces Luminar photo editing app for Mac

Posted in Uncategorized


Adobe and UC Berkeley demonstrate image editing tool powered by machine learning

01 Oct

Researchers with Adobe and the University of California-Berkeley have detailed a new AI-powered photo manipulation tool that enables sophisticated photo modification using ‘target images’ and/or crude user sketches. The end result is a realistically altered photo that has been machine-modified (or, in the case of blank images, completely machine generated) to match a target image without extensive ‘natural’ user editing.

According to a newly published study detailing the technology, this tool involves a ‘generative adversarial neural network’ that works to modify images in near-real time. As one example demonstrated in the video below, drawing a general shape over a photo of a bag causes the software to automatically adjust the bag’s size to match the sketched shape without compromising its realistic nature. The software can also generate images based on crude user ‘scribbles’ – no artistic talent required.

Articles: Digital Photography Review (dpreview.com)

 
Comments Off on Adobe and UC Berkeley demonstrate image editing tool powered by machine learning

Posted in Uncategorized


Palette offers physical controllers for your photo editing software

22 Sep

In hall 4 at Photokina we had the chance to take a closer look at Palette’s system of customizable physical controllers for software, which started out as a crowdfunding project but have been available in retail for some time now. The system consists of a core unit with a small display and a range of buttons, dials and sliders that all come with a sturdy aluminum housing and attach to each other magnetically. 

Palette can me made to work with any software but predefined setups are available for Adobe Photohop, Lightroom and other photo and video editing applications. You can switch between functions using buttons, or adjust parameters such as digital exposure compensation, contrast or hue with sliders or dials. Your personal profile can be created in the Palette app. Multiple profiles are supported for different users or workflows and the Palette application can be set to automatically switch profiles when the application focus on your computer changes. The Palette starter kit is available for $ 199 on the Palette website.

Articles: Digital Photography Review (dpreview.com)

 
Comments Off on Palette offers physical controllers for your photo editing software

Posted in Uncategorized


Image Editing Software Overview – On1 Photo 10

31 Aug

Since the advent of digital photography there has been one program that has been the penultimate of all image editing – Adobe Photoshop. There is no denying that it is powerful, but many find it confusing and hard to learn. Another aspect that some people aren’t sure about is the new subscription based ownership. So for many, another solution to the predicament is On1 Photo 10. It’s a program that is not that expensive, and can do most of what the majority of photographers want.

leannecole-on1-enhanced003

Image processed with the Enhance Module in On1 Photo 10

Overview of On1 Photo 10

The On1 Photo 10 editing software has been around for some time, and you may know it more as plugins for Lightroom and Photoshop. However, recently it has been given a new look, and it is now also a standalone program. This means you don’t need another program to be able to use it. You can download it and do all your editing within its confines.

When you open On1 Photo 10, it looks a bit like Lightroom, but that is about it. Locating all the tools is different, but not so different that you can’t find things. When you begin using On1, a window pops up with several videos to teach you how to use it. It is advisable that you watch them and learn. They are not very long, but they are packed with useful information.

On the right side of the panel there are a series of modules that you can edit your photos in. Each one is specific and gives you different options.

Browse Module

In the Browse section you can look at your photos and catalogue them, decide where you want them, and upload them to Cloud storage facilities like Dropbox, Google Drive, and OneDrive. It is similar to Bridge in Photoshop or the Library Module in Lightroom. You can make the images larger, so you can get a better look at them and decide which ones you want to work on.

When you want to start editing, the other modules are there for you to use.

leannecole-on1-browse-folder

Browse Module, here you can view your photos and move them around.

Enhance Module

When you open your photo into the Enhance module you can do some basic editing, for example: changing the exposure, adjusting whites, black, shadows, and highlights. It will allow you to fix the white balance and help with noise reduction. This section is where you get your image ready for further work. It is like the preparation area before you go on to do the real work.

Similar to Lightroom, On1 works in a non-destructive manner. If you don’t understand that, it means nothing you do to your image is permanent. If you do something to it and don’t like it, you can go back and reverse the change. When you are just learning photo editing, it is good to work with software that allows you to work this way, without having to worry about ruining your image.

leannecole-on1-enhance-folder

The Enhance Module allows you to do some basic editing to your images.

Effects Module

In Effects, you can add filters and presets to your photos. There is a large variety of them, and each one has several options within. You have the option of creating your own and saving them (just as in Lightroom), which is very helpful if you want to use the same one a lot.

There is a difference between presets and filters. On1 explains that presets do multiple effects, while the filters have only one. When using any of them you can make adjustments so it is as strong as you like, or they can be made to have less effect. You get to be the judge of how you want the final result to look.

leannecole-on1-effects-module-1

In the Effects Module you can apply presets and filters to your images.

leannecole-on1-effects-module-2

You can see what the presets or filters will do to your image, if you click the grid you will get a larger of view of each option.

leannecole-on1-effects-module-3

You can see what each preset or filter will do and when you decide which one to use, just click on it.

leannecole-on1-effects-module-4

On1 will then apply it to your image.

Portrait Module

Portrait module is possibly is the hardest one to use. For people who photograph portraits on a regular basis, though, it may seem more intuitive. You have to work out faces, and point out the eyes and mouth to the program. Then it will whiten the eyes, and make the lips lighter. You also have the option of going back over everything and readjusting the settings. While whitening the eyes can be nice, if it is done too much it looks very strange.

leannecole-on1-portrait-module-1

On1 allows you to do specific work to faces, and asks you to highlight the eyes and mouth so it can to its thing.

leannecole-on1-portrait-module-2

You can work on the skin and other parts of the face as well.

Layers Module

On1 Photo 10 also has the ability to work in layers, so if you like working with texture overlays and replacing skies, you will like this module. It makes these very easy to do, especially the former.

The program comes with a number of textures, backdrops, and borders. You could quite easily just use what it provides, but it also has a section where you can add your own. So, you can upload any textures you have collected and apply them to your images.

As with most sections in On1, you can adjust, and then decide how strong the layer will be. There are blending options and tools are available if you want to remove part of it too.

leannecole-on1-layers-module-1

The Layer Module lets you work in layers, there are also some tools on the left that allow you to do some specific processes.

leannecole-on1-layers-module-2

You can apply textures.

leannecole-on1-layers-module-3

Or you can replace a sky, which is very easy with the masked brush tool.

Resize Module

Figuring out how to resize an image is easy, and fairly straight forward. It is a task that many people usually find difficult. I often see people putting up large images on the internet because they don’t know how to make them smaller. On1 has a separate module where you can make them  the size you want. If you want to resize it for something special, there are options available for that as well. There are no excuses now for loading images that are too big.

Who would use On1 Photo 10?

If you like plugins and seeing the different effects on your images, you will love this software.  It is perfect for someone who is just starting out, and looking for software that is simple and easy to use. Many of the other programs can get you bogged down because of how complicated they are, On1 has great online help and there are a number of videos available to help you work through it.

Experience using On1 Photo 10

I have to admit that while I know how to use many different types of editing software, I had to find some video tutorials to help me find my way around. On1. It is something that you should always do when learning new products, it can help you find the correct way to use them. Fortunately, On1 has a lot of tutorials available to help you learn how to use it.

It could just be my computer, or the size of my files, but I had trouble with the program crashing or freezing. I have a PC and am using Windows 10, so it may not be compatible. I have sent an email to the developers in hope of finding out what keeps causing that. There is however, a 60 day trial version available, which is far more than most other software products. So you can find out if it will work for you or not.

The program does have a tendency to blow out the highlights. In Photoshop you can often fix them, but On1 blows them out even more, and it seems like you are unable to do anything about it. However, it only happens when using RAW images, if you convert them to JPEG it doesn’t appear to happen. Though, it will teach you to be careful with them.

leannecole-on1-highlights-001

You can see with the top image, which was a RAW file how the highlights have been blown out, but it has not happened in the jpeg file.

Every time you open an image it asks if you want to edit a copy or the original. When you start you may find that every time you open the image you are creating another copy of it. Take care, and perhaps once you have that first copy, just work on that one.

leannecole-on1-opening-an-image

Read the windows as they open up, and make sure you are aware of what you are doing.

Overall

On1 Photo 10 is a good program, and those interested in doing only basic editing will find it very useful. Those that love the grunge look and adding textures will also enjoy using it. It likely won’t replace Photoshop, but for beginners and people who love using plugins, it’s a great option.

Have you tried it? What are your thoughts?

googletag.cmd.push(function() {
tablet_slots.push( googletag.defineSlot( “/1005424/_dPSv4_tab-all-article-bottom_(300×250)”, [300, 250], “pb-ad-78623” ).addService( googletag.pubads() ) ); } );

googletag.cmd.push(function() {
mobile_slots.push( googletag.defineSlot( “/1005424/_dPSv4_mob-all-article-bottom_(300×250)”, [300, 250], “pb-ad-78158” ).addService( googletag.pubads() ) ); } );

The post Image Editing Software Overview – On1 Photo 10 by Leanne Cole appeared first on Digital Photography School.


Digital Photography School

 
Comments Off on Image Editing Software Overview – On1 Photo 10

Posted in Photography


Announcing the Winners of the Corel AfterShot Pro Editing Software

16 Aug

A huge thank you to everyone who entered our recent contest to win one of 10 copies of Corel’s AfterShot Pro 3 Photo Editor Software. This was an “After” themed competition, and so many of you shared your beautiful photographs, that we encourage everyone to go back and scroll through the comments section to view these wonderful images.

ASP3-Logo.png

As a bonus to the entire dPS Readership, Corel is offering a 30% discount on their AfterShot 3 leading Photo Editing Software for a limited time, and you’ll also receive FastFlick Instant Slideshow Maker for free! Just click here.

Yet again, the response was absolutely wonderful! But now, onto the winners! Drum roll please, and the winners are:

The Winners of the Corel After Photo Contest for 10 copies AfterShot Pro 3 Photo Editor Software are…

Winner 1: Huston Traviss

Winner 1 Pic 717

Used the AfterShot Pro 3 free demo to finally fix a lightning picture of mine that was close but not perfect because of a raindrop on the lens. In 5 minutes I fixed something that was bothering me for months. If given a copy of this wonderful software, I would be able to finally salvage shots that are slightly off that I’d normally delete.

Winner 2: Glenn Lancaster

Winner 2 Pic

I picked this sunrise picture of the Grand Tetons to edit with AfterShot for one reason – I captured this picture with my Nikon D800 using a 50mm lens and a UV filter. The RAW file (.NEF) is 74 MB, and with some of the other post-production programs I use, there is a huge download time, but AfterShot opened the file in the shortest amount of time.

I use Adobe Lightroom (LR) 6, Creative Suites 6, Elements 14 and DXO Pro 10 to edit my photography and with that knowledge base, judging a new post-production editing program is based on experience and not guess work. The format of AfterShot appears to be directly off the layout of LR, so if you’re familiar with Adobe programs, the learning curve will be near zero.

In reality I find LR non-user friendly for beginners, especially importing files, AfterShot has a direct system of importing and exporting files. AfterShot has a simple editing sequence, with a color engine generator slightly clearer & cleaner than LR. Bottom line – if you’re looking for a post production editing program for less $ $ $ and you don’t need hundreds of different selections to confuse your efforts, AfterShot is the answer.

Winner 3: Jayme Hunt

Winner 3 pic 2

I have to say that I’d never even heard of this software prior to reading this article. I did go ahead and download the trial, specifically to see what could be done with a low-light shot of lights. I certainly wasn’t expecting much. However, it warmed the whole scene up and made my photo look much more the way I envisioned it in my head! The presets produced some stunning visuals, but, in the end, I played with the histogram and produced exactly what I was after.

Winner 4: Andy Dines

Winner 4 Pic 717

I use Lightroom as part of my job as a graphic designer but AfterShot Pro 3 really appeals to me for my own personal photography use, for the improved file opening times. Typically I can be loading several hundred photos at a time and this will make such a difference. Here is my ‘after’ photo.

Winner 5: Zabi Zafari

Winner 5 Pic

Well this is a very nice software! When I first started out with Lightroom, it was nearly impossible to learn how to use any part of the program… But AfterShot is an extremely user friendly, simple yet powerful software, that almost anyone can use. The tools are right there, the histogram is great and much more refined compared to LR. And oh my, I have a MacBook pro from 2014 with 8 GB of ram and a SSD, yet Lightroom lags when opening, importing, exporting and saving files which is not convenient at all.

As they say for professionals, time is money and AfterShot is the real deal. The photo I have taken is with a standard 18-55 mm lens from my backyard, I edited in AfterShot and it gave me amazing results! great job to my friends at Corel.

Winner 6: Chris

Winner 6 Pic 717

I have moved from Windows to Linux and have used AfterShot Pro 2 (edited the above image). Linux has some pretty good open source software but I find AfterShot works well for my needs. Very easy learning curve going from Lightroom to AfterShot. The price is more reasonable too!

Winner 7: Claudia Najhar Raphael

Winner 7 Pic 717

I have AfterShot 2, and now I’m trying the AfterShot Pro 3, and so far I’m enjoying! There are some useful new features that make a lot of difference for me when editing my photos. I’m used to Corel products, since I’ve been using PaintShop since version X4, and AfterShot 2, and for me they work better than Lightroom or Photoshop. I like the fact that I don’t have to import my photos to edit, it makes everything much faster, and I directly export them as batch to finish my editing in PSP X8. …I call my photo After party, because that was a beautiful flower gift that’s been given to me. I edited in AfterShot [Pro 3] and finished in PaintShop Pro X8.

Winner 8: Dennis Fisher

Winner 8 Pic 717

Well this little program made this little flower pop. A program for times when you thought you got it right but didn’t.

Winner 9: Jakob Maruši?

Winner 9 Pic 717px

Most of the time I shot macro photos of flowers and animals. For this contest I picked one of [my] newer photos of a tiny butterfly who was just having dinner. I would use AfterShot to mainly correct colors and composition…

Winner 10: Jake Nunnelee

Winner 10 Pic 2

…I downloaded AfterShot Pro [3] and picked this image. I did some tweaking and made this picture look 10 times better using this program. I would love to win Corel AfterShot Pro! It would make editing pictures so much easier.

We were all very happy with the entries. You made us smile, but most importantly, you made us want to do more of what we do; provide you quality information and guidance to become a better photographer. We were so pleased to see that you came from every part of the world. Thank you all for your entries!

Again, for those of you that didn’t win, Corel is offering a 30% discount off their AfterShot 3 leading photo editing software for a limited time, AND, you will also receive FastFlick Instant Slideshow Maker for FREE!

Click HERE to receive your discount and free FastFlick.

The Winners will be emailed with details of how to collect their prize. Please make sure to look for our email. Thank you again for all the wonderful submissions and to Corel for sponsoring this competition.

ASP3 Logo

Learn more about AfterShot Pro 3 HERE.

Disclaimer: Corel is a paid partner of dPS.

googletag.cmd.push(function() {
tablet_slots.push( googletag.defineSlot( “/1005424/_dPSv4_tab-all-article-bottom_(300×250)”, [300, 250], “pb-ad-78623” ).addService( googletag.pubads() ) ); } );

googletag.cmd.push(function() {
mobile_slots.push( googletag.defineSlot( “/1005424/_dPSv4_mob-all-article-bottom_(300×250)”, [300, 250], “pb-ad-78158” ).addService( googletag.pubads() ) ); } );

The post Announcing the Winners of the Corel AfterShot Pro Editing Software by Darlene Hildebrandt appeared first on Digital Photography School.


Digital Photography School

 
Comments Off on Announcing the Winners of the Corel AfterShot Pro Editing Software

Posted in Photography


Stylized Techniques for Editing Portraits Using Lightroom

25 Jul

This is the promised follow-up to my article on Creating Compelling Wide-Angle Portraits Using One Off-Camera Flash. While part one discussed equipment, composition, lighting and posing, this article focuses exclusively on post-processing.

1 Romanian Woman

Let me start by stating the obvious. Everyone has their own unique preferences regarding post-processing. Just read the comments below a posted image that is somewhat heavy on processing and you will see the variety of opinions out there. Personally, I like creating portraits that look somewhat surreal. I achieve some of this look by lens choice and composition and the rest in Adobe Lightroom and Photoshop.

2 Malawian Guy

Rather than go through my entire workflow, I’ll focus on five steps in Lightroom that form the foundation for my portrait processing. If you also like portraits that look a bit surreal, my hope is that you will learn a technique or two here that you find helpful.

This article assumes that you already have some familiarity with the menus and tools in Adobe Lightroom or Bridge.

3 Chinese Guy Hat

Let’s look at the work I did in Lightroom for the above portrait, shot in rural China. First, here is the image right out of camera.

4 Out Of Camera

Step 1. Move the contrast to the mid-tones

One of the first steps was to reduce the overall contrast in the image using the Highlights, Shadows, Whites and Blacks sliders. The image is fairly contrasty, but weighted more towards dark tones. I moved the Highlights and Whites sliders left (only a minor adjustment to Whites) to reduce some of the highlights (bright areas) in the background. I then moved the Shadows and Blacks sliders right (only a minor adjustment to Blacks) to make sure detail can be seen throughout the image, even in the gentleman’s hat.

These initial adjustments gave the image a flat (non-contrasty) look as a starting point. This was intentional, as I planned on building contrast back into the image.

Notice in the image below that the light area in the background is somewhat less distracting, and that there is more visible detail in the background shadows.

5 Global Luminosity

While I removed some contrast at the outer ends of the spectrum, I then added contrast into the midtones by pushing up the Clarity slider. This varies by image, but in this case I moved it to +60 in Lightroom, in order to accentuate facial features. The Clarity slider focuses on the mid-tones while mostly leaving the luminosity of the brighter and darker areas of the image as is. Here are the results:

6 Clarity

Step 2. Reduce saturation globally

For my portraits, I always make an initial global reduction (applies to the entire image) to Saturation and Vibrance. In this case, I reduced Saturation to -10, and Vibrance to -5. The shirt is still too blue in my opinion, but I’ll target that in the next step.

7 Reduce Saturation

Step 3. Make local adjustments using the Adjustment Brush

Using the Adjustment Brush, I made changes to luminosity, saturation and sharpness in targeted parts of the image:

Adjustments to Luminosity – Your eyes usually gravitate towards the brightest areas of an image. So, I used the Adjustment Brush to draw more attention to the subject, especially his face, and less attention to other areas.

I started by brushing over brighter areas that were competing with his face, and darkening them slightly using the local Exposure and Highlights sliders. I also brushed over some darker areas that were missing detail, and pulled the local Shadows slider up slightly. Lastly, I added some overall brightness to the face and a little more to the eyes.

Adjustments to Saturation – I used the Adjustment Brush and local Saturation slider to further desaturate the man’s t-shirt. In this case, I also darkened it, while de-saturating.

Adjustments to Sharpness – I added a bit of additional sharpness to the eyes, eyebrows, and hair using the Adjustment Brush with the local Sharpness slider.

After these local adjustments, here is the image at its next stage:

8 Local Adjustments

Step 4. Create a vignette using the Gradient Tool

In photography, when someone speaks of a vignette, they are usually referring to the darkening of the outer areas of the image, relative to the center of the image. The standard vignette darkens the outer edges equally, usually in an oval shape. However, using several gradients allows you to control the direction, size and strength of the vignette on each side independently.

I clicked on Lightroom’s Gradient Tool, then clicked and dragged from outside the image towards the center, overlapping the subject slightly. Then, I pulled the local Exposure slider down, until I created a subtle edge vignette. I then added a gradient from the opposite side, and a very subtle one from the bottom. Conversely, if the edge of your image is darker than you’d like, you can also increase exposure with the gradient.

Here is the image after adding a subtle gradient vignette:

9 Vignette

Step 5. Create a virtual copy of the RAW file for the background

To add more dimension to this image, I used a different processing treatment between subject and background. I created a virtual copy of the file in Lightroom (Photo > Create Virtual Copy, or use the keyboard shortcut CMD/TRL+’) and named it “Background”. If you use Adobe Bridge, you can create a copy of the RAW file instead. Then, for this second copy, I simply pulled the Clarity slider back to zero, and backed off on the global Sharpness slider as well. No other changes were made.

I then opened both of these file copies into Photoshop as layers, with the sharper rendition as the top layer. With the top layer active, I made a careful selection of the subject and created a mask so that the less sharp bottom layer becomes visible in the background areas. This adds a bit more dimension and helps keep your focus on the subject, as seen below.

10 Imported Photoshop

Background edits applied in Photoshop

4-Out-Of-Camera.jpg

Original out of camera for comparison

Note: If you do not have Photoshop, you can also use the Adjustment Brush inside Lightroom to paint in less Clarity and Sharpness to the background areas.

Although it is beyond the scope of this article, I continued on with processing in Photoshop, including additional adjustments to luminosity and contrast.

3-Chinese-Guy-Hat.jpg

I hope this short overview of my five steps in Lightroom has been helpful and that there was a technique or two that will help you in your workflow.

googletag.cmd.push(function() {
tablet_slots.push( googletag.defineSlot( “/1005424/_dPSv4_tab-all-article-bottom_(300×250)”, [300, 250], “pb-ad-78623” ).addService( googletag.pubads() ) ); } );

googletag.cmd.push(function() {
mobile_slots.push( googletag.defineSlot( “/1005424/_dPSv4_mob-all-article-bottom_(300×250)”, [300, 250], “pb-ad-78158” ).addService( googletag.pubads() ) ); } );

The post Stylized Techniques for Editing Portraits Using Lightroom by Ken Koskela appeared first on Digital Photography School.


Digital Photography School

 
Comments Off on Stylized Techniques for Editing Portraits Using Lightroom

Posted in Photography


Adobe boosts Lightroom Mobile with Raw editing for iOS

14 Jul

Adobe’s Lightroom Mobile apps for Apple and Android mobile devices have both been given significant updates that allow users a much wider range of controls when editing and shooting. The company has quite different apps for the two operating systems, and while Android users have been able to edit Raw files for some time the facility is now offered to iOS users via version 2.4. Owners of Android devices can now install version 2.1 which offers what Adobe calls a ‘Pro’ shooting mode that allows much more detailed control over the way pictures are recorded.

Adobe says the version 2.1 for Android has a completely new Lightroom Camera function that features a mode that gives the photographer access to shutter speed, ISO, white balance and focus so that they can all be adjusted manually. Aperture isn’t listed as few mobile cameras have significantly variable apertures. The company also says it has improved the app’s ability to export high resolution files.

Apple iPhone and iPad users get Raw Technology Preview, which effectively allows photographers to import files from all the cameras supported by the main desktop version of Camera Raw. These Raw files can be edited using a wide range of tools to control contrast, exposure and white balance, and marked with star ratings and flags – all of which can be synched with Lightroom on the owner’s other devices. The company says it has edited 50MP images from the Canon EOS 5DS on an iPhone 6 to demonstrate how powerful the application is.

iOS users can also now make radial and linear selections that allow local editing of particular areas of the image.

Both the Android and iOS versions of Lightroom Mobile are free to download and use, but to enjoy the new features iOS users need to have a subscription to Creative Cloud.

For more information see the Adobe blog. 

Photograph by Elia Locardi of the valley in Meteora, Greece. Shot in raw on a Fuji XT-2 and edited on location with an iPad Pro with Lightroom for iOS.

Manufacturer’s information:

Two big updates for Lightroom for mobile are now available for download

Lightroom for iOS 2.4
In version 2.4, two major improvements have been added: a raw technology preview and the addition of local adjustment tools. In addition to these major improvements, we’ve also added the ability to use keyboard shortcuts with physical keyboards connected to iPads, the ability to add your copyright to all imported photos, functionality to turn on lens profiles (if your camera and lens combination are supported), as well as the usual bug fixes and improvements.

Raw Technology Preview
We’re sure it’s happened to you before: you’re out taking photos (in raw of course) and you capture a real stunner that you can’t wait to share with the world. Until now, you had to either transfer a JPEG version of the file over or you had to wait until you got back to your desktop or laptop. With the raw technology preview, you’ll be able to import raw photos immediately to either your iPhone or iPad, edit them, and then share them, anywhere you’ve got a connection. Our goal with Lightroom for mobile is to make it an indispensable part of your photography workflow, providing the tools that you’re familiar with and the quality you expect in a product that can be with you, no matter when inspiration strikes. With this technology preview, we want to push the boundaries of how photographers around the world work with their mobile devices.

You get all of the benefits of raw, such as the ability to change the white balance, being able to recover blown out highlights, access to the full range of color information, as well as editing an uncompressed file, all using the exact same technology that powers Lightroom on your desktop. An added benefit is that the raw file that you’ve imported into Lightroom for iOS will be synced with Lightroom on your other devices, such as Lightroom for desktop or Lightroom on the web, along with any of the edits, star ratings, or flags that you added.

Lightroom for mobile supports all of the same raw files that Lightroom for desktop as well as Adobe Camera Raw support, with the full list available here.

To transfer photos to your mobile device, you need to use either the camera connection kit or the lightning to SD or USB kits from Apple to transfer your raw files over to your device, which will bring up the Import tab within the iOS Photos app. Importing the files will add them into your camera roll, where you can then access and load in any raw file directly into Lightroom mobile. It’s important to keep in mind that raw files are significantly larger (3-5 times larger) than JPEGs, meaning the raw files will take longer to import, upload, and take up more space on your device. Even as such, we found that the added control and quality that the raw files afforded were so useful that it outweighed the negatives.

Just as when working with raw files that were synced from Lightroom for desktop or Lightroom on the web, you’ll be able to perform raw-specific enhancements, such as changing the white balance with greater control and recovering clipped highlights, but unlike when working with raw files synced from Lightroom for desktop, you’ll have access to the full resolution file AND you can do it anywhere in the world, even from your iPhone! 

We’ve run Lightroom for mobile through its paces on a number of different files, including the 50MP Canon 5DS running on an iPhone 6, proving that you really can edit nearly any photo anywhere. After playing with the app for a few months, we’ve found that it’s a really great way to take a few of your favorite images from the day (or even that you just captured), review to make sure you captured what you saw, edit, and then share them, all right away, and with all of your edits carried through the rest of the Lightroom ecosystem.

We had the pleasure of working with a number of photographers while creating the raw technology preview, take a look at how travel photographer Elia Locardi was able to put the technology to use while shooting on location in Greece.

You can read more about the images that were created for this release through an article about Elia on Adobe Create as well as on Elia’s own blog.

Linear and Radial Selections
In addition to the raw technology preview, we’ve also added in the ability to perform local adjustments with linear and radial selections, the two most requested features after raw support.

Lightroom for iOS Availability
Lightroom mobile 2.4 is available immediately for iPhone and iPad from the iOS App Store for free. Both of these improvements are available only for members with a creative cloud subscription or or if you start a free Creative Cloud trial.

Lightroom for Android 2.1

While the iOS team was working hard on the raw technology preview, the Android team doubled-down on the unique end-to-end DNG capture experience first announced in Lightroom for Android 2.0 and created a brand new capture experience. Our goal is to create the best mobile photography experience available, and with the amazing quality possible on Android devices, especially thanks to DNG raw capture, we wanted to provide all of the controls and functionality needed.

Now, the built-in camera has a new Pro mode that lets you control the shutter speed, ISO, white balance, and focus all manually, in a brand new interface.

You can access the camera directly using the new Lightroom Camera widget. This new widget will launch the Lightroom camera directly, making it faster for you to get in and start taking pictures.

In addition to the new built-in camera, we’ve also improved the app’s ability to export full-resolution files. If the files are available somewhere within the Lightroom ecosystem, Lightroom for Android will now download the full resolution version and enable you to export them.

You can download Lightroom for Android 2.1 here now for free.

Articles: Digital Photography Review (dpreview.com)

 
Comments Off on Adobe boosts Lightroom Mobile with Raw editing for iOS

Posted in Uncategorized


DEAL: Save 72% off Lightroom Editing System for Travel Photography

08 Jul

Travel lightroom presetsIt’s day 2 of our Summer Sale and today we have a special Adobe Lightroom Presets Travel pack* for you with a 72% Saving.

This “system” normally sells for $ 176, but it’s being offered to dPS readers for the special price of $ 49 USD – a massive 72% saving.

One of the best parts about travelling is documenting your trip with pictures. But what’s not so great is pending hours weeding out the stinkers from the keepers. And editing them to look as awesome as possible.

What if you could systemize and cut the editing process in half?

And reduce the struggle, endless fiddling and overwhelm with all the features and options of Lightroom editing tools?

Well, now you can thanks to the Lightroom Rapid Editing System for Travel Photography.

Pro travel photographer Viktor Elizarov got tired of drowning in digital images. And spending more time processing pictures than taking them.

So he searched for a better way. And after a year testing different approaches and systems with lots of trial and error – the Rapid Editing System was born.

And he wants to share it with you.

Learn how to automate 80% of your editing process so you save time on repetitive tasks. And have more free time to spend on fun tasks (like taking pictures).

Viktor’s system features a large collection of Lightroom Presets specifically for travel photography. And will help take your photos from good to great – fast.

Viktor normally sells his system for $ 176, but he’s offering it to dPS subscribers for the special price of $ 49 – a 72% saving.

Here’s everything you get:

  • 90+ page eBook with step by step tutorial on how to use Lightroom Rapid Editing System
  • 20 1-Click LANDSCAPE Style presets
  • 20 1-Click CITYSCAPE Style presets
  • 20 1-Click PEOPLE Style presets
  • 10 1-Click Fall Colors Style presets
  • 10 1-Click Winter Colors Style presets
  • 10 1-Click Spring Colors Style presets
  • 10 1-Click Summer Colors Style presets
  • 41 TOOLKIT adjustment presets
  • “Reset All” preset that reverts your image to its original state
  • Documentation and Installation Instructions
  • Source RAW and JPEG photos used in the tutorials

If you love travel photography – or just want to speed up your post processing – don’t miss out.

But hurry! This valuable offer for the Lightroom Rapid Editing System for Travel Photography only lasts 24 hours – secure it for yourself and save 72% today only.

*Note: You’ll need a copy of Adobe Lightroom installed to use these presets.

googletag.cmd.push(function() {
tablet_slots.push( googletag.defineSlot( “/1005424/_dPSv4_tab-all-article-bottom_(300×250)”, [300, 250], “pb-ad-78623” ).addService( googletag.pubads() ) ); } );

googletag.cmd.push(function() {
mobile_slots.push( googletag.defineSlot( “/1005424/_dPSv4_mob-all-article-bottom_(300×250)”, [300, 250], “pb-ad-78158” ).addService( googletag.pubads() ) ); } );

The post DEAL: Save 72% off Lightroom Editing System for Travel Photography by Darren Rowse appeared first on Digital Photography School.


Digital Photography School

 
Comments Off on DEAL: Save 72% off Lightroom Editing System for Travel Photography

Posted in Photography