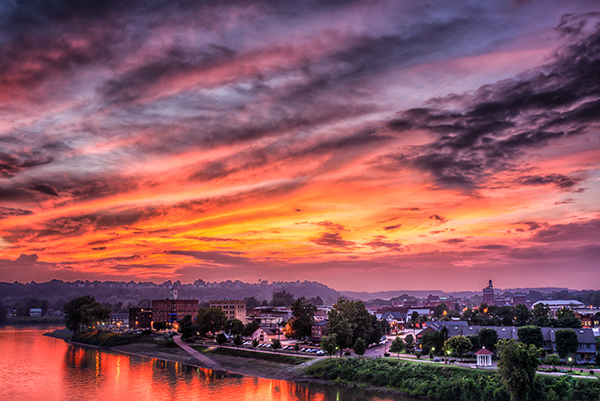
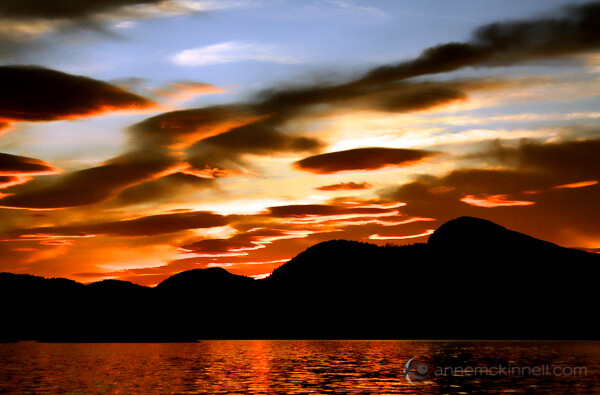
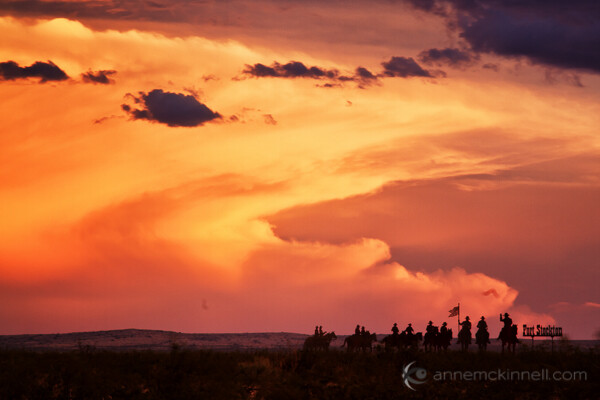
“Red Sky” Summer sunset over Marietta, Ohio
One question every child asks is, “Why is the sky blue?” But let’s look at why is the sky red at Sunset. Light from the sun is made up of all the colors in the rainbow. As the sunlight enters the earth’s atmosphere, the short wave length of blue light is scattered in all directions, more than any of the other colors, causing the sky to be blue during the day. At sunrise and sunset, the light has farther to travel due to the low angle of the sun in the sky. This causes the blue light to be blocked and scattered away, allowing the longer wave lengths of red and yellow colors to appear in the sky.
I am sure you wish there was some magic formula that could tell you exactly the night for photographing a beautiful sunset? It’s not that easy, but hopefully we can discover some ways to increase your odds.
Let’s take a closer look at some other factors that will help you predict brilliantly colored sunsets. You have no doubt heard the saying “Red sky in the morning, sailors take warning. Red sky at night, sailors’ delight”. This saying can also help you predict sunsets (and sunrises) if you know the weather forecast. Look for a red sky at sunrise ahead of a storm and at sunset after a storm. Knowing what to expect weather-wise is key to anticipating the right conditions for a shoot, so the first thing you need to do is find a good weather app or website. A website such as Intellicast.com will give you a detailed hourly report for key factors: cloud cover, air quality, humidity, and wind speed.

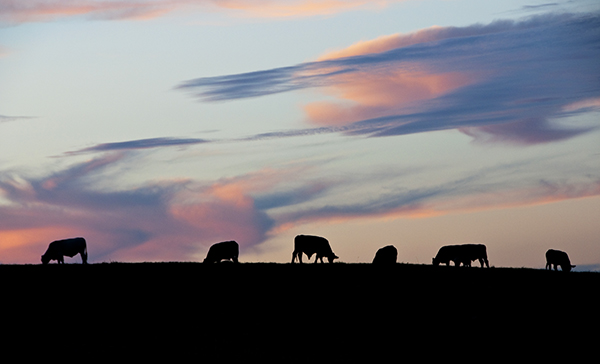
Winter sunset after a snow storm.
Clouds and Cloud Cover
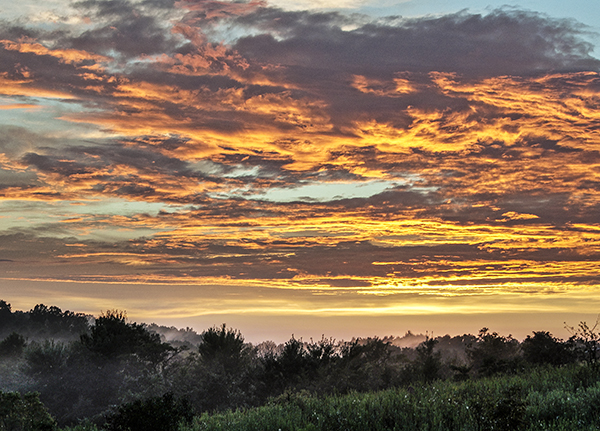
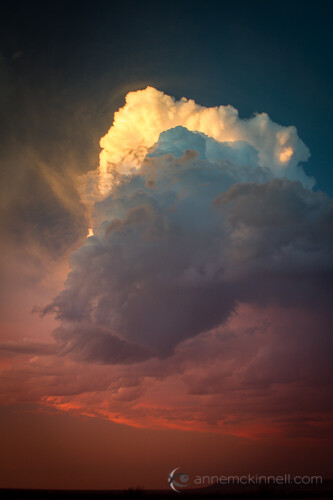
Clouds are a crucial factor to predicting dramatic sunsets, for without clouds there is not much to see. One common misconception of brilliant sunsets is that clouds create the colors; in reality clouds only serve as the canvas to display the colors that the light is painting. High to mid-level clouds are the most effective canvases, as they will reflect the colors of the setting sun. Puffy clouds on the horizon at sunset will more than likely not allow the sun rays to pass through them, thus muting the colors. Lower clouds (such as dark rain-filled clouds) are not very helpful at reflecting much light. If the clouds on the horizon are low and thick the sun will not be able to shine through them. It is also worth noting that too many or too few clouds can be detrimental for an optimal photo, so check out your detailed weather report for cloud cover percentages between 30 to 70 percent at sunset.
You can observe cloud conditions in the afternoon and if the sky looks favorable, you can hope that these clouds will still be present at sunset. No guarantees, but if there is not much wind these clouds may stick around to create a beautiful sunset.
A brief description of fair weather clouds that may produce dramatic sunsets:
- Cirrocumulus Clouds – These look like ripples on water. Blue sky is the usual backdrop.
- Altocumulus Clouds – Often occur in sheets or patches with wavy, rounded masses or rolls, like little cotton balls. They are generally white or grey, and usually appear after a storm.
- Cumulus Clouds – Easily recognizable, large, white, and fluffy, often with flat bases.
- Cirrus Clouds – Generally characterized by thin, wispy strands. These clouds arrive in advance of frontal systems indicating that weather conditions may soon deteriorate. Nevertheless, these are one of the best kinds for photographing dramatic sunsets!
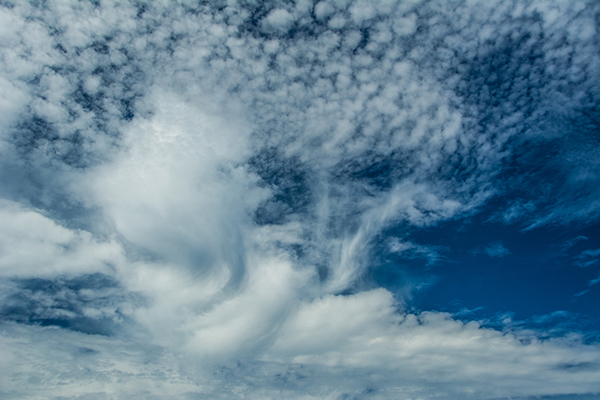
If you see this kind of sky in the afternoon with calm winds, chances are good you are in for something special at sunset.
Clean Air
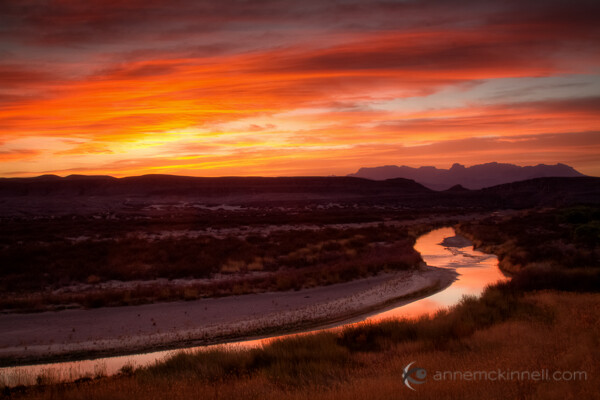
Clean air is very effective at scattering the blue light. For this reason one of the best times for dramatic sunsets is right after a rain or wind storm. While lower clouds rarely reflect brilliant colors (as mentioned above), note that where the lower atmosphere is especially clean, as in over open oceans in tropical regions, more vivid colors are allowed pass through. This is the reason so many beautiful sunset images are captured in the tropics.
Humidity
The amount of humidity in the air will also have an effect on the colors of your sunset. Lower humidity will produce more vibrant colors. With higher humidity the colors will be muted because of the water content in the atmosphere. The seasons of autumn and winter typically produce lower humidity than in the warmer seasons.
Wind
Wind is a factor that can either enhance or destroy a beautiful sunset. A change in wind direction can cause the clouds to develop ripples or billows, which can create a beautiful effect as the setting sun reflects a nice red glow onto the ripples. Also, as established earlier, clean air will produce more brilliant colors, and a nice breeze before sunset can help clear the air. Unfortunately, the wind can become a negative factor on those days when favorable clouds are present in the afternoon, but a weather front moves through with strong winds that remove those clouds and leaves you with a clear sky at sunset. This is another instance when a good weather app or weather website can give you an indication on its radar as to when a front may move through your area.
To summarize your sunset prediction, look for:
- Mid to high level clouds
- 30 to 70 percent cloud coverage
- Clean air
- Lower humidity
- Calm winds
A final thought to consider when photographing sunsets – sometimes the afterglow of the sunset, which can occur 15 to 20 minutes after the sun goes behind the horizon, can be much more spectacular than the actual sunset.
Generally, all these weather-related rules also apply to photographing sunrise, but the visual signs are more difficult to spot since it is darkest before the dawn. A good time to photograph at sunrise is in the fall and winter when it occurs later in the day than in the summer months.
Do you have any other tips for predicting dramatic sunsets? Please share some of your favorite sunset images. Who doesn’t love a good sunset? If you want some tips for shooting the great sunset you’ve found try: 8 Simple Guidelines for Capturing Spectacular Sunrise and Sunset Images
The post Predicting Dramatic Sunsets by Bruce Wunderlich appeared first on Digital Photography School.


You must be logged in to post a comment.