A previous article showed you how to get started in Lightroom’s Develop module by using the Camera Calibration, Lens Corrections and the Basic panels.
In this article you’ll learn how to use the remaining right-hand panels in the Lightroom Develop module:
- Tone Curve panel
- HSL / Color / B&W panel
- Split Toning panel
- Detail panel
- Effects panel
This guide is aimed at photographers who are new to Lightroom, so it doesn’t cover every aspect – just the important things you need to know if you’re just getting started with it.
It is quite possible that you won’t have to touch any of the panels listed above when processing a photo. Many photos can be developed in Lightroom just by using the Camera Calibration, Lens Correction and Basic panels, plus local adjustments. But the panels mentioned above will help you be more creative with your processing, especially when it comes to working with colour and tone.
The Tone Curve panel
One purpose of the Tone Curve panel is to give you another way of applying the same tonal adjustments that you can make with the Basic panel sliders. If you’re accustomed to using curves in Photoshop, the Tone Curve panel gives you the option of doing the same in Lightroom in addition to, or instead of, using the Basic panel sliders.
This is what you will see when you open the Tone Curve panel for the first time.
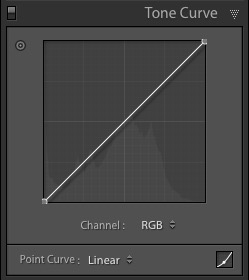
This is the RGB curve. Adjusting this curve affects the brightness values, but not the colours, of the photo.
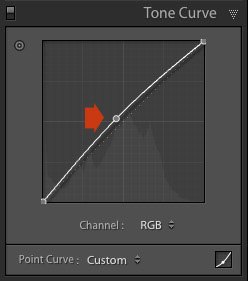
You can move the curve upwards (as shown below) to make the image lighter. To do so, left-click once on the midpoint of the curve to add an adjustment point. Then click and drag the adjustment point to move it up, and change the shape of the curve.
You can also move it downwards to make the image darker.
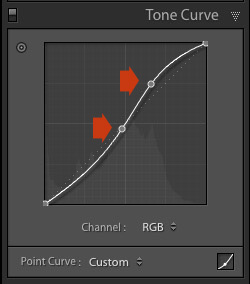
You can create an S-curve like this to increase contrast (add a second adjustment point first).
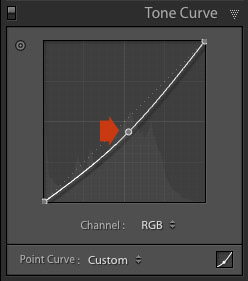
You can create the matte look with a curve like this. Add an adjustment point near the bottom of the curve then lift the left-side up. This makes the darkest tones in the photo dark grey rather than black, imitating the look of a print made on matte paper.
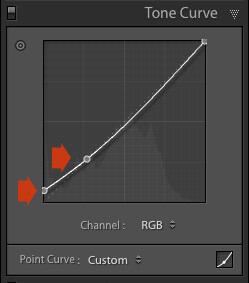
Notice the lower left point is not touching the bottom, this creates a matte look.
You can return to the original straight tone curve at any time by going to the Point Curve menu and selecting Linear.
Colour curves
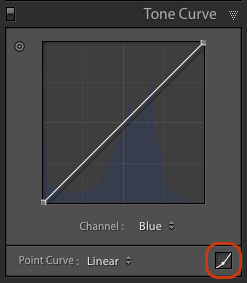
Underneath the Tone Curve is a menu that lets you select the Red, Green, or Blue tone curves individually. These curves affect each of the color channels in the photo respectively. The blue curve is shown below.
More options
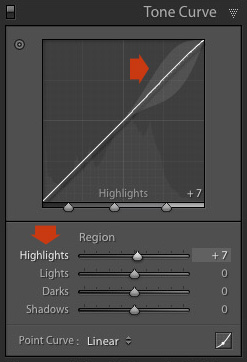
If you click the icon in the bottom right-hand corner of the Tone Curve panel (circled above) the panel opens up to reveal four sliders, called Highlights, Lights, Darks and Shadows (see below).
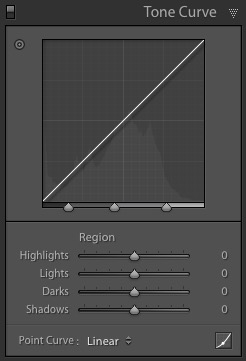
These sliders give you another way to make adjustments to the tone curve. When you move one of the sliders, the corresponding region of the tone curve is highlighted, so you can see which tones are affected.
The illustration below shows what happens when you move the Highlights slider. The top right of the tone curve is marked in grey. This part of the curve changes when you move the Highlights slider.
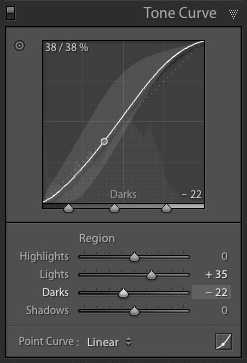
You can click and drag on a single adjustment point (but not multiple points) to change the shape of the curve. The sliders change value as you adjust the curve. The diagram below shows the effect a simple S-curve has on the sliders.
Double click on any slider heading to reset that slider to zero. That covers the basics of curves. You can learn more advanced techniques by reading our article Lightroom’s Tone Curve Explained.
HSL / Color / B&W
The HSL / Color / B&W panel is for adjusting colour values. It is also for converting photos to black and white. This is beyond the scope of this article, but you can learn more by reading my article How to Convert Photos to Black and White in Lightroom.
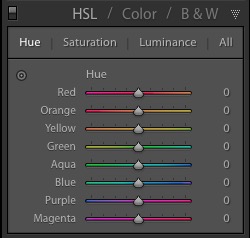
The HSL / Color / B&W panel is divided into three tabs. The HSL and Color tabs are the ones you need for making adjustments to colour. They contain the same sliders, just arranged in a different order. The screen shots below are taken from the HSL panel.
The Saturation and Vibrance sliders in the Basic panel affect all the colours in the photo. The HSL and Color tabs allow you to target individual hues without affecting others. You can target a specific colour and change the following:
- Hue
- Saturation
- Luminance
Adjusting Hue replaces the selected colour with an adjacent colour on the colour wheel. For example, you can target red tones and make them more magenta (pink tone) or orange. Or you could target blue tones and make them aqua or purple.
You don’t need a colour wheel to see how colours are affected by the Hue sliders. You can just look at the eight Hue sliders. For example, the Red slider (top in the diagram below) is coloured magenta to the left and orange to the right. Moving the slider in those directions changes red colours in the photo to either magenta or orange.
The easiest way to see how this works is to try it. The examples below show the effect that moving the Red slider to -100 and +100 (the strongest available settings) have on the image.
No adjustment.
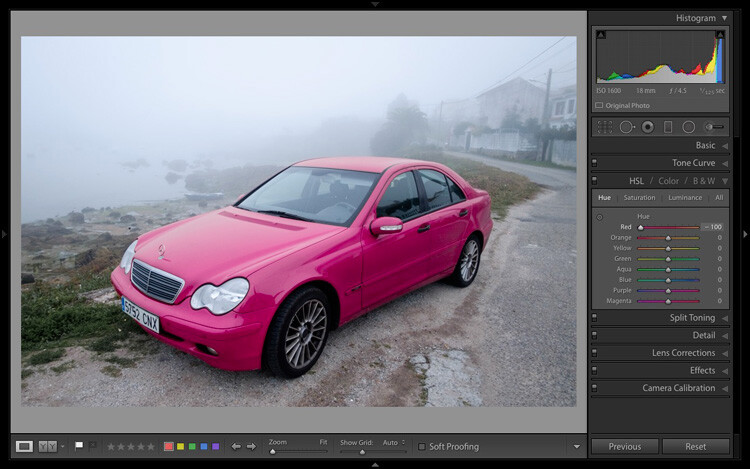
Red -100.
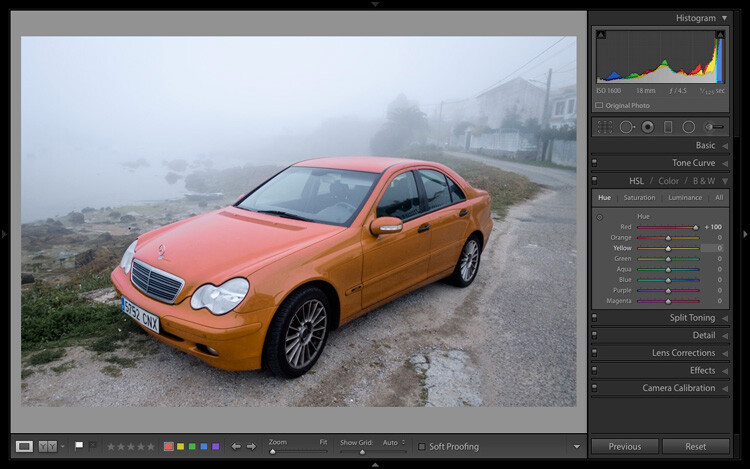
Red +100
The Saturation and Luminance sliders work in a similar way. Saturation adjusts the saturation (intensity) of specific colours, and Luminance adjusts the brightness.
Targeted Adjustment Tool
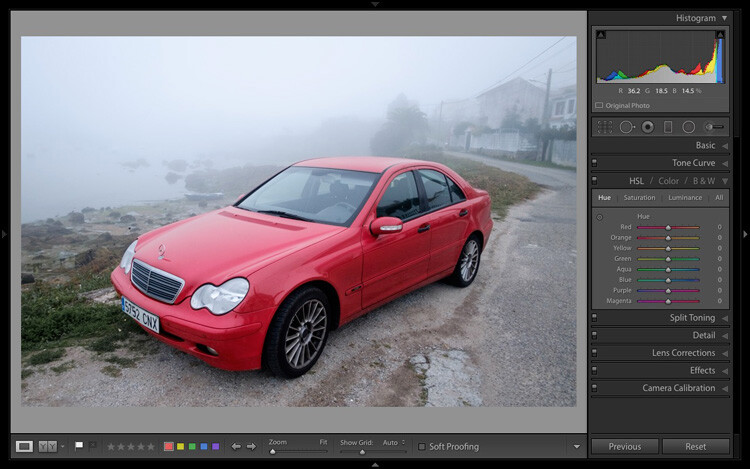
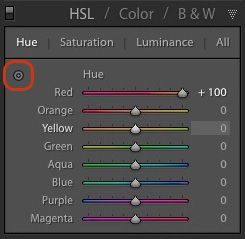
The Targeted Adjustment Tool gives you an even more precise way of adjusting colour values. To use it, click on the Targeted Adjustment Tool icon in the HSL / Color / B&W panel (circled below).
Then move the cursor over the colour (area) in the photo you want to adjust. Click and hold the left mouse button, while you drag the mouse downwards to reduce the Saturation or Luminance of the colours underneath the cursor, or adjust the hue.
Move the mouse upwards to increase the saturation or luminance, or adjust the hue in the opposite direction. Lightroom analyzes the colours underneath the cursor and moves the sliders in the HSL / Color / B&W panel accordingly. All similar colors in the image will be affected.
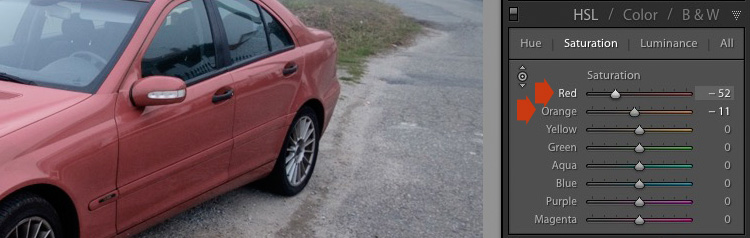
For example, in the following photo I activated the Targeted Adjustment Tool, then clicked on the car’s paintwork and dragged the mouse downwards to reduce the Saturation. Lightroom adjusted both the Red and Orange sliders, showing that the red paintwork is comprised of those two colours. This is more accurate result than only moving the Red slider.
The Targeted Adjustment Tool is a useful tool that appears in other Develop module panels.
Read my article Mastering Color in Lightroom using the HSL tab to learn more about the HSL / Color / B&W panel.
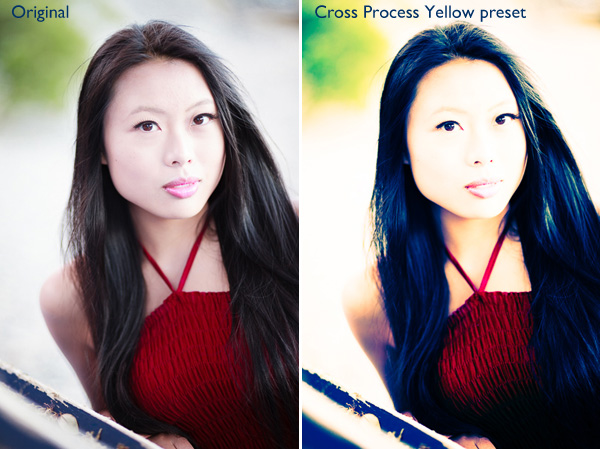
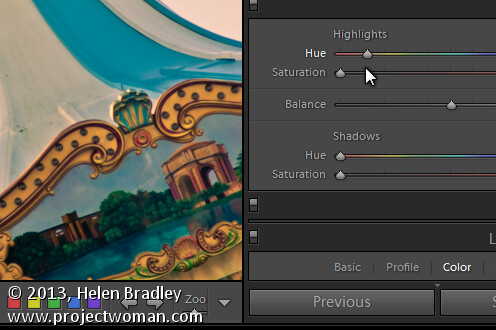
The Split Toning panel
The Split Toning panel is for toning photos. While this is a technique traditionally associated with black and white photography, you can also use it with colour. If you’re a beginner, split toning is a little advanced for you at this stage, so I’ll direct those of you who are interested to articles that cover it in detail.
How to Split Tone Black and White Photos in Lightroom shows you how it’s done with black and white photography.
How to Create a Vintage Look using Lightroom shows you how to split tone colour photos (it also covers tone curves and Lightroom Develop Presets)
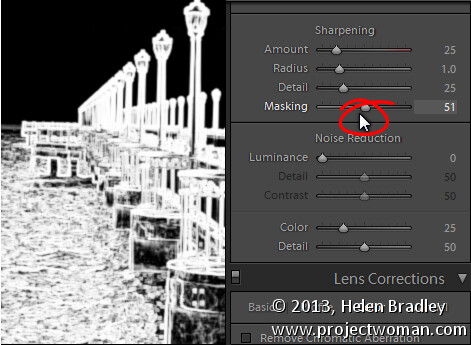
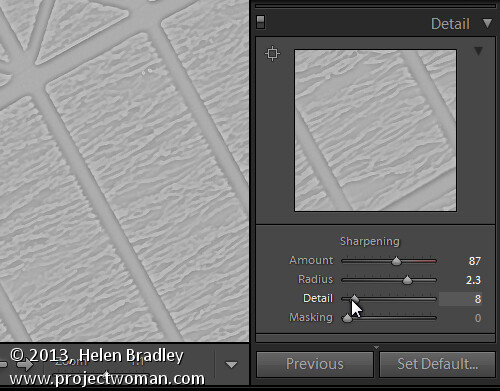
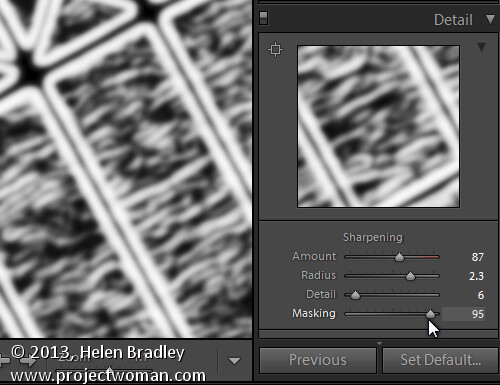
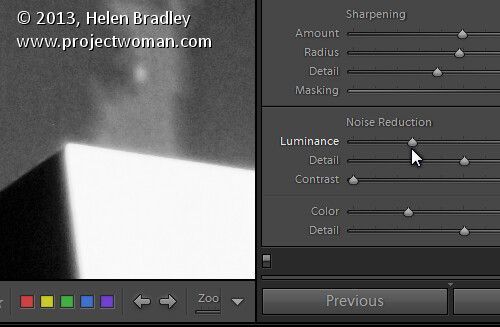
The Detail panel
The Detail panel is for adjusting the default image sharpness and noise reduction settings. For beginners it is simplest not to touch these. You won’t need to do so until you are a more advanced user.
Those of your curious to learn more can read our articles Learn How to Use the Sharpening Tools in Lightroom and How to Do Noise Reduction in Lightroom.
The Effects module
Use the Effects module to apply a creative vignette, add grain or (new in Lightroom CC only) add or remove atmospheric haze.
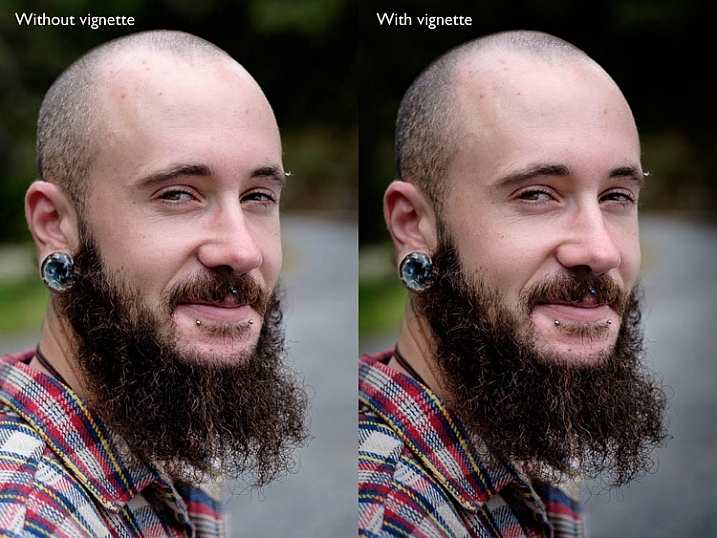
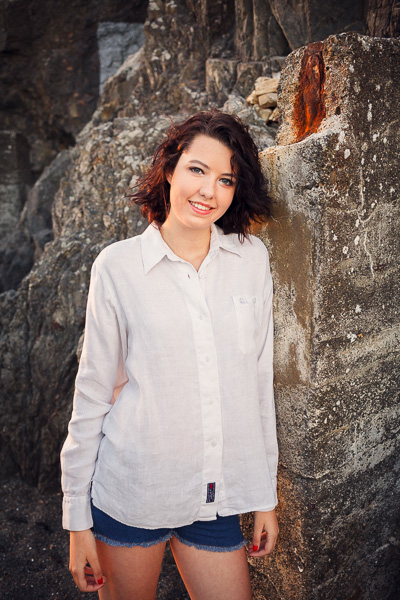
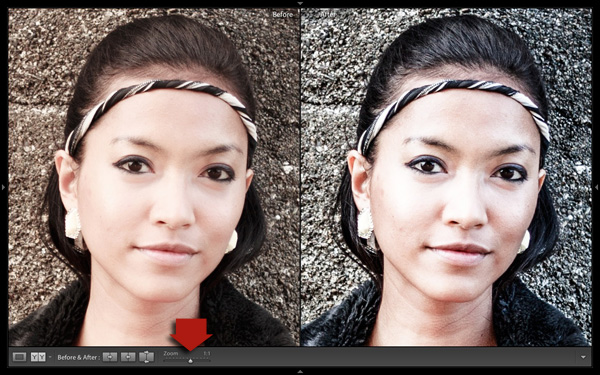
Vignetting lets you darken (or lighten) the edges of your photo, gently guiding the viewer’s eye towards the centre. Many images, especially portraits, can be improved by adding a subtle dark vignette. Here’s an example:
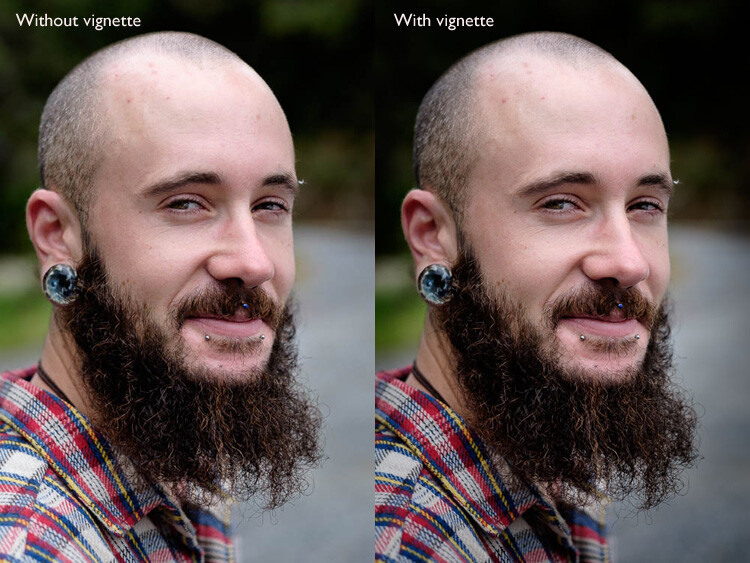
You may have to look closely to see it as the effect is subtle, but the portrait on the right has a vignette. It is most obvious in the bottom right corner.
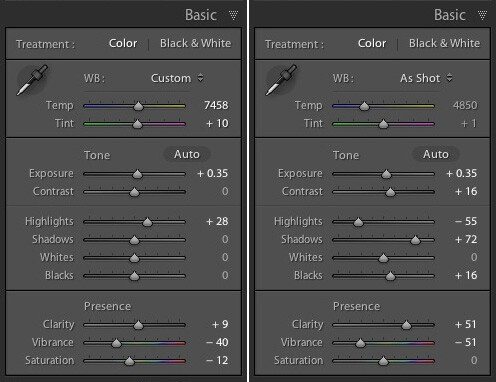
These are the settings used to create this vignette:
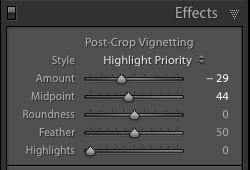
- Move the Amount slider left to darken the edges of the image, or to the right to lighten them.
- Move the Midpoint slider left to make the area covered by the vignette larger, or right to make it smaller.
- Move the Roundness slider left to make the vignette squarer, or right to make it more circular.
- Move the Feather slider left to make the edge of the vignette harder (a more defined end and beginning of it), or right to make the edge softer (graduates slower from dark to light).
- Move the Highlights slider right to preserve any highlights present in the area covered by the vignette.
Tip: The easiest way to see what these sliders do is to set Amount to -100. Then move the other sliders to see what effect they have.
Use the Grain sliders to add grain to your photos. This is only useful if you would like to emulate the look of photos taken with film. Move the Amount slider right to add grain (there is no grain at the zero setting) and then use the Size and Roughness sliders to adjust the size and appearance of the grain. This before and after image shows the effect of increasing Grain to 100, the maximum setting:

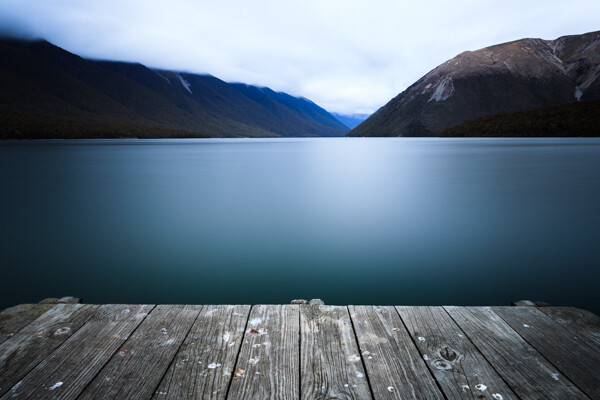
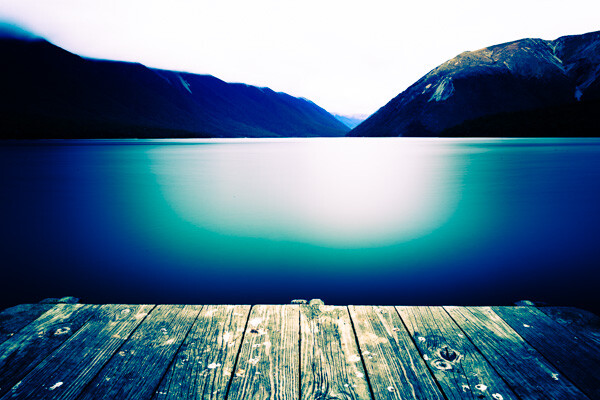
Dehaze is a new slider that is only available in Lightroom CC. Use it to reduce atmospheric haze caused by flare, mist, or pollution. You can also use it to increase haze – a good example of this is with photos taken in foggy conditions.
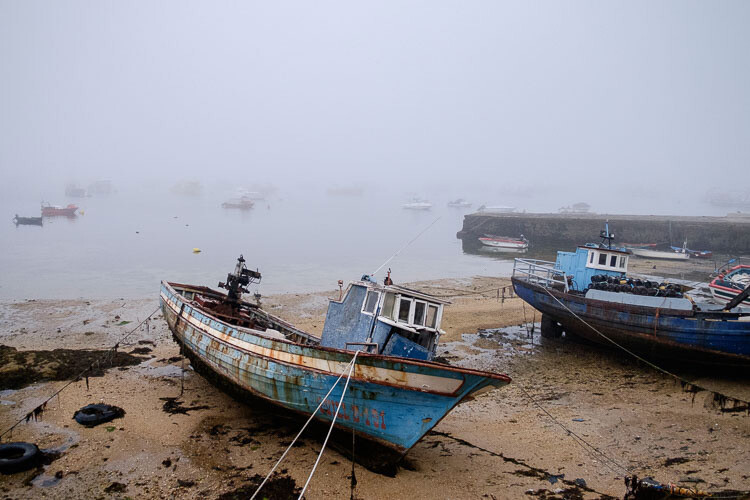
Photo taken in foggy conditions. Dehaze set to zero (the default).
Dehaze set to -10 to increase effect of fog.
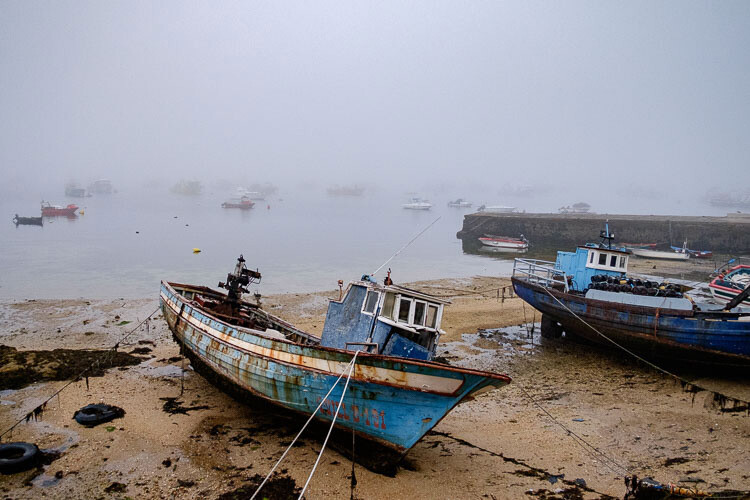
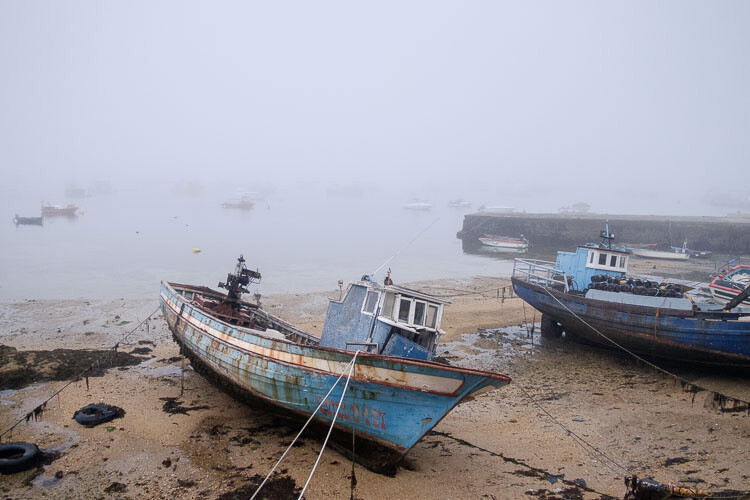
Dehaze set to +30 to decrease effect of fog.
I’ll show you how to build on the work done in the right-hand panels by making local adjustments in my next article. In the meantime, if you have any questions about the techniques in this article, please let me know in the comments.
The Mastering Lightroom Collection
My Mastering Lightroom ebooks will help you get the most out of Lightroom. They cover every aspect of the software from the Library module through to creating beautiful images in the Develop module. Click the link to learn more or buy.
googletag.cmd.push(function() {
tablet_slots.push( googletag.defineSlot( “/1005424/_dPSv4_tab-all-article-bottom_(300×250)”, [300, 250], “pb-ad-78623” ).addService( googletag.pubads() ) ); } );
googletag.cmd.push(function() {
mobile_slots.push( googletag.defineSlot( “/1005424/_dPSv4_mob-all-article-bottom_(300×250)”, [300, 250], “pb-ad-78158” ).addService( googletag.pubads() ) ); } );
The post Next Steps to Getting Started in the Lightroom Develop Module by Andrew S. Gibson appeared first on Digital Photography School.


 Profile: Should be set for the most appropriate setting for your photo. The options you see here depend on the camera used to take the photo. All cameras have profiles that you set to determine the treatment of the image. Each manufacturer has different names for this setting (for example, Canon calls it Picture Style, Nikon Picture Control and Fujifilm Film Simulation).


 Alternatively, you can use the WB presets: As Shot, Daylight, and so on (note: those options only appear when you are processing a Raw file). I selected Daylight for this image for a fairly neutral colour balance.
 White Balance is all about color and there are two more sliders at the bottom of the Basic panel that assist with controlling colour, they are called Vibrance and Saturation. Move these sliders left to reduce the color intensity, or right to increase it.
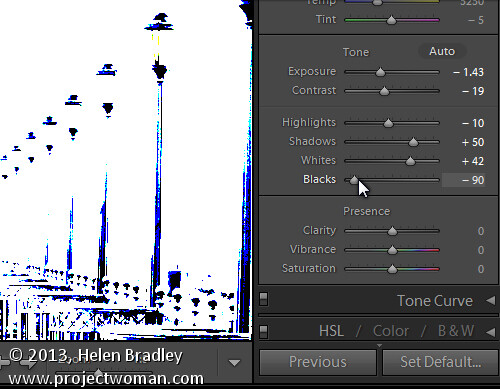
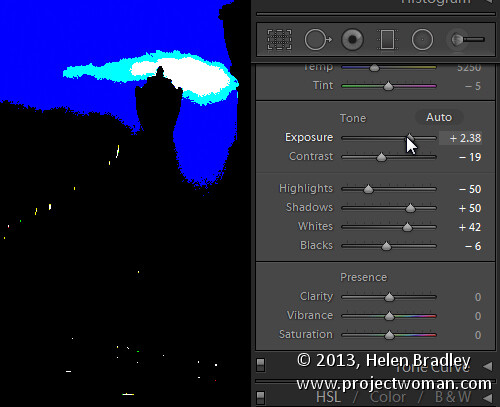
 The following sliders affect tones, and are used for adjusting brightness and contrast. Feel free to press the Auto button to see what Lightroom thinks you should do with your photo.


 My new ebook Mastering Lightroom: Book Two – The Develop Module teaches you how to process your Raw files in Lightroom for spectacular results. Written for Lightroom 4 & 5 it takes you through every panel in the Develop module and shows you how to creatively edit your photos.
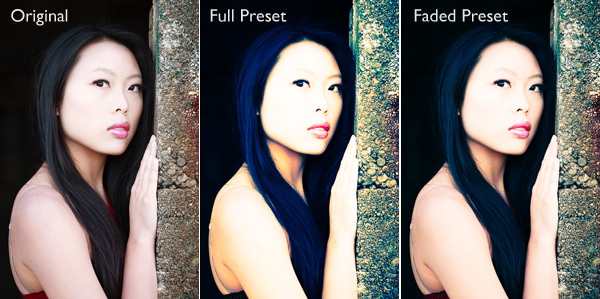

 My latest ebook Mastering Lightroom Book One: The Library Module is a complete guide to using Lightroom’s Library module to import, organize and search your photo files. You’ll learn how to tame your growing photo collection using Collections and Collection Sets, and how to save time so you can spend more time in the Develop module processing your photos.


You must be logged in to post a comment.