RSS
 

Posts Tagged ‘develop’

Researchers develop method for revealing images on degraded daguerreotypes

28 Jun

Researchers at Western University in Canada have developed a method for restoring damaged daguerreotypes, including plates so degraded that no portion of the original image remains discernible to the eye. The method, the university explains, involves using rapid-scanning micro-X-ray fluorescence imaging to analyze the silver-coated plate and identify the mercury element used to develop it.

“Mercury is the major element that contributes to the imagery captured in these photographs. Even though the surface is tarnished, those image particles remain intact,” explained study co-author Tsun-Kong (TK) Sham. “By looking at the mercury, we can retrieve the image in great detail.”

Whereas a human hair is around 75 microns thick, the X-ray beam used in this method is as small as 10 x 10 microns, resulting in about 8 hours of scanning time per daguerreotype plate. This method can be used by art conservators to reveal a daguerreotype’s image when cleaning the degraded plate is not possible.

Via: TechCrunch

Articles: Digital Photography Review (dpreview.com)

 
Comments Off on Researchers develop method for revealing images on degraded daguerreotypes

Posted in Uncategorized


Researchers develop low-power HD streaming tech for wearable cameras

26 Apr
Dennis Wise/University of Washington

Wearable cameras, such as the type found in Snap Spectacles, are often limited to low-resolution video streaming due to their tiny batteries and small size. But now, researchers with the University of Washington in Seattle have developed a solution to that problem, one that involves offloading the processing burden to a nearby smartphone in order to stream high-definition content from the wearable camera.

The new low-power HD video streaming method utilizes backscatter technology and works by transmitting pixel intensity values via an antenna directly to the user’s smartphone. Unlike the wearable camera, which by its nature is small and lightweight with limited hardware resources, a smartphone offers way more processing power and a much larger battery.

When used as part of this new system, the phone receives the pixel information from the wearable camera, then processes it into a high-definition video for streaming. The prototype system was tested using a 720p HD YouTube video, which was successfully fed into the backscatter system and streamed at 10fps to a smartphone located 14ft / 4.2m away.

The wearable camera features only a small battery and uses between 1,000 and 10,000 times less power than existing streaming methods; however, the researchers plan to go a step further and develop a battery-free camera system with potential applications outside of smart glasses and body cameras.

Security systems, for example, could benefit from this technology, which would eliminate the need to either plug the cameras into a power source or frequently recharge internal batteries. Instead, the video data would be transmitted via antennas from the cameras to a central processing unit connected to a large battery or wired powered source.

As study co-author Joshua Smith explained:

Just imagine you go to a football game five years from now. There could be tiny HD cameras everywhere recording the action: stuck on players’ helmets, everywhere across the stadium. And you don’t have to ever worry about changing their batteries.

If the idea of “tiny cameras everywhere” also sounds mildly disturbing and like a privacy nightmare to you, you’re not alone… but we digress.

The full paper detailing this technology is available here.

Articles: Digital Photography Review (dpreview.com)

 
Comments Off on Researchers develop low-power HD streaming tech for wearable cameras

Posted in Uncategorized


Sony interview: ‘If cameras are going to develop, manufacturers have to develop mirrorless technologies’

16 Mar
Kenji Tanaka, Senior General Manager of Sony’s Digital Imaging Business Group, pictured in Yokohama for the 2018 CP+ show.

At the recent CP+ show in Yokohama, we sat down with executives from several major camera and lens manufacturers. Among them was Kenji Tanaka, of Sony. In our interview we discussed the new a7 III, as well as Sony’s plans to attract more professional users, without ignoring entry-level and APS-C customers.

The following interview has been edited slightly for clarity and flow.


What is your target customer for the new Alpha a7 III?

We describe it as a basic model but maybe our definition is different [to other manufacturers]. What we mean is that any customer can use this model. Many professionals could use the a7 III, I think. I hope that many kinds of customer will be happy with this model, so we’re not strictly defining a target customer for the a7R III.

The new Sony Alpha a7 III is ostensibly an entry-level model in Sony’s a7-series lineup but despite its relative affordability, it’s packed with features.

Sony had a very busy year last year – what are your priorities going into 2018 and beyond?

We’re displaying the 400mm F2.8 [at CP+] – of course many articles are written about the a7 III, but as well as the camera bodies, the lenses are very important. Especially lenses like the 400mmm F2.8 – sports photographers are a new category for us.

One of the most important lenses for sports photographers is the 400mm F2.8

Last year we launched the a9 and some sports photographers are already using the a9, for example at the Olympics, but one of the most important lenses for sports photographers is the 400mm F2.8. The weight is very light. Usually sports photographers use monopods because the lenses are very heavy, but the weight of our 400mm F2.8 is very light, and you can use it handheld, which makes it easy to create different kinds of photographs. We already announced the development of this lens, and the launch is scheduled for this summer.

How important is feedback from sports photographers?

It’s very important. Not only when it comes to quality, but also durability. The winter Olympics for example, with the low temperatures, whether a product works in those tough conditions is very important. Whether or not we will launch a new product, the proof of concept is very important.

For a product aimed at a hobbyist, maybe it’s less important but for the 400mm F2.8 we’re really dedicated to create a ‘monster’ lens.

Sony was showing a prototype of its forthcoming 400mm F2.8 at CP+, which Mr. Tanaka sees as an essential weapon in Sony’s arsenal of lenses if the company is going to attract professional sports photographers to the brand.

There have been questions about the weather sealing of a7-series and a9 cameras. Is this something you want to address?

In really bad conditions, in really heavy rain, will photographers keep on taking pictures [for long periods of time?] I don’t think so. In those conditions, most photographers will use some kind of rain cover. But of course durability is very important. Photographers should be able to shoot [in poor weather]. We have an internal ‘weather test’ and for each kind of customer we will aim to produce products with adequate durability.

For a professional camera, the requirement for durability is higher

Is that something that your professional users are asking for?

Yes. But we need a balance between durability, and size and weight. For a professional camera, the requirement for durability is higher, but for hobbyist kinds of camera, the priority is smaller size and lower weight.

Tamron and Sigma are now creating lenses for Sony FE – is this a good thing for Sony?

Yes, it’s a good thing. The E-mount is an open standard – anyone can create a lens for the E-mount system. Of course there are criteria for compatibility, but because we think that the E-mount is a good technology, we think that the open format is good for the market and good for customers.

Tamron’s first lens for full-frame Sony mirrorless cameras will be the upcoming 28-75mm F2.8 zoom. Sigma is planning its own range of native E-Mount primes and zooms, too.

How long will it be before Canon and Nikon join Sony and mirrorless full-frame becomes the norm?

This is just my personal opinion, but I think that maybe by next year’s CP+ you’ll see full-frame mirrorless cameras from Canon and Nikon. I think [by then] they will be participating in this market.

If cameras are going to develop, manufacturers have to develop mirrorless technologies

Just look at our technologies, like eye focus. All of those are made possible because of data from image sensors. In DSLRs, the data comes from separate sensors. The main imaging sensor is blacked out, 90% of the time by the mirror. The sensor is turned off. But the imaging sensor is very important. So if cameras are going to develop, and be able to capture the moment [more effectively], manufacturers have to develop mirrorless technologies. So within one year, I think.

Do you think we’ll see mostly mirrorless cameras at the 2020 Olympic Games in Tokyo?

Yes.

How many of those cameras do you want to be made by Sony?

Many! But the professional market is very conservative, so we’re taking it step by step. We saw some photographers using the Alpha 9 at this year’s winter Olympics but of course the majority was Canon and Nikon. But the number of Sony photographers is increasing.

The Sony Alpha a9’s innovative wide-coverage autofocus system makes it a powerful tool in the hands of an experienced sports photographer.

A lot of our readers want more Sony APS-C lenses…

We know that some people think we’ve neglected the APS-C market, but it’s just an issue of prioritization. A couple of years ago we introduced the a6500. Then the next year we introduced the a9, and the a7R III. But we think that the APS-C market, and APS-C customers are both very important, because the majority of the market is APS-C, and we’re developing many kinds of APS-C products, so please be patient – we will never ignore APS-C.

Some of your competitors keep flagship products up to date over time with firmware updates. This seems like the opposite strategy to Sony. Is this something that might change?

We’re still in the early stages of challenging the market with our products, and the new model cycle is relatively rapid, compared to our competitors. But the next step is to increase our market share. And if we want to reach new customers, we need [to make] new types of cameras.

We’re still in the early stages of challenging the market with our products, and the new model cycle is relatively rapid

Sony makes a lot of key devices, for example image sensors and processors. I’m originally an engineer. Engineers always want to provide the latest sensor, the latest processor, and so on. Maybe this is one of the reasons our product release cycle is faster than some of our competitors. [But] user-upgradable software is very important. Our new model cycle is speedy, however I think that firmware updates are something we should offer.


Editor’s note:

Our conversation with Mr. Tanaka was candid and interesting, coming in the middle of a very busy period for Sony. The company has released a lot of high-end products over the past 18 months, and shows no signs of slowing down. We don’t know how far out the new 400mm F2.8 sports lens is, but given recent sightings of at least one working prototype ‘in the wild’ at the winter Olympics, it could be pretty imminent.

Mr. Tanaka knows that Sony won’t have the full-frame mirrorless field to itself for much longer, and welcomes the competition

Mostly I came away from this interview with the strong sense that Sony isn’t planning on resting on its laurels. Mr. Tanaka knows that his company won’t have the full-frame mirrorless field to itself for much longer, and welcomes the inevitable competition from established DSLR manufacturers like Canon and Nikon, as well as third-party lens manufacturers like Sigma and Tamron. As he correctly points out, some of the most useful features to emerge in the photography market in recent years could only have been possible thanks to mirrorless technologies, and Sony deserves enormous credit for developing and perfecting many of these technologies faster than any other manufacturer.

Sony will not ignore either APS-C users, or entry-level full-frame customers

It was very reassuring to hear Mr. Tanaka stress the importance of durability, as well as technology in Sony’s high-end cameras. Concerns have been raised about the ability of some of its products to withstand use in wet conditions, but clearly this is something that the company is mindful of – especially in cameras and lenses designed for professional use.

That’s not to say that Sony is focused entirely on breaking into the professional market. Mr. Tanaka was at pains to reassure us that Sony will not ignore either APS-C users, or entry-level full-frame customers. The new a7 III is proof of the latter point – a ‘basic’ model in Sony’s terminology, but one that I suspect will satisfy the needs of many enthusiasts and even professionals.


Previous Sony interviews:

CP+ 2017 – Sony interview: ‘We need to offer new imaging experiences’

‘We want to make lenses that can be used forever’: Sony engineer discusses G Master lenses

Interview: Kimio Maki of Sony – ‘the customer’s voice is the most important data for me’

Articles: Digital Photography Review (dpreview.com)

 
Comments Off on Sony interview: ‘If cameras are going to develop, manufacturers have to develop mirrorless technologies’

Posted in Uncategorized


5 Ways to Develop Your Photography Style

02 Feb

Finding your photography style can be a somewhat daunting task especially when you are just starting out. But let me assure you that this also is a problem some of the veterans face from time to time. Do you know why? Because we are human and our likes, dislike, and attitudes do change over time. This is only natural.

While you may think that if you have a good thing going in terms of an established style, why rock the boat? But sometimes not listening to that inner voice can have negative effects in terms of creating work that you are really proud of!

5 Ways to Develop Your Photography Style

This bridal shoot reflects my style, my branding and the visual aesthetics of my business.

So regardless of where you are in your photographic journey, there are a few things you can do to find your style and creative voice – be it in terms of photographing or editing your photos.

One thing to keep in mind as you are going through this process is that less is often more than enough. So don’t feel like you need hundreds of images to create a successful collection of photographs! Here are 5 tips to get you started on finding or defining your photography style.

#1 – Determine your goals (this is your why)

The first thing to understand in defining your style is to ask yourself what are you looking to accomplish with your photography. Are you looking to photograph for leisure or pleasure? Do you want to sell your work in terms of print or stock? Do you want to use your images for your portfolio to attract a certain type of clients?

There are many different genres of photography and there are many different types of clients for each genre. It’s typically best to start the process of defining your style by focusing on one collection of work at a time, so set your goals on what you want to accomplish for each individual series of work.

5 Ways to Develop Your Photography Style

I want to create images that really reflect the personality of my clients – the people they are and not the people I want them to be! My client, the couple in this wedding, is really a fun loving bunch with a great set of friends they share lots of laughs and joy with on a daily basis! So this goofy photo was one of their favorites.

#2 – Seek inspiration

Research, research, research. In other words, look around you to see what everyone else is doing and creating. It is very important to be aware of what other photographers are creating in your industry. I am not telling you this with the intention of you copying or following what everyone else is doing. But with the intention of educating yourself on what all is out there in the market space.

When you are defining a unique style for yourself, you can certainly use their work for inspiration, but do make your images different so they speak to you and your own aesthetic sensibilities. Your photographs are a visual representation of your brand, so try to think of ways to be true to yourself while still adding a unique edge to your work.

You can use visual tools like Pinterest and fill it with images that represent the look and feel you are trying to achieve – not just with the photographic style but also the editing style.

5 Ways to Develop Your Photography Style

This is one of my favorite go-to poses. It was an inspiration from a magazine – it has been used many times over but is still a favorite for both my clients and myself.

#3 – Be your own critic

This may be the most difficult thing to wrap your head and mindset around, but it will definitely help you in the long run. Take a step back and really analyze your work. Pick 10-20 of your favorite images that speak to what you want to focus on (your goals) and really ask yourself what is it about them that you like or dislike. Analyze the images in terms of emotions they convey, tone and mood they set, and even how they look from a distance as well as from up close.

The idea is that you want to bring yourself to a point where you feel you can recognize your style from wherever you look. Look for similarities in subject matter, composition, depth of field, lenses used, tones, colors, and any unique patterns your eye may catch. No matter which genre of photography you are pursuing, you are still the artist behind the camera and you are creating these images.

5 Ways to Develop Your Photography Style

I love photographing on clear bright sunny days as it really helps me photograph with intention and keep my style in mind.

#4 – Define your rules of engagement

This process is important because it will really help you set guidelines for yourself so you can start to be consciously consistent. Note what makes all of the images unique to your brand and your style of photography, and how you are going to make them better. Maybe even print out your favorite images so you can compare and contrast any new work you produce to fit within the framework of your style.

For example, my work is very light, bright and airy because that is how I like my images. I constantly compare new work to see if it fits within that style. In order for me to photograph in that style, I need a few things to be aligned – bright sun, elements that are pastel toned, and scenes that are less busy. This is not to say that I will not photograph dramatic skies or colorful market scenes – it is just not what my eyes naturally gravitate towards. This is just one of the rules I have given myself permission to maintain in order to stay true to my style.

5 Ways to Develop Your Photography Style

I love using Instagram as a visual media to showcase my style and my brand. It is a very curated look at how I photograph, what colors I gravitate towards, and how my images look and feel. Instagram is also a way to attract potential customers so I view this platform as an extension of my portfolio.

#5 – Make mistakes intentionally

After all the hard work you have put into defining your style, I am going to do a complete 360 turn and tell you to go ahead and break some of the rules and make mistakes. Why? Because that is the best way to learn what to do and what not to do.

By experimenting and trying out new things, you might find inspiration for a new genre of work. Like I said earlier in the article, your photographic style does not have to stay consistent for the rest of your life. If something else really motivates you and gets your creative juices flowing in spite of having a set style of photography, go ahead and experiment and see where that leads you, based on your why and your goals.

One accidental shutter click or new editing technique can often spark something new that’ll make your work better, or lead you into an entirely new collection of work.

5 Ways to Develop Your Photography Style

Every once in awhile I find myself walking over to the dark side and I quite like that creative freedom. A photo shoot where the light and shadows were so extreme it opened my eyes to the possibilities of dark and moody images. I love giving myself the freedom to experiment with this style.

Over to you

I hope these simple yet powerful steps help direct you towards finding and experimenting with your own photography style until you find something that is a reflection of you, your mindset, and your brand.

The post 5 Ways to Develop Your Photography Style by Karthika Gupta appeared first on Digital Photography School.


Digital Photography School

 
Comments Off on 5 Ways to Develop Your Photography Style

Posted in Photography


How to Make Creative Lightroom Develop Presets for Portraits

03 Aug

It’s natural for portrait photographers to take lots of photos during a shoot. Therefore, it’s also helpful to have a system in Lightroom that allows you to save time processing your portraits. The easiest way to do this is with Develop Presets.

Lightroom Develop Presets for portraits

A Develop Preset is a record of the processing work you have done on a photo in the Develop Module of Lightroom. The idea is to save the settings you used in a preset that you can then easily apply to other photos. The end result is that you save time and finish developing your portraits more quickly.

Let’s take a more detailed look at how it works.

1. Select a portrait to process

First, select a portrait and adjust it in Lightroom. Alternatively, use a portrait you have already developed.

Lightroom Develop Presets for portraits

2. Create a Develop Preset

Make a new Develop Preset by going to the Presets panel (on the left-hand side) in the Develop module and clicking the plus icon on the right (or, go to Develop > New Preset).

Lightroom Develop Presets for portraits

When you do this, the New Develop Preset window appears. There are three sections you need to pay attention to, see below.

Lightroom Develop Presets for portraits

A. Preset Name and Folder. Give your preset a name and select the folder you want to save it in. The default folder is User Presets but you can pick another or create a new one by going to the New Folder option at the top of the menu. It’s a good idea to create a new folder for your Preset as it helps you keep your Presets panel organized.

B. Auto Settings. Lightroom gives you the option to tick the Auto Tone box. I recommend you leave it unticked. Otherwise your preset may behave unpredictably when you apply it to other portraits.

C. Settings. This is where you tell Lightroom which Develop Module settings you want to include in the Preset.

Some settings may be unique to your photo. For example, you may have used a Graduated or Radial filter to make the background darker. These won’t work when applied to another portrait with a different background, so you should leave those out.

It’s also a good idea not to include Exposure or White Balance settings. These need to be adjusted individually for each portrait. For the same reason, you should leave the Sharpening, Noise Reduction, Lens Corrections and Transform boxes unticked.

You can tick all the other boxes, as shown in the above screenshot.

3. Apply the Develop Preset to other portraits

The next step is to apply the Develop Preset you just made to another portrait. Open the new portrait in the Develop module. Click on the Preset you just created, which you can see in the Presets panel.

In this case, I created a new Develop Preset, especially for this article.

Lightroom Develop Presets for portraits

You can also apply your new Develop Portrait to more than one portrait at a time. This is useful if you have several portraits that you would like to develop in the same style. Here’s an easy way to do it.

1. Go to the Library Module and select the portraits to which you want to apply the preset. It helps if you have already organized your portraits in a Collection.

Lightroom Develop Presets for portraits

2. Go to the Quick Develop panel. You can access all your Develop presets under Saved Preset. Select the preset you just created from the menu. Lightroom will apply it to all of your selected portraits.

Lightroom Develop Presets for portraits

3. Open the portraits one by one in the Develop module and tweak the settings or retouch them if needed.

The creative power of Develop Presets for portraits

Now we’ve explored the mechanics of creating Develop Presets for portraits, let’s look at some of the creative things you can do in the Develop Module. All of these can be included in presets. Eventually, you will build a personal library of your own presets for portraits.

There are four techniques that are useful for portraits.

1. Apply a vignette

There are two ways to apply a vignette in Lightroom.

The first option is to go to the Effects panel and use Post-Crop Vignetting. Move the Amount slider left to apply a vignette. Use the Midpoint slider to change the area covered.

Lightroom Develop Presets for portraits

Here’s a before and after example.

Lightroom Develop Presets for portraits

The only drawback of Post-Crop Vignetting is that the effect is centered. That leads us to the second way of creating a vignette which is using a Radial Filter. The advantage of Radial filters is that you can put them wherever you like.

Here you can see two screenshots of a Radial Filter I applied to a portrait. The first (left) shows the position of the Radial Filter. The second (right) shows the area affected by the Radial Filter in red.

Lightroom Develop Presets for portraits

I moved the Exposure slider left to make the area outside the Radial Filter darker.

Lightroom Develop Presets for portraits

This is the comparison so you can see the difference.

Lightroom Develop Presets for portraits

2. Adjust colors in the HSL / Color / B&W panel

Lightroom also gives you the option of adjusting the saturation and luminance (brightness) of individual colors. You do this in the HSL / Color / B&W panel.

In my portrait, there is some blue paint on the wall behind the model. You can adjust only that color by going to the Saturation tab and moving the Aqua and Blue sliders left.

Lightroom Develop Presets for portraits

These photos show you the effect.

Lightroom Develop Presets for portraits

3. Split Tone

Split toning isn’t just for black and white, it’s very effective for color portraits as well. The effect is similar to color grading used in TV shows and movies.

One option for split toning is to apply blue to the shadows and orange to the highlights. Another is to apply teal to the shadows and yellow to the highlights. Here are some settings you can try.

Lightroom Develop Presets for portraits

Here are the results.

Lightroom Develop Presets for portraits

4. Adjust the Tone Curve

You can use the Tone Curve panel to create a matte look. That is where the blacks are dark gray rather than black as if the photo has been printed on matte paper.

Lift up the left-side of the RGB curve, as shown in the screenshot below. You can also do the same with the blue curve for a similar effect that also adds blue to the shadows.

Lightroom Develop Presets for portraits

These are the results.

Lightroom Develop Presets for portraits

Adjustment Brush presets

You can also create your own Adjustment Brush presets to make retouching portraits easier. A good example is Lightroom’s own Soften Skin preset, which sets Clarity to -100 and Sharpness to +25.

I like to make the model’s eyes more defined by creating an Adjustment Brush and setting Exposure to around +0.30 and Clarity to +70.

Lightroom Develop Presets for portraits

You can make an Adjustment Brush Preset from those settings by going to Save Current Settings as New Preset at the bottom of the Effect menu. Give the preset a name and Lightroom saves it in the Effect menu. You can also use this preset with the Gradient and Radial filters.

Conclusion

Develop Presets are powerful tools that help you leverage Lightroom’s advanced developing options. With the techniques in this article you can use presets to speed up the developing process and apply creative effects to your portraits.

Do you have any questions about using Lightroom Develop Presets? Please let us know in the comments below.


Are you a fan of the natural / vintage look in portraits? Then check out my Vintage Portrait Presets for Lightroom. There are over 30 presets to help you create beautiful portraits in Lightroom.

The post How to Make Creative Lightroom Develop Presets for Portraits by Andrew S. Gibson appeared first on Digital Photography School.


Digital Photography School

 
Comments Off on How to Make Creative Lightroom Develop Presets for Portraits

Posted in Photography


FAA may develop a remote drone identification system for law enforcement

05 Jul

Despite present drone regulations in the US, identifying the operator of any given drone in the sky is nearly impossible, making it difficult for law enforcement to deal with drones that are being misused. To address this issue, the Federal Aviation Administration has developed the new UAS Identification and Tracking Aviation Rulemaking Committee (ARC), which just recently wrapped up its first meeting.

According to the FAA, this initial meeting was used to discuss law enforcement concerns related to drones, to present regulations concerning drone tracking and identification, as well as possible legal issues and air traffic drone management. Existing drone ID tech was reviewed, and ‘preliminary…identification parameters’ were created.

Speaking on the behalf of unnamed sources, Recode reports that law enforcement agencies are concerned about their inability to identify drones from the ground; this concern has reportedly delayed an FAA proposal related to flying drones over people. The FAA is said to be using this committee to develop a system in which law enforcement will be able to identify a drone from the ground, addressing the agencies’ concerns.

Such a system may involve the drone itself broadcasting its identification to a law enforcement system, enabling police to ID the drone’s operator or, at the very least, its owner. Such an identification system would likely require small non-commercial drones to be registered, however, marking a deviation from current drone regulations.

At the moment, only commercial drones must be registered with the FAA.

Articles: Digital Photography Review (dpreview.com)

 
Comments Off on FAA may develop a remote drone identification system for law enforcement

Posted in Uncategorized


How to Develop a Unique Style for Your Photography

17 Feb

In today’s world, everyone has a camera. It may be as simple as the camera on their phones, but they still have one. This means that millions, maybe billions of people are taking photos every day. What does that mean for you? It means you have to compete with all those to make your images stand out. You have to find a way to be different, but how? The best way is to develop a style that is uniquely yours.

When people look at your work they instantly know it is yours, or someone trying to copy it. Your style is how you become known and how you make yourself stand apart.

How to Develop a Unique Style for Your Photography

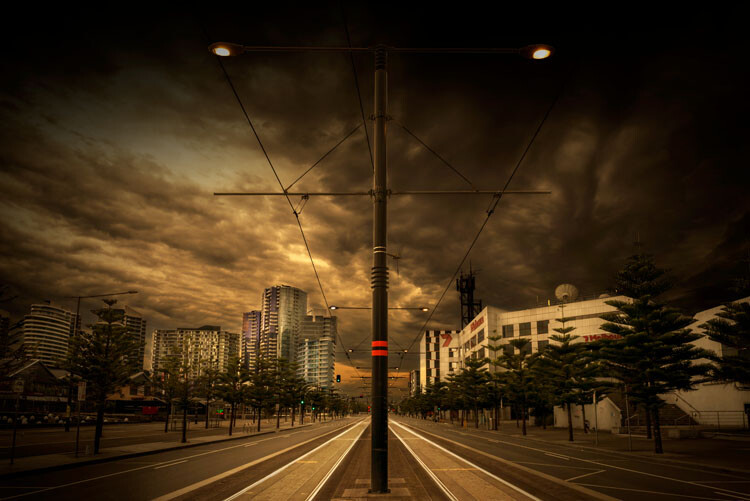
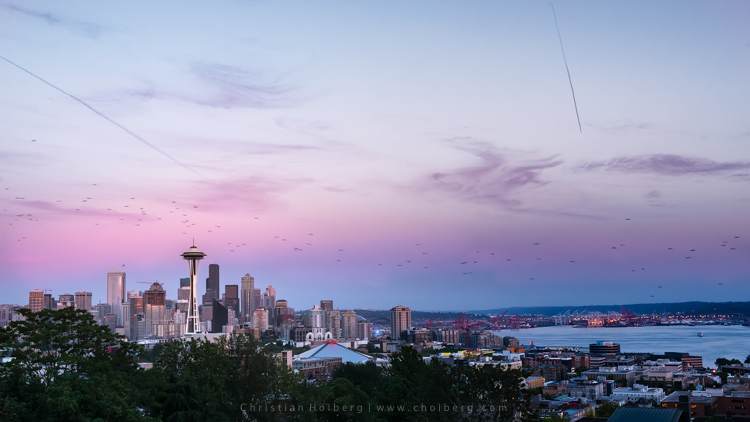
Looking north along the Harbour Esplanade.

What does having a photographic style mean?

Basically, that you do something to your images that make them different, whether it is done when the shot is taken or in post-processing, or maybe both. Whatever it is that you do, you want people to know straight away that the image is yours before they see the name. There should be a similarity between all your images and they look like they belong together.

It almost goes against the grain of what humans are like and our need to conform. If you want your images to stand out you have to find a way to make them different to what everyone else is doing. Think about how you can work that is not the same. It can be about photographing the same thing, but you do it your way.

When I was in art school we were told over and over again that nothing was original anymore. Anything that you wanted to do had already been done. It is true in most cases, but that doesn’t mean you shouldn’t try to find a way to work that could be different.

How do you develop a style?

Ask any artist or photographer that has their own distinct style and they will give you a different answer. For most, there will be something that drives them to create work in a particular way.

There are four main things to consider when developing your own unique style; why you are doing the work, the subject matter, the technical process, and post-processing. Let’s look at these individually and see some artists who work that way.

How to Develop a Unique Style for Your Photography

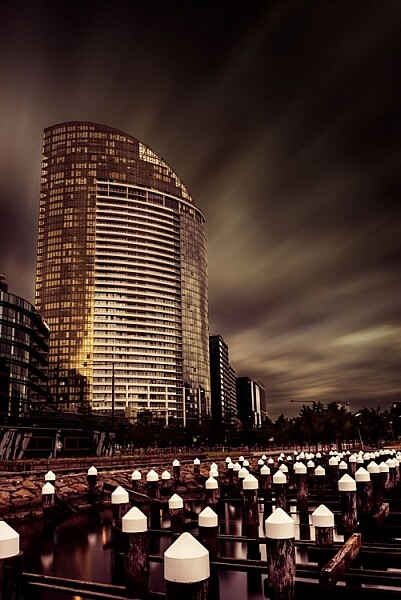
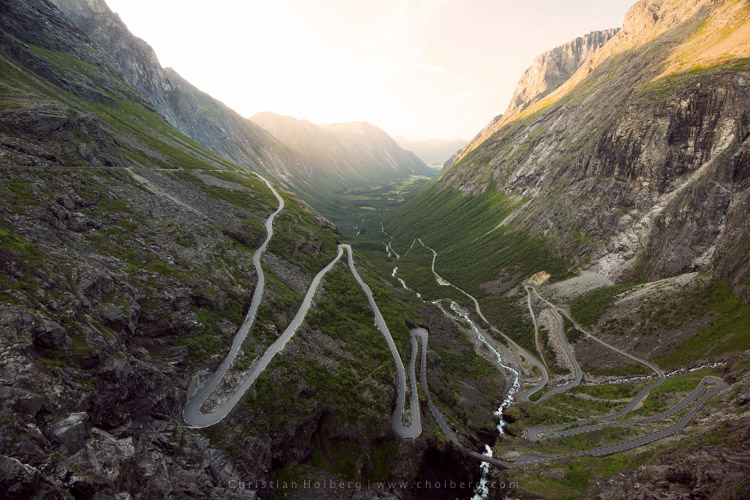
A long exposure of a building in the Docklands.

Why are you doing it

This is a bit like an artist’s statement in that you know what you are trying to do with your images. Many artists work this way. They understand what they are trying to achieve and have a look or story they are trying to get.

Australian artist/photographer Tracey Moffat looks at indigenous people and culture, and how they are understood culturally and socially. She says she is more interested in creating her own realities than dealing with reality. From the start, Moffat has an idea of what it is she is striving for.

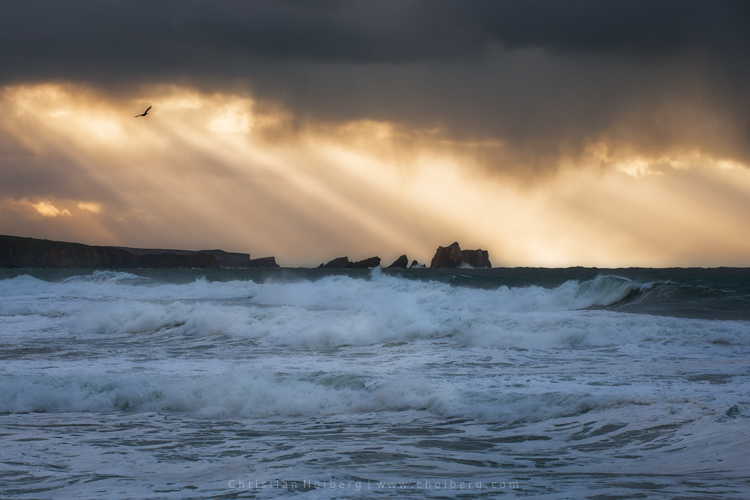
My own work starts with the idea of what would the world be like without humans. I find places like Pripyat, the worker’s town that was evacuated after the Chernobyl nuclear disaster in 1986, fascinating. It has not been lived in since, and there is a quietness in the images that I find quite appealing. I try to photograph places with no people in them to see if I can imitate that silence. At the same time, I like to create a world in my images that doesn’t seem quite real.

How to Develop a Unique Style for Your Photography

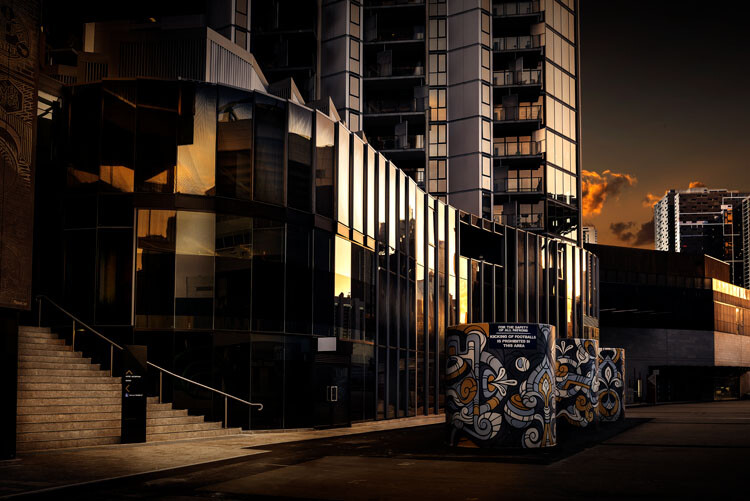
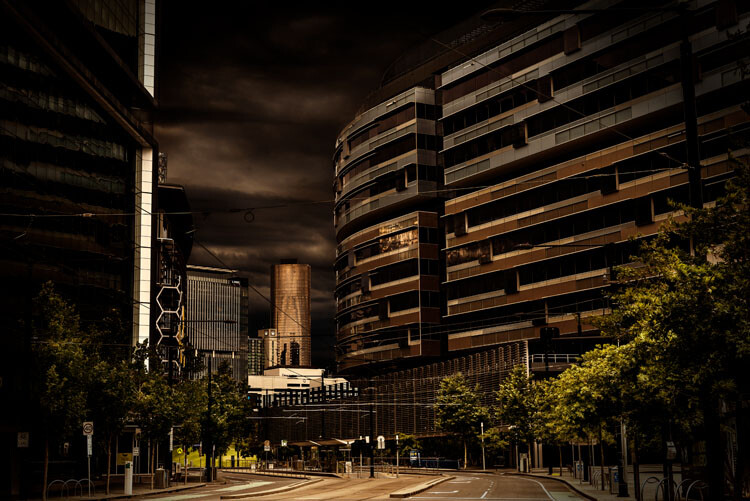
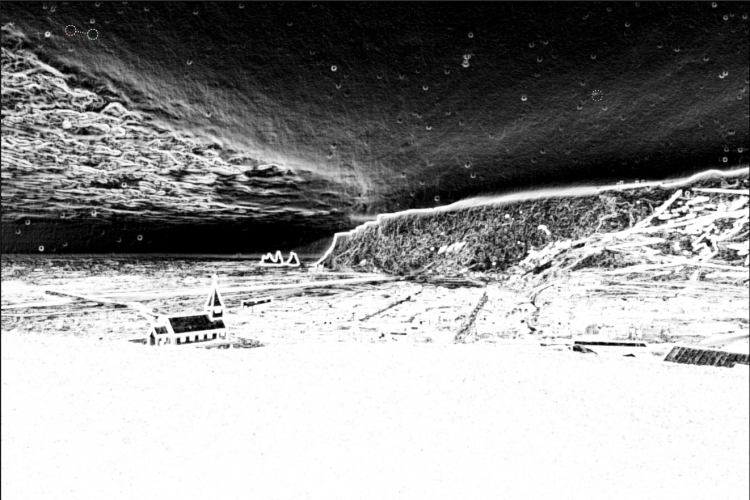
Off the street at the entrance of a building.

The subject matter

Usually, someone who is developing a style, or has one, will have a certain subject matter that they stick to – it might be mountains, the night sky, or waterfalls. It will be what they want to photograph and they tend to only do that thing. While some can be that strict with themselves, most photographers have a few things they like to photograph. However, that doesn’t mean that all the images will fit within that same style.

One of my favorite painters, Rick Amor, does a lot of architectural paintings. He creates his own realities in fictional cities, but he also likes to paint scenes from the beach and he does a lot of self-portraits. There is variety in his work, and each has its own style.

It could be said that I like architecture the most, but really, what interests me is the hand of man. I find anything that man has built or destroyed interesting. I tend to concentrate on cities, perhaps because I live in one, and it is easy to get there to take photos. However, if you were to look at my Instagram page you would see that I also like to photograph anything with water in it. Many images do not fit my subject, but you can’t always do art images and I do like photographing other things from time to time.

How to Develop a Unique Style for Your Photography

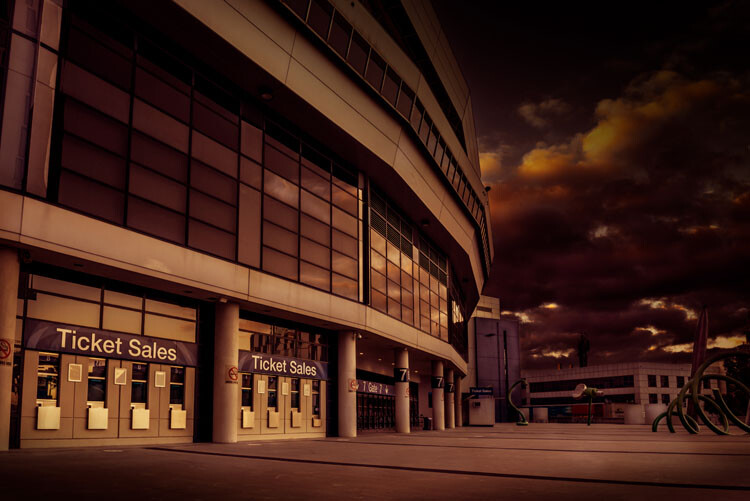
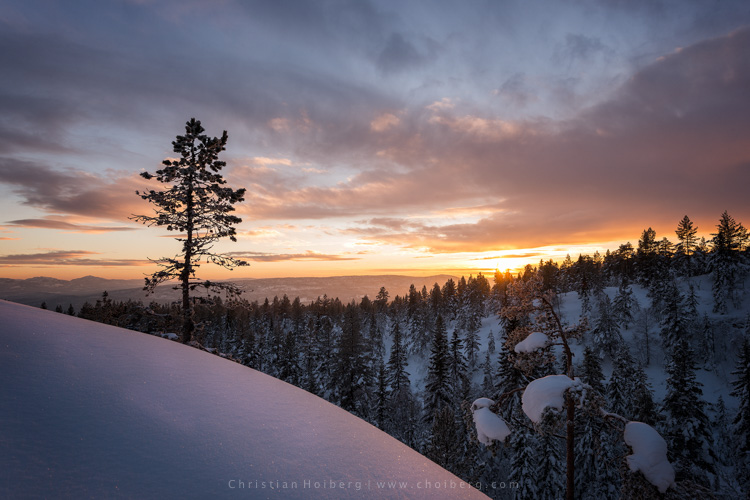
Etihad Stadium closed.

The technical process of taking images

The best way to get your images is knowing how to use your camera and getting the best out of it. There are photographers that rely on their cameras to give them what they want and the technical details become very important. The art of photography comes from the technical aspects.

If you are a technical photographer then you would be looking for a specific technique that you can use that will help give all your images the same feel. What that technical aspect will be is completely up to you. There are a lot of photographers that are striving for an image that is very technical, and the creative part isn’t necessarily that important.

You will find that many landscape and nature photographers are more technically driven. Matty Smith, an Australian underwater photographer, does his best to get everything in camera. He likes to reduce how much post-processing he has to do, therefore it is very important to him that he gets what he wants while out in the field, or under the water.

I am not a technical photographer. I don’t let the technical aspects of photography dictate my image. That doesn’t mean I don’t know them, they just don’t mean as much to me.

Using Post-processing

You will find that technical photographers don’t do a lot of post-processing, while others will use it a lot. There are no rules about what you should use, but you will find that many photographers that have really distinctive styles get their look through photo editing.

Brooke Shaden is primarily an artist who uses photography to create her own look. She does portraits in different settings and often uses costumes for them. The thing that sets her apart is her post-processing. She has a distinctive style that is hers. You will see lots of images that are similar, but they are usually people who are trying to imitate what she does.

My work is mostly created with post-processing. I have things I like to do to images, and playing in Adobe Photoshop is as much fun to me as taking the photos. I spend far more time processing than I do taking the images. I like to play with the light to see what I can do with it and for me, an image is complete when it looks almost like a movie still, not quite real.

How to Develop a Unique Style for Your Photography

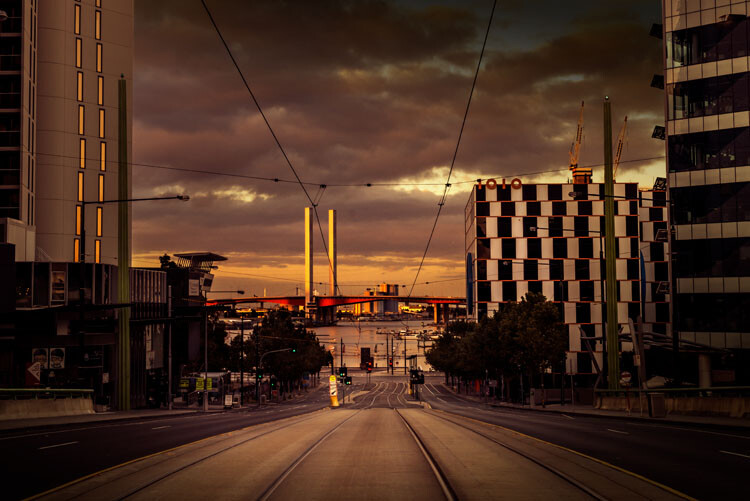
La Trobe Street looking to the Bolte Bridge.

Artists who have their own style

There are so many photographers that have very distinctive styles and if you want to develop your own style you should look at their work to see what they do. See if you can find inspiration.

Here is a list of photographers that have, at some stage, influenced my photography and helped me to develop my own style.

  • Joel Grimes
  • Peter Eastway – see also: The Magic of Antarctica with Special Guest Peter Eastway
  • Kristy Mitchell
  • Joel Tjintjelaar
  • Julia Anna Gospodarou
  • Art Wolfe

There are a few for you to start with.

How to Develop a Unique Style for Your Photography

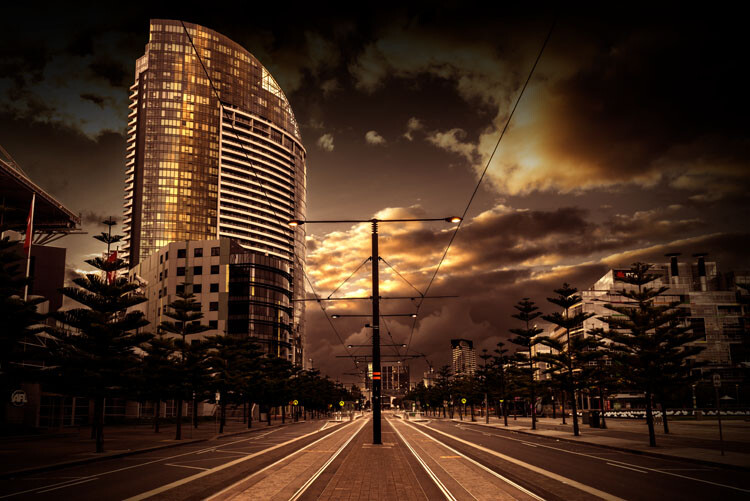
The Harbour Esplanade looking down the tram tracks.

Should you copy

It is so easy to copy what another photographer does, especially if they teach somewhere, but should you really copy what they do? There have been photographers who have done that and everyone just says, “Oh they are copying so and so.”

It is okay to copy what a photographer does to learn some new skills, but ultimately if you want your own style, one that is uniquely yours, then you need to work out what to do with your own images.

I learned a lot about developing a style and working as an artist through my fine arts degree. I also watched a lot of videos on how other photographers created their work. I would pick up tips and then see if I could apply them to my own work. I experimented with what they did so I could use it, but also so it would look different.

How to Develop a Unique Style for Your Photography

Near the end of Collins Street.

How to develop your own style

Go through all the steps here and see which apply to you. Work out what you want your work to be about and how you can get a look that is you, or so others know it is yours without having to look for a name.

Remember, that for your style to be uniquely yours, it needs to be different to what others are doing. It can be something simple, or perhaps more complicated. It won’t happen straight away and may take you quite a while to develop your own look.

You might find that you start one thing, and then change. It is normal, and in the beginning, it will change quite a bit. It will also evolve over time. What I am doing now is quite different to what I was doing 20 years ago, or even 10 years ago. Some might say that it is has changed a lot in the last two to three years.

As you start thinking about it, you may also find that you already have a style and are not even be aware of it, which is what happened to me. It took me a while to see what my style was, though many others could see it before I did. However, I know it now and understand it better.

To see how you progress places like Instagram can be perfect. You see all the work there and it is easy to look at the images together and over time.

Finally

Just experiment and try things. You never know where it will end up. Also, don’t always listen to others, especially for approval, do your own thing and eventually others will come around to it.

Have you developed a unique style for your photography? How did you do it? Please share your comments and thoughts below.

leannecole-developing-your-style-44

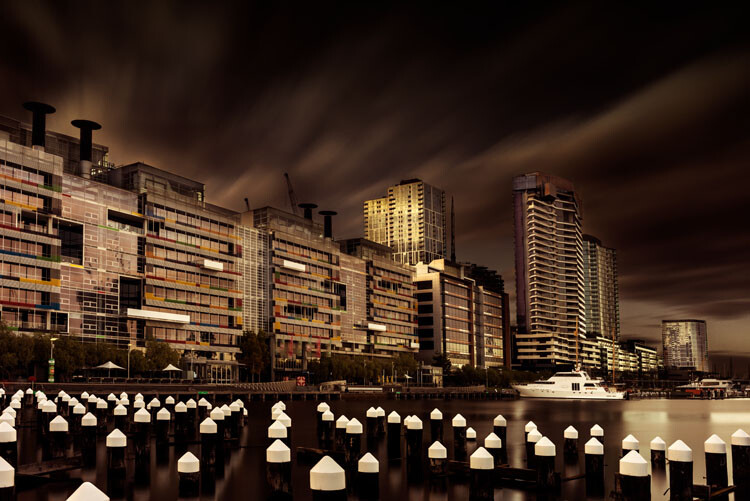
A long exposure over the water at Docklands.

googletag.cmd.push(function() {
tablet_slots.push( googletag.defineSlot( “/1005424/_dPSv4_tab-all-article-bottom_(300×250)”, [300, 250], “pb-ad-78623” ).addService( googletag.pubads() ) ); } );

googletag.cmd.push(function() {
mobile_slots.push( googletag.defineSlot( “/1005424/_dPSv4_mob-all-article-bottom_(300×250)”, [300, 250], “pb-ad-78158” ).addService( googletag.pubads() ) ); } );

The post How to Develop a Unique Style for Your Photography by Leanne Cole appeared first on Digital Photography School.


Digital Photography School

 
Comments Off on How to Develop a Unique Style for Your Photography

Posted in Photography


3 Habits Every Outdoor Photographer Should Develop to Avoid Missing Shots

14 Jul

Have you ever been out to photograph a gorgeous sunset, just to realize that you can’t, because your batteries are dead? Perhaps you’ve come home and imported your images, and noticed that all of them are unusable due to hundreds of dust spots?

Don’t worry. Most of us have experienced the exact same things. Luckily, there are certain habits you can develop to avoid ever missing a shot again. None of them are time consuming, so there’s really no excuse not to implement them into your workflow.

Kerry-Park-Sunset

Habit #1 – Charge your batteries

It might sound obvious that you should charge your batteries but you would be surprised how often I meet people that are out in the field without any battery power. In fact, I’m guessing you’ve experienced this yourself (don’t worry, so have I, and most other photographers too).

About a year ago I decided to take a seven hour drive to Åndalsnes in Norway, known for its spectacular landscape, in particular the iconic Trollstigen road. I had been there a few times before, but the weather was never ideal, so I wanted to go back and capture at least one good image. When I arrived at the scenic road and walked out to the viewpoint I managed to take a handful of pictures before my battery died. Weird, I thought, but no problem, I still have two spare batteries. Turned out both of them where empty too. I guess you can imagine my frustration when I realized that this entire trip was ruined because I had forgotten to charge my batteries.

trollstigen-sunset-glow

I managed to capture one decent image before my batteries died

I made it a habit after that incident to always charge my batteries after I come home from a trip, or evening out photographing. I set my batteries to charging even before I import my images, because I know if I don’t do it right away I may forget.

Habit #2 – Clean your equipment

Cleaning your camera gear is extremely important (especially for outdoor photographers) not only to lengthen the life of your equipment but also to improve image quality. I always get a bit upset when I view a beautiful image that is broken due to hundreds of small (or a few huge) dust spots. This is so unnecessarily, and easy to get rid of, so why let others believe you’re not as talented as you actually are.

Honestly, you don’t need more than a cheap microfiber cloth to remove dust and dirt from your lens or filters. Even though that is enough in most cases (and something that should always be in your camera bag), I do recommend purchasing a liquid lens cleaner too, as this helps get rid of all smudges and especially salty spots.

After bad weather on Iceland my lens was filled with dus spots

After bad weather on Iceland my lens was filled with dust spots, as you can see here in Lightroom.

I’ve made it a habit to clean my equipment after each photo trip that lasts more than a day. If I’m out photographing seascapes or in windy/rainy conditions, I usually spend an extra minute afterwards getting rid of the worst. Making this a habit will help save you a lot of time in post-production using tools such as Lightroom’s Spot Removal.

If you’re getting serious with your photography, and perhaps you have even began selling a print or two, it’s even more important to get rid of those nasty spots. Just imagine selling a large print, then seeing that those small spots suddenly look large and take away the attention of the image. Don’t make that mistake!

Habit #3 – Don’t leave before it’s over

My final habit is perhaps one of my most important advice for any outdoor photographer.

Don’t leave before it’s over!

An unexpected sunset this winter in Norway

An unexpected sunset this winter in Norway

This is a habit I had to learn the hard way. It happened many times when I was an amateur photographer that I decided a sunrise or sunset wouldn’t turn into anything good, because the weather looked a bit shabby. Instead of staying at the location longer, I preferred to go home and hope for better conditions next time. What happened as I was driving back home? The sky turned red for just a few minutes.

Even though the conditions look a little dull it doesn’t mean that you won’t have a few minutes of good light. Alright, in most cases it doesn’t turn into something spectacular, but the times it does you will wish you had stayed for that 10-20 minutes extra.

So, remember this the next time you’re considering leaving early: it’s not over before it’s over. Stay a little bit longer, and perhaps you will be treated with great light that results in a portfolio worthy image. It’s worth it!

Bird flying through a stormy sunset at Liencres, Cantabria.

Bird flying through a stormy sunset at Liencres, Cantabria.

Are you guilty of missing these 3 habits? Have you developed any other habits, either in the field or when you’re back home? Let us know by leaving a comment below!

This week we are doing a series of articles to help you do nature photography. This is the first – watch for more coming soon! 

googletag.cmd.push(function() {
tablet_slots.push( googletag.defineSlot( “/1005424/_dPSv4_tab-all-article-bottom_(300×250)”, [300, 250], “pb-ad-78623” ).addService( googletag.pubads() ) ); } );

googletag.cmd.push(function() {
mobile_slots.push( googletag.defineSlot( “/1005424/_dPSv4_mob-all-article-bottom_(300×250)”, [300, 250], “pb-ad-78158” ).addService( googletag.pubads() ) ); } );

The post 3 Habits Every Outdoor Photographer Should Develop to Avoid Missing Shots by Christian Hoiberg appeared first on Digital Photography School.


Digital Photography School

 
Comments Off on 3 Habits Every Outdoor Photographer Should Develop to Avoid Missing Shots

Posted in Photography


The 6 Most Important Things You Need to Know about Lightroom’s Develop Module

15 May

Lightroom is powerful, but it’s also complex and has a steep learning curve. If you feel overwhelmed by all the options, there’s great value in taking a simple approach and learning to use the tools that are most useful first. Leave the more advanced features until you have more experience.

With that in mind, I’ve put together this list of the six most important things you need to know about Lightroom’s Develop module. Learn these and you will be well on the way to Lightroom mastery.

1. Backup your catalog regularly

This is the most crucial thing to set up, as everything you do to your photos in the Develop module (not to mention metadata changes like Collections, flags and keywords) is stored in the catalog. It would be a disaster to lose your catalog (and consequently all your hard work) to hard drive failure, so you need to make sure that Lightroom is backing it up regularly to an external hard drive.

To do so, go to:

  • For Windows users: Edit > Catalog Settings > Back up catalog
  • For Mac users: Lightroom > Catalog Settings > Back up catalog

I have mine set to: Every time Lightroom exits – some photographers find that Once a week, when exiting Lightroom is enough.

When you exit Lightroom, a dialog window appears that shows you where Lightroom is going to save the backup Catalog. Click Choose to change the location if you need to. Note: this is the only time you can select the destination where the backup will be saved.

Make sure the Test integrity before backing up and Optimize catalog after backing up boxes are both ticked. This slows down the back up process, but it’s worth it because it helps ensure that your catalog remains free from corruption, and is optimized for speed.

Lightroom Develop module

Please note: The Catalog doesn’t contain any of your photos. Backing up your Catalog doesn’t back up your photos, only the information that Lightroom contains about them. Photo backups need to be managed separately.

2. Profile is the most important setting in the Develop module

The Profile menu is tucked away in the Camera Calibration panel, at the bottom of the right-hand panels in the Develop module. The default profile setting is Adobe Standard (circled below). This profile was created specifically for your camera by Adobe. Pick that one for accurate colors.

You will also find the color profile settings specific to your camera (Landscape, Portrait, and so on). You can pick one of these if you prefer the look to Adobe Standard.

Lightroom Develop module

The profile affects both color and contrast, so from a practical point of view it’s important to select the right one, before you start adjusting contrast and white balance in the Basic panel. Get the profile right, and it makes all subsequent processing steps much easier. Get it wrong, and it makes them more difficult.

For example, if you apply a profile intended for landscape photos to a portrait, then you could end up with over-saturated colors and unnatural skin tones. Then you might try and fix that by playing with the Basic panel sliders or other color controls. This approach rarely works, it’s far better to select the most appropriate profile from the start.

These two photos show the difference between the Adobe Standard and Velvia profiles on a Fujifilm X-T1 camera. The Velvia profile saturates colors, the Adobe Standard profile looks more natural.

Lightroom Develop module

3. Use Lens Corrections to correct distortion and eliminate chromatic aberrations

No lens is perfect, and most have at least a little distortion and chromatic aberration. One of the benefits of digital photography is that you can eliminate these in the processing stage, so they are not the problem they once were. Go to the Basic tab in the Lens Correction panel, select Enable Profile Corrections and Remove Chromatic Aberration in order to do so.

Lightroom Develop module

This comparison shows the result on a photo taken with a zoom lens producing barrel distortion.

Lightroom Develop module

Lightroom Develop module

4. You can carry out 80% of your processing in the Basic panel

Once you have selected a Profile, and applied Lens Corrections, you can go to the Basic panel to start making any adjustments required to the photo’s brightness, contrast, and color.

The sliders in the Basic panel are extremely powerful. Take the time to get to know what each one does, and how the settings affect your images. Once you get the hang of these sliders it’s quite possible that you can do all of your global adjustments (those that affect the entire image) here, and not have to touch the Tone Curve or HSL / Color / B&W panels at all.

This photo is a good example. Virtually all the processing was done in the Basic panel, made possible by selecting the most appropriate profile first. The only additional thing I did was add a vignette using the Effects panel.

Lightroom Develop module

My article Steps for Getting Started in the Lightroom Develop Module goes into this in more detail.

5. Learn to use local adjustments wisely

It wasn’t so long ago that many professional photographers would send their negatives to master printers who used dodging, burning, and other fancy darkroom techniques, to create a far better print than the photographer ever could. These local adjustments – those applied to only part of the image, rather than all of it – are often vital for bringing the best out of your Raw files in Lightroom.

Lightroom has three tools for making local adjustments – the Adjustment Brush, Radial Filter and Graduated Filter. They allow you to selectively adjust brightness, contrast, and other tone and color settings. Each tool has its own idiosyncrasies, so take the time to get to know each one in turn.

This example shows the difference that local adjustments make. I used a combination of all three of Lightroom’s tools to turn the image on the left, into the one on the right.

Lightroom Develop module

6. Don’t overlook the Clarity slider

The Clarity slider is extremely useful as both a local, and global adjustment. It’s primary use is to enhance texture, and it does so by increasing edge contrast (the spots where dark and light areas meet). You do have to be careful not to overuse it, but judicious applications of texture enhancement can help bring the best out of any photo. Clarity is also an ideal tool for enhancing black and white images, which often rely on texture to add impact.

The following photos show the effect of adding Clarity. I used the Radial filter to apply Clarity to the Buddha heads to bring out the texture.

Lightroom Develop module

Lightroom Develop module

These six items are not a comprehensive list of what you can do in Lightroom’s Develop module, but they will certainly get you started, and simplify the process of learning to use it.

What do you think are the most important tools to master in the Develop module? Do you agree with my selection? Please let me know in the comments below. And if you want to learn more about Lightroom then please check out my Mastering Lightroom ebooks.

googletag.cmd.push(function() {
tablet_slots.push( googletag.defineSlot( “/1005424/_dPSv4_tab-all-article-bottom_(300×250)”, [300, 250], “pb-ad-78623” ).addService( googletag.pubads() ) ); } );

googletag.cmd.push(function() {
mobile_slots.push( googletag.defineSlot( “/1005424/_dPSv4_mob-all-article-bottom_(300×250)”, [300, 250], “pb-ad-78158” ).addService( googletag.pubads() ) ); } );

The post The 6 Most Important Things You Need to Know about Lightroom’s Develop Module by Andrew S. Gibson appeared first on Digital Photography School.


Digital Photography School

 
Comments Off on The 6 Most Important Things You Need to Know about Lightroom’s Develop Module

Posted in Photography


5 Lightroom Develop Module Secrets Revealed

16 Jan

5-lightroom-develop-module-secrets-revealed

When you’re new to Lightroom, some features of the program aren’t immediately apparent, or easily discoverable. In this article I’ll introduce you to five Lightroom Develop module secrets that will help you get more out of photo editing in Lightroom.

#1 Smarter Virtual Copies

Often when you’re working in Lightroom you’ll edit an image to look one way, and then decide you’d like to try to edit it in a different way – without losing your work. The trouble is, that once an image has been edited, any virtual copy that you create will use the current look of the image as its starting point. So the first entry in the History Panel will be the creation of the Virtual Copy and you can’t, using the History Panel, wind the photo back to how it looked out of the camera.

You can, however, use the Reset button at the foot of the right panel of the Develop module. Click Reset to reset your new Virtual Copy, so it is the original out of camera image with all edits removed. Of course, the edits will remain on your original image (just the Virtual copy will be reset).

reset a virtual copy to the original image state in Lightroom
So far, so good. But what if you want to create a Virtual Copy that starts partway through the editing process? Well, that can be done too. Start with the original image, open the History Panel on the left, and click on the entry which shows the image looking as you want for your virtual copy. Note that the most recent edit is at the top of the History panel.

make a virtual copy from a partially edited image in Lightroom

Notice the History panel is opened, and a state other than the current one is chosen to make the Virtual Copy.

Now right click the image and choose Create Virtual Copy – Lightroom will create a new virtual copy and switch to it. Immediately after you do this, click back on the image that you made the copy from – the original image – and in the History Panel, click the topmost entry. This reinstates your edits to the original image, back to your last edit. It’s important to do this before you start working on the new Virtual copy as it is easy to forget to perform this step and, in doing so, you may lose your edits if you subsequently make changes to the original image.

#2 Comparing Before and After

In Lightroom you can compare the before and after editing state for an image by clicking on the image in the Develop module and pressing the backslash key on your keyboard (\). Press once to see the Before state and once again to return to the current edited state of the image.

So far, so good. But what if you want to compare the current edited state with an earlier edited state – not with the original out of camera image? You can do this if you open the History panel, then right click the entry in the History list that you want to compare with the current state of the image – you can choose any of the states in the list. From the popup menu choose Copy History Step Settings to Before. Now when you press the Backslash key to compare the before and after, you’ll be comparing a previous state but not the original out of camera image.

change the starting point for a before/after comparison in Lightroom

#3 Reverse Engineer Presets

A Lightroom preset is a set of slider settings that have been saved in such a way that they can be applied to any image, at any time. That said, there is nothing that can be applied using a preset that you cannot also apply manually to an image, by using the tools in the Develop module. This means that Presets contain valuable information for editing images which you can discover by reverse engineering them. So, if you like a preset that ships with Lightroom, or if you have downloaded and installed other presets that you like, use the process that follows to learn how they work.

Start with an image that is in its original out of camera state, and apply the preset to the image. Now look through the settings in the Develop module panels on the right to see what adjustments have been made to the image.

To see if there are any Graduated Filter or Radial Filter adjustments included in the preset, click the Graduated Filter tool, set the Show Edit Pins setting to Always and see if any pins appear on the image. If so, click to see where they have been applied and what their settings are. Repeat this step with the Radial Filter to see if any radial filter adjustments have been made to the image. As presets cannot contain Adjustment Brush edits there’s no point in checking that tool.

reverse engineer a preset in Lightroom

It’s best to study presets without first making any changes to your image, except for applying the preset. This way you will know that all the edits that have been applied to the image are part of the preset, and none of them are your own edits.

#4 The Alt Key works nearly everywhere

The Alt key is the biggest hidden secret keystroke in Lightroom. When you press it, various things appear on the screen that previously were not visible. For example, in the Basic panel you can use the Alt key to display Reset Tone and Reset Presence options. The Exposure, Whites, Blacks and Split Toning sliders all display visual feedback when you hold the Alt key while adjusting them. So too do the sliders in the Sharpening panel. To learn more about using the Alt key in the Lightroom Develop module, check out this post: Lightroom Tips for the Develop Module – the magic Alt key.

alt key provides visual feedback for many sliders in Lightroom

#5 Keyboard Adjustments

If you find it difficult to adjust the sliders in Lightroom using your mouse, then try adjusting them using the keyboard instead. To do this, click on a slider to target it and then use the left and right arrow keys to adjust the slider in small increments. To move in larger increments hold the Shift key as you press the arrow keys. You will find that the Up and Down arrow keys work identically to the Left and Right arrow keys.

adjust Lightroom sliders using the arrow keys

If you want to continue to use the sliders to make your adjustments, but you find that they travel too fast for you to get an accurate adjustment, hold the Shift key as you drag on a slider. This slows its movement down and makes it easier for you to make small adjustments. You can also click on the numeric value that a slider is currently set to and use the Up and Down arrow keys to adjust the value in small increments.

To reset a slider – double click its name and it will return to its default value for that type of image.

Watch the video

Here is a video version of this article so you can follow along as I walk you through each point.

googletag.cmd.push(function() {
tablet_slots.push( googletag.defineSlot( “/1005424/_dPSv4_tab-all-article-bottom_(300×250)”, [300, 250], “pb-ad-78623” ).addService( googletag.pubads() ) ); } );

googletag.cmd.push(function() {
mobile_slots.push( googletag.defineSlot( “/1005424/_dPSv4_mob-all-article-bottom_(300×250)”, [300, 250], “pb-ad-78158” ).addService( googletag.pubads() ) ); } );

The post 5 Lightroom Develop Module Secrets Revealed by Helen Bradley appeared first on Digital Photography School.


Digital Photography School

 
Comments Off on 5 Lightroom Develop Module Secrets Revealed

Posted in Photography