RSS
 

Posts Tagged ‘density’

Using a 10 Stop Neutral Density Filter to add Drama to the Sky

24 Nov

In this Adorama video Bryan Peterson shows you how he uses a 10 stop neutral density filter to take an image from average, to dynamic. The filter basically just blocks light allowing you to make longer exposures. In this city skyline shot it changes how the clouds appear in the final image.

Filter mentioned in the video:

  • B+W 10 stop neutral density filter

Other dPS articles about using ND filters:

  • Polarizing and Neutral Density Filters: Essentials for Landscape Photography
  • High Speed Sync Versus a Neutral Density Filter to Overcome Bright Sunlight in Portraits
  • How to do Dreamy Landscape Photography with a Neutral Density Filter
  • 7 Tips to Help Improve Your Seascape Photos by Controlling the Waves
  • Step-by-step Guide to Long Exposure Photography

The post Using a 10 Stop Neutral Density Filter to add Drama to the Sky by Darlene Hildebrandt appeared first on Digital Photography School.


Digital Photography School

 
Comments Off on Using a 10 Stop Neutral Density Filter to add Drama to the Sky

Posted in Photography


High Speed Sync Versus a Neutral Density Filter to Overcome Bright Sunlight in Portraits

11 Sep

ND3

For several years now I have used high speed sync (HSS) in order to light portraits in full sunlight at a wide aperture. If you’re unfamiliar with HSS, it allows you to shoot at shutter speeds that are higher than the native sync speed of your camera (usually 1/200 or 1/250 of a second, read your camera and flash manual to find yours) while still using speedlights. The reason this ability is so enticing is that you can shoot flash-lit images at wide open apertures in full sunlight, allowing for a shallow depth of field. Normally if you were using a flash, your maximum shutter speed would be at 1/200 or slower, meaning that you would need to close your aperture down in order to get a proper exposure in the sun.

ApertureOnly

Raw image shot at f/29

How HSS works is that the flash will begin pulsing light, just before the shutter opens, since the exposure is so short. The problem with this is that much of the output of the light is lost in the pulsing process, meaning that you need more flash units to achieve a decent output. For example, when I am shooting at 1/8000th of a second, I need to combine four flashes, on one stand, in order to light a subject that is about five feet away. And that is without any modifiers, like an umbrella or soft box. The other issue with HSS is that not just any flash and trigger system will do the trick. You need to have gear that will communicate information from the camera to the flash.

A couple systems that can do that are the PocketWizard Flex TT5 and Mini TT1, or the RadioPopper PX system. Since most photographers don’t already own one of these triggers systems, this means starting from scratch, which isn’t cheap. I personally opted for the RadioPopper system, since the PocketWizard Flex system for Canon was super glitchy. The RadioPopper system wasn’t perfect either. Just the amount of batteries alone, for four Canon Speedlites with triggers, including a ST-E2 transmitter for the camera, required 27 batteries. Even though they were mostly all rechargeable (the ST-E2 required the hard to find 2CR5 battery), imagine trying to troubleshoot a misfire. Did the batteries need changed in one of the transceivers or was the speedlite misaligned, obscuring the sensor? Or imagine that one of the speedlites’ batteries may be slightly more drained than another, causing only three of four lights to fire. This made the overall exposure fluctuate with every frame.

HSS1

Raw image unlit

HSS2

Raw image, 1/8000 @ f/2.8

I recently decided to compare HSS against using a variable neutral density (ND) filter. ND filters screw on to your lens and cut down the light that hits the sensor, thus allowing for a wider aperture in bright light. This allowed my shutter speed to stay at or below the sync speed cutoff, allowing the full strength of the Speedlite to light my subject. This meant that I wouldn’t need to transmit ETTL information (sell the RadioPoppers) and it meant that I would need fewer Speedlites (less batteries).

After setting my ISO as low as it would go (50), my shutter speed as high as was allowed (1/200th on the Canon 5D MarkII), and my Speedlites at their full output, I dialled down the variable ND until the ambient light perfectly balanced with the light from the flash.

ND1

Raw image unlit

ND2

Raw image, 1/200 @ f/4

Some people have pointed out that there could be the issue of a color cast with certain brands of ND filters. I have not experienced any issues with the ProMaster brand. However, it’s important to keep in mind that if you are shooting directly in to the sun, there will likely be glare in your image, causing a possible color cast or the image to appear washed out.

Note that this experiment was done using Canon 430EX Speedlites with RadioPopper PX triggers. I’ve since sold them all, opting for the cheaper, sturdier and more powerful LumoPro LP180 with PocketWizard PlusX triggers. Now with one bare bulb flash, and a variable ND filter, I can effectively cut the ambient light while fully lighting a subject at f/1.4 in full sunlight.

The post High Speed Sync Versus a Neutral Density Filter to Overcome Bright Sunlight in Portraits by Nick Fancher appeared first on Digital Photography School.


Digital Photography School

 
Comments Off on High Speed Sync Versus a Neutral Density Filter to Overcome Bright Sunlight in Portraits

Posted in Photography


Epson launches A3+ SC-P600 printer with ‘industry’s highest black density’

06 Sep

Epson has announced a new A3+ desktop inkjet printer aimed at the professional and semi-professional photographer that it claims is capable of producing a maximum black density of 2.8. According to Epson this beats all competitors’ A3+ machines that use 6 or more inks. The SureColor SC-P600 is part of Epson’s plan to introduce ten new professional printers to the market under the ‘Sure’ brand by 2016, and is the first SureColor model to be aimed at the photo market. Click through to read more.

Articles: Digital Photography Review (dpreview.com)

 
Comments Off on Epson launches A3+ SC-P600 printer with ‘industry’s highest black density’

Posted in Uncategorized


How to do Dreamy Landscape Photography with a Neutral Density Filter

18 Apr
Neutral density filter 01

16mm lens, ISO 100, f/13, 2 second exposure

Perhaps one of the most overlooked and undervalued tools you can own as a photographer is a Neutral Density filter (ND Filter) or Graduated ND Filter. In fact, if photography is considered painting with light then a ND filter would be considered the brush tip. You see, different paint brush tips can be used to regulate, if you will, the amount of paint you apply with each stroke – just like different Neutral Density or Graduated ND filters can be used to regulate the amount of light you allow to enter your camera.

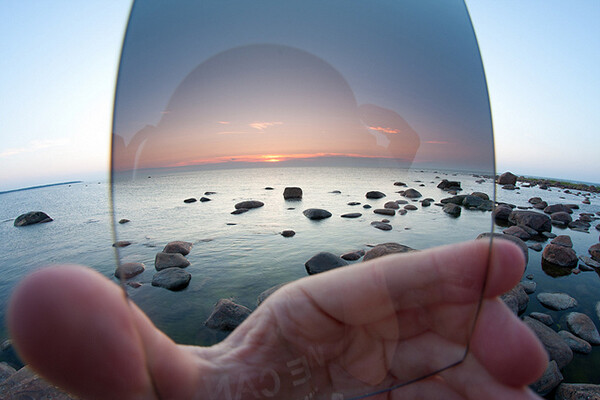
What is a Neutral Density Filter?

A Neutral Density filter reduces the intensity of all wavelengths or colors of light equally. That’s just a fancy way of saying it lets less light into your camera. They come in different intensities and styles. One such style is the Graduated Neutral Density filter which blocks light on half of the filter, and gradually transitions to the other half which is clear.

neutral-density-filter-07

Same scene as above without the Graduated Neutral Density Filter. Notice however that it is the same exposure – 16mm lens, ISO 100, f/13, 2 seconds

Mastering the ND Filter or Graduated Neutral Density filter does not take a degree from Hogwarts School of Witchcraft (though it couldn’t hurt). Below I’ll show you the dynamic photographs you are able to capture with the proper tools and then I’ll show you a technique to replicate the ND filter in the off chance that you don’t already own one, or can’t afford one due to the fiscal restraints your significant other has put in place to reign in your “hobby budget”. Remember, there is often more than one way to achieve the desired results in photography.

The neutral density filter is probably best recognized by its ability to slow your camera’s shutter speed to the point that fast moving water looks calm and silky.

Neutral density filter 02

23mm lens, ISO 200, f/16, 2.3 seconds

Anytime you are working with slow shutter speeds you need to be careful of camera shake so it’s always recommended that you use a tripod and either a remote shutter release, or set the self-timer. Depending on the neutral density filter you use, you may be leaving your shutter open for many minutes at a time. Shooting in RAW is highly recommended as most ND filters leave a color cast on your photograph and you’ll want the flexibility to fine-tune your white balance in post processing.

The Difference

Neutral density filter 03

26mm lens, ISO 100, f/18, 25 seconds

The above photograph was taken with a 10 stop neutral density filter in order to enhance the reflections on the water. The ND filter slows the shutter speed significantly allowing the water to look like glass. This is a more subtle example than the first photograph, but either way the end result is more unique than what you’d be able to do without it.

Think Outside the Box

Neutral density filter 04

16mm lens, ISO 100, f/16, 0.6 second

By now, if you’re a regular reader, you’ll have learned that there is more than one way to photograph a subject or scene. There are many articles that talk about the harsh light during the afternoon – the neutral density filter tames that light and allows you to create some really interesting photography. The shot above was also taken with a 10 stop neutral density filter, on a very bright day. The ND filter allowed me to slow the shutter speed just enough to blur the couple who walked in front of me. The end result ended up being one of my favorite shots that day.

Fine Art

Neutral density filter 05

16mm lens, ISO 3200, f/4, 30 seconds

Fine art photography is created within accordance of your own vision as the artist photographer. Sound vague? It is, but that’s the great thing about fine art, you can express yourself through your photography without following anyones rules, not even your own. The photograph above is actually classified as Intentional Camera Shake (or ICM) and it’s created by moving your camera while the shutter is open. I used a 6 stop neutral density filter for this shot and panned the camera to the left, and then back to the right while the shutter was open. If you are new to Intentional Camera Shake, the ND filter will give you more time with the shutter open in order to make deliberate movements.

What if You Don’t Have a Neutral Density Filter?

If you don’t already have a neutral density filter, but you’d like to improve the look of your photographs right now, there is a little trick you can tuck away in the recesses of your mind for the next time you’re out and about. Remember how your shutter speed and aperture are so closely related? Well, you can slow your shutter speed enough to make choppy water look smooth even without a neutral density filter by making a couple of adjustments.

Note:  I’m going to recommend that you to close your aperture (smaller f-number) to the narrowest setting your lens will allow and you must be aware of the trade off. When you shoot with the smallest aperture your lens allows, you may cause lens diffraction. Lens diffraction is where your images will be less sharp due to light disbursement when passing through the small aperture opening of your lens. This is the tradeoff when trying to replicate the effects of a neutral density filter without having the actual filter.

For this example we are going to talk about fast moving water, the Virgin River to be precise. The photo below was taken at Zion National Park in rather bright conditions. The brighter the scene, the harder it will be to use this technique. In order to smooth the water you need to slow your shutter speed, right? Right. In order to slow your shutter speed without overexposing the image you need to compensate by reducing the amount of light that enters the camera another way. Opening your aperture (smaller f-number) lets more light in, while closing your aperture (larger f-number) will reduce the light, so we must close the aperture.

Neutral density filter 06

34mm lens, ISO 100, f/22, 1.3 seconds – no filter

Close the aperture as far as you can, and make sure your ISO is as low as possible as well. Slow your shutter speed (if you are shooting in aperture priority mode the shutter speed will adjust automatically). Be sure to use a tripod or you’ll have blurry photographs. You will want a shutter speed around 1/4th to 1.3 seconds.

Note: this will be pretty much impossible if you’re in full bright sunlight as the “Sunny f/16 rule” will apply and best you can do without a filter is 1/50th at f/22. So you’d need at least a 3 stop ND filter to slow down more than that, 6 stop would be even better in that situation. 

Finally

Remember, not all neutral density filters are created equally and the glass you put in front of your cameras sensor will directly impact the image quality of the photographs you take. You should strive for the best quality you can afford. The best ND filters can be purchased for $ 50-$ 200+ depending on the size and materials.

When shopping for a neutral density filter I’d recommend purchasing the screw on type to fit the size of your largest lens (the size of filter you need will be written on the lens with a little circle with a line through it next to it, and inside the lens cap). You will save yourself money if you stick with the largest lens size, as you can purchase cheap metal adapters, (called step down rings) generally less than $ 10, to accommodate your smaller lenses.

Let me leave you with this final tip. Your camera lets light in through the lens (and sometimes leakage around the lens) as well as through the viewfinder. When you shoot with fast shutter speeds this is not noticeable but when shooting with longer exposure times you’ll find that the light that comes through the viewfinder will cause brown areas to pollute your image. Cover your viewfinder when using a neutral density filter and you’ll eliminate this phenomenon. Enjoy.

Check out the newest dPS ebook – Loving Landscapes A guide to landscape photography workflow and post-production – a brand new dPS ebook by the authors of Living Landscapes

The post How to do Dreamy Landscape Photography with a Neutral Density Filter by John Barbiaux appeared first on Digital Photography School.


Digital Photography School

 
Comments Off on How to do Dreamy Landscape Photography with a Neutral Density Filter

Posted in Photography


Polarizing and Neutral Density Filters: Essentials for Landscape Photography

24 Oct

In landscape photography, just as in portraits, fashion, products, or any other subject matter, accurate color capture is crucial. What makes it so much more difficult with landscapes, however, is the wider disparity in dynamic range, not only between foreground and background elements, but primarily between the upper and lower halves of the frame– between the earth and the sky. If you are into shooting landscapes, overcoming this hurdle will require you to have one of two filters (if not both) in your arsenal, even if you don’t use filters in any of your other photography.

Polarizing Filter

Polarizing filters– sometimes called the secret weapon of professional landscape photographers– create richer, more vivid colors. The filter pulls double duty by (1) cutting down on reflections from bright surfaces like water and rocks, and (2) adding rich blues to skies by darkening them and increasing the color and tonal saturation throughout the frame. Polarizing filters are most effective when shooting at a 90-degree angle to the sun. It will therefore be least effective when the sun is either in front of or behind you. Polarizing filters will also enhance clouds, but you have you to be careful with your lens choice. Just like you can overdo it in post production, it’s quite possible to overdo it in-camera if you use a polarizing filter on a super-wide-angle lens. The result will be uneven shades of blue in an over-saturated sky.

Without a polarizing filter

Without a polarizing filter

With a polarizing filter

With a polarizing filter

Neutral Density Filter

Neutral density gradient filters help balance the exposure between the ground and sky to capture a range of exposure that the camera cannot possibly handle on its own. If you expose for the ground, you’ll get a gray or white washed-out sky. Exposing for those awesome blues and soft, billowy clouds, on the other hand, will make the ground so dark you’ll lose much of the detail you set out to capture in the first place.

A wide view of a hand-held graduated neutral density filter illustrates how valuable it is to capturing accurate colors in landscape photography.

A wide view of a hand-held graduated neutral density filter illustrates how valuable it is in capturing accurate colors in landscape photography.

The filter itself is dark at the top, completely clear at the bottom, and essentially shades of gray in between. Available in two varieties, the circular version attaches to the front of the lens like any other traditional filter. The other type is a square or rectangular filter that you hand-hold in front of your lens. Both work the same way, darkening the sky to avoid blowouts, while leaving the ground untouched and unfiltered. It’s a seamless transition that ensures proper exposure throughout the frame– making sure you get vibrant, saturated, and (most importantly) accurate colors in all of your landscape shots.

Neutral Density Photo Credit: Flickr Creative Commons User Kain Kalju.

Post originally from: Digital Photography Tips.

Check out our more Photography Tips at Photography Tips for Beginners, Portrait Photography Tips and Wedding Photography Tips.

Polarizing and Neutral Density Filters: Essentials for Landscape Photography

The post Polarizing and Neutral Density Filters: Essentials for Landscape Photography by Jeff Guyer appeared first on Digital Photography School.


Digital Photography School

 
Comments Off on Polarizing and Neutral Density Filters: Essentials for Landscape Photography

Posted in Photography


Kenko-Tokina launches NDX variable neutral density filter

08 Aug

Kenko-Tokina has announced a variable neutral density (ND) filter that can be adjusted fro ND2.5 to ND1000. The Kenko NDX filter can darken the scene by anywhere from 1.3 to 10 EV. The filter allows the use of wide apertures while keeping the correct exposure within the shutter speed range of your camera, or of very long shutter times to emphasise motion. The company suggests its use for shooting video with shallow depth-of-field, for instance. Its variable nature allows the amount of filtration to be reduced for focusing, then increased to the desired amount, without having to remove the filter. The filters can vignette when used with lenses wider than 28mm equivalent and are available in 77mm and 82mm filter thread sizes.
News: Digital Photography Review (dpreview.com)

 
Comments Off on Kenko-Tokina launches NDX variable neutral density filter

Posted in Uncategorized