RSS
 

Posts Tagged ‘Create’

How to Create a Kaleidoscope and Make Unique Abstract Images

22 Apr

Struggling to remain creative

I’ve recently been struggling to shoot creative images and found myself in a rut battling to see things with fresh eyes. As I needed to come up with a topic for my next article (this one!), I decided to take this as an opportunity to experiment and come up with some new ways to shoot abstract images.

How to Create a Kaleidoscope and Make Unique Abstract Images

Here’s one of the images I took using the kaleidoscope I made. I processed this image in Analog Efex.

Inspiration can come from anywhere

I decided to focus on abstract images since they seem to be speaking to me lately. The challenge became to create unique abstracts and have fun at the same time. Well, I happened to come across this video on the web. I was looking for a craft to create with my son, and the idea sprang from there.

The Construction Details

How to Create a Kaleidoscope and Make Unique Abstract Images

Here’s the finished Kaleidoscope. It’s a pretty simple design.

I decided to adapt this idea and create something I could use with my DSLR. I went to my local home renovation store purchased a mirror and had them cut it into three sections. My mirrors are 16cm wide by 31cm long. I chose this size so that my wide angle lens could fit inside the kaleidoscope opening. I didn’t want any of the outer edge included in my images.

Clear packing tape was used to attach the mirrors forming a triangle. I then taped three pieces of cardboard around the outside of the mirrors. This was done to protect my hands from the sharp edges of the glass.

How to Create a Kaleidoscope and Make Unique Abstract Images

Here’s a top view. You can see that it was a pretty rough tape job.

You could certainly choose to attach more mirrors together if you want. The important thing to remember is that you always want to use an uneven number of mirrors so that the shape is more conducive to creating abstracts. The look of the image you shoot will change with the size and number the mirrors you use. Have fun and experiment.

How to Create a Kaleidoscope and Make Unique Abstract Images

I used both my Canon 5D with a wide angle lens and my phone. Note that this technique doesn’t work with a telephoto lens.

Now it’s time to have fun and play

After constructing my kaleidoscope, it was time to start experimenting. I immediately thought of trying to photograph some flowers. My idea was to place a bright bloom on a black background. I was curious about what types of images I could create.

Unfortunately, Mother Nature wouldn’t cooperate. We had a massive snowstorm, and I was stuck in my house with no chance to purchase some flowers. So it was time to experiment with other items. I found some square pieces of felt sitting around my house and decided to try using them. Here are the results.

How to Create a Kaleidoscope and Make Unique Abstract Images

Here you can see how I set up the kaleidoscope with some pieces of felt underneath it.

How to Create a Kaleidoscope and Make Unique Abstract Images

I again took this image into Analog Efex for editing.

As you can see, my kaleidoscope created some rather interesting designs and shapes. It was a lot of fun to see what types of designs could be created. I used several different items in front of the mirrors. I tried fabric, tinfoil, camera lenses and even Lego toys.

People photos

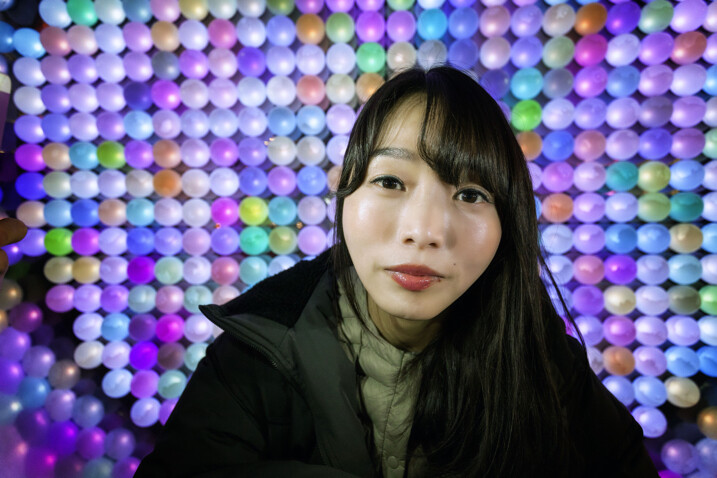
After experimenting with so many different materials, it was time to try it with people. My son was willing to have his photo taken. Here are the results. He spent a few minutes giggling at the images. It would be interesting to see what a larger kaleidoscope and mirrors might do to portraits like this.

How to Create a Kaleidoscope and Make Unique Abstract Images

It’s an interesting effect. My son loved messing around with it.

I then experimented with photos of a good friend. These images were shot through the kaleidoscope from images projected on my computer screen. They were taken from different Facebook photos. It was a lot of fun, and he was certainly entertained by the results as much as I was. I truly appreciate him allowing me to post the results here on the web. Thanks, Ali.

How to Create a Kaleidoscope and Make Unique Abstract Images

He was hesitant at first to let me post this but we had a lot of fun messing around with the image. There’s a little bit of banding from the computer screen but oh well we were just having fun.

Drawbacks of the experiment

One of the things I noticed as I shot was the very fuzzy and slightly darker reflections. That bothers me. Parts of the image that contained the original piece of fabric were much brighter and sharper than the reflections. I found the effect to be quite displeasing. So, I need to experiment more with the kaleidoscope to try and alleviate that.

Perhaps a light shining from above might change this effect, it is something I will consider for the future. As you can see from this experiment, I used a very rough and simple set up. It was put together quite quickly. In the future, it would be beneficial to try several different methods for positioning the kaleidoscope and my camera. You will note that I used both my DSLR and my cell phone for these shots. I used the Lightroom mobile App as it allowed me to use some pretty specific manual controls.

How to Create a Kaleidoscope and Make Unique Abstract Images

I used my phone for several of the shots.

Things learned from this experiment

This whole activity was very insightful. It was well worth the afternoon I spent creating and shooting. It has sparked my curiosity. As a result, I created a list of questions that can be used to further the project and inspire more creative shooting.

  1. What types of objects look best when shot with a kaleidoscope?
  2. How can post-processing change the look and feel of these abstract images?
  3. What would be the effect of a larger kaleidoscope?
  4. What would happen if I added much smaller sections of mirrors to a kaleidoscope?

There’s so much more that I can learn from this exercise. It feels like just the surface has been scratched. The use of mirrors for creating interesting abstracts is now on my list of projects. If you’ve experimented with different techniques, tell us about it. Share your experiments good or bad. There’s so much to learn. There’s also a lot of fun to be had during that experimentation. Perhaps as I perfect this technique, I will produce a further article that will contain my lessons learned. But for now, I hope my afternoon of tinkering will inspire you to try new ways of creating images.

How to Create a Kaleidoscope and Make Unique Abstract Images

This is a shot taken from my computer screen through the kaleidoscope.

How to Create a Kaleidoscope and Make Unique Abstract Images

I used black velvet and an old lens from my film camera for this shot. I think this one is my favorite images.

There’s so much to learn. There’s also a lot of fun to be had during the experimentation phase. Perhaps as I perfect this technique, I will produce a further article that will contain my lessons learned. But for now, I hope my afternoon of tinkering will inspire you to try new ways of creating images.

The post How to Create a Kaleidoscope and Make Unique Abstract Images by Erin Fitzgibbon appeared first on Digital Photography School.


Digital Photography School

 
Comments Off on How to Create a Kaleidoscope and Make Unique Abstract Images

Posted in Photography


How to Create a Retro Faded Look Using Lightroom or Photoshop

15 Apr

You’ve probably seen images floating around because it’s popular these days, you know, the ones with the retro faded look. It’s pretty popular with the instagram and wedding photography crowd. It’s not my fancy but I am all about empowering photographers to shoot what they have in mind. If that happens to be retro-faded here’s how to achieve that look in Lightroom and Photoshop.

How to Create a Retro Faded Look in Lightroom and Photoshop

Why this look is so popular

Here’s why I believe this look is very popular, it’s a quick and easy way to de-digitalize digital images. When you click that shutter release button, you get a straight, clinical, boring representation of reality. The faded retro look makes the images seem dreamy and ethereal because the colors are muted. Since it’s easy to do and already built into apps like Instagram, you have a recipe for popularity.

How to Create a Retro Faded Look in Lightroom and Photoshop

How to get this look using Lightroom

In Lightroom go ahead and process the image the way you want first. Once you are done, go to the Develop Module and scroll down until you reach the Tone Curves panel. Click the button on the bottom right.

How to Create a Retro Faded Look in Lightroom and Photoshop

First, click the button on the bottom right. Next, click on the little circle on the bottom left of the graph and drag it up. The higher you put it, the more faded the look. Adjust to your tastes and you’re done!

What you are essentially doing is putting a cap on how dark the black pixels will be. Imagine you had 3 groups of students with black, gray, and white shirts. The darkest shirt is black. But if you tell the group of students in black to become grey, the darkest shirt will be grey. It’s the same principle here, you are taking pixels that would normally be black to become dark gray.

How to get this look using Photoshop

In Photoshop the principle is the same. After you have processed the image, go in Image>Adjustments>Levels. You could also alternatively make an adjustment layer to do non-destructive edits by going to Layer>Adjustment Layer>Levels.

How to Create a Retro Faded Look in Lightroom and Photoshop

Drag the black output adjustment to the right to taste and you are done!

Examples

So to recap, take your straight image:

How to Create a Retro Faded Look in Lightroom and Photoshop

Straight original image.

Post-process to taste:

How to Create a Retro Faded Look in Lightroom and Photoshop

Post-processed with basic adjustments.

Then edit the blacks using Levels/Curves:

How to Create a Retro Faded Look in Lightroom and Photoshop

Black level lowered using Levels or Curves.

Further customization

Just like for any new technique, the trick is in experimenting, mixing, and finding your own favorite style. You can add some grain in Lightroom (My favorite, de-facto settings are 50-50-50 for Amount, size, and roughness) but you can also play around with the colors of the photograph for an added effect.

Under the Develop Module, you will find Split Toning in the right-side panel.

How to Create a Retro Faded Look in Lightroom and Photoshop

Split-toning adjustment panel.

The top is where you color the highlights of your image, the saturation controls how strong that color will be. The bottom is where you select the color for your shadows and saturation does the same as above. The Balance slider adjusts which direction you want the colors to lean more toward. If you push that slider to the right, the image will lean more towards the color you have chosen for highlights. If you push the slider left, the overall image will lean more towards the colors selected for the shadows. It’s usually best to keep it at 0 (in the middle) and play around with it after selecting the colors.

Starting points and examples

I personally keep my saturation levels around 10 for Highlights and Shadows because too much saturation will make the image go completely one color. Color images, I find 35 maximum saturation fit my tastes. Here are some results:

How to Create a Retro Faded Look in Lightroom and Photoshop

Playing with split-toning to add to the retro look. Top left is the original faded image.
Top right: Highlights color 299, Saturation at 25, Shadows at 99 and Saturation 31 (Balance at 0)
Bottom right: Highlights color 101, Saturation at 25, Shadows at 47 and Saturation 31 (Balance at 0)
Bottom left: Highlights color 30, Saturation at 25, Shadows at 253 and Saturation 31 (Balance at 0)

Yes, that is indeed how you get a cross-processed look in Lightroom. It fits in well with the overall retro faded look.

Conclusion

That’s it. It’s pretty easy to do if you ask me. It probably takes a bit more time (and you have more control) than using Instagram filters but it’s worth the time to learn if the look resonates with you. You will quickly learn “the numbers” that you like most and be able to be consistent throughout your images. Be yourself, stay focused and keep on shooting.

Please sure your faded retro look images in the comments below and tell us how you achieved it.

The post How to Create a Retro Faded Look Using Lightroom or Photoshop by Olivier Duong appeared first on Digital Photography School.


Digital Photography School

 
Comments Off on How to Create a Retro Faded Look Using Lightroom or Photoshop

Posted in Photography


How to Create Portraits with a Black Background

07 Apr

Who does not love a crisp, deep black background for a portrait? You can achieve this with the application of just two ideas, and just a little post-processing too.

black background

We are talking about a couple of techy things in hopefully, a non-techy way. These two ideas will give you tips for how to make black backgrounds for your portraits.

No calculations necessary

As an erstwhile teacher of Mathematics, I should not apologize for numbers, should I? There is quite a lot of Mathematics in photography. However, you may be pleased to know that I think you can achieve everything, without thinking much beyond the basics. If you have a broad understanding of the concepts you will be absolutely fine.

These techniques are not just applicable to portraits.

Two Tips for Making Portraits with a Black Background

Banana palm leaf

Firstly, please think of stops of light as units. Using the term stop is like saying that something weighs 12 kilograms or that it is 10 miles away. As photographers, we tend to talk about stops and stopping down, but it is just as valid to say units. The thing is not to get bogged down in technicalities, the term stop is only a unit of measure.

The falling off of the light

The first concept might be stated simply as light falls off rapidly. Fleshing that out just a little, the amount of light available decreases greatly as you move away from the source of the light. But we are photographers and we do tend to think that a picture is worth a thousand words, so look at the diagram below:

In the example above, one unit of light arrives at our subject, one meter away from the window. If she moves two meters away, just one-quarter of a unit of light will now be arriving at her. Then, if she moves three meters away from the window, which is the source of light, there will be only one-ninth of a unit of light. The available light disappears very quickly.

It might suit some if I illustrate the same point with a graph (which, in the past, I have tended to introduce to students as a Mathematical picture).

Two Tips for Making Portraits with a Black Background

A mathematical picture tells a story?

How does that affect the background?

When trying to achieve a black background, you are interested in the amount of light hitting it. Again, pictures tell the story best. Both these photos had only white balance and very small adjustments to balance exposure done in post-processing.

Two Tips for Making Portraits with a Black Background

Not happy

The image on the left has the background close to the subject, about three feet (one meter) behind her. Then, on the right, the white background is about thirteen feet (four meters) back. You do not need me to do calculations, quote some nice formulae, to prove what is happening above. It is obvious, isn’t it?

In these photographs, the subject hasn’t moved and the exposure does not change. The background moves farther away, and the amount of light reaching it reduces rapidly. Even when the background is white, rather than the desired black, it gets much darker the greater the distance it is positioned from the light source.

In the practical world, there may be limits to what you can do, perhaps by the shooting space you have available. However, the message is simple, push the background as far away as possible, and even a seemingly small distance will help make it appear darker.

Two Tips for Making Portraits with a Black Background

Young Filipino.

The background for this photograph was the inside of a room. The teenage Filipino boy was standing in a doorway, getting full benefit from the light source. The background, the far wall of the room, might be only eight feet (just over two meters) away, but it is getting very close to the blackest of blacks, isn’t it?

Combine this reasonably straightforward science, the way light falls away, with the science of the dynamic range of camera sensors and you will be a long way towards achieving black backgrounds for your portraits.

Dynamic Range

Please understand that the numbers I am using here are approximate. They do vary from camera to camera, and from the conclusion given by one source to another. But I am going for using what is easy, what is really needed to make the point so you understand.

Dynamic range is the measurement from the darkest to the lightest item which can be seen. Your camera has a great deal less dynamic range than the human eye. It is much less capable of seeing into dark and light areas at the same time. That is why, when your camera produces an image with blown out highlights, and blocked up shadows. But your eye can still see the detail of a bird, which sat in bright sunlight, and you can also see the black dog which sat in the darkest shadows. Your camera simply cannot see both at the same time.

Two Tips for Making Portraits with a Black Background

Light the subject, not the background

It might be stating the obvious, but it needs to be said – the first step to getting a black background is to use a black backdrop. Then, if you can get the subject lit more brightly than the background, that will push the background into the underexposed, dark areas, outside the camera’s more limited dynamic range.

Portrait setup

If you can throw some extra light onto the subject and have them exposed correctly, in the brighter end of the dynamic range, that will help to send the rest of the image into darkness. The brightly lit subject should be properly exposed. Then there is a good chance that the background will be outside of the part of the dynamic range for which you are exposing. It will, at the very least, be heading towards black.

Portrait setup

Here is the setup for a portrait, with only natural light hitting the subject. It is not as obvious in this reduced jpeg as in the original RAW file, but the background is rather muddy, certainly getting towards black, but not the pure black you are looking for. In the original, you can clearly see folds in the cloth.

Two Tips for Making Portraits with a Black Background

Still not happy – most people would describe the background as black, but it is not the blackest of blacks, is it?

Here is the same set up again, with some extra light on the subject.

black background

I think the point is illustrated. Is it clear that the background is worthy of the classic description “inky”? Other things could be improved with a few post-processing tweaks. They are presented to show the backgrounds, not as finished portraits, and I’ve only changed color balance and tried to balance the exposures.

Use the natural law (it is called the Inverse Square Law) which dictates that light falls away rapidly from the source, and the limited dynamic range of your camera and you are a long way to getting a good, deep black, background. Next, you can help complete it further in post-processing.

Post-processing

I am referring to Lightroom here, but there are equivalent tools in other software.

Two Tips for Making Portraits with a Black Background

A bit of a muddy RAW file.

This is the photograph from the top of the article, as it first appeared out of the camera. You do not want to hear my excuses, but I did not get it as completely right in-camera as I would normally like to do. However, it turns out that is lucky, as it makes a good example for a post-processing in this case. Because the file was produced with the application of the ideas talked about above, it is very workable.

Most of the way to being processed in just a very few steps.

Edit intuitively

One of the best bits of advice I ever received, which I sometimes manage to apply, is to ignore the numbers. You should move those sliders till they give the look which you think suits the picture. Look at the photo and see what happens, take a breath, pause for a moment, and make some judgment as to whether it gives you what you’re looking for. Often this involves going a bit too far (whether it be with sharpening, or exposure, shadows, or whatever) and then dialing back a little.

I managed to do just that with this image. It makes me smile when I look at it now, a few weeks later, as I am slightly surprised at how far I went. I adjusted the color balance, brushed some negative clarity onto mom’s face, rotated the image counter-clockwise a little, but the exposure was not adjusted at all as the faces looked fine to me. Then I started pushing the sliders around.

Push the limits

It was a bit of a surprise to see just how far towards the negative I had moved the contrast slider. This may be counter-intuitive when you are trying to make parts of the image darker, but because we have got a reasonably well-produced file, we can get away with reducing the contrast, and this has the pleasing effect of lightening the hair and separating it from the background.

Of most significance to this exercise is the shadows slider which was moved in the opposite direction to usual. It was moved to the negative, to block up the shadows, rather than to the right, to try to pull out some detail.

I was also a bit surprised at how far I moved the black point. It seemed to work, though. As I say, I think it often works best if you move the sliders, without too much concern for the numbers they represent. Try to look at each photograph individually, rather than apply some sort of formula.

The final image had only a couple more, tiny, detailed tweaks.

black background

Extra Tips

A couple of other things.

How you decide to throw some light onto the subject of the photograph is for other articles. There are many other great Digital Photography School articles, which offer a huge number of suggestions for illuminating subjects. I thought you should know that I do very much like my LEDs, as I like being able to see the light. I also use reflectors. However, the first source of light in all the photographs above is natural light. You do not necessarily need a fancy kit.

In respect of the black cloth, most advice will suggest that you buy black velvet. I am sure it does an excellent job of absorbing light from all directions. But it is expensive, and with careful technique, it seems to me that another dark, non-shiny cloth can do the job too. One thing to pay a little attention to is making sure that you stretch the background cloth out a little. Try to get it as smooth and even as possible, with no creases, as any imperfections are liable to catch the light.

black background

Conclusion

The power of photography! 25 years after the event, I paid a bit of homage to Annie Leibowitz’s photograph of Demi Moore. I was not trying to replicate it as such, just nod in the photograph’s direction. But I did manage to get a really black background, didn’t I? Please give it a go yourself.

Share your images and questions in the comments below. I’m happy to try to help further if I can.

The post How to Create Portraits with a Black Background by Richard Messsenger appeared first on Digital Photography School.


Digital Photography School

 
Comments Off on How to Create Portraits with a Black Background

Posted in Photography


How to Create a Potluck Photography Party

07 Apr

It’s always great to meet up with friends, and as photographers, it’s great to meet with fellow photographers. A lot of people’s photography style is to go it alone, which can be good for many things. But, even if you like to photograph alone there are times when meeting other photographers, and bouncing ideas off them will help you. Those meetings are often in the form of photo walks, where most people photograph by themselves. A progression of this type of photography meet up is the potluck photography party.

As you probably know potluck parties are about food. This is such a great idea that we photographers should also use it too. So what does a photography potluck party look like? It’s all about collaborating as a team, and trying everyone’s stuff!

How to Create a Potluck Photography Party

It’s great to collaborate with others and work on photos together. Here two cell phones are used as light sources.

What is a potluck photography party?

The idea of a potluck party is you bring different food dishes to a party, so how can this be applied to photography? Well if you substitute food dishes for photographic equipment then you have the basis of how this idea works. The equipment each participant can bring with them is as follows.

  1. A camera body: This can be a DSLR, a point and shoot camera, or a Smartphone.
  2. A camera lens: This is applicable to those bringing a camera body with interchangeable lenses. Bring just one lens with you to the photography potluck party.
  3. Additional equipment: You can bring one other piece of equipment with you. This can be anything from a tripod, to an additional lens, or even a glass ball.
How to Create a Potluck Photography Party

The gear used in a potluck photography party.

The above parameters form part of a creative exercise, one where the equipment you have is deliberately constrained. In order to realize more complex photography ideas, collaboration and sharing of equipment will be necessary. If the group size is around five, hope at least one person brings a tripod, but not everyone.

If you like to take portraits then equipment for off-camera flash would be great, and working in a team allows the stronger photographers to help those learning this type of photography. The equipment could be as simple as an umbrella that could be used as a prop with a model, or an interesting way of framing a photo. The last variable is where you really should look to push that creative potential, another good piece of additional equipment is the Smartphone!

How to Create a Potluck Photography Party

This photo shows how the flashlight from Smartphones can be used to light the face in a portrait.

Will you go blind?

No, we’re not talking about blind dates here, but equipment. Will you organize your event so that nobody knows what the others will bring? This is the purest form of a potluck photography party, but sometimes you need to engineer what everyone brings a little. Think of those potluck parties where everyone brought cheesecake, that would be awesome but didn’t you want a salad as well?

Letting other people know what you’ll bring can give you a much more balanced set of equipment, and with that comes more creative photos. So the type of potluck photography party you decide to have is important. There are three main types to choose from, they are:

  1. Blind: In this type of party, nobody knows what others will bring, so results will vary. This is the purest form of a potluck party, you will have to use the tools given to you and come up with the best results.
  2. Early bird: In this type of event, you share with other people what you’ll bring through social media or e-mail. This means those people deciding what equipment to bring later can choose based on what other people say they’ll be bringing.
  3. Listed: This form of potluck is highly engineered as you list the items people can bring. In this case, a list is posted on your event page or e-mail invitation. Once people can see the list they can choose which item they’ll bring, and once taken nobody else can bring that same thing. This list may only apply to item #3, the additional equipment.
How to Create a Potluck Photography Party

In this photo, the phone is used to create a second image, with the Smartphone being used creatively.

Make an event on social media

The best way to share your potluck photography party is through social media, with Facebook the best placed to deliver on this. Creating an event on Facebook is a straightforward task. To grow the potluck photography community, and share the results of your party, joining this Facebook group is encouraged. In addition to the resource of this article, you’d be welcome to use this document to explain the concept to other people.

Why not create some country, or city-specific, potluck photography party groups, and host your events through these groups? Instagram is also a great platform to promote your event. Create a new account just for the potluck party photos.

How to Create a Potluck Photography Party

You don’t have to collaborate, some photos don’t need it. In this photo, simple composition and moment of capture were used.

Sharing your equipment

The collaborative nature of this type of event means you’ll be sharing equipment with others. You’re not likely to share your camera body, but other equipment can be shared. If you have a camera body that’s compatible with other people’s lenses, why not see if you can try them out? This way you can increase the pool of lenses available for your shot.

Tripods, Smartphones, and off-camera strobes can be used by almost everyone, regardless of the camera. Take care with speedlights, these are specific to the camera brand they’re designed for and may damage other cameras. Using other people’s expensive equipment does carry some risk, so asking people to sign an agreement to replace damaged items is an option to consider.

How to Create a Potluck Photography Party

Some photographers carry so much gear, it looks like they’re checking in for a flight! Potluck photography parties aim to reduce how much each person carries, but by pooling gear, you still get to experiment.

The potluck photography party group

The idea with the party is that each person has a chance to create their own concept for a photo. In turn, you allow each photographer time to use the available equipment to make their concept happen.

You will need to split larger groups into several smaller groups of around five to seven people. The most sensible way to divide is by camera brand, this will make it easier for people to share lenses. If you have a large group finish the day with something social, where everyone can mix together.

How to Create a Potluck Photography Party

This is the group for a potluck photography party.

Share your potluck photography party experience!

The types of photos that can come out of these events can be conceptual or spontaneous. As with all meetups like this, it’s great to share the results with everyone after you have had an event. This will give you feedback on what you did and will give other people fresh ideas about how they could do something new.

If you go out and try a potluck photography party be sure to come back here and post your work, or a link to your Facebook event page. Those posting to Instagram can use #potluckphotographyparty and #PPP to share on that platform. So now all you have to do is go out and party!

How to Create a Potluck Photography Party

In this photo, no extra gear was needed, but collaborating with one of the other photographers who would model for the shot.

How to Create a Potluck Photography Party

In this photo, a Jinbei 600 flash unit, a pixelstick for the light painting, and a tripod for long exposure were used fro the items that were brought for the party.

How to Create a Potluck Photography Party

The most important thing about parties is to keep it fun and spontaneous!

The post How to Create a Potluck Photography Party by Simon Bond appeared first on Digital Photography School.


Digital Photography School

 
Comments Off on How to Create a Potluck Photography Party

Posted in Photography


Researchers create method for photorealistic Prisma-style effects

28 Mar

Popular app Prisma applies painting styles to photographs using neural networks, turning a snapshot into an artwork in the style of ‘The Scream,’ for example. But what if you could transfer photorealistic effects from one photo to another? Researchers at Cornell and Adobe have successfully demonstrated a method that will translate a variety of styles from a reference photo to another image, including things like lighting, time of day and weather.

Input image on the left, reference style image in the center, output image on the right. It’s not incredibly realistic-looking, but more realistic than your average Prisma treatment.

Images via Fujun Luan

This could open up a whole new world of possibilities for ‘lazy’ photo editing. Say you snapped a photo of a rock formation in the middle of the day, but you’d rather it had the orange glow of golden hour. With this method, you could apply the textures and colors of a reference style image, i.e. some other rock formation at sunset, to your own image.

This photo-style-transfer method augments the neural-style approach Prisma takes by constraining the colorspace of the transformation applied to the source image. Taking a content-aware approach and classifying features like sky and water in each image helps to avoid mismatched textures and distortions.

Advanced photographers would likely be wary of making such drastic edits to their photos. However, the technology might appeal to someone who wants to apply the effects of professional lighting to a badly lit photo of an interior, for example.

What do you think? Could this technology be useful to you? Let us know in the comments.

Articles: Digital Photography Review (dpreview.com)

 
Comments Off on Researchers create method for photorealistic Prisma-style effects

Posted in Uncategorized


How to Create Artistic Photos with a Magnifying Glass

23 Mar

A magnifying glass is a handy little tool, popular with intrepid detectives and bug collectors. As the name suggests, the convex lens produces a magnified image of an object, but it can also be used to make some unusual and eye-catching imagery. Pairing a photographic lens with a magnifying glass will probably not create a flawless alternative to a macro lens, but the unique properties of a handheld convex lens mean that there are endless combinations of optical effects to exploit.

How to Create Artistic Photos with a Magnifying Glass

What you will need:

  • DSLR camera
  • Magnifying glass
  • Subject to photograph
  • Cleaning cloth
  • Tripod

Getting Started

How to Create Artistic Photos with a Magnifying Glass

The first thing to remember when using this technique is that the glass in your average, run-of-the-mill magnifying glass will be of far lesser quality than that of the glass inside your camera. The nature of the cheaper quality glass lends a softening effect to an image so sharpening in post-production (using software like Photoshop or Camera Raw) will help to add a bit more definition to the photographs. But don’t worry if you aren’t getting pin-sharp precision, the softness can actually add to the image overall.

Using a tripod to photograph subjects through the lens of a magnifying glass is a good idea too. Without a tripod, camera shake will add another layer of difficulty to a process that can be slightly tricky at times. For the purpose of this tutorial, I’ve chosen flowers as my subject. They make good subjects for this technique because they are colorful, interesting and they don’t move around. Getting the hang of this technique on a static subject will save you a bit of frustration when moving onto more animate subject matter later

How to Create Artistic Photos with a Magnifying Glass

This leaf was photographed against a window with the afternoon sun pouring through from behind. The light illuminated the veins in the leaf and the magnifying glass helped capture the detail in its intricate fibers.

Magnification depends upon a magnifying glass’s distance relative to the subject or camera, so there are endless angles and distances to experiment with to create imagery with soft light and diffused bokeh-like effects.

Method

First, clean the glass of the magnifying glass with a tissue or cleaning cloth to avoid dust spots. Maneuver your camera up close to the subject. If you are using a zoom lens, zoom in as far as possible. Your autofocus will most likely get confused by the additional glass between the lens and the subject, so set your lens to manual focus instead.

Hold the magnifying glass over the front of the lens with your hand.  Notice that it will either make the subject appear bigger or just extremely out of focus. With one hand you will need to either adjust the camera focus manually or move the magnifying glass forward and backward between the camera and subject. Trying to find a sweet spot where part or all of the image looks focused can be tricky – but be open to how the magnifying glass alters the photograph. The results can often surprise you.

How to Create Artistic Photos with a Magnifying Glass

Keep in mind that the extra layer of glass will cut down the amount of light that reaches the camera sensor so you may have to adjust the exposure compensation, depending on the available light of your setup. Don’t forget to experiment with depth of field by adjusting the aperture as well. Taking control of the aperture will guide the viewer’s eye around the photograph. That can be crucial in more abstract images like these floral landscapes.

Experiment!

The best bit about this technique is that it rewards experimentation. Once you have a feel for photographing your subject through a magnifying glass, why not use two taped together for greater magnification? Or take a chance at photographing a friend or pet? Or why not try including the loop of the magnifying glass to create a framing effect? With even the slightest adjustment in angle or distance a magnifying glass can render some unique results. Take the time to experiment and have fun.

How to Create Artistic Photos with a Magnifying Glass

Experiment with black and white images to highlight shape and form.

How to Create Artistic Photos with a Magnifying Glass

Tape two magnifying glasses together for greater magnification.

How to Create Artistic Photos with a Magnifying Glass

Create unusual framing effects by incorporating the loop of the magnifying glass in your photograph.

How to Create Artistic Photos with a Magnifying Glass

How to Create Artistic Photos with a Magnifying Glass

How to Create Artistic Photos with a Magnifying Glass

After you get the hang of photographing still objects, why not move onto something more animated.

The post How to Create Artistic Photos with a Magnifying Glass by Megan Kennedy appeared first on Digital Photography School.


Digital Photography School

 
Comments Off on How to Create Artistic Photos with a Magnifying Glass

Posted in Photography


Rim Light – A Simple Way to Create Powerful Images with a Single Flash

22 Mar

In this article, I will introduce you to creating a rim light using a single flash. While not so common, it is extremely easy to put in place and will allow you to get very interesting and powerful images. To do this kind of photography you just need a flash with the ability to place it off camera. A welcome accessory, the only one you may need, is a light stand or tripod to easily keep the flash in place.

Rim Light - A Simple Way to Create Powerful Images with a Single Flash

Learning flash doesn’t have to be hard

If you are just getting started in portraiture, chances are you have been faced with the “flash versus natural light” dilemma, and you probably went with natural light. I find many amateur and beginning photographers are intimidated by lighting equipment because they think that in order to get something good, they have to use complicated setups where many pieces of equipment are required.

In my opinion, the problem with learning to use flash is that the easiest possible setup, i.e., a single flash used off-camera, is often presented only as a way to create a basic image that needs to be improved by adding more gear and by creating more complicated lighting setups. As if nobody would seriously use just one light. So, I can see why flash photography is intimidating.

If you are a beginner, you probably want to know how to use your single, entry level, flash and how to create images that will stand out from the gazillion of portraits out there.

googletag.cmd.push(function() {var gpt_slot = googletag.defineSlot( “/1005424/_dPSv5in-post-mobile(300×250)”, [300, 250], “pb-ruleset-mobile-ad-0” ).addService( googletag.pubads() );ruleset_mobile_slots.push( gpt_slot );});

googletag.cmd.push(function() {var gpt_slot = googletag.defineSlot( “/1005424/_dPSv5in-post-mobile(300×250)”, [300, 250], “pb-ruleset-desktop-ad-4” ).addService( googletag.pubads() );ruleset_desktop_slots.push( gpt_slot );});

Keep it simple

My solution was to forget about the magazine and fashion style portraits. I wanted to take advantage of the limitations of my single light setup to create strong and moody portraits by combining the hard light from the bare flash with a low-key style. Note; this style will better suit male models.

Rim lighting 01

Self-portrait using a single flash on my right, without any light modifiers.

By changing the output power and the zoom setting of the flash, you can get a more gentle and intimate portrait, like the one below.

Rim lighting 02

A single light setup can produce less punchy and contrasty images by changing the flash output power and the zoom settings.

Creating a rim light

This is all nice and good, but you can get a very different look by using a rim light. This kind of light highlights only the contours of the subject, and I love it.

Rim lighting 03

Rim light and low-key style; a powerful combination.

The setup is extremely simple. Just hide the flash right behind the model or the object, and point it back directly at the subject.

In practice, we could see the rim light as the opposite of a silhouette, where the subject is seen as a black shape against a brighter, often white, background. In the studio, the light setup for a silhouette is, in fact, the same of as that used to create a rim light, except that the flash is pointing at the background instead of at the subject.

Rim lighting 04

Self-portrait in silhouette.

Ideally, you want to have only the rim light in the scene and not record any ambient light. But this does not mean you have to work in a dark room. The only thing you need to be careful about with rim light setup is to ensure that the flash output power is such that the light does not spill over and around the subject edges. You want to have only the light running along the subject contour.

googletag.cmd.push(function() {var gpt_slot = googletag.defineSlot( “/1005424/_dPSv5in-post-mobile(300×250)”, [300, 250], “pb-ruleset-mobile-ad-1” ).addService( googletag.pubads() );ruleset_mobile_slots.push( gpt_slot );});

googletag.cmd.push(function() {var gpt_slot = googletag.defineSlot( “/1005424/_dPSv5in-post-mobile(300×250)”, [300, 250], “pb-ruleset-desktop-ad-5” ).addService( googletag.pubads() );ruleset_desktop_slots.push( gpt_slot );});

Rim Light - A Simple Way to Create Powerful Images with a Single Flash

It is all about that thin light running along the subject’s edges.

Refine it a little

If possible, the editing is even easier. Make sure that the blacks in your image are deep and the highlights are bright. Do this and you have pretty much done with the editing.

What I like about this technique is that the resulting photo has a mysterious look that captures the viewer’s imagination. I guess it has all to do with the “see/not see”.

If you like props, you can also use them with a rim light to better convey a message, like in the photo below.

Rim Light - A Simple Way to Create Powerful Images with a Single Flash

Addiction. Here I have allowed the light to spill a bit more, so as to light my hands and the mobile screen.

We all live, most of the time, with our noses inside a smartphone screen, somewhat unaware of the reality around us. That and a feeling of addiction is the message I tried to attach to the photo.

Adding emotion

Emotions can also be easily conveyed in an interesting way by using rim light. We had a new baby girl a few months ago, and a few weeks before the due date, I experimented with a rim light in the living room when my pregnant partner passed by. I decided to take the usual very cliché photo of the father kissing the belly of the mother. While kissing her baby bump, I had the vision of the sun rising from behind the Earth, seen from space and thought, “Use a rim light!”. This is the result:

Rim Light - A Simple Way to Create Powerful Images with a Single Flash

Rim light can change a cliché image into a very moody and interesting one.

googletag.cmd.push(function() {var gpt_slot = googletag.defineSlot( “/1005424/_dPSv5in-post-mobile(300×250)”, [300, 250], “pb-ruleset-mobile-ad-2” ).addService( googletag.pubads() );ruleset_mobile_slots.push( gpt_slot );});

googletag.cmd.push(function() {var gpt_slot = googletag.defineSlot( “/1005424/_dPSv5in-post-mobile(300×250)”, [300, 250], “pb-ruleset-desktop-ad-6” ).addService( googletag.pubads() );ruleset_desktop_slots.push( gpt_slot );});

I think this simple light setup transformed the same old same old photographic cliché into a much more powerful and interesting image.

Special effects

Finally, because the scene is backlit, an easy way to add interest is to include in the shot smoke or aerosols. Both will capture and scatter the light around, creating some interesting effects.

Rim Light - A Simple Way to Create Powerful Images with a Single FlashSince I do not smoke, I sprayed water around to make this self-portrait shot more interesting.

Finally, try to turn the model towards the light and allow the flash to light them a bit more for some interesting variations.

Rim Light - A Simple Way to Create Powerful Images with a Single FlashTurning the model to face the light can be an interesting variation on the theme.

To conclude, I hope I have given you some ideas to start playing with a single off-camera flash in a simple and non-intimidating way using a rim light. The bonus is creating some particular and interesting photos in the process.

googletag.cmd.push(function() {var gpt_slot = googletag.defineSlot( “/1005424/_dPSv5in-post-mobile(300×250)”, [300, 250], “pb-ruleset-mobile-ad-3” ).addService( googletag.pubads() );ruleset_mobile_slots.push( gpt_slot );});

googletag.cmd.push(function() {var gpt_slot = googletag.defineSlot( “/1005424/_dPSv5in-post-mobile(300×250)”, [300, 250], “pb-ruleset-desktop-ad-7” ).addService( googletag.pubads() );ruleset_desktop_slots.push( gpt_slot );});

The post Rim Light – A Simple Way to Create Powerful Images with a Single Flash by Andrea Minoia appeared first on Digital Photography School.


Digital Photography School

 
Comments Off on Rim Light – A Simple Way to Create Powerful Images with a Single Flash

Posted in Photography


How to Create an Antique Photo Look Using a Lemon and Layer Masks in Photoshop

17 Mar

Layers were presented for the first time in Adobe Photoshop in version 3.0, which launched in 1994. We take them for granted nowadays, but they were a total game changer at the time as they allowed image composites to be taken to a whole different level with image stacking and transparencies.

Layer Masks may seem like a scary monster for a Photoshop newbie, but they are in fact quite easy to understand as they work the same way as layer transparency. But layer masks use a non-destructive way to reveal or hide portions of a layer by defining pixel opacities without affecting the original data.

It all happens with greyscale data: think of black as transparent, white as opaque and gray as different levels of opacity depending on if they are lighter or darker. Following this theory, this also means that you can convert any greyscale image into a Layer Mask and use it to create many types of effects on your image.

This tutorial is a step-by-step example on how to use this technique.

How to create your own Layer Mask

Create an old school effect

For this particular image, I wanted to create an old-school or antique effect, like an alternative darkroom process of developing a black and white image with a brush. This mask could be done in many different ways, but, because I wanted to make it really textured and as authentic as possible, I used an oxidation process.

Prepare the paper first

To give this process a try, you will need a paper sheet and some lemon juice.

02 How to create your own Layer Masks

Brush the paper with the lemon juice and create you mask area

03 How to create your own Layer Masks

The lemon juice will oxidate upon contact with air, but it will take a long time. To accelerate the process, you can put the paper near a heat source like a tungsten lamp or if you want it even faster, you can use an oven at a low temperature setting like I did here.

04 How to create your own Layer Masks

The lemon juice will start to turn a brown color. Remove the paper from the oven when you get the color and texture you intend, and your paper sheet is ready to be scanned or photographed to create an image file like this:

05 How to create your own Layer Masks

Photoshop technique

Now open Photoshop and the image on which you want to create the mask.

06 How to create your own Layer Masks

Convert the layer to a mask

Now click on the layer mask icon on the bottom of the layers’ palette and your background layer will be converted into Layer 0 with a white mask next to it.

Press the alt/option key on your keyboard and click on the white mask to make it visible and active. This is a very important step! If you miss this step the image itself will be active and visible instead of the mask, that is what you will be working on.

Once you have done this, the image itself will not disappear, it will just be hidden.

07 How to create your own Layer Masks

Convert to greyscale

Now it’s time to open your mask image and convert it to greyscale. One easy way to do it is to use the desaturate function located in: Image > Adjustments > Desaturate (or keyboard shortcut Control/Cmd+Shift+U)

08 How to create your own Layer Masks

The final image you want to create is white around the edges, so your mask should be the opposite. You can use the invert function for this: Image > Adjustments > Invert (Control/Cmd+I)

09 How to create your own Layer Masks

Put the image into the mask

Next, it is time to paste the image into the mask with these simple steps:

  • Select > All (Control/Cmd+A)
  • Edit > Copy (Control/Cmd+C)
  • Now click on the original image where you created the layer mask and go to: Edit > Paste (Control/Cmd+P)
  • Click on the eye icon on the left side of the layers’ palette to see the image and the mask working together.

10 How to create your own Layer Masks

Add a white layer

As you can see the mask creates different levels of transparency on the image. To be able to see the transparency as white we can create a new white layer to use as a background.

  • Go to: Layer > New > Layer (Control/Cmd+Shift+N)
  • Edit > Fill > Contents: White; Mode: Normal; Opacity: 100%

11 How to create your own Layer Masks

Now just drag the new white layer to the bottom position of the layers panel, and you will have a full view of the final image appearance.

12 How to create your own Layer Masks

Fine-tune the effect

Now it is just a matter of a few adjustments to fine-tune the effect you want. In this particular image, I will adjust the size of the mask. Click on the mask icon in the layers’ palette and then click on the chain between the image and the mask icon to unlink them.

13 How to create your own Layer Masks

Next go to: Edit > Transform > Scale (Control/Cmd+T). Drag the image edge lines to transform the shape of the mask and adjust it to the image size.

14 How to create your own Layer Masks

The size of the mask is right, but the image looks to washed out. We can increase the contrast of the mask to make the blending with the image look better.

Go to: Image > Adjustments > Levels (Control/Cmd+L). Adjust the sliders on the levels dialogue box to create the effect you want.

15 How to create your own Layer Masks

Lastly, for the old image look, you can use the black and white function. Click on the image icon in the layers’ palette so that you are editing the image and not the mask, then go to; Image > Adjustments > Black & White (Control/Cmd+Alt+Shift+B). Adjust the sliders on the Black & White dialogue box to create the effect you want.

Note: You can also add the black and white as an adjustment layer to keep your editing non-destructive. Additionally, you can paint on the mask with a black brush, over any areas you want to keep clear (such as her eyes or face). 

16 How to create your own Layer Masks

There it is, a quick and easy way to create your own layer masks. Give it a try and share your images with us in the comments below.

The post How to Create an Antique Photo Look Using a Lemon and Layer Masks in Photoshop by Ivo Guimaraes appeared first on Digital Photography School.


Digital Photography School

 
Comments Off on How to Create an Antique Photo Look Using a Lemon and Layer Masks in Photoshop

Posted in Photography


A Fun Project You Can do in Your Own Home – How to Create a Physiogram

09 Mar

Anyone who has ever experimented with shutter speed knows that long exposures can yield some pretty interesting results. Whether it’s light painting at night or capturing the motion blur of a running river, long exposures can truly transform an image. A physiogram is a slightly different take on long exposure projects like light painting. It’s a technique that can easily be done in your living room, with no assistant required. Although the resulting images may look complex, the process to create a physiogram is actually very simple.

How to Create a Physiogram

How to Create a Physiogram

This double-physiogram was created by photographing part of a physiogram, covering the lens mid-exposure, swinging the LED in a different direction and resuming exposure.

How to Create a Physiogram

What is a Physiogram?

Physiography is actually a field of geography that studies the processes and patterns found in the natural environment. The name physiogram is apt because it is a photographic study of the patterns and movement of a suspended object. Imagine an object tethered to a string and suspended from a fixed point. If you push it, the object will swing around in a neat circular motion at first, completing each rotation in roughly the same place each time. However, as the object loses velocity, it will complete an orbit that is increasingly smaller than the last one.

The sequence of rotations that the object takes while it swings around isn’t visible to the naked eye. Fortunately, however, we can use photography to reveal these fascinating patterns. By attaching a light source like a flashlight or LED (don’t use a laser pointer – they can wreck your camera’s sensor!) to a rope or string and allowing the object to swing, we can view the entire path of the object in a single long exposure. The resulting photograph or physiogram reveals fascinating patterns and shapes.

How to Create a Physiogram

What you will need

  • A small flashlight or LED  (key chain lights work great)
  • About a meter (3 feet) or so of string
  • A white sheet of paper
  • Camera with manual exposure capabilities
  • A dark room

Note: the tools in the Light Painting Brushes set can work as your light source for this and add color to your physiogram as well. 

How to create a physiogram

Take the LED and tie the length of string to it. Small LED lights on keychains are great because they won’t smash your lens if they fall. They also have a narrow light for better line definition and come with a key ring and chain for hanging perfectly vertical. You can usually pick one up at discount stores.

How to Create a Physiogram - light source

These novelty keychains are great for creating physiograms because the light source is narrow and bright. They are also easy to suspend from the ceiling. You can depress the ON button with a bit of duct tape.

Take the other end of the string and attach it to the ceiling with a pin or hook. You want to fix the LED so that it will swing easily, about a meter and a half (5 feet) above the camera to start. Your camera will be positioned on the floor directly beneath the LED, so make sure each component is securely fastened. Having a UV filter fixed to the lens is a good idea, just in case something does drop on the camera.

The view looking up – I attached my keychain to a length of string suspended from a removable hook in the ceiling

Camera setup

To photograph nice clean lines of light, we will need to focus the camera on the head of the LED. This can be difficult when the camera is laying on the floor, and the LED is hard to define against the background of the roof. Instead, place your camera directly underneath the LED and place a piece of white paper beneath the camera to mark the spot (you may need to mark an X on the paper as your camera cannot focus on just white, it needs contrast). Then, take your camera and position it beside the hanging LED. Autofocus on the piece of paper and once it locks, turn the autofocus function off.

To start off, set your exposure time to 30 seconds at f/16 with 100 ISO. Position your camera beneath the LED, turn the LED on and turn out the room lights. Give the LED a good push, but be careful not to swing it so hard that it goes out of frame. Wait until the light settles into an even motion and press the shutter button.

How to Create a Physiogram

This exposure was taken directly after I swung the LED. The rippled effects are due to the light source moving out of sync with the rest of the pendulum set-up. As centrifugal force takes over, the lines become smoother.

Once your exposure is complete, have a look at the results!  This project does require some trial and error to perfect, adjustments to your pushing technique, exposure time, and changing the length of the string or the light source are all ways you can refine the final image. A shutter release cable or remote trigger is handy too if you are experiencing camera shake.

How to Create a Physiogram

The physiogram was made with a flashlight. The lines look thicker because the light from it is wider. Using a small LED means that you will see more defined lines.

Tidy it up in Photoshop

Although you need a dark room to properly photograph a physiogram, you may find that part of the background still shows up in your photographs.  This is caused by the light of the LED spilling around the room as it swings. The easiest way to fix this is by adjusting the black point in Photoshop. By adjusting the black point, you can reset what is interpreted as the blackest point in an image, without compromising the white light of the physiogram.

How to Create a Physiogram

The roof and light can still be seen in this image due to the light spilling from the light source. Adjusting the black point in Photoshop is the easiest way to darken the background without affecting the pattern of the physiogram

First, open your image in Photoshop and select Curves (in the adjustment layers panel or via Image > Adjustments > Curves). Click on the eyedropper tool with the black ink and the cursor will change to the eyedropper icon. Now click on an area in the background of the image, preferably a lighter tone that occurs consistently throughout the unwanted backdrop.

How to Create a Physiogram

Click this eyedropper.

How to Create a Physiogram

Then click on an area of the background you want to be pure black.

How to Create a Physiogram

And voila!

How to Create a Physiogram

See how much cleaner the background is now.

As soon as you click an area in the image, any tone up to the selected tone will be reset to read as completely black. It may take you a few tries to get the background uniformly dark (if you don’t like what it did, undo it click a different spot). This will also get rid of light fittings from your image as well as the hook that fixes the LED to the roof.

Spice it up a little

Once you get the hang of creating physiograms, switch it up a little! You can put layers of cellophane, glad wrap or glass over the lens for different textural and color effects. Change the light source, string length or zoom in and out during the exposure to create different pattern results.

This is a great opportunity to have fun and experiment, so enjoy! If you have kids they will love helping you with this project. Please give it a try and post your results in the comments below.

How to Create a Physiogram

I used glad wrap over the lens to soften the lines of this physiogram. The sharp lines indicate the beginning of the exposure with no glad wrap. The softer, more central lines have been taken with the glad wrap over the lens towards the end of the exposure.

How to Create a Physiogram

Some lines in this physiogram aren’t visible. The beak of the Angry Bird keychain blocked light from the LED. I quite like the effect, however.

How to Create a Physiogram

To create the multi-coloured effect in this image I used the gradient tool and blending layers function in Photoshop

How to Create a Physiogram

How to Create a Physiogram

The post A Fun Project You Can do in Your Own Home – How to Create a Physiogram by Megan Kennedy appeared first on Digital Photography School.


Digital Photography School

 
Comments Off on A Fun Project You Can do in Your Own Home – How to Create a Physiogram

Posted in Photography


How to Create a Solid Backup Strategy for Your Photos

09 Mar

Most people take reasonable precautions when engaging in activities that are potentially unsafe or harmful, like wearing seat belts in a car or even washing your hands before eating. The benefits of these basic procedures are easy to understand which is one reason these practices are so widely adopted. But things look quite different where our digital lives are concerned; in other words, a backup strategy.

Every mobile phone, laptop, and personal computer stores your photos, documents, and other data on either a small memory chip or a spinning hard drive and it is not uncommon for these to fail. In fact, due to the nature of how hard drives (which are still by far the most common method of storing data) operate, they are guaranteed to wear out over time. It’s just a question of when. Anyone even remotely concerned with making sure their digital files are safe and accessible one, five, 10, or even hundreds of years from now needs to have a solid backup strategy in case the unthinkable happens.

Solid Backup Strategy for Your Photos

Don’t let your photos disappear when your computer fails.

The challenge

One problem with creating a backup strategy is that it can seem so complex and convoluted it’s difficult to even know where to begin. From clouds to closets to safe deposit boxes, the world of data backup has so many options it’s enough to make your head spin. I’m going to explore three common options in this article, but before I get too far I want to remind you of the words of Carl von Clausewitz who said, “The enemy of a good plan is the dream of a perfect plan.”

Don’t get so caught up with finding the ideal backup strategy that you don’t do anything at all. The important lesson, no matter which method you use, is to create copies of your data – especially your photographs – so you can still get them if something bad happens.

3-2-1 Strategy

One of the best ways to approach backing up your data is the 3-2-1 strategy:

  • 3: Have three copies of your data.
  • 2: Keep them in two separate places.
  • 1: At least one must be offsite.

This might seem like a lot of hassle, but it’s similar to most things in life that require small behavioral changes. Once you get over the initial setup of utilizing a backup strategy it becomes a habit or better yet, a completely transparent activity that just happens in the background. As someone who has lost data, and has had friends and family lose thousands of photos thanks to computer failures and hard drive corruption, I can confidently say that it is well worth your time to back up your data. It won’t save your physical life, but it could save your digital life.

Solid Backup Strategy for Your Photos

A good backup solution doesn’t have to be complicated and can help make sure your memories stand the test of time.

Option #1 – External hard drives

Inside nearly every personal computer is a spinning hard drive that rotates at a mind-numbing speed of 5400-7200 rotations per minute, every day, for as long as the computer exists. Over time, hard drives have proven themselves to be simple cost-effective vessels for storing massive amounts of data. However, their mechanical nature makes them not only prone to failure but quite expensive and time-consuming to recover your files and photos if something does happen.

Because of these caveats, one of the simplest methods of backing up your data is to use software to make a clone of your hard drive onto – you guessed it – another hard drive. This duplicates everything on your computer so you can instantly access it in the case of an emergency. Thanks to the relatively inexpensive nature of external hard drives and backup software (which is often bundled with hard drives) the process is mostly painless.

Solid Backup Strategy for Your Photos

Backup hard drives are a cheap and effective way of making sure your data is safe.

File recovery

Mostly, that is, until it comes time to actually recover your data. In my experience, this method of file backup is best when your entire computer dies and you need to start from scratch, at which point a clone of your hard drive can be used to create an exact copy on a new computer. I have had to do this a few times with excellent results, and except for re-registering some serial numbers with Adobe I was up and running again in no time.

However, if you accidentally delete some data, such as an entire folder of images, and need to recover just those specific things from your backup it can be tricky depending on the software solution you are using. Apple’s Time Machine, for example, is designed to facilitate the easy recovery of an entire computer’s worth of data but many people (myself included) have found themselves more than a little frustrated when restoring individual files or folders. Microsoft includes software called Backup and Restore which will do the same thing for Windows users. Either one of these is a great solution if you want a simple way of making sure all the data on your computer is saved and stored in the event of a complete hard drive failure.

One significant benefit of both Time Machine and Windows Backup and Restore is that they run automatically in the background so you never have to think about it once you set them up. However, one drawback is that because they only backup to external hard drives, if you lose data to a catastrophic event such as a fire or flood, chances are your backup drive will be toast also. For that reason I like to keep a second backup hard drive at the office where I work and switch the hard drives out every Monday. That way even if my house explodes in a freak meteorite incident everything but the very latest files and photos will still be available on my backup drive at work.

Solid Backup Strategy for Your Photos

Mac users can use Time Machine to easily create automatic backups on an external hard drive.

Extra options

If you really want to go the extra mile with an external hard-drive-based backup plan, you can set yourself up with a multi-drive solution where all your data is copied to not only one, but several hard disks at the same time. This is called a RAID (Redundant Array of Independent Drives) system and while it’s more costly than a single drive solution, it’s virtually guaranteed to protect against data loss. If one of the drives in a RAID array fails you can usually just swap it out with a fresh drive and continue backing everything up.

Finally, if you are going to use external backups it’s important to keep them encrypted so prying eyes or thieving scoundrels can’t peek at your data. Time Machine lets you do this with the click of a mouse, and Windows has an option to do this as well using a setting called BitLocker. This adds a huge layer of security to your backups while taking almost no effort on your part. I highly recommend doing this.

Solid Backup Strategy for Your Photos

BitLocker offers a great solution for Windows users who want a simple and effective backup strategy.

Hard drives are so cheap these days that it’s hard to go wrong with this type of solution. If your backup drive ever goes belly-up you can buy another one for the price of a few movie tickets. I recommend buying a drive that is double the capacity of your computer’s internal hard drive which means you can restore old copies of files long after they have been deleted from your computer.

Option #2 – Save your data to the cloud

If you don’t want to bother with the hassle of setting up an external hard drive, encrypting your data, and switching out drives every week or every month, another good option is to go with a cloud-based backup service like CrashPlan, BackBlaze, or Carbonite. These companies offer paid plans that backup all the data on your computer, or just a portion that you specify, to their own servers automatically. In terms of convenience, these services are hard to beat since they require almost no interaction from you after the initial setup.

Drawbacks

One of the downsides is the price, as they require a recurring monthly or yearly fee which, though usually not too expensive, can add up over time. They also make the act of restoring all your data, such as in the event of a fire or flood, more difficult than just hooking up a spare hard drive with a full copy of everything. Thankfully many cloud-based services will actually mail you a hard drive with a full copy of your data on it for an additional fee if you really need to do a full restore of your entire computer. You also have the option of logging into your account from a web browser and selectively downloading individual files or folders, which can be useful if you just need to retrieve specific items and not restore your entire computer.

Solid Backup Strategy for Your Photos - CrashPlan, BackBlaze, or Carbonite - cloud options

One of the major drawbacks of cloud-based backup options involves actually getting your data to them in the first place. While broadband internet access is becoming increasingly common around the world, upload speeds still lag far behind download speeds. According to BackBlaze, a typical home internet connection will let you upload 2GB to 4GB per day, which means it could take several months to backup your entire hard drive! If you shoot in RAW and are constantly filling up your memory cards, you might find cloud-based backup services to be quite limiting unless you have a very fast internet connection!

Other cloud-based options are available that specifically address the needs of photographers. Google Photos allows unlimited storage for JPG pictures up to 16 megapixels, and Amazon allows unlimited photo storage for Prime members. Flickr, that longtime stalwart of online photo sharing, gives users 1TB (Terabyte, or 1024 GB) of storage for free. Services like Dropbox, OneDrive, and Apple’s iCloud offer paid plans that allow you to backup massive amounts of photos and other data for a fee while also syncing them across your devices.

Solid Backup Strategy for Your Photos

Even if you already share pictures on social networks, it’s a good idea to have a full backup of all your images and a dedicated cloud-based solution is a nice way to accomplish this.

Shop around for the best cloud option for your needs

If you are thinking about using a cloud-based solution I would encourage you to investigate some options and see what you think would work best for your needs. I have used CrashPlan, BackBlaze, and Carbonite, as well as solutions like Arq which store your data on the Amazon cloud. Each of these has its own strengths and weaknesses and because of that, it is difficult to recommend a single cloud-based solution as every individual has their own needs.

All of them are good, and you really can’t go wrong with any of them if you currently don’t have a backup solution in place. I also like to caution people that when you utilize free services like Google Photos or Flickr it’s a good idea to review their Terms of Service so you know exactly what information and personal data you are giving up in exchange for the free use of their storage.

Option #3 – DVDs and Blu-Rays

Longtime computer users might fondly remember the days when CD-ROM drives first entered the scene. In those heady days of the mid-1990s the idea of putting as much data as you could fit on an entire 500MB hard drive onto one single CD was basically a computing miracle, and as CD drives became more prevalent they also became a good way to backup data such as documents and photos.

However as digital cameras rose to prominence in the early 2000s it became painfully obvious that backing up data to CDs and, subsequently, DVDs was too slow and cumbersome to be a good solution. Burning the discs took time, and getting files off them could be a chore especially as more and more computers abandoned these types of disc drives altogether.

So why in the world would this type of solution even be considered as part of a balanced backup strategy in 2017?

Solid Backup Strategy for Your Photos CD and DVD

Behold the classic Compact Disc. You might not give this type of media much thought nowadays, but it can still be an essential component of a comprehensive backup strategy.

Cost and drawbacks

The answer to this question is mostly related to cost. Blank discs are cheap, and even if your computer doesn’t have a disc burner you can buy an external one for about $ 50-100. CDs hold about 600 MB of data, or enough for your vacation photos if you shot on medium-quality JPG. DVDs hold about 4.5 GB of data or a couple months of pictures (if you shoot RAW this will be more limited). Blu-Ray discs hold about 25GB of data or enough for an entire year’s worth of JPG images which make them very well suited for long-term image backup. Even if you already use a hard drive or cloud solution, it’s still a good idea to make regular backups of your pictures to some type of physical disc that you can then store in a safe deposit box or even mail to a trusted friend or family member.

One of the notable downsides to disc-based backups is that this media is prone to the same harsh realities of time as any hard drive. Sooner or later all discs that you create at home will fail due to a concept known as “bit rot” which is when the layer of dye inside a CD, DVD, or Blu-Ray that actually contains your data deteriorates over time. It might be a few years or 50 years, but it’s almost certainly going to happen to every disc you burn.

Thankfully some drives are capable of burning a special format of Blu-Ray called M-Disc which is supposed to keep your data safe for hundreds of years. Even though the actual discs are a little more expensive it could be well worth it to make sure your images aren’t lost to dust and decay over the years.

Solid Backup Strategy for Your Photos

It might be worth your time to dust off that old DVD or Blu-Ray burner and use it as part of your photo backup plan.

Annual plan

When adding a disc-based component to your backup strategy I recommend making it part of an annual ritual instead of something you do monthly or weekly. Get a Blu-Ray burner so you can store all your pictures from the whole year and make the process of burning a disc and taking it to a safe deposit box an annual tradition. It might seem silly at first, but it could really save your digital life if you ever need it.

The Solution

The great challenge with backing up your digital images is that all methods have their positive and negative aspects, no one single solution is best. And very few things in life are truly permanent, so even if you physically print your pictures they will eventually fade and will also be susceptible to mold, moisture, or physical damage.

Any digital backup option is better than none at all. If you leave your photos on your computer or phone without duplicates then you are at risk of putting all your eggs in one basket which is almost certainly guaranteed to fail. The solution, then, is to do something to make sure your pictures don’t meet a premature digital demise. It could be a second hard drive, a cloud-based solution, making a Blu-Ray disk, using a combination of all three, or another method I didn’t even mention.

My father still has a hard drive sitting in his closet filled with thousands of images he may never see again. The disk failed years ago and was not backed up. The same thing has happened to many photographers around the world. Don’t let it happen to you.

Read more here:

What about you? What solution do you use to make sure your pictures are backed up and ready to access if you need them? There are hosts of other solutions I didn’t address in this article and I’m sure other DPS readers would like to know what ideas you have and what works for you. Please share in the comments below.

The post How to Create a Solid Backup Strategy for Your Photos by Simon Ringsmuth appeared first on Digital Photography School.


Digital Photography School

 
Comments Off on How to Create a Solid Backup Strategy for Your Photos

Posted in Photography