RSS
 

Posts Tagged ‘comparison’

Tripod versus Monopod – a Comparison and When to Use Each

12 Oct

Tripods and monopods, you’re very likely to have seen them. They both have their uses and their purposes for existing. But when do you use one over the other and what advantages do each have? In this article, I’ll look to explain when you would use a tripod versus a monopod and how they’re not necessarily exchangeable in their properties.

Tripods

Jake Khuon

By Jake Khuon

Uses and pros of tripods

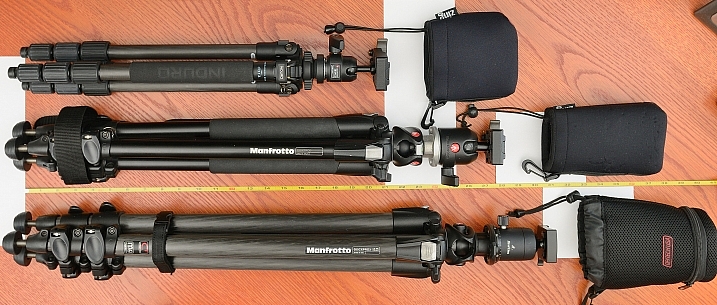
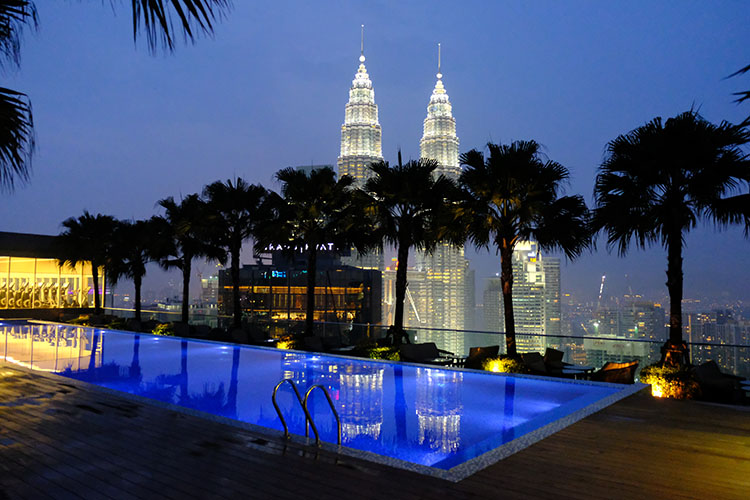
Let’s start off with tripods. You know, those three legged stands that nearly all photographers have?! They provide your camera with a sturdy platform to which you attach your camera. Tripods come in all different sizes and have a huge variety of heads (the actual mounting point) to suit different shooting styles. They are especially helpful for avoiding camera shake when using slow shutter speeds. This is most useful when you want to blur water in a stream, show car light trails at night or simply do a long exposure.

tripod versus monopod - use a tripod for long exposures

With this frame, I used a tripod to prevent camera shake that would have been caused by the 3.2 second shutter speed. This shutter speed was used to blur the water.

Tripods can also be extremely helpful with macro, still life, and studio photography as they hold the camera in the exact spot you want while you set your shot up. Time-lapse photographers can also benefit from using a tripod over a monopod as it will ensure that there is no jumping between each frame as the camera is securely locked in one position. However, tripods are not without their cons.

tripod versus monopod

Use a tripod for long exposures like this.

Cons of tripods

However, tripods are not without their cons. They can be heavy to carry around and take some time to set up. Depending on which head you are using, tripods can also be very limiting for quick camera movements which you may need when photographing moving objects. Everything about using a tripod is slower. So if it’s speed, and ease of portability that you’re looking for and stability isn’t your main priority, then perhaps a tripod is not the best item for you.

Monopods

tripod versus monopod - use a monopod for more mobility

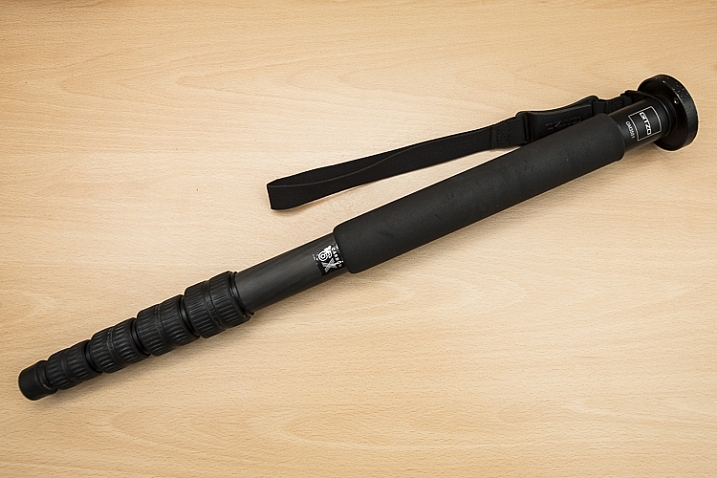
This is the monopod I use. Here, it is compacted (54cm/21.26″) but it extends to be 192cm (6’2″). It is made of carbon fibre and weighs in at only 620g (1.36lb) but can hold up to 18kg (39lb).

Uses and pros of monopods

When a rock solid platform for stability isn’t a priority many photographers turn to a monopod for their camera support needs. Just as the TRI in tripod means three, the MONO in monopod means – you guessed it – one! They are simply a single leg support on which you can mount your camera and/or lens. They too come in different sizes and will support different weight limits.

Monopods are perfect for taking the weight of a heavy lens/camera combination to stop aches and pains from a long day of shooting. If you’ve ever seen sports photographers with their long lenses, then you may have noticed that they are often being supported by a monopod. Monopods also offer much more versatility in movement as you now have only on one leg, not three, and they are much quicker to set up than their three-legged brethren.

tripod versus monopod - use a monopod for more mobility

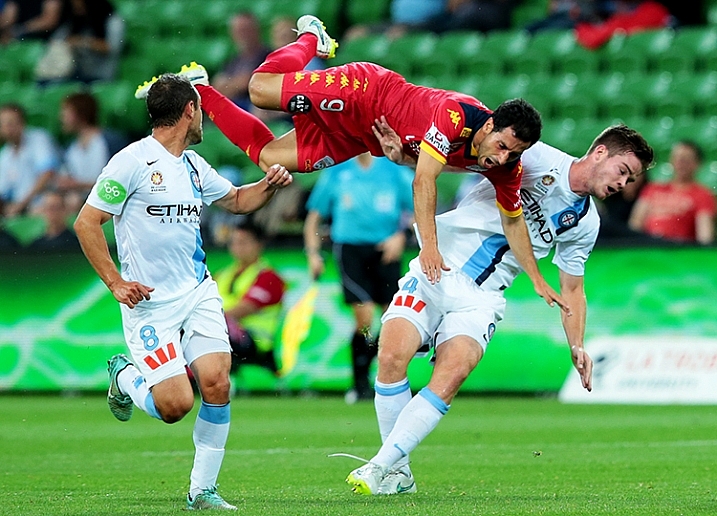
This photo was taken using a 400mm f/2.8 lens. These lenses are quite heavy, so using a monopod is a great way to take the weight off your arms. Daniel Smith/Getty Images.

Cons of monopods

A monopod, however, will not offer you the same stability as a tripod, so if you’re considering a monopod as a lighter alternative to a tripod, do remember this. If it’s milky streams and flowing car lights that you’re after, a monopod will not help you here at all; you will still need a tripod.

But if your arms get tired from holding your camera up all day, then a monopod may well be very suited to your needs.

Conclusion

tripod-versus-monopod

While tripods and monopods offer extra support and in some cases, stability for your camera, there are times when one is more useful than the other and one cannot always be used in place of the other. Generally, for very long shutter speeds or time-lapse photography you’ll want to use a tripod to avoid camera shake and to maintain consistency between each frame. But if it’s a little extra support and to take the weight of a camera/lens combination, you can’t go wrong with a monopod.

Do you have either or both of monopod and tripod? How do you find using each of them?

googletag.cmd.push(function() {
tablet_slots.push( googletag.defineSlot( “/1005424/_dPSv4_tab-all-article-bottom_(300×250)”, [300, 250], “pb-ad-78623” ).addService( googletag.pubads() ) ); } );

googletag.cmd.push(function() {
mobile_slots.push( googletag.defineSlot( “/1005424/_dPSv4_mob-all-article-bottom_(300×250)”, [300, 250], “pb-ad-78158” ).addService( googletag.pubads() ) ); } );

The post Tripod versus Monopod – a Comparison and When to Use Each by Daniel Smith appeared first on Digital Photography School.


Digital Photography School

 
Comments Off on Tripod versus Monopod – a Comparison and When to Use Each

Posted in Photography


Updated: iPhone 7 and iPhone 7 Plus added to mobile studio scene comparison

30 Sep

When the most popular camera in the world gets a major update, it’s a newsworthy event all around. We’ve put the 12MP iPhone 7 and iPhone 7 Plus cameras in front of our studio test scene to see what they (and their new Raw capture abilities) can do.

$ (document).ready(function() { ImageComparisonWidget({“containerId”:”reviewImageComparisonWidget-55056378″,”widgetId”:405,”initialStateId”:2855}) })

The iPhone 7 Plus includes both wide-angle and telephoto lenses. However, because the telephoto lens is 1.3EV slower, the phone will sometimes use a digitally zoomed shot from its brighter wide-angle lens in low light when in ‘telephoto’ mode.

For this reason we’ve focused on getting the Raw images for the iPhone 7 Plus, to ensure we’re seeing the results from telephoto lens/sensor. It’s reasonable to assume that the wide-angle JPEGs will look the same as those from the iPhone 7.

Please also note that the 7 Plus has also used a much faster shutter speed for its low light telephoto shot, presumably to avoid camera shake on the unstabilized telephoto lens/camera.

Articles: Digital Photography Review (dpreview.com)

 
Comments Off on Updated: iPhone 7 and iPhone 7 Plus added to mobile studio scene comparison

Posted in Uncategorized


iPhone 7 and 7 Plus added to mobile studio scene comparison

29 Sep

The iPhone 7 and 7 Plus don’t exactly break new ground for mobile photography. As has been the case in the past, Apple has embraced emerging technology that other manufacturers already offer in their devices. But when the most popular camera in the world gets a major update, it’s a newsworthy event all around. We’ve put the 12MP iPhone 7 and its bigger dual-cam sibling in front of our studio test scene to see what they (and their Raw capture abilities) can do.

See the iPhone 7 and iPhone 7 Plus in our studio test scene

Articles: Digital Photography Review (dpreview.com)

 
Comments Off on iPhone 7 and 7 Plus added to mobile studio scene comparison

Posted in Uncategorized


Canon EOS 5D Mark IV added to studio scene comparison

30 Aug

As soon as our Canon EOS 5D IV test unit arrived we put it straight to work, both out and about in Seattle and in the studio. The EOS 5D IV has just been added to our studio test scene comparison tool, so you can easily compare it to its peers. Our dynamic range test results will be following shortly.

For now, check out how the EOS 5D IV compares to its peers and competitors in our studio by clicking on the link below.

Canon EOS 5D Mark IV studio test scene

*Raw images have been processed with an early beta build of Adobe Camera Raw. Image quality may not represent the final version of the plugin, but is likely to be close.

Articles: Digital Photography Review (dpreview.com)

 
Comments Off on Canon EOS 5D Mark IV added to studio scene comparison

Posted in Uncategorized


Comparison Review: Sony FE 50mm F1.4 ZA vs 55mm F1.8 ZA

20 Jul

Sony has announced a high-end ‘normal’ prime for its Alpha E-mount line of cameras: the Planar T* 50mm F1.4 ZA lens. As the third normal prime for the system, we wanted to know what it offers over the already excellent FE 55mm F1.8 ZA, so we set about performing some benchmark tests.

We’ll take a look at sharpness on this page, and bokeh, coma, and longitudinal chromatic aberration on the next.

Sharpness

Below, you’ll see a series of aperture progressions for the 50mm F1.4 ZA and 55mm F1.8 ZA. Have a look around the scene at various apertures to get an idea of the capabilities of these two lenses – with the caveat that this performance is only representative of our single copy of each lens.

$ (document).ready(function() { ImageComparisonWidget({“containerId”:”reviewImageComparisonWidget-27965628″,”widgetId”:381,”initialStateId”:null}) })

Wide-open, the 55/1.8 is slightly sharper than the 50/1.4, both centrally$ (document).ready(function() { $ (“#imageComparisonLink2690”).click(function() { ImageComparisonWidgetLink(2690); }); }) and peripherally$ (document).ready(function() { $ (“#imageComparisonLink2691”).click(function() { ImageComparisonWidgetLink(2691); }); }) (the advantage is retained on the left side$ (document).ready(function() { $ (“#imageComparisonLink2692”).click(function() { ImageComparisonWidgetLink(2692); }); }) of the frame as well, despite the fact that our 55/1.8 is slightly decentered and has poorer left side performance). But none of this should be too surprising, since sharpness at F1.4 is far more challenging than at F1.8. In fact, the 50/1.4 holds up very well considering the 2/3 EV disparity in f-stop.

Comparing both lenses at F1.8 (a more level playing field), the 50/1.4 catches up to the 55/1.8 in terms of center sharpness$ (document).ready(function() { $ (“#imageComparisonLink2695”).click(function() { ImageComparisonWidgetLink(2695); }); }), but still lags in peripheral sharpness on the left$ (document).ready(function() { $ (“#imageComparisonLink2693”).click(function() { ImageComparisonWidgetLink(2693); }); }) and right$ (document).ready(function() { $ (“#imageComparisonLink2694”).click(function() { ImageComparisonWidgetLink(2694); }); }) sides of the frame. By F2, though, the 50/1.4 just surpasses$ (document).ready(function() { $ (“#imageComparisonLink2701”).click(function() { ImageComparisonWidgetLink(2701); }); }) the 55/1.8 in central sharpness, though off-center it still lags a bit$ (document).ready(function() { $ (“#imageComparisonLink2702”).click(function() { ImageComparisonWidgetLink(2702); }); }). By F2.8 though, the 50/1.4 pulls ahead$ (document).ready(function() { $ (“#imageComparisonLink2703”).click(function() { ImageComparisonWidgetLink(2703); }); }) of the 55/1.8 even here off-center, and particularly at center$ (document).ready(function() { $ (“#imageComparisonLink2696”).click(function() { ImageComparisonWidgetLink(2696); }); }) where it pulls and stays ahead at higher F- numbers. Peripherally, though, the 50/1.4 never quite catches up to the 55/1.8, not at F2.8$ (document).ready(function() { $ (“#imageComparisonLink2697”).click(function() { ImageComparisonWidgetLink(2697); }); }), and not even by F5.6$ (document).ready(function() { $ (“#imageComparisonLink2698”).click(function() { ImageComparisonWidgetLink(2698); }); }) (the lenses are a bit more even on the left side at F2.8$ (document).ready(function() { $ (“#imageComparisonLink2699”).click(function() { ImageComparisonWidgetLink(2699); }); }) and F5.6$ (document).ready(function() { $ (“#imageComparisonLink2700”).click(function() { ImageComparisonWidgetLink(2700); }); }) due to the weaker performance of our 55/1.8 on the left but, technically, the F1.4 is still a little bit behind).

What does this mean?

The new 50/1.4 ZA displays impressive sharpness and contrast at F1.4. Not quite as much as the venerable 55/1.8 wide open, but a respectable amount considering the 2/3 stop light and depth-of-field advantage. These new lens designs deliver sharp and punchy images wide open, instead of the soft and hazy images you may be used to getting if you slap on old F1.4 designs on such high resolution sensors (remember that we’re using the unforgiving 42MP a7R II for this test).

That said, the new 50/1.4 does not retain this sharpness across the field as well as the 55/1.8, which offers better field uniformity at all apertures. By F2, though, the new 50/1.4 ZA matches the 55/1.8 in central sharpness, and surpasses it at all smaller apertures. Considering the high bar set by the 55/1.8 ZA, this is very impressive. However, you give up off-center sharpness at the widest apertures. If we were forced to pick an overall winner here in terms of sharpness, we’d probably go with the 55/1.8, but really there isn’t a huge difference between the two.

Roger Cicala over at LensRentals found the Sony 50mm F1.4 lens to be the sharpest centrally of any 50mm prime, outperforming the 55mm F1.8 ZA. However, peripherally, the 50/1.4 takes a plunge in terms of resolution, and the 55mm F1.8 pulls ahead. In fact, just 4mm out from center in the image circle, tangential resolution (which we assess by considering the highest frequency MTF trace: 50 lp/mm) drops below that of the 55/1.8 (solid purple line). Source: LensRentals Blog

It’s worth noting that Roger Cicala at LensRentals found the central sharpness wide open of the 50/1.4 to exceed the 55/1.8 (see MTF traces above), while our visual results don’t show the 50/1.4 to exceed the 55/1.8 until F2.8. We can’t rule out the possibility that our copy of the 50/1.4 slightly under-performed relative to the average, perhaps due to decentering; however, it’s reassuring that he found the 55/1.8 to offer greater uniformity. This difference in peripheral sharpness may be the reason for the apparent discrepancy in our results.

Below, we show our infinity scene overlaid with red and blue rings representing image heights of 4mm and 16mm, respectively: the two points where the 50 lp/mm MTF traces of the two lenses intersect. Between these rings, Roger’s 50/1.4 sagittal 50 lp/mm trace falls well below the 55/1.8. Hence, our visual shootout seems to agree with Roger’s results: aside from a very small region in the center, the 55/1.8 does outperform the 50/1.4 wide open (though we don’t see the improvement towards the edges of the 50/1.4: our 55/1.8 remains better). 

Our infinity scene with red and blue rings that represent 4mm and 16mm image heights (distance from center in the image circle). Between these regions, Roger’s own MTF data indicate a dip in sagittal resolution. It’s likely only the small region in the center (within the red circle) where the 50/1.4 resolves more than the 55/1.8 wide open, which would explain the apparent discrepancy between Roger’s results and ours. 

All that said, sharpness isn’t everything. How does the new 50/1.4 fare in terms of bokeh, coma, and purple/green fringing? Let’s take a look on the next page.

Articles: Digital Photography Review (dpreview.com)

 
Comments Off on Comparison Review: Sony FE 50mm F1.4 ZA vs 55mm F1.8 ZA

Posted in Uncategorized


Side by Side Comparison: The Sony a6300 Versus Fujifilm X-Pro2

17 Jul

The Sony a6300 and Fujifilm X-Pro2 are two mirrorless cameras that debuted very recently as updated versions of their popular and beloved predecessors. Both cameras are comparable in technical specs and appeal, but how does each fare when compared side-by-side? Find out below!

Fujifilm X-Pro2 versus Sony a6300 6

Technical Specs: Main Similarities

Camera Sensors and Format

Both the a6300 and X-Pro2 are APC-C crop sensor bodies with a 1.5x crop factor. Each has a CMOS sensor with 24-megapixel resolution and is capable of shooting in both JPG and RAW on SD memory cards.

Solid, Weather-Resistant Body

Perhaps the biggest cosmetic upgrade that Sony made to the a63000 was including a tougher, more weather-resistant body. Like the X-Pro2, the a6300 is composed of magnesium alloy promises to be dust and moisture resistant.

Fujifilm X-Pro2 versus Sony a6300 6

In-Camera Wi-Fi

Like most modern digital cameras, both the X-Pro2 and a6300 have built-in Wi-Fi, making it a snap to transfer photos from your camera to your mobile phone, or shoot remotely via a mobile app.

Technical Specs: Main Differences

Price

The a6300 can be purchased body-only for $ 998.00, while the X-Pro2 is quite a bit more expensive at $ 1,699.00. Accompanying Fujifilm lenses also tend to be pricier than Sony equivalents.

Size and Weight

The X-Pro2 is quite a bit bulkier and heavier, weighing in at 15.70 ounces (445 g) body-only compared to the a6300’s 14.25 ounces (404 g). In terms of dimensions, the X-Pro2 is also slightly bigger with dimensions of 5.5 x 3.3 x 1.8″ (141 x 83 x 56 mm), compared to the a6300’s dimensions of 4.7 x 2.6 x 1.9″ (120 x 67 x 49 mm). Accompanying Fujifilm lenses are also heavier and larger than Sony equivalents.

Sony a6300

Sony a6300

Fuji X-Pro2

Fuji X-Pro2

Both shot with the same settings. Images are straight from the camera, unedited.

Video

The a6300 can record 4K video, while the X-Pro2 can only record video at 1080p. Interestingly, the Fujifilm offers two SD-card slots compared to the Sony’s single SD-card slot. You’d think Sony would squeeze in another slot to accommodate their higher-quality video formats.

Viewfinders

Among the unique features of Fujifilm’s digital cameras is their signature hybrid viewfinder which really shines on the X-Pro2. For those unfamiliar, the hybrid viewfinder offers the ability to switch between optical (rangefinder style) and electronic viewfinders , which can be a huge advantage for photographers who dislike shooting with electronic viewfinders only, which is what you get with the a6300.

Focus Tracking

Besides the inclusion of 4K video, the main selling point of the a6300 was its brand new sensor, and what Sony claims is the world’s fastest autofocus (dubbed “4D focus”) with 425 phase detection autofocus points. Combined with the Sony’s ability to shoot at up to 11 frames per second and accurate lock-on AF, the a6300 is a beast for shooting sports and action photography.

Comparatively, the X-Pro2 sports a total of 273 AF points including 169 embedded phase-detect AF points, plus a maximum burst rate of 8 frames per second.

Sony a6300

Sony a6300

Fuji X-Pro2

Fuji X-Pro2

Display Screen

While both cameras have a 3-inch rear LCD screen, the a6300 has a pop-out tilting screen, while the Fujifilm’s screen is melded to the camera body.

Built-in Flash

The a6300 offers a small pop-up flash that can be angled to bounce off the ceiling, in addition to a hot-shoe mount, while the X-Pro2 does not have a built-in flash (only a hot-shoe mount).

In Practice

Given the technical similarities and differences above, how did it actually feel to handle both cameras? The Fujfilm’s weight and size were definite factors, especially while switching between the smaller, lighter-weight Sony. With that being said, one could definitely argue that Fujifilm’s heavier, more solid camera and lenses felt like a higher-quality investment compared to some of Sony’s lightweight, plastic-based lenses.

Sony’s newly engineered 4D focus tracking was incredibly spot-on and accurate, especially compared to the Fuji. However, unless you’re shooting a ton of action scenes, Sony’s ultra-fast autofocus is a luxury that isn’t a make or break feature. One feature on the Sony that did come in handy was the flexible pop-up flash that would have been nice to have on the Fuji.

Fujifilm X-Pro2 versus Sony a6300 6

Sony a6300 photo on the left; Fujifilm X-Pro2 photo on the right. Both shot with the same settings. Images are straight from the camera, unedited.

The X-Pro2 has a clear vintage, rangefinder look and feel to it, which some photographers may prefer. Personally, I preferred the feel and overall button placement of the Sony, and was ultimately able to customize buttons and settings to operate it similarly to my Canon 5D Mark III.

On both cameras, the built-in Wi-Fi was a little tricky to set up, but from then on was incredibly intuitive and easy to wirelessly transfer images straight from the cameras to cell phones.

Sony a6300

Sony a6300

Fuji X-Pro2

Fuji X-Pro2

One last consideration – lens availability

Since both the a6300 and X-Pro2 are interchangeable lens cameras, compatible lens selection is another crucial difference between the two brands. Fujifilm lenses, while more solid and often more expensive, are contained to primes with a rather limited selection of zoom lenses, most of which have variable maximum apertures. In comparison, Sony offers a slightly more varied selection of lenses from primes and wides to mid-range and telephoto zooms.

Which is better for you?

Both the X-Pro2 and a6300 are feature-packed, brand new cameras that will appeal to different types of photographers.

Go Sony: If you value wicked fast autofocus, enhanced video recording capabilities, and/or are on a bit of a budget, the Sony a6300 is probably best for you.

Go Fuji: If you love the look and feel of a rangefinder camera, value Fuji’s unique hybrid viewfinder, and/or have a larger budget, the X-Pro2 will be your new favorite camera.

Sony a6300

Sony a6300

Fuji X-Pro2

Fuji X-Pro2

Have you tried either or both of these cameras? What are your thoughts?

googletag.cmd.push(function() {
tablet_slots.push( googletag.defineSlot( “/1005424/_dPSv4_tab-all-article-bottom_(300×250)”, [300, 250], “pb-ad-78623” ).addService( googletag.pubads() ) ); } );

googletag.cmd.push(function() {
mobile_slots.push( googletag.defineSlot( “/1005424/_dPSv4_mob-all-article-bottom_(300×250)”, [300, 250], “pb-ad-78158” ).addService( googletag.pubads() ) ); } );

The post Side by Side Comparison: The Sony a6300 Versus Fujifilm X-Pro2 by Suzi Pratt appeared first on Digital Photography School.


Digital Photography School

 
Comments Off on Side by Side Comparison: The Sony a6300 Versus Fujifilm X-Pro2

Posted in Photography


Three’s a charm: Sony RX10 III added to studio scene comparison tool

02 Jun

The Sony Cyber-shot RX10 III has impressed us so far. Its new 24-600 F2.4-4 lens has impressed us on the trail and in our initial testing, but it does come at a pretty price. We put it in the studio for a more controlled lens, and image quality test. See how it stacks up against its nearest competitors.

Articles: Digital Photography Review (dpreview.com)

 
Comments Off on Three’s a charm: Sony RX10 III added to studio scene comparison tool

Posted in Uncategorized


Hello, ISO 3,280,000… Nikon D5 studio test scene comparison published

28 Mar

Just moments after the Nikon D5 rolled into our office we whisked it into our studio, putting the flagship FX-format DSLR in front of our test scene. We were curious to see exactly what the 20.8MP CMOS sensor is capable of, and what its impressive ISO range looks like – especially its astronomical ISO sensitivity limit of ISO 3.3 million. And we couldn’t resist sharing some initial thoughts with you.

So what does ISO 3 million look like? See for yourself if any of the ISOs above the D4S’ previous maximum ISO offer anything useful. Nikon’s claims of better ISO performance due to color filter array optimizations appear to have some merit: noise levels in Raw mode are slightly lower in comparison to the D4S, or any other camera, when normalized. Although the performance advantage is more obvious at higher ISOs, like 204,800, the actual benefit does appear to be minimal at best. In fact, compared to the 42MP Sony a7R II, midtone performance at the very high ISOs is fairly similar at a common viewing size, with benefits most apparent in high ISO dynamic range (or shadow performance). And even there, a less than 1/3 EV high ISO dynamic range benefit over the a7R II comes at the cost of a 2 EV deficit in base ISO dynamic range, according to our very own DPReview forum member Bill Claff’s independent measurements.* At this point, we’re simply running up against the best that modern silicon can do: with less than one electron of read noise levels at the highest ISOs in some modern architectures, there’s only so much performance to be gained without drastically increasing light gathering efficiency past the limits already imposed by the Bayer array and current (very good) microlens design. 

When it comes to JPEG, Nikon (and Canon, for that matter) have some work to do with respect to optimally balancing sharpening and noise reduction in JPEG, as detail in the Raw is left on the table at both low and high ISO sensitivities compared to Sony’s more sophisticated engine. Colors, though, are very pleasing, even at high ISOs.

There’s a lot more testing to do. Rest assured we’ll be doing much out-of-studio shooting in the weeks to come – putting to test what we initially feel is the most exciting AF system we’ve ever seen in a DSLR to-date – but for now see how the D5 performs in our standard studio scene test.


* Interestingly, a sinusoidal dynamic range vs. ISO curve is reminiscent of older Canon designs (like the 5D Mark III), distinctly different from the performance of Nikon (and Sony, and even recent Canon) cameras we’ve come to expect (note the D810’s rather linear drop with ISO). In Canon’s older designs, this was due to a dual amplification architecture – which was far from ideal when it came to dynamic range – and we’re surprised to see this result in the D5, as it means that intermediate ISOs on the lower end are less than ideal. We’ll be following up on this result in our dynamic range tests to visualize the noise impact.

Articles: Digital Photography Review (dpreview.com)

 
Comments Off on Hello, ISO 3,280,000… Nikon D5 studio test scene comparison published

Posted in Uncategorized


Panasonic Lumix DMC-ZS60 / TZ80 real-world samples and studio comparison

04 Mar

Panasonic’s ZS60 puts a lot of enticing features in a very small package. It’s an iteration on a tried-and-true travel zoom formula that combines a 24-720mm equivalent zoom, 18MP sensor, 3″ touchscreen and a built-in electronic viewfinder. The ZS60 also offers 4K/UHD video at 30p as well as Wi-Fi. We spent some time outside with the ZS60, even managing to catch a few breaks in the late winter clouds, and have a real-world sample gallery to show for it. Take a look at how it fares out and about and in the studio.

Articles: Digital Photography Review (dpreview.com)

 
Comments Off on Panasonic Lumix DMC-ZS60 / TZ80 real-world samples and studio comparison

Posted in Uncategorized


1.4 and More: Canon EF 35mm F1.4L II comparison

21 Jan

Canon is making some big claims about the development put into its 35mm F1.4L II. Its new Blue Spectrum Refractive optical element is claimed to minimize longitudinal chromatic aberration, and a new 9-blade aperture promises smoother bokeh. Initial MTF charts provided by Canon showed improvements in resolution and sharpness over the old 35 F1.4, and the Sigma 35 F1.4 Art as well. Once a copy landed in our hands, we decided to test these claims.

Sharpness

These shots were all focused wide-open in Live View on the bottom of the Space Needle, and shot within a few minutes of each other with the cameras white balance setting on ‘Daylight.’ They were then processed with no exposure corrections or WB corrections in ACR using the ‘Adobe Standard’ camera profile.

$ (document).ready(function() { ImageComparisonWidget({“containerId”:”reviewImageComparisonWidget-63332475″,”widgetId”:296,”initialStateId”:null}) })

When used wide-open, the differences between these three 35mm F1.4 lenses seem fairly significant. The new Canon shows little to no chromatic aberration on the tower of the Space Needle, an area where the other two struggle. It also shows better performance wide-open in the extremes$ (document).ready(function() { $ (“span#imageComparisonLink-1864”).click(function() { ImageComparisonWidgetLink(1864); }); }) of the image$ (document).ready(function() { $ (“span#imageComparisonLink-1865”).click(function() { ImageComparisonWidgetLink(1865); }); }). At F2$ (document).ready(function() { $ (“span#imageComparisonLink-1872”).click(function() { ImageComparisonWidgetLink(1872); }); }) the Sigma starts to catch up in overall IQ towards the center, and the first version of the Canon starts to narrow the gap at F2.8$ (document).ready(function() { $ (“span#imageComparisonLink-1869”).click(function() { ImageComparisonWidgetLink(1869); }); }), although in this specific area it never quite catches up. There are areas where there is a similar amount of sharpness$ (document).ready(function() { $ (“span#imageComparisonLink-1870”).click(function() { ImageComparisonWidgetLink(1870); }); }) behind the Mark I’s aberrations, and there are places where it is far behind$ (document).ready(function() { $ (“span#imageComparisonLink-1873”).click(function() { ImageComparisonWidgetLink(1873); }); }) the Mark II version. These inconsistencies are part of the wonderful world of copy variation, and these lenses are by no means hand-selected examples. Overall, the Canon EF 35mm F1.4 L II does perform a step above the competition.

Copy Variation

After shooting this comparison on the Canon EOS 5DS R, we were concerned with how poorly the EF-mount Sigma 35mm F1.4 performed off-center. While we didn’t have access to more EF-mount versions at the time, we did have a Nikon F-mount Sigma 35mm F1.4 in the office, which we adapted to a Sony a7R II with a Metabones adapter to re-shoot the comparison. While we were at it, we also threw in the Sigma 24-35mm F2 zoom, to see how it stacks up against two of the best 35 primes in the business. We adapted both the EF-mount Canon 35/1.4L II and EF-mount Sigma 24-35mm F2 to the same Sony a7R II via a Metabones Smart Adapter IV for a fair comparison. Result of this comparison are below. Please keep in mind the general caveats surrounding adapters and adapted lenses, especially around compounded mount tolerances affecting off-axis performance (which we see little evidence of). 

$ (document).ready(function() { ImageComparisonWidget({“containerId”:”reviewImageComparisonWidget-51449040″,”widgetId”:300,”initialStateId”:null}) })

Immediately, we see that a better copy of the Sigma 35mm F1.4 Art performs admirably against the new Canon 35L II, at least matching, if not slightly exceeding, center sharpness wide open$ (document).ready(function() { $ (“span#imageComparisonLink-1926”).click(function() { ImageComparisonWidgetLink(1926); }); }) and even at F2$ (document).ready(function() { $ (“span#imageComparisonLink-1927”).click(function() { ImageComparisonWidgetLink(1927); }); }). The story is a little different at the extremes$ (document).ready(function() { $ (“span#imageComparisonLink-1924”).click(function() { ImageComparisonWidgetLink(1924); }); }) of the scene$ (document).ready(function() { $ (“span#imageComparisonLink-1922”).click(function() { ImageComparisonWidgetLink(1922); }); }): although we see a great improvement in this copy of the Sigma 35mm, it still does fall behind the Canon wide-open with a hint more coma at the extremes. At F2.8$ (document).ready(function() { $ (“span#imageComparisonLink-1925”).click(function() { ImageComparisonWidgetLink(1925); }); }) we see the gap between the Sigma 35mm and the Canon 35mm close, while the 24-35 F2 trails slightly behind.

The Canon 35L II continues to perform better with respect to chromatic aberration, though. The extreme variance in performance from copy-to-copy of the Sigma 35mm F1.4 is certainly concerning, and is a good reminder that discerning buyers should test their copy. Interestingly, Roger Cicala has actually found greater copy-to-copy variation with the Sigma 35mm Art in comparison to the Canon 35L II (see Conclusion of this article). This is also a reminder that any internet shootout (save for Roger’s work) is generally prone to only being valid for the copies tested. We hope to circumvent this issue by – in the future – performing these sorts of shootouts with a copy that represents the performance of the average of a population.

Longitudinal CA

Method

Here we look for longitudinal chromatic aberration (CA), which manifests itself as green or magenta fringing behind or in front of the plane of focus. This is particularly an issue with fast primes, and isn’t as easy to remove in post as one would like. Low amounts of longitudinal CA (LoCA) are, therefore, extremely welcome in fast primes that photographers are prone to shoot wide open, and Canon makes some bold claims in this department with the 35L II.

For this test we used our Lens Align tool, which shows green and magenta fringing quite easily in the horizontal black lines around the plane of focus.* The slight differences in lens size, optical center, and focal length meant moving the camera slightly to hold magnification constant. Focus was set wide-open on the center target in LiveView, then locked in place for the sequence.

$ (document).ready(function() { ImageComparisonWidget({“containerId”:”reviewImageComparisonWidget-20031416″,”widgetId”:295,”initialStateId”:null}) })

Results

It looks like the Blue Spectrum Refractive optical element does what Canon developed it for. The 35L II has the best control of LoCA of them all, and is far ahead of the original 35L which, frankly, really didn’t impress in this arena. While the Sigma Art does hold its own, it still falls behind the new Canon, with the magenta fringing even more obvious in our infinity shots of the Space Needle above. And even at F2$ (document).ready(function() { $ (“span#imageComparisonLink-1874”).click(function() { ImageComparisonWidgetLink(1874); }); }) in our Lens Align chart above, the Sigma hasn’t quite caught up to the 35L II. This, combined with the better across-the-frame sharpness, potentially makes the new Canon the better choice for photographers looking to shoot wide-open.**

Bokeh Comparison

While shooting the Longitudinal CA test, we put a net of Christmas lights a few feet behind our Lens Align tool to create beautiful balls of bokeh, giving us a way to visualize differences between the three lenses’ out of focus characteristics. Hover your mouse over any given aperture of any given lens to have the main image switch to a full-frame view of the resulting shot.

Canon 35 F1.4L 1.4 2 2.8 4 5.6 8 11 16
Canon 35 F1.4L II 1.4 2 2.8 4 5.6 8 11 16
Sigma 35 F1.4 Art 1.4 2 2.8 4 5.6 8 11

16

Comparing the new Canon to the old Canon, we can see the effect of the new 9-bladed aperture. Stopped down, the ‘bokeh balls’ have points to them on the older lens, whereas the new lens produces smooth out of focus areas. The odd number of aperture blades also ensures that the new 35 produces brilliant, multi-pointed sunstars.

It’s important to note that all lenses show relatively similar-sized ‘bokeh balls’, suggesting that subject isolation characteristics should be relatively similar between all these lenses. That said, because bokeh and sharpness fall-off is complex, we can’t make sweeping judgements about overall bokeh characteristics at any given plane; simply that, overall, it’s unlikely that there are drastic difference between these lenses in terms of ability to isolate subjects and throw backgrounds out of focus.

All in all, what theses tests show is that the $ 1799 sticker price of the new Canon EF 35mm F1.4 L II does offer some significant advantages over its predecessor, but only a slight advantage over the Sigma that only high-megapixel bodies can really expose the differences in. The biggest advantage it provides is usable wide-open results with nearly no corrections required, which is getting tougher to achieve as resolution goes up. Hats off to Canon for the achievement, but hats off to Sigma for still remaining competitive at a much lower price.


* The rulers on the top and bottom of the chart are NOT part of the tool and are there for framing purposes only. These rulers are not parallel with the focus plane, and should not be used to judge sharpness in any way.

** We should mention that there are limits to the utility of infinity tests focused at the center for prime lenses typically used to shoot wide aperture portraiture. A photographer is likely to focus on non-central human subjects using a non-central AF point, which may yield different sharpness result compared to our centrally-focused infinity shots (especially for lenses demonstrating significant field curvature). In future lens tests using charts, we’re considering providing results from two different focusing methods: centrally focused vs. focused at each measurement point on the chart. The latter may give a better idea of sharpness for non-central, closer-up human subjects.

Articles: Digital Photography Review (dpreview.com)

 
Comments Off on 1.4 and More: Canon EF 35mm F1.4L II comparison

Posted in Uncategorized