RSS
 

Posts Tagged ‘Classic’

Four of the Latest Updates to Lightroom Classic CC

08 May

The post Four of the Latest Updates to Lightroom Classic CC appeared first on Digital Photography School. It was authored by Adam Welch.

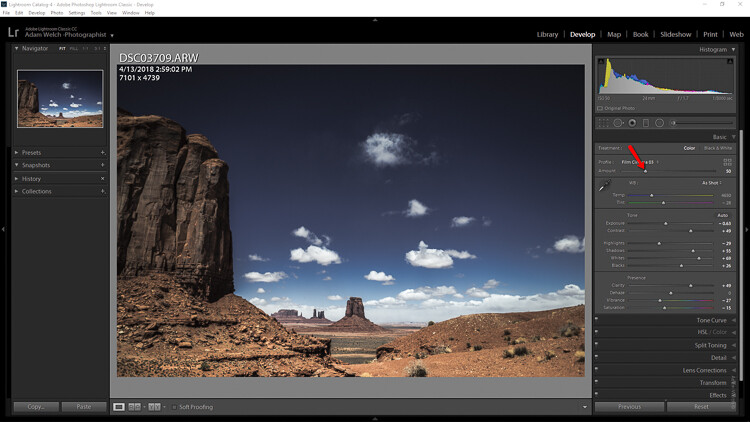
When it comes to the world of photography it seems as if change is an everyday occurrence. New cameras, new lenses and new ways to make your photographs better, give the feeling that we are never quite standing still. One of the biggest testaments to this fluidity comes from the recent changes made to Adobe Lightroom Classic CC. It seems as if Adobe has been extremely busy over the past year by introducing new features and settings to Lightroom.

F:\DPS Images\Four Updates for LR Article\Lightroom-updates-adobe-adam-welch-digital-photography-school-3-3.png

It’s impossible to list all of the changes here, so I’ve picked four of the biggest and freshest new features to be introduced into Lightroom Classic CC. These range from somewhat complex to some very simple tweaks that might leave you thinking “hey, why didn’t I think of that?!”

Here’s a short list of the new features which are currently available in Lightroom Classic CC v8.2 which was the most current build at the time this article was written.

Customize Develop Panels

To kick things off, we’ll take a look at a very simple yet interesting new feature introduced to Lightroom in December of 2018. Until now the only choice of customization for our Develop panels was to switch to “Solo” (highly recommended) mode. With the release of Lightroom Classic CC v8.1, we can now choose the order we want the Develop panels to appear and even decide which panels we want to have listed at all.

Lightroom-updates-adobe-adam-welch-digital-photography-school-3

I know, right? Looks a little odd to see all the panels in a different order and a few missing! To customize your Develop panels all you need to do is right-click on the title bar of any panel.

Lightroom-updates-adobe-adam-welch-digital-photography-school-3

This opens up the customizer dialog box.

Lightroom-updates-adobe-adam-welch-digital-photography-school-3

From here it’s just a matter of checking or unchecking the panels and/or dragging and dropping them into the order you like.

Show/Hide Develop Presets

Moving over from the far right to the far left side of Lightroom Classic CC, we’ll find another new feature added to the v7.4 (seems so long ago) update which dropped in June of 2018. Beginning with this build, we can now control which Develop Preset groups appear in our Preset panel. This feature is called “Manage Presets,” and it is accessed by right clicking on any Develop Preset group or by clicking the dropdown icon at the top right of the panel.

Lightroom-updates-adobe-adam-welch-digital-photography-school-3

We are then met with this preset management window.

Lightroom-updates-adobe-adam-welch-digital-photography-school-3

This is where you can check or uncheck the preset groups you want to appear in the Develop presets panel. Remember, you can always select “Reset Hidden Presets” should you ever decide you want to restore everything to the default configuration.

Preset Compatibility

While we’re on the topic of Develop presets, it’s worth mentioning another brand new aspect to grace the halls of Lightroom Classic CC in 2018. Starting with the v8.1 update, we have the option to determine which presets appear in our Develop Preset folders even more judiciously than before with the ability to hide or show partially compatible presets.

Now, you might be wondering what a partially compatible preset is? Simply put, any Develop Preset that contains a setting not compatible with your current version of Lightroom will now be italicized or hidden depending on your preferences.

Here, let me show you.

First, let’s say this preset was made with a creative profile which you don’t have installed. You’ll notice that its name appears in italics. This means that the preset is still usable, however, it only offers limited functionality.

Lightroom-updates-adobe-adam-welch-digital-photography-school-3-3

Alternatively, we can choose to not have that preset appear at all. To do this, we first select ‘Edit’ and then ‘Preferences’

Lightroom-updates-adobe-adam-welch-digital-photography-school-3-3

Next, click on the ‘Presets’ tab and then set the preset visibility checkbox to your desired preference. If left unchecked ANY of your presets that feature settings not fully compatible with your version of Lightroom will no longer appear in your presets folder.

Lightroom-updates-adobe-adam-welch-digital-photography-school-3-3

This of course can be undone at any time by simply checking the presets visibility box once again.

Single-step HDR Panorama Photo Merge

Don’t worry, just because the title is lengthy doesn’t mean this next feature is overly complicated. For years we’ve been able to tell Lightroom to stitch together our panoramic and HDR images for us. Now, the folks at Adobe have given us an incredibly easy way to combine the best of both worlds with the release of Lightroom Classic CC v8.0 back in October of 2018. We can now merger multiple bracketed photos into a high dynamic range (HDR) panorama in, you guessed it, just a single step. Well, maybe a little more than that – but it is still incredibly easy.

Lightroom-updates-adobe-adam-welch-digital-photography-school-3-3

The majority of the work involved in making use of this new feature happens before you ever import your images into Lightroom.

Namely, your photos need to be correctly bracketed and meet a few other criteria. It will be helpful to read the full release notes from Adobe to learn more about how to make sure your images are compatible with Single-step HDR Pano Merge.

In any case, once you have selected the bracketed images for your HDR pano, the actual process is remarkably straightforward. So go ahead and select them first.

Lightroom-updates-adobe-adam-welch-digital-photography-school-3-3

Then right-click on any image and select ‘Photo Merge,’ and then ‘HDR Panorama’.

Lightroom-updates-adobe-adam-welch-digital-photography-school-3-3

From here, Lightroom will create a smart preview of your HDR Panorama.

Lightroom-updates-adobe-adam-welch-digital-photography-school-3-3

You then have options to control the way the final photograph gets cropped as well as how the images combine. This new “single-step” approach to creating high dynamic range panoramas is light years ahead of previous methods. Instead of first needing to merge individually bracketed image sets into separate HDR photos, only then to require further stitching into the final panorama, we can now eliminate virtually half of the effort involved. If you’re an avid landscape photographer, you will absolutely fall in love with single-step HDR Panorama Photomerge.

And that’s not all…

Of course, this is just a taste of the new flavors Adobe has added to Lightroom in the last year or so. It’s nearly impossible to include all of the new features constantly added – and that’s a good thing. There are many more fresh features to be found in Lightroom Classic CC.

Do you have any favorites? Feel free to let us know in the comments!
 

The post Four of the Latest Updates to Lightroom Classic CC appeared first on Digital Photography School. It was authored by Adam Welch.


Digital Photography School

 
Comments Off on Four of the Latest Updates to Lightroom Classic CC

Posted in Photography


Leica launches limited edition versions of three classic M lenses

09 Feb

Limited edition versions of the Leica APO-Summicron-M 50 mm F2 ASPH, Summaron-M 28 mm F5.6 and Summilux-M 28 mm F1.4 ASPH lenses have been announced for the Leica M rangerfinder series, with alternative finishes, red markings and different materials setting them out from the normal production versions.

Each of the limited editions has its distance or aperture markings picked out in red paint, and each comes in a different paint or finish to the standard models.

The lens with the most unique features is the APO-Summicron-M 50 mm F2 which comes in black chrome, and substitutes the regular focusing ring for a ‘scalloped’ version that the company says echoes the design of the 1956 model. There is a lot of brass too, with the components of the barrel made in brass, as is the lens hood and the lens cap.

The Summaron-M 28 mm F5.6 will come in a black matt paint that’s especially hard wearing, according to Leica, making it as tough as the black chrome finishes. The Summilux-M 28 mm F1.4 will come in a silver anodized finish.

Each of the lenses will be technically identical to the standard production models, just with these cosmetic differences. There will only be 700 of the 50mm lens, 500 of the 28mm F5.6 and 300 of the 28mm F1.4 – and all will be available by the end of the month.
For more information see the Leica website.

Leica APO-Summicron-M 50 mm F2 – $ 9,595

Leica Summaron-M 28 mm F5.6 – $ 2,995

Leica Summilux- M 28 mm F1.4 – $ 6,995

Press release:

Leica Camera AG presents three new design options in the Leica M-Lens portfolio.

Leica Camera AG presents new design versions of the Leica APO-Summicron-M 50 mm F2 ASPH., Leica Summaron-M 28 mm F5.6 and Leica Summilux- M 28 mm F1.4 ASPH. lenses for the Leica M-System. The special series of the three lenses are distinguished by unique design highlights and are being offered in a limited number of examples. The performance and technical specifications of the lenses are otherwise identical to those of the serial production products.

The new series of lenses includes a black chrome version of the APO-Summicron-M 50 mm F2 ASPH. standard lens. In comparison to the serial production lens, this design alternative features a characteristically scalloped focusing ring that recalls the appearance of the Summicron 50 mm F2 (II) from 1956. The components of the barrel of this special series are machined from brass. The engravings for the focal length and the distances in feet are picked out in red. The lens is supplied complete with a classic, round brass lens hood engraved with ‘Made in Germany’ and a lens cap turned from solid brass. The edition of the lens in this design version is strictly limited to 700 examples. The APO-Summicron-M 50 mm F2 ASPH. in black chrome is available from 21 February.

The second special series presents a version of the Leica Summaron-M 28 mm F5.6 in matt black paint finish, a lens from the classic line-up of Leica M-Lenses. The Summaron-M is modelled on a screw mount lens produced at the Leitz factory in Wetzlar from 1955 to 1963. With a length of less than 2 centimetres, this extremely compact wide-angle lens is the smallest lens of the M-System lens portfolio. The special paint used for this special series is particularly resistant to wear and lends the lens an appearance almost identical to that of the classic black chrome finishes.

A further feature of the new lens is the engraving of the aperture scale visible from the front, with numbers now picked out in red. This edition of the Leica Summaron-M 28 mm F5.6 in matt black paint is limited to 500 examples for the global market. The lenses will be on sale from 28 February.

The third design option, the Summilux-M 28 mm F1.4 ASPH. in a silver anodised version, offers owners of Leica M-Cameras in silver a further high-performance lens that matches the finish of their cameras. This fast wide-angle lens is an ideal companion for reportage photography and delivers impressive imaging performance in all lighting situations. The lens with the alternative finish will be on sale from 28 February in a limited edition of 300 examples.

Articles: Digital Photography Review (dpreview.com)

 
Comments Off on Leica launches limited edition versions of three classic M lenses

Posted in Uncategorized


10 Tips to Make Lightroom Classic CC Run Faster

08 Jan

The post 10 Tips to Make Lightroom Classic CC Run Faster appeared first on Digital Photography School. It was authored by Darina Kopcok.

Making Lightroom Run Faster-Darina kopcok-DPS

Lightroom is an excellent program editing and managing your image files. When it comes to organizing and developing your photos, Lightroom can’t be beaten. However, there are times when it slows down; like when it renders previews. To address this, here are ten tips that will make Lightroom Classic CC run faster.

10 Tips to Help Lightroom Classic CC Run Faster-Darina Kopcok-DPS

Update Lightroom regularly

Let’s start with the simplest tip: update Lightroom regularly.

Word is that Adobe has been working diligently behind the scenes on improving the performance of Lightroom, so it’s important to keep it updated.

To check for updates, click on -> Help in the top menu bar in Lightroom and then click on -> Updates to install them.

Help-Updates-Lightroom-DPS

Optimize your Catalog

Lightroom continually updates the catalog file, but eventually, the data structure can become less optimal.

Lightroom has an “optimize catalog” option you can enable to improve performance.

To access this option, go to Lightroom -> Preferences and click on -> Performance.

Then click on -> Optimize Performance.

Set up Lightroom to back up on a regular schedule, and set it to optimize the catalog following the backup.

You can backup as often as you like. Ensure you always have the latest backup in case your Lightroom catalog becomes corrupt.

Be sure to discard previous backups to keep them from slowing down your computer.

More on this in a bit.

Optimize Catalog in Lightroom-DPS


Store your Lightroom Catalog and Previews on your main hard drive

Lightroom stores your catalog and preview files on your main hard drive by default.

To check where the catalog and previews files are stored, go to Lightroom -> Catalog Setting (Mac) or -> Edit -> Catalog Settings (PC).

The Catalog name is an .lrcat file and its location can be found under the -> General tab.

The preview file is an .lrdata file and it is stored in the same location.

Lightroom Catalog Location-DPS

Check your hard drive space

If your computer’s main hard drive is running low on space, Lightroom will slow down, as will any other programs that you’re running simultaneously, like Photoshop.

Your main hard drive needs at least 20% free space for Lightroom to run optimally.

Keep in mind that Lightroom can actually be one of the reasons you’re running low on space!

If you have Lightroom set to back up your catalog every day or every time you close it down, that can result in a lot of space being taken up by backup files.

Delete all of these backup files except the last couple of backups you have made.

It’s important to have the latest backup in case your Lightroom catalog becomes corrupt, but that is all you really need.

Convert your images to DNG when importing into Lightroom

DNG is short for Digital Negative. It’s a RAW file format created by Adobe.

When you convert a file into DNG, Lightroom ads Fast Load Data to the file, which results in a partially processed preview that allows Lightroom to render faster previews in the Develop module.

Adobe claims that a DNG file with Fast Load Data can load up to eight times faster.

Another benefit of converting to DNG files is that they are smaller files than other RAW formats and take up 20% less space on your hard drive.

You must enable this Fast Load Data under your Lightroom Preferences tab.

Go to -> File Handling and check off Embed Fast Load Data. Make sure you have DNG selected as the file extension.

Fast Load Data-Lightroom-DPS

Edit your images using Adobe’s recommended Adjustment Steps

The panels in the Develop module are organized according to a suggested workflow.

Adobe also recommends that adjustments in Lightroom follow a certain order to maximize performance. They are as follows:

  1. Spot Healing
  2. Lens Correction
  3. Transformations
  4. Global Adjustments
  5. Local Adjustments
  6. Sharpening
  7. Noise Reduction

Whenever you make an edit, Lightroom applies it and calculates the previous adjustments that have been made. The more adjustments you apply, the more Lightroom slows down.

This helps keep track of your edits but slows down your system because Lightroom is calculating adjustments as you edit.

I personally stick to this order, except that I start by adjusting my white balance.

I also leave detailed edits for Photoshop. For example, as using the spot healing brush repeatedly can slow Lightroom down significantly. You are better off using this tool in Photoshop, which is also more precise.

Also, editing your images in the order they appear in your Lightroom filmstrip can have an impact on speed.

Lightroom caches images for faster performance in the Develop module.

It will automatically load the next and previous images in the filmstrip below your photos in the memory.

In the screenshot below, the active image is highlighted with a lighter grey background. The images on either side have also been loaded into memory for quick access.

LR Edit Order-Darina Kopcok-EP

Build standard  previews on Import

Lightroom offers several preview settings for your images.

Although there are differing opinions as to which is the optimal preview setting, I suggest building standard previews on import.

This will slow down the import process, but it will make the Library module more responsive when you review the imported images. Lightroom renders the previews from your SSD, rather than building them from the RAW files.

Make sure your previews are set close to the width of your screen.

For example, I work on a 27-inch iMac with a 5120 x 2880 built-in retina display. This means my display should be set at 5120 pixels.

To make this adjustment, go to the -> Catalog Settings and choose -> File Handling.

Choose the previews size under -> Standard Preview Size.

Display-Lightroom-DPS

Make your Camera RAW cache larger

Lightroom has a Preview Cache, which is stored with your Catalog file and used in the Library view.

It also has a Camera RAW cache, which loads the image date when you’re in the Develop module.

The default size for this is 1GB, which slows down performance due to Lightroom swapping images in and out of its cache while you’re editing.

I suggest setting the Camera RAW cache to 20 or 30GB.

To set this option go to your Lightroom -> Preferences and click -> Performance.

Set your desired maximum size RAW cache Settings.


Disable XMP Writing

Lightroom keeps track of the edits you make in the Develop module in its catalog. If something happens to this catalog, you can lose all your data.

Lightroom can be configured to write the develop setting data into an XMP file. This a small file that contains the edit information and is written to your computer’s hard drive in the same place as your original RAW file.

The problem is that writing changes into this file can really slow your computer down.

I suggest disabling this feature and make sure that you always have a current backup instead.


Pause Address and Face Lookup features

Lightroom allows you to look up image address based on the GPS data, or the ability to search for faces.

However, allowing these options to run in the background can slow Lightroom down. So it’s best to pause them while you’re actually editing your photos.

You can start them up again if they’re relevant to your editing process.

For example, as a food photographer, I don’t use these features so I have mine set permanently on “pause”.

To access these features, go to where your name appears in the top left-hand corner of the Lightroom interface and click on the arrow beside it to access the drop-down menu. Choose -> Pause.

In Conclusion

When it comes to archiving, organizing and all-around management of your photos, Lightroom is an amazing program.

Hopefully, these tips help you get the most out of the program and speed up its performance so you can spend less time editing and more time shooting!


The post 10 Tips to Make Lightroom Classic CC Run Faster appeared first on Digital Photography School. It was authored by Darina Kopcok.


Digital Photography School

 
Comments Off on 10 Tips to Make Lightroom Classic CC Run Faster

Posted in Photography


How to Use Import and Export Presets in Lightroom Classic CC

06 Nov

When it comes to using Lightroom Classic CC (formerly Lightroom CC. Yeah, it confuses me too) there are lots of fun things to do and some not-so-fun things to do. Oddly enough, those not-so-fun (okay, painfully monotonous) undertakings can be the most pragmatic and valuable.

Don’t get me wrong. I like using the filters and sliders as much as the next guy. But sometimes you need to endure a little dullness so you have time to do more of the fun stuff.

In this article I’ll be tackling two of the less adventurous aspects of working with image files in Lightroom Classic CC: import and export presets.

The Great Power of Presets

A Lightroom preset (along with a Photoshop action) is a file containing a set of actions you want to perform. It can help you complete a relatively complicated operation without needing to perform each step manually. What’s more, it can easily be repeated as many times as needed.

Import and export presets allow you to apply certain choices when importing and exporting your images. They tell Lightroom where you want to start and end with one or more images.

Fortunately, creating and working with import and export presets is extremely easy. Let me show you how easy and useful they can be. (I promise I’ll sneak in a joke at some point to keep things fresh.)

Using Import Presets

Import presets are sets of parameters you can apply when you first import your images using the import dialog box.

Creating an import preset is a great way to speed up importing your photos. Instead of having to choose the destinations, file naming and handling, and metadata each time you bring your images into Lightroom, you can simply make a preset. What’s more, the develop and metadata presets can be automatically applied as you import them. This is a great way to not only speed up your processing but also ensure your images are protected with copyright metadata.

How to Create an Import Preset

Once you’ve selected all the options you want saved as a preset, look for the ‘Import Preset:’ tab at the bottom of the import dialog screen. This is what you’ll use to save your import preset.

Next, select the drop-down menu on the far right of the tab and select ‘Save Current Settings as New Preset…’.

Next, enter a name for your new import preset. In this example, I’ve chosen a name that’s demure and professional.

Finally, select ‘Create’. Your new import preset should now appear in the presets drop-down menu.

How to Apply an Import Preset

If you think creating an import preset is easy, wait ’til you see how painless it is to apply one to your next import.

This is the real reason why import presets are so great to have in your Lightroom toolbox.

Simply go back to the ‘Import Preset:’ tab at the bottom of the import dialog screen and select the preset you want to use. (You’ll notice I’ve added some more presets with similarly demure and professional names.)

Select the preset you want to use from the list and it will instantly be applied to your import. No more cycling through option panels or wasting time on file handling and renaming.

Using Export Presets

Export presets are the cool uncle of our import presets. They accomplish essentially the same task except they look after the back end of your editing.

In a way, export presets are even more flexible and useful than import presets. They can ensure you export and store your images correctly every time, which is important when working with websites, publications or clients that have specific image requirements. And they’re just as easy to make as import presets.

To get started, click ‘Export…’ to bring up the export dialog screen.

As you can see you have the usual suspects you can apply as you export – export location, file naming, file settings, image sizing  – along with develop presets, watermarking and output sharpening. Won’t it be great having a preset ready and waiting to save you from doing all those clicks?

How to Create an Export Preset

Creating an export preset is incredibly simple. Lightroom comes with some default export presets, but we’re going to be grownups and create our own.

Once you’ve made all the selections you want to be included in your preset, click the “Add” button

Next, choose a name and a folder for your export preset. If you want to create a new folder, select the ‘New Folder’ option from the drop-down.

Congratulations. You’ve just created your first export preset. If you regularly work in Lightroom Classic CC you’ll fine them indispensable. And your mouse (and your fingers) will thank you.

And now, as promised…

“Knock knock.”

“Who’s there?”

“An interrupting cow”

“An interrupting cow w—”

“MOOOO!” 

Thanks, folks. I’ll be here all week. Try the veal.

How to Apply an Export Preset

To use your export presets, simply select it from the list on the left. But don’t forget that all of your export presets are entirely editable.

Let’s say you want to tweak the preset you just made. To do this simply make your changes, and right-click on the preset and select “Update with Current Settings”.

This will save your current export settings, overwriting the previous export preset settings.

Note: This won’t change the name of the preset. So to avoid any mixups for future exports you should save the changed settings as a new export preset.

Some Final Thoughts on Import and Export Presets

The question isn’t whether you should use import and export presets, but rather why on earth wouldn’t you use them? Your time is valuable, so why not work smarter instead of harder. Sure, creating import and export presets isn’t the most glamorous part of working in Lightroom. But the time and guesswork they’ll save you are definitely worth the effort.

If you don’t currently use these types of presets I hope this article gives you the kick you need to do yourself and your processing a huge favor.

The post How to Use Import and Export Presets in Lightroom Classic CC appeared first on Digital Photography School.


Digital Photography School

 
Comments Off on How to Use Import and Export Presets in Lightroom Classic CC

Posted in Photography


How to Find Your Best Photos Using Compare View In Lightroom Classic CC

01 Sep

To compare your images in Lightroom, you can either use Survey View or Compare View. In this article, I will focus on Compare View in Lightroom Classic CC.

Comparing images allows you to choose the very best image or images to edit in the Develop Module. Compare View is used to compare two similar images, whereas Survey View is useful for comparing a series of similar photos to narrow down your favorite choices.

I personally use Compare View often because as a still life photographer, I am often filtering through many images that are very similar to each other. Compare View allows you to do this efficiently. Grid View in the Library Module is where you can find and utilize Compare View.

Using Compare View

With the images of the Brussels sprouts below, my goal was to select the best composition. Although the pictures look really similar, some of them are better than others in terms of the placement of the knife and the Brussels sprouts, and how they lead the eye through the frame. I wanted the cut Brussels sprout to fall in one of the focal points according to the Phi Grid, and the other small pieces to look random and well balanced.

This is how some of the unedited images look in Grid View.

Grid View-Best Photos Compare View In Lightroom Classic

To compare your images, start in Grid View. The keyboard shortcut to get to Grid View is G.

Then enter  C to go to Compare View. You can also hit the X/Y icon on the left-hand side of the toolbar.Using Compare View-Lightroom-DPS

Choose the first image you would like to compare. This will appear in the left-hand window and is labeled Select in the upper right-hand corner. The next image in the Lightroom filmstrip appearing on the right is the Candidate.

Select Candidate Compare View In Lightroom Classic

Info Overlay

If you hit the letter I on the keyboard, you will be able to see the date and time you shot the image in the left-hand corner of the image, as well as the pixel size. If you hit the “I” key again, it will display your camera settings and lens information. Hit it for the third time and the info overlay will disappear.

Compare View In Lightroom Classic

File date and size.

Compare View In Lightroom Classic

Camera metadata and shooting information.

If you select only one photo and then switch to Compare View, Lightroom Classic CC uses that photo and either the last, previously selected photo, or an adjacent photo in the filmstrip.

Compare View-Lightroom-DPS

When you look at your filmstrip, the white diamond in the upper right-hand corner of the image is the Selected one, whereas the black diamond is the Candidate. The Selected image is brighter as seen here (thumbnail on the left).

The difference between the Selected image and Candidate is that the Selected image will remain where it is on the left, while you can choose different photos in the Candidate window. You do this by clicking on the right or left arrow in the toolbar, or using the arrows on your keyboard.

Compare View Icons

Here is the toolbar in Lightroom’s Compare View.

LR Toolbar - Compare View In Lightroom Classic

Zoom

The cool thing about Compare View is that you can zoom in on your image, which you cannot do in Survey View. You can access the zoom at the bottom left of the tool panel, as shown in the photo below.

You can also use Cmd/Ctrl+ to zoom in, and Cmd/Ctrl- to zoom out. While you are zoomed in you can click on the image and drag it around to inspect it closer, to see if it’s in focus, or if there was dust on your sensor, etc.

Link Focus

The link focus icon looks like a lock. When you’re scrolling through a zoomed-in image, both of the images will move. If you click on the lock icon to “unlock” it, it will allow you to scroll around only on one of the photos.

This is good if you’re comparing images with a slightly different composition. It’s a great tool when you want to check that all of the people in a group photo have their eyes open, for example.

Compare View Compare View In Lightroom Classic

Sync

If you click to unlock the Link Focus tool, once you want to go back to viewing the same parts of your image at the same time, you simply need to click on the Sync button next to the zoom. This button controls the zoom sync ratio.

sync-compare view-lightroom

Swap

Use Swap to change the image that shows up in the Select window. It swaps it out with the image that is currently in the Candidate window.

Take care that when you are choosing photos in the filmstrip that you actually click on the photo itself, and not the frame. If you click on the grey part, not only are you choosing the photo as a Select but also you are choosing the photo next to it as the Candidate photo.

You can also swap photos by clicking on the images individually in the filmstrip.

Compare View In Lightroom Classic

Make Select 

When you click on this icon, it will move to the Select Window and use the next photo in the filmstrip as the Candidate. Swap simply reverses them.

Compare View-Lightroom-DPS

Select Previous/Next Photo

Then you can click on the arrows to toggle through the images in the Candidate window.

Compare View-LR-DPS

Rating Images

Photographers all have their preferred way of rating their photographs, whether that be by flagging them, adding a color label, or star rating. You can do this in Compare View.

I personally find flagging is the easiest way. After I have finished going through my photos and am in the Develop Module, I will use star ratings to signify where I am in the editing process. For example, four stars need further editing, while five stars indicate that I have finished editing and exported them to the appropriate file.

I use color labels to separate my personal photos from client work and stock images. Currently, this is what is working for me. You may have a very different system.

Flag the photographs you are potentially interested in editing by hitting P, which marks it as a “pick”. To mark one as a reject (for later deletion), hit the X on your keyboard. If you keep your CAPS lock on, you can simply hit the arrow keys. You can later delete all of those rejected images in bulk.

To Sum Up

  • Go to Grid View
  • Choose your Select Image
  • Choose C for Compare View
  • Use the arrows to cycle through the images. Inspect them as necessary, using the Zoom and Link Focus tools as necessary. 
  • Pick the images you want to keep by hitting P to flag them. Hit X for any images you want to get rid of. Rate them now if desired.

Compare View is a bit more difficult to use than Survey View. However, you can also cycle through your images very quickly, once you get the hang of it.

Take advantage of Lightroom’s powerful features to quickly filter through tons of your photos. You can immediately get rid of images that don’t work and you’ll never use, or images that are very similar but miss the mark. This will free up space and make your life a lot easier when it comes to searching for photos and going through Lightroom’s filmstrip.

The post How to Find Your Best Photos Using Compare View In Lightroom Classic CC appeared first on Digital Photography School.


Digital Photography School

 
Comments Off on How to Find Your Best Photos Using Compare View In Lightroom Classic CC

Posted in Photography


Adobe updates Lightroom CC, Lightroom Classic CC and Camera Raw

22 Aug

Adobe has released its August 2018 update for Adobe Lightroom CC (v1.5), Adobe Lightroom Classic CC (v7.5) and Adobe Camera Raw (v10.5). Across the board, the update brings along bug fixes, new features and support for more cameras and lenses.

First on the docket is Adobe Lightroom CC (v1.5). The stand-out feature of the update is the ability to store albums locally. Now, you can download images from an album onto your computer and edit them offline if you’re going to be without internet for a bit. The next time you get internet the images will sync to the files stored in Creative Cloud.

Adobe Lightroom CC (v1.5) also brings the ability to see what albums a particular image belongs to. Windows users now have support for Apple’s HEIC image file format as well.

Onto Lightroom Classic CC (v7.5), Adobe has added the ability to upload presets and profiles in bulk, rather than having to do it one-by-one. ‘You can import XMP presets and profiles, DCP profiles, and LCP profiles as part of a zip file,’ says Adobe in its press release. ‘However, .lrtemplate presets can’t be imported as part of a zip file.’

Adobe also added two new book types (Blurb Magazine and Blurb Trade Book), as well as a new paper type (Standard Layflat) inside the Book module of Lightroom Classic CC. Lightroom Classic CC (v7.5) for Windows also receives support for Apple’s HEIC image file format.

Bug fixes inside Lightroom Classic CC (v7.5) include fixes for various preset issues, exporting problems, metadata errors and performance issues. You can find a full list of squashed bugs on Adobe’s announcement page.

The update to Adobe Camera Raw (v10.5) is rather minor, as it only adds support for three new cameras and eight new lenses. Support for these new cameras and lenses has also been added to Adobe Lightroom CC (v1.5) and Lightroom Classic CC (v7.5). Below is a complete list of the new cameras and lenses supported in these updates:

Cameras:

  • Parrot Anafi
  • Sony RX100 VA (DSC-RX100MSA)
  • Sony RX100 VI (DSC-RX100M6)

Lenses:

  • Nikon AF-S NIKKOR 180-400mm f/4E TC1.4 FL ED VR
  • Nikon AF-S NIKKOR 180-400mm f/4E TC1.4 FL ED VR + 1.4x
  • Anafi 23mm F2.4
  • SIGMA 70mm F2.8 DG MACRO A018
  • SIGMA 105mm F1.4 DG HSM A018
  • Sony FE 400mm F2.8 GM OSS
  • Sony FE 400mm F2.8 GM OSS + 1.4X Teleconverter
  • Sony FE 400mm F2.8 GM OSS + 2X Teleconverter

You can find a full list of cameras and lenses supported by Adobe products here and here, respectively.

The updates for all three apps went live today, so head to your Adobe Creative Cloud desktop app (or respective app store) and update your programs.

Articles: Digital Photography Review (dpreview.com)

 
Comments Off on Adobe updates Lightroom CC, Lightroom Classic CC and Camera Raw

Posted in Uncategorized


An In-Depth Look at the Range Mask in Lightroom Classic CC

22 Jul

Lightroom is an ever-changing ever-morphing evolution of the cutting edge of digital image processing. Quite literally, it seems like Adobe releases new features and updates for their upper tier consumer photo editing software extremely frequently. Now, some of these updates and new features are loved by the photographic community and others…well, not so much.

One of these brand new features, called the “Range Mask”, came along with the v7.2 release of Lightroom Classic CC back in February (2018) and it caused quite a stir. It allows you to incorporate masking with the local adjustment tools right inside of Lightroom V7.2 and later.

An In-Depth Look at the Range Mask in Lightroom Classic CC - Death Valley

As with most fresh features in Lightroom, some photographers were a little bit skeptical about its actual usefulness in their editing workflow. It’s an interesting tool to be sure and after this, you’ll know everything there is to know about the brand new range mask feature in Lightroom Classic CC.

What is the Range Mask?

Before we get too far into the conversation let’s take a moment and briefly talk about masks as they pertain to editing photographs. A mask is simply a way for you to control what areas of a photo receive the edits you want to apply. There is a huge range of mask types and they vary quite infinitely in their applications.

Usually, masks are routinely used in Photoshop. The old adage “black conceals and white reveals” was born directly from the usage of layer masking inside Photoshop. For the purposes of understanding the range mask in Lightroom, just know that masks allow selective control over edits within a photo.

The new range masking feature provides you with two different methods for applying masks: luminance and color.

Luminance Range Masking

If you’re a Photoshop user, think of luminance masking as a boiled down version of luminosity masks. Don’t sweat it if you’ve never used luminosity masking in Photoshop. Just know that the luminance mask applies local adjustments based on the brightness range you select.

luminance slider - An In-Depth Look at the Range Mask in Lightroom Classic CC

This means that you can apply any edit from a local adjustment tool to only the shadows, highlights, or mid-tone luminance ranges that you choose. The luminance masking function also features a “smoothing” slider. This controls the intensity of the masking effect from hard to soft.

Color Range Masking

Conceptually, the color range mask works just as the luminance range mask except instead of basing its masking on brightness it relies on the color ranges you select with the dropper tool.

color range mask - An In-Depth Look at the Range Mask in Lightroom Classic CC

The dropper tool lets you select a large color palette by clicking and dragging the eye-dropper over an area of your photo.

An In-Depth Look at the Range Mask in Lightroom Classic CC

Using the eye-dropper tool to select the color range.

Alternatively, you can also select up to four (five without the large area selected) highly specific color areas by shift+clicking each desired point.

An In-Depth Look at the Range Mask in Lightroom Classic CC

Using the dropper to select up to 5 target colors for the mask range.

It’s important to note that you can not use both the luminance and color range masks within the same local adjustment tool at the same time. However, you can create a new local adjustment (or duplicate one) and “layer” the masks as many times as you see fit.

How to use the Range Mask in Lightroom Classic CC

Alright, let’s get down to business and look at an example of how the luminance and color range masks work. It’s extremely easy and can yield some impressive results once you get the hang of things.

Using the Luminance Range Mask

Here’s an image from an awesome night I spent in Death Valley a couple months ago.

death valley no-edit An In-Depth Look at the Range Mask in Lightroom Classic CC

Let’s say I want to use the Gradient Filter tool to brighten up that foreground and bring out a little more detail around the two people crouched by the fire.

An In-Depth Look at the Range Mask in Lightroom Classic CC

That looks okay, but it definitely caused the highlight portions of the sky to be a little too bright for my taste. To solve this, I’ll apply a luminance range mask.

Simply select “Luminance” from the mask selection drop-down. Next, adjust the slider so that most of the highlights are excluded from the gradient filter adjustments and voila! The sky is no longer overexposed yet the foreground is now much more visible.

And since you can use the range mask with any edit in the local adjustment tool kit I went ahead and added in a little clarity and highlight boost to really make the foreground pop.

To truly demonstrate the effect of the luminance range mask I’ll tick the “show selected mask overlay” box at the bottom of the view window (the keyboard shortcut to show the overlay is O). The areas in red are the portions of the image where the gradient filter has applied its edits.

An In-Depth Look at the Range Mask in Lightroom Classic CC

Gradient Filter applied without a mask. See how it is affecting parts of the sky as well.

Next, let’s have a look at the effect of the luminance range mask.

An In-Depth Look at the Range Mask in Lightroom Classic CC

Gradient Filter with the Luminance Mask applied. Notice how the sky is now less affected in the bright areas.

Notice how the red masking recedes from the highlights in the skyline? It’s not overly obvious in this example but it will be incredibly apparent when we take a look at the effects of the color range mask.

Using the Color Range Mask

We’ll stick with the same photo from earlier for this example. But this time I’m going to use a Radial Filter to brighten up the fire and add some saturation to make the orange glow of the flames stand out more from that gorgeous purple of the desert night.

First, let’s see how a normal Radial Filter looks when applied to the area in question.

An In-Depth Look at the Range Mask in Lightroom Classic CC

Radial Filter applied in Lightroom Classic CC.

Sure, it definitely brightens and adds saturation to the fire but it also added the adjustments to the entire filter area.

To remedy this, I’ll use the color range mask. I begin by using the‘shift+click and drag method to select the majority of the fire area color. Next, I set the Amount slider for the color range mask virtually to zero so that the mask really targets just those oranges and reds. This is the result:

An In-Depth Look at the Range Mask in Lightroom Classic CC

And remember how I said you could immediately discern the effects of the color range mask? Well, look at the mask overly before the color masking was applied….

An In-Depth Look at the Range Mask in Lightroom Classic CC

Radial Filter without masking.

…and now check out the incredible selectivity of the color mask.

An In-Depth Look at the Range Mask in Lightroom Classic CC

Radial Filter with color range mask applied.

Final Thoughts on the Range Mask in Lightroom Classic CC

The new range mask feature borrows the power of Photoshop layer masks and brings it home to the warm safety and comfort of Lightroom. While the range mask is admittedly nowhere near as versatile and customizable as say a luminosity mask in Photoshop, it does have its own excellent merits when it comes to taking more control of your local edits.

With the luminance range mask, you can fine-tune where your edits are applied based on the brightness levels within the photo. This is hugely beneficial when working with highly contrasted scenes and works great for black and white images.

The color range mask harnesses the power of color to let you creatively select exactly which tones will receive your adjustments. As you saw in the examples above, the color range mask is an excellent way to really bring out the contrast when working with complementary colors.

If you haven’t updated to the Lightroom Classic CC v7.2 or later then I urge you to do so now. Take the new range mask feature for a spin and let us know what you think in the comments below.

The post An In-Depth Look at the Range Mask in Lightroom Classic CC appeared first on Digital Photography School.


Digital Photography School

 
Comments Off on An In-Depth Look at the Range Mask in Lightroom Classic CC

Posted in Photography


Lightroom Tricks: How to Process Video in Lightroom Classic CC

03 Jul

Video? Wait…what? Isn’t this Digital Photography School? Yes, it most certainly is and yes you indeed read the title of this article correctly. I’m about to show you how easy it is to actually process video right inside of Adobe Lightroom Classic CC.

Now, this isn’t exactly a true hack (no Matrix stuff here) but it is a way for you to “work around” some of the limitations of Lightroom when it comes to processing your video files.

A possum and a movie camera 1943

By Australian War Memorial collection from Canberra, Australia (A possum and a movie camera 1943) [No restrictions], via Wikimedia Commons

Lightroom has always been able to support limited video editing in the Quick Develop module but not in the processing powerhouse that is the Develop Module. Many photographers today tend to work with some type of video format in addition to their photography ventures. I happen to run my own YouTube channel which means I shoot quite a bit of video as well as working in straight photography.

Lots of wedding and event photographers split their time between making images and recording video. Furthermore, aerial photography and video have exploded lately with the increased commercial availability of drones. This means there are a lot of photographers out there with video files that need to be processed quickly. If you’re in a pinch, being able to use Lightroom to easily process a quick video is invaluable.

Alright, enough of building it up. Let’s get down to business and learn how to use Lightroom process video files.

Import the Video

The process of importing a video file into Lightroom is exactly the same as any other image file. Once the video file is imported you have the ability to view and play the video in its entirety right inside of the Library  Module.

This is where the problem with video processing in Lightroom begins. Once you try and switch to the Develop Module you’re confronted with this…

Lightroom Tricks: How to Process Video in Lightroom Classic CC

Conventionally, this is as far as you can go with your video file. If you stop here you’re limited to the Quick Develop buttons at the top right.

Lightroom Tricks: How to Process Video in Lightroom Classic CC

You do have the ability to apply presets here but these are an end unto themselves. Meaning, you can’t adjust the video appearance using the adjustment sliders in the Develop Module. Or can you? Yes, you can, as a matter of fact. And this is where the gentle hacking begins.

Capture a Frame

To begin your Lightroom trickery, and therefore the editing of your video, you first have to capture a frame of the video. This essentially becomes an image file and you’ll use this image to apply your edits that will eventually be transferred to the video. To obtain the frame capture, simply click the small frame icon below the video and select Capture Frame.

Lightroom Tricks: How to Process Video in Lightroom Classic CC

Now you have what is really just a screenshot from the video. The new frame capture appears immediately after the video in the film strip (see red arrow below).

Lightroom Tricks: How to Process Video in Lightroom Classic CC

Process the Frame Capture

To process your frame capture you first need to switch over to the Develop Module from the Library Module. It’s easy to think that you somehow need to augment your workflow since you’re processing a frame capture. This is not the case.

Process this image captured from the video just as you would any other normal photo. Keep in mind though that you are only able to save the following edits for transfer to your video.

Lightroom Tricks: How to Process Video in Lightroom Classic CC

Only the adjustments not greyed out below are available to copy over to video files.

Here’s the breakdown:

  • Treatment and Profile
  • White balance
  • Exposure
  • Contrast
  • White clipping
  • Black clipping
  • Vibrance
  • Saturation
  • HSL
  • Split Toning

Yes, unfortunately, there will be no Clarity, Sharpening or Vignetting applied to your video in Lightroom. But look at that list! Of special interest is the tone curve which will give you amazing control over the look of your video. For this example, I’ve made some fairly extreme edits for the sake of demonstration.

Lightroom Tricks: How to Process Video in Lightroom Classic CC

You may be thinking “Okay, but how do I get those edits onto the video?” You’re in luck. I’m about to show you how, and it’s incredibly easy.

Sync the Edits

The magic happens when you synchronize the edits you’ve just made to your frame capture with the video file you’ve imported. In truth, you can sync the edits from any image you have in the Lightroom catalog but the most predictable method is by using a still from the actual video you’re processing.

To sync the processed frame capture and the video, first, you need to switch back to the Develop Module. Then use Ctrl/Cmd+click to select both the video file and the frame capture from the film strip.

Lightroom Tricks: How to Process Video in Lightroom Classic CC

Next, it’s just a matter of clicking the “Sync Settings” button at the bottom right.

Lightroom Tricks: How to Process Video in Lightroom Classic CC

That’s it! All of your edits are instantly transferred from the frame capture to the video.

Lightroom Tricks: How to Process Video in Lightroom Classic CC

Export the Video

Once all the editing is over, the method to export the video file is just as simple as importing. Simply choose the destination, file naming and quality settings for the video. You can even add your own watermark.

Lightroom Tricks: How to Process Video in Lightroom Classic CC

Final Thoughts….

Is processing your videos in Lightroom the ideal method? I don’t think so. Is it an easy and effective way to apply some creative edits to your video file? Absolutely.

I actually process most of my videos in this manner and then export them to another program to finish the cutting and final processing. Lightroom gives us the ability to apply most of the same processing power to our videos, with a few limitations.

If you’re like me and constantly on the go, being able to stay in a familiar photo processing program like Lightroom is a welcomed alternative to more involved video processing software. Try it for yourself if you need an easy way to process your video clips!

The post Lightroom Tricks: How to Process Video in Lightroom Classic CC appeared first on Digital Photography School.


Digital Photography School

 
Comments Off on Lightroom Tricks: How to Process Video in Lightroom Classic CC

Posted in Photography


Understanding Creative Profiles in Lightroom Classic CC

26 Jun

In April of 2018, Adobe took a much-anticipated advance in the way it allows users to process their images in Lightroom. Beginning with the version 7.3 release of Lightroom Classic (and ACR 10.3) Adobe now offers the use of something called “Adobe Profiles” as well as “Creative Profiles”.

For us photo nerds, this is a BIG deal.

Understanding Creative Profiles in Lightroom Classic CC

Image courtesy Adobe Blog https://theblog.adobe.com/april-lightroom-adobe-camera-raw-releases-new-profiles/

But exactly what are these new “profiles” and how can you use them in your everyday image processing? Well, sit back and relax because I’m about to tell you all about the brand new creative profile section in Lightroom Classic. If you can’t tell…I’m really excited about this!

What are Creative Profiles?

Before we go too far it’s important to note that you’ve probably used profiles before either in Lightroom or right inside your camera. All those settings in your camera for things like Vivid, Standard, Landscape or Portrait are all considered profiles.

Understanding Creative Profiles in Lightroom Classic CC - camera profiles landscape

All of those modes found in your camera are just a way that your camera’s tiny internal computer can process your images. When you shoot RAW, those profiles are simply bypassed in favor of more control in your editing later. The new creative profiles in Lightroom Classic work in essentially the same way.

Think of the profiles as ways to “cook” your RAW files while not needing to sacrifice any editing power. Furthermore, Lightroom’s new profile feature harnesses the user-friendliness of develop presets and integrates that creative simplicity with the power and flexibility of what’s called a color LUT (look up table). I won’t go too far into explaining LUTs in this article but just know that they are used extensively to color grade images.

The great thing about the creative profiles is that they allow you to use custom made LUTs in your editing.

How to Use Creative Profiles

Making use of the new profiles feature in your editing is extremely easy. These profiles can be applied just like develop presets…only not. What I mean by this is that a profile is similar to a develop preset in that it instantly performs edits for you with simply a click of the mouse. But this is where the similarity between profiles and presets end.

The difference comes down to how the nature of the profiles and how they apply their edits. Develop presets are simply saved blueprints of adjustment slider settings. This means that develop presets override the current setting of each adjustment slider and set each slider according to the saved value on the preset.

Understanding Creative Profiles in Lightroom Classic CC - LR preset settings

While develop presets are a powerful tool for any workflow, you can still run into trouble when you begin to use multiple develop presets while editing the same image.

Applying Profiles

A creative profile works differently from a preset in that it does not rely on the adjustment sliders to make changes. This means that a profile can be added at any time during your processing workflow without affecting the edits you might have already made. Let me show you.

This image has had some basic processing and now I’m going to apply one of my presets.

Understanding Creative Profiles in Lightroom Classic CC - scene of a desert and dark blue sky

Have a look at the adjustment sliders before…

Understanding Creative Profiles in Lightroom Classic CC - sliders in LR

…and now after the develop preset is applied.

Understanding Creative Profiles in Lightroom Classic CC

The preset will automatically change the respective sliders that I saved when I made the preset. This can cause some problems especially if you choose to apply the preset at the end of your editing. It can be one big post-processing headache.

Next, we’re going to take that same image and apply a creative profile.

Just look at the image and the sliders as compared to before we applied the profile. The profile has applied edits without affecting those we already have made.

Understanding Creative Profiles in Lightroom Classic CC

I don’t have to tell you how extraordinarily convenient it is to be able to impart a certain look to the photo without disrupting the things I’ve already adjusted.

Adjusting Profile Density

Not only can profiles be used completely autonomously of the current image adjustments, but you can also control how much of the profile is applied. Think in terms of opacity and intensity.

You can now determine how much or how little of the effect you need and then dial in the desired setting using the amount slider.

Understanding Creative Profiles in Lightroom Classic CC

Here’s the profile effect at approximately 75%…

Understanding Creative Profiles in Lightroom Classic CC

…and now with about 25%

Understanding Creative Profiles in Lightroom Classic CC

Something to keep in mind when using profiles is that even though they are more flexible than develop presets that doesn’t mean they don’t come without their limitations.

The main one being that you can only apply one profile at a time. So don’t get any ideas of stacking profiles…at least not yet.

Final thoughts on Creative Profiles

I love presets. I love making presets. In fact, a good bit of my work revolves around the developing and constructing of develop presets for Lightroom. So when I say that I love the direction Adobe is heading with the profiles feature in their latest versions of Lightroom Classic CC hopefully you’ll want to give them a try as well.

Profiles are extremely similar to develop presets in that they allow you to perform a lot of processing in the fraction of the time it might normally require. The difference between profiles and presets is not in their outcome but rather in the little detours each one takes to reach the final destination.

Will profiles ever totally replace develop presets? I don’t think so, at least not for a while. And why should they? Like most aspects of photography, each small link in the chain serves to pull together a greater whole; it’s in this way that presets and profiles complement each other.

Once you understand the basics of using Adobe’s new creative profiles each one of them will serve you extremely well. As always, use presets and profiles up to and never beyond the point of your own creative vision for your images. Less is usually more. Have fun and enjoy shooting!

The post Understanding Creative Profiles in Lightroom Classic CC appeared first on Digital Photography School.


Digital Photography School

 
Comments Off on Understanding Creative Profiles in Lightroom Classic CC

Posted in Photography


Adobe apologizes for Lightroom Classic CC bugs, releases bug fix update

25 Apr
Credit: Adobe

The latest update to Lightroom Classic CC—a ‘massive update’ to camera profiles for both Lightroom and ACR—came complete with an infuriating set of bugs that, judging by our comment section, left Adobe users quite frustrated. But have no fear: the software giant is back with an apology and a slew of bug fixes in the form of Adobe Lightroom Classic CC 7.3.1.

The release went live this morning, complete with this apology on the Adobe blog:

We heard your feedback and felt that parts of the release didn’t uphold the level of quality that we hold ourselves to. We’re happy to report that these issues were resolved and now available for immediate download. Some of the issues resolved included converting presets, sorting and copying/pasting profiles, translation errors, along with crash fixes.

You can download the update and read the full release notes at this link, but here is the TL;DR about what this Lightroom Classic CC update fixes:

  • An issue where some presets were not converting to the new format.
  • An issue with B&W legacy presets where the profile resets to Adobe Standard
  • An issue where Develop presets were not sorting correctly
  • Translation errors in other languages for some profiles
  • An issue where users were unable to copy/sync Black and White Mix settings
  • Lightroom backup catalog error issues.
    • Note: To resolve corruption issue in the backed up catalogs, update to Lightroom Classic CC v7.3.1 and then back up your catalogs again. If you’re backing up your catalogs on macOS, see this known issue related to catalog compression below.
  • Known Issue on macOS only: When backing up your catalogs on macOS, Lightroom Classic doesn’t compress (zip) catalogs that have a file size less than 4 GB. As a workaround to this issue, manually compress the backed up catalog files. Compressed files take up less hard disk space. By default, Lightroom Classic saves backed up catalogs to the following location on macOS:
    • /Users/[user name]/Pictures/Lightroom/[catalog name]/Backups

To update to the latest version, simply run the update in the Creative Cloud Desktop App.

Articles: Digital Photography Review (dpreview.com)

 
Comments Off on Adobe apologizes for Lightroom Classic CC bugs, releases bug fix update

Posted in Uncategorized