
Image courtesy Miggo
As the Editor here at dPS I don’t usually do gear reviews here any more, but Miggo sent me a beta version of their new Agua bag to try out so here are my thoughts.
Miggo Agua Features
Directly from their product brochure, here are some of the main features of this bag:
- Comes in three sizes from large SLR down to small for mirrorless cameras.
- Storm-proof: water, sand, wind, snow, it keeps it all out and your camera safe from the elements.
- Quick-draw ability (more on my thoughts about that later)
- QUick-adjusting padded strap
- Dual-use strap: connect to the bag or to your camera
- Lens cap inner pocket (never lose your cap again)
- Thermo-forming front lens protector – put your camera in the bag without the cap on and it it still protected

Image courtesy Miggo

Image courtesy Miggo
Is it really waterproof?
I wanted to challenge their claims that it is storm and waterproof but not risk my camera just in case. So I decided to use a roll of toilet paper, tucked inside the bag to test its ability to stay watertight. As I was relaxing in the Canadian Rocky mountains last week I took it with me and went off in search of a stream. I decided this one would do nicely – it had nobody around to watch me and think I was a complete weirdo.

Stream I found to test the waterproof claims for this bag.
So I borrowed the tissue from my hotel bathroom and stuffed it inside the bag.

Test subject – hotel toilet tissue.
Zipped it up and plunged it fully into the stream. First thing I noticed is that the zippers are a bit stiff and sticky. Could be a symptom of being a beta version, perhaps something they are working on for the final release.

I put the bag right into the running water.

I moved it around to cover all areas of the bag, and left it there for a couple minutes.
So did it hold true to its claims? Did the little Miggo Agua bag keep the paper dry? Watch this little video I made and find out!
How did the bag handle?
Okay the next thing I tested was how comfortable and usable is the bag. They had sent me the mirrorless size so I put my Fuji X-T1 inside with the standard 18-135mm lens that comes with that rig. It did not fit! I removed the lens hood, and took my tripod insert off the bottom of the camera and still it did not fit. Hmmm . . .

The bag would not close with my Fuji X-T1 with 18-135mm lens attached (no lens hood).
I had to switch lenses to my 35mm f/1.4 which is much more compact and finally it fit inside the bag.

Had to resort to the smaller 35mm lens to give this a go.
Attaching the camera to the little quick-draw thing was a bit finicky and a bit annoying. I already have my regular camera strap in the o-rings attached to the camera. To get it to work with the Miggo I had to also add one of their straps as well. You can see how it goes on and clips inside the bag in the image below.

The camera attaches only to the left side of the bag via this strap and buckle.
It only attaches on one side of the camera (left), then tucks inside the bag. I found using it in this manner was a bit cumbersome actually. I couldn’t leave the bag undone or the camera would pop out (not good), so I was forced to zip it up after each shot. Once again the sticky zipper was a bit annoying as it took two hands to do it up and undo it each time.
I found the little cloth strap that attaches to the camera bit thin too. I find that with most camera straps there is wear and tear and the straps start to get frayed and worn through by rubbing on the o-ring and the camera itself. I could see this one getting worn through fairly quickly, but then again maybe not because it’s always inside the bag.

Notice how the bag doesn’t really bend? It’s very stiff.
Overall I found the bag a bit crunchy. The fabric is very sturdy but a bit inflexible, it doesn’t mould to the body or bend much at all. I didn’t hike around with it all day but could see it rubbing if one were wearing shorts.
Size
I already mentioned that my Fuji didn’t fit inside the size designed for mirrorless cameras – perhaps I’d need to go a size up, but that would be good to know before you buy it. I also found that I had to carry a second bag with me because there is no room inside the Miggo Agua for anything other than one camera and lens attached. Nothing!

Bag size comparison for reference.
Above you see the size comparison to my LowePro Passport Sling bag, which I often use as a small day bag. It holds two lenses, batteries, a water bottle (as you can see in the photo), and personal items like a jacket, book, etc.
I would have loved to see an extra pocket for a spare battery or memory card, maybe even one small lens. As it is it’s pretty limiting.
Construction and build
No beefs here with construction and build, it is solidly made. The inside is double padded, the zippers tuck up under little flaps to keep the bag waterproof and the bottom is extra protected so you can put your lens inside without a cap and not worry.


Pros and Cons
Pros of the Miggo Agua
- It certainly does what it claims and keeps the water out.
- It is compact.
- The strap is comfortable and adjustable.
- Great for adventurers that want to have their camera handy when hiking.
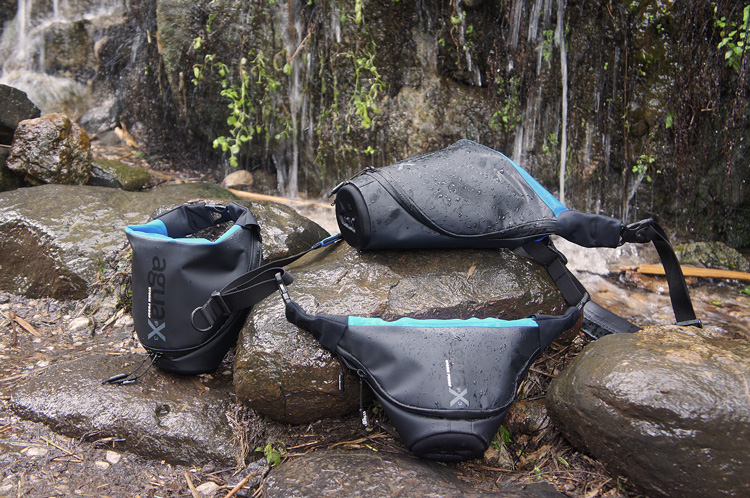
Image courtesy of Miggo
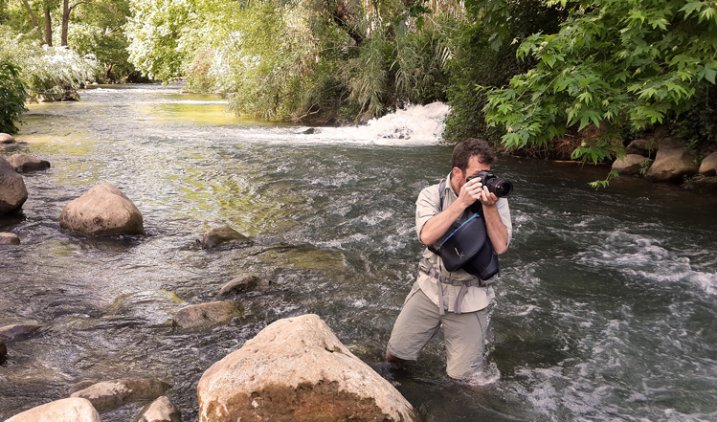
Image courtesy of Miggo
Cons of the Agua
- It isn’t big enough to fit all mirrorless cameras. Size description needs to be more clear or a list of which cameras fit into which size nicely available before you purchase a bag.
- There is no room for anything else – just one camera and lens attached – so it’s application is limited.
- The attachment of the camera inside the bag just feels “off”. The strap is thin and having it only attached to one side makes it feel unbalanced somehow.
- The zipper is a bit stiff and sticky.
- It’s nearly impossible to leave the camera out, it has to be tucked away and zipped up after every use or shot.
Who is this bag good for?
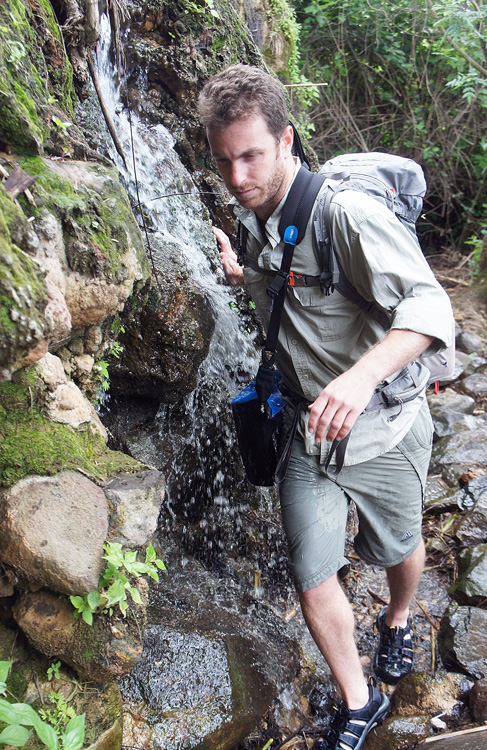
Image courtesy of Miggo
I’m giving this bag 3.5 out of 5 stars, mostly because there are a few things that could use improvement and I’m guessing that because this is a prototype some of those bugs will be worked out before the final version is released.
I would recommend this bag if you are a backcountry hiker, like to kayak, do extreme sports, or spend a lot of time on the beach. This little bag will allow you to take your camera along and keep it safe in conditions you might otherwise leave it behind.
This bag is likely not for you if you just do mostly city shooting and tend not to push the boundaries of where you take your camera. Also if you like to drag around all your lenses and extra stuff you may find its size limits too much for you and another option like a rain cover on your existing bag may be all you need.
Learn more – get it early
You can find out more about the bag in this video from the manufacturer or check out their Kickstarter campaign (already funded!) and get in on getting one of these bags early.
googletag.cmd.push(function() {
tablet_slots.push( googletag.defineSlot( “/1005424/_dPSv4_tab-all-article-bottom_(300×250)”, [300, 250], “pb-ad-78623” ).addService( googletag.pubads() ) ); } );
googletag.cmd.push(function() {
mobile_slots.push( googletag.defineSlot( “/1005424/_dPSv4_mob-all-article-bottom_(300×250)”, [300, 250], “pb-ad-78158” ).addService( googletag.pubads() ) ); } );
The post Camera Bag Review – Miggo Agua by Darlene Hildebrandt appeared first on Digital Photography School.

Digital Photography School


You must be logged in to post a comment.