RSS
 

Posts Tagged ‘Balance’

How Auto White Balance Can Hinder Your Photography

01 Feb

You’ve likely heard that auto settings like auto exposure and autofocus aren’t fail-proof. They’re strong features, no doubt, and most photographers take advantage of them at least some, if not all, of the time. But the key to success with auto-anything is to make it work for you; that is, to understand its limitations, and know when it’s not going to give you the best results.

If you’ve been a photographer for very long, you’ve likely run into the situation in which a very bright scene, a snowy landscape, for example, caused your camera’s auto exposure to significantly underexpose the shot, giving you murky gray snow instead of brilliant white. Likewise, a shot that was naturally dark, like a portrait of a black dog, might have been recorded too light, also resulting in unwanted gray or brown.

In both of these cases, the auto exposure was tricked by the scene’s overall light or dark tone, and attempted to compensate for this problem by doing exactly what it’s designed to do: choose an exposure that will average out the tones in the scene. For many photographs, auto exposure does a fine job of selecting a correct exposure, for scenes when average is correct. The trouble is when a situation is not average. In those cases, it’s up to you, the photographer, to make the necessary adjustments.

DJ ATM7 40 2

DJ ATM7 40

The exact same thing happens with your camera’s Auto White Balance, only in this case, the issue is not with light intensity, but with color.

The Color of Light

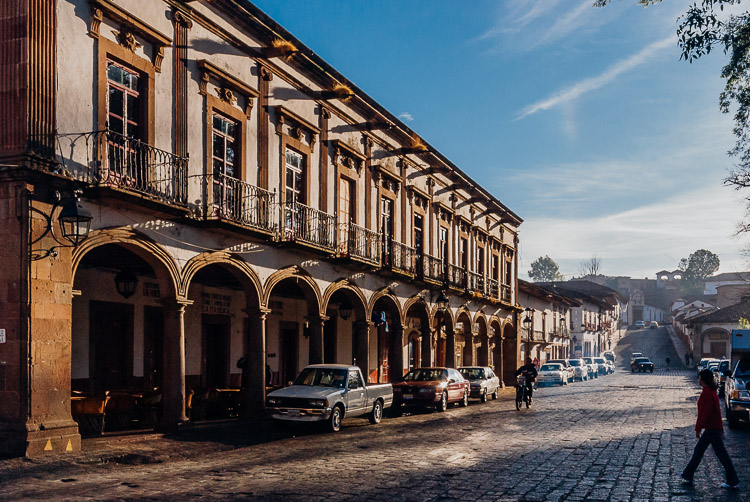
Not all light is the same; different types of light have different colors built-in to them. Daylight is basically white, while light from a sunrise or sunset has a red, orange, or pink cast to it (caused by the light being bent through deeper layers of atmosphere). Shade is usually a bit blue, as is snow, as both of these situations are receiving reflected blue light from the sky. Standard incandescent (tungsten) lightbulbs give off a strong yellow cast, while fluorescent lights, long the bane of photographers, can be anywhere from blue, to purple, to green.

Your camera needs to know the color of the light so that it can accurately record the rest of the colors in the scene. With film, this White Balance” is built into the product (i.e., Daylight film and Tungsten film), but with digital cameras, we have the ability to change the White Balance on the fly. If you shoot a room illuminated only by tungsten light with your camera’s Daylight White Balance setting, the resulting photo will show incorrect colors that are skewed towards yellow (try it and see for yourself). You could also shoot an outdoor natural-light photo with the tungsten setting and get some simply awful blue images. But when these situations are shot with the correct White Balance selected, the colors in the photos should be spot-on accurate.

The Auto White Balance Blues

Your camera likely offers a handful of White Balance choices, settings like: Daylight, Cloudy, Shade, Flash, Tungsten, and Fluorescent. There is also, surprise, an Auto choice.

Many beginning photographers tend to set their White Balance selection to Auto and leave it there. This mistake can be the cause of quite a few photographic problems. Like your auto exposure, Auto White Balance is pretty good. Especially when dealing with artificial light sources, the results of Auto can be very satisfactory. The trouble arises when a color cast is desirable, or when shooting a subject that is mostly one color.

DJ CWG 3 11 E 2

DJ CWG 3 11 E

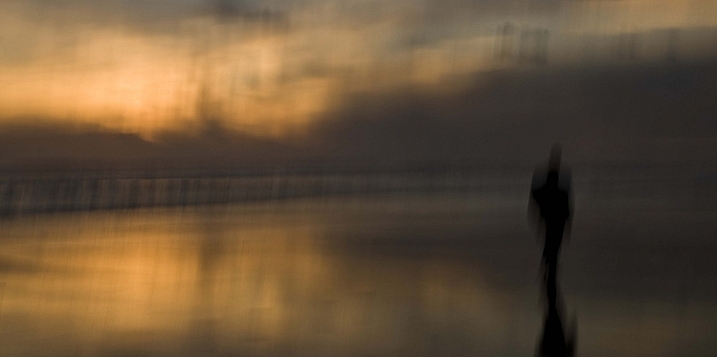
A great example is a classic sunrise or sunset scene. In this case, there can be quite a lot of red or orange light illuminating the scene. If you choose Auto White Balance for this shot, the camera will evaluate the scene and think, “Hey, something’s wrong! There’s a lot of red here! Better back off on the reds.” The problem is, you do NOT want your camera to correct for those colors. In this case, having a lot of red in the scene is correct according to the subject and your intention. Auto White Balance will probably deliver a sunset that has a much more bluish feel, not as dramatic, and not what the scene actually looked like.

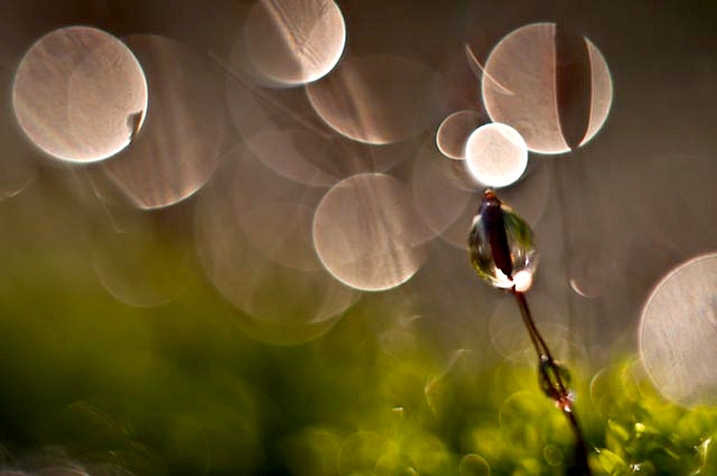
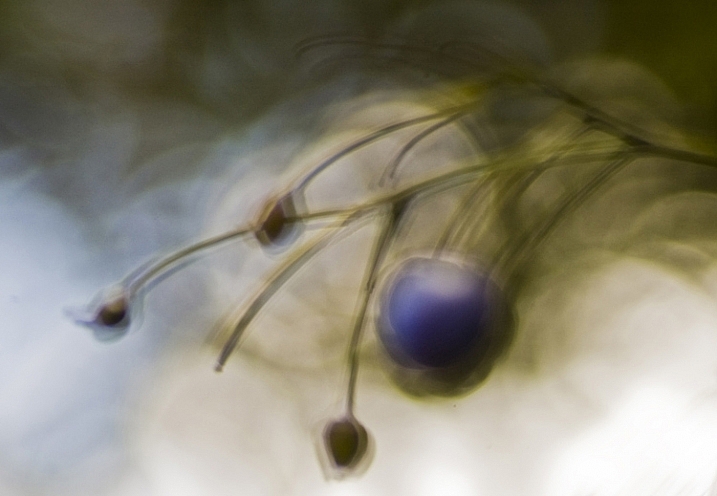
Another way Auto White Balance can be fooled is with objects that are mostly one color. A good example is flower photography. Suppose you’re photographing a large pink flower that fills the frame almost entirely. Auto White Balance will look at this shot and think, “Whoa, too much pink! Gotta back off on that.” Auto White Balance has no way of knowing if subject is truly that color, or if it’s the lighting. The only thing it can do is try to deliver what it perceives to be an average color balance for the image. In this case, the flower in the photo won’t appear the correct, vibrant pink that it was.

DJ 776 9 2

DJ 776 9

Auto White Balance can even cause slight inaccuracies to everyday outdoor photos, often resulting in shots with just a bit too much purple than they should have (the result of Auto trying to over-compensate for green vegetation).

Use Presets!

So what’s the solution? Use those White Balance presets! Many photographers, including me, use the Daylight setting a great deal of the time, to help ensure accurate colors during all times of the day and in many weather conditions. The Shade and Flash presets can also be quite useful. If you’re shooting JPEG files, selecting the correct White Balance at the time of shooting is critical. But even if you shoot RAW files and have the (very useful) ability to adjust your White Balance in post-production, choosing the correct White Balance preset at the time of shooting can start your images off right, and save you plenty of time, and who doesn’t like that?

Do you have any other stories or examples where Auto White Balance did you wrong? Please share in the comment below.

googletag.cmd.push(function() {
tablet_slots.push( googletag.defineSlot( “/1005424/_dPSv4_tab-all-article-bottom_(300×250)”, [300, 250], “pb-ad-78623” ).addService( googletag.pubads() ) ); } );

googletag.cmd.push(function() {
mobile_slots.push( googletag.defineSlot( “/1005424/_dPSv4_mob-all-article-bottom_(300×250)”, [300, 250], “pb-ad-78158” ).addService( googletag.pubads() ) ); } );

The post How Auto White Balance Can Hinder Your Photography by Daniel Johnson appeared first on Digital Photography School.


Digital Photography School

 
Comments Off on How Auto White Balance Can Hinder Your Photography

Posted in Photography


Light Balance: Illuminated Seesaws in a Montreal Plaza

29 Dec

[ By Steph in Art & Installation & Sound. ]

see saws 2

Don’t even try to suppress your inner child when you come across a public installation as fun as this interactive collection of illuminated seesaws in Montreal, which play music in time with riders’ movements. Looking to inspire a bit of spontaneity in the streets, collaborating firms CS Design and Lateral Office offer up an all-ages playground stretching for a full block in the city’s Place des Festivals.

see saws 3

see saws 4

Entitled ‘Impulse,’ the installation is comprised of 30 glowing seesaws with built-in speakers. Take a seat and they’ll produce a series of musical sounds, the lights strengthening and fading in intensity depending on the angle of the board. When the bulk of them are occupied, they join together into symphonies of light and sound that can either spontaneously synchronize or become totally random and chaotic.

see saws 1

see saws 5

The seesaws are paired with colored LEDs projected onto the adjacent building facades, turning the whole square into a light show after dark. Every visitor has a different experience depending on where they’re sitting, how fast they move up and down, and how many other seesaws are engaged.

light projections 2

light projections

“Through the use of architectural lines, a hypnotic soundtrack and an entertaining illusion of depth, the nine architectural video projections echo the seesaws of the Place des Festivals,” say the designers. “Playing with the notions of balance and unbalance, symmetry and asymmetry, tension and harmony, the video projections are visual experiments illustrating the original soundtrack created for each video.”

Share on Facebook


[ By Steph in Art & Installation & Sound. ]

[ WebUrbanist | Archives | Galleries | Privacy | TOS ]


WebUrbanist

 
Comments Off on Light Balance: Illuminated Seesaws in a Montreal Plaza

Posted in Creativity


7 Quick Tips on How to Use Visual Balance to Make Better Photographs

19 Dec

Balance is one of the characteristics of good composition. It is the way elements of an image are arranged to create a feeling of stability. If you imagine that your image is a set of scales, all elements of your composition should be balanced to make a photograph feel stable.

balance 1 eva polak

There are many ways to create balanced images. The easiest way to achieve it is by using symmetry, as it guarantees left to right, or top to bottom balance. The results look formal, organized, and orderly.

If you would like to create a balanced composition that feels more casual, free, and energetic, then use asymmetry.
To understand this concept, let’s go back to our analogy of a set of scales. If you have several small items on one side, they can be easily balanced by one large object on the other side. Visual balance works in a very similar way, but it can be affected not only by the size of objects, but also by their value, colour, texture, quantity, orientation and isolation.

Different colours, shapes and sizes create different degrees of visual interest. So, to achieve asymmetrical balance you need to arrange elements of all different visual weights, when composing your image, in such a way that each side is still balanced out.

balance 2 eva polak

There are seven basic factors to consider when you compose your images with visual balance in mind. Let’s have a close look at how you can use these different factors affecting visual weight and gain some advantage.

1 – Colour

1 Colou by Eva Polak

Colour has many properties that can affect an object’s visual weight relative to others in the photograph, such as saturation, brightness, darkness, and hue. Warm colours advance into the foreground and tend to weigh more than cool colours, which recede into the background. Red attracts attention better than any other colour, and thus has the highest visual weight as opposed to yellow, which has the least visual weight. Also bright colours attract more attention than subdued colours.

2 – Size

2 Size by Eva Polak

Large elements appear heavier than small ones. Size is an evident visual weight factor because, in the physical world, an object that’s bigger than another will naturally be heavier, and will take up more physical space. Large elements command more attention. We naturally see them first, or spend more time looking at them anyway.

3 – Value


3-Value-by-Eva-Polak.jpg

Value is a powerful tool for balancing images. Dark elements feel heavier than light items. The higher the value-contrast (between object and background), the heavier will be the weight of the object.

4 – Texture

4-Texture-by-Eva-Polak.jpg


Texture adds visual weight to items in photographs. Texture is just more interesting and our eyes are drawn to it. Smooth areas will feel lighter than those with a lot of heavy texture.

5 – Isolation

Objects isolated in a space appear heavier than those surrounded by other elements. Look at the image below with a brown circle on it. Your eyes go directly to the brown circle first because there’s nothing else to see.

5-Isolation-by-Eva-Polak.JPG


6 – Quantity

A few small objects can balance out a single large object. Repetition of objects can be used here as well. In the example below, the three small berries are balancing out the large berry.

6-Quantity-by-Eva-Polak.jpg


7 – Orientation

Vertical objects appear heavier than horizontal objects. A diagonal orientation carries more visual weight than a horizontal or vertical one. Lines can be very powerful in your composition. Pay close attention to them.


7-Orientation-Eva-polak.JPG

Remember, you don’t have to balance colour with colour, or light with dark – you can mix and match your visual weights. For example, a counterweight to a large, bright area might be a small red object. Experiment with different kinds of balance and play around with visual weight. See what works best for your images and the story you want to tell.

As you go out exploring with your camera on your next photo shoot, keep balance in mind and the seven factors of visual weight. Look closely and try to determine which elements are commanding the most visual weight when you compose your photographs, and see how they affect balance in your images.

If you have any comments or questions please post them below. And we’d love to see your visually balanced images.

googletag.cmd.push(function() {
tablet_slots.push( googletag.defineSlot( “/1005424/_dPSv4_tab-all-article-bottom_(300×250)”, [300, 250], “pb-ad-78623” ).addService( googletag.pubads() ) ); } );

googletag.cmd.push(function() {
mobile_slots.push( googletag.defineSlot( “/1005424/_dPSv4_mob-all-article-bottom_(300×250)”, [300, 250], “pb-ad-78158” ).addService( googletag.pubads() ) ); } );

The post 7 Quick Tips on How to Use Visual Balance to Make Better Photographs by Eva Polak appeared first on Digital Photography School.


Digital Photography School

 
Comments Off on 7 Quick Tips on How to Use Visual Balance to Make Better Photographs

Posted in Photography


Finding Balance Between Photography and Friends When Travelling

18 Sep

If there is one common thing that gets photographers fired up and excited, it’s the prospect of travel. Just like most other artists, you need your creative fire stoked and it’s hard to beat a walkabout to some exotic foreign land (or even a Cow Safari).

The new surroundings, different cultures, or new experiences are the perfect excuse to charge your batteries, clean your lenses and format those memory cards (you do format your cards before you use them, right?).

Colonial architecture in a historical Mexican town

Exotic lands just might be the ideal catalyst to get the creative juices flowing.

If you’re wandering out into the world solo, you have full photographic freedom to choose where you go and how much time you spend there. However, you may often find yourself with accompaniment on these excursions in the form of friends, your significant other, or family. The more obsessive of a shutterbug you become, the more challenges you are going to face, in order to strike a balance between being selfish for your own passions, and trying to appease everyone.

I can’t tell you how many times I’ve wandered off into the photographic zone, and inadvertently ignored my traveling companion. Once I realize, I glance around thinking they probably abandoned me, only to see them half asleep on a bench or standing hands on hips, not looking happy.

If your travel partner (s) are as psyched about photography as you are, read no further, you have it made. Unfortunately this isn’t usually the case so we need to muster up some diplomacy to keep things running smooth.

The trade-off

While traveling, whether with a significant other or friends, one method that will help you reach that middle ground is to make a conscious effort to take photos of them along the trip, in exchange for you being able to wander around a little more, or spend some extra time shooting. Of course this doesn’t necessarily have to be a spoken exchange, but often it will just work out this way.

Capture photos of traveling companions

Capturing some fun shots of your traveling companions goes a long way towards striking the balance between photography and sharing the experience.

To make this work well, you need to actually put some time, effort, and thought into the shots. You can’t just snap a quick shot of them by the doors of an old church, then spend an hour on various compositions of the doors themselves. Get a remote flash and use it off-camera to get some nice lighting and flattering portraits. Have them pose in interesting positions and underexpose some shots to create cool silhouettes.

The concept is to not only get some memorable shots of them in the exciting places you’re traveling to, but to engage them in your process, and make them feel like they’re not traveling alone.

Careful planning

Although a big part of traveling is embracing surprises and the discovery of new things, a little diligence in planning can help you get the shots you want without sacrificing your relationships.

Using a city map to plan the day

A little forethought and planning can help make adventures run smoother.

If you think ahead about the places you want to photograph and when the light will be best, you can work up an itinerary that can flow more smoothly without waiting around for the light. Want a sunset shot on the coast or golden hour light for that cityscape panorama? Think about planning for dinner on the water, and showing up a little early or find a rooftop bar for a drink.

There are apps that can help you with this planning such as Stuck On Earth or even Google Earth.

Breathing room

While traveling or going on vacation with others can be a blast, there’s nothing wrong with splitting up sometimes. Especially on long trips, it can be a strain on relationships to spend every waking moment together, and a couple hours of solo-exploring can be a nice respite.

Solo adventure

A few hours of splitting up to pursue varying interests can work wonders.

Again, if you can figure out how to plan this ahead of time, all the better. Maybe there is some cool architecture near a shopping mall or an outdoor market that can provide activities for all involved.

Go with the flow

Then there is, of course, the path of least resistance. If you are willing to sacrifice the time-consuming or contrived shots, you can always wing it and see what happens. This is also the default position you might find yourself in anyways – after all, plans are made to be broken.

This approach can also be a good exercise in picking up your pace, and developing a keener eye. Maybe this entails ditching the tripod at the hotel, and venturing out with only one lens (tragic, I know). Be resourceful instead; find a firm surface and use the self-timer for dark shots, and use a zoom lens or challenge yourself to rely on a fixed focal length lens for your compositions.

Life is all about compromises. It’s important to keep in mind that not everyone shares the same passions, and you should do your best to try and see the situation through your travel partners’ eyes.

“Learn the wisdom of compromise, for it is better to bend a little than to break.”

googletag.cmd.push(function() {
tablet_slots.push( googletag.defineSlot( “/1005424/_dPSv4_tab-all-article-bottom_(300×250)”, [300, 250], “pb-ad-78623” ).addService( googletag.pubads() ) ); } );

googletag.cmd.push(function() {
mobile_slots.push( googletag.defineSlot( “/1005424/_dPSv4_mob-all-article-bottom_(300×250)”, [300, 250], “pb-ad-78158” ).addService( googletag.pubads() ) ); } );

The post Finding Balance Between Photography and Friends When Travelling by Jeremie Schatz appeared first on Digital Photography School.


Digital Photography School

 
Comments Off on Finding Balance Between Photography and Friends When Travelling

Posted in Photography


Balance the Cost and Coverage for the Insurance

06 Sep

Finding the best insurance can be a tricky stuff. This set by the fact different people will naturally will have different situation to be put into consideration. Blindly take the insurance with complete coverage is not always that great. The same thing also set for those who pay the insurance with the lowest cost applied. […]
Digital Photography Information Center

 
Comments Off on Balance the Cost and Coverage for the Insurance

Posted in Equipment


Architectural Photography Using Layer Masking to Correct Contrast and White Balance

17 Dec
Dps 2

A challenging nighttime scene was overcome with multiple exposures and layer masking.

Blending indoors and outdoors in architectural photography can often create a compelling image. Unfortunately, however, it is often fraught with exposure and white balance issues. These issues are compounded at night, when artificial lights inside buildings coupled with the darkness of the night sky create an especially contrasty image with an unattractive colorcast created by the different light sources. Luckily, with multiple exposures and layer masking in Photoshop, you can create a photo that looks a lot like what you saw with your own eyes.

This method is a little different than HDR, which involves taking three or more photos at different exposures, then using automated software to combine them into one image that captures the range of light in the scene. Here, you’ll be taking three or more photos and blending them manually, since HDR software often creates unpleasant artifacts and odd color blending when used in the type of situations presented in this tutorial. You can always try HDR software first, and if the colors don’t seem to bleed, you can skip down to the later part of the tutorial for dealing with the colorcasts.

Dps 1

An image that required three exposures and had a color cast from the lamps.

Shoot three or more exposures on a tripod

You need to shoot as many photos as it takes to capture the dynamic range (the range from light to dark) in the scene. It is really important to shoot in RAW, to get as much mileage out of each photo as possible. A tripod is also necessary, since you’ll probably be taking these at night, and also because you won’t be using HDR software which aligns the images. You can use auto exposure bracketing to capture three images, but at night, exposures on the high end can often exceed 30 seconds, the longest shutter speed most cameras will let you shoot manually. It’s probably easiest to use manual mode, set your ISO to 100 or 200, stop down your aperture to f/7.1 or f/8 (if it’s really dark out, you can open it up wider), and then take a series of shots at increasingly slower shutter speeds until you’ve captured the range of light in the scene. If you need to go past 30 seconds, go into bulb mode (consult your camera’s manual for how to find it), and use a remote trigger release, holding the shutter open as long as you want. Don’t worry about white balance yet.

Dps 3

Processing one of the RAW files in Lightroom. Here you can see where just processing one RAW file wouldn’t be sufficient.

Process each exposure in Lightroom or Camera Raw, then open as layers in Photoshop

First, you are going to process the photos for exposure only, ignoring white balance. If you don’t have Lightroom, you can do this in Adobe Camera Raw. Since you have multiple exposures, you don’t need to go crazy trying to recover lost highlights (overblown bright spots) and shadows (dark parts that look black), but you want to recover them a little bit to give you more leverage later on in the process. There’s no magical formula for processing here. I usually apply lens profile correction, remove chromatic aberration, and do a little noise reduction before bringing down the highlights a little bit and bringing up the shadows and whites a little bit. Once you’re done processing each exposure, select them all, right click, and select “open as layers in Photoshop. Now you’ve got an image with three or more layers all ready to go, but we’re no quite ready to do the layer masking yet.

Dps 4

Go back and reprocess for white balance

White balance is a setting that keeps the whites in the image white, removing any colorcasts. Different light sources have different white balance settings though, so if you have a photo with two or more different light sources (such as the night sky and an artificial light), no matter how you adjust your settings, you’ll always have a color cast somewhere on your photo. What you’re going to do here is reprocess each photo so that you’ve corrected any colorcasts. If you’re lucky, you’ll have no more than two light sources in the photo. Unfortunately, though, there can often be more.

It’s important to note that you only have to correct for colorcasts that are in properly exposed parts of each photo. For instance, in one of your overexposed photos, don’t worry about the white balance for the overblown highlights. You’ll be discarding that part of the photo later. For one of your underexposed photos, don’t worry about correcting for the shadows, since you’ll also be discarding that. Start with your most properly exposed photo, and correct for any colorcast you see (for instance, the lights inside a building have a yellow cast).

All you have to do to correct the white balance is slide those two sliders (one goes from blue to yellow, and the other goes from green to magenta) until the part of the photo with the colorcast looks normal. When you’re done, open that photo in Photoshop, and make it a layer in the other image you have open. Do this by hitting Ctrl-A on Windows, or Command-A on a Mac to select the photo you just opened, then Ctrl-C or Command-C to copy it. Then click on the image with the three layers, and hit Ctrl-V or Command-V to paste it in as a layer. Repeat the processing until you have corrected all colorcasts in the photo. Then, move on to the other exposures, and correct any color casts there (remember, only the properly exposed parts need to be corrected).

Dps 5

Mask in one layer at a time

Once you’ve finally got every exposure and every colorcast accounted for as separate layers, you’re going to mask them in one by one. I start by making all but the bottom two layers invisible and masking in one layer at a time (by the way, the order of the layers does not matter, but having the most properly exposed image on the bottom will probably make things easier). Do this by clicking the little eye to the left of each layer except the bottom two. Then, with the layer one up from the bottom selected, click the layer mask icon (it’s a rectangle with a dot in the middle, found at the bottom of the layer panel). Make sure the paintbrush icon is selected as well (this can usually be found on the left hand side). You may need to adjust your brush size as you go through.

When painting with black on the layer mask, you will cover up the parts of the layer you don’t want appearing (the improperly exposed or color cast parts of the image are what you want to cover up). When you want to go back and reveal parts because you’ve made a mistake, paint with white on the layer mask. Click X on your keyboard to toggle back and forth between black and white.

When you’ve masked out all the parts of the layer you don’t want shown, select the layer on top of that and make it visible (click the space where the eye used to be). Then create another mask and start masking that layer. Keep revealing layers and masking them in until you’re done. In some cases, one part of the photo may be properly exposed in more than one image. In this case, keep the one that looks better to you. Once you’ve finished this process, save the photo as you would normally. If you think you might come back to this photo later and edit it, make sure to save a copy as a PSD.

Dps 6

Sometimes you get lucky, and the part of the image that’s colorcast has a very strong hue to it. If you have a colorcast that’s almost all one color, you can automate the masking process a bit for that layer. In the top pane, go to Select –> color range, then click somewhere in the colorcast. Look at the preview. You want the part of the image that’s your colorcast to be almost completely white, and the rest to look almost completely black. Adjust the fuzziness slider until this is the case, and then click ok. You actually want to select the inverse of that, so go to Select –> inverse. Now click the layer mask icon, and you’ll have a mask that hopefully masks out the colorcast. If it doesn’t look right, undo it and try it again with a different fuzziness setting. This is not a perfect fix. You will still need to do some fine-tuning, but it really helps move things along quicker.

Dps 7

A simple “select color range” layer mask got rid of most of the colorcast in this photo.

Conclusion

This is just one method of conquering the challenges brought on by nighttime architectural photography. As you start working with photos of this nature, you may find a different method that you prefer. Luckily, many photos only require some of the steps detailed in this tutorial. Sometimes you only need one exposure, but you need to process for colorcasts. Other times, the white balance is even, but you need to mask for exposure. It takes practice to master these intricate masking techniques, so don’t give up if you’re unhappy with your results at first. Start with simpler photos with fewer colorcasts and exposures needed before diving into a really complex one. In time you’ll be creating photos that look as natural as they appeared when you saw them in person.

Dps 8

A single exposure that required layer masking to correct colorcasts.

Have you got any tips for doing architectural photography or using layer masking? Please share in the comments below.

googletag.cmd.push(function() {
tablet_slots.push( googletag.defineSlot( “/1005424/_dPSv4_tab-all-article-bottom_(300×250)”, [300, 250], “pb-ad-78623” ).addService( googletag.pubads() ) ); } );

googletag.cmd.push(function() {
mobile_slots.push( googletag.defineSlot( “/1005424/_dPSv4_mob-all-article-bottom_(300×250)”, [300, 250], “pb-ad-78158” ).addService( googletag.pubads() ) ); } );

The post Architectural Photography Using Layer Masking to Correct Contrast and White Balance by Samantha Decker appeared first on Digital Photography School.


Digital Photography School

 
Comments Off on Architectural Photography Using Layer Masking to Correct Contrast and White Balance

Posted in Photography


Setting Your White Balance with a Gray Card – a Tip from Phil Steele

15 Dec

Setting your white balance can be done two ways: in camera when you’re shooting or later in post-processing. In this short video tutorial Phil Steele shows you how to do both methods.

Part one is using a gray card to set a custom white balance. Read more about that topic with: Get your White Balance Right in Seconds Using Grey Card.

Part two is how to adjust the white balance using a gray card in Lightroom. Read more here: Adjusting White Balance in Lightroom.

Phil also mentioned where to buy gray cards, you can find several options on Amazon:

If you liked this tip, you can find out more about Phil’s Lightroom course or his brand new Event Photography course here.

googletag.cmd.push(function() {
tablet_slots.push( googletag.defineSlot( “/1005424/_dPSv4_tab-all-article-bottom_(300×250)”, [300, 250], “pb-ad-78623” ).addService( googletag.pubads() ) ); } );

googletag.cmd.push(function() {
mobile_slots.push( googletag.defineSlot( “/1005424/_dPSv4_mob-all-article-bottom_(300×250)”, [300, 250], “pb-ad-78158” ).addService( googletag.pubads() ) ); } );

The post Setting Your White Balance with a Gray Card – a Tip from Phil Steele by Darlene Hildebrandt appeared first on Digital Photography School.


Digital Photography School

 
Comments Off on Setting Your White Balance with a Gray Card – a Tip from Phil Steele

Posted in Photography


How to Balance Off-Camera Flash and Ambient Light on Location

01 Dec

In this Adorama TV video Gavin Hoey takes you on location to learn how to balance flash and ambient light to create some stunning portraits in the forest.

After going through three different setups outdoors he takes you inside for the post-processing stage so see how he completes the images in Photoshop.

Some of the items Gavin used and demonstrated in the video for your convenience:

  • Canon 70-200mm f/2.8L lens
  • BlackRapid Curve RS-7 camera strap
  • Flashpoint RoveLight 600ws monolight
  • Glow ParaPop 28″ R Series
  • Sekonic L-308S Flashmate light meter

You can get the free light ray brushes he mentions in the video here.

In Practice

Have you tried any location portraits using both the natural or ambient light combined with flash? If you have any other tips or want to share your images, please do so in the comments below.

The post How to Balance Off-Camera Flash and Ambient Light on Location by Darlene Hildebrandt appeared first on Digital Photography School.


Digital Photography School

 
Comments Off on How to Balance Off-Camera Flash and Ambient Light on Location

Posted in Photography


Balance Lamp Forces You to Sacrifice Your Phone for Light

11 Nov

[ By Steph in Design & Fixtures & Interiors. ]

balance lamp 2

Chances are good that if you keep your phone nearby while you’re working, you’re going to be tempted to pick it up every now and then, checking Instagram and sending texts. Get in the habit of doing it compulsively, and you’re sucking away a lot of time that you should probably spend focusing on the tasks at hand. This lamp by designer Weng Xinyu aims to solve that problem by forcing you to give up your phone in order to illuminate your desk.

balance lamp 3

Consisting of a balancing lamp pole on a simple wooden tripod, the lamp leans its light source to the desk when it’s turned off. If you want light, you’ll have to insert your phone into the slot on the end of the pole. This turns the light on automatically and balances the lamp to its proper position.

balance lamp 1

Sure, you could cheat and find some other object that fits into the slot so you don’t have to give up your precious smartphone. But as we all heard from authority figures throughout our childhoods, the only person you’d be cheating is yourself.

“Superfluous information is flowing from everywhere,” says Xinyu. “The sense of priority is fading, resulting a precarious Balance between work and amusement, true and virtual life. It is time we ask the question, what do we really want? ‘Balance’ might help us find the inner balance in this information exploding society.”

Share on Facebook


[ By Steph in Design & Fixtures & Interiors. ]

[ WebUrbanist | Archives | Galleries | Privacy | TOS ]


WebUrbanist

 
Comments Off on Balance Lamp Forces You to Sacrifice Your Phone for Light

Posted in Creativity


Finding the Balance: Capturing Memories Versus Making Memories

27 Oct

CM3

I am more than a little obsessed with capturing and preserving memories for my family. We have a photo wall that’s regularly updated. We print photo books, both from Instagram and of photos from my “real” camera. My girls know that twice a year, we go out to a field nearby our house, and I do a mini photo session with them. I’m the type of person who easily had 5,000 photos in the first year after my daughter was born, and that’s just what I decided to keep. So whenever I see a mom taking photos of her kids at the park, or a dad taking pictures at his son’s soccer game, I want to run over and give them a high five. I want to tell them that I think they are awesome, and that capturing those memories for their family is something priceless. They’re images that will be pulled out during graduation parties, played on wedding slideshows, and – God forbid – treasured after the loss of a loved one. It’s important work, and it is work that I feel absolutely passionate about.

But there’s a catch. If you’re anything like me, it can be easy to become so focused on capturing memories for our family and of our kids that we can sometimes tend to forget to be part of making memories WITH our family. It can be hard to find a balance, so here are a few tips that I have picked up along the way that can help you find that sweet spot of capturing those important moments, while also being present for them as well.

1. Do a dry run

CM

Halloween is coming up later this month, and my oldest daughter Lizzy wants to be Merida (from Pixar’s Brave). I absolutely want a non-phone photo of her all dressed-up in her costume. This is non-negotiable. But, I know that on the day of Halloween Lizzy will be excited (and probably a little hopped up on sugar), and trying to have a little photo session with her on that day would probably be fighting a losing battle. So, we did a dry run. We do this every year, and it works out so well for us because I can take a few photos of her to stick in the scrapbook in a no-pressure environment, and then on Halloween night, I can leave the camera at home and just be present with my family. We all get a good outcome, and in my book that’s a win. Does it really matter that the photo was taken the weekend before the event? Not to me in this instance, because the memory that I’m actually interested in capturing was the fact that at age four-and-a-half, Lizzy thought that Merida was the coolest of all the princesses, and that she wants to be strong, independent, and brave just like Merida is.

This tip is SO easy, but it has made such a big difference for our family, and it isn’t just for Halloween – this same idea would work for any occasion in which you want a photo of your kids either in a special outfit or with a particular person, opposed to during an event. For example, doing a dry run would be a good fit for capturing your daughter in her ballet outfit, taking a photo of your kids with Mom for Mother’s Day, or even to catch your kiddos in their Christmas pajamas.  As a bonus, doing a dry run lets us know if there are any costume or clothing  issues (dress is too itchy, shoes too tight, needing six cans of red hairspray instead of one) that need to be addressed before the big day as well.

2. Make good use of your camera’s creative modes

CM5

I have several friends who are currently learning how to shoot in manual. One of them was told by her mentor that the creative modes on her camera are cheating and that she should quit using them cold turkey and shoot in full manual, all the time, if she wants to be a real photographer. When she told me all this, I audibly groaned.

Here’s the deal – learning to shoot in manual is awesome and worthwhile. But as far as I’m concerned, if trying to shoot in full manual means that you spend all of your daughter’s soccer game (or birthday party) behind the camera trying to figure out appropriate settings rather than participating in the event itself, that’s a bummer. In my opinion, you would have been better off to stick your camera in Program mode or any other creative mode that you are very familiar with, take a few photos you love, and then be able to set the camera down and enjoy the rest of the time with your family. I’m not saying that you shouldn’t play around with settings or experiment at all, I’m simply saying that at special events like birthdays, weddings (in which you are not the official hired photographer), anniversaries, once-in-a-lifetime vacations, and graduations are the types of events where it is just as important to be a part of making the memories with your family as it is to be capturing those memories. If using one of your camera’s creative modes can help you in that way, go for it!

3. Don’t feel the need to photograph everything

CM2

Such an easy thing to say, and such a difficult thing to put into practice! The reality is that I don’t need to photograph all three times my daughter will go to the pumpkin patch this month between school field trips, family, and friends. The reality is that I don’t need to photograph every time my kids go out to the backyard to play. Sometimes, pulling out the camera while they play is an awesome time for me to practice and play around, but it can also really frustrate my kids if I do it too often (EVEN if I’m not asking them to, “Look here and say cheese!”).

So, for my sanity and theirs, whenever my gut instinct is to grab my camera, I try to stop and ask myself when the last time I photographed this particular event or activity was. If it has been less than a month, that’s a good cue for me to pause and consider whether or not I really need to bring the camera along that day. I really encourage all you moms and dads out there to choose a similar pause point for your family – maybe it’s weekly, maybe it’s monthly, but however frequent it is, it gives you and your kids some built in grace.

4. Get IN the picture sometimes

This is the only photo with me in it from my daughter's first birthday. It's a little blurry, but it went in the album nonetheless, and it's one of my daughter's favorite photos from the day.

This is the only photo with me in it from my daughter’s first birthday. It’s a little blurry, but it went in the album nonetheless, and it’s one of my daughter’s favorite photos from the day.

If you’re the photographer of the family, chances are that there are a lot fewer photos of you in the family album than there are of anyone else. I think this is something that we ALL struggle with. Or maybe you’ve even tried to pass the camera off to someone else and have been disappointed by the blurry, too light, too dark, weirdly cropped results. I get it, and I’ve been there.

One thing that I’ve noticed is that if I’m quickly handing the camera off to a friend or family member that isn’t familiar with photography, I get the best result if I pass the camera off in AV mode, with the aperture set at least at the number of people that will be in the photo, and the center focal point selected. So, if there will be four people in the photo, make sure the aperture is set to at least f/4 when you hand it over. I usually have my 50mm lens on my camera, so if I hand the camera over in Program mode, there’s a chance that it will elect to shoot at f/1.8 or f/2.2, which would probably not yield the best results for a photo of four or five people. If you’re shooting with a kit lens that isn’t capable of shooting that wide open, it may be just as beneficial to pass off the camera in Program mode. This is just one simple thing that will help yield better results when passing the camera to someone else, but trust me when I say that when it comes to family photos, the important thing is that you’re there, not that you’re well composed and perfectly in focus.

Do you struggle with the balance between capturing memories and making them? Do you have any other tips you’d like to share?

The post Finding the Balance: Capturing Memories Versus Making Memories by Meredith Clark appeared first on Digital Photography School.


Digital Photography School

 
Comments Off on Finding the Balance: Capturing Memories Versus Making Memories

Posted in Photography