What operation on a camera could possibly be more simple than pressing the shutter button to take a picture? There’s not much to it, really – you look through the viewfinder (or at the LCD screen on the back of the camera), press a button with your index finger, wait for the camera to focus, and voilà! You’ve got a photo.
Well, as the popular saying goes, what if I told you there was a better way? Hidden deep within the settings of most cameras is a feature called Back Button Focusing, and enabling it can transform your approach to photography.
A Brief History
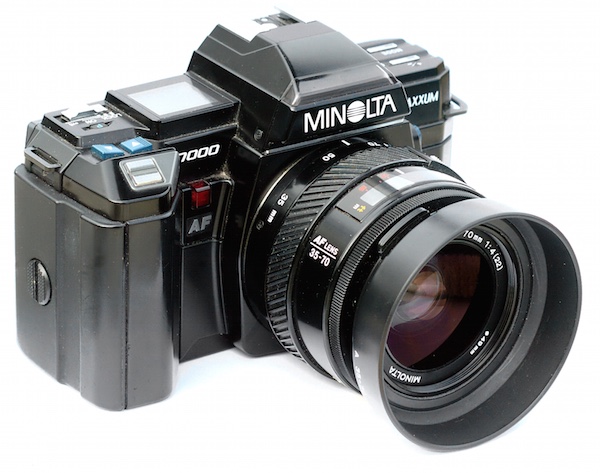
The Minolta Maxxum 7000 was one of the first SLR cameras with autofocus capability in 1985.
To understand what Back Button Focusing is, it’s important to know a little about the history of the autofocus function on your camera. Until the mid-1980s, there was no such thing as autofocus on consumer-level film cameras. You had to hold your camera up to your eye and either turn a ring on the outside of the lens or adjust what’s known as a rangefinder in the top-left corner. It required a great deal of patience and practice, and there are many photographers today that still swear by this method.
In 1985 Minolta released the Maxxum 7000 which integrated the autofocus function into the shutter button, which seemed like a sensible choice because you would normally want to make sure the camera was focused before taking a photo. This implementation of autofocus worked well, but required a bit of maneuvering if the photographer wanted to focus on something other than what was in the center of the photo. To do that, he or she would have to aim the camera at the object to be in focus, carefully hold the shutter button down halfway to keep the focus locked while re-composing the shot, then pushing the button all the way when the picture was ready.
This system remains in place on most cameras today, and it’s probably how your own camera operates. At this point you might be wondering why you should bother to change something that has worked perfectly well for the past 30 years.

Canon’s EOS 630 was the first camera to give users the option of using a separate button for focusing instead of the shutter button.
The answer is because there really is a better way to focus your camera before you take a picture, and it was invented by Canon in 1989. On their EOS 630 camera they included an option within the camera’s custom settings menu to separate the actions of focusing and snapping the shutter. Users could tell the camera to use a separate button on the back of the camera to handle focusing duties, which left the shutter button to do one thing and one thing alone: take the picture. It was not an immediately obvious feature, and it never really caught on like Canon may have hoped, but the same capability is in every Canon DSLR today as well as virtually all cameras from other manufacturers like Nikon, Pentax, Sony, and the rest. If you have any sort of DSLR or mirrorless camera there is probably an option in your settings menu to enable Back Button Focus, and it’s something I highly recommend trying out.
Back Button Focus requires your thumb to press a button on the back of your camera (hence the name) and your index finger to press the shutter, which does take a few days to get used to, but soon becomes second nature. All this begs the question – why should you re-learn how to do something as basic as focusing your camera when the shutter half-press works perfectly fine? The answer lies in the overall concept of giving more control back to you, the photographer.
More Creative Freedom
Cameras today have a dizzying array of autofocus points – those little dots or squares that light up in the viewfinder when you press the shutter button down halfway. You also have a ton of options in how you use these points. You can select an individual point, you can have the camera select what it thinks is the best one, you can tell your camera to use some of them in conjunction with one another, and many cameras have modes such as automatic face detection as well. To be honest, all these options works really well. But just know that by decoupling the act of focusing from the shutter button, and moving it to a separate button, you will be able to do a lot more with your photography than you may realize.

If your camera has an AF-ON button, you can use it to focus instead of the shutter button. If your camera does not have this button, you can usually adjust the camera’s settings to make another button such as AE-L/AF-L perform this function.
By using a button on the back to focus, you will no longer have to hunt around for the specific autofocus point you want to use or wait for the camera to focus on what it thinks you want to before allowing you to take a picture. Trying to keep a moving subject in focus while deftly holding the shutter down halfway is a feat of dexterity that would keep Legolas himself at bay. This is easily remedied by using back button focus. With this method you can hold the back button down as long as you want, which keeps your camera continually focusing on your subject, until you are good and ready to snap a photo. This is incredibly useful when your subject is in motion, whether people, animals, mechanical objects, or simply a flower petal meandering across a meadow.
One of my favorite cameras is the Nikon D7100, which has 51 autofocus points that cover almost the entire frame. For a while I used all of them, frantically shifting from one to the next as I adjusted each shot or tried to track a moving subject. It worked fairly well, especially in conjunction with Nikon’s 3D subject tracking algorithm (variants of that can be found in most cameras today) which did a good job of keeping my subject in focus whether it moved or I altered my perspective. But I found that I often messed up some critical shots because I was either too busy changing the autofocus point, or letting my camera decide what it thought should be in focus. Switching to back button focus remedied all of this, and helped me gets shots that would have been much more difficult otherwise.

To get this shot I used the back button to focus on a different passer-by, and then waited for others to come down the sidewalk. I was then free to snap photos no matter where people were in the frame, because the shutter button was not also refocusing the picture.
By using the back button to focus I will often just utilize the center focus point to get my subject in focus, and then release my thumb from the button while re-composing to frame the subject. It’s much faster than hunting for a specific autofocus point, and allows me to take the photo at the exact instant I want -not when the camera thinks the subject is in focus. This focus-and-recompose technique works great for a variety of situations, but there are certainly times when I like to utilize one of the built-in AF points. When that happens I just go through the motion of selecting one and then taking a picture like normal while using the back button to focus. In essence, using the back button to focus simply gives me more options when taking a photo, which allows me to think more about the pictures I’m taking instead of fiddling with the camera.

I was able to snap a few photos of this husky by holding my thumb down on the back button to continually adjust the focus, and pressing the shutter to snap photos whenever I wanted.
Taking the Power Back
Most cameras have a few common focusing modes: Single, Continuous, and Manual. In Single mode, the camera focuses once and then won’t re-focus again until after you take a picture. This is how many photographers use the focus-and-recompose method without using the back button, and it works fine in a variety of situations. The Continuous method forces your camera to constantly adjust focus while your finger is held down on the shutter button, and doesn’t stop until you snap a photo. Manual, as its name implies, leaves all the focusing duties to the photographer who must adjust a ring on the lens in order to nail the focus without any assistance from the camera. All three of these methods have their uses, and you will often encounter situations in which you need to switch from one to the other (for example, switching quickly from Single to Continuous). Doing this requires digging through menus or flipping a dial on your camera, and it can be a bit of a pain.
Using the back button combines all three focusing modes, giving an incredible amount of power and control to the photographer:
Manual: Take your thumb off the back button and focus by rotating your lens barrel. (Note: do not do this if your lens doesn’t have a “M/A” focus setting. If it is in fully autofocus you will be forcing the gears)
Single: Press your thumb on the back button until your camera is in focus, and then lift your thumb up to keep the focus locked until you press the button again.
Continuous: Hold your thumb on the back button as long as you want, forcing your camera to continually adjust the focus until you take a picture. (Note: you must be using Continuous focus mode for this to work).

Nailing this shot of falling water drops required a lot of switching between automatic and manual focus, and would have been virtually impossible if the shutter button was used for focusing instead of the back button.
You can effortlessly switch between all three methods without doing anything at all except moving your thumb away from the back button, which means you can spend far more of your effort on things like composition and framing, instead of digging through menus on your camera.
Finally, one of the most overlooked benefits of using the back button to focus is that it frees up your shutter half-press to do other functions like lock the exposure. You will have to enable this option using your camera’s settings menu, and you might not use it on every shot, but it’s yet another tool in your photographic arsenal that can help you get better photos. When your subject is in danger of being over or underexposed, you can quickly point your camera at something else to get a better exposure, press the shutter button down halfway to lock the shutter/aperture/ISO values, and then recompose to get the image you want. This trick, combined with back button focusing, has saved my proverbial bacon more times than I can count. Normally this exposure-locking function is handled by its own dedicated button, but I have found it to be far more useful to use the exposure-lock button for locking focus and the shutter for locking exposure – effectively reversing the default behaviours of both buttons, but making your camera much more versatile in the process.
All this talk of button-switching and extra finger-pressing might seem inordinately confusing, but it’s much easier than it sounds. Though it might seem counterintuitive at first the more you use the back button to focus the more it will make sense and help you unlock new creative possibilities with your camera.
If you can’t figure out how to set it up on your camera, try and quick YouTube search for “setting up back button focus on a _________” and fill in your camera model.
Do you like to use back button focus? What other tricks do you have up your sleeve to help you get better photos? Leave your feedback in the comments section below.
googletag.cmd.push(function() {
tablet_slots.push( googletag.defineSlot( “/1005424/_dPSv4_tab-all-article-bottom_(300×250)”, [300, 250], “pb-ad-78623” ).addService( googletag.pubads() ) ); } );
googletag.cmd.push(function() {
mobile_slots.push( googletag.defineSlot( “/1005424/_dPSv4_mob-all-article-bottom_(300×250)”, [300, 250], “pb-ad-78158” ).addService( googletag.pubads() ) ); } );
The post Back Button Focus: What is it and why should you try it? by Simon Ringsmuth appeared first on Digital Photography School.

Digital Photography School


 Extra photos for bloggers: 1, 2, 3


You must be logged in to post a comment.