By: Oded Wagenstein
There is no doubt that using natural light in portrait photography can get you the best results.
However sometimes, as you all probably know, natural light does not do what he’s told. So here comes into action what I like to call my secret weapon in outdoor Portrait Photography.
It is cheap, easy to carry and especially does not frightens my subjects, who themselves can be a little intimidating at times.
Reflector
It is just that! It reflects light. There are hundreds of different types of reflectors, which differ in sizes and colors (i.e. white, silver, gold, etc.). A reflector is usually a reflective fabric, stretched over a bendy ring, allowing it to fold, and easy to carry.
With so many types of reflectors on the market, I cannot review them all. This mini-guide will focus on the main reflector I use for my work.
12 ” in size, and costs less than a movie theatre ticket.
I sometimes use other larger reflectors (mainly in cinematography productions), but this 12? reflector suits my needs in travel photography; mainly because it is small enough, allowing me to hold it with one hand and the camera with the other.
To Fill up Shadows:
We all love taking pictures at sunrise and sunset. But when dealing with the harsh mid-day light, a reflector is almost a must.

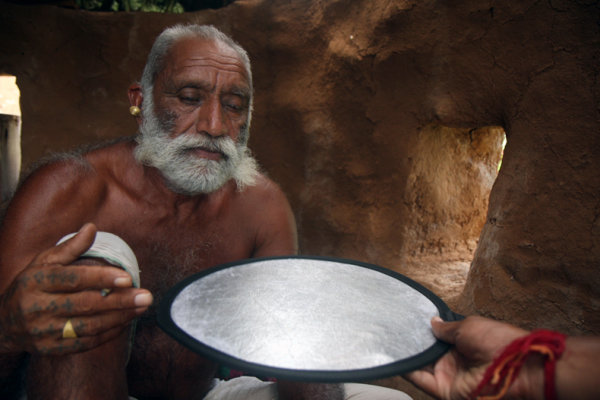
Fstop of 2.8, shutter speed@ 1/100 and ISO 200
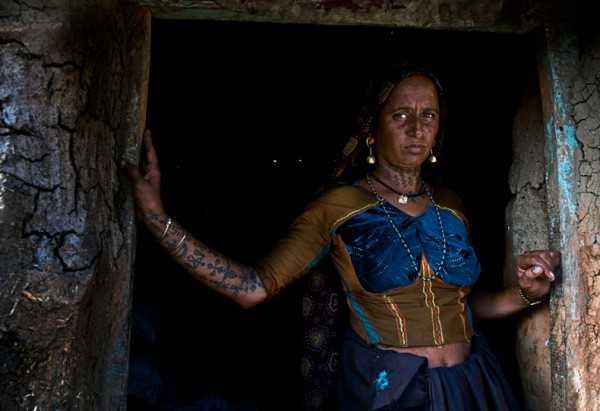
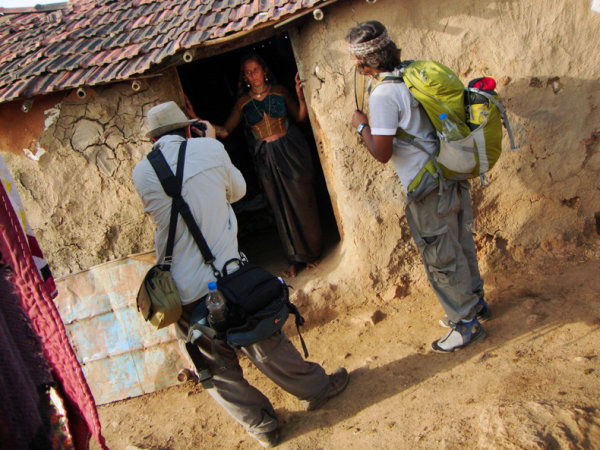
In the above picture, taken in the western Indian Rabari tribe, for the National Geographic Traveler magazine (Israeli edition), our model was sitting in a dark mud house. He was sick; therefore it was not an option to move him outside. On the left wall of the house, there was a small window (as can beautifully seen illuminating in the background), My trusty camera assistant Hardik Pandaya, held a silver colored reflector below the subject ‘s face in order to fill any shaded areas such as under the eyes.
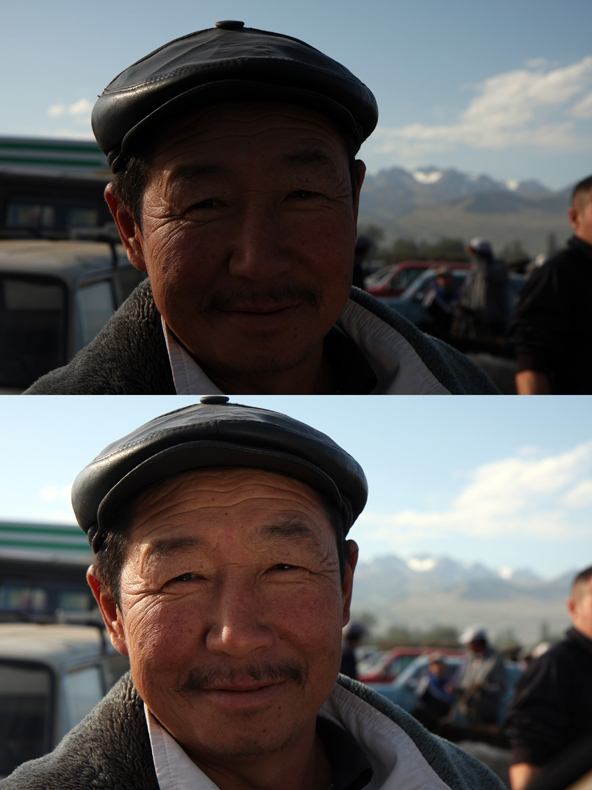
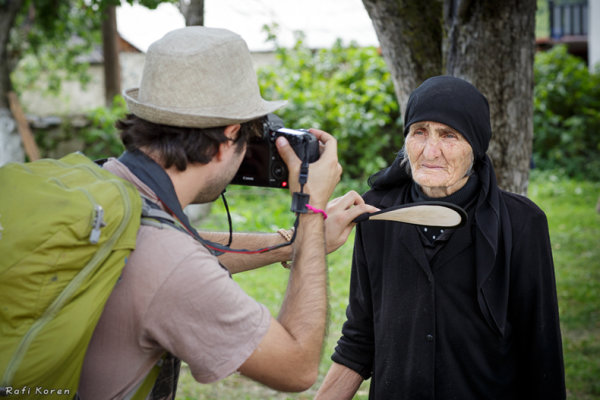
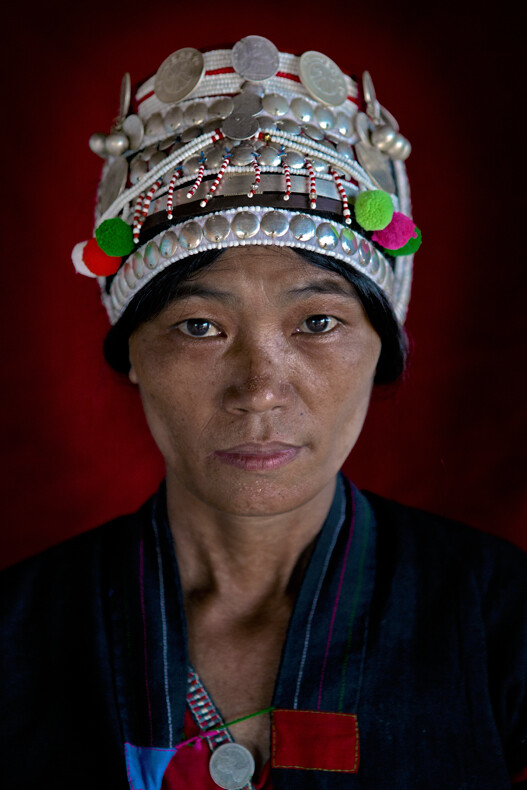
The above picture was taken on the border of Afghanistan and Tajikistan. Please note that although the woman is standing in the shade and the background is bright, the woman is not a black silhouette and the background is not burned out. I measured the light from the background (using spot metering). In such a situation, without using a reflector, the character will turn out completely black (silhouette) but with a reflector held on my left hand, I was able to light up her face.
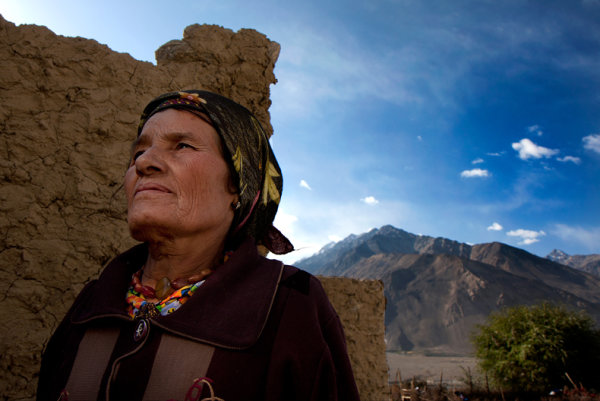
Fstop of 8, shutter speed@ 1/250 and ISO 100
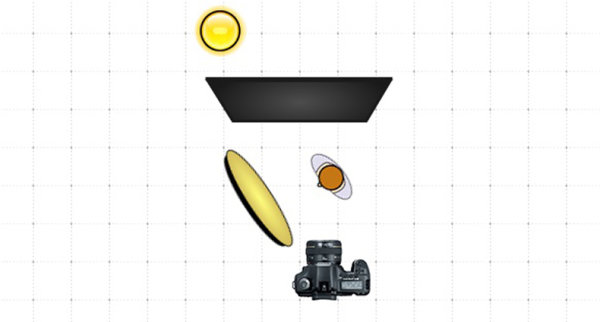
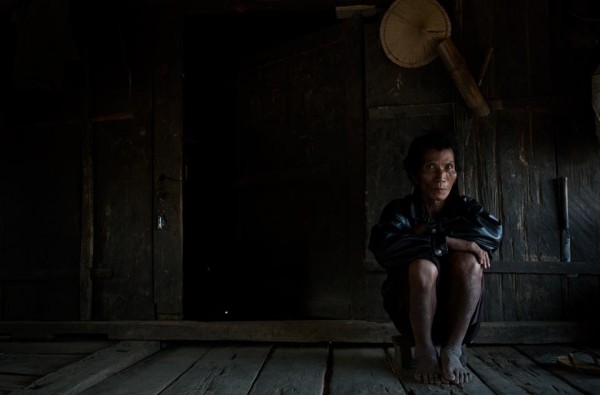
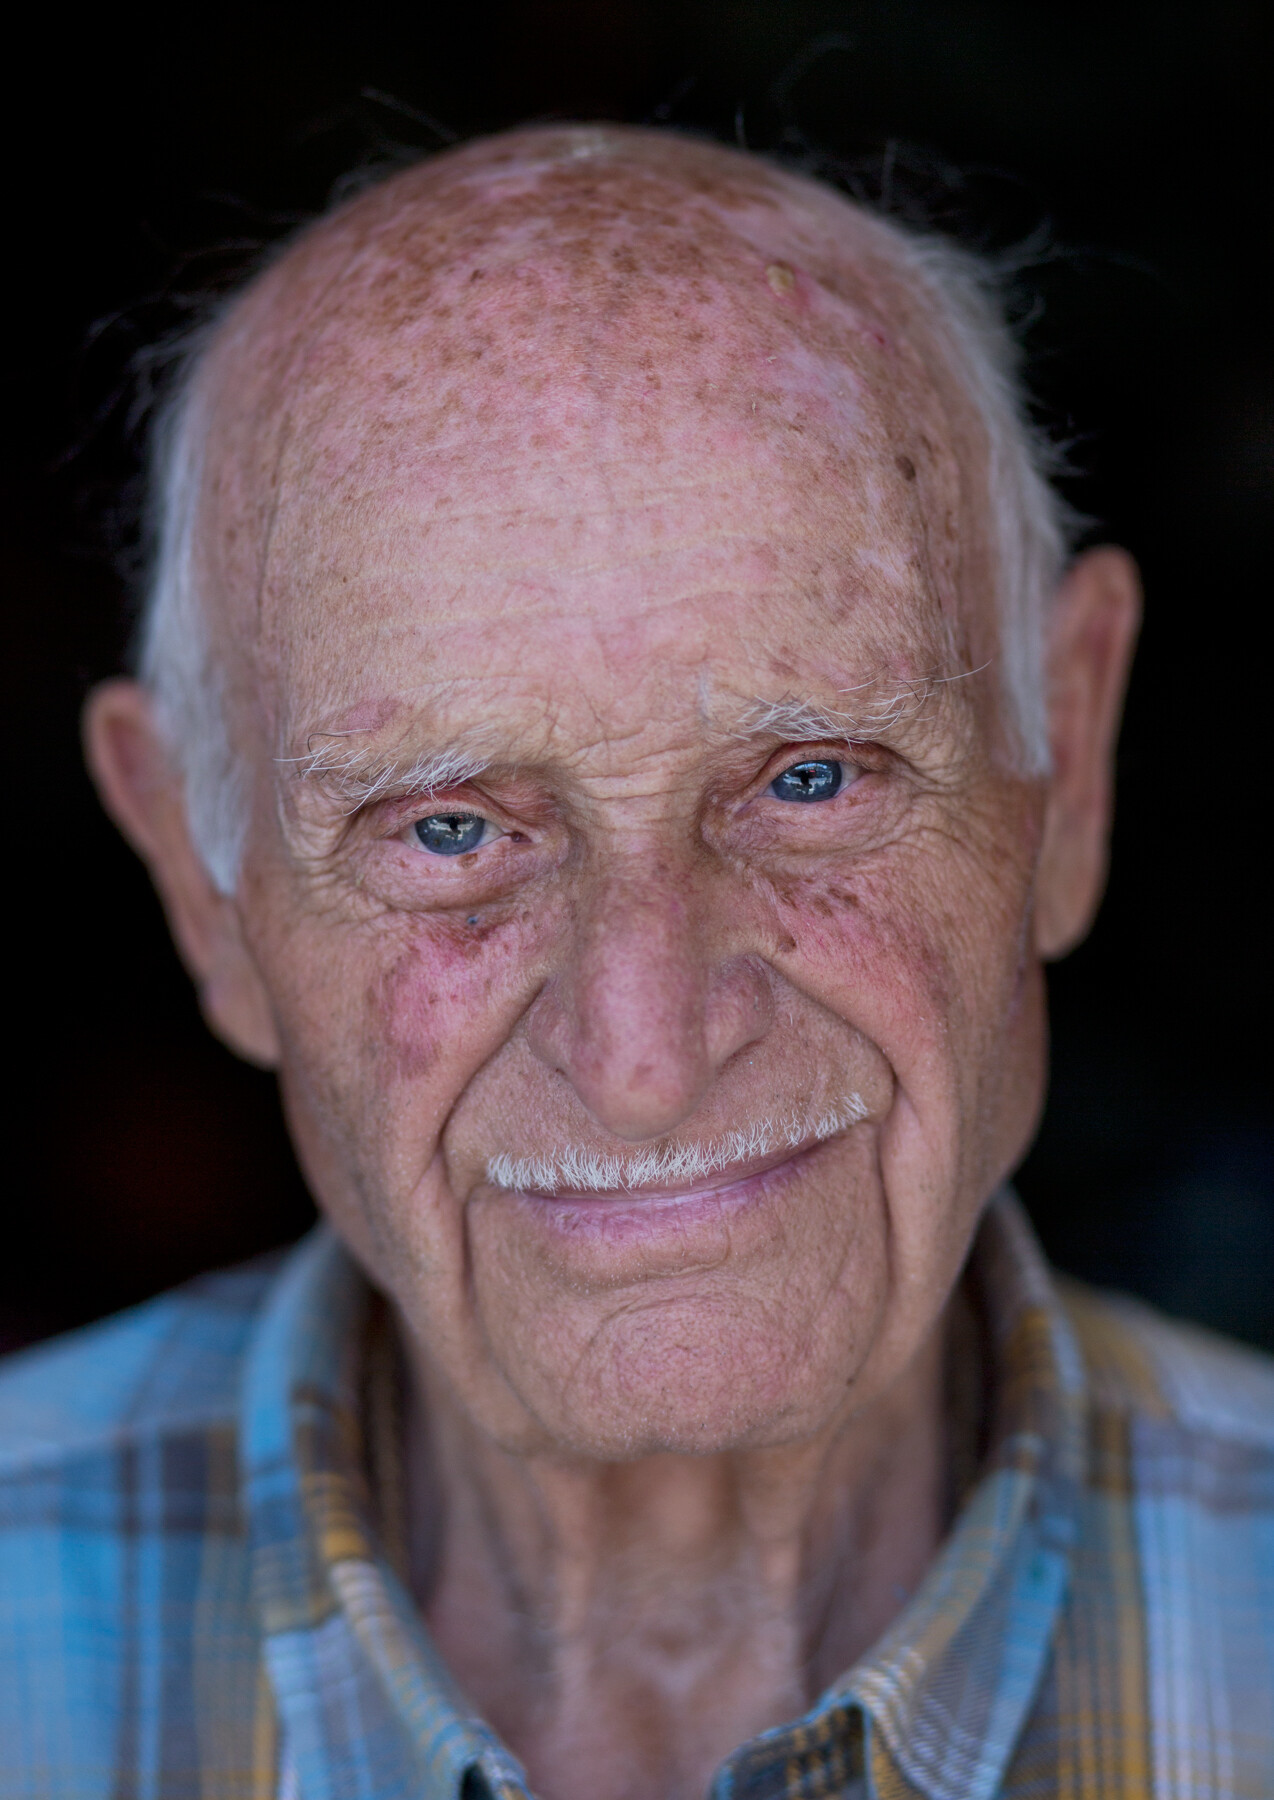
Below is 80 years old Getho. A fisherman from the small community of Sea Gypsy living in, Thailand. This image is a little bit complex in terms of lighting, because there are three sources of lighting here. Just like in the studio, my main light source (key light) was the house door (right side of the frame). The light was coming from a 45 degree angle, creating this dramatic volume on Getho’s face (you can read more about “sculpturing” with 45 degrees light in this post here).
In my left hand I held the small Silver color reflector, filling the shadows (fill light) on his face? and behind him was an open window for additional light on his beautiful white hair (back light).
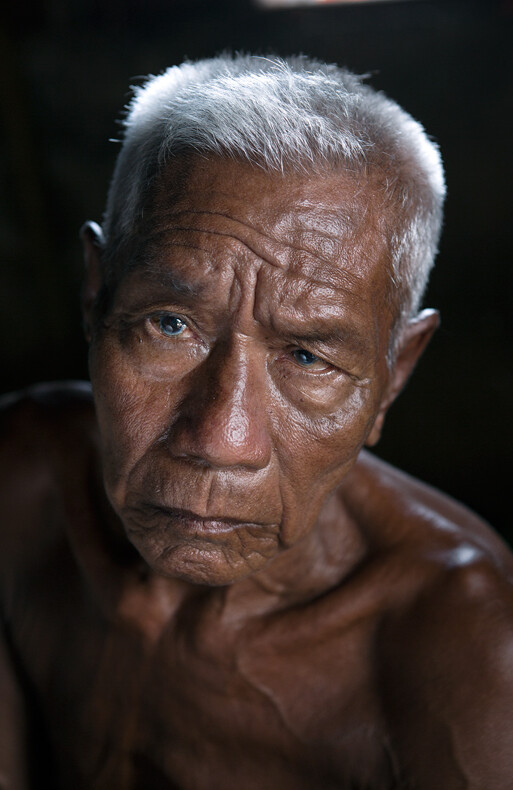
Fstop of 4, shutter speed@ 1/100 and ISO 320
Sometimes a reflector is the only option to shoot under strong sunlight, as you can see in this picture.
Choose the Right Color
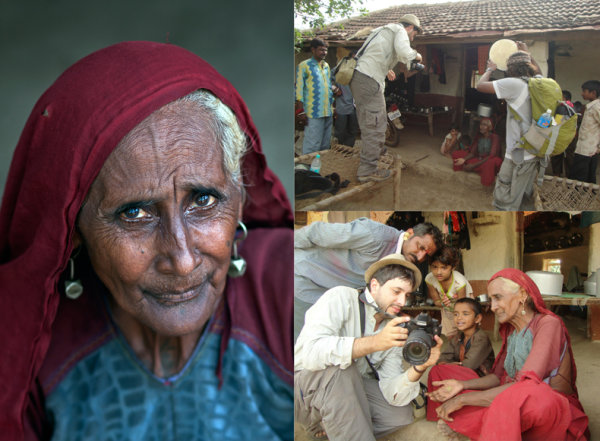
Most reflectors come in multiple colors. In this picture, taken in Western India for the National Geographic Traveler magazine (Israeli Edition), I wanted to preserve the golden- brown color which was dominate in this scene. So I asked Hardik to hold the reflector on its golden side giving the woman’s face a golden glow.
Fstop of 4.5, shutter speed@ 1/80 and ISO 100
Choosing the right distance
It is important to keep in mind that the closer the light source is to the photographed subject, the stronger and less soften it will appear. Thus, a small reflector is easier to carry and hold; however it will be not as soft as a large reflector.
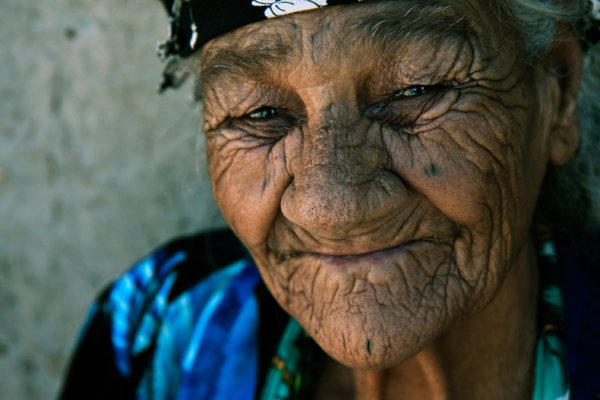
A “catch light” is an interesting spark in the eyes of the subject, “pulling” the audience to look straight at them. There are lots of methods to create a catch light in the subject’s eyes. For example using a flash or a flashlight. However, as we are discussing on the usage of natural light, a reflector can become a great tool for creating a catch light. Just place the reflector under the person’s face.
You can see some catch light examples here:

Fstop of 3.5, shutter speed@ 1/640 and ISO 250
Fstop of 2.8, shutter speed@ 1/200 and ISO 100
One of the most useful techniques, in order learn how to work with natural light in my opinion, is by observing the images of other photographers. Try to guess the direction of the light and the position and color of the reflector in the images below:
Fstop of 2.8, shutter speed@ 1/320 and ISO 3200
Fstop of 4.5, shutter speed@ 1/160 and ISO 100
Fstop of 3.5, shutter speed@ 1/320 and ISO 1000
Fstop of 2.8, shutter speed@ 1/15 and ISO 200
Fstop of 3.5, shutter speed@ 1/320 and ISO 160
Fstop of 2.5, shutter speed@ 1/1000 and ISO 250
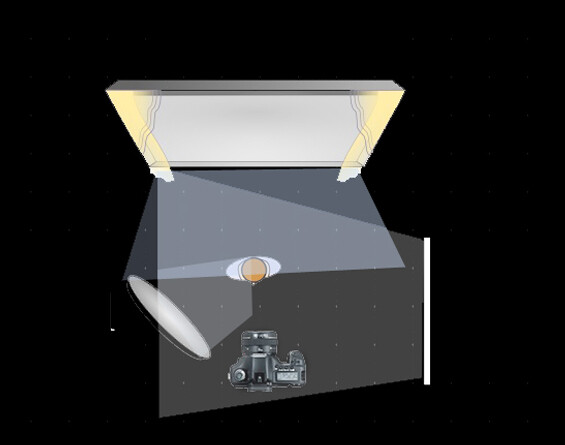
The diagrams were created by http://www.lightingdiagrams.com
Oded Wagenstein is a Travel photographer and writer. He is a regular contributor to the National Geographic Traveler magazine (Israeli Edition) and he is known for his intimate portraits from around the world. You can join his Portrait & Travel Photography Facebook page and continue to discuss on travel and people photography and get more amazing tips! –
Post originally from: Digital Photography Tips.
Check out our more Photography Tips at Photography Tips for Beginners, Portrait Photography Tips and Wedding Photography Tips.
Reflectors: Your Secret Weapon for Amazing Portrait Photography
The post Reflectors: Your Secret Weapon for Amazing Portrait Photography by Guest Contributor appeared first on Digital Photography School.

Digital Photography School


You must be logged in to post a comment.