RSS
 

Posts Tagged ‘Adobe’

Adobe has released the final standalone version of Lightroom

20 Dec

If the release of Lightroom Classic CC and Lightroom CC on October 18th was the beginning of the end for standalone Lightroom, today marks the end of the end. Adobe has released the final standalone Lightroom, version 6.14, adding some bug fixes and camera and lens compatibility, but otherwise using the opportunity to encourage users to jump on the subscription bandwagon.

To their credit, Adobe isn’t hiding this fact. They announced that this final update was coming all the way back in October, and today’s update announcement notes state the facts plainly:

Lightroom 6.14 is the last perpetual, standalone version of Lightroom.

While you may continue to purchase and use Lightroom 6 with a perpetual license, Adobe will no longer provide updates to the software. Consider upgrading to the Creative Cloud Photography plan to get the latest updates in Lightroom Classic CC and the all-new Lightroom CC, and ensure that the software works with raw files from the newest cameras.

As of today, Lightroom 6 becomes an ‘unsupported product.’

Of course, that’s okay if you plan to use it with a camera you currently own and don’t intend to upgrade any time soon. Problems—or, rather, inconveniences—arise with your next camera purchase. That camera won’t be supported by Lightroom 6, and you’ll be forced to use Adobe’s DNG converter before importing your images.

Not to mention the OS compatibility issues that will inevitably arise as Microsoft and Apple continue releasing new operating systems.

If that all sounds like too much of a hassle, and a Creative Cloud subscription is simply out of the question, it might be time to check out some of the popular alternatives that we’ve been testing and writing about recently.

Click here to download the latest (and last) version of Lightroom 6.

Articles: Digital Photography Review (dpreview.com)

 
Comments Off on Adobe has released the final standalone version of Lightroom

Posted in Uncategorized


Major Update: Adobe adds tone curve, split toning and more to Lightroom CC

13 Dec
The tone curve, one of the most important features missing from Lightroom CC 1.0, is finally being added. Photo: Adobe

Adobe has launched a major update to the entirely Lightroom CC ecosystem today, releasing major updates for Lightroom CC on Mac, Windows, iOS, Android, and the web, in addition to a few updates for Lightroom Classic CC and Adobe Camera Raw. If you’re a Creative Cloud subscriber, you’ll want to update ASAP.

Here’s what Adobe has in store for you with this latest Lightroom update.

Tone Curve and Split Toning

Two of the most useful and conspicuously absent features in Lightroom CC 1.0 were the Tone Curve and Split Toning. Well, there’s no longer any reason to hop back into Lightroom Classic CC to take advantage of these: they’re coming to Lightroom CC.

You’ll find the Tone Curve next to the Auto button in the Light panel, where you can choose between Parametric Curve or Point Curve modes, as well as the Red, Green, and Blue channels.

Split Toning lives in the Effects panel, where you can … well … split tone.

Adobe Sensei Auto Mode

Another major feature improvement coming with the December update is Auto mode, which is now much more intelligent thanks to Adobe Sensei artificial intelligence platform. From Adobe’s blog post about the update:

Using an advanced neural network powered by Adobe Sensei, our artificial intelligence (AI) and machine learning platform, the new Auto Settings creates a better photo by analyzing your photo and comparing to tens of thousands of professionally edited photos to create a beautiful, pleasing image.

This new Auto mode is launching ecosystem wide—you’ll find it in Lightroom CC, Lightroom CC for iOS, Lightroom CC for Android, Lightroom CC on the web, Lightroom Classic, and Adobe Camera Raw (ACR).

Everything Else

The three updates above are the most impactful, but the December update comes with a bit more to enjoy.

  • Lightroom CC now lets you change the capture time of an image or batch of images (“providing relief for those times that you forgot to change your camera’s time or time zone settings.”).
  • Lightroom CC for Android received several bug fixes and the ability to launch directly into popular modes from the home screen by pressing and holding the app icon.
  • Lightroom CC for iOS now lets you create and customize a text based watermark for your images on export, and HDR capture has been improved.
  • Lightroom Classic CC and Adobe Camera RAW are seeing some ‘refinements’ to the Color Range Masking tool.
  • And, finally, Adobe has added support for new cameras and lenses, including the Sony a7R III, Leica CL, iPhone X, and Google Pixel 2 among others.

You can read more about the December update on Adobe’s blog. CC subscribers just have to update their copy to the latest version to take advantage of all the features described above.

Articles: Digital Photography Review (dpreview.com)

 
Comments Off on Major Update: Adobe adds tone curve, split toning and more to Lightroom CC

Posted in Uncategorized


This 32-inch QHD Philips monitor with 99% Adobe RGB only costs $500

05 Dec

Bargain hunters looking for a high quality monitor for designer work or photo editing, there’s a new panel in town that you will want to consider. Meet the Philips 328P6AUBREB P-line display, a 32-inch Quad HD (2560 x 1440) monitor with 100% sRGB coverage, 99% Adobe RGB coverage, and HDR technology.

This monitor is essentially Philips response to BenQ’s 27-inch SW2700PT, which retails for $ 600 and features nearly identical specs, albeit in a slightly smaller screen. Depending on your needs, you might actually prefer the higher PPI of the smaller BenQ monitor, but the ability to get a slightly higher contrast ratio—1,200:1 on the Philips vs 1,000:1 on the BenQ—and a bit more screen real estate for $ 100 less is definitely tempting.

Regarding the ‘HDR technology’ mentioned above, HDR viewing will definitely benefit from the relatively bright (for computer monitors, anyway) 450 nits typical brightness, and the wide color gamut support. However, the low contrast typically associated with IPS displays means you won’t want to use this as a primary HDR viewing or grading monitor.

Finally, before you put it on your wish list, there is one more thing to consider. Despite diving into the user manual, we couldn’t find any mention of direct access to the 12-bit internal LUTs for color calibration on the Philips monitor.

The BenQ monitors, by comparison, come with calibration software that directly addresses the 14-bit internal LUTs to calibrate your monitor without sacrificing the overall bit-depth of the display, minimizing the risk of banding. The color calibration solution BenQ provides, while of course requiring the purchase of a separate colorimeter or spectrophotometer, is definitely an advantage of its lineup.

The Philips 328P6AUBREB P-line display will officially go on sale in January for £439 / 499 EUR/ 499 USD, and if you’re like some of the folks at our office, you’re seriously tempted by this display… at this price.

Press Release

New Philips Adobe RGB, QHD, docking USB-C monitor

  • USB-C docking for simplicity and single-cable peripherals docking
  • Designed for professionals whose work demands a maximum of quality

Amsterdam, 30 November 2017 – MMD, the leading technology company and brand license partner for Philips monitors, is rolling out a new Philips Brilliance QHD docking USB-C monitor with High Dynamic Range (HDR). The 32-inch 328P6AUBREB delivers great image quality and one-cable docking for enhanced productivity and effortless convenience.

Connectivity made simple

The 328P6AUBREB is equipped with the extremely versatile connectivity of the latest-generation USB 3.1 Type C technology. Featuring a slim, reversible connector, USB-C enables users to charge, transfer audio and video signal, and connect to the Internet – all with one single cable. Hence, the monitor instantly becomes a hub and serves as a docking station, just without using that extra space on the desk. It also enables easy linking of multiple monitors, which is useful for graphic designers for example. Consequently, USB-C extends the limited connectivity of notebooks and allows users to transfer data securely at ultra-fast speeds. USB 3.1 is 20 times faster than USB 2.0, making data transfer a breeze. And, for those whose devices seem to always be running low on battery, USB-C with power delivery can even charge notebooks.

An unparalleled visual experience

Explaining the display’s positioning, Artem Khomenko, Product Manager Philips Monitors Europe at MMD, says: “The P-line monitors are designed to deliver precise, accurate and colour-critical colour performance. We are proud to bring this new model to the market, and to meet the high standards of professionals. This model is the perfect fit for graphic designers, CAD engineers, photographers, video editors and other professionals who rely on an outstanding on-screen reproduction of fine details.”

With Quad HD, you will enjoy an excellent viewing experience with high-resolution visuals. HDR technology ensures exceptional brightness and contrast, as well as a rich palette of captivating new colours never before seen on a display. The 10-bit display offers 1.074 billion of them, supported by 12-bit internal processing for natural colours and smooth gradients. With 99% Adobe RGB and 100% sRGB (CIE 1973), the 328P6AUBREB offers professional colour standards and 2560 x 1440 pixels deliver crystal-clear images and make graphics come alive. Thanks to IPS technology, the monitor can be viewed from an angle of 178° without losing any of the colour accuracy or consistent brightness that professional applications demand.

An extra dose of convenience

Beyond its connectivity and stunning visuals, this 32-inch QHD display boasts many of the standout features that have earned Philips monitors their reputation: the SmartErgoBase ergonomic adjustable stand enables users to tilt, swivel and raise the display for maximum viewing comfort. It also features Philips LowBlue Mode which reduces potentially harmful shortwave blue light. Flicker-free technology regulates brightness and reduces flicker for even more comfortable viewing; built-in stereo speakers provide excellent audio reproduction while eliminating the need for peripheral speakers; and what is more, with 65% post-consumer recycled plastics, this monitor is a good choice for eco-friendly users.

The Philips 328P6AUBREB P-line display, with an RRP of £439, will be available in January 2018.

Technical Specifications:

Specification

  • Philips 328P6AUBREB P-line display

LCD panel type

  • IPS technology

Backlighting technology

  • W-LED

Panel size

  • 31.5 inch / 80.1 cm

Aspect ratio

  • 16:9

Optimum resolution

  • 2560 x 1440 @ 60Hz

Effective viewing area

  • 698.11 (H) x 392.69 (V)

Viewing angle

  • 178° (H) / 178° (V), @ C/R > 10

Brightness

  • 450 cd/m²

Display colours

  • 1.07 billion

Colour gamut

  • 99% Adobe RGB (CIE 1973); HDR400

SmartContrast

  • 50,000,000 :1

USB Connectivity

  • USB-C (upstream), USB 3.0×2 (downstream, w/fast charging)

Connectivity

  • Signal Input: VGA (Analog ), DisplayPort 1.2, HDMI 2.0 x 1, USB-C (DP Alt mode, PD, data)
  • Sync Input: Separate Sync, Sync on Green
  • Audio (In/Out): PC audio-in, Headphone out
  • RJ45

Convenience

  • Built-in speakers: 3 W x 2
  • SmartImage, Input, Brightness Menu, Power On/Off
  • Control Software: Smart Control
  • Kensington lock, VESA mount (100 x 100 mm)
  • Plug & Play Compatibility: DDC/CI, Mac OS X, sRGB, Windows 10 / 8.1 / 8 / 7

Stand

  • Height adjustment: 180 mm
  • Pivot: 90 degree
  • Swivel: -170/170 degree
  • Tilt: -5/20 degree

Sustainability

  • Environmental and energy: EnergyStar 7.0, EPEAT Gold, RoHS
  • Recyclable packaging material: 100 %
  • Post-consumer recycled plastic: 65%
  • Specific Substances: PVC / BFR free housing, Mercury free, Lead free

Compliance and standards

Regulatory Approvals: CE Mark, FCC Class B,
VCCI, RDM, BSMI, ICES-003, J-MOSS, cETLus, EPA, PSB, CU-EAC, SEMKO, SASO, KUCAS, UKRAINIAN, PSE, CECP, WEEE, TUV Ergo, TUV/GS

Cabinet

  • Front bezel, rear cover and foot: Black
  • Finish: Texture

What’s in the box

  • Monitor with stand
  • Cables: D-Sub cable, DP cable, HDMI cable, USB-C to USB-C cable, USB-C to USB-A cable, Power cable, Audio cable
  • User Documentation

Articles: Digital Photography Review (dpreview.com)

 
Comments Off on This 32-inch QHD Philips monitor with 99% Adobe RGB only costs $500

Posted in Uncategorized


Pixelmator reveals Pixelmator Pro, an Adobe competitor for Mac users

02 Dec

Pixelmator’s new high-end Mac photo editor Pixelmator Pro, which the company partially revealed back in September, is officially live and available to purchase through the Mac App Store.

In case you’ve forgotten, Pixelmator Pro is a nondestructive single-window application with some editing features powered by machine learning, GPU-based image editing tools, and what the company describes as “an incredibly intuitive and accessible design.” Users get a fully native Mac experience, says Pixelmator, which designed Pixelmator Pro with a look inspired by macOS.

Thanks to Core ML framework, Pixelmator Pro also features integrated machine learning to power features like automatic horizon detection and layer naming, intelligent quick selection, and realistic object removal.

Ultimately, the company is hoping that Pixelmator Pro will represent the perfect marriage between pro-tier features and accessible design.

Other notable features include full Mac integration, including support for iCloud, compatibility with Adobe Photoshop, support for raw images and multiple raw layers, HEIF compatibility, and vector tools, among many other things. And if you feel that a major feature is missing, you’ll be happy to know that multiple free updates bringing major new features are already in the pipeline for release in the near future.

Until then, you can pick up Pixelmator Pro 1.0 is through the Mac App Store for $ 60 USD.

Articles: Digital Photography Review (dpreview.com)

 
Comments Off on Pixelmator reveals Pixelmator Pro, an Adobe competitor for Mac users

Posted in Uncategorized


Designer imagines the perfect keyboard for Adobe software

23 Nov

Designer Vinicius Araújo has created a series of concept images that imagine what a keyboard may look like if it were made by Adobe specifically for Photoshop and its other specialized software. Araújo shared the images on Behance under the handle VA Designer, where he shows a concept that containing half a dozen touch shortcuts, a scroll wheel, colored LED lighting, and a high level of sensitivity.

While various DIYers have developed their own enhanced control methods for some Adobe products—such as using a PS3 gamepad to control Lightroom—and some interesting options do exist, a perfect hardware companion to the software suite remains elusive.

Araújo’s concept imagines what that companion device might look like should one ever be developed.

$ (document).ready(function() { SampleGalleryV2({“containerId”:”embeddedSampleGallery_0008864831″,”galleryId”:”0008864831″,”isEmbeddedWidget”:true,”standalone”:false,”selectedImageIndex”:0,”startInCommentsView”:false,”isMobile”:false}) });

Rather than using color-coded shortcuts, this concept presents a sleek low-profile keyboard with several customizable touch pads on the left, and a small display in the upper right-hand corner. That display shows which tool is currently active in the software, and is joined by a smaller display just above it that shows the application in use.

Above the keyboard’s function keys resides a display somewhat similar to the Touch Bar found on some MacBook Pro laptops. The concept’s upper display, however, is used to present the logos for Adobe software not currently in use; tap one of the logos, and the related application will launch on the computer.

Finally, the concept also includes a scroll wheel that could be used to precisely adjust sliders or select colors in programs like Lightroom and Photoshop. The inclusion of a scroll wheel on a keyboard isn’t a new idea, though; Logitech, for example, recently introduced a keyboard with a scroll wheel for use with products like Adobe Photoshop.

Because this is simply a concept design, it isn’t available to purchase as an actual product, but we’d be curious to hear your thoughts on Araújo’s keyboard. How would you improve upon it? And would you buy it if it were to become reality?

Articles: Digital Photography Review (dpreview.com)

 
Comments Off on Designer imagines the perfect keyboard for Adobe software

Posted in Uncategorized


How to Create a Beautiful Online Gallery with Lightroom Classic CC and Adobe Portfolio in 15 Minutes

04 Nov

One of the common questions I hear from photographers is regarding a way to link Lightroom to a photography portfolio website. It usually comes from photographers who don’t like the design options in the LR Web module. The perfect solution doesn’t exist, perhaps the closest (until recently) is Koken, a free plugin that I wrote about some time ago that uses Lightroom’s Publish Collections to update your online portfolio.

But, the good news is that Adobe has just made creating a portfolio website a whole lot easier with its latest update to Adobe Portfolio.

Adobe Portfolio Lightroom

What is Adobe Portfolio?

Adobe Portfolio is exactly what it sounds like – an online gallery of photos. The benefit of using Adobe Portfolio is that it’s very easy (no web design or coding skills required). It also integrates with your Lightroom Collections (this is the update I just referenced).

That means all you have to do is set up some Collections containing the photos you want to include in your gallery and synchronize them with Adobe Portfolio. Then it’s just a matter of choosing a layout, tweaking the design, and making the website live. You can do all of this in less than 15 minutes.

The only caveat is that you need to be an Adobe Creative Cloud Photography Plan subscriber. Just like Lightroom mobile and Lightroom web, it isn’t available to photographers who use a standalone (purchased) version of Lightroom.

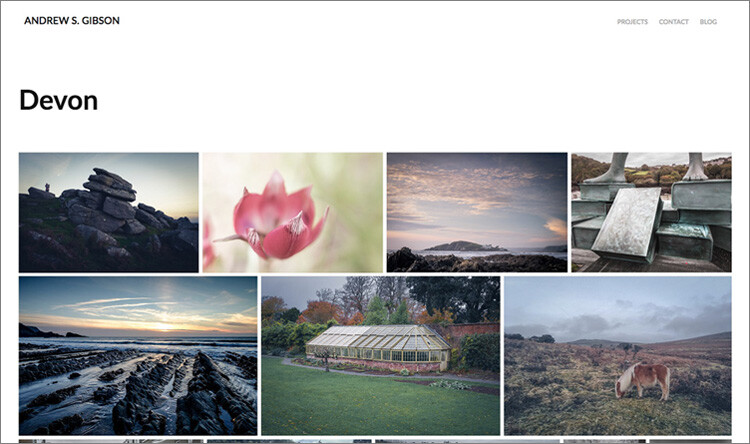
Curious? You can check out a portfolio website I created for myself using Adobe Portfolio here to see what it’s capable of.

Adobe Portfolio Lightroom

Step-by-Step Guide to Adobe Portfolio

The first step – and probably the hardest – is to decide what photos you want to include in your portfolio. Once you’ve made your mind up about that, the rest is easy.

  1. Create a Collection Set in the Library module called Portfolio.
  2. Create several Collections inside this Collection Set, one for each gallery you want to include on your portfolio website.
  3. Add photos to the Collections.
  4. Arrange the photos in the order in which they are to be displayed online.
  5. Synchronize the photos in the Collections by ticking the boxes to the left of the Collection name (marked below).

My portfolio website (link above) has four galleries; Black & White, Portraits, Spain, and Devon. Each gallery corresponds to a Collection in Lightroom with the same name (seen below).

Adobe Portfolio Lightroom

Register

Go to www.myportfolio.com and sign in with your Adobe ID. If you haven’t created a portfolio yet click the button that says Get Started Free. Otherwise, click the button that says Edit Your Portfolio.

Adobe Portfolio Lightroom

Choose a design for your gallery

Now it’s time to choose a layout. Start by clicking the Switch layouts icon (marked below).

Adobe Portfolio Lightroom

Adobe Portfolio gives you eight layouts from which to choose. All the layouts are fully mobile responsive, which means they work and look professional on mobile phones and tablets as well as desktop computers. Decide which one you want to use and click the Use this layout button.

Adobe Portfolio Lightroom

It may be difficult to visualize which one works best when populated with your photos. Don’t worry about that at this stage – you can change the layout afterward if you want to.

Settings

Next, click the Edit your settings icon (marked below).

Adobe Portfolio Lightroom

Go to Site Options and click the Lightbox for Images tab. Tick the “Enable lightbox for images on my pages” box and click Done (see below). This is important as it lets people view the photos on your portfolio website. If you don’t tick it all they will be able to see are thumbnails.

Adobe Portfolio Lightroom

Add images to your gallery

Click the Manage content icon (marked below).

Adobe Portfolio Lightroom

Go to the Integrations tab and Click the Add Collections button. The website opens a window that displays all your synchronized Lightroom Collections. Pick the ones you want to include in your portfolio and click the Import Selected button (see button below lower-right).

Adobe Portfolio Lightroom

Go to Adobe Portfolio, click on the Manage content icon again and go to the Website Pages tab. Make sure the switch is set to the On position for each Collection you want to display on your portfolio website.

Adobe Portfolio Lightroom

Choose cover photos

Now it’s time to tidy up the gallery cover photos. You’ll need to do this once for each gallery. Start by clicking the pencil icon next to the gallery cover photo (see below).

Adobe Portfolio Lightroom

Pick Edit Cover Image from the menu to edit the cover photo. At the moment this feature is a little limited – the website automatically picks the photo that appears on the cover and it’s not easy to change it.

The only way currently is to click Upload a new image and upload a photo you’ve exported from Lightroom – there’s no way to select another photo from the Collection. But you can zoom the photo and adjust the crop. Click Done when you’re finished and repeat for the other gallery cover photos.

Adobe Portfolio Lightroom

Setup the domain name

Click the Edit your settings icon again and click Domain Name. You can select a URL for your portfolio in the form yourname.portfolio.com. This is the easiest option. Alternatively, if you have a domain or a subdomain you can follow the instructions to use that.

Adobe Portfolio Lightroom

Preview your portfolio gallery

Click the gray Preview button to see a preview of your portfolio website. Happy with what you see? Click Update Live Site to publish your portfolio to your chosen URL. Congratulations – your brand new portfolio website is now live!

Adobe Portfolio Lightroom

Customizing the design

So far I’ve shown you how to get your portfolio website online as quickly as possible. The hardest part, as I said, is deciding which photos to include in your gallery. That can take hours, days, or even weeks. But, once the decision is made, you can get your portfolio online in under 15 minutes. It really is that quick.

If you’re happy with the default settings of your layout you can stop there, your job is done. But it’s worth spending some time looking at both the page and global settings. You can customize things such as fonts, colors and the number of columns on your front page. There is an option to add pages (for instance an About page) and links to other websites. You have a lot of options and it’s worth exploring them to see how you can individualize your portfolio website.

You can even change the layout by clicking on the Switch layouts icon. Adobe portfolio remembers your customizations, which gives you peace of mind as it means you won’t lose your customizations when you switch from one layout to another.

When you are finished, remember to click the green Update Live Site button. None of your customizations are published until you click that button.

How to update the photos

Portfolios are fluid and as time goes by you will add and remove photos from the Collections you created. You may also add more Collections as your photo collection grows. There are two steps to updating your portfolio website.

1. Update your Lightroom Collections and make sure Lightroom has had time to synchronize the changes.

2. Go to Adobe Portfolio, click on the Manage content icon and go to the Website Pages tab. Click on the Cog icon next to the Collection that you want to update and select Reset from Lightroom to update your portfolio gallery.

Adobe Portfolio Lightroom

3. Finish by clicking the green Update Live Site button to publish the updates to your portfolio website.

Next steps

With the recent update that lets you integrate Lightroom Collections, Adobe Portfolio has become the easiest way to create a portfolio website using Lightroom Collections. The only downside, as mentioned earlier, is that you need to be a Creative Photography Plan subscriber to use this feature.

If you are not, then look at Koken as an alternative. Don’t dismiss the Web module out of hand either, it has some very useful features and doesn’t require a CC subscription to use.


You can learn more about all aspects of Lightroom with my bestselling Mastering Lightroom ebooks.

The post How to Create a Beautiful Online Gallery with Lightroom Classic CC and Adobe Portfolio in 15 Minutes by Andrew S. Gibson appeared first on Digital Photography School.


Digital Photography School

 
Comments Off on How to Create a Beautiful Online Gallery with Lightroom Classic CC and Adobe Portfolio in 15 Minutes

Posted in Photography


Macphun unveils Luminar 2018, takes on Adobe Lightroom CC

02 Nov

Macphun—the photo editing software company that will rename itself ‘Skylum’ at the end of the year—has just unveiled the latest version of its full-featured photo editing suite Luminar. Meet Luminar 2018: a photo editor and (eventually) digital asset manager that seeks to compete with Adobe’s Lightroom at a time when many Lightroom users are looking for an out.

Available for pre-order starting today, Luminar 2018 features speed improvements, a dedicated RAW develop module, LUT support, AI-powered filters that can do some strange/interesting things like create intelligent light rays, and a digital asset management system (coming soon) that will allow you to organize your photo library sans subscription.

Macphun is very much hoping disgruntled Lightroom users will give Luminar 2018 a go:

Luminar 2018 has been re-built from the ground up for dramatic performance boosts.

[…]

Instead of stuffing menus with boring effects and old technology, Luminar only puts in filters that photographers want and need. Luminar offers more than 40 filters to correct color, sharpen details, and release creativity. New filters include the ability to enhance color with Brilliance, selectively lighten or darken specific areas of an image with Dodge & Burn, as well as the ability to change the lighting in a photo with Sun Rays.

Want a whole new way to stylize images? Try the new Lookup Table adjustments, known as LUTs . Creative color, perfect black and white conversions, and even digital films stocks are just a click away. Lightroom users who rely on custom presets created for Lightroom can also easily convert those presets into LUTs (with a free 3rd party tool) and use them inside of Luminar 2018.

Here’s a closer look at the interface:

$ (document).ready(function() { SampleGalleryV2({“containerId”:”embeddedSampleGallery_3300296879″,”galleryId”:”3300296879″,”isEmbeddedWidget”:true,”standalone”:false,”selectedImageIndex”:0,”startInCommentsView”:false,”isMobile”:false}) });

And a few before and after images to show what Luminar 2018 can do when you put it to work on your images:

$ (document).ready(function() { SampleGalleryV2({“containerId”:”embeddedSampleGallery_6390293885″,”galleryId”:”6390293885″,”isEmbeddedWidget”:true,”standalone”:false,”selectedImageIndex”:0,”startInCommentsView”:false,”isMobile”:false}) });

Most of the features discussed will launch with Luminar 2018 later this month, with the exception of the DAM, which is scheduled to ship “in 2018.” Pre-orders start today at a special discount price of $ 60 for new users (usually $ 70) and $ 40 for users of the current Luminar (usually $ 50).

To learn more about Luminar 2018, head over to the Macphun (soon Skylum) website by clicking here.

Press Release

The new Luminar 2018 takes on Adobe Lightroom

New Luminar 2018 delivers a breakthrough photo editing experience for photographers on Mac & Windows with new filters, tools, non-destructive editing, major speed boosts, and a digital asset management platform that will arrive in 2018.

San Diego, CA – November 1, 2017 — Macphun, the California-based software developer today announced Luminar 2018. New users will be able to purchase Luminar 2018 for $ 59, and current users of Luminar may upgrade at a special price of $ 39. Preorders start November 1 at www.macphun.com/luminar.

Luminar 2018 offers everything a modern photographer needs for photo editing, including new filters powered by artificial intelligence, major speed improvements, a dedicated RAW develop module and a forthcoming in 2018 digital asset management platform. Users will also benefit from the new intelligent Sun Rays filter, LUT support, and real-time noise removal. With adaptive workspaces that match styles of shooting, Luminar adapts to deliver a complete experience that avoids clutter and complexity.

Luminar 2018 has been re-built from the ground up for dramatic performance boosts. Existing filters deliver richer colors and depth in less time. A brand new streamlined user interface speeds up working with presets, filters, and masks. With full support of pro options like layers, masks, and blending modes, complex repairs and photo composites can be easily accomplished.

And, importantly, Luminar works on both Mac- and Windows-based desktop computers*.

“We’ve taken the time to listen to photographers, and what they want is performance and quality. The less time photographers have to spend in front of computers, the more time they have for taking pictures,” said Alex Tsepko, CEO of Macphun. “Our mission is to get Luminar streamlined with just the tools and controls photographers need. The goal is simple: enable the best-looking images with the least amount of effort.”

Luminar offers a new RAW Engine that can handle high-quality images faster. Plus, it’s easy to solve image problems caused by camera lenses with Lens Correction features that resolve vignette, distortion, and color aberrations. If the photo has unwanted perspective problems, a new Transform tool can quickly solve them.

Instead of stuffing menus with boring effects and old technology, Luminar only puts in filters that photographers want and need. Luminar offers more than 40 filters to correct color, sharpen details, and release creativity. New filters include the ability to enhance color with Brilliance, selectively lighten or darken specific areas of an image with Dodge & Burn, as well as the ability to change the lighting in a photo with Sun Rays.

Want a whole new way to stylize images? Try the new Lookup Table adjustments, known as LUTs**. Creative color, perfect black and white conversions, and even digital films stocks are just a click away. Lightroom users who rely on custom presets created for Lightroom can also easily convert those presets into LUTs (with a free 3rd party tool) and use them inside of Luminar 2018.

Luminar 2018 will become available in November 2017, and in 2018 a free update will provide a new image browser/digital asset manager to help photographers manage their image libraries.

Photographers will be able to sort, rate, organize, and backup their photos at great speed. The new digital asset management platform in Luminar will work without subscription and will work with any storage (cloud or local). It will also bring a number of unique features, that the current Lightroom library can’t boast.


* Workspaces, Clone & Stamp, blend modes for layers, luminosity masking, flip and rotate, as well as some other tools and features will be available in the Mac version at launch, and arrive in the PC version with free updates by the end of the year.

** Look-Up Table (LUT) – is mathematically precise way of taking specific RGB image values form a source image – and modifying them to new RGB values by changing the hue, saturation and brightness values of that source image. LUTs are used creatively to impose a specific ‘Look’ on a source image.

Availability

Pre-order for Luminar 2018 will run from November 1 until November 16.

Pre-order customers will receive a special price and value-add bonuses such as:

  • A pack of signature presets & textures from a Pro photographer Nicolesy.
  • An exclusive pack of LUTs.
  • 1-year Power plan from SmugMug ($ 72 value). For new accounts only

Pricing

Mixed-computer households can share the same product key for Mac and PC which can be activated on five devices.

Current users of Luminar may upgrade at a special pre­-order price of $ 39

New users can purchase Luminar at a special pre­order price of $ 59

The retail price for Luminar 2018 after November 16 will be:

$ 49 upgrade for current Luminar HDR users

$ 69 for new users

The digital asset management platform will arrive in 2018 as the free update for all the users of Luminar 2018.

Articles: Digital Photography Review (dpreview.com)

 
Comments Off on Macphun unveils Luminar 2018, takes on Adobe Lightroom CC

Posted in Uncategorized


Adobe will release the last update to Lightroom 6 ‘towards the end of the year’

27 Oct

The countdown to the end of Lightroom as a standalone product is officially ticking, and the deadline is drawing near. Earlier today, Adobe released a fresh compatibility update for Lightroom 6, but in addition to adding support for cameras like the Nikon D850 and Fuji X-E3, Adobe also answered a burning question in the release notes: Is this the last upgrade of Lightroom perpetual product?

The answer, it seems, is no… but that last upgrade will arrive “towards the end of the year.” Here is Adobe’s answer in full:

As we align our investments in the direction of supporting our subscription-based products, the last version of Lightroom 6 will be coming out towards the end of the year. If there is a camera not supported in Lightroom 6, you can use the DNG converter before importing your images into Lightroom 6.

Once that final upgrade goes live, Lightroom 6 will become an ‘unsupported’ product, and if you intend to keep using Adobe Photoshop Lightroom you’ll either have to subscribe to CC or deal with the less-than-ideal workflow described above… while you can. It might not take too many operating system upgrades before unsupported LR6 breaks entirely.

Not everybody is happy about this state of affairs… as Senior Reviewer Richard Butler pointed out last week:

RIP Lightroom 6: Death by Subscription Model

Articles: Digital Photography Review (dpreview.com)

 
Comments Off on Adobe will release the last update to Lightroom 6 ‘towards the end of the year’

Posted in Uncategorized


Adobe Scribbler uses AI to colorize black-and-white portraits and sketches

25 Oct

At the Adobe MAX 2017 conference last week, the engineers at Adobe Research showed off a deep learning system called Project Scribbler that can transform a line sketch or black-and-white portrait into a fully colorized and realistic image. The technology utilizes Adobe Sensei artificial intelligence technology to generate a realistic color image based on a partially-colored sketch created by the user.

As with all of their “Sneaks” at Adobe MAX, Adobe describes this as an early technology, teasing that it “may or may not” become a future product or feature in an existing product like Photoshop.

In a description posted on the Adobe Research website, researchers explain that existing deep convolutional networks are able to generate realistic images, but that users have little control over what the final images look like. This makes the technology “of limited utility,” according to the researchers, a reality not shared by their Scribbler network.

Unlike the aforementioned deep convolutional networks, Scribbler gives users a great deal of control over the final image it generates. This is made possible by feeding Scribbler a sketch where the lines serve as boundaries for the final image. As well, users are able to control how Scribbler colorizes the image by applying “sparse color strokes” to the sketch. These color strokes serve as a guideline so that Scribbler knows what colors to use for each part of the sketch.

Scribbler is capable of realistically coloring sketches and black-and-white photos without the aid of user-created color strokes, though, as demonstrated by Adobe researcher Jingwan Lu in the video above.

Scribbler was also demonstrated as capable of realistically applying existing textures to a sketch. To do this, the user places a texture over the part of the sketch where the desired texture should be applied. And, of course, Scribbler can apply more than one texture to different parts of the same sketch.

A product or feature based on Project Scribbler could prove useful in a variety of ways. Photographers, for example, could use this technology to rapidly colorize a black-and-white photo. Similarly, an artist could use Scribbler to flesh out a quick sketch of a planned art piece, enabling the artist or their client to see a representation of the final artwork before time is invested in creating it.

The full paper detailing the Scribbler colorizing technology is available here, the paper about Scribbler’s texture control technology is available here, and, of course, you should definitely check out the demo at the top.

Articles: Digital Photography Review (dpreview.com)

 
Comments Off on Adobe Scribbler uses AI to colorize black-and-white portraits and sketches

Posted in Uncategorized


Interview: Adobe will ‘absolutely continue investing’ in Lightroom Classic

24 Oct

The release of Lightroom CC and Lightroom Classic CC—and the untimely death of Lightroom as a stand-alone product that is available sans subscription—has inspired some very strong reactions within the photo community. But even those of us who aren’t itching to yell profanities at the folks at Adobe are left with some questions about the future of this software.

Enter Dan Watson of Learning Cameras, who recently sat down with Adobe director of product management Tom Hogarty and Lightroom product manager Sharad Mangalick for a deep dive on this major release, how it would impact current Lightroom users who don’t want to switch to a cloud-based workflow, and, most importantly, what the future looks like for Lightroom Classic CC.

In other words: is Lightroom Classic an afterthought that is going to be phased out in a couple of years?

You can check out the full interview at the top of this post—they cover everything from the reason for the name change, to moving images between the two versions, to potential future features, video integration, custom preset, and a lot more—but since everyone has been wondering, here’s the answer to the question above.

No, Lightroom Classic CC isn’t going anywhere.

In fact, Adobe has two separate teams working to build out Lightroom CC and Lightroom Classic CC, so this isn’t some side-project that will quickly be relegated to the back burner.

Some photographers want to work on a hard disk-based desktop workflow, and Adobe has no interest in deserting those users, at least according to Hogarty. Speaking of Lightroom CC, he said:

We don’t want [the name change] to be perceived as a lack of investment, or a lack of effort with that product. It is very good at what it was designed to do, which is manage files and folders on disk. All of those desktop-local workflows that photographers told us about during our first Lightroom Public Beta back in 2006, we are absolutely going to continue investing in. It’s a different team.

To hear more about Lightroom CC and Lightroom Classic CC from the product managers who actually decide where these products go in the future, click play up top. And if you want to hear our thoughts on the product-line split, read two opposing opinions by senior editors here at DPReview below:

RIP Lightroom 6: Death by subscription model

Hello Lightroom CC: Embracing the future

Articles: Digital Photography Review (dpreview.com)

 
Comments Off on Interview: Adobe will ‘absolutely continue investing’ in Lightroom Classic

Posted in Uncategorized