RSS
 

Posts Tagged ‘Photoshop’

3 Essential Photoshop Tools for New Portrait Photographers

29 Aug

Opening Photoshop for the first time is kind of like going on your first date; your hands sweat, your eyes glaze over, you completely lose all sense of direction and time. At least that was the scenario for me.

Portrait

Photoshop is an incredibly complex program that can be used as an artistic tool for positive enhancement, or gross distortion when it comes to portraiture. It’s all too easy to over-edit, get carried away with the sheer number of the tools at your fingertips, or attempt elaborate cover-up schemes for poorly shot images when first starting out. There are certain tools I grasped at the beginning of my learning curve, however, that were essential for editing clean and simple portrait images. Three years after my initial dumb-struck encounter, and countless hours of reading and practicing later, there are three tools that I still use in almost every photo I push through Photoshop. I’ve since discovered that users at every stage continually apply these tools to their photography workflow, as well.

Everyone has to start somewhere, so if you know nothing else about it yet, start by familiarizing yourself with these three Photoshop tools and you’ll build a solid foundation for taking your portrait photography editing to the next level.

1. Curves

The “S-curve” is one of the most common techniques in editing that packs an instant punch. I guarantee that a large majority of photographers working on everything from landscapes, to boudoir images, use this tool at some step in their Photoshop workflow. There are many different effects that you can achieve using the Curves tool, so the trick is to just play around with it a little to see what works best per image; there’s no specific settings within the tool that will always achieve great results. Much of it is about preference. You can achieve bold, colorful, contrast or a soft matte finish, simply by just readjusting the points on the curve. Extreme curves will give some strange discolorations, though, so for clean portrait editing, stick to small adjustments.

Curves

before-after-curves

2. Clone (stamp) Tool

Clonetool

This is especially helpful for fixing blemishes or small imperfections on skin, but has countless other applications as well. To use, just hover your mouse over the area you want to copy, press the Option key for Mac (Alt for Windows) and click. This “clones” the area you want to replicate. Release the option/alt key, navigate your cursor over the area you wish to fix, then click again. This will replace the “bad” area with the “good” area.

Lesson learned: don’t try to do all your skin smoothing with the clone tool. It will look way over-done and it’s far too time-consuming to match up every pixel. This was clearly not my smartest idea, I admit. Save yourself the trouble—there are better ways!

As I got better with my precision of this tool, I was able to use it for things like removing stray hairs, filling in patches of sand or grass, and other little pesky details as well. It really is a crucial tool to master.

Before after clone

3. Dodge and Burn

Dodge and burn

Dodge and Burn are technically two different tools but are often used in conjunction with each other. They are a power duo with subtle but impressive impact. I use it most commonly on eyes to give them that extra sparkle. To understand the function of each, think of it this way: when you “dodge,” you’re dodging the shadows in order to brighten your highlights and when you “burn,” you’re burning in the shadows and making them darker.

Befor eafter dodge burn

When I use these tools for eyes, I decrease the opacity to about 30% and “dodge” the iris, then I “burn” the shadows in the ring around it as well as the eyelashes. Again, make sure you don’t go overboard and give your client ghostly bright eyes, but a little adjustment goes a long way in those close-up shots! You can also use these tools to add color and contrast to skies, or add interesting light to specific areas of your image.

As with all the Photoshop tools, the successful edit hinges on the user knowing what to use when, and how to use in moderation. If you are a beginner, I hope this helps give you some direction about where to begin and rid you of the deer-in-the-headlights look for good!

The post 3 Essential Photoshop Tools for New Portrait Photographers by Leah O’Connell appeared first on Digital Photography School.


Digital Photography School

 
Comments Off on 3 Essential Photoshop Tools for New Portrait Photographers

Posted in Photography


Photoshop Versus Lightroom Which is Right for You?

24 Aug

As a photographer, whether it be professional or hobbyist, you have several skill sets to juggle and many hats to wear; you’ll need to be an artist when composing your photo’s scene, technically proficient with your camera and settings, and in the case of professionals, an adept businessperson who can maintain a business and satisfy clients consistently.

Lightroom versus photoshop

One of the most important roles you play as a photo enthusiast is that of image editor. Rarely do our images come straight out of the camera exactly as we had envisioned, so before release we are required to put our shots through the post-processing phase; this is where our raw photos are enhanced, adjusted, toned, and sharpened to give us the final image we want to deliver.

Although we have many tools at our disposal these days to help us through this phase of processing, the industry juggernaut has undoubtedly been Adobe Photoshop since its first version’s release in 1990. The software has been used by amateurs and professionals alike year after year, and is considered an essential part of most photographer’s toolboxes.

Through the following years, and the popularity surge of digital photography, Adobe realized the need for a tool more targeted for photographers, and in 2007, released Lightroom. This workflow-centric and management software has become incredibly popular in its own right, and maintains a massive following in today’s industry.

Post processing poll 2013 dPS

Click to see more on the survey results

So the obvious question is, as a photographer, which software package do you need? Both titles are excellent and carry their own strengths and weaknesses, so let’s drill down and examine them in a bit more detail to discover which one is right for you!

What we require in post-processing software

Rarely do we get a perfect result in camera that allows us to bypass the post-processing workflow, and even then, some editing is almost always required to prepare the photo for different mediums.

Generally, photos will need to be altered in size, adjusted for exposure and contrast, edited for blemishes or other imperfections, and possibly toned or have their appearance altered through filters, presets or other means. The file then needs to be exported in its final format, ready for the client, printing, or for web use.

Photoshop’s strengths

  • Pixel-level editing – images created or opened in Photoshop are comprised of pixels, which are the small physical points in a raster image, and are the smallest addressable elements in a photo. The software allows for editing even at this tiny level, meaning limitless manipulation is possible. Raster and vector images can be created from scratch.
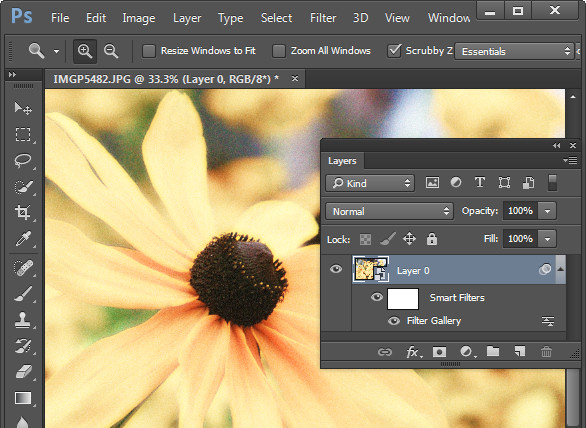
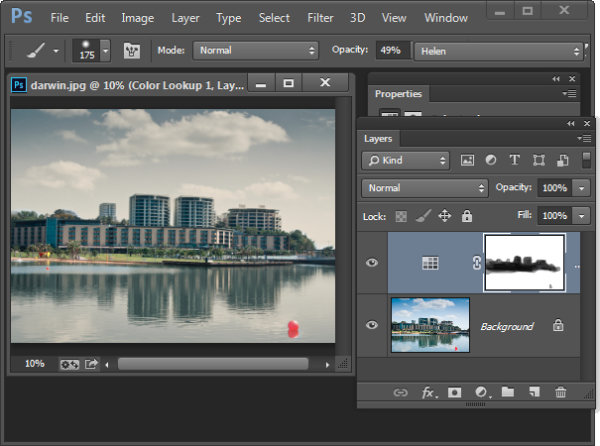
  • Layers – Photoshop allows for multiple layers to be stored within a master file, meaning that you can keep different images or edits on separate layers, and then hide, modify or enhance any of those layers independently.
    3a

    Photoshop’s layers

    4a

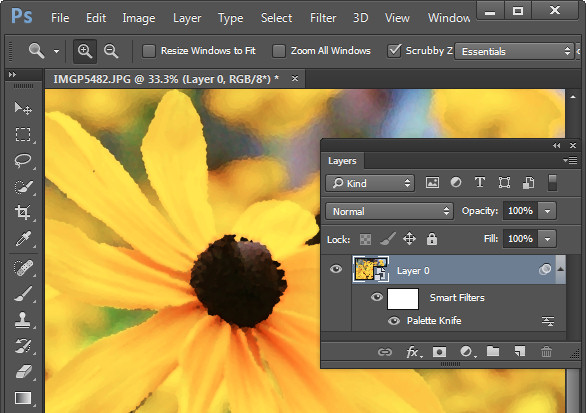
    Layer blending modes in Photoshop

  • Actions  – an extremely useful feature, actions allow manipulation steps to be chained together and recorded, letting you recreate an entire editing process with a click of the mouse.
  • Compositing and blending – because of the ability to layer components within an image, it is possible to blend those layers together in unique ways. Masking allows you to protect specific parts of the photo from any adjustments being made down to the pixel level, simply by painting out the area you’d like to keep.
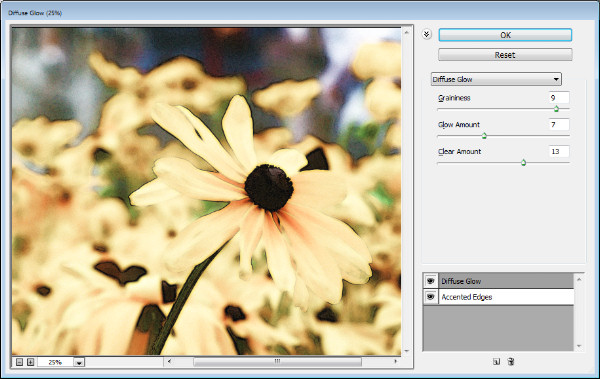
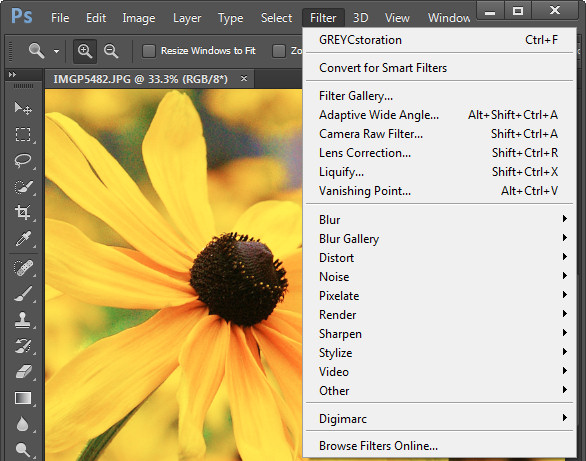
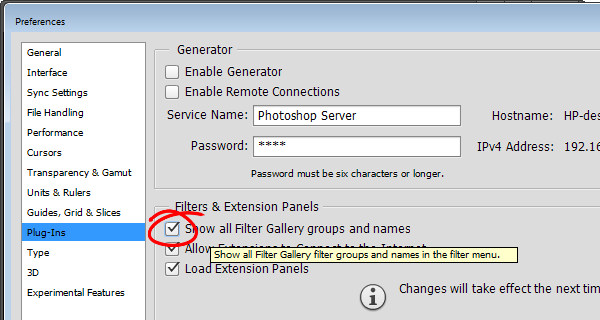
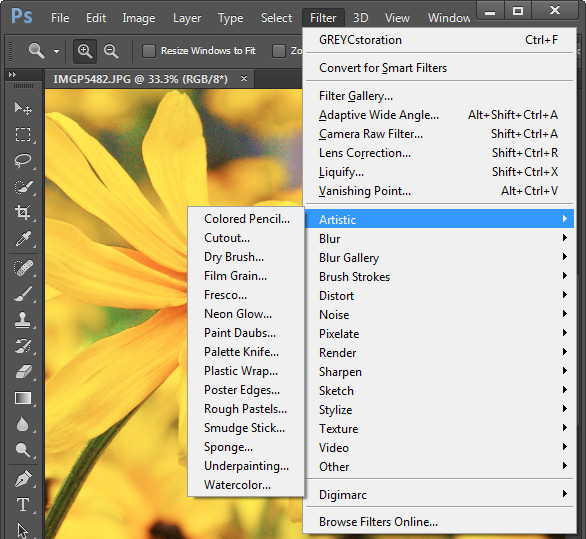
  • Huge toolbox – each progressive release of Photoshop seems to bring more and more useful tools into the mix. From content-aware filling, reducing camera shake effects, photo filters, and automatic panoramic image stitching, there is a tool for almost every task a photographer would need.
5

Photoshop Actions

Photoshop’s weaknesses

  • Steeper learning curve – with great power comes… a steep learning curve. Although you have a massive array of tools at your disposal, mastering them is something that takes time and practice.
  • No built-in RAW editing – unlike Lightroom’s native ability to manipulate RAW files directly from your camera, Photoshop must rely on a plugin like ACR (Adobe Camera RAW) or something similar in order to import and modify these files.
  • No image management – Photoshop is built from the ground up to be a powerful image creation and editing tool. Although there are batch import and export tools available to make some aspects of the process easier, there isn’t a fully-recognized  built-in management or workflow system for photographers.
6

Adobe Camera Raw must be used for processing RAW files in Photoshop

Lightroom’s strengths

9

Built-in RAW processing in Lightroom

  • Built-in RAW editing – no plugin required! Lightroom natively accepts RAW files straight from your camera, and allows all of the editing you’d expect from within the software.
  • Image management and workflow centric – Lightroom was born from the desire to give photographers something better to manage their photo libraries with.  The entire program is based on creating a solid, consistent workflow that will help you make the most of the post-processing phase.

    8

    Lightroom’s image management system

  • Simple and easy to use – since Lightroom doesn’t have the huge toolbox found in Photoshop, there is MUCH less to learn. Everything from the tools available, to the interface itself, is simple and easy to manipulate.
  • Presets – a photographer’s dream; imagine having the ability to string together exposure levels, contrast, and toning, and then save those to a handy file. Then imagine you can have unlimited variances of these, and apply them to any photo with a click of the mouse. Welcome to Lightroom’s presets! Photographers around the world share these online as well, giving you limitless potential options for your photo’s look and feel.
10

The power of Lightroom’s Presets

Lightroom’s weaknesses

  • No advanced editing tools – because Lightroom wasn’t intended as a full-on raster editor, most of the editing functions Photoshop users take for granted are not present here. With the exception of a few basic tools, you’ll want to use Photoshop in situations where heavy image editing is necessary.
  • No layer management – the powerful layer system in Photoshop is non-existent as well. Effects and modifications can be stacked on an image, but there is no real separation of image segments or any ability to use blending modes.
  • Photos only – again, Lightroom is intended as a workflow system for photographers, meaning you’ll only be able to import existing photos and modify them; there are no raster or vector image creation tools to be found here as there are in Photoshop. Lightroom is assuredly one-track minded.


Adobe Creative Cloud logotype with icon RGB vertical

Creative Cloud and pricing models

?Up until fairly recently, Photoshop would have had one additional disadvantage compared to Lightroom, and that would be price. In the past, purchasing Photoshop could set you back $ 400 to $ 900, depending on the version and any discounts you could use.  Comparatively, Lightroom could be had for less than $ 100. The huge up front cost made buying Photoshop outright a financial strain for budding photographers on a slim budget.

Those days are gone, thanks to Adobe’s awesome cloud and subscription program. As of the last release, all of Adobe’s main products have been converted to cloud-based programs and are all rooted in the new Creative Cloud subscription model. Generally, $ 20 per month will give you unlimited access to one Adobe title, such as Photoshop or Lightroom, and ample cloud storage, enabling you access to your files regardless of where you were. $ 50 per month will give you access to Adobe’s entire Creative Cloud suite, which is quite a deal.

This year, however, Adobe unveiled their Photography Program, and if you haven’t already gotten involved, you might want to take a look. For less than $ 10 per month, Adobe gives you Photoshop CC AND Lightroom CC, along with the aforementioned cloud storage. It’s an unbeatable deal, and eliminates the need to pick and choose which image program to use.

Which one is right for you?

Since pricing is no longer an issue, the choice as to which program to use for your photography work comes down to what is most important to you.

Use Lightroom if…

You value a smooth clean workflow more than infinite control over the editing of your images. Having said that, Lightroom is no slouch when it comes to processing photos, and you can recreate almost any look using the controls available to you in this software.

The presets provide an endless array of styles, and thousands more are available on the internet. Lightroom’s clean, efficient interface will allow you to process those multiple wedding or portrait shots quickly and consistently, and make managing all of those photos simpler than you could have imagined.

Use Photoshop if…

You need more control over your images. Photoshop can do it all, but of course the cost of that is a higher learning curve. Quick presets are not what the program does best; instead, it offers complete image editing with masks, layers, and a multitude of other tools, giving you all of the options you could ever need.

At the end of the day…

BOTH titles can be an integral part of the post-processing workflow.  Like anything else they both have strengths and weaknesses.  Fortunately, with Adobe’s wonderful new Creative Cloud subscription model, you can enjoy both programs, and employ the advantages of each within your workflow, without breaking your bank.

For more information and tutorials on both programs check out these dPS articles:

  • Save Tons of Editing Time with Lightroom Presets
  • A Concise Guide to Lightroom Develop Presets
  • 4 Quick Tips For Getting The Most Out of Lightroom Presets
  • How to Convert Photos to Black and White in Lightroom
  • Improve Your Images with the Lightroom Graduated Filter Tool
  • 3 Easy Steps Using Photoshop to Making your Images POP
  • Ten Go-to Editing Tips for Using Photoshop
  • 6 Commonly Used and Confused Tools in Photoshop Explained
  • Changing Color in Photoshop
  • Photoshop Tutorial: How to Color, Brighten and Sharpen Eyes

The post Photoshop Versus Lightroom Which is Right for You? by Tim Gilbreath appeared first on Digital Photography School.


Digital Photography School

 
Comments Off on Photoshop Versus Lightroom Which is Right for You?

Posted in Photography


How to Make Instagram Filters in Photoshop: Sierra & Brannan

15 Aug

I’m happy to continue our series of Instagram photo filter Photoshop tutorials. Before going to the tutorial, I’d like to share with you a few interesting facts about Instagram that you probably don’t know! Did you know that New York City is the most geotagged place on Instagram? Or that the most Instagram users are located in the United States, Continue Reading

The post How to Make Instagram Filters in Photoshop: Sierra & Brannan appeared first on Photodoto.


Photodoto

 
Comments Off on How to Make Instagram Filters in Photoshop: Sierra & Brannan

Posted in Photography


The Mysterious Disappearing Filters in Photoshop

15 Aug

photoshop-missing-filters-1
If you use filters in Photoshop CS6, Creative Cloud (CC) or CC2014 you may notice that some of your old favorites are missing. Some (sadly) are gone forever, and others are just less easy to find. So, here’s what you need to know about the filters that are gone, how to make those that are hidden more accessible and why that might be important.

Going…Going…Gone!

First to Photoshop CC 2014. Gone from this version is the Oil Paint Filter. This was the sole remaining filter left when support for the Pixel Bender plug-in was removed from Photoshop CS6.

Also gone from this version is the Kuler Extension which you could get to by choosing Window > Extension > Kuler, and Mini Bridge too. In addition, any older Flash based extension panels are also no longer supported. That said there is a new html based Kuler extension with a different feature set that you can download from Adobe here.

photoshop-missing-filters-2

Missing but not gone…

In Photoshop CS6, CC and CC2014 some filters groups are missing from the Filter menu. Those missing are the Artistic, Brush Strokes, Distort, Sketch, and Texture groups. The filters themselves are still available from the Filter Gallery but the actual menu options for those filters are no longer visible by default.

photoshop-missing-filters-3

Luckily you can restore those filters to the Filter menu. To do this, go to your Preferences dialog on Mac by choosing Photoshop > Preferences (on PC select Edit > Preferences). Click the Plug-Ins group of preferences and locate and select the checkbox for” Show all Filter Gallery groups and names” and click Ok.

photoshop-missing-filters-4

If the filter groups don’t appear on the Filter menu immediately, close and reopen Photoshop.

photoshop-missing-filters-5

You may be wondering if there is any real reason to return these filters to the Filter menu when they are all still accessible via the Filter Gallery. The answer is that there is a difference in how the filter is referred to in the Layers palette depending on whether you select it from the menu, or the Filter Gallery.

In the image below I first selected the image layer and chose Filter > Convert for Smart Filters to make the layer a Smart Object. I then applied the Diffuse Glow filter to the photo by choosing Filter > Filter Gallery. I selected the Distort group of filters and applied the Diffuse Glow filter and clicked OK.

photoshop-missing-filters-6

The Layers palette entry for this filter simply reads Filter Gallery, there is nothing to say what filter was applied to the image. Worse still if I were to apply multiple filters this way the entries in the Layers palette will each read Filter Gallery so I have no visible indication of what filters have been applied or in what order.

Contrast this to the image below where I applied the Palette Knife filter by choosing Filter > Artistic > Palette Knife > OK and the Layers palette shows the filter name. So, even though the settings for the filter are applied using the Filter Gallery dialog, the very fact that the filter was initially selected from the Filter menu results in the filter’s name appearing below the Smart Object layer in place of the less helpful “Filter Gallery”.

photoshop-missing-filters-7

This is the case if you apply multiple filters from the Filter menu, and also if you select one filter from the menu and then change your mind and apply a different one when the Filter Gallery appears. The trigger seems to be that you start the process of applying a filter in the menus and not via the Filter Gallery.

If you use filters a lot then it’s best to have them appear on the Filters menu and to use them from that menu rather than the Filter Gallery.

An Oil Paint Filter option

If you’re bemoaning the demise of the Oil Paint Filter in Photoshop CC 2014 there are some options available. One option is to keep an older version of Photoshop on your computer so you can use that version when you need to use that filter.

If you are using Windows, there is a Windows only plug-in called GREYCstoration which you can find more details about here. This is an open source filter typically used for noise reduction that will double as an Oil Paint filter which installs inside Photoshop. Make sure you download the correct version for your version of Windows (there are x86 and x64 versions), unzip the file and copy the 8bf and bin files into your Plug-ins folder. Then you will find the filter in your Filters > Noise category. To date there is no Mac equivalent for this filter.

photoshop-missing-filters-8

Some sites have also suggested you try the Pixel Bender Accelerator for Photoshop that allows you to run Pixel Bender files in Photoshop CS6 and later. This will be of use to you if you want access to Pixel Bender filters that are available as .pbk files. Unfortunately the Oil Paint Filter was never distributed as a .pbk file so it appears that, inspite of suggestions to the contrary, this application won’t be of use for getting access to the Oil Paint filter.

photoshop-missing-filters-9

That said, this application is great for running Pixel Bender filters in later versions of Photoshop so, if that’s what you’re seeking to do it is worth a look.


The post The Mysterious Disappearing Filters in Photoshop by Helen Bradley appeared first on Digital Photography School.


Digital Photography School

 
Comments Off on The Mysterious Disappearing Filters in Photoshop

Posted in Photography


6 Commonly Used and Confused Tools in Photoshop Explained

11 Aug

There are lots of tools in Photoshop that are sometimes a bit confusing due to the similar nature of their functionality. With subtle differences, these tools have been a topic of confusion between a lot of Photoshop enthusiasts. In this article I am going to share a distinction between Fill and Opacity, the Healing brush and Stamp tool, and “Merge Visible” and “Flatten image”. I hope it will help you one understand these tool a little better.

Distinction

Fill versus Opacity

Both Fill and Opacity control the transparency of a layer. They work exactly same except for the layer styles. When you reduce the percentage of opacity the layer starts to get transparent and at 0 % the layer is completely invisible, even if layer styles likes drop shadow, stroke, inner glow etc., are applied. Where as, if you reduce the fill, the layer starts to get transparent, but layer style stay the same. Keeping it simpler:

Opacity = Takes away both layer content + layer style

Fill= Takes away only layer content – but leaves the layer style as it is

Additionally there are eight blending modes that react differently with Fill and Opacity. These are called special eight groups. These 8 blending modes are Color Burn, Linear Burn, Color Dodge, Linear Dodge, Vivid Light, Linear Light, Hard Mix, and Difference. When these blending modes are applied, the 50% Fill will have different effect than 50% Opacity.

The below images should help you understand the concept better.

Opactiy 100 fill 100

I added text and then applied two layer effects, outer glow and a drop shadow. Opacity and Fill both are both at 100%

Opacity 3 fill 100

Now I have reduced the opacity to 3 percent, you can see the layer is almost invisible. If I reduce the percent to 0%, the layer would be completely invisible.

Fill 0 opacity 100

Now, I have changed the Opacity back to 100% and reduced the Fill to 0%. You will see, the layer content became transparent, but the layer style remains the same.

Healing Brush versus the Stamp Tool

Healing brush captures the texture of the area you sampled and blends with the color tone of the area you are painting. Another option: Spot-healing brush is more like content aware. It analyzes the texture around the brush and fills in the center, blending with the color tone.

Stamp tool is more like a copy and paste. It copies the area you sampled and pastes over the area you are healing.

So when is each tool will be most appropriate to use?

I mostly use the Healing Brush whenever I have to remove the blemishes of the skin, remove the mark or any texture (pimples, wrinkles) but like to have the same natural skin color tone. This helps my image remain evenly colored.

I use Stamp tool, when I want to remove something from image. For example, if I want to remove the hanging clock on the wall, light bulb or anything whose both texture and color both need to be removed.

Below is an immage of skin with blemishes. I used Healing Brush to remove the pimple by sampling a clean area and painting over the blemish.

Pimple2 copy

Here in the image below I have used the Stamp Tool to remove the helicopter. This is the after and before version of an image.

Compositional balance

Merge Visible versus Flatten Image

This is a very simple technique we regularly use whenever we work in layers, but a lot of photographers are still confused about the distinction between these two options. If you are working with multiples layers and apply Merge Visible, only layers will be merged which are visible or with eye icon turned onon. Where as Flatten Image merges all layers together, discarding the invisible layers.

The images below should help you understand better:

3 layer with one hidden

I created three layers with only two currently visible (blue and red)

Merge visible

Apply Merge Visible by going to: Layer> Merge Visible

Merge visible applied

You can see that only the visible layers have been merged, leaving the hidden layer alone. Now we will apply Flatten Image.

Flatten image

If there are any hidden layers when you apply Flatten Image, you will get this dialog box:

Discard hidden image

Now if I click OK in the dialog box, the hidden layer will be deleted and all visible layers will be merged like this:

Flattened image applied

Have you used these tools before? If you’ve had some confusion over the subtle differences I hope that has helped clear that up. Please share if have any questions or comments on these tools.

For more Photoshop tips and tutorials see here.

The post 6 Commonly Used and Confused Tools in Photoshop Explained by Anup Ghimire appeared first on Digital Photography School.


Digital Photography School

 
Comments Off on 6 Commonly Used and Confused Tools in Photoshop Explained

Posted in Photography


Creatively Recolor Photos with Color Tables in Photoshop

04 Aug

Photoshop-color-tables-opener

If you’re looking to use some creative enhancements on your photos in Photoshop CS6 or CC then the new Color Lookup adjustment is one to consider. The Color Lookup adjustment is used to remap the colors in an image to a set of colors that comes pre-configured and stored inside a color table file. Color Tables are used primarily with film but they are also useful for applying creative coloring to photos.

You don’t need to know anything about color tables to use this feature, as is a default set of color tables in Photoshop that you can use. Better still, if you like the effects and you subscribe to the Creative Cloud you can grab more color tables from the Adobe Speed Grade application, store them in the Photoshop PresetDLUTs folder, and use them inside Photoshop.

To see the Color Lookup adjustment at work open a photo and choose Layer > New Adjustment Layer > Color Lookup. This opens the Color Lookup dialog where you will find three settings; 3DLUT File, Abstract and Device Link. Select one of the options from one of the dropdown lists to see it at work. When you do this, the colors in the photo will be remapped.

For example the Soft_Warming.Look in the 3DLUT collection warms up the image.

Photoshop-color-tables-img1

The Moonlight.3DL option gives the image the look of being shot on a moonlit night.

Photoshop-color-tables-img2

You can experiment to see which of the options you like.

Some of the options open up additional Data Order and Table Order settings which let you create different effects. The Device Link collection on a Mac includes some additional options which are not available on a PC.

Photoshop-color-tables-img3

Like any other Adjustment Layer the Color Lookup option has a mask you can use to mask out the effect on selected areas of the image. You do this by selecting the mask and then paint on the image with black or grey to remove the effect from that area of the image. Paint with white to bring it back.

Photoshop-color-tables-img4

You can also use a blend mode to blend the Color Lookup adjustment into the image layer below and reduce its opacity if desired.

Here is a video tutorial for the Color Table Adjustment Layer. It includes details of how to find and use the .Look files shipped with Speed Grade in Photoshop:

If you haven’t tried this technique before give it a go and show us what you come up with. For more Photoshop tutorials check these:

  • Ten Go-to Editing Tips for Using Photoshop
  • 5 Photoshop Tools to Take Your Images from Good to Great
  • 3 Easy Steps Using Photoshop to Making your Images POP
  • 5 Easy Photoshop Tips for Beginners

The post Creatively Recolor Photos with Color Tables in Photoshop by Helen Bradley appeared first on Digital Photography School.


Digital Photography School

 
Comments Off on Creatively Recolor Photos with Color Tables in Photoshop

Posted in Photography


How to Make Instagram Filters in Photoshop: Nashville & 1997

04 Aug

We all love the web for its ability to let you communicate with other people in various ways. That’s why Instagram’s so famous today. It’s our way to share visual stories of our lives with people around us. Instagram’s so popular not just because of the sharing option, but because of a set of gorgeous filters you can apply to Continue Reading

The post How to Make Instagram Filters in Photoshop: Nashville & 1997 appeared first on Photodoto.


Photodoto

 
Comments Off on How to Make Instagram Filters in Photoshop: Nashville & 1997

Posted in Photography


Ten Go-to Editing Tips for Using Photoshop

28 Jul

PS CC launch

The recent release of Adobe Photoshop Creative Cloud (CC) 2014 (which is the 15th release of the product) got me thinking about my own workflow. Photoshop is an amazing piece of software. I have been using it commercially since version 5. However, I don’t necessarily think the latest version is the best one. I’ve just recently upgraded to CS6 and I’m loving it but I can’t see myself going the CC route just yet, as it doesn’t suit my business model.

The beauty of this software is the power that it can bring to your images, but it is a complex piece of software and coming to grips with it as a beginner can be daunting. Time and practice will be your allies in learning Photoshop.

As a photographer, Photoshop is the main editing software package I use in my photography workflow. Every photographer or designer has their own unique approach to editing images using Photoshop. I find this fascinating.

I’m constantly refining, and tweaking my editing workflow. I get such a buzz when I find an alternative method or a shortcut, that I wasn’t aware of before, which makes things more efficient. Having said that there are a lot of the features in Photoshop I wouldn’t use, and there are some that I use more than others.

Before I start editing my images in Photoshop, I open them with Adobe Camera Raw (ACR) since I shoot RAW format. I need to make basic adjustments such as exposure, white balance, correcting chromatic aberration and any lens distortion. From there, I take my images into Photoshop as Smart Objects.

The following tips for using Photoshop are my regular editing techniques in no particular order. These can be used in most versions of Photoshop. These are a small set of useful tips. I could have extended it by a dozen more.

Ten go-to editing tips for using Photoshop

1. Duplicating Layer Masks for other Adjustment Layers

To save time when you need a copy of a mask from one layer to another adjustment layer; when you’ve used the brush tool to create a mask. Simply hold down the Option key on a Mac or CTRL key on a PC, click on the layer mask and drag it to the adjustment layer in question. This makes a copy of the layer mask without having to redo the same again.

Gorilla duplicating masks on other adjustment layers

2. Add a Curves Adjustment Layer with a Difference

Normally in the Curves adjustment, you adjust points on the curve line which affect the image’s tonal range. The S-shaped curve is a classic tonal tweak for boosting contrast and color saturation. However, if you add a curves adjustment layer, change the blend mode to Soft Light and reduce the Fill down to approximately 55% (the reduction amount will depend entirely on your image & preference), this gives a similar boost to color and contrast. For demonstration purposes, I have left the Fill at 100%, so that you can see a difference as outlined within the white square.

Field in France curves softlight

3. Dodge and Burn

Create a separate layer, change the blend mode (Mode) to Overlay and fill the layer with 50% gray. Name this layer “Dodge and Burn”. The Dodge and Burn tools are my go-to method for making selected areas of an image lighter or darker. Dodge is for lightening and the Burn tool is for darkening an area. Use a soft Brush and set Exposure to between 6-12%. In most cases, I leave Range set to Midtones. If you find that you have overdone it in the specific areas, just reduce the Opacity on the layer. The image on the right (below) shows the areas where I used the Burn tool to darken his arm, his face, and the bright spots in the background, and also where I lightened his back shoulder.

Secret Agent Dodge Burn

4. Layer Comps

I find the Layer Comps feature in Photoshop invaluable. It is a useful guide to the different editing stages as a before and after comparison. It is so easy to overdo it and get carried away with over-editing your image. This has five stages from straight out of camera, to the final image.

Poker

5. Stamp Visible

Cmd+Shift+Alt+E (Mac) or Ctrl+Alt+Shift+E on a PC is the command to keep all the layers in a Photoshop file and make a merged copy on top of them. I find this particularly useful, especially at the end of my editing process, where I apply some sharpening or contrast by using a Topaz effect (plug-in for Photoshop).

6. The “Place” Command

This is found under File>Place. I normally work with multiple images in the same document. Therefore, I find using this method really handy as it imports the image as a Smart Object automatically, which is great for resizing the image without any degradation.

7. Patch Tool

The Patch Tool was my favorite of the Healing Brush Tools in Photoshop CS5. But now that I’ve upgraded to CS6, the Patch tool has just gotten even better. You can now use the Patch tool to fill using the Content-Aware on a new empty layer. I prefer to set the Adaption to Loose. Make sure Sample All Layers has been ticked. The Healing Brush also feels more intuitive to use than before.

Ringbuoy Patch Tool

8. CMD+T or Transform

I seem to use this shortcut a lot. If I’m working on multiple images in the same document, I may need to resize one or two of the images accordingly. As I import my images using the Place command, this means they are converted to Smart Objects, so the resolution of the images isn’t affected when transforming or resizing.

9. CMD+T+Warp Tool

Similar to the above point, the Warp tool is great for fine-tuning an element of an image, especially if you are working on composites. In the image below, I was using my own stock photo of Heron’s talons to replicate the Owl’s talons for the purpose of realism.

Owl Warp tool

10. Opening a Second Window for the Same Document

When you are retouching your image to get rid of dust and blemishes and so forth, you may need to zoom in as much as 300% or more. Open another window for the same document by Window>Arrange>New window for new_filename.PSD but keep it at 25% (or fit to window). This way, instead of zooming back out to see how the image looks and then zooming back in to resume your retouching, just click on the second window where you have the same document viewed at 25% (or fit).

Do you have another other go-to Photoshop tools or tips you’d like to share? What is in your workflow? Please share in the comments.

The post Ten Go-to Editing Tips for Using Photoshop by Sarah Hipwell appeared first on Digital Photography School.


Digital Photography School

 
Comments Off on Ten Go-to Editing Tips for Using Photoshop

Posted in Photography


How to Make Instagram Filters in Photoshop: Amaro & Mayfair

25 Jul

With over 100 million users worldwide on both iOS and Android devices, Instagram’s success as a mobile platform and social network is clear to see. These days, it has an expanded web presence, so there are more opportunities than ever to show off your photography skills. Instagram’s 20 filters that fit a handy app are a great playground for photographers Continue Reading

The post How to Make Instagram Filters in Photoshop: Amaro & Mayfair appeared first on Photodoto.


Photodoto

 
Comments Off on How to Make Instagram Filters in Photoshop: Amaro & Mayfair

Posted in Photography


Adobe Photoshop Express update brings Raw editing

15 Jul

Adobe has updated both the iOS and Android versions of its free Photoshop Express mobile app. The new version comes with a number of added features and improvements but to many photographers the most useful new function will be the ability to edit Raw files. We gave it a try – read more on our sister site, connect.dpreview.com.

Articles: Digital Photography Review (dpreview.com)

 
Comments Off on Adobe Photoshop Express update brings Raw editing

Posted in Uncategorized