RSS
 

Posts Tagged ‘Photoshop’

10 Quick Photoshop Tips to Improve Your Workflow

27 Jun

Whether you are a Photoshop newbie or a guru, there is always something new to learn or discover in this extensive image editing software. One of the joys of using it,  is that there are many ways to do the same thing in Photoshop. Here are a few tips that are useful to improve your workflow, either by speeding it up or adding a few tweaks to your process.

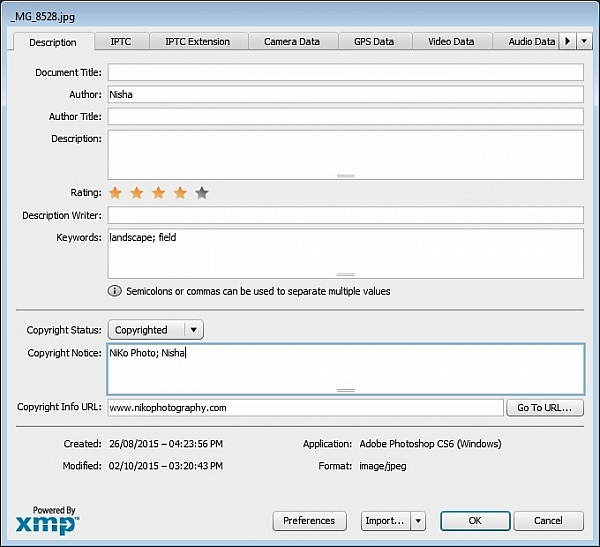
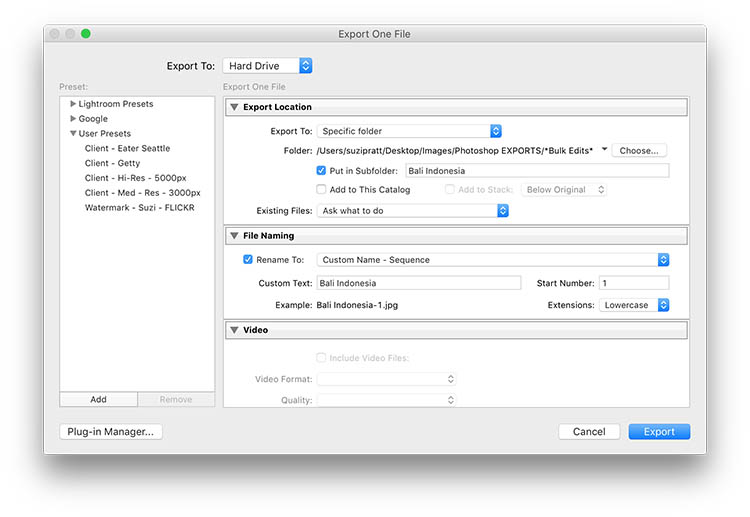
1. Copyright Metadata Tip

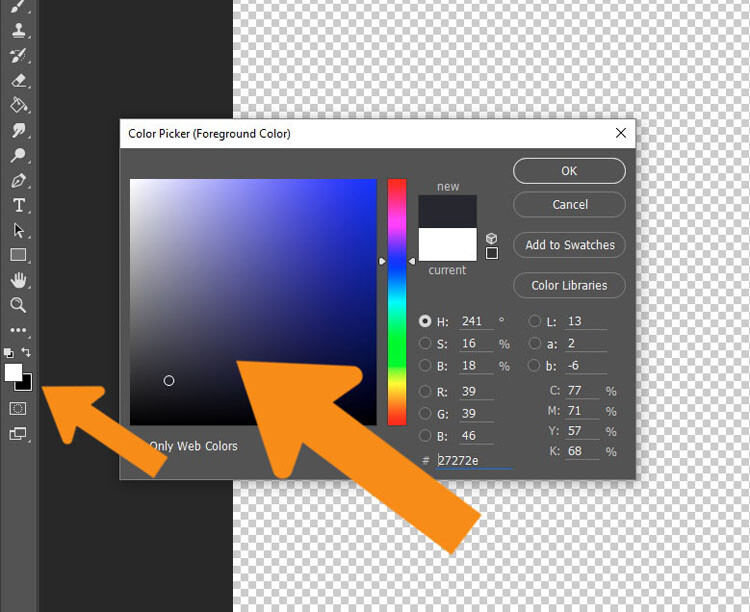
Many people use the terms watermarking and copyrighting interchangeably, but these are two different things. While arguments continue for and against watermarking images, in this digital age copyrighting your photos is still highly recommended. One of the best ways of doing this, is to embedding the copyright information right into the metadata of your image.

Follow these steps:

  1. Click Ctrl + Alt + Shift + I (Mac: Command + Option + Shift + I), or go to File > File Info to bring up the Metadata panel
  2. Click on the Description tab (left one) and enter your copyright information in the relevant fields

Copyright

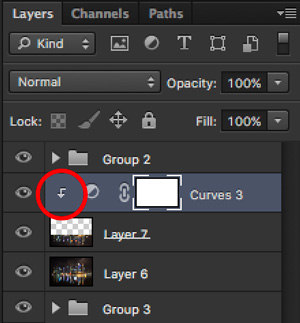
2. Color Correcting with Curves Tip

As you may know, there are many way to correct color in Photoshop, and you may have even experimented with using a Curves Adjustment layer to achieve this. Sometimes, while working on this layer to color correct an image, you may inadvertently make the image lighter (or darker).

An easy fix that allows you to apply your color correction, without affecting the tonal values of the image, is to set the Curves Adjustment layer’s Blending Mode to Color.

3. Double Windows Tip

ComparativeForEdit

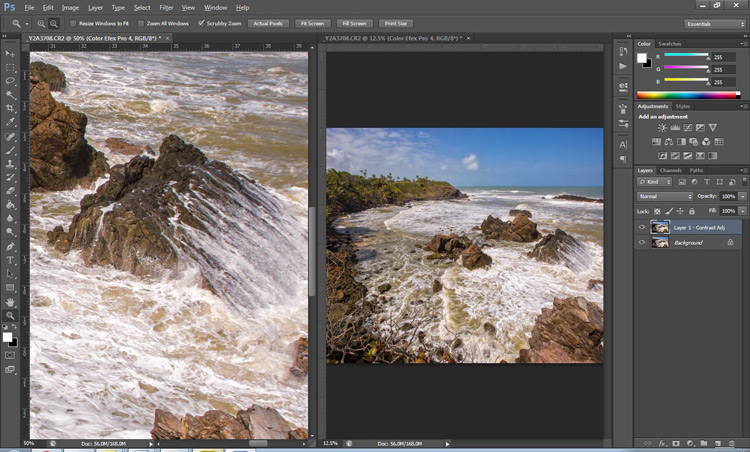
Zooming into your images can be helpful when editing details, but it can feel like a chore if you constantly have to zoom in and out to see how your changes affect the overall image. A simple solution to your problem is to open the same image in two windows. Now you will be able to put them side by side, at different zoom levels for your comparative purpose.

  1. With your image open, go to Window > Arrange > New Window for [file name of your image].  This this will open up a second window for the original image.
  2. Then, go to Window > Arrange > 2-Up Vertical and this will put your windows adjacent to each other. Now you have one zoomed out for an overall picture, and you can zoom in to edit the other.

The coolest part is that all the adjustments you make to one window, will be reflected in the other.

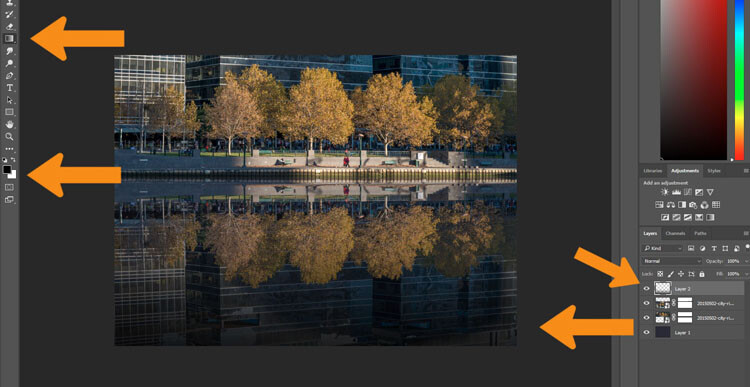
4. Contrast with Channel Mixer Tip

The Channel Mixer is an easy way to add great contrast to an image.

  1. Create a new Channel Mixer adjustment layer.
  2. Choose Black and White With Red Filter from the preset drop-down (in the Properties Panel).
  3. Change your blending mode for the adjustment layer to Soft Light.
  4. Play around with the opacity of the layer until you get the desired level of contrast.
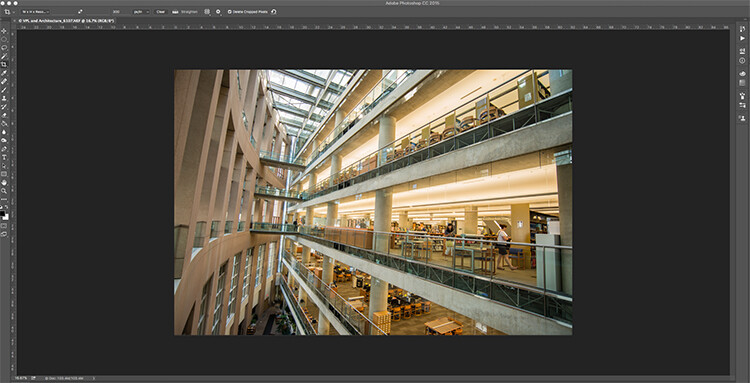
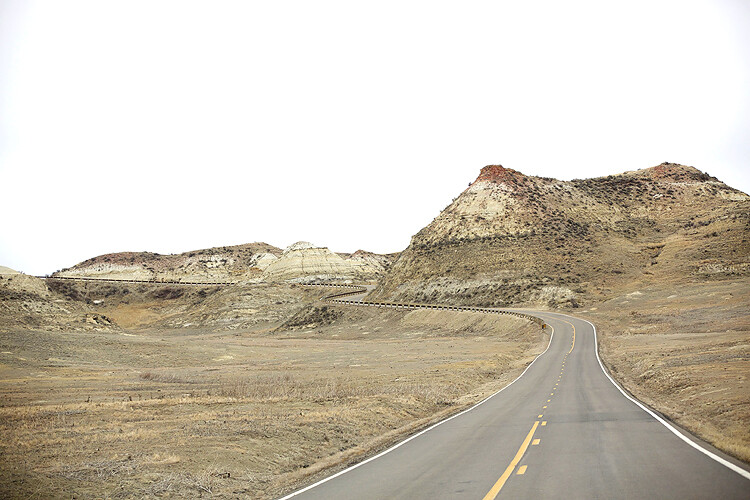
Before_ChannelMixerContrast

Original Image

After_ChannelMixerContrast

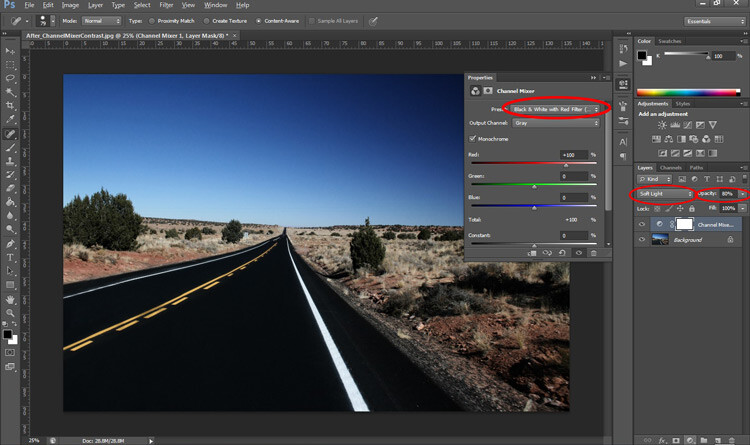
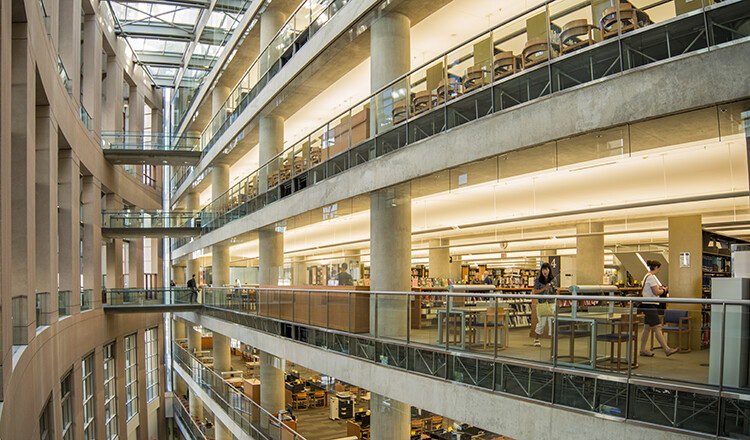
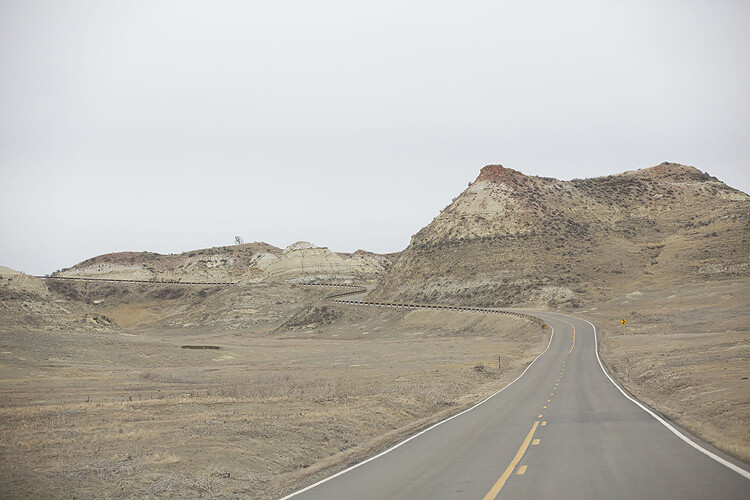
Image Contrast changed using Channel Mixer

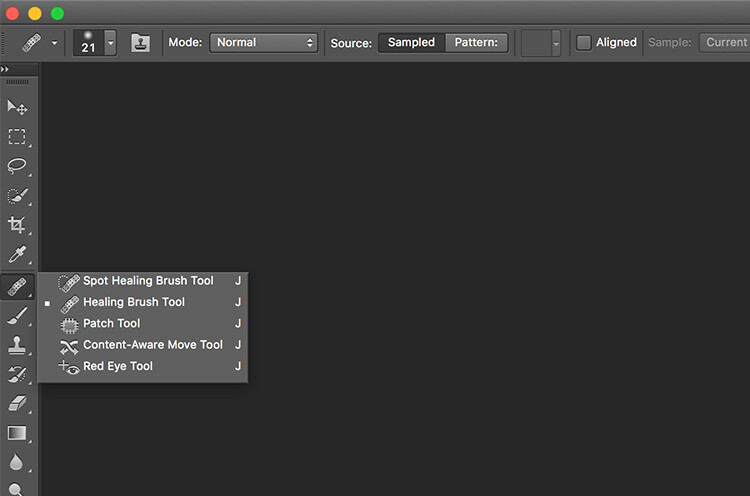
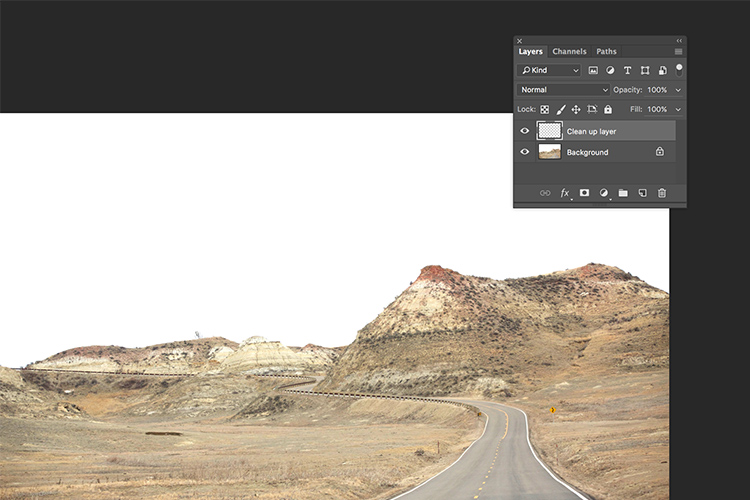
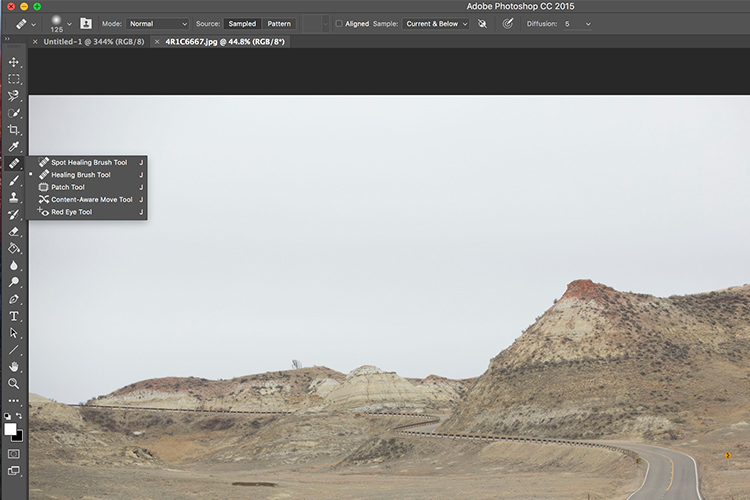
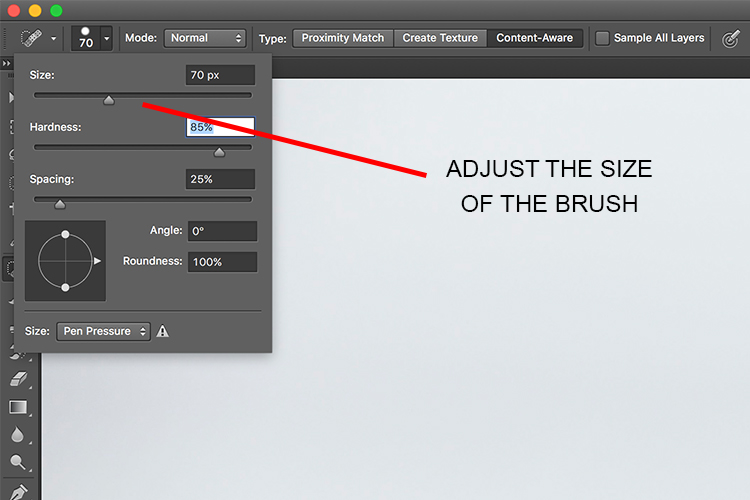
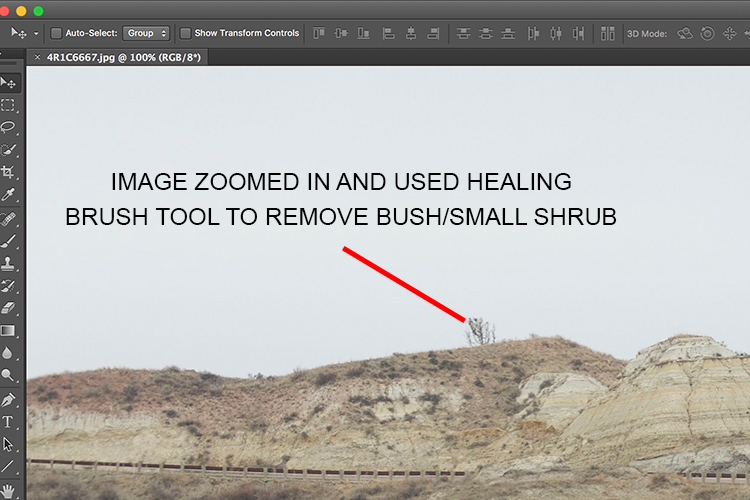
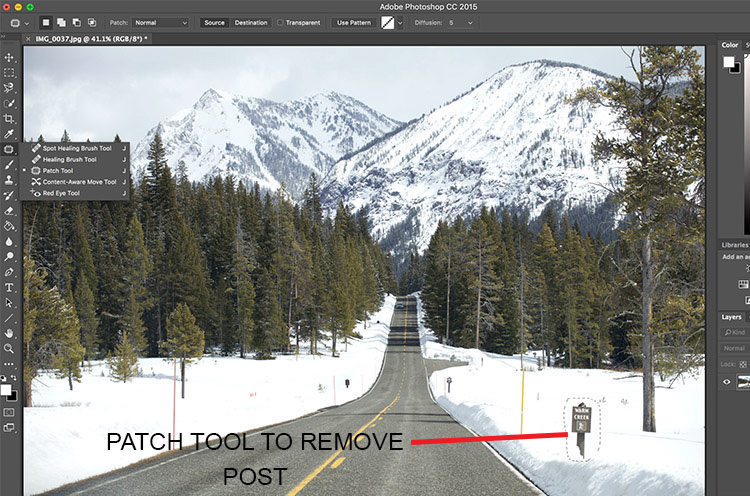
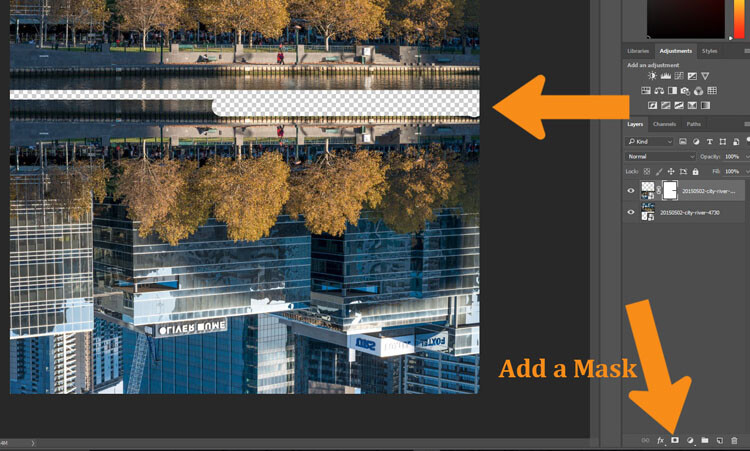
5. Content Awareness Tip

Several tools use Content-Aware, which is Photoshop’s method of examining your image, and calculating which pixels are needed to repair the selected area. At times though, even awesome tools such as the Healing tool or the Content Aware fill, do not return the best results when applied

If you are not happy with what the tool has returned, simply apply the adjustment again. Yes you read that correctly, you can apply content aware a few times and get a more desirable result the second or third time around.

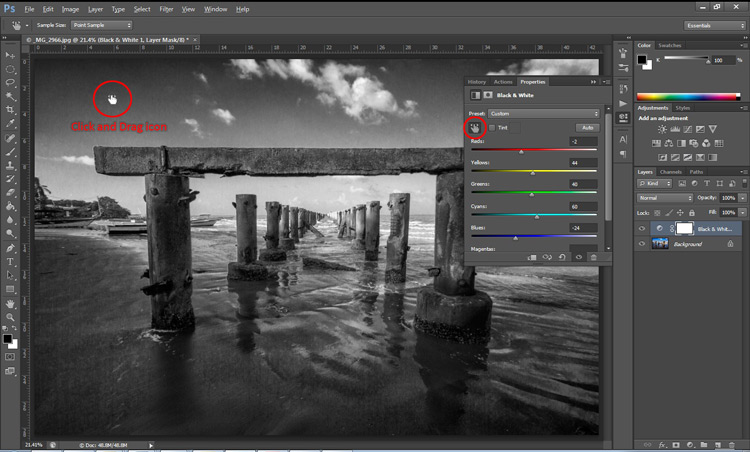
6. Better Black & White Image Tip

Making a black and white photo can be as easy (and boring) as desaturating your images (using Image > adjustment > desaturate). If you want to take it up a notch, try using a Black and White adjustment layer (from the Layers panel), where you can use up to six color sliders to control the main colors in your imag,e and adjust the relative brightness of each color.

While you’re there, check out the very useful click and drag (targeted adjustment tool) icon. Click it, then click and drag (hold the button in while you drag) on any area of the image that you wish to make darker or lighter— to the left for darker, right to make it lighter

BWAdjLayer

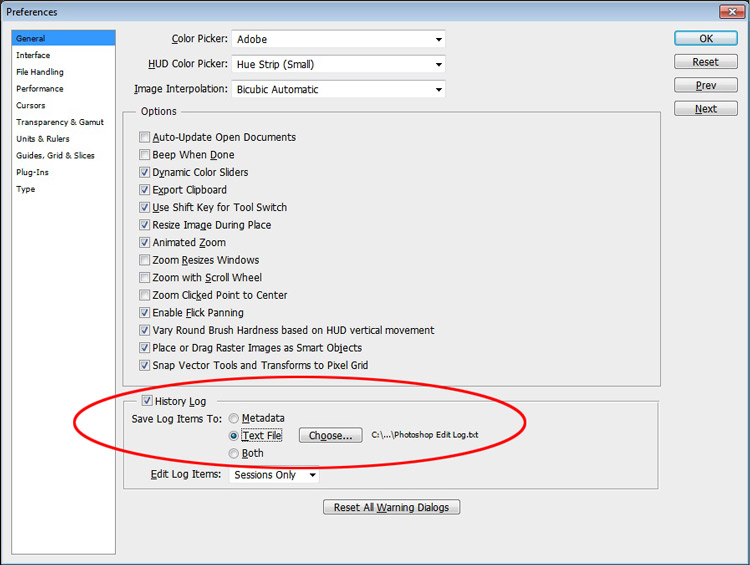
7. Getting Historical Tip

Have you ever wanted to repeat your timely editing on another image and found your memory unreliable? Photoshop’s History Log is a great feature to turn on if you want to keep a text record of every single step you have done to your image.

  • Click Ctrl + K (Mac: Command + K) to bring up the Preferences panel.
  • In the General tab check the History Log and the Text File box, and choose a location to save the file (name it for easy reference later on).

Now when you work on your image, and Photoshop will record every step you take. If you ever want apply the same steps to another image, just locate the text file and review.

HistoryLog

8. Check Spelling With Photoshop Tip

Spell check is not something that would come to mind when you think of Photoshop, but yes it can do that too. All you have to do is click on Edit > Check Spelling and your visible text layers will benefit from more accuracy.

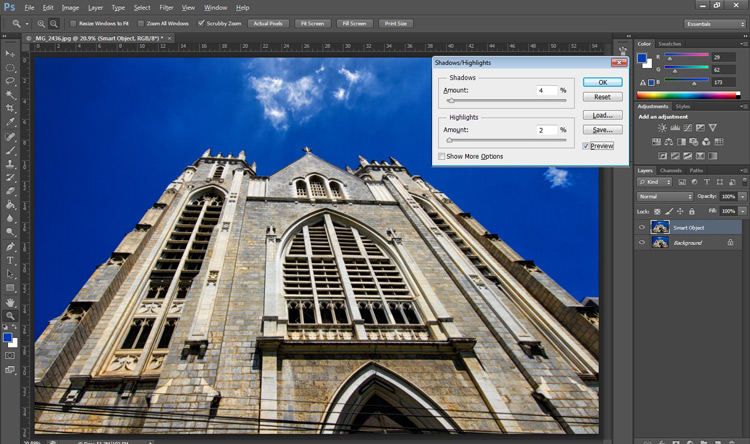
9. Revealing Hidden Detail Tip

To bring out hidden detail in the shadows and highlights of your image, one of the best tools is the (you guessed it) Shadow/Highlight Adjustment. Sadly though, it is not available for application via an Adjustment Layer, so for non-destructive use, first convert your layer to a Smart Object.

Then go to Image > Adjustments > Shadows/Highlights and apply to recover those details.

HighlightsShadows

10.  Close Everything Tip

Did you know you can close all your open images at once? Simply hold down the Shift key and click the close icon on any of your image windows.

Conclusion

While there are several ways to accomplish a task in Photoshop, hopefully there was something new hidden in these quick tips. Were any of these new to you or did you discover a new way to execute an old favorite? Maybe you can share some other must-know, or time saving tip,s that you use to be more efficient at post-processing in Photoshop.

googletag.cmd.push(function() {
tablet_slots.push( googletag.defineSlot( “/1005424/_dPSv4_tab-all-article-bottom_(300×250)”, [300, 250], “pb-ad-78623” ).addService( googletag.pubads() ) ); } );

googletag.cmd.push(function() {
mobile_slots.push( googletag.defineSlot( “/1005424/_dPSv4_mob-all-article-bottom_(300×250)”, [300, 250], “pb-ad-78158” ).addService( googletag.pubads() ) ); } );

The post 10 Quick Photoshop Tips to Improve Your Workflow by Nisha Ramroop appeared first on Digital Photography School.


Digital Photography School

 
Comments Off on 10 Quick Photoshop Tips to Improve Your Workflow

Posted in Photography


Use Photoshop to Correct Perspective Distortion of Buildings in Your Images

25 Jun

Shooting buildings can be tricky. The main reason is that they are tall, and you need to get far away from them if you want to fit them into the frame. If you are shooting in the city, you don’t have the luxury of getting really far away, the best you may be able to do is get farther down the street. What you have to do then, is tilt your camera upwards to get the whole building in, and that’s when it happens – perspective distortion.

City Scenes can be difficult to photograph

City scenes can be difficult to photograph because of the risk of distortion

When you are using a wide angle lens (which you probably will be when shooting architecture) and you tilt your lens up or down, your image will distort. Architectural photographers would use a tilt-shift lens to counteract this distortion, which can make a really big difference in your image. The only problem is that it is a specialist lens, and it is expensive.

Until a few years ago, that was the only solution for fixing perspective distortion, but in the latest versions of Photoshop, there are a few truly amazing tools that can fix it painlessly. Sometimes the distortion may work well in the image, but if you need to fix it, these techniques can help. To learn more about getting better architectural photos read: Tips for Different Approaches to Architecture Photography

1. Working with distortion

The definition of distortion is: when the straight lines of a subject are either curved in a particular direction, or they converge or diverge. This happens when the focal plane of your camera is pointed upward or downward. This is called perspective distortion. The second most common type of warping is barrel distortion, this type is dependent on the type of lens you are using. Barrel distortion make the image look like it has been inflated in the middle of the scene so it looks like a barrel – wider in the middle, and narrower at the top and bottom. Wide angle lenses tend to distort a fair amount when pointing up or down, and in some cases, you may get barrel distortion in the image too. So, how do we fix this?

Tall buildings distort easily with a wide angle lens

Tall buildings distort easily with a wide angle lens.

2. Fixing distortion in camera

If you want to avoid perspective distortion, then you will need to keep your focal plane at 90 degrees to your subject. In other words, don’t tilt your camera up or down when you are shooting. This may work well for landscape photography, but when you are shooting tall buildings, it may be very difficult to get that right. Sometimes there is no way to avoid perspective distortion in camera.

Thankfully Photoshop can help you out here. Barrel distortion is a function of the lens you are using, wide angle lenses can make the middle of the image seem bloated or inflated. You can try and fix this by zooming in a little, as wide angles tend to suffer from barrel distortion when they are at their widest focal length. Zooming in is not always possible, so we will fix the bulk of the issues in Photoshop.

3. Fixing distortion in Photoshop

Photoshop has a few functions that can help you fix both perspective and barrel distortion. One of the best tools that has been included with recent versions is the Adaptive Wide Angle Tool. This tool is intuitive and easy to use, but takes a little practice initially. In the past, I would use the transform tools (i.e., Distort, Skew, Perspective and Warp). While these worked really well, it took a fair amount of time to get the corrections to look realistic.

In the examples below, you can see that the building looks shorter and more squat. Some further adjustments would need to be made to correct this, but overall, the buildings are vertical and look correct architecturally.  With the Adaptive Wide Angle tool, this process is easily done, in some cases with only three or four mouse clicks.

Image of a building before the distortion tool was applied in Photoshop

Image of a building before the distortion tool was applied in Photoshop

Same image after the distortion tool was applied

Same image after the distortion tool was applied

4. Adaptive Wide Angle tool

The Adaptive Wide Angle tool sits under the filter menu. Open the image you want to correct (with skew buildings or walls) click on FILTER>ADAPTIVE WIDE ANGLE, and a new box will open up with your image inside it.

Adaptive Wide Angle tool screen

Image to be corrected, you can see the vertical lines are pretty skew

Depending on how your image is displayed in the box, you may need to scale it to see the whole thing. On the right hand side you will see a box that says Correction. Underneath that you will see a scale slider, adjust it until you can see your whole image in the box. There is a dropdown box in there with other options such as perspective, fisheye, etc., – I find leaving it on Auto seems to work best. The other functions within that box may work in some cases, but by leaving it on Auto and making specific adjustments to the verticals and horizontals in your image, you will get the best results.

Adaptive Wide angle tool screen

Adaptive Wide angle tool screen

You will then need to identify the walls of the building that are converging or diverging. On the left hand side of the dialogue box, you will see some constraint tools. The tool that is first in the row is simply called the Constraint Tool, this is the one I use most often.

Click on that and move your mouse over to one of the vertical lines of the building, and draw a line down the wall. Start at the top of the building and drag the line down to the bottom, along a vertical wall that should be straight. Click at the bottom of the line when you are done and Photoshop will drop a line down exactly where you dragged. As you click, Photoshop will correct any barrel distortion, but the line will still be skew.

At the bottom of the line you will see a square, right click on the square and three options will pop up: Horizontal, Vertical, and Arbitrary. These are the three ways you have to correct that line. If it is a vertical wall, then click on Vertical. Immediately, Photoshop will bring that wall into a perfect upright position. What you will notice is that it may distort other lines now. That’s okay, find a second vertical that is not correct and repeat this process, once you have done three or four verticals, your building should be perfectly straight, as should the rest of the building. Sometimes what may happen is that the horizontal alignment may shift with all these vertical changes. You can then select a horizontal line in the image and repeat the same process you did for the verticals, just use a line that you know should be horizontal. Also, when you right click, select the Horizontal option in the popup box.

To make sure you are making a precise selection when you draw your line, there is a 100% zoom window on the right hand side. This is really useful, as it can be difficult to be zoomed in to the image, and drag the line down at the same time. This box really helps make sure that you start and finish at the right places on the building.

Adaptive Wide Angle tool and image after 3 adjustments have been made

Adaptive Wide Angle tool and image after 3 adjustments have been made

Once you have straightened some of the more skewed verticals, and one or two horizontals, your image should be looking pretty close to perfect. Once you are done, click ok and your image will open up in Photoshop. From there you can edit the rest of the image with all the lines being straight and aligned.

A new tool has recently been launched by Adobe Photoshop for CC users called Guided Upright and you can find it in Camera RAW of the latest version.

Final image after being edited in the Adaptive Wide Angle tool

Final image after being edited in the Adaptive Wide Angle tool and cropped.

Here is a great short minute video that Adobe has released, take a look, this could also be a useful tool to use.

What’s your go-to method of correcting perspective distortion? Please share in the comments below.

googletag.cmd.push(function() {
tablet_slots.push( googletag.defineSlot( “/1005424/_dPSv4_tab-all-article-bottom_(300×250)”, [300, 250], “pb-ad-78623” ).addService( googletag.pubads() ) ); } );

googletag.cmd.push(function() {
mobile_slots.push( googletag.defineSlot( “/1005424/_dPSv4_mob-all-article-bottom_(300×250)”, [300, 250], “pb-ad-78158” ).addService( googletag.pubads() ) ); } );

The post Use Photoshop to Correct Perspective Distortion of Buildings in Your Images by Barry J Brady appeared first on Digital Photography School.


Digital Photography School

 
Comments Off on Use Photoshop to Correct Perspective Distortion of Buildings in Your Images

Posted in Photography


Adobe updates PhotoShop CC with content-aware crop, face-aware liquify

22 Jun

Photoshop CC 2015.5 introduces a couple of editing tools that have been showcased recently by Adobe, as well as a new selection and masking workspace. 

Face-aware liquify uses facial recognition to identify facial features, offering slider adjustment tools to change the shape of a nose or a mouth, for instance. Content-aware crop aims to fill in blank canvas space around an image resulting from a horizon adjustment, for example, applying the same logic as the existing content-aware fill tool. In addition to these new retouch tools, users will find a new selection and masking workspace, making it easier to isolate elements of an image with tools like refine edge brush. 

With this update, Adobe claims that Photoshop CC will open documents faster and performs with better overall responsiveness. Specifically mentioned is content aware fill, which Adobe claims will be ‘up to 3X faster with even better results.’

Subscribers can update to Photoshop CC 2015.5 starting today.

Articles: Digital Photography Review (dpreview.com)

 
Comments Off on Adobe updates PhotoShop CC with content-aware crop, face-aware liquify

Posted in Uncategorized


How to Enhance Urban Night Photographs Using Luminosity Masks in Photoshop

19 Jun

As the sun sets on a city’s skyline, thousands of lights come flooding the concrete jungle, turning every urban scene into a photographer’s paradise. Every corner around the city suddenly seems too irresistible not to be photographed.

Image 01

Urban night shots is probably one of the most common photos taken at night. The way most people shoot cityscapes at night is to keep the camera still, press the trigger, and snap the shot. The result is often an uninspired image, with overexposed highlights due to the long exposure. This problem can be fixed by blending multiple exposures, to recover details in the highlights with luminosity masks.

Image 02

Overexposure of highlights circles in red.

Using Luminosity Masks is a way of making a selection based on the luminosity (or brightness) value of the pixels. The main advantage of luminosity masks over other selection tools is its ability to feather the edges, which makes the transition seamless. One of the earliest articles detailing how luminosity masks works was published by Tony Kuyper. You can learn more about luminosity masks here.

In this tutorial, I will show you step by step, how you can recover detail in the highlights of your urban night shots, using luminosity masks in Photoshop. There are two parts to this: taking the multiple exposure, and editing them in Photoshop with luminosity masks.

Part one: How to take multiple exposures

  • Step 1: You need a tripod, and a camera that has aperture priority and manual mode.
  • Step 2: Mount your camera on the tripod and compose your image. In aperture priority mode, set the aperture and ISO settings you want, and take a shot with the default metering mode (usually matrix metering).
  • Step 3: Review the image on the LCD screen and take note of the shutter speed. Switch your camera to manual mode and dial in the ISO, aperture, and shutter speed that you used for the first shot.
  • Step 4: Speed up your shutter speed by one stop and take a shot again. For example, if the initial shutter speed was 30 seconds, stopping up by one stop would be 15 seconds (the shutter speed halves).
  • Step 5: Repeat step 4 until you can see details in the highlights by zooming in on the LCD screen on your camera, and checking the histogram for clipped highlights (blinks).

Tip: Use a remote release and/or enable mirror lockup (in a DSLR) to ensure the sharpness of your photos.

Part two: Recovering the highlights using luminosity masks in Photoshop

Step 1: If you use Adobe Lightroom, select all the images you want to blend. Right click on the mouse, choose Edit in > Open as layers in Photoshop. Otherwise, you can open them individually in Photoshop, use the move tool and drag each image into a single file as layers.

Step 2: Make sure the images are arranged such that the brightest exposure is at the bottom of the layers. To make sure all images are absolutely aligned, select all layers, then go to Edit > Auto-Align Layers. You may have to crop the image a bit after alignment.

Image 03

The layers are arranged so that the brightest image is at the bottom.

Step 3: Make sure you have luminosity masks Photoshop Actions to add and remove luminosity masks. If you don’t, you can download it here (the file is zipped, so make sure you unzip it first, then follow the instruction on how to install it here).

Step 4: To start off, make all layers invisible except the bottom two (layer 1 and 2). You can do so by unchecking the eye icon next to each layer. Next, create a mask for Layer 2 and fill it with black.

Image 04

Step 4: Next, generate luminosity masks based on Layer 1 (the brightest exposure). To do that, select Layer 1 on the layers panel, and generate the luminosity mask with the Photoshop Action.

Step 5: Go to Channels panel, select a Brights luminosity mask that targets just the highlights. In this case, Brights 2 seems like a good choice because it is not too restrictive and has good feathering on the edges.

Image 05

Step 6: Select Brights 2 luminosity mask by holding down CMD (Mac) or CTRL (Win) and left click on the mask. You should see marching ants appear on the image. Depending on your image, if you do see a pop-up window that says “Warning: No pixels are more than 50% selected…”, don’t worry about it and just click ok.

Step 7: Go back to the layers panel and click on the mask on layer 2. Select the brush tool, set the opacity to 50%, color to white, and paint over the layer mask to blend the darker exposure (Layer 2) into the brighter exposure (Layer 1 below). Depending on your image, you can choose to paint just the brightest highlights or all of them. In this example, I chose to paint all the highlights. If you find the marching ants annoying, hit CMD (Mac) or CTRL (Win) + H key to hide them.

Image 06

Details in the highlights are gradually recovered.

Step 8: Delete the luminosity masks generated previously because you now need luminosity masks based on the brightness of Layer 2, where you have just blended in the darker exposure. To do so, remove the current luminosity masks with the Photoshop Action.

Step 9: Now select Layer 2 and generate luminosity masks with the Photoshop Action.

Step 10: Select Layer 3, add a layer mask, and fill it with black.

Step 11: Go to the Channels panel, select a brights mask that targets the highlights. In most cases, selecting the same mask should do the job. In this example, I have chosen the Brights 2 mask again.

Image 07

Comparison of Brights mask for Layer 1 and Layer 2.

Step 12: Hold down CMD (Mac) or CTRL (Win) and click on Brights 2 mask to select once again. Go back to layers panel and click the mask on Layer 3, then use a white brush as before, and paint over the highlights again. You should see details being recovered gradually. At this stage, you should consider painting over the brightest highlights only instead of the whole image. In this example, I only painted the highlights as circles in the illustration below.

Image 02

Step 13: Repeat Steps 8 to 12 until you are done with all the layers. Your final image should have a more balanced exposure, with details in the highlights. You can then apply further tonal or color adjustments, and sharpening to your image.

Image 08

Final image.

Bonus: Adding a reflection and color to the lights

This involves a lot of editing, and may not be for everyone. For those of you who are into post-processing, you can clean up the image by removing unwanted objects, add a reflection, and change the color of the lights.

Adding a reflection

This only works if you have an empty foreground in your image like the example here.

  • Step 1: Use the rectangular marquee tool and make a selection of the city’s skyline. Then, copy and paste it as a new layer.
Image 09

Copy and paste the selection as a new layer.

  • Step 2: Select the layer of the copy, hold CMD (Mac) or CTRL (Win) + T to transform. Move your cursor to the image, right click and select > Flip Vertical. Use the move tool to position the flipped image lower to align the border.

Image 10

  • Step 3: You can add a ripple effect to the reflection by going to the top menu and selecting Filter > Distort > Ripple. Keep the size of the ripple to medium, set the amount you like, and press ok.
  • Step 4: Increase the contrast of the reflection by adding a curves adjustment layer, and clip it to the reflection layer only. To do that, right click on the curves layer and select Create Clipping Masks. You should see a little arrow on the curves layer pointing down at the layer below it. You can also reduce the opacity of the reflection layer if you like.
image-11

Clipping curves adjustment to the layer below.

Image 12
Final image with reflection.

Adding color to the lights

  • Step 1: You need a visible layer to begin with. If you don’t have one, you can go to the menu on the top and choose Layer > Merge Visible.
  • Step 2: Generate luminosity masks based on this layer. Remember to delete any luminosity masks you had before this.
  • Step 3: Select a brights luminosity masks that targets the highlights. In this example, I know from before that brights 2 mask works very well, so I’m going to choose it again. Select it by holding cmd (Mac) or ctrl (Win) + left click on your mouse.
Image 13

Brights 2 luminosity mask.

  • Step 4: Add a new layer, and change the blend mode to soft light. The selection should be automatically loaded onto this new layer already.
  • Step 5: Now fill the with the color of your choice by holding down Shift + Backspace, select a color, and press ok. You should now see the color of the lights have changed subtly.

Image 14

  • Step 5: If you want the effect to be stronger, duplicate the layer once or twice until you like it.
Image 15

Duplicate the layer for a stronger effect.

  • Step 6: The final step is what makes the lights glow. Double click on the top layer to bring up the layer style. Check the box for outer glow, and pick a color that is slightly darker than the one you have used before. Click ok and your done!
Image 16

Apply outer glow for the final touch.

Apply a few other tweaks and sharpening and you’ve got yourself a cool urban night cityscape!

Before

Before

Image 01

After


googletag.cmd.push(function() {
tablet_slots.push( googletag.defineSlot( “/1005424/_dPSv4_tab-all-article-bottom_(300×250)”, [300, 250], “pb-ad-78623” ).addService( googletag.pubads() ) ); } );

googletag.cmd.push(function() {
mobile_slots.push( googletag.defineSlot( “/1005424/_dPSv4_mob-all-article-bottom_(300×250)”, [300, 250], “pb-ad-78158” ).addService( googletag.pubads() ) ); } );

The post How to Enhance Urban Night Photographs Using Luminosity Masks in Photoshop by Yaopey Yong appeared first on Digital Photography School.


Digital Photography School

 
Comments Off on How to Enhance Urban Night Photographs Using Luminosity Masks in Photoshop

Posted in Photography


3 Methods for Converting to Black and White Using Photoshop

16 Jun

I am a huge fan of color. I love bold colors to create a mood in my images, and often use the meaning behind colors to reinforce the message I want to convey.

Sometimes though, you want to get rid of the colors to draw the viewer’s attention to your compositional lines, to textures, or to make a contrast. To do so, you may want to turn a color picture to black and white, in order to see what works best.

I do not work so often with black and white, but I truly love it. There are some photographers who create amazing black and white pictures and I really appreciate such a beautiful images even if I am mainly drawn by color.

Setting the mood in color or in a black and white image is very different.

Color and bw image

There are very different types of black and white – whether you have a full tonal range from white to black, or merely light or dark grey tones. Dark or light tones will create different effects, and convey a different mood to your image. Dark tones are often associated with a sombre mood, while light tones are more optimistic, or positive. This is a generalization, of course, but it tends to be true most of the time.

Low contrast would impact a gentler mood, while high contrast will have a stronger impact. The eyes usually jump directly to the highest contrast area of an image. In addition to a well thought out composition, using contrast is a great way to highlight an important feature of your subject.

Think about what kind of black and white you are attracted to. It is very personal for you, plus it also depends on the genre of photography you are dealing with. As I am a portrait photographer, I will be showing you how I process a color portrait into a black and white one. I chose a portrait from a vegetal hairstyle shoot I did in Paris last month.

As usual you have many ways to achieve the same result in photoshop. Find the way that suits your workflow best, or the one that achieves the best results according to your photographic style, or mood of the day.

I am going to use two different adjustment layers to show you the difference regarding tones and contrast. Then, we are to combine those different layers, to keep the best part of each one.

1 – Channel mixer adjustment layer

Go to your layer panel and click on Channel mixer, or go to Layer > New Adjustment Layer > Channel Mixer.

Add channel mixer

Channel mixer layer

With channel mixer you can do more than just desaturate your colors. You can get great results sorting by color channel. This will modify your input and output levels.

You can get lighter or darker tones, you can also play with your constant overall tone, which I use mainly to darken my background. You can play with each channel and see what you like the most. You can play with red channel in a portrait, as skin tones are usually red, therefore highlighting your subject.

Channel mixer

2 – Using a Black and White Adjustment layer

Black and white layer adjt

When working with black and white you cannot see different adjustments at once. To keep several adjustments visible, I create a stamp layer (a separate layer on which the adjustment has been applied directly to the image). To do so, press Shift + Option + CMD + E, and the stamp layer appears (combining all visible layers into one).

You can then combine with a black and white adjustment layer. To do so you go to Layer > New Adjustment layer > Black and white. Then, play with the different values for each color to adjust the tones as you wish in your image. As in the previous step I create a stamp visible layer.

Black and white

On the two different stamp visible layers I have different contrasts. I can choose to apply each of these contrasts on different parts of the final image, combining those layers.

Different contrats bw or channel mixer

Add a layer mask to each one, and paint on the mask using black, over the areas you want to hide, thus revealing the layer underneath. Paint with white (layer mask is white by default) to reveal the selected areas of the top layer.

If you are not so familiar with layer masks I would suggest you create only two types of black and white, making it easier to apply selectively the different effects.

Layer mask

Layer masks deserve an entire article, so I will save how I use them for another article.

At the end, you have a mix of different contrasts in your image, and can apply those contrasts as they best suit each area where you want to drawing the viewers’ attention. There are so many ways to create a black and white images in Photoshop, each way giving a different look, and contrast to your image

For example see how I use gradient map in this previous tutorial: How to Create a Vintage Look for Your Image Using Photoshop

3 – Use a Level/curves adjustment layer

In this image I create a new curves adjustment to modify a little the overall light. Also, it is great to remove distractions such as you can see in this image.

Curves

Usually I do not pay much attention to small distraction in my backgrounds, as I would add a texture overlay to my image (therefore adding more details to a plain background). If you like smooth backgrounds it is very useful.

In this image I also wanted to remove the light distraction on the top right corner (too bright compared to the rest of the dark background).

Using curves to remove bg distractions

To finish this image I will add some texture.

Final image BW

Do you have other methods to convert to black and white using Photoshop? Please share in the comments section below.

googletag.cmd.push(function() {
tablet_slots.push( googletag.defineSlot( “/1005424/_dPSv4_tab-all-article-bottom_(300×250)”, [300, 250], “pb-ad-78623” ).addService( googletag.pubads() ) ); } );

googletag.cmd.push(function() {
mobile_slots.push( googletag.defineSlot( “/1005424/_dPSv4_mob-all-article-bottom_(300×250)”, [300, 250], “pb-ad-78158” ).addService( googletag.pubads() ) ); } );

The post 3 Methods for Converting to Black and White Using Photoshop by Amélie Berton appeared first on Digital Photography School.


Digital Photography School

 
Comments Off on 3 Methods for Converting to Black and White Using Photoshop

Posted in Photography


Content-aware cropping coming soon to Adobe Photoshop CC

27 May

Adobe Photoshop CC will soon offer content-aware cropping, the company has announced. The feature, as demonstrated in a video released today, will allow Photoshop users to automatically fill any white space around an adjusted photo with content that matches the original image. The tool can be used to add content (to change the aspect ratio, for example), or to fill in gaps that result from rotating or repositioning the image.

Content-aware cropping has been a frequently requested feature, says Adobe. The company will include the new cropping tool ‘as part of an upcoming major release,’ though it doesn’t specify whether it will be the next major update or a later one.

Via: Adobe

Articles: Digital Photography Review (dpreview.com)

 
Comments Off on Content-aware cropping coming soon to Adobe Photoshop CC

Posted in Uncategorized


How to do Bulk Resize and Edit in Photoshop

25 May

Have you ever found yourself with a batch of photos that you needed to have edited in the same way? Rather than editing each image one-by-one, Adobe Photoshop offers batch editing processes that can help you save time, while preserving consistent quality among your images.

This tutorial will show you how to use Photoshop Actions to resize and edit multiple photos, along with a quick tip on how to replicate this process in Lightroom.

What You Need

The bulk editing process is pretty easy and straightforward, requiring just a handful of things:

  • A batch of images you want to bulk edit
  • Adobe Bridge
  • Adobe Photoshop
  • Basic Photoshop working knowledge

Get Started: Record an Action in Photoshop

The very first step is to determine the process or edit that you wish to have automated, and record it as an Action in Photoshop. In this case, let’s use the example of resizing an image. Then you’ll use Bridge to select your set of images and apply the Action to all of them at once.

Step 1: Open Photoshop and have a sample image open to perform this action on. Go to the main menu bar and click Window > Actions.

Photoshop bulk resizing edits


Step 2: When the Actions panel pops up, click the bottom right button next to the trash can icon that says “Create New Action.” Enter a name for your action, such as “Image Resizing.” Then start recording your new action by clicking the “Record” button.

Bulk edits new action

Step 3: Now begin the series of steps that you want to have recorded. For resizing, head up to the main Photoshop menu bar and go to Image > Image Size. Input your ideal photo size, such as 800 pixels wide.

Photoshop bulk resizing edits

Step 4: After you’ve completed all of the steps for your action, go back to the Actions panel and click on the Stop button to end recording. You should now see your saved action within the panel.

Bulk edits image resizing

Run A Batch of Images Through Photoshop

After you’ve created your action, it’s time to apply it to your batch of images.

Step 1: Put all of the photos you want to batch edit into one folder. Open Adobe Bridge and find your folder of images. Click on the folder and select all of the content.

Step 2: Within Bridge, go to Tools > Photoshop > Batch.

Photoshop bulk resizing edits

Step 3: A Batch dialogue box will appear and you’ll want to adjust these settings in particular.

  • In the top left corner, select the action that you want applied to your images (in our case, “Image Resizing.”).
  • In the middle of the dialogue box, specify the folder where your bulk edits should end up. I always have a folder called *Bulk Edits* where I automatically have all of my bulk edited images saved.
  • Finally, you can specify a particular image name that you want to give to your batch of images, as well as assign unique identifiers, such as numeric order. Then click OK to have the action applied to your batch of photos.

Photoshop bulk resizing edits

Step 4: After your batch of images are processed, go to your specified folder to check out the results.

Photoshop bulk resizing edits

Making bulk edits in Lightroom

While doing bulk edits in Photoshop is relatively easy to do, it’s even quicker in Adobe Lightroom. If using Lightroom, import your images and select them all. Then go to File > Export. A pop up dialogue box will then appear with fields where you can specify where to save the images and also rename, resize, and watermark the images (you can also save that as an export preset)

Lightroom bulk resizing edits

Over to You

Do you perform many bulk edits in Photoshop or Lightroom? If so, what are the types of processes you tend to bulk edit? Let me know in the comments below!

googletag.cmd.push(function() {
tablet_slots.push( googletag.defineSlot( “/1005424/_dPSv4_tab-all-article-bottom_(300×250)”, [300, 250], “pb-ad-78623” ).addService( googletag.pubads() ) ); } );

googletag.cmd.push(function() {
mobile_slots.push( googletag.defineSlot( “/1005424/_dPSv4_mob-all-article-bottom_(300×250)”, [300, 250], “pb-ad-78158” ).addService( googletag.pubads() ) ); } );

The post How to do Bulk Resize and Edit in Photoshop by Suzi Pratt appeared first on Digital Photography School.


Digital Photography School

 
Comments Off on How to do Bulk Resize and Edit in Photoshop

Posted in Photography


How to Use the Healing Tool in Photoshop

23 May

We all have those moments in our photographic careers where things just don’t pan out exactly how we imagined them. Our image is almost exactly as we imagined it to be, but perhaps there are some spots, blemishes, marks or distractions that just don’t fit in the frame.

In most cases, all the elements of the image tend to work together to tell the story, but sometimes we just to clean the image up a tad, to get rid of some of the distracting elements that take away from that story. Luckily, most editing software, including Photoshop, have very easy, yet powerful tools, that you can use to clean up your image and get rid of the distractions.

Memorable Jaunts Landscape Image cleaned using healing brush tools Artcile for DPS 01

The Healing Tool in Photoshop

This article provides a basic explanation of the Healing Tool in Photoshop, that is very effective in removing or cleaning out distracting elements in an image. For the purposes of this article, I am using Photoshop version CS6. The Healing Brush Tool in Photoshop is made of three parts. These are probably the most used tools in the healing tool family, and 90% of the time they get the job done.

  • Spot Healing Brush Tool
  • Healing Brush Tool
  • Patch Tool
Memorable Jaunts Landscape Image cleaned using healing brush tools Artcile for DPS 07

The Healing tool in PS has the bandaid icon. When clicked, it opens up this menu. You can also click the J key on your keyboard to access this tool.

Here is an example of a simple landscape image that was cleaned up using the Spot Healing Brush Tool, and the Healing Brush Tool.

Memorable Jaunts Landscape Image cleaned using healing brush tools Artcile for DPS 02

Original Image – SOOC. I am looking to clean out some of the distracting elements here like the ‘Road curves’ sign on the right, the dead bushes on the left and the little tree on the top of the hill to the left of the image.

The first step, before any cleanup is done, is to perform any basic edits to the image. I consider adjustments in exposure, contrast and temperature to be basic adjustments. For this image, I increased the exposure and added some contrast, to highlight the browns in the hillside. This image was taken from a stopped car because I really liked the curve in the road along the small hill on the top right side. But I wanted to get rid of the road sign and the dead branches on the sides of the road leading up to the hill.

Once I brightened and adjusted the contrast of the image, I created a new layer in PS to add my cleanup edits. I called it, “Clean up layer” for easy identification. This keeps all the cleanup elements together, so I can toggle between the On and Off to see the affects of the cleanup at any time (toggling a layer On and Off is done by clicking on the eyeball symbol to the left of the layer.)

Memorable Jaunts Landscape Image cleaned using healing brush tools Artcile for DPS 06

The Spot Healing Brush Tool is used for quick, easy cleanups. Once you select the it, and adjust the size of the brush (use the left square bracket key [ to decrease size of the brush and right square bracket key ] to increase the size), you simply click on the blemish to remove it. Also set Sample to “Current & Below” or “All Layers” so it will pull pixels from your base layer (otherwise you’re just healing with a blank layer).

The Spot Healing Brush automatically selects the source area from which to clone. So sometimes it might not be completely accurate, because the software is making the judgement on where is the best source to take a sample. A good tip is to zoom in to the specific area and watch the pixels closely while making the adjustments. The Spot Healing Brush works best on small areas and easy cleanups.

Memorable Jaunts Landscape Image cleaned using healing brush tools Artcile for DPS 05

The Healing Brush Tool

I use the Healing Brush Tool is for slightly more complex cleanups, especially areas that have sharp edges, curved, or straight lines that separate areas of different textures and color. As you can see here, the top of the hill has a small tree which sticks out against the overcast sky. For more accurate editing, zoom in to the area that needs to be edited, so as to eliminate any errors. It is hard to be completely accurate if you are not zoomed in accurately to the specific area that needs to be edited.

Once selected, theHealing Brush Tool requires you to set a source point from which to heal the affected area (that is the easiest way to think about the healing action, in my opinion). I set the right size of the brush (use the [ ]  keys to increase or decrease brush size, OR click on the slider as shown in the image below), then I select the edge of the line closest in texture to the source area. Holding my cursor down (holding down the mouse button), I drag the cursor from start to finish over the object to be removed.

Memorable Jaunts Landscape Image cleaned using healing brush tools Artcile for DPS 04

After

After cleanup

The Patch Tool

I use the Patch Tool in Photoshop for any bigger areas that need to be adjusted. For example, in the image below, there are many sign posts along the road that are larger. I could use the healing brush tool but it would be a little bit more time-consuming as I would have to go over the adjustments several times, to clean it out completely. Instead I used the Patch Tool to fix the affected spot, and replace it with another area sampled from the surrounding landscape. Using the Patch Tool, select the area to be cleaned up, then select the area close to it to sample from, to do the patch.

Notes about the Patch Tool:

  • To do your editing non-destructively use the patch tool on a duplicate layer (it cannot be an empty layer).
  • You must select a Patch type as Normal or Content Aware. For most things Content Aware does a better job, so try that first and resort to Normal if it doesn’t work.
  • If you select Normal you have to choose either Source or Destination. The difference is that when Source is highlighted, the area you select will be Patched with the area you drag it over to. When Destination is highlighted the area you select will be cloned over to the area you move it to.

Final image where all the posts, signs and snow measurement sticks have been removed using a combination of patch tool, spot healing brush and healing brush tool.

As you can see, the healing tools in Photoshop are quite effective. With such a wide variety of options, any cleanup is easy and effective. One tip that I have learnt from experience is to do all the adjustments while zooming in to the affected area. This ensures that right amount of cleanup is done to all the pixels. If you find that the cleanup effect is too stark and harsh, an easy fix is to adjust the Opacity (i.e. visibility) of the cleanup layer. Especially when cleaning up blemishes on the face, this gives a more natural, blended effect. There is no right opacity percentage, simply choose the value that seems more natural to the eye.

How do you use the Healing Tools in Photoshop? Please share in the comments below.

googletag.cmd.push(function() {
tablet_slots.push( googletag.defineSlot( “/1005424/_dPSv4_tab-all-article-bottom_(300×250)”, [300, 250], “pb-ad-78623” ).addService( googletag.pubads() ) ); } );

googletag.cmd.push(function() {
mobile_slots.push( googletag.defineSlot( “/1005424/_dPSv4_mob-all-article-bottom_(300×250)”, [300, 250], “pb-ad-78158” ).addService( googletag.pubads() ) ); } );

The post How to Use the Healing Tool in Photoshop by Karthika Gupta appeared first on Digital Photography School.


Digital Photography School

 
Comments Off on How to Use the Healing Tool in Photoshop

Posted in Photography


JPEGmini Photoshop extension aims to top Adobe’s ‘save for web’

10 May

Beamr, the software company behind the content-aware JPEGmini image compression application, has introduced an extension for Adobe Photoshop. Dubbing it the ‘The Save For Web button Adobe should’ve made’, the company claims the extension will save users time and produce better results than Adobe’s default Save For Web settings.

JPEGmini is an image compression package that analyzes individual sectors of an image and applies different degrees of compression to each sector according to its content. The designers claim that its compression results in no visible degradation of the image, but that it can reduce file sizes by up to 80% while ‘preserving their full resolution and quality.’ The smaller files save space on a hard drive and are also lighter for emailing and web hosting, according to the company.

The Photoshop extension comes as part of the JPEGmini Pro bundle, along with a plug-in for Lightroom, which costs $ 99. Photoshop CC 2015.1 is required to use the extension. For more information visit the JPEGmini website and read our test of a previous version of the software. 

Articles: Digital Photography Review (dpreview.com)

 
Comments Off on JPEGmini Photoshop extension aims to top Adobe’s ‘save for web’

Posted in Uncategorized


How to Add a Reflection in Photoshop

10 May

There is one thing in photography that seems to be universally loved – reflections. They aren’t always easy to get, especially if water is involved. The wind only has to be blowing slightly to create ripples in the water, and you will lose the chance of a reflection.

Take the following image, a real reflection taken one morning just before it started raining on the Yarra River in Melbourne. It was almost perfect, but after repeated efforts to get something similar it has never happened again, well not for me.

LeanneCole-reflections-18

One of those magical times when the river was so still the reflection just happened.

If you love that look, then there are ways to do it without having to wait for the perfect conditions. You can fake it in Photoshop, with the right image. Finding the right image is hard, especially when you start, but as you get more experienced at doing it you will find it easier to put reflections in other images.

Find an image that is straight on, like the following one.

LeanneCole-reflections-14

The basic image.

Adding a reflection layer

Open the image in Adobe Photoshop, or any program that will allow you to work in layers. You could use Adobe Photoshop Elements or even GIMP to do this tutorial. Once the image has been opened in Photoshop, you will need to make it bigger to fit the reflection. You can do this by using the Crop tool.

LeanneCole-reflections-1

Extend the area of the image with the Crop Tool

You can double the size of the original image, simply by dragging down the point at the bottom of the image using the Crop tool. If the overall size is too big, you can always crop it down once you are finished with the photo.

Press Ctrl J to duplicate the original image to new layer, or go to the main menu at the top, to Layer > Duplicate. Go to Edit > Transform > Flip Vertical.

LeanneCole-reflections-2

Flip the duplicate image.

If you do the vertical flip in the Image menu you will flip all layers, and for this you only want to flip the one layer. Select the Move tool, the first one in the tool bar on the left, the cross shape (keyboard shortcut is V). Click on the duplicate layer and move the image down, as in the following.

LeanneCole-reflections-3

Move the flipped vertical image down to where the reflection will begin.

You will need to figure out where the image finishes, and the reflection will start. In the example image for this tutorial, the river edge has a wooden panel which seemed to be the perfect place to start the reflection. However, to do this you will need to erase or delete the water in the image.

You will need to add a mask to the flipped layer and click on the brush tool so you remove some of the image. You can add a mask by using the icon at the bottom of the layers panel or go to the Main Menu > Layer > Layer Mask > Reveal all.

LeanneCole-reflections-4

Remove or mask out part of the image that won’t be needed.

Using the Move tool, shift your image up to meet the original, at the line between the image and the reflection.

LeanneCole-reflections-5

See where the reflection will begin.

You will need to remove the water, or the area underneath the reflection. To do this click the Eye next to the reflection layer so that you can no longer see it (turn off that layer). Add a layer mask to the original image and using your brush, hide those areas away as you did on the duplicate layer.

LeanneCole-reflections-6

On the original image, hide the area that is covered by the second photo.

Turn the reflection layer on again. Now you will have a basic reflection, but you can take it a lot further than that.

Refining your reflection

Add a blank layer to your image, then drag it down to be the bottom layer. If you are unable to do that, it may be because the original image layer is locked and called the Background layer. To remove that, double click on the word Background, you should be able to change the name to something else. This will allow you to move the new blank layer to the bottom.

LeanneCole-reflections-7

Add the new layer at the bottom.

Turn off two image layers so they disappear (click the eyeballs on each). Select the Paint Bucket Tool, it is with the gradient tool, right click and you will see the bucket tool.

LeanneCole-reflections-8

Select the Paint Bucket Tool and click on the foreground color.

Click on the foreground and background color selectors and a window will pop up for you to select the background colour of your reflection. It is good to go with something dark, and a similar colour to your image.

LeanneCole-reflections-9

Select the color to go under the image.

When you have chosen your color, fill the layer with it and turn the other two layers back on.

Select the layer that is the reflection and go up to the Opacity Slider which is just above the layers panel. Turn the reflection layer opacity down a little. Just make it slightly less bright than the original. For this tutorial it was turned down to 71%.

LeanneCole-reflections-10

Change the opacity of the reflection.

Select the Crop tool so you can remove any part that is now no longer needed. You may also want to crop the image so it is doesn’t look like there is just one image on top of another.

LeanneCole-reflections-11

Select the crop tool to get the final image.

Fade the reflection

For the final part, add one more blank layer, then select the gradient tool. Make sure that black is the foreground colour. Add some Gradient to the bottom of the image to help it blend in. If you are not getting the gradient to work so that you are getting the foreground to transparent, you will need to select that option in the tool options bar at the top under the main menu. You may also want to change the opacity of the tool to around 50%.

LeanneCole-reflections-12

Add a gradient to the bottom.

Here is the final image.

LeanneCole-reflections-13

The final image

This can be done for many things and you don’t have to have a body of water to do it. Here is an image of a train station in Melbourne where I have tried to make it look like the street is flooded.

LeanneCole-reflections-16

Flinders Street Station as though the street in front were flooding.

Here are a couple of other images in different situations for you to look at and give you inspiration. Let your imagination go wild and see how else you can use this technique.

LeanneCole-reflections-17

Bolte Bridge at sunset with a reflection in the harbour.

LeanneCole-reflections-15

The New York skyline with reflection in the water.

googletag.cmd.push(function() {
tablet_slots.push( googletag.defineSlot( “/1005424/_dPSv4_tab-all-article-bottom_(300×250)”, [300, 250], “pb-ad-78623” ).addService( googletag.pubads() ) ); } );

googletag.cmd.push(function() {
mobile_slots.push( googletag.defineSlot( “/1005424/_dPSv4_mob-all-article-bottom_(300×250)”, [300, 250], “pb-ad-78158” ).addService( googletag.pubads() ) ); } );

The post How to Add a Reflection in Photoshop by Leanne Cole appeared first on Digital Photography School.


Digital Photography School

 
Comments Off on How to Add a Reflection in Photoshop

Posted in Photography