RSS
 

Archive for May, 2018

Google Lens will soon be available in several Android camera apps

13 May

Google’s AI-based image recognition system Google Lens will be making its way into stock camera apps, the company revealed during its I/O 2018 conference this week. The tool— which identifies objects, landmarks, and more in the images you capture with your phone—was first revealed last year, later launching for the maker’s own Pixel smartphones and then on Android and iOS in general.

For now, Google Lens is only available through the Google Photos app, but that will be changing in coming months. The company plans to launch Google Lens in stock mobile camera apps starting with its own Pixel handsets; other Android smartphone models will get support later on. According to The Verge, a total of 10 models will offer Google Lens in their stock camera apps.

Joining the expansion announcement are three new Google Lens features: smart text selection, style match, and real-time functionality for instant results.

With smart text selection, Google Lens is able to identify words within images and find relevant information—such as retrieving data on a food dish after the user captures an image of its name in a menu or other document. Style match, meanwhile, is a feature for finding objects similar to ones captured in an image, such as related outfits or home decor.

Finally, all of this information will be made available at a faster pace thanks to real-time functionality. With this addition, Google Lens finds and provides information proactively based on items in the user’s environment that are captured as they point their phone’s camera around.

Google says these features will start rolling out in the next few weeks.

Articles: Digital Photography Review (dpreview.com)

 
Comments Off on Google Lens will soon be available in several Android camera apps

Posted in Uncategorized


Sony RX10 IV sample gallery updated

13 May

$ (document).ready(function() { SampleGalleryV2({“containerId”:”embeddedSampleGallery_1816870055″,”galleryId”:”1816870055″,”isEmbeddedWidget”:true,”selectedImageIndex”:0,”isMobile”:false}) });

The Sony RX10 IV is among the most capable, all-in-one camera packages money can buy – read our full review. Earlier this week, we had the chance to spend a little more time shooting with it alongside Chris Niccolls and Jordan Drake as they filmed the DPReview TV RX10 IV video review. Check out both their video and the gallery for plenty of sand, surf and nice hair.

See our updated Sony RX10 IV sample gallery

Articles: Digital Photography Review (dpreview.com)

 
Comments Off on Sony RX10 IV sample gallery updated

Posted in Uncategorized


DPReview TV: Sony RX10 IV Review

13 May

This week on DPReview TV, Chris and Jordan are off to the sunny shores of the Pacific Ocean in Monterey, California, where they review the Sony RX10 IV. Watch to find out how this all-in-one superzoom camera held up to the sun, surf and a challenging range of shooting scenarios.

Read our in-depth RX10 IV review for even more analysis, and be sure to subscribe to our YouTube channel for more from Chris and Jordan!

Read our RX10 IV review

Subscribe to our YouTube channel

Sony RX10 IV sample gallery

$ (document).ready(function() { SampleGalleryV2({“containerId”:”embeddedSampleGallery_1816870055″,”galleryId”:”1816870055″,”isEmbeddedWidget”:true,”selectedImageIndex”:0,”isMobile”:false}) });
Articles: Digital Photography Review (dpreview.com)

 
Comments Off on DPReview TV: Sony RX10 IV Review

Posted in Uncategorized


Shooting Greenland in Winter: Part 2 – The Better Part of Winter

13 May

In the previous article, I wrote about reaching Uummannaq and the relatively difficult conditions I found in the beginning. Luckily, the days after the gale had passed were much more comfortable, so I began scouting around and shooting, and continued to do so throughout my stay.

The little guesthouse I stayed at was very well located—right next to the harbor. This was advantageous since, firstly, I didn’t have to walk too far to get to the sea ice (Uummannaq’s streets are steep and slippery in winter, not the best setting for a hike), and secondly, I had a very good point of view to judge the light and weather outside without having to dress up and walk out, which was quite a project.

Sunrise at the harbor right next to my guesthouse

Throughout my stay in Uummannaq, my guide Paaluk and I walked and snowmobiled all around the Fjord and took shots of beautiful icebergs in various conditions, from overcast to pink sunrise light. It was astounding to be able to walk right up to these gigantic icebergs and shoot them without the need for a boat.

Note that the icebergs are mostly under the surface and since currents shift them, getting too close is dangerous and shouldn’t be done without a local expert. Paaluk was very experienced in checking the ice with his spear and deciding what distance was safe for me to stand, and I trusted his calls.

$ (document).ready(function() { SampleGalleryV2({“containerId”:”embeddedSampleGallery_1948292092″,”galleryId”:”1948292092″,”isEmbeddedWidget”:true,”selectedImageIndex”:0,”isMobile”:false}) });

Once I was several kilometers away from town, I also used my drone to get aerials of the icebergs and of Uummannaq Island. There is something so incredibly iconic about Mount Uummannaq, it’s hard to look away. The scale can be very confusing—this mountain is 1,170 meters tall, and the island 7 km long!

The cold conditions can be quite problematic for drone photography. Yours truly has previously lost a drone to cold weather and was determined not to do so again. To keep the batteries warm, I kept them next to the heater in the room, put them into the sort-of-insulating polystyrene box and went on the shoot. I then usually put a battery in my armpit for 10 minutes, after which it was warm enough to operate safely… if a bit stinky.

Once the drone is up in the air the battery is kept warm on its own.

$ (document).ready(function() { SampleGalleryV2({“containerId”:”embeddedSampleGallery_2120222170″,”galleryId”:”2120222170″,”isEmbeddedWidget”:true,”selectedImageIndex”:0,”isMobile”:false}) });

One of the definite highlights of this visit was shooting Mount Uummannaq in golden afternoon light, reflecting in the frozen lake Tasersuaq (Greenlandic for “big lake”).

Paaluk drove me to the starting point of the hike and it wasn’t long before we were walking on scaringly-clear black ice with a million patterns, cracks and even Canadian-style methane bubbles! Walking on that lake was a surreal experience, since at some points you could see all the way down through the ice. Rest assured, it was so thick it could hold a semi-trailer, so there was no risk whatsoever.

After shooting last light above the cracked lake Tasersuaq, I went back to the guesthouse and got updated with the Aurora situation. It appeared that a minor solar storm had happened, and that we were going to get some lights. The sky was totally clear and scheduled to remain so. The only question was when it would happen.

I returned to the lake with Paaluk and took a few moonlight shots, before the sky began turning green. It was looking pretty good, so I quickly decided to hike back to the icebergs embedded in the sea ice. Paaluk had to switch back to the snowmobile, and by the time he found me I was shooting very strong Aurora above the icebergs.

The lights gained more and more strength, and soon enough they were shining all around the sky, even to the north—quite a rare occurrence in Uummannaq, whose 70-degree latitude is too far north to be in the center of the party, figuratively speaking.

$ (document).ready(function() { SampleGalleryV2({“containerId”:”embeddedSampleGallery_9343439540″,”galleryId”:”9343439540″,”isEmbeddedWidget”:true,”selectedImageIndex”:0,”isMobile”:false}) });

I shot the lights for several hours, and even took a few shots of Mount Uummannaq with Aurora above it. Even though the moon was a bit brighter than optimal, this had turned out to be the very best day of the trip.

In the next part of the series, I will tell you about my visit to Ilulissat.


Erez Marom is a professional nature photographer, photography guide and traveler based in Israel. You can follow Erez’s work on Instagram and Facebook, and subscribe to his mailing list for updates.

If you’d like to experience and shoot some of the most fascinating landscapes on earth with Erez as your guide, take a look at his unique photography workshops in Southern Iceland, Northern Iceland, The Lofoten Islands, Patagonia, Greenland in summer, Greenland in winter, Namibia and the Faroe Islands.

Erez offers video tutorials discussing his images and explaining how he achieved them.

More in this Series:

Part 1: Uummannaq Whiteout

Selected Articles by Erez Marom:

  • Parallelism in Landscape Photography
  • Winds of Change: Shooting changing landscapes
  • Behind the Shot: Dark Matter
  • On the Importance of Naming Images
  • On Causality in Landscape Photography
  • Behind the Shot: Lost in Space
  • The Art of the Unforeground
  • Whatever it Doesn’t Take

Articles: Digital Photography Review (dpreview.com)

 
Comments Off on Shooting Greenland in Winter: Part 2 – The Better Part of Winter

Posted in Uncategorized


Trint’s AI-powered plug-in automatically creates captions for Premiere Pro CC

13 May

We’re a little late to this one, but it’s an interesting option for video editors that is worth sharing all the same. Last month, transcription company Trint launched a new Adobe Premiere Pro CC plug-in that uses artificial intelligence to automatically create captions in Adobe Premiere Pro. Called Trint for Premiere, the new plug-in allows Premiere Pro CC users to upload videos to Trint’s system directly from Adobe’s application. Trint’s speech-to-text tech then automatically transcribes the audio and generates captions.

According to Trint, its system creates a draft transcript that the user refines in the Trint Editor. These corrected transcriptions are made available in the plug-in’s panel, providing direct SRT access within Premiere. The software also supports Edit Decision Lists (EDLs), simplifying soundbite creation.

Trint’s new plug-in is available from Adobe Exchange with a free trial. After the trial period ends, users have the option of paying a fee per-hour of transcribed video, or signing up for a monthly subscription. The free trial signup and more information is available on Trint’s website.

Press Release

Trint’s AI transcription software to add integrated panel for Adobe Premiere Pro CC in Enterprise Offering

London (April 4, 2018) – Customers of Adobe® Premiere® Pro CC, part of the Adobe Creative Cloud®, will now have the opportunity to make their workflow even more seamless using Trint’s automatic speech-to-text technologies.

Trint for Premiere, Trint’s new panel for Adobe Premiere Pro CC enables direct upload of footage to Trint for fast automated transcription. This gives users a quick and integrated flow for making audio searchable and for creating captions for their media. Using Trint’s automated speech-to-text technologies, editors quickly get a machine-generated draft transcript that they can easily polish to perfect in the Trint Editor. Transcriptions corrected in Trint will be available in the panel, giving editors direct access to SRTs from within Premiere Pro CC.

Highlighted selections of Trint transcripts will be available as EDLs, making it fast and simple to find key soundbites and the editing process much quicker for users. EDLs for videos can be exported from the panel and can be seamlessly used in the Timeline.

“Our customers have been asking us for an Adobe Premiere Pro CC integration for some time,” says Jeff Kofman, CEO of Trint. “We know that many of our users are video editors, and it’s exciting to be able to streamline their captioning and editing workflows.”

Building on its strong transcription toolkit, the company is also releasing additional enterprise features which will make it the leading transcription service for organizations.

Trint has also released the new Trint mobile iOS app that lets users record interviews and meetings on their iPhone and upload them to Trint for fast transcription and collaboration from anywhere.

Articles: Digital Photography Review (dpreview.com)

 
Comments Off on Trint’s AI-powered plug-in automatically creates captions for Premiere Pro CC

Posted in Uncategorized


Qualcomm’s 700-series chipset will bring triple-cameras to mid-range smartphones

13 May

With the Huawei P20 Pro there is still only one triple-camera smartphone currently available on the market. We have already heard that Apple might be launching a third generation iPhone X with triple-camera in 2019, but now it seems the technology could trickle down to mid-range devices even before that.

Specifications for Qualcomm’s upcoming 700 series mobile chipset have leaked on Suggestphone.com, and the documents indicate the new chipset will support triple-cameras as well as AI processing accelerators. The latter should come in handy for all sorts of AI-powered imaging tasks, such as scene and object identification. The former… well that one’s obvious.

The Snapdragon 700 series should slot in nicely between the current SD600 series (which powers mid-range smartphones up to around the $ 500 price point) and the Snapdragon 800 line (which is reserved for high-end models).

Image: Suggestphone.com

The Snapdragon 710 was allegedly designed using a Samsung 10nm LPE process for low power consumption and higher performance than previous 14nm chipsets. The Snapdragon 730, meanwhile, builds on the newer Samsung 8nm LPP process, resulting in a 10% smaller surface area and 10% lower power consumption than the 10LPP process. It’ll also provide more oomph than the SD710.

The first smartphones with the SD710 chipset are expected to hit the shelves in early 2019; we’ll have to wait a little longer until later in 2019 for the SD730. Hopefully we’ll see a few SD8xx-powered triple-cameras before then, but it’s reassuring to know more affordable triple-camera will be available in the foreseeable future.

Articles: Digital Photography Review (dpreview.com)

 
Comments Off on Qualcomm’s 700-series chipset will bring triple-cameras to mid-range smartphones

Posted in Uncategorized


Free Versus Paid Photography Portfolio Websites – Which is Best for You?

13 May

One of the joys of photography is sharing it with the world. Once upon a time, a photography portfolio was a collection of prints, but digital photography and the internet have changed everything. Photography portfolios these days come in many forms, and they are almost exclusively online.

So, do you need a portfolio, and how do you decide where to proudly display your photos for the world to see?

Long exposure landscape photo of rocks at sunset, Mt Maunganui, New Zealand - photography portfolio

Why You Need a Photography Portfolio

You may be asking why you need a portfolio at all. Maybe you’re happy keeping your photos to yourself and never sharing or printing them for anyone else to see? It’s your photography, and you can do what you like with it. But, there are a few benefits that only come from sharing your work, though.

A photography portfolio allows other people to see and enjoy your creations. I’m betting you love not only the process of creating images but also the final product. So why not let others appreciate your artwork too?

You will be driven to stretch yourself and work on improving your photography if you put it out there for others to see. This is often a quiet voice nudging you to try a new technique or take a workshop or develop your post-production skills. A portfolio opens your photography up to critique, which is a little daunting, but I’ve found it to be positive and helpful most of the time.

noosa heads sunshine coast queensland australia - photography portfolio

A portfolio is also necessary if you ever plan to sell your photography. This isn’t for everyone, and I wouldn’t recommend that this be your primary motivation, but it’s worth considering. You may not think you want to make money with your photography, or not yet at least, but if and when that time comes, you will be better prepared if you already have an online presence and portfolio.

Free Versus Paid Photography Portfolio Websites

The options for displaying your photography portfolio online can be a little overwhelming. A quick google search for “photography portfolio website” returns 48 million results. The first question you need to ask is whether a paid or free service is best for you? There are many options within each category, but they each have their pros and cons.

It’s also worth noting that “photography portfolio” doesn’t necessarily look how you expect. In fact, you may already have a portfolio online, you just aren’t thinking about it in that way yet. Let’s look at a few of the options and you’ll see what I mean.

Free Services

If you’ve ever shared any of your photos online, whether on social media or on a photo-sharing website, then you already have an online portfolio. Although not generally considered portfolio websites, some social networks actually make great free portfolios.

Photo sharing websites are a great place to display your portfolio for free. They’re aimed more towards photographers than most social networks, so often include features that may assist you in using them as your primary portfolio.

Sunrise at Urangan Pier, Hervey Bay, Fraser Coast, Queensland, Australia - photography portfolio

Pros

Other than being free, the biggest advantage of free services is the volume of traffic. The larger websites are among the biggest on the internet, so the potential for people seeing your photos is far greater. With all these visitors and traffic comes community. The ability to engage with other users is a huge advantage in my opinion. They have become the modern camera club. They are places where you can not only find an audience for your work, but other photographers to inspire you and network with.

Free services are constantly pushing forward with new features and technology, so you get to be on the cutting edge. The regular updates can be frustrating at times, but I think the good far outweighs the bad in this regard.

These are also the places that you are likely to be found by buyers. One of my first magazine features was an image that was found on Flickr by a photo editor searching for a specific image to buy. Again, this isn’t for everyone, but something worth considering if you are wanting to sell your photos.

Landscape photo of Two Mile Bay, Lake Taupo, New Zealand - photography portfolio

Cons

There are downsides to using a free service, though. The biggest one for me is that you are depending on someone else’s platform to build your portfolio. Their primary interest is profit, not making you rich or famous. They can and will change things whenever they like and you have no say in the matter. If they close down or are sold to a new owner, that can mean a lot of hard work goes down the drain.

You have little or no ability to customize your profile page, meaning you have no options for how your portfolio looks. This may not be something you’re concerned about, but it’s worth considering. Free services make money by either selling ads (social networks) or offering premium features to users (photo sharing sites). This is fine, as it keeps the service free for those who don’t want to pay, but it means you’ll miss out on some of the best features the service has to offer.

You’re probably already using one or more free portfolio services, or are at least aware of them. Let’s take a look at a few of the biggest ones and see if they’re right for you.

Flickr

The photo-sharing website Flickr has been around forever and was one of the first places I began sharing my photography when I started out. With around 75 million users, it is a giant in the photo-sharing world. Flickr’s biggest strength lies in its communities. I have been involved with many Flickr groups where I have met lots of other photographers and learned a ton.

flickr free vs paid photography portfolio websites

Flickr’s popularity has declined over the last few years as users have moved on to other things, and the Yahoo-owned website (recently acquired by SmugMug) hasn’t done itself any favors by being incredibly slow to innovate and keep up with the competition.That being said, it still has a thriving photography community and is worth considering.

500px

Like many Flickr users, I abandoned ship when I discovered 500px, a newer photo sharing website that offered many of the same features but with a fresh new user experience. 500px also used an algorithm that meant you were far more likely to see amazing photography on its “popular” page. The standard of photography seemed higher, so it naturally attracted a lot of photographers.

500px has never reached the same volume of users as Flickr, with current numbers sitting around 12 million, but the service has added new features like communities and their “Marketplace”, which is essentially a way to license your images to sell as prints or stock.

500px free vs paid photography portfolio websites

500px has made headlines recently in the photography world after it was sold to VCG, the “Getty Images of China”. This has been a hugely controversial issue for 500px users, and there has been a mass exodus of previously loyal users. Don’t let that be the deciding factor for you, as 500px still has a lot to offer as far as free portfolio websites go.

Instagram

You may think of Instagram as just another social network, but you might be surprised how many photographers are now using it as their primary portfolio.

I’m sure I don’t need to tell you that Instagram is currently the world’s number one photography app, and for good reason. People want to go where the masses are. With over 800 million users, there is no question as to whether it’s a place to consider sharing your portfolio.

instagram free vs paid photography portfolio websites

Instagram can be used in many different ways, but if you choose to use it as a portfolio, you must learn to be selective about what you share. Try to resist the temptation to share every photo. Curate your feed well, and you will have a portfolio that will attract people to it. If you must share photos of your cat, try using Instagram’s awesome Stories feature.

Pinterest

Just like Instagram, Pinterest has grown into a social network with a massive number of users, and it has the added advantage of being heavily visual. It’s a great place to be able to share your portfolio with the potential of being seen by a large audience.

Pinterest allows you to create boards and then “pin” your photos to as many boards as you like. You can create a different board for each photography category or location, such as “Weddings” or “Australia”. You can even have a “Portfolio” board where you only pin your best photos.

pinterest free vs paid photography portfolio websites

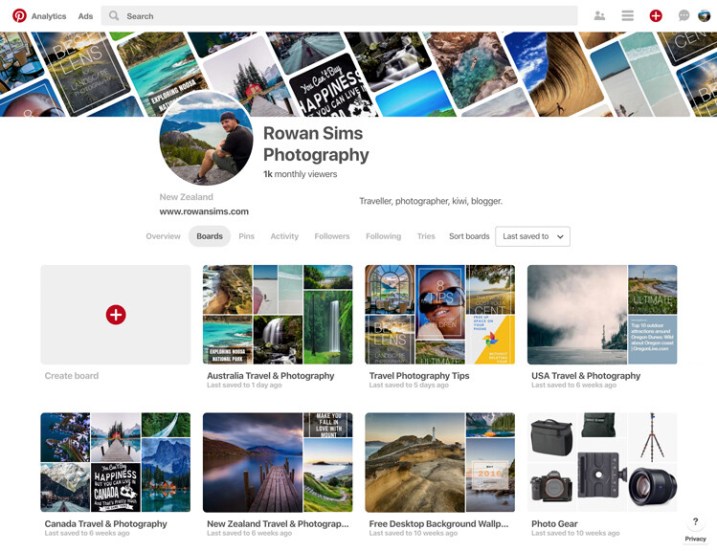
Pinterest also allows you to pin web pages, so if you have a blog you can pin your posts. The ability for others to re-pin your pins to their own boards means your work can be seen by a lot more people. You can also create inspiration boards for re-pinning other photographers’ pins. With all these features, Pinterest is definitely worth considering as a place to share your photography portfolio for free.

Paid Services

When it comes to paid photography portfolio websites, there aren’t as many options, but the ones that are available give you pretty amazing bang for your buck. Most professional photographers use one of these services these days, but that doesn’t mean you have to be a professional to use one.

They all have a range of options that vary in cost and features, but if you are considering a paid service for your portfolio, I’m sure you can find something that will fit your budget and needs.

Pros and Advantages

As with the free options, these services have their pros and cons. The biggest advantage, in my opinion, is the ability to customize how your portfolio looks and feels. You can change colors, layouts, text, logos, etc., all without needing to know how to code websites.

noosa national park sunshine coast queensland australia - photography portfolio

Most of them include unlimited storage for your photos, meaning you can upload as many high-resolution images as you want. This not only means you never have to delete another photo to make space for new ones, but you also have a copy of your photos backed up in the cloud.

The ability to sell your photos as prints or license them as stock directly from the website is a major attraction for many photographers. Each service’s e-commerce system works differently, but if this is a feature you want, you will find something that works for you. Some paid portfolio websites also allow you to deliver image files directly to clients, which works great if you’re a wedding or portrait photographer, or if you want to deliver files directly to a magazine, etc.

If you have a blog, some of these services will allow you to integrate your domain with your portfolio. For example, you can make your portfolio URL something like “portfolio.yourdomainname.com” rather than “yourname.photoshelter.com”. Visitors to your portfolio won’t even know that they’re on another website.

Driftwood bench seat on sand dunes overlooking Mount Maunganui Beach at sunset. - photography portfolio

Cons or Disadvantages

As you’re paying for premium features, there aren’t as many disadvantages of using a paid service. The main one is that they don’t have the social element that you get with photo-sharing sites or social networks. Getting your portfolio in front of eyeballs is a lot harder without the ability for viewers to engage with your work like they can on social media.

Although you have far more options to customize the way your portfolio appears, you’re still at the whim of the website that it is hosted on, and therefore how it functions. If you don’t like the features a website offers, it’s take-it-or-leave-it.

The following paid photography portfolio websites are by no means an exhaustive list, but these are some of the largest and most popular amongst photographers.

PhotoShelter

This is the first paid portfolio service I used for my own photography. PhotoShelter offers some of the best photography portfolios money can buy. Their websites look and work great, and their e-commerce features are second-to-none.

You can sell and license your photos directly through the website, and they even offer self-fulfilled printing if you want to print and ship images yourself. Although it’s one of the most expensive services, PhotoShelter is a solid option.

photoshelter free vs paid photography portfolio websites

SmugMug

I switched from PhotoShelter to SmugMug a few years ago after running an experiment to see how the two big boys compared in terms of Google search traffic. SmugMug won hands-down, so I moved my portfolio over. The two are very comparable in terms of cost and features.

If you want a beautiful portfolio website that works well and offers unlimited storage, I would definitely consider SmugMug. They also offer a solid e-commerce system, although they let themselves down with their refusal to allow self-fulfilled printing, despite users requesting it for years.

smugmug free vs paid photography portfolio websites

Zenfolio

I haven’t used Zenfolio personally, but from what I’ve seen and heard from other photographers, it’s a service worth considering. Their websites look great, although aren’t as customizable as the competition. Zenfolio is one of the more affordable services available, especially if you aren’t planning to sell your photos. It’s definitely, worth a look.

zenfolio free vs paid photography portfolio websites

Editor’s note: I personally use Zenfolio (screenshot below) and have used their print fulfillment services for clients, as well as for file downloads. It all works seamlessly and you can set your own prices with the Pro or Advanced plans. So, I can add my recommendation for this service. 

Zenfolio photography portfolio of Darlene Hildebrandt, dPS Managing Editor.

Self-Hosted Website and Portfolio

The last option sits somewhere between paid and free, and is yet another option to consider. If you want total freedom to customize and run your portfolio website however you want, you need your own self-hosted website.

The easiest way to do this is with an installation of WordPress on your own domain. It’s cheap and easy to set up with a service like BlueHost. Once it’s up and running, the options for your portfolio are endless. There are many free and paid gallery plugins, and if you want to sell your photos you can do it directly from your own website with a plugin like WooCommerce, all without having to pay anyone else a commission, so you get 100% of the profit.

If you have time (and are technology savvy) and you like to have total control over how things look and work, this is a great option. It does require a lot more user input, though, so be careful about rushing into it. If you prefer something that’s easier to set up and does most of the heavy lifting for you, one of the paid services is probably best.

tea tree bay sunset noosa heads queensland australia - photography portfolio

How do you choose?

With so many options, it’s hard to know which is best for you. The good news is that whatever you choose, nothing is permanent. I have used almost all of the services that I’ve mentioned in this article. They all worked for me at the time that I used them, and then I moved on when they no longer served my needs.

Try one or two of the free ones and see if you like them. If you think one of the paid services might be for you, they all offer free trials, so you don’t need to commit until you’re ready.

Whatever you decide, remember to have fun and don’t take it too seriously. Sharing your photos with the world can be one of the most enjoyable parts of photography. I would love to know about your experiences with portfolio websites. Have you used any of the websites mentioned? Are there any others you would recommend? Questions? Let me know in the comments area below.

The post Free Versus Paid Photography Portfolio Websites – Which is Best for You? appeared first on Digital Photography School.


Digital Photography School

 
Comments Off on Free Versus Paid Photography Portfolio Websites – Which is Best for You?

Posted in Photography


How to Use the Lightroom HSL Panel for Landscape Photo Editing

12 May

If you are a landscape photographer, you might already be using various lens filters to get desired colors and saturation in your images. What if you do not own these filters or forget to carry them along? There is a tool in Adobe Lightroom can help you.

The HSL (Hue, Saturation, and Luminance) tool is a savior for all photographers, especially those shooting landscapes. This is because the HSL tool allows you to adjust the hue, saturation, and luminance in your photos very efficiently.

Where is HSL Panel located in Lightroom?

First, you have to make sure that you are working on the Develop module, in order to access the HSL tool.

How to Use the Lightroom HSL Panel for Landscape Photo Editing - develop module

Once you are in the develop module, you can now see all the toolbars on the right-hand side of the window. Simply scroll down a bit until you see the “HSL / Color / B&W” panel. As you will be working on the HSL tool, just click on the “HSL” tab.

How to Use the Lightroom HSL Panel for Landscape Photo Editing - HSL panel

Using the Hue Sliders in HSL

The first tool that we shall be discussing is the Hue tab, which as the name suggests allows you to adjust the hue (or color tint) of a photo. Hue enables you to adjust the tones ranging from -100 to +100. In simple language, you can change the tone/tint of a particular color in a photo, but within the hue range. By default, Lightroom allows you to play with the hue of eight default colors as shown in the photo below.

For example, if you look at the comparison below the original color of the sky was blue (middle image below). So if I adjust the blue slider and take it all the way to -100, the color shifts from blue to a somewhat greenish color. Similarly, if I take the slider all the way to +100 the color shifts towards a magenta tone.

hue adjustments - How to Use the Lightroom HSL Panel for Landscape Photo Editing

Hue adjustments with the Blue slider.

I know it looks disastrous, but this extreme example gives you an idea of how you can use the Hue tool when required. Let me share a perfect example with you that I achieved using the Hue adjustments.

How to Use the Lightroom HSL Panel for Landscape Photo Editing

LEFT: Original image RIGHT: Color corrected using the Hue tool

Using the Saturation Sliders in HSL

Now once you are done adjusting the hue of the colors that you desire, you can move on to the saturation tab in the HSL panel. We all love saturation in landscape photos especially in the sky, don’t we?

Using the saturation tab, you can adjust the intensity of a particular color from the list of eight default colors. Unlike the saturation slider in the Basic LR panel where the whole photo gets affected, here you can selectively adjust the saturation of a single color.

Suppose you want to boost the saturation of blue color in the sky, simply drag the blue slider towards the right and see the magic. If you wish to make it less saturated, mode the slider towards the left and experiment with selective coloring effect.

Similarly, you can perform repeated actions using different colors in your frame and get a well-saturated photo.

How to Use the Lightroom HSL Panel for Landscape Photo Editing - blue saturation slider

The blue saturation slider on the HSL panel in action.

Using the Luminance Sliders in HSL

The last tool from the HSL panel is Luminance, which allows you to adjust the brightness of a particular color tone. So basically you can increase or reduce the brightness of a color by adjusting the Luminance slider.

There are situations when the sky is way brighter than the mountains or your subject, or maybe your subject is brighter than other elements of your frame. Using the luminance sliders, you can balance the brightness of the scene.

For instance, in the photo below, the sky is overexposed and I want the blue color to be dark in order to get more contrast in the sky. Using the Luminance tool I adjusted the blur color slider to -80 to get the desired result as shown below.

How to Use Lightroom HSL Settings for Landscape Photo Editing

Choosing Colors Manually in HSL

There are chances that the color that you want to choose to adjust the Hue, Saturation, or Luminance is not amongst the eight default colors. No worries, you can still adjust the HSL settings using a special feature called the Targeted Adjustment Tool which is located on the HSL toolbar itself (as shown in red below).

How to Use Lightroom HSL Settings for Landscape Photo Editing

The targeted adjustment tool is highlighted in red.

Simply tap on the icon and take it over to the exact spot where you wish to adjust the hue, saturation,  or luminance. Now click and hold at that point in your frame and drag the mouse up/down to adjust the sliders automatically.

Some colors are a mix of two or more primary colors, so you may see multiple sliders being adjusted when you click and drag the mouse. For example, green grass isn’t always just green, it usually has a lot of yellow in it as well.

Final Words

Hue, saturation, and luminance play an important rule in landscape photo color correction, do you agree? Using the HSL sliders, you get a lot more flexibility as you can perform better color correction based on particular colors.

Be it changing the hue of trees from green to orange, boosting the saturation of the sky, or adjusting the luminance of the scene, the HSL tool in Lightroom takes care of it pretty well.

The post How to Use the Lightroom HSL Panel for Landscape Photo Editing appeared first on Digital Photography School.


Digital Photography School

 
Comments Off on How to Use the Lightroom HSL Panel for Landscape Photo Editing

Posted in Photography


Tamron 70-210mm F4 Di VC USD sample gallery

12 May

$ (document).ready(function() { SampleGalleryV2({“containerId”:”embeddedSampleGallery_9414440590″,”galleryId”:”9414440590″,”isEmbeddedWidget”:true,”selectedImageIndex”:0,”isMobile”:false}) });

Tamron’s 70-210mm F4 VC, released in April, is a decent bit cheaper than similar on-brand Canon and Nikon offerings. For $ 800 it includes Tamron’s well-regarded image stabilization, rated to four stops, as well as overall moisture resistance. Take a look at our initial sample gallery, and stay tuned for more as we continue testing Tamron’s newest tele-zoom.

See our Tamron 70-210mm F4
sample gallery

Articles: Digital Photography Review (dpreview.com)

 
Comments Off on Tamron 70-210mm F4 Di VC USD sample gallery

Posted in Uncategorized


The Yongnuo YN43 is a Four Thirds smartphone clip-on camera with Canon lens mount

12 May

Yesterday, affordable photography accessory maker Yongnuo unveiled a 60mm F2 macro lens, and they’ve also taken the wraps off a YN43 camera module, a clip-on camera for smartphones in the spirit of Sony’s QX-cameras, the Olympus Air, DxO One, and the Kodak PixPro models.

Unfortunately, at this point there are no specifications available on the site. Looking at the images and model name it’s fair to assume the device will feature a Four Thirds sensor. Curiously the lens mount appears to be of the Canon variant, though. On the product images we can see a Yongnuo 14mm F2.8 wide angle lens for Canon mounted to the module. The choice of lens mount is likely due to the fact that Yongnuo only makes lenses for Canon and Nikon, but no Micro Four Thirds glass.

The camera is pictured with an Apple iPhone and an app is already available in the App Store which suggests it will definitely work with Apple devices, but one would assume it’ll be compatible with at least the most popular Android phones as well.

With its unusual sensor/lens mount combination the YN43 looks like a slightly odd product to put it mildly. It also doesn’t bode well that all the similar products mentioned above have disappeared from the market and the built-in cameras in smartphones have improved drastically, almost nullifying the need for bulky clip-on modules.

That said, Yongnuo is known for its budget pricing and while no price information is available yet for the YN43 we’d expect it to be quite affordable. This could make it worth a closer look to anyone who has a few Canon lenses lying around and likes tinkering with photo equipment.

We’ll let you know as soon as more information and specs become available.

Articles: Digital Photography Review (dpreview.com)

 
Comments Off on The Yongnuo YN43 is a Four Thirds smartphone clip-on camera with Canon lens mount

Posted in Uncategorized