RSS
 

Archive for January, 2018

How To Get Bitcoins Without Mining

16 Jan

Why am I talking about Bitcoin here? Because everyone is? Not exactly. For one, you can now exchange bitcoin into dollars and that can buy some nice photo gear. If only there was a way to get bitcoin without spending thousands of dollars building a rig that sounds like an airport runway in your basement and destroys your electric bill. Continue Reading

The post How To Get Bitcoins Without Mining appeared first on Photodoto.


Photodoto

 
Comments Off on How To Get Bitcoins Without Mining

Posted in Photography


Condé Nast has cut ties with Mario Testino and Bruce Weber amid sexual misconduct allegations

16 Jan

Left: Mario Testino by Walterlan Papetti, CC-BY-SA-4.0

Right: Bruce Weber by Christopher Macsurak, CC-BY-2.0

A shocking report published by the New York Times this past Saturday shares a slew of sexual misconduct allegations against iconic fashion photographers Bruce Weber and Mario Testino. The allegations, which both photographers categorically deny, have already convinced Condé Nast to sever ties with Testino and Weber “for the foreseeable future”, and come just as the publisher is finalizing a new Code of Conduct.

Allegations Against Two Fashion Industry Giants

The Times article quotes former assistants and current and former male models who shared sometimes graphic harassment and molestation stories of their photo shoots with Testino and Weber. In light of these allegations, Condé Nast has promised not to commission any new work from either Weber or Testino. The official statement by both Anna Wintour, artistic director of Condé Nast and editor of Vogue, and Bob Sauerberg, CEO of Condé Nast, reads:

We are deeply disturbed by these accusations and take this very seriously. In light of these allegations, we will not be commissioning any new work with Bruce Weber and Mario Testino for the foreseeable future.

Both Weber and Testino vehemently deny the accusations. Weber told the Times in a statement that he is, “completely shocked and saddened by the outrageous claims being made against me, which I absolutely deny,” while Testino’s lawyers “objected to the allegations and called the credibility of the men who said they were harassed into question,” according to the Times.

A New Code of Conduct at Condé Nast

In addition to cutting ties with the two fashion photographers, Condé Nast also announced a new code of conduct today. The code, which the publisher began working on after cutting ties with photographer Terry Richardson—is meant to protect models from sexual harassment and workplace abuse, and will go into effect at the end of the month.

Bob Sauerberg, CEO of Condé Nast, revealed a few of the new “guidelines for vendors” who plan to work with the publisher in the future:

  1. All models appearing in fashion shoots must be at least 18 years old. The only exceptions that will be made are for subjects appearing as themselves as part of a profile or news story, who will be required to have a chaperone with them on set at all times.
  2. Alcohol is no longer allowed on Condé Nast sets. Recreational drugs are also not allowed.
  3. Photographers are no longer permitted to use a Condé Nast set for any work that is not commissioned or approved by Condé Nast.
  4. Any shoot involving nudity, sheer clothing, lingerie, swimwear, simulated drug or alcohol use, or sexually suggestive poses must be approved in advance by the subject.

Sauerberg expects to release the full code of conduct by the end of the month, at which point he hopes “our colleagues and partners will adopt these or similar recommendations so that each of us involved in the creative process does our part to help ensure a safe and respectful work environment.”

Articles: Digital Photography Review (dpreview.com)

 
Comments Off on Condé Nast has cut ties with Mario Testino and Bruce Weber amid sexual misconduct allegations

Posted in Uncategorized


Canon launches refillable ink printers in the UK

16 Jan

Canon has announced that it will introduce a series of printers that are fitted with ink tanks designed so that users can refill the inks themselves. In move that might be interpreted as an “if you can’t beat them, join them” attitude, the company will release four models in the new Pixma G range, each of which has four built-in tanks for black, cyan, magenta and yellow ink.

The company will also sell bottles of ink so that users can refill the printers without having to buy individual cartridges—they will also, in theory, save money.

The new printers will be filled via 70ml bottles of colored dye ink which cost £10, and a 135ml bottle of black pigment ink that will cost £13. This makes the colored ink 13p per ml and the black 9.5p per ml compared with the 200p per ml that UK consumers pay for ink for the Pixma MG series, and 106p paid for 1ml of ink that’s used in the Pixma Pro range.

It’s worth noting, however, that Canon hasn’t made any print-life claims with these inks, and the printers are being marketed as general-purpose photo-capable machines rather than photo-specialist printers, so perhaps we shouldn’t expect the same quality.

The Pixma G series consists of four models that range from basic printer to a multi-functional four-in-one (print, copy, scan and fax) with the second two models offering Wi-Fi connectivity and printing from a smartphone app.

For more information, visit the Canon website.

Pricing and Availability

  • The PIXMA G1510: Available from March 2018 with a SRP of £180/€200
  • The PIXMA G2510: Available from March 2018 with a SRP of £200/€230
  • The PIXMA G3510: Available from March 2018 with a SRP of £250/€280
  • The PIXMA G4510: Available from March 2018 with a SRP of £300/€350

Press Release:

Canon launches refillable ink tank printer range in the UK

Canon announces the anticipated launch of its new collection of refillable ink tank printers. The high yield, easy to use and compact PIXMA G Series printers are designed for those seeking high volume, low cost per page, productive printers for home, home office and small office environments.

The new PIXMA G series collection includes:

  • PIXMA G1510, a printer designed for high volume printing at low cost per page
  • PIXMA G2510, a high yield multi-function printer with added user benefits of copying and scanning
  • PIXMA G3510, a high yield multi-function 3-in-1 printer with Wi-Fi connectivity that supports smartphone and tablet print, copy and scanning via the Canon PRINT app
  • PIXMA G4510, a compact 4-in-1 printer with 20 sheet Automatic Document Feeder (ADF) and wireless connectivity to smart devices with a high page yield resulting in a low cost per page

Boost Productivity:

Created for home, home offices and small office environments, the PIXMA G Series has been designed to boost productivity. Keeping running costs down and delivering more prints, the PIXMA G Series offers convenience and efficiency to suit all printing requirements.

Key Features:

  • The strong focus across the range is the high page yield allowing users print up to 6,000 pages from the black ink or 7,000 pages from a set of colour inks[1] meaning you can print for longer without changing inks and ensuring very low cost per page
  • Auto Power ON/OFF setting[2] helps to save energy when the printer is not in use
  • High quality prints with genuine pigment black ink ensuring sharp and crisp text & dye colour inks for vibrant images; all the models within this series can produce borderless photos up to A4

Design & Technology

The new PIXMA G Series printers have been built with productivity and design at its forefront; with front facing ink tanks that make it easy to determine remaining ink levels, well designed ink bottles minimising potential spills or leaks and quick installation process due to the inherent technology of the printer.

Easy to set up and simple to use, the PIXMA G series models ensure better prints on plain paper for high quality prints every business will be proud of. PIXMA G2510 and PIXMA G3510 also feature a new 1.2” mono segment LCD screen while PIXMA G4510 retains the 2 line segment mono LCD. The handy screens make it easy to copy, check Wi-Fi connectivity and troubleshoot so your time is better spent on work.

With the FINE print head system the new printers are made to be durable and produce high volume printing meaning you can rely on the PIXMA G Series when printing weighty documents for that all important meeting. The air-tight ink tube technology for smooth printing ensuring every print is as good as the one before.

Connectivity

PIXMA G4510 and PIXMA G3510 both feature Wi-Fi technology, allowing users to print wirelessly via a laptop/PC or smart device. Use the Canon PRINT app[3] for printing, scanning and copying purposes, as well as printer maintenance. You can access PIXMA Cloud Link via the Canon PRINT app so you can print photos and documents remotely from cloud services such as Facebook, GoogleDrive, Dropbox, Instagram and more.

Both models are compatible with Mopria on Android so you can print without needing to download additional apps. PIXMA G4510 is compatible with Apple AirPrint which allows compatible iOS devices to print directly too.

PIXMA G4510 and PIXMA G3510 allow users to simultaneously handle both conventional Wi-Fi connection via a router and without access to a Wi-Fi router using Wireless Direct or Access Point Mode[4], making connecting a smart device to the printer simple.

Photo Printing

Users can now print borderless 4 x 6” photos in just 60 seconds and select from a range of templates with My Image Garden. Use the software to get creative with your photos and print various projects using your own images.

The rear paper feeding system capable of holding up to 100 sheets of plain paper enables a smooth paper pass for a wide range of media support including glossy photo paper Square Media (5×5”).

Get Creative

Enjoy a range of creative platforms to do more with your printer:

  • PosterArtist Lite[5] programme lets users create and print eye-catching posters and brochures for all business purposes.
  • Experiment with Canon’s Message In Print[6] app by sending invisible messages to friends and family when printing photos with PIXMA G3510 and PIXMA G4510. Add animations, URLs or text to the photo for the recipient to decode when using the Message In Print app
  • Organise photos, create collages or gift personalised calendars and cards to loved ones, with online platform My Image Garden – compatible with all printers in the PIXMA G Series with applications such photo layout print and Full HD Movie Print
  • Print arts and crafts from Canon’s Creative Park free online web platform, allowing users to print a range of crafts from 3D models, greeting cards, frames, masks and more

Convenient Copying

Make copies of hard documents at the touch of a button. Simply take a photo of any document with the Smartphone Capture and Copy function on the Canon PRINT app and convert it to a PDF to save, share or print; ideal for remote working.

Make copies of double sided ID cards with PIXMA G4510 for trips abroad or personal verification. The easy to use feature enables you to scan the front and back sides to print on one page.

Handy Design

Built for the home and office environment, the compact PIXMA G Series is designed to save space while optimising both print quality and quantity. The front-facing ink tanks make it easy for you to monitor your ink levels so you’re always prepared for your printing demands.

Make copies[7] at the touch of a button when you choose either PIXMA G2510 or PIXMA G3510 with built-in 1.2” LCD screen. With PIXMA G4510 users will also benefit from a two-line LCD screen to assist with initial setup, Wi-Fi status and troubleshooting.

The new PIXMA G Series range offers small businesses and home offices cost-effective printing solutions; increasing productivity and easing flexible working. The new printers guarantee long-lasting, durable prints, whether it’s vivid photos or documents for a professional-looking finish.

Articles: Digital Photography Review (dpreview.com)

 
Comments Off on Canon launches refillable ink printers in the UK

Posted in Uncategorized


CVS bans photo manipulation on its beauty images, will hold other brands to same standard

16 Jan
Photo: CVS Health

Earlier today, CVS announced that it would ban ‘materially altered’ imagery on its store-brand beauty products, and begin marking imagery on all of the beauty products the store carries as ‘Digitally Altered’ if it doesn’t match the new policy by 2020. Given the influence CVS wields—it is the US’s largest drug store chain—major beauty brands such as L’Oreal, Maybelline, and others are expected to follow suit.

The announcement is branded as a “commitment to create new standards for post-production alterations of beauty imagery,” and includes the introduction of the so-called CVS Beauty Mark: a watermark that will appear on all beauty imagery in the store that has not been materially altered. And, just in case you’re not sure what CVS means by ‘materially altered,’ the company explains:

For this initiative, materially altered is defined as changing or enhancing a person’s shape, size, proportion, skin or eye color, wrinkles or any other individual characteristics.

The move, says Helena Foulkes, President of CVS Pharmacy and Executive VP of CVS Health, is a recognition of the company’s responsibility as one of the largest beauty retailers in the United States:

The connection between the propagation of unrealistic body images and negative health effects, especially in girls and young women, has been established. As a purpose-led company, we strive to do our best to assure all of the messages we are sending to our customers reflect our purpose of helping people on their path to better health.

The CVS Beauty Mark will begin appearing on CVS-produced beauty imagery in 2018, but the goal is to have all of the photographs in the beauty sections of CVS stores up to transparency standards by the end of 2020. At that point, any altered beauty image that appears in CVS “stores, marketing materials, websites, apps or social media” will be clearly labeled as such.

To learn more about this initiative, head over to the CVS Beauty Mark website. And if you plan to shoot campaign images for … well … almost any beauty brand from this point forward, you might want to keep these standards in mind. Chances are good that product is carried in a CVS store.

Press Release

CVS Pharmacy Makes Commitment to Create New Standards for Post-Production Alterations of Beauty Imagery

WOONSOCKET, R.I. | January 15, 2018 – CVS Pharmacy, the retail division of CVS Health (NYSE: CVS), today announced a commitment to create new standards for post-production alterations of beauty imagery it creates for stores, websites, social media and any marketing materials. As part of this initiative, transparency for beauty imagery that has been materially altered will be required by the end of 2020.

The company also announced that it will introduce the “CVS Beauty Mark,” a watermark that will be used to highlight imagery that has not been materially altered. For this initiative, materially altered is defined as changing or enhancing a person’s shape, size, proportion, skin or eye color, wrinkles or any other individual characteristics. CVS Pharmacy will be working together with key brand partners and industry experts to develop specific guidelines in an effort to ensure consistency and transparency.

“As a woman, mother and president of a retail business whose customers predominantly are women, I realize we have a responsibility to think about the messages we send to the customers we reach each day,” said Helena Foulkes, President of CVS Pharmacy and Executive Vice President, CVS Health. “The connection between the propagation of unrealistic body images and negative health effects, especially in girls and young women, has been established. As a purpose-led company, we strive to do our best to assure all of the messages we are sending to our customers reflect our purpose of helping people on their path to better health.”

This new initiative is being introduced in an effort to lead positive change around transparency in beauty as well as to allow customers to differentiate between authentic and materially altered imagery. The CVS Beauty Mark will start to appear on CVS Pharmacy-produced beauty imagery in 2018 with the goal of all images in the beauty sections of CVS Pharmacy stores reflecting transparency by the end of 2020.

“We’ve reached out to many of our beauty brand partners, many of whom are already thinking about this important issue, to work together to ensure that the beauty aisle is a place that represents and celebrates the authenticity and diversity of the communities we serve,” Foulkes added. “We’ve been inspired by their willingness to partner with us to redefine industry standards around this important issue for the well-being of all of our customers.”

“Girls Inc. applauds CVS Pharmacy’s leadership commitment to showcase and celebrate beauty in all of its forms. As the national nonprofit dedicated to inspiring all girls to be strong, smart, and bold, Girls Inc. is honored to be a partner in CVS Pharmacy’s movement to counter limiting stereotypes too often faced by girls and women. Allowing diversity and natural beauty to shine will have an immensely positive impact on girls and women everywhere.” said Judy Vredenburgh, Girls Inc. President & CEO.

CVS Health has previously made significant changes in its retail stores with the health of its customers in mind, such as ending the sale of tobacco products, delivering healthier food options throughout CVS Pharmacy stores and committing to remove certain chemicals of concern from all store brand beauty and personal care items by 2019.

To learn more about CVS Pharmacy’s new beauty imagery initiative, visit www.cvshealth.com/BeautyMark.

Articles: Digital Photography Review (dpreview.com)

 
Comments Off on CVS bans photo manipulation on its beauty images, will hold other brands to same standard

Posted in Uncategorized


18 useful Lightroom shortcuts for beginners

16 Jan

Adventure and lifestyle photographer Lucy Martin put together this useful little video that goes over her favorite Lightroom shortcuts. There are 18 in all, and while they’re all probably a little basic for the power users out there—L = lights out, X = reject, etc.—the beginners reading this will definitely pick up a few new shortcuts to add to their repertoire.

We’ve listed all 18 below, just like Martin did in the video’s description, but check out the video to see all of the min action:

  • G – Go to Grid (Library Mode)
  • E – Enter Loupe View
  • L – Lights Out
  • P – Pick/Flag Photo
  • X – Reject Photo
  • CAPS LOCK – Auto Next Photo
  • CMD + DELETE – Delete all Rejects
  • D – Go to Develop Module
  • \ – Before & After Shortcut Key Lightroom
  • Y – Before & After Side-by-Side
  • V – Black& White
  • R – Resize & Rotate (Crop)
  • Q – Spot Removal Tool
  • H – Hide Adjustment Pins
  • CMD + Z – Undo Last Action
  • CMD + C – Copy Develop Settings
  • CMD + P – Paste Develop Settings
  • CMD + / – Show All Shortcuts

If you have any favorites you want to add to this list, drop them in the comments. And if you found the video helpful, you can check out more from Martin on her YouTube channel.

Articles: Digital Photography Review (dpreview.com)

 
Comments Off on 18 useful Lightroom shortcuts for beginners

Posted in Uncategorized


How to Photograph the Sheer Beauty of Soap Bubbles

16 Jan

Most of us are fascinated by soap bubbles and love playing with them since childhood. Watching bubbles float in the air and burst is a pleasure every child and even adults enjoy. Soap bubbles have an exciting range of color and textures. When light shines onto a bubble it displays vivid color that changes swiftly. Even though we see them on regular basis, we never actually observe them so closely to enjoy the thrilling beauty they hold within.

They are stunning, amusing and mesmerizing but extremely short-lived. Soap bubbles usually last only for a few seconds and then burst either on their own or upon contact with another object. So how can you capture these beautiful soap bubbles and keep it forever? Let’s find out.

Soap Bubbles 01

What gear do you need?

First, we’ll talk about the camera gear you need for photographing soap bubbles. These photos can be taken with any DSLR or even compact camera if it is capable of firing an external flash. And for the lens, it’s better to use a macro lens but if you don’t have one, any lens will work fine.

Get or make a large light source

The most important aspect of soap bubble photography is the light source rather than a camera. It requires a large light source. If you have a studio light with a large softbox or beauty dish that will work great. But if you don’t have one, it doesn’t mean that you can’t take this type of photo. It can be done by using off-camera flash with a DIY softbox too.

For a DIY softbox, make a frame of two by two feet by using wood or iron wire and wrap it in white cotton cloth or butter paper. This frame, combined with an off-camera flash, will give the same impact as studio flash with a softbox.

And if you don’t have an external flash, you may place this frame near the window (or hang a white bed sheet over a window) and use sunlight as your light source. The possibilities are endless, you just need to use your imagination.

Steady the camera

You will also need a tripod so you can fix your camera on it and free your hands to blow bubbles. If you have a shutter release cable (remote trigger) it would be great to use that as well.

Other supplies

Other than this, get a piece of black cloth or black paper to use as a backdrop. You’ll also need soap solution to blow bubbles. You can buy it from local stores or make it at home by adding two tablespoons of liquid soap and one tablespoon of glycerine in half cup of water and leave it overnight.

Workflow

Okay, now we have everything, let’s start shooting. First, switch-on your music system and start playing your favorite album. It’s not necessary but it’s always good to listen to music while you shoot.

Now pour soap solution into a small bowl and place it on a table. Put a black cloth or black paper behind the bowl and set up your light source. Your light should be very near to the bubble (just 2-3 inches). If you want your bubbles to look like a floating planet, place the light source right above the bubble otherwise place it at 45 degrees downward.

Soap Bubbles 19

Soap Bubbles 12

Set your camera on the tripod and attach the shutter release cable. Set a narrow aperture between f/11-f/16, so you can get deep depth of field and get the entire bubble in focus. Focus manually and change other settings like shutter speed and ISO according to the light. Now use a straw to blow bubbles and start clicking.

Problems and Solutions

Once you blow the bubble, you’ll notice that it doesn’t have the swirls of colors which you were expecting. Wait a few seconds, and the colors will begin emerging, which is your cue to start clicking pictures.

Soap Bubbles 14

Soap Bubbles 15

Also, keep a close watch on the surface of the bubble. If it starts looking transparent, it means that the bubble is about to burst. To increase its lifespan, use a straw and blow on the bubble slightly. This will also add some unique texture to it.

If you are using homemade soap solution which you made using the formula I talked about earlier, soap bubbles will have a longer life but if you are using other soap solution, bubbles will burst in very short time. If that’s happening, adding a few drop of glycerine will increase its lifespan.

I also discovered that the temperature and the humidity of room play an important role in increasing the life of a soap bubble. If the temperature of the room is hot or atmosphere too dry, the bubbles would burst very quickly. This happens because soap bubbles have a layer of water between two thin layers of soap and when the water evaporates, it bursts. This is why it has a shorter lifespan in hot and dry environments.

So, by adding glycerine and lowering the temperature of the room, you can increase the lifespan of the bubble up to five minutes. Soap bubbles show a whole range of colors and textures from their formation until they burst. Every second you’ll find different colors and patterns and you can get lots of different shots with just one bubble.

Soap Bubbles 09

Post-processing

If everything has been set up properly, there is no need for heavy post-processing. Just level adjustments, some cleaning, cropping and sharpening would be enough and your image end up looking like scenes from the movie Interstellar.

At last, keep trying until you get the desired results and share your photos in the comments below.

The post How to Photograph the Sheer Beauty of Soap Bubbles by Ramakant Sharda appeared first on Digital Photography School.


Digital Photography School

 
Comments Off on How to Photograph the Sheer Beauty of Soap Bubbles

Posted in Photography


On Assignment with Kylie Mazon and the Canon EOS M6

15 Jan

The M6 is a lightweight and compact mirrorless interchangeable lens camera, which features a 24MP APS-C format sensor, tilting touch-sensitive rear screen and Canon’s innovative Dual Pixel autofocus system, for fast and reliable AF in both stills and movie modes.

Recently, we spent a day in Los Angeles with the M6, in the company of photographer, cook and food blogger Kylie Mazon. Join us and see how Kylie approaches the challenge of shooting lifestyle and promotional images for a downtown hotel with the Canon EOS M6.


This is sponsored content, supported by Canon. What does this mean?

Articles: Digital Photography Review (dpreview.com)

 
Comments Off on On Assignment with Kylie Mazon and the Canon EOS M6

Posted in Uncategorized


Playing Stuck in the Mud – A Creative Exercise for Photography

15 Jan

Do you remember that game called Stuck in the Mud we used to play as kids? It goes something like this; one kid is elected to be “it” and runs around to tag as many people as possible. When tagged, the other players have to freeze and stand with legs and arms apart, as if they were stuck in some glutinous mud. The only way to get free of the mud is when a non-tagged comrade climbs through the legs of the trapped players. It goes on until everybody inevitably gets stuck in the mud.

I was thinking about this game rather nostalgically over the course of this project.

Playing Stuck in the Mud - A Creative Exercise for Photography

Um… What has mud got to do with photography?

Actually, a fair bit sometimes. Fortunately, this project doesn’t involve wading in sticky mud (unless you want to).  This project is about parking your feet for a few minutes to have a good look around – as if you were stuck in the mud yourself.

Even when going for a dedicated photography walk, you are bound to miss the subtle details of a landscape. You can’t help it. The brain prioritizes images that portend to the mission at hand – surviving. Physical activity, self-preservation – it’s all the ingredients a brain focuses on to sustain its host. That’s why the best way to draw more detail out of a location is to slow down.

We know this because often when we see a potential photograph, we stop in our tracks to take the shot. So rather than halting for a brief second, the idea of this project is to and make a little extra time to investigate an environment. The shapes, colors, people, graffiti, or details in a window sill. There are countless moments that are ready for the taking, they just have to be caught.

Playing Stuck in the Mud - A Creative Exercise for Photography

How to play stuck in the mud with a camera

It sounds terrible, doesn’t it? The thought of my camera even coming near mud makes me sweat. But playing photographic stuck in the mud is easy.

The first step is to grab your camera and head out the door. Wander around, find a place to take a few shots and hold your position. Keep in mind that your spot doesn’t have to appear instantly enticing. In fact, choosing a boring location would be a quicker way to train yourself onto detail.  Plant your feet on the ground and have a good look around. I would recommend holding your position for a good one to two minutes at first. You’ll notice the time tends to go faster each try. In order to concentrate, set an alarm on your phone and get shooting!

Rules of the game

Apart from taking a few minutes to study the spot you’ve chosen, there aren’t any hard and fast rules to the stuck in the mud project. To advance, add a higher photo count or hang out in one spot for a longer period of time.

Want to stop every 100 steps? Do you want to be able to swivel around in a circle? Want to halt at particular points on a map? It’s totally up to you. You could even go out with a friend and compare shots from the same spot after! But I do recommend staying in the one spot for at least a minute or so – to truly get into that state of mindfulness and awareness. Sometimes it can be hard to get into that creative flow, so slowing down your process can help activate what I like to call “The Photography Zone”.

Also, it’s probably obvious, but don’t stop in the way of others or get yourself in a dangerous situation. This isn’t Pokemon Go, okay?

Playing Stuck in the Mud - A Creative Exercise for Photography

This is an example of a street corner I parked my feet on the other day. I was waiting for a friend and decided to take advantage of the surrounds. It doesn’t look like much, right? A fresh construction zone impeded by scaffolding. But, embracing the challenge I honed in on some of details that really make up the urban landscape.

Playing Stuck in the Mud - A Creative Exercise for Photography

This dark blue scaffold retains a sharp contrast in the midday sun.

Playing Stuck in the Mud - A Creative Exercise for Photography

A vibrant red scaffolding hanging just close enough to get a detailed shot.

Playing Stuck in the Mud - A Creative Exercise for Photography

Playing Stuck in the Mud - A Creative Exercise for Photography

You never know what you are gonna find! A cute little button.

Playing Stuck in the Mud - A Creative Exercise for Photography

And of course, don’t forget the selfie!

Pleasant Surprises

This short collection below surprised me a little because I’ve walked the route many so times before. But that’s what is so great about this project. It slows down your photographic practice, making room for unusual subjects to peek through.

Playing Stuck in the Mud - A Creative Exercise for Photography

The black and white conversion was a no-brainer to match tones in this image

Playing Stuck in the Mud - A Creative Exercise for Photography

Playing Stuck in the Mud - A Creative Exercise for Photography

I’ll often use these manholes to mark where I’ll stand next. This time, I decided to photograph one instead. I really enjoy the light filling out the overall image.

Playing Stuck in the Mud - A Creative Exercise for Photography

This tarp has been under construction for weeks but it took me a concerted effort to stop and explore the panorama of the city to capture this picture.

Sometimes the stuck in the mud project yields a cohesive series in itself. This image is the remains of Honeysuckle Creek Tracking Station in Australia. But instead of walking around to hunt out the obvious subject matter, I took a few minutes to plant my feet and take a good look at the detail around me.

It’s the act of staying put in the one space that allowed me to capture a different perspective of the old station.

Playing Stuck in the Mud - A Creative Exercise for Photography

The site of the Honeysuckle Creek Tracking Station. Before I set off to scurry around for subjects I deliberately took a minute or two to survey the details of the overall environment.

Playing Stuck in the Mud - A Creative Exercise for Photography

The results of a few minutes stuck in the mud. The detail of the ground around me lit up like an abstract artist’s canvas.

The variation from one tile to the next is a striking contrast. Perfect for focusing on the historical site in a different light.

Over to you

I would love to see the results of your stuck in the mud sessions. By taking a few moments to truly check out a landscape, odd little moments become clearer. You’ll almost definitely leave your spot thinking, “Wow, I never noticed that before!” So have a go! and share your images in the comments below.

The post Playing Stuck in the Mud – A Creative Exercise for Photography by Megan Kennedy appeared first on Digital Photography School.


Digital Photography School

 
Comments Off on Playing Stuck in the Mud – A Creative Exercise for Photography

Posted in Photography


6 Mistake to Avoid When You’re Starting Out in Photography

15 Jan

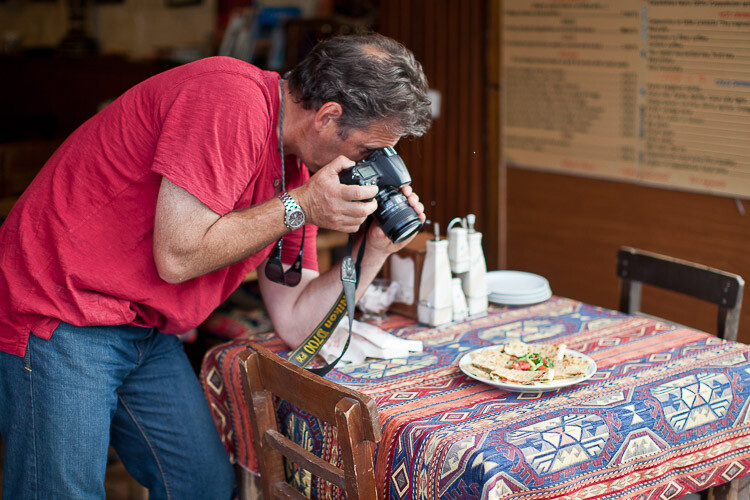
Like most hobbies or professions, every photographer started out somewhere. This usually means they also made mistakes along the way from which they have learned.

The thing to remember is that everyone makes mistakes – even seasoned pros might on the odd occasion get things wrong, but the key is to learn from your mistakes and move on. As you become more experienced the mistakes will get less and less, but in the meantime, here are six mistakes to avoid when you’re just starting out in photography.

6 Mistake to Avoid When You're Starting Out in Photography

#1 – Avoid Skipping Over the Camera Manual

I often get asked if I have any advice for people starting out in photography and my first tip is to read the camera manual cover to cover. Even now, whenever I upgrade my camera I always read the manual a couple of times. Besides the fact that your camera is the tool you need to use to capture photos so you need to understand how to use it, the manual also has a wealth of information about photography.

Set yourself a task of reading each part over and over again until you understand it, then practice it using your camera until it becomes second nature to you. In an instant, you should be able to change settings, focus points, review images, and so on.

Cameras these days offer so many possibilities and you can only use your camera to its full potential if you know and understand everything about it.

6 Mistake to Avoid When You're Starting Out in Photography

#2 – Avoid Blaming Your Gear

Every new photographer has probably at some point early on in their photography journey said the words, “If only I had a better camera I could take better photos”. While better cameras allow you to take better photos by giving you more control, bigger image sizes, less noise, etc., that alone will not make you a better photographer and thus make you capture better photos.

A good photograph requires that many elements come together and regardless of the camera that you have, a boring or uninspiring subject will still be boring and uninspiring even shot with the latest high-end camera.

If you really want to improve your photography, first you need to improve the creative and visual elements. Things like being able to light the scene or subject nicely, compose/frame your image correctly and actually find interesting opportunities to photograph. Once you have mastered these parts, your photos will look better regardless of the camera you are using.

6 Mistake to Avoid When You're Starting Out in Photography

#3 – Avoid Skipping the Theory Parts of Learning

Like most things, the more you practice photography the better you will become. It’s easy to forget that there is actually some science and theory behind photography.

Now while you don’t need to understand every intricate part of the theory (unless you want to) and be able to recite color temperatures off by heart, it still does help if you know some of the basics. It can help you in your photography, but also it can give you an indication of the limitations of modern day DSLRs.

The great thing is that there is tons of information about photography online these days and you can learn as much or as little as you want to, at your own pace, in your own time.

6 Mistake to Avoid When You're Starting Out in Photography

#4 – Avoid Comparing Yourself to Others

When you are starting out in photography there will always be a part of you that looks at your work and compares it to other people’s. While you should always look at other photographer’s work and be influenced by those who you admire, trying to compare yourself to others is not only a pointless exercise but it might actually be detrimental to your long-term success.

You will find yourself trying to copy other people rather than developing your own style which is what can help you and your photos stand out from the crowd. So don’t get consumed by comparing your work to others, view other people’s work with admiration but never envy.

6 Mistake to Avoid When You're Starting Out in Photography

#5 – Not Being True to Yourself

One of the great things about photography is that you could send a brief to multiple photographers and they will all likely come back with different work. Whether it’s in their interpretation, their vision or their style – the key is that their work will all probably look different even if that difference is subtle. It’s this uniqueness that makes photography such a wonderful art form to be involved in. But all of those photographers have one thing in common and that is that they stay true to their own way of working.

Sure, at times you’ll have to adapt when working for clients on a brief, but when photographing for yourself, there should always be a synergy in your work. If you want a test to see if you have developed your own style, lay out a whole load of your photos on a table. You should immediately see a connection between them. If you don’t, then ask yourself why and try to understand what is different.

6 Mistake to Avoid When You're Starting Out in Photography

#6 – Not Doing What You Love

Most photographers will tell you that they absolutely love what they do, and they wouldn’t want to be doing anything else.

If photography is a hobby for you, why would you want to photograph something you don’t enjoy? Most people get into photography with a part of it that they really enjoy. For some, it’s travel images, for others, it might be food or weddings. Some people like shooting wildlife photos and others like sports photography.

Whatever your passion is, you’ll be far better off focusing on the things you love photographing rather than things you don’t enjoy as that passion will likely be shown in the quality of your work.

6 Mistake to Avoid When You're Starting Out in Photography

Conclusion

While this may seem like an obvious list, it’s incredible how often people still fall into these pitfalls. If you want a few more mistakes to avoid – go here.

Photography for many people is a hobby, and as such should be like any other hobby, an enjoyable activity. Avoid these beginner pitfalls and you’ll be sure to enjoy your photography even more and it will show in your work.

The post 6 Mistake to Avoid When You’re Starting Out in Photography by Kav Dadfar appeared first on Digital Photography School.


Digital Photography School

 
Comments Off on 6 Mistake to Avoid When You’re Starting Out in Photography

Posted in Photography


Panasonic Lumix DC-GH5S added to studio scene comparison

15 Jan

Our test scene is designed to simulate a variety of textures, colors and detail types you’ll encounter in the real world. It also has two illumination modes to see the effect of different lighting conditions.

$ (document).ready(function() { ImageComparisonWidget({“containerId”:”reviewImageComparisonWidget-17234702″,”widgetId”:585,”initialStateId”:null}) })

We’re hard at work on our review of Panasonic’s video-focused Lumix DC-GH5S and have added it to our studio comparison tool. Here’s a quick look$ (document).ready(function() { $ (“#icl-3892–2071317688”).click(function() { ImageComparisonWidgetLink(3892); }); }) at how it stacks up against the GH5 at very high sensitivities, and another versus Sony’s a7S II$ (document).ready(function() { $ (“#icl-3893-1117426504”).click(function() { ImageComparisonWidgetLink(3893); }); }).

Articles: Digital Photography Review (dpreview.com)

 
Comments Off on Panasonic Lumix DC-GH5S added to studio scene comparison

Posted in Uncategorized