RSS
 

Archive for August, 2016

Samsung uses brain-inspired processors to create digital camera ‘vision’

17 Aug

Samsung has used IBM’s neuromorphic computer processors, built under the latter company’s TrueNorth project, to create digital ‘eyes’ that see in real time. The IBM TrueNorth processors are composed of 4096 small cores that simulate brain neurons, the primary advantage being faster data processing with lower comparative energy usage. Combined with Samsung’s Dynamic Vision Sensor, the technology functions somewhat like a digital eye, perceiving the world by changing each pixel independently of the others to record movement.

Samsung Advanced Institute of Technology’s VP of Research Eric Ryu detailed the technology at an IBM Research event in San Jose last week. Unlike ordinary cameras, this DVS-based camera only changes pixels when necessary to record the movement of specific objects while other pixels remain unchanged. Because of the unique pixel technology, this camera can process video at 2000 fps while using only about 300mW of energy. 

The combination of super high frame rates and exceptionally low energy consumption makes the technology useful for other types of technology, including self-driving cars, robots, gesture-recognizing gadgets, and more. Samsung envisions projects that utilize many of these chips stacked together; a 16-chip stack would be akin to utilizing nearly 86 billion brain neurons.

Via: CNET, Inilabs

Articles: Digital Photography Review (dpreview.com)

 
Comments Off on Samsung uses brain-inspired processors to create digital camera ‘vision’

Posted in Uncategorized


How to Use Smart Objects in Photoshop

17 Aug

We have all felt the frustration of editing an image either in Lightroom or Adobe Camera Raw (ACR), only to remember that we forgot to adjust the white balance, or tweak the sharpening after we’ve spent hours of editing the image in Photoshop. If this has happened to you, let me introduce to you to something called a Smart Object.

Smart Objects give you greater flexibility in your editing workflow inside Photoshop. You can create a Smart Object when opening your image from Lightroom or ACR into Photoshop, and you can also create Smart Objects later on in your editing process, which can be very helpful – especially when you are applying a sharpening (or other) filter.

Smart Object

The icon over the preview of the layer indicates that this is a Smart Object.

So, what does a Smart Object do?

Smart Objects preserve an image’s source content with all its original characteristics, enabling you to perform nondestructive editing to the layer. When opening an image in Photoshop as a Smart Object, you have the ability to double-click the background layer (the base layer) which will open the image in ACR with all the adjustments you previously made, and enable you to make any alterations to the image. These alterations will then be pushed through to the image open in Photoshop.

So for example, say you adjusted an image in ACR and then opened it in Photoshop. After editing the image, you decide that the colour temperature is a little off. If you opened the image in Photoshop without it being a Smart Object, you would have to re-edit the image in Lightroom or ACR, then re-open the image in Photoshop, and finally, move any of the adjustments layers across to the new image. But if it were opened as a Smart Object, all you would need to do is double-click the background layer, make any of the desired adjustments in ACR and you’re done. The Smart Object will update in Photoshop and you can carry on.

Another way Smart Objects can help you is when applying a filter, such as Unsharp Masks or High Pass filters. By creating a Smart Object to apply these filters you will be able to double-click and adjust whichever filter has been applied.

How to Create a Smart Object

In Lightroom:

Inside Lightroom (with your image selected) go to the top menu and click: Photo > Edit In > Open as Smart Object in Photoshop… (see below)

Lightroom-Create 1

OR Right click on the image you want to open in Photoshop. Then select Edit In > Open as Smart Object in Photoshop…

Lightroom-Create 2

Through Adobe Camera Raw:

At the bottom of the ACR window you will see something like this:

ACR Create-1

Clicking on this will open this dialog box. Make sure you have the Open in Photoshop as Smart Objects box checked. If you do not wish to do this (it is set as a default), you can also hold down the Shift key and the Open Image button will change to Open Object at the bottom right of the screen.

ACR Create

These are the two methods for creating a Smart Object before being opened in Photoshop. But what if you want to create one after you have already made adjustments? To do this, follow these steps:

Step 1: You need to create a new layer with all the adjustment layers combined (stamped) into that one layer – but you don’t want to flatten the image. To do this, select the top visible layer (visible layers are denoted by the eye icon directly next to them), hold down the Option/Alt key, and select Layer > Merge Visible. Or you can use the keyboard shortcut: Then do one of the following: Press Shift+Ctrl+Alt+E (Windows) or Shift+Command+Option+E (Mac).

Photoshop will create a new layer containing the merged layers. So you will now have a layer at the top of your Layers panel which has all the visible adjustments made below, stamped into it (the rest will remain untouched).

With the top visible layer selected, go Layer > Merge Visible.

With the top visible layer selected, hold the Alt/Option key down, and select Layer > Merge Visible.

Step 2: With this new top layer selected, right-click and choose Convert to Smart Object. Now any adjustments you apply to this layer such as; motion blur, gaussian blur, any sharpening, etc., you will be able to alter again later by double-clicking on the Smart Object.

Convert to Smart Object

Creating Smart Objects is that simple, and the flexibility they give you is tremendous!

A couple of things to know about Smart Objects:

If you do not open the image in Photoshop as a Smart Object, creating a Smart Object in Photoshop will not give you the same editing abilities. If you want these editing abilities on your background layer, you must open it as a Smart Object.

Next, if you have made adjustment layers with masks applied to them, I would highly suggest that you do not crop the image through the Smart Object. This will crop the background image (your base image) and any masks that you have will not adjust to the new crop so you will have to go do your masking again. I would recommend doing any cropping before opening in Photoshop, or after you are finished in Photoshop.

Don’t be scared of Smart Objects. They are dead easy to make, and offer a massive amount of flexibility. Do you use Smart Objects? Have they helped you in your editing workflow? Let us know in the comments below.

googletag.cmd.push(function() {
tablet_slots.push( googletag.defineSlot( “/1005424/_dPSv4_tab-all-article-bottom_(300×250)”, [300, 250], “pb-ad-78623” ).addService( googletag.pubads() ) ); } );

googletag.cmd.push(function() {
mobile_slots.push( googletag.defineSlot( “/1005424/_dPSv4_mob-all-article-bottom_(300×250)”, [300, 250], “pb-ad-78158” ).addService( googletag.pubads() ) ); } );

The post How to Use Smart Objects in Photoshop by Daniel Smith appeared first on Digital Photography School.


Digital Photography School

 
Comments Off on How to Use Smart Objects in Photoshop

Posted in Photography


Art of Protest: Student-Built Scale Model of $20 Billion ‘Bailout City’

17 Aug

[ By WebUrbanist in Art & Sculpture & Craft. ]

hypotopia city imag

After the Austrian government spent €19,000,000,000 to bail out a bank in 2014, a student group in Vienna created a giant urban model of a place Hypotopia in protest. This visionary city for 100,000 people represents a place that could have been built with the money used to rescue the Hypo Group Alpe Adria banking group.

hyptopia entry path

The city of Hypotopia is and will remain a Utopian fantasy, but represents a novel form of protest – a way for it to take physical form and convey a visceral sense of lost possibilities. This (quite literally) walkable city was opened to the public, allowing people to inspect it in full detail.

According to Lukas Zeilbauer, “while Utopia stands for an ideal fictitious world, ‘hypo’ is a Greek word meaning under, beneath or bellow – so a change coming from the bottom, from the folk.” While fictional architecture has been used by niche practitioners for polemical purposes throughout history, it is rare for such a large-scale, full-city effort to be driven by political motivations.

hypotopia view

Students from the Technical University of Vienna designed and created the model city in Karlsplatz, a central city square, building it over the course of four months. Were it to be built, it would be the sixth largest city in Austria.

Construction of the model was aided by businesses who donated building materials, including wood and concrete blocks, carted in wheelbarrows to the site and assembled according to a predetermined computer model.

hypotopia at night

The public received the project with great enthusiasm, as the majority of citizens did not agree with using taxpayer money to bail out the bank in question.

Meanwhile, the makers of the model did more than just create a miniature mock-up: they actually ran the math and calculated the cost of construction, from architecture to infrastructure, making room and accounting for everything … except big banks, that is (images by Armin Walcher).

Share on Facebook


[ By WebUrbanist in Art & Sculpture & Craft. ]

[ WebUrbanist | Archives | Galleries | Privacy | TOS ]


WebUrbanist

 
Comments Off on Art of Protest: Student-Built Scale Model of $20 Billion ‘Bailout City’

Posted in Creativity


Rebel in your pocket: Canon EOS M3 Review

17 Aug

Unbeknownst to many, Canon has been selling mirrorless cameras since 2012, in addition to SLRs and point-and-shoots. Marketing for the EOS M system is starting to pick up – at least in the U.S. – with two models to choose from: the entry-level EOS M10 and step-up EOS M3, which we’ll be covering here.

The EOS M3 (left) with its cheaper sibling, the EOS M10.

The EOS M3 is very much like a Rebel T6s stuffed into a compact body that resembles the company’s PowerShot models. It uses the same Hybrid CMOS AF III 24.2MP CMOS sensor as the T6s as well as a Digic 6 processor, touchscreen LCD and Wi-Fi with NFC. Unlike the Rebel and EOS DSLRs in general, EOS M bodies use the EF-M lens mount, though EF lenses can be used via an optional adapter.

Trying to figure out where the EOS M3 fits into the mirrorless landscape is tough. Its closest peers, based on price and features, are the Fujifilm X-A2, Olympus E-M10 II and Sony a6000 (we’re leaving Nikon 1 cameras out of the list, as we believe the series is no longer being developed.) Like the EOS M3, the Fujifilm lacks a built-in EVF and has an LCD that flips upward 180°. The Olympus E-M10 II and Sony a6000 offer EVFs but don’t have the ‘selfie’ LCD.

Compared to EOS M10 and Fujifilm X-A2

Below is a spec comparison pitting the EOS M3 against its cheaper sibling, the EOS M10, as well as the Fujifilm X-A2, which is one of its closest competitors.

  Canon EOS M3 Canon EOS M10 Fujifilm X-A2
Sensor 24MP APS-C CMOS 18MP APS-C CMOS 16MP APS-C CMOS
Lens mount Canon EF-M Canon EF-M Fujifilm X
Crop factor 1.6x 1.6x 1.5x
Hybrid AF Yes Yes No
LCD type Tilting
(180° up/45° down)
Tilting
(180° up)
Tilting
(175° up)
LCD resolution 1.04M-dot 1.04M-dot 920k-dot
Touchscreen Yes Yes No
Electronic VF Optional No No
Control dials 2 1 2
Burst rate 4.2 fps 4.6 fps 5.6 fps
Video 1080/30p/24p 1080/30p/24p 1080/30p
Mic input Yes No No
Hot shoe Yes No Yes
In-camera Raw conversion No No Yes
Battery life 250 shots 255 shots 410 shots
Dimensions 111 x 68 x 44mm 108 x 67 x 35mm 117 x 67 x 40mm
Weight 366 g 301 g 350 g

The features that differentiate the M3 vs the M10 are pretty obvious – the M3 offers one more control dial and another for exposure compensation plus a hot shoe (to which you mount the optional EVF), an LCD that can angle downward and superior build quality. All of which suggest Canon has a more committed photography audience in mind. Comparing the M3 versus the X-A2 is a bit more complex, as there are clear tradeoffs for both cameras. One thing is for certain, though: Canon needs to work on battery life – badly.

The EOS-M system

The six currently available EF-M lenses from Canon

Despite being around for over four years, there are just six EF-M lenses available from Canon. They include four zooms (11-22 F4-5.6, 15-45 F3.5-6.3, 18-55 F3.5-5.6, 55-200 F4.5-6.3) and two primes (22mm F2 and 28mm F3.5 macro). There are lenses from third party manufacturers such as Tamron and Samyang/Rokinon (which are manual focus).

The EF to EF-M adapter lets you use giant lenses like this 70-200 F2.8L II.

To get access to the full collection of Canon EF and EF-S lenses, you can use an optional adapter, which sells for about $ 80. As it turns out, there are adapters for nearly every lens mount you can think of, from Micro Four Thirds to Olympus OM.

Articles: Digital Photography Review (dpreview.com)

 
Comments Off on Rebel in your pocket: Canon EOS M3 Review

Posted in Uncategorized


Bridge Camera – What is it and is it for me ?

16 Aug

Bridge Camera is a general name for digital cameras that have some degree of manual control, a long range zoom lens and a viewfinder – but usually not interchangeable lenses. They are somewhere between a point and shoot camera, and a full DSLR.

Between those three shared properties there are many models to choose from. Use the following information to decide if there is a room for one in your kit, or if it is a good first camera to enter the world of photography.

Bridge camera

How did it all begin ?

In the early days of the second millennium, a digital camera was either a point and shoot with very few controls and fun to use for the amateur photographer, or it was a heavy, bulky digital SLR with a price tag far beyond reach of the average photographer (see below). Then there was room for a new type, the bridge camera with manual controls, a long non-interchangeable zoom lens, and decent amount of options. For many photographers the bridge camera was a safe option, connecting the old world of film, and future world of digital photography, hence the name – bridge.

A 2MP DSLR from the year 2000, price tag was USD10,000

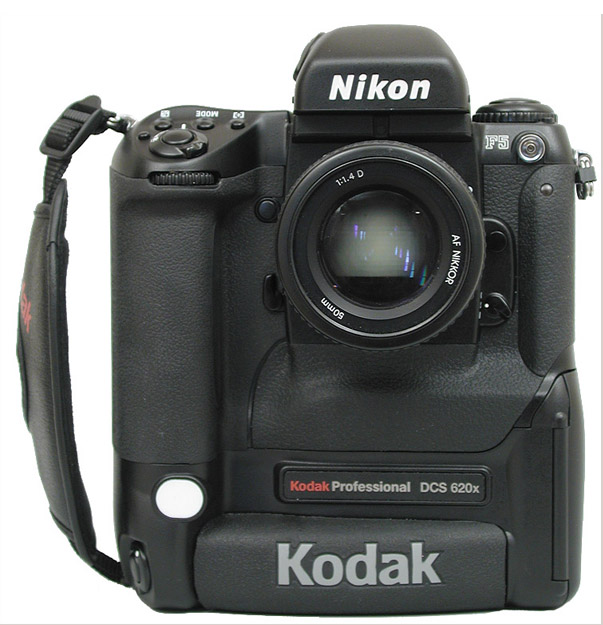
A 2MP DSLR from the year 2000, price tag was $ 10,000 USD.

Take a small image sensor, put it behind a long zoom lens, in a body that looks and feels like an SLR camera, with all the manual controls and gadgets, replace the complicated SLR viewfinder system with a small LCD – and you have created a camera that is a compromise between price, size, and image quality – the bridge camera. A camera that is more than specifications and image quality, a camera that brings the experience of digital photography to non-professionals.

The golden age of bridge cameras was short lived, and it seemed like they disappeared as soon as affordable DSLRs hit the stores. That happened in 2004, but the bridge is still solid.

FujiFilm Finepix 4900Z

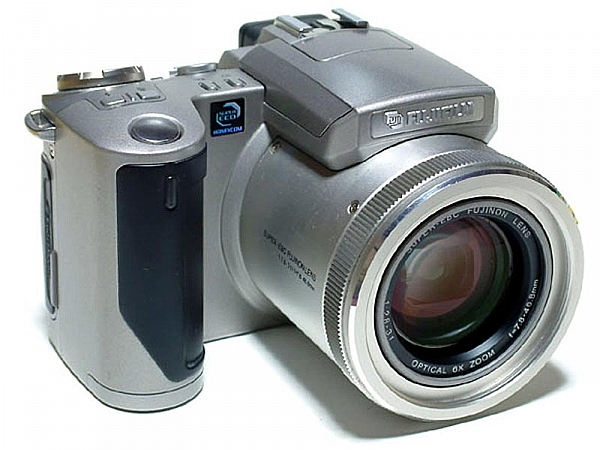
FujiFilm Finepix 4900Z, announced in 2000, was among the first digital stills cameras to use an electronic viewfinder (EVF) instead of the bulk of an optical one.

Is a bridge camera for you ?

A decade later, deep into the age of mirrorless interchangeable lens cameras (MILC) and bridge cameras perform a new role. They stay loyal to their core design values, but with current technologies, they became a formidable tool that often is the right choice, rather a compromise. Bridge cameras today are made by many manufacturers, to fit different photographer’s needs. Some take the traditional task of being a good compromise between price, size and image quality, and others come to replace the DSLR as a complete photographic solution for all your needs.

Here is a quick overview of some leading bridge cameras today, and their strong points.

Panasonic Lumix FZ1000

The capital ship in Panasonic’s fleet of bridge cameras, is no a small camera by absolute measures, but it is a good package size for what it offers. The Lumix FZ1000 ($ 798 USD) offers a great combination of large image sensor (1″ 20MP) with a long, fast zoom lens that is optically stabilized. The camera’s EVF is very large and bright.

This camera has something for the beginner, as well as the seasoned photographer. Its ergonomics and controls resemble the ones of the Lumix G line of MILC cameras, and are made for fully manual operation. It is a very fast and responsive camera, the lens goes from 25mm to 400mm (35mm equivalent) at a fast f/2.8 at the wide side, and f/4 at the long side of the zoom.

Bridge camera review
This camera has the most tools in its box. It works great in low light, and the lens can produce shallow depth of field thanks to the large sensor. It is capable of 4k video and has a microphone input socket for better sound recording. The lens is not the longest, nor the fastest and also not the sharpest lens in the family, but in the right hands it will produce beautiful images that will look great on screen, as well as on prints as large as 16×24 inches.

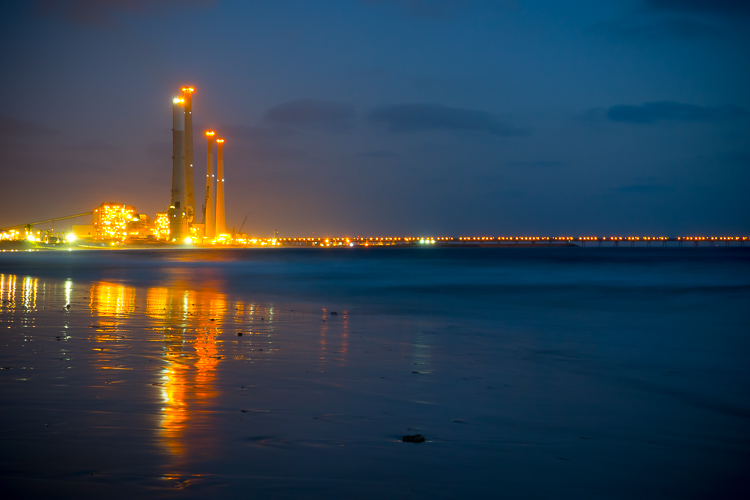
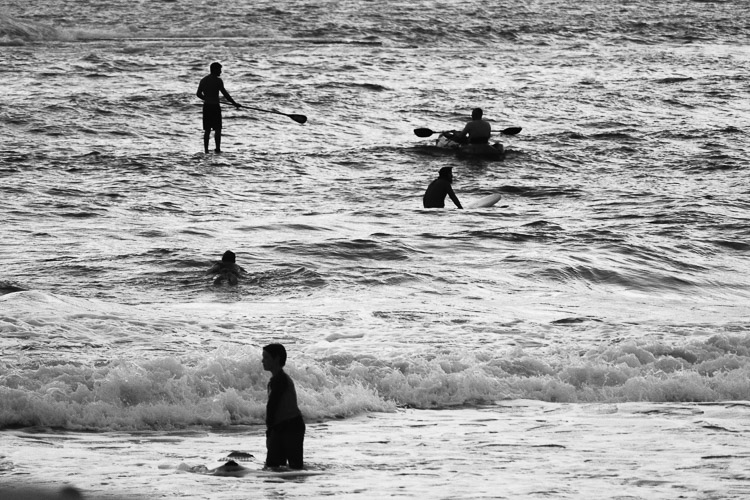
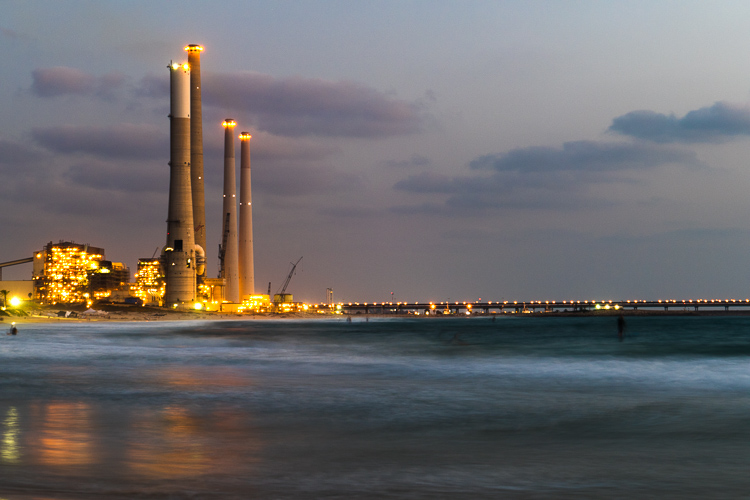
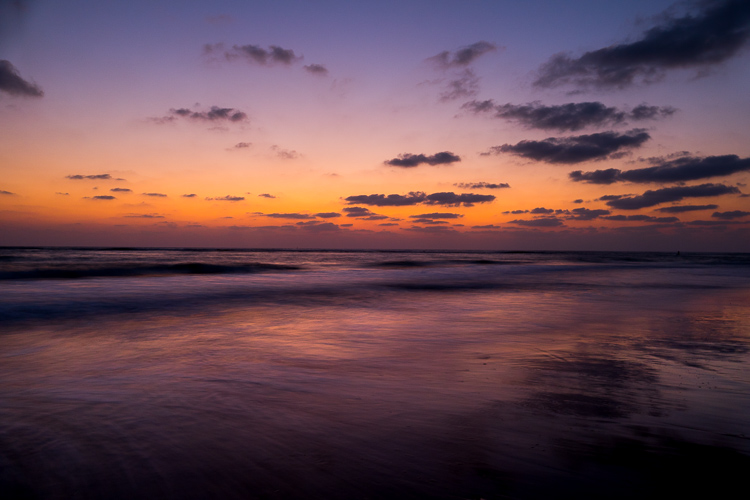
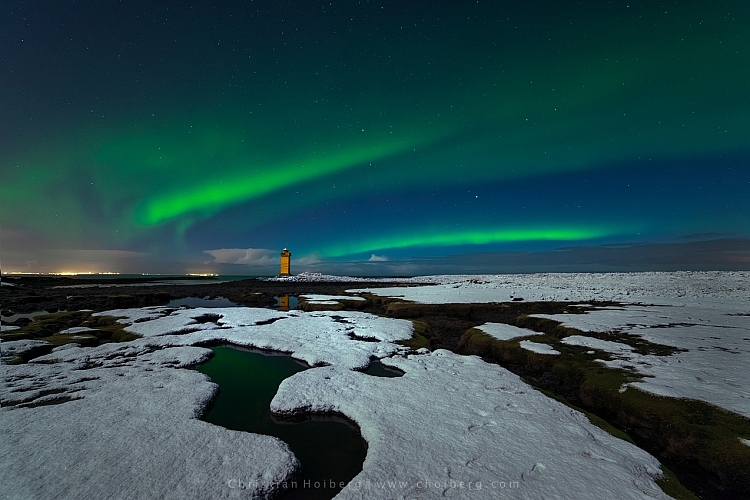
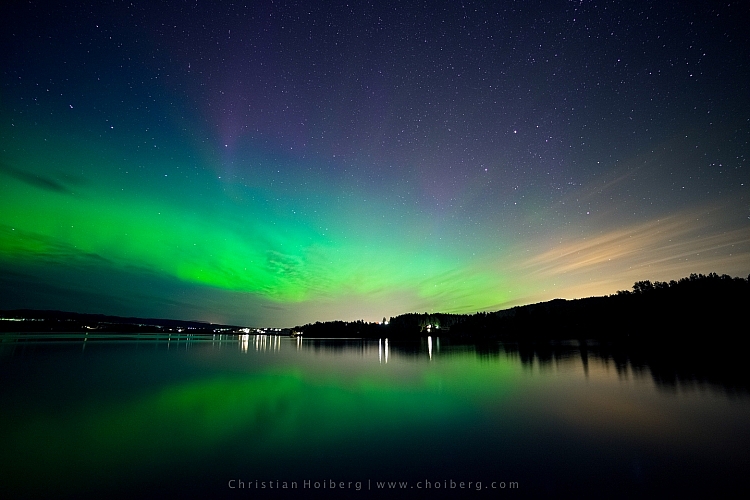
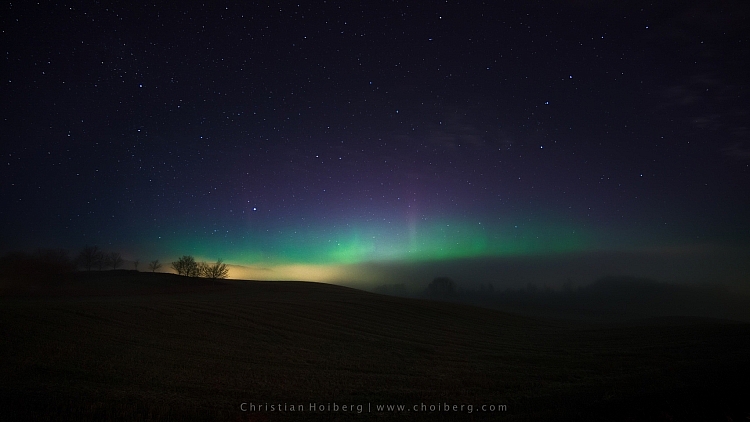
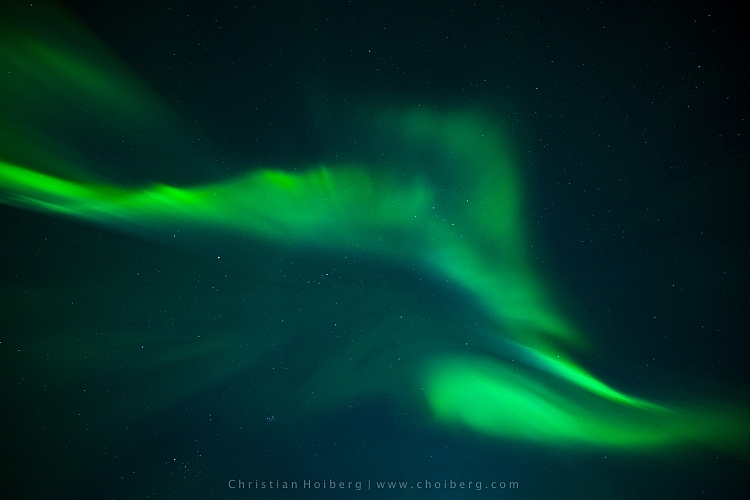
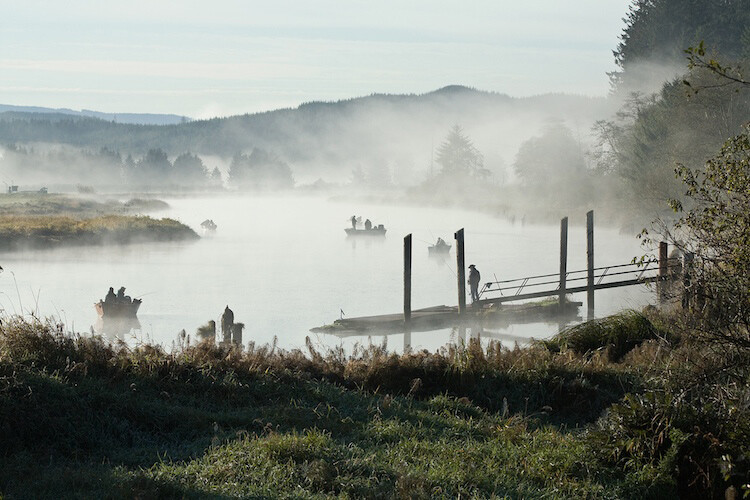
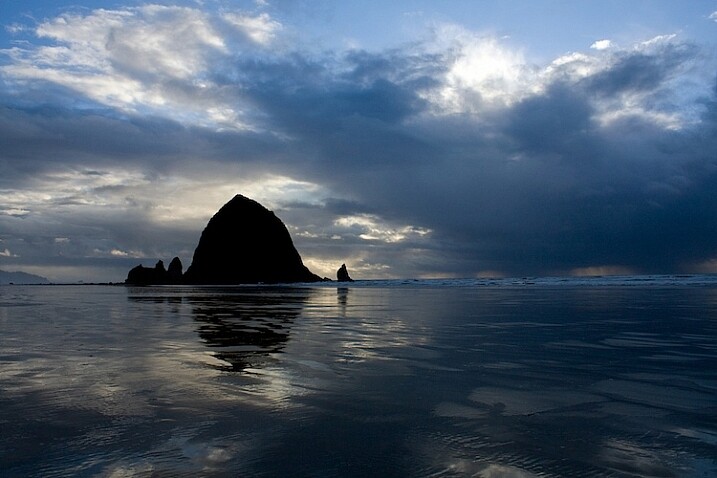
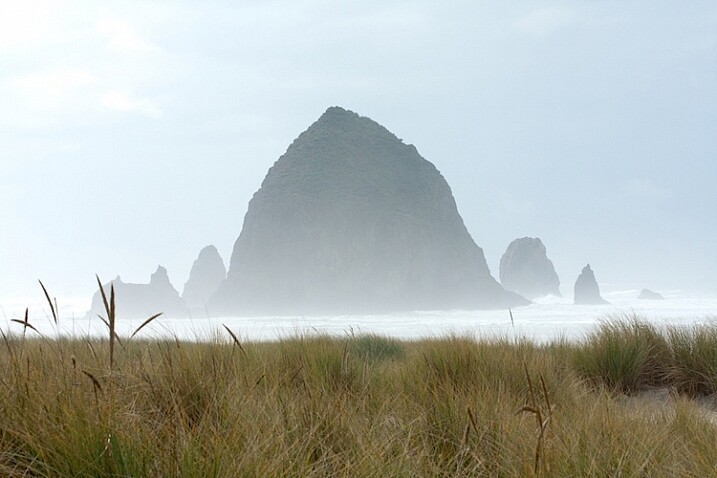
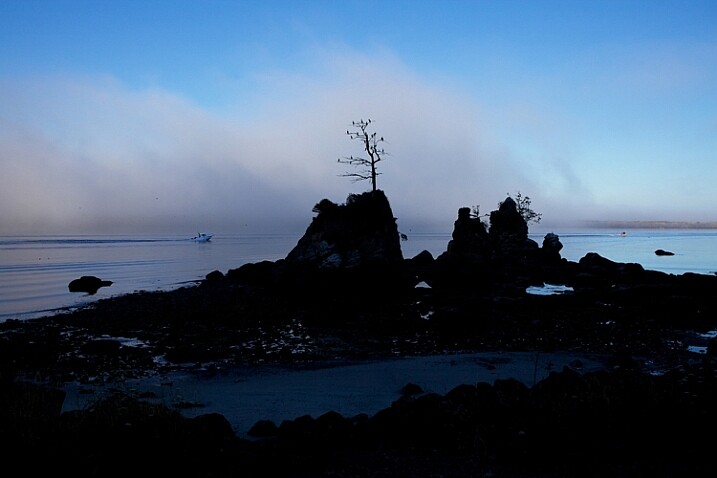
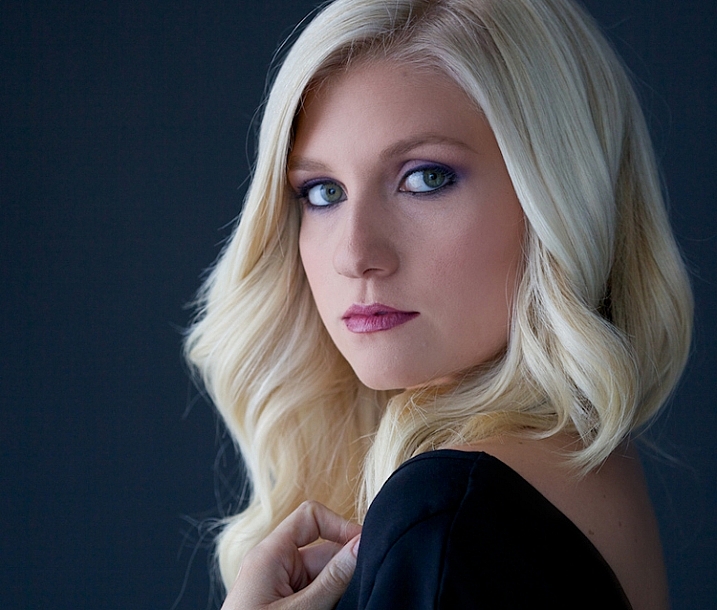
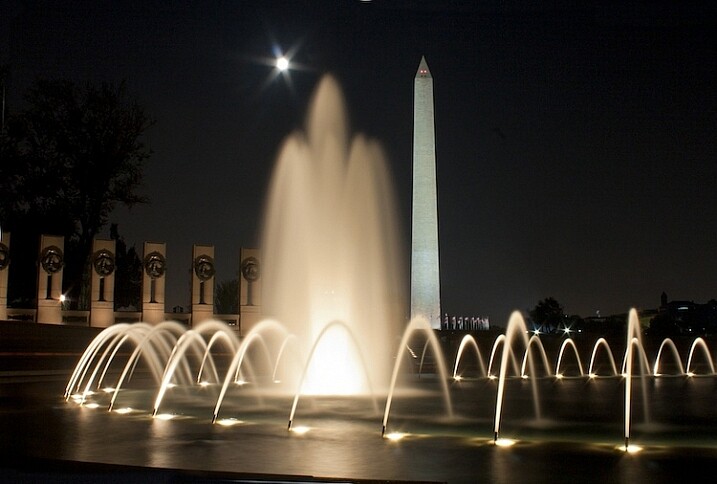
This is the bridge camera to have when you want one camera to do it all. All photos in this article were made with a Panasonic FZ1000.

Bridge camera review

Sony RX10III

The king of all bridge cameras, the Sony RX10III is the one that truly redefines the place of such cameras in the bag of the professional photographer. It costs similar to a professional camera (at $ 1498 USD) and weighs in like one at 1.05 kg (2.32 lb / 37.07 oz), for some photographers it is the best photographic solution available with its unique features.

Aimed at wildlife photographers, Sony’s designers created this camera around the same 1″ 20MP sensor as the FZ1000, but in a weather-sealed body that feels like it was meant to suffer. It has a 24-600mm lens (35mm equivalent) with a fast f/2.4 aperture at the wide end and f/4 at the telephoto side of the zoom. The camera has three control rings around its large lens, of which one is a dedicated aperture control ring, a feature that offers more freedom than any other camera to manual photographers.

The RX10III is a large and heavy camera, but it shines in the most important spot, its image quality. The 24-600mm Carl Zeiss T* lens really makes the most out of the large sensor, at any point along the huge range, it performs in a way that makes you want to use it for your next shoot. For the wildlife photographer the camera offers a speedy 14FPS (frames per second) rate and a unique ultra slow motion video.

This is the bridge camera to take on a wildlife photo-journey, or if you are a one man show photojournalist. It will make sure you will return with great photographs.

Bridge camera review

Nikon Coolpix P900

Nikon Coolpix P900

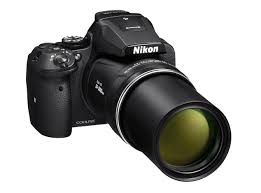
The Nikon Coolpix P900, is an optical miracle but at a high cost in usability other than day time wildlife or other long distance objects.

The Nikon Coolpix P900 ($ 529 USD) is the longest bridge, with its extremely long 24-2000mm zoom lens (35mm equivalent). With f/2.8 at the wide end and f6.5 at the telephoto end of the zoom, the P900 has the longest lens you can get in a camera without breaking your back or your savings. For example, the same focal length in a fullframe Nikkor lens would cost you about $ 95,000 USD and it weighs 38.5 pounds. This telephoto wouldn’t be available without Nikon’s five-stop optical image stabilizer, that makes it possible to use the mighty lens without a tripod, even at a shutter speed of 1/60th of a second, given your subject is not moving.

At 899g (1.98 lb / 31.71 oz) the Nikon Coolpix P900 if far from being called a compact camera. It should not be your first choice if you plan to do low light photography or video, nor does it have the best image quality. You should choose this camera if you are going to photograph real far subjects in broad daylight.

Bridge camera review

Panasonic Lumix FZ300

The Lumix FZ300 ($ 498 USD) is a well balanced mix of technologies and features, together they make this camera one of the funnest to use in most photographic situations, within the limitations of a small sensor. Panasonic chose a fairly low resolution sensor for this camera of only 12mp, in order to better its low light performance. The sensor is behind a 25-600mm lens (35mm equivalent) with a constant maximum aperture of f/2.8, a combination that not only allows for more control over the depth of field and creating beautiful portraits, but is also important to make the long lens useful in a larger variety of scenes with different light conditions.

The FZ300 is a mature bridge camera that works well within its size and cost limits and it makes the most out of the different components. It takes beautiful 4k video and make use of its that capability also to produce 8mp stills images at an astonishing rate of 30 FPS, a useful feature when you’re photographing fast moving objects. Its weather sealing will help you make the right decision before leaving home for a winter vacation, or just to get closer to the waves when photographing on the beach. This camera should be your choice if you wish to have lots of fun, but are not going to make very large prints.

Bridge camera review

A digital camera is a magnificent combination of optical, electronic and digital devices, put together in order to let you fulfill your photographic creativity and ideas. They come in many different styles and forms, some will fit for you more than others. It is always good to check-in with yourself as to exactly what is it that you want to photograph most, then go look for the camera that can give you that, rather than buy the one with the most impressive specification sheet.

Have you used a bridge camera? If so which one? Do you think there’s still a place for them in today’s photography world? Please share your thoughts in the comments below.

googletag.cmd.push(function() {
tablet_slots.push( googletag.defineSlot( “/1005424/_dPSv4_tab-all-article-bottom_(300×250)”, [300, 250], “pb-ad-78623” ).addService( googletag.pubads() ) ); } );

googletag.cmd.push(function() {
mobile_slots.push( googletag.defineSlot( “/1005424/_dPSv4_mob-all-article-bottom_(300×250)”, [300, 250], “pb-ad-78158” ).addService( googletag.pubads() ) ); } );

The post Bridge Camera – What is it and is it for me ? by Ouria Tadmor appeared first on Digital Photography School.


Digital Photography School

 
Comments Off on Bridge Camera – What is it and is it for me ?

Posted in Photography


Digital Dynamo: Massive Motion-Activated Media Wall Animates Office

16 Aug

[ By WebUrbanist in Art & Installation & Sound. ]

motion activated display

Spanning 1,700 square feet of interior walls in a Washington, DC office building, this stunning digital display cycles through different settings and seasons, reacting to workers as they walk through the building.

Designed by ESI, the bright and dynamic lobby installation is also visible through expansive glass panels at the front of the building, making it visually accessible to the public as well.

seasons lifecycle media

seasons series

The design shifts between three core programs: Color Play, Cityscape and Seasons. The scenes are constantly shifting, generated by algorithms that keep them fresh from one day to the next. Ambient sounds play in the background, adding a layer of effect to the visual experience.

series rose blossoms

exterior view

The installation is 80 feet wide and 13 feet high, seamlessly integrated into the architectural surfaces. In Season mode, it displays DC’s famous cherry trees through periods of the year. In Color Play, bright patterns light up the walls. In Cityscape, iconic architecture, statues and transportation settings are shown.

color play interactive

motion display

“The different media create distinct rhythms to give terrell place a unique identity and strong street presence,” says Michael Schneider, Senior Creative Technology Designer at ESI design. “Each of the media scenes reflects the time of day and the movement of people through the lobby, acting almost as a large abstract data-visualization of the ebb and flow of Terrell Place.”

Share on Facebook


[ By WebUrbanist in Art & Installation & Sound. ]

[ WebUrbanist | Archives | Galleries | Privacy | TOS ]


WebUrbanist

 
Comments Off on Digital Dynamo: Massive Motion-Activated Media Wall Animates Office

Posted in Creativity


How to Photograph the Northern Lights or Aurora Borealis

16 Aug

Tips for seeing and photographing the Northern Lights:

Northern Lights, also known as Aurora Borealis, might be one of the most fascinating phenomena to photograph during the night. Watching the sky turn green, blue, pink and even red, is something that will change you forever. After seeing The Lady in Green countless times, I still find myself shouting in awe when she’s elegantly dancing in the sky.

Innfjorden-Aurora-Horizontal-Reflections

Seeing, and photographing, the Northern Lights aren’t something you can do all over the world. The truth is that even if you’ve booked a flight to northern Norway or Iceland, there’s no guarantee that you will see the northern lights at all.

How to see the Northern Lights

Be in the Northern Hemisphere

Unfortunately, the Northern Lights aren’t visible all over the world. As the name might indicate, they are a phenomenon visible in the northern hemisphere. Places such as northern Norway, Iceland and Alaska are typical areas where people travel to witness the Aurora Borealis.

Lauarvann-Aurora-Metorite

That being said, during extreme solar storms your might be able to see the phenomenon further south too, but not as powerful as in the north.

So, the first step in seeing the Northern Lights is to travel to the north. Remember that the Aurora Borealis is a night phenomenon and since summers in the north have up to 24 hours of sun, you should plan your visit for late fall or winter.

Get away from light pollution

It’s nearly impossible to see the Northern Lights if you’re standing in the downtown of any larger city with light pollution. Yes, it is possible; if the KP Index (the strength indicator for Northern Lights) is at its highest. However, to increase the chances of seeing, and capturing a good shot of the Northern Lights, you should get away from light pollution, and find a location where you can clearly see the stars.

vatnsleysustrandar-aurora-borealis

I have lived in a small town not far away from Oslo, Norway for most of my life. Yet, it wasn’t until a few years ago I realized that even here in southern Norway we can see the Northern Lights. In fact, it happens more often than you realize.

There are a few different tools you can use to see what area close to you is dark enough to see the stars, and possibly the Northern Lights. Dark Sky is a great website for this exact purpose, and it shows a detailed map of the light pollution.

How to photograph the Northern Lights

Now that you know where, and how to discover the Aurora Borealis, let’s see how you can capture it with your camera.

Use a tripod and remote shutter release

Since you will be photographing in the dark you’ll be working with long exposures (long shutter speeds), and it’s therefore essential that you use a tripod to ensure you get a correctly exposed image that is still of usable quality.

fiskumvannet-northern-lights

You should also consider using a remote shutter when you’re photographing the Northern Lights. This removes any chance for vibration caused by pressing the shutter. Optionally, you could use the 2-second timer, but sometimes you want to capture the image at that exact moment with no delay.

Use a wide angle lens at a large aperture

When photographing the Northern Lights you want to use a wide angle lens. This lets you capture both the landscape and the sky in one shot. When the Northern Lights are strong you’ll also notice that they stretch all over the sky and it’s impossible to capture all of it in one image, unless you use a wide angle.

northern-lights-hedenstad

During nighttime photography you want to use an open aperture such as f/2.8 to allow enough light to reach the sensor. When using my 14mm I more or less always have it at f/2.8, as I rarely use it at any other time than during the night.

Set the shutter speed according to the KP Index

The shutter speed depends on the strength of the Northern Lights. I’ve experienced when one second at ISO 400 has blown out the green (I’ve never seen the Aurora as powerful as that since) but then it can be barely visible at ISO 3200 and a shutter speed of 20 seconds at other times.

You should also keep in mind the movement of the Northern Lights. If they area quickly changing shape, a long exposure might blur them out too much, and you’ll lose detail. It’s better in that instance to increase the ISO, and lower the shutter speed, so you freeze the motion and capture all its textures.

corona-aurora

Another factor you should keep in mind when you choose the shutter speed is the movement of stars. If you go beyond 25 seconds you’ll start seeing small startrails. Sometimes this can give an interesting effect, but if you want to have a sharp and crisp image, be sure to use 25 seconds or less as your shutter speed.

Set a cool white balance (3000-4000K)

I’ve experienced that the ideal white balance is somewhere between 3000-4000 Kelvin when photographing at night. This results in a cooler, and more natural look in the dark sky. If you go above 4000K you’ll also notice that the green in the Northern Lights gets a muddy look, which you want to avoid.

Avoid using Automatic White Balance and other preset modes such as cloudy. While these often do a great job during the day, they’re more of a gamble at night. You could get some okay results with AWB but generally you won’t.

Innfjorden-aurora-vertical

Bring something warm to drink!

I had to include this last tip. Remember, when you’re photographing the Northern Lights that it’ll most likely be winter or late fall. That means that temperatures drop, and since you’ll be out during the night, there’s no sun to warm you.

Bringing a thermos with something warm to drink could be wise during these long winter nights. Especially if you’re planning to stay out for a while or even make a timelapse.

googletag.cmd.push(function() {
tablet_slots.push( googletag.defineSlot( “/1005424/_dPSv4_tab-all-article-bottom_(300×250)”, [300, 250], “pb-ad-78623” ).addService( googletag.pubads() ) ); } );

googletag.cmd.push(function() {
mobile_slots.push( googletag.defineSlot( “/1005424/_dPSv4_mob-all-article-bottom_(300×250)”, [300, 250], “pb-ad-78158” ).addService( googletag.pubads() ) ); } );

The post How to Photograph the Northern Lights or Aurora Borealis by Christian Hoiberg appeared first on Digital Photography School.


Digital Photography School

 
Comments Off on How to Photograph the Northern Lights or Aurora Borealis

Posted in Photography


Canon and Sony dominate EISA awards for photographic equipment

16 Aug

The European Imaging and Sound Association (EISA) has awarded Canon and Sony four titles each from the 19-strong list of photography products it has held up as the best of the year. The European DSLR Camera award, which is the main photography title, went to the Canon EOS 80D, while the EOS-1D X Mark ll won the European Professional DSLR category. Canon also picked up awards for its EF 35mm F1.4L II USM lens (Professional Lens of the Year) and for its imagePROGRAF Pro-1000 printer.

Sony’s awards came in the Premium Compact  for the Cyber-shot RX1R II, Professional Compact System Lens for the FE 85mm F1.4 GM, Prosumer Compact System Camera  for the a6300 and Photo & Video Camera for the a7S II categories.

Sigma collected the DSLR Zoom Lens title for its 50-100mm F1.8 DC HSM Art lens, while Tamron won the overall DSLR Lens award for the recent SP 85mm F1.8 Di VC USD. Other notable awards are Prosumer DSLR of the Year for the Nikon D500 and Fujifilm’s X-Pro2 collecting the Professional Compact System Camera title. The Photo Innovation award went to Panasonic’s DUAL IS system as demonstrated in the GX80.

The EISA Awards have been running since 1982 when the only title was Camera of the Year – which went to the Minolta X700. Today’s awards are decided by the 14 editors of the Photography Experts group who represent weekly, monthly and bi-monthly photography magazines from 14 countries across Europe.

For more information visit the EISA website. 

Articles: Digital Photography Review (dpreview.com)

 
Comments Off on Canon and Sony dominate EISA awards for photographic equipment

Posted in Uncategorized


Tips for Creating a Personal Photography Project

16 Aug

One of the best ways to grow your photography is by working on a personal photography project. As a professional photographer, I am always working on personal projects. It’s a way to keep myself inspired, and to feel challenged to grow. It’s also a great way to keep my portfolio fresh, try out new ideas, and grow my vision as a photographer.

Shooting a place more than one time gives you the opportunity to capture the place in the perfect light. I had visited this part of the Oregon Coast more than a dozen times before the perfect scene appeared.

Shooting a place more than one time gives you the opportunity to capture the place in the perfect light. I had visited this part of the Oregon coast more than a dozen times before the perfect scene appeared.

In this article, I will share with you:

  1. What is a personal photography project?
  2. What’s the value of working on personal projects?
  3. What makes a good project?
  4. How to be successful
  5. Ideas for personal photography projects of your own

What is a personal photography project?

I define a personal photography project as choosing a subject to shoot over and over again over time. It can be as simple as shooting your kid’s sporting event every weekend, photographing an intriguing building near your home six times, or creating a series of portraits of your friends.

Personal-Projects-Oregon-Beach-CBB

I photographed about 60 miles along the northern Oregon coast over a period of six months. I created a route that I drove whenever I could. By shooting the same place over and over again, I was able to truly capture the personality of the places.

2 – What’s the value of personal projects?

Some photographers are reluctant to shoot the same subject over and over again, but by photographing it more than once, it gives you some great opportunities to grow as a photographer.

  1. It gives you the chance to get it right. Have you ever said, “I wish I would have done X better?” By going back and shooting something more than one time, you create the opportunity to analyze your mistakes, and go back and do it again. In this exercise, you shoot one day, analyze what you can do better, then tweak your shooting until you learn to nail it every time.
  2. It gives you some structure. When you have some free time, you don’t have to wonder what you are going to shoot. If you have committed to photographing the City Hall in your town six times, you can just go shoot it. On the other side of the coin, you can also put your shoots on your calendar weeks, or months, ahead of time.
A different mood of Cannon Beach, Oregon.

A different mood of Cannon Beach, Oregon.

A Project could look like this – Shoot City hall at:

  1. Sunrise
  2. Sunset,
  3. Morning light
  4. Afternoon light
  5. Golden hour
  6. Dusk
  7. With the moon
  8. On a sunny day
  9. On a cloudy day
  10. On a rainy day
  11. On a Snowy day
  12. During each of Spring, Winter, Fall, and Summer

Can you begin to see the many opportunities, and how to create different pictures of just one thing?

I was fascinated by this lone tree growing out of a huge rock near Garlibaldi, Oregon but I wanted to get it with a beautiful sky.

I was fascinated by this lone tree growing out of a huge rock near Garlibaldi, Oregon, but I wanted to get it with a beautiful sky.

It took many evenings of watching for the perfect sunset, but the photo was well worth it.

It took many evenings of watching for the perfect sunset, but the photo was well worth it.

Once you nail the technical part of a situation, you can challenge yourself to do something really different. This is the point the great photos come in!

The great photos don’t come when you are trying to figure out how to focus your camera, use your flash, or what is the right exposure or camera angle. Once you’ve got all that nailed, the real creativity begins! That’s when the great pictures happen. Here’s an example:

Posey-Personal-Projects

This was my first glamour shoot. I just practiced finding the perfect window light in my studio. And, as a journalistic photographer, I rarely do any retouching, but this subject offered the opportunity to pull out some new retouching tools, and also reminded me to pose the subject in such a way to hide skin imperfections.

I fell in love with the work of a glamour photographer, Sue Bryce. She does beautiful work and doesn’t use studio lighting, she uses window light in a very sophisticated way. I decided to emulate her work by studying her technique. I had never studied glamour photography, so not only would the lighting be a challenge, but the posing would be too. Here’s what I did:

  • I studied her technique, watched some YouTube videos, and took detailed notes.
  • I practiced posing myself in front of the mirror.
  • I did some tests with window light in my studio to find the best times of day to shoot, and to decide what kind of reflectors, props, and backdrops I needed.
  • I found a few make-up artists who wanted to build their portfolio, and offered to work with me for prints.
  • I scheduled several friends for shoots.
Suzanne-personal-projects

This was my second shoot. I practiced using a different kind of light, a little bit harder with more fill.

I also had the chance to work with posing and hands. It felt awkward to me, and I didn’t really get the subject to do what I wanted her to. It was time to go back to the mirror and practice with my own hands, then create language that would help my subject move into those poses.

allie-personal-projects

This shoot went much better. I was learning, developing skills, having fun, and building my confidence in this new world of glamour photography.

Tyler2-personal-projects

By my fourth subject, I had learned how to direct my subject into a pose, and had a great feel for window light.

Tyler-personal-projects

I had a few new pieces for my portfolio, not to mention a few happy friends with prints.

Let’s back up a few steps and review some of the ideas we’ve touched on so far.

3 – What makes a good photo project?

  1. Have an objective, a goal. Be clear on your outcome. It can be to master a new skill, to create a series of prints, or to make a calendar as a gift.
  2. Select a subject that you can return to over and over again.
  3. Choose something you are really interested in, and passionate about. For ideas, think about the activities you and your family are involved in. Would any of your hobbies make a good project? Are there places you love to visit or photograph?
  4. Find something to shoot within 10 or 20 minutes of your home.
  5. Commit to something that either happens on a regular basis at a scheduled time, or a place you can just show up and shoot anytime. For example, a ballet class that happens every week or a favorite park, botanical garden, or lake.
  6. Choose a subject with a variety of visual possibilities.
  7. Choose a subject with a learning goal, or end product in mind. You might want to learn more about light, or shooting in manual mode, or photographing people.
The Capital Building in Washington DC is stunning at night, and I wanted to capture the full moon rising behind it. This was the sixth night I made a trip to the monument. Persistence paid off.

The Capitol Building in Washington, DC is stunning at night, and I wanted to capture the full moon rising behind it. This was the sixth night I made a trip to the monument. Persistence paid off.

Several years ago, while living in Washington, DC, I chose to shoot the monuments with a full moon. Why was this a good project? Let’s look at the checklist above and compare

  1. I love documenting history, enjoy being out in the evenings taking pictures at night, and I always feel a sense of wonder seeing the Washington, DC monuments.
  2. I wanted to create a set of prints that I could share and offer to my corporate clients.
  3. Getting to the monuments was easy for me.
  4. I could write the full moon dates in my calendar months ahead of time and keep my schedule clear. (Although I did get strange looks when I told friends I couldn’t join them for dinner because it was a full moon!)
  5. There are lots of monuments to photograph within walking distance.

I loved having something on my calendar to shoot. It provided some structure, and gave me something to shoot for several months without having to come up with a new idea. And, now I have a beautiful collection of photograph for my portfolio.

This is the World War II Memorial in Washington DC with the Washington Monument in the background. Committing to shooting a personal project is fun, rewarding and builds your self-confidence.

This is the World War II Memorial in Washington, DC with the Washington Monument in the background. Committing to shoot a personal project is fun, rewarding, and builds your self-confidence.

4 – How to be successful

  1. Make a commitment and write out the whys of doing the project.
  2. Find an accountability partner, a coach, a class, or a photo group, to share your progress.
  3. Put the time commitments on the calendar. Treat this as a new ritual. Plan the time and treat it as sacred.

5 – Ideas for your own personal photography projects

Here are some ideas to get you started on your own personal project.

  • Find a photographer or a style you love and try to mimic that style. I fell in love with Georgia O’Keefe’s paintings and her use of color. Ultimately, studying her art led me to creating these photographs. 
  • Shoot the full moon every month for six months. I chose to shoot the monuments in Washington, DC with a full moon and created a beautiful series of art prints.
  • Photograph a local park 10 different times, at different times of day. This is a simpler version of my Oregon Coast project.
  • Shoot a local landmark at all times of the day. It could be a building, for example the City Hall, a mountain, or a river. This project will give you an opportunity to learn about the quality of light at different times of days, the right angles, and it’s simple! Buildings and mountains are always there for you.
  • Shoot a kid’s sporting event every weekend. This will help you refine your skills with stopping action and learning focus.
  • Make portraits of your relatives and create a beautiful coffee table as a Christmas gift for the family. A great way to take care of that holiday gift list, as well as learn more about photographing people and developing a style of your own.
  • Photograph pets. Pets can be a real challenge. It will be an opportunity to learn about capturing action as well as learning about light.

Shooting projects is an amazing way to grow your portfolio and your self-confidence. Do you have an idea for a project? Share it with me in the comment section below, I’d love to hear about it or see your images.

googletag.cmd.push(function() {
tablet_slots.push( googletag.defineSlot( “/1005424/_dPSv4_tab-all-article-bottom_(300×250)”, [300, 250], “pb-ad-78623” ).addService( googletag.pubads() ) ); } );

googletag.cmd.push(function() {
mobile_slots.push( googletag.defineSlot( “/1005424/_dPSv4_mob-all-article-bottom_(300×250)”, [300, 250], “pb-ad-78158” ).addService( googletag.pubads() ) ); } );

The post Tips for Creating a Personal Photography Project by Vickie Lewis appeared first on Digital Photography School.


Digital Photography School

 
Comments Off on Tips for Creating a Personal Photography Project

Posted in Photography


1956 Stereo-Nikkor 3.5cm F3.5 lens auction goes live on eBay

16 Aug

A Stereo-Nikkor 3.5cm F3.5 lens said to be in mint condition has been put up for auction on eBay. This speciality lens was designed for the Nikon S-Mount rangefinder to produce stereoscopic 3D images on a single photograph. The lens is being offered as part of a full kit that also includes a brown Nikon leather case, a Nippon Kogaku lens cap, original silica gel, Nikon Stereo Prism, and original Nikon Stereo L 38 filter.

According to the eBay seller, there’s a chip in the prism’s glass and ‘very tiny scratches’ on the lens, but otherwise the items are said to be in excellent condition. Unfortunately, not much information about the Stereo-Nikkor exists; the product was introduced in December 1956 and discontinued in 1961 or 1962, according to Mir.com. Estimates place Stereo-Nikkor manufacturing at between 100 and 200 units during its brief production.

Though the auction currently has $ 1,125 in bids, it has not reached its minimum reserve amount. The product is located in Vienna, and has a $ 300 shipping rate.

Via: PetaPixel

Articles: Digital Photography Review (dpreview.com)

 
Comments Off on 1956 Stereo-Nikkor 3.5cm F3.5 lens auction goes live on eBay

Posted in Uncategorized