We all have those moments in our photographic careers where things just don’t pan out exactly how we imagined them. Our image is almost exactly as we imagined it to be, but perhaps there are some spots, blemishes, marks or distractions that just don’t fit in the frame.
In most cases, all the elements of the image tend to work together to tell the story, but sometimes we just to clean the image up a tad, to get rid of some of the distracting elements that take away from that story. Luckily, most editing software, including Photoshop, have very easy, yet powerful tools, that you can use to clean up your image and get rid of the distractions.
The Healing Tool in Photoshop
This article provides a basic explanation of the Healing Tool in Photoshop, that is very effective in removing or cleaning out distracting elements in an image. For the purposes of this article, I am using Photoshop version CS6. The Healing Brush Tool in Photoshop is made of three parts. These are probably the most used tools in the healing tool family, and 90% of the time they get the job done.
- Spot Healing Brush Tool
- Healing Brush Tool
- Patch Tool
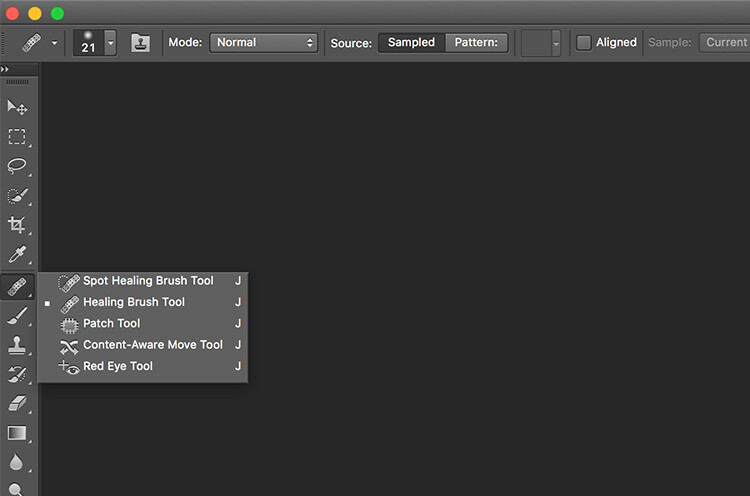
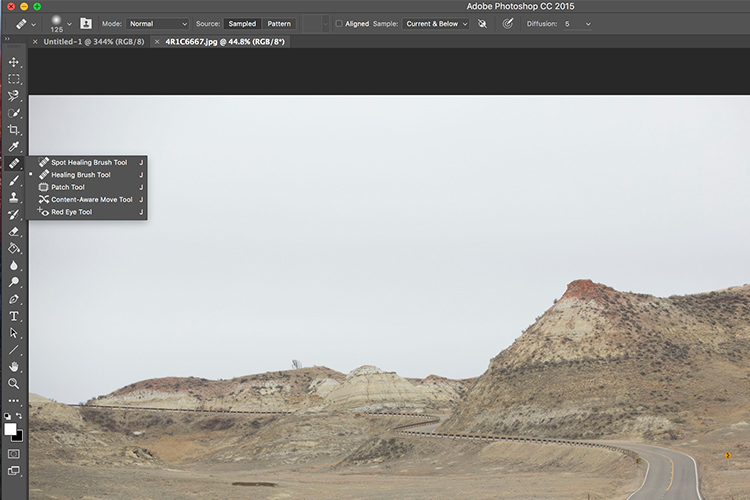
The Healing tool in PS has the bandaid icon. When clicked, it opens up this menu. You can also click the J key on your keyboard to access this tool.
Here is an example of a simple landscape image that was cleaned up using the Spot Healing Brush Tool, and the Healing Brush Tool.
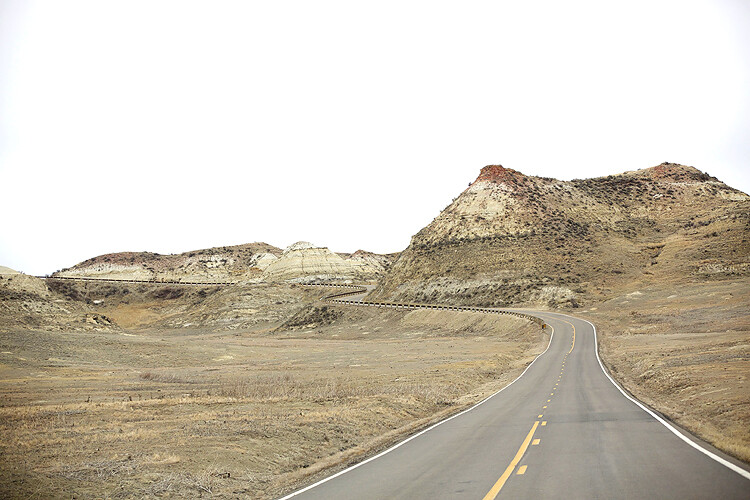
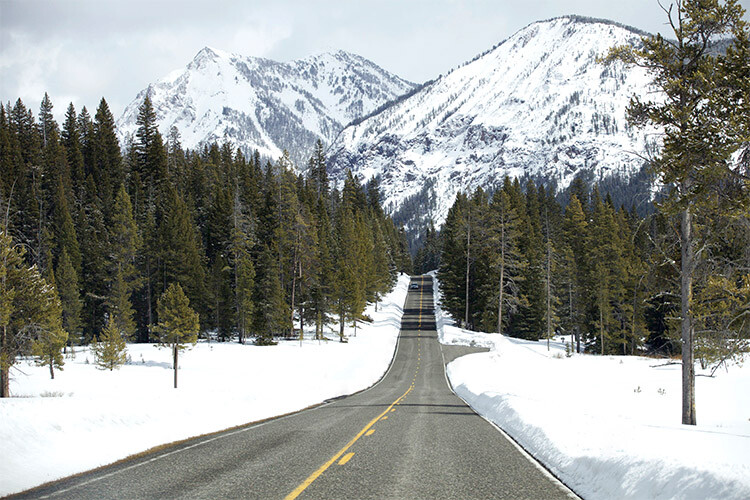
Original Image – SOOC. I am looking to clean out some of the distracting elements here like the ‘Road curves’ sign on the right, the dead bushes on the left and the little tree on the top of the hill to the left of the image.
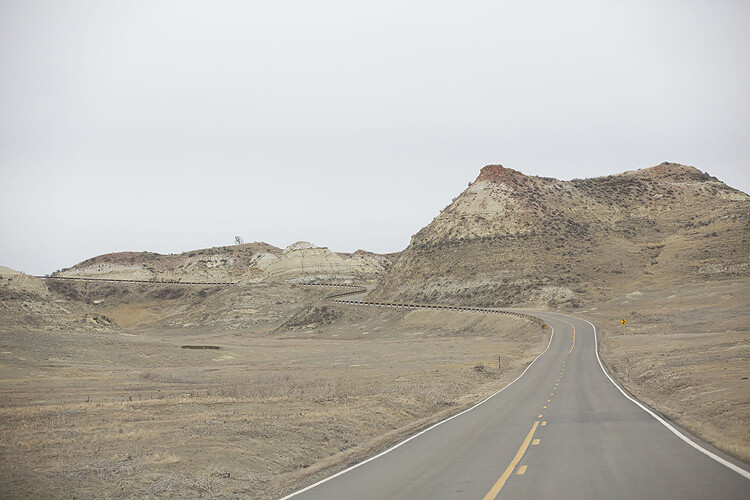
The first step, before any cleanup is done, is to perform any basic edits to the image. I consider adjustments in exposure, contrast and temperature to be basic adjustments. For this image, I increased the exposure and added some contrast, to highlight the browns in the hillside. This image was taken from a stopped car because I really liked the curve in the road along the small hill on the top right side. But I wanted to get rid of the road sign and the dead branches on the sides of the road leading up to the hill.
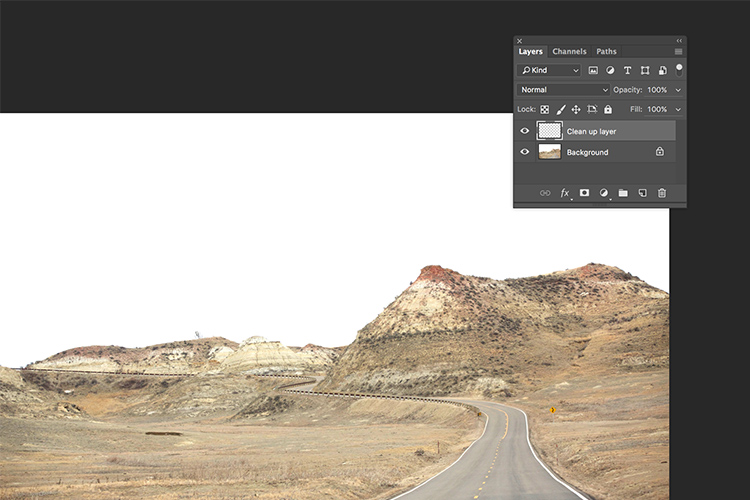
Once I brightened and adjusted the contrast of the image, I created a new layer in PS to add my cleanup edits. I called it, “Clean up layer” for easy identification. This keeps all the cleanup elements together, so I can toggle between the On and Off to see the affects of the cleanup at any time (toggling a layer On and Off is done by clicking on the eyeball symbol to the left of the layer.)
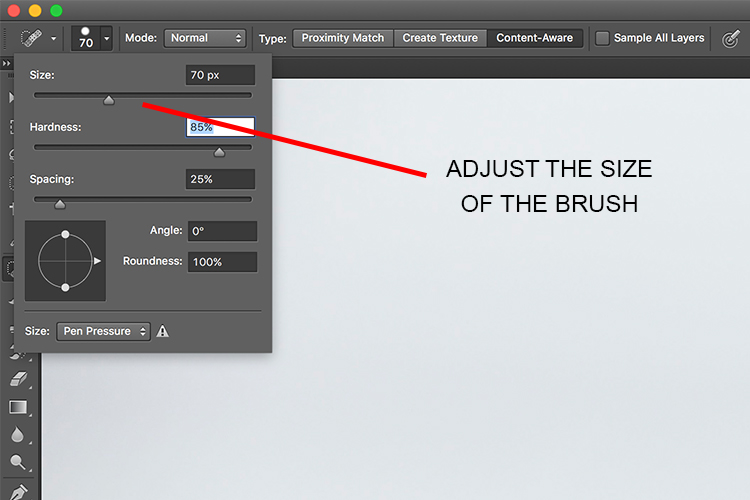
The Spot Healing Brush Tool is used for quick, easy cleanups. Once you select the it, and adjust the size of the brush (use the left square bracket key [ to decrease size of the brush and right square bracket key ] to increase the size), you simply click on the blemish to remove it. Also set Sample to “Current & Below” or “All Layers” so it will pull pixels from your base layer (otherwise you’re just healing with a blank layer).
The Spot Healing Brush automatically selects the source area from which to clone. So sometimes it might not be completely accurate, because the software is making the judgement on where is the best source to take a sample. A good tip is to zoom in to the specific area and watch the pixels closely while making the adjustments. The Spot Healing Brush works best on small areas and easy cleanups.
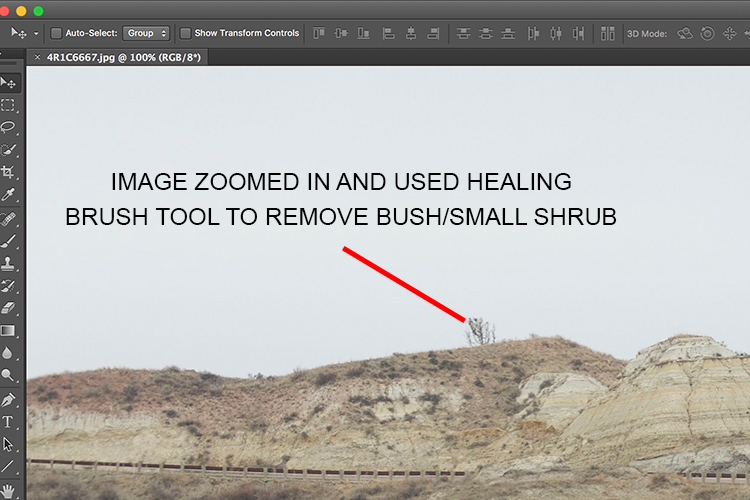
The Healing Brush Tool
I use the Healing Brush Tool is for slightly more complex cleanups, especially areas that have sharp edges, curved, or straight lines that separate areas of different textures and color. As you can see here, the top of the hill has a small tree which sticks out against the overcast sky. For more accurate editing, zoom in to the area that needs to be edited, so as to eliminate any errors. It is hard to be completely accurate if you are not zoomed in accurately to the specific area that needs to be edited.
Once selected, theHealing Brush Tool requires you to set a source point from which to heal the affected area (that is the easiest way to think about the healing action, in my opinion). I set the right size of the brush (use the [ ] keys to increase or decrease brush size, OR click on the slider as shown in the image below), then I select the edge of the line closest in texture to the source area. Holding my cursor down (holding down the mouse button), I drag the cursor from start to finish over the object to be removed.
After cleanup
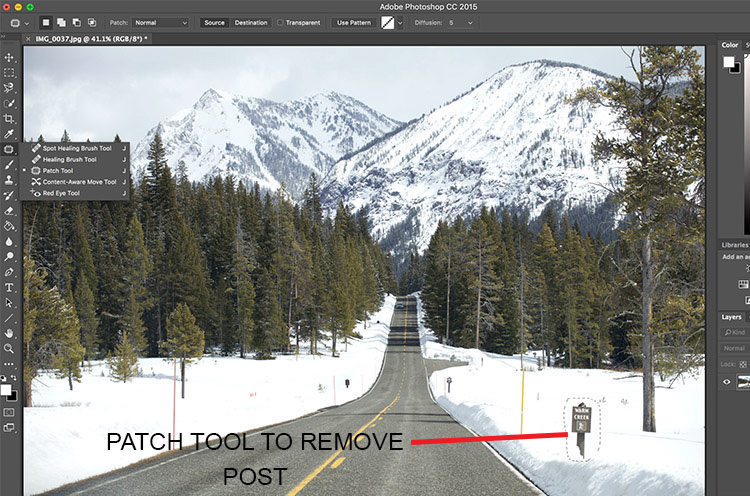
The Patch Tool
I use the Patch Tool in Photoshop for any bigger areas that need to be adjusted. For example, in the image below, there are many sign posts along the road that are larger. I could use the healing brush tool but it would be a little bit more time-consuming as I would have to go over the adjustments several times, to clean it out completely. Instead I used the Patch Tool to fix the affected spot, and replace it with another area sampled from the surrounding landscape. Using the Patch Tool, select the area to be cleaned up, then select the area close to it to sample from, to do the patch.
Notes about the Patch Tool:
- To do your editing non-destructively use the patch tool on a duplicate layer (it cannot be an empty layer).
- You must select a Patch type as Normal or Content Aware. For most things Content Aware does a better job, so try that first and resort to Normal if it doesn’t work.
- If you select Normal you have to choose either Source or Destination. The difference is that when Source is highlighted, the area you select will be Patched with the area you drag it over to. When Destination is highlighted the area you select will be cloned over to the area you move it to.
Final image where all the posts, signs and snow measurement sticks have been removed using a combination of patch tool, spot healing brush and healing brush tool.
As you can see, the healing tools in Photoshop are quite effective. With such a wide variety of options, any cleanup is easy and effective. One tip that I have learnt from experience is to do all the adjustments while zooming in to the affected area. This ensures that right amount of cleanup is done to all the pixels. If you find that the cleanup effect is too stark and harsh, an easy fix is to adjust the Opacity (i.e. visibility) of the cleanup layer. Especially when cleaning up blemishes on the face, this gives a more natural, blended effect. There is no right opacity percentage, simply choose the value that seems more natural to the eye.
How do you use the Healing Tools in Photoshop? Please share in the comments below.
googletag.cmd.push(function() {
tablet_slots.push( googletag.defineSlot( “/1005424/_dPSv4_tab-all-article-bottom_(300×250)”, [300, 250], “pb-ad-78623” ).addService( googletag.pubads() ) ); } );
googletag.cmd.push(function() {
mobile_slots.push( googletag.defineSlot( “/1005424/_dPSv4_mob-all-article-bottom_(300×250)”, [300, 250], “pb-ad-78158” ).addService( googletag.pubads() ) ); } );
The post How to Use the Healing Tool in Photoshop by Karthika Gupta appeared first on Digital Photography School.

Digital Photography School


You must be logged in to post a comment.